-
Teen/Pre-teens for other ethnicities
I own the Growing UP for Gen 3, and have used it, but because of convenience I find that I will generally just use Princess Leila, Josie, Amber, or even Skyler when it comes down to it. I just thought it would be cool if that convenience was offered for creators who wish to do scenes set in other places, or not using the usual suspects.
I've also found out that there are less problems morphing a youthful character to a younger age, than an older character to a youthful state, another reason a teen character would be helpful.
Maybe someone will do a tutorial on the best methods to use the Growing up plug-ins, because right now it's trial and error, and time is not something all of us have to devote to figuring things out when people have already figured out ways to get optimal results.As SpottedKitty points out, dialing down the body morph for lets say Victoria 7 to where what is left is essentially Genesis 3Female with the Victoria 7 scaling and face morph applied is the best option if you want to create a teen or younger from a DAZ Original figure. Select her in the scene tab (or in the viewport), then select Currently Used in the Parameters tab to see what dials are available for adjustment.
Carrara Challenge #36 - Pinups and Cheesecake ---final days to vote...would appreciate your helpThat poster is Victoria 3. Wow. Great job, UB.
Novica & Forum Members Tips & Product Reviews Pt 10***** Tutorials T through W ******
Tutorial: Tears by SereneNight NEW JUNE 2017
Tutorial: Teeth, Getting Realistic Shapes Getting realistic teeth shapes was here and slight tweaks here.
Tutorial: Texturing Texturing With DestinysGarden is a good thread- let a pro show you how!
Tutorial: UltraScatter Advanced Instancing UltraScatter Advanced Instancing: RGcincy's handy notes, how-to.
Victoria 4 for Genesis 2 Female: How to use the product.
Tutorial: Weight Mapping: How To Smooth All Face Groups At Once (By SickleYield)
Tutorial: Windows, Making Them From Planes And Cubes Realistically Making Windows using planes and cubes, with glass panes and images!
 Novica & Forum Members Tips & Product Reviews Pt 10
********** TUTORIALS**********
Tutorial: Bus, Noggins- Converting from Bryce to Daz Studio (RGcincy) Here
Tutorial: Breast Gone- In Hexagon (Smoothing Zev0s Grow Up product even more)
Tutorial: Clothing, Making in Blender SickleYield's tutorial on Deviant Art.
Tutorial: Create Categories Using Gen2F, I showed how to Create Categories and Export to save your custom categories. (Here's WHY you may want to do that with your characters.)
Tutorial: Custom Actions In Toolbar How to Create Custom Actions In Toolbar
Tutorial: Customizing Morphs Using Morph Loader Pro New Feb 19 2018
Tutorial: D Former D Former Tutorial D Former tutorial and links
Tutorial: Depth of Field Flipmode provides a good depth of field tutorial for you.
Tutorial: Fisty's Shaders & Getting Rid of Gooey Lips This one shows you Fisty's shaders. Get rid of the overly gooey lips.
Tutorial: Fur Brushes Download and Video (Kathryn Loch)
Tutorial: Garibaldi Hair Doing a cat with Garibaldi Hair- Tutorial
Tutorial: GenX links on "how to use."
Tutorial: Generation 4 Materials on Genesis 2 This one put Generation 4 materials on Genesis 2 using Victoria 4 for Genesis 2 Female.
Tutorial: Geometry Shells How to do Geometry Shells (video tutorial the3dwizard) and doing makeup for different characters
Tutorial: Hair Shaders (Slosh, his product) explaining how to use them.
Tutorial: Iclone Iclone videos
Tutorial: Images- How To Put Them In Forum Posts Here's Putting Images in Posts
Tutorial: Instances: Using Ultrascatter
Novica & Forum Members Tips & Product Reviews Pt 10What fun, we're now in the double digits for threads. Welcome to the TENTH installment of the product showcase thread and helpful tips/tutorials!
The previous threads / views as of June 9th 2017 are shown below, let's see how we're doing. (This is a community effort.) When you show others the products, those renders get seen and you help a lot of people. The threads FOUR YEARS AGO are still being actively surfed. These are the increase in views from June 2017 to November 18th.
Thread 1 81,805 Now 82,388 (+583 new!)
Thread 2 66,316 Now 66,979 (+726)
Thread 3 77,281 Now 77,832 (+702)
Thread 4 57,095 Now 57,703 (+608)
Thread 5 51 603 Now 52,017 (+414)
Thread 6 70,937 Now 73,230 (+2,293)
Thread 7 48,944 Now 51,745 (+2,801)
Thread 8 42,300 Now 45,690 (+3390)
Thread 9 47,117 (midnight on Nov 18th) (+47,117)Total views: 554,470 New views since June on threads 1-8 only- 11,517 views, no new posts!
A few good links from previous threads:
*If you want to back up your content, SereneNight gives you a step by step. It's in the second half of the post.
*RGcincy is the creator of Shape Magic, a very neat program and if you want to try modeling, take a look!
*For examples of older content, visit these threads.
Examples of Generations 2 and 3 are here. Older sets are here. V4 and M4 Clothing Conversion to Iray is here
*To post your images in a thread and avoid attaching them below your post, here's where you can post them!*Some threads I started which will help you:
ZBrush Silo Modeling Infinito How To Use GenX2 Applying Material Presets (Skin) for GenX2 Material Zones ~ Geometry Tool TutorialFree Portrait Backgrounds Wanna Render? Iray Tutorial (one of my favorites, very detailed and goes step by step on setting up an Iray rendered scene.)
Some fun and useful threads:
Photoshop Playtime! Where we showed you some really neat plug-ins to get cartoon, oil, watercolor effects.Scripts: A one click solution to put things on your ground plane, under things, etc
Thumbnail Mastery Apparently the PDF got removed from the ReadMe, it was found online and here it is. (It may have gotten put back, don't know.) Here's a handy thread with questions. It's for DUF files.
The References links have to be expanded to several pages, believe it or not there is a limit to a post size, and we passed it. I had to trim down descriptions of existing links to add new ones, so I am scattering the References to several pages because they are alphabetical and I can't just stick new ones at the end. Whenever I add a new Reference, I always mention it in the thread.
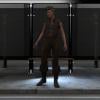
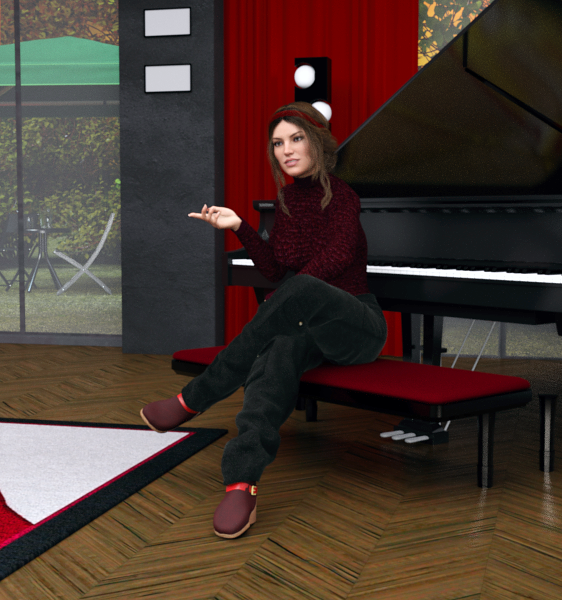
Novica & Forum Members Tips & Product Reviews Pt 9Okay, this is taking too long, aka all afternoon, into evening. Obviously, instead of a quickie, I'll give some fun tips and show you how to tweak things. Let's get quite a few products in here and spend time on it. (Started around noon.) Tackling something hard, dark room (black, gray, red) with black and red clothing. Why not? I want to chat about keeping your character separate from the background.
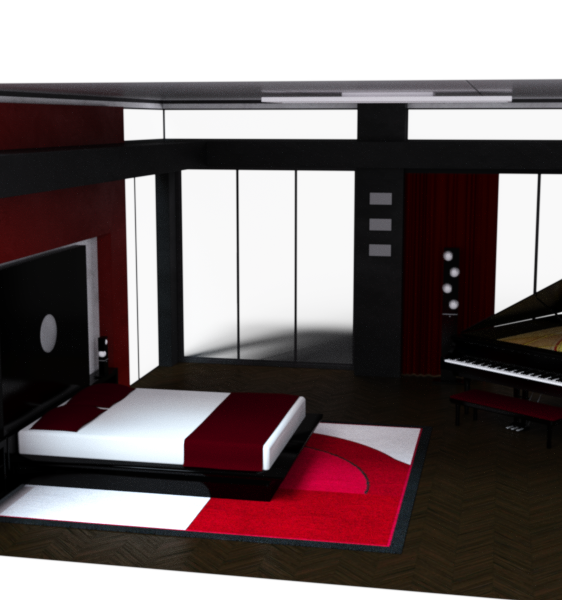
Modern Room Bedroom Tara 2 HD (Victoria 7/8) GeeGee Hair (Gen8F)
NOTE: Male Clothing! Cool Casual for Genesis 3 Male(s) Brrrrr for Cool Casual thanks to @sickleyield SY Ultra Templates Genesis 8 Female
Cold Weather Outfit (Gen8F) (boots only) Be Seated For Her (and tweaked a lot) Fabric GazeboI feel like I'm doing RRRR, putting things together based on the order of what I bought them. This is actually kinda fun. ( @RGcincy, remember when we did scenes based on the order we bought them? I'm at it again. And I had to laugh, Brrrrr had a RED shirt option, and GeeGee Hair had a red handband, both go with the room!)
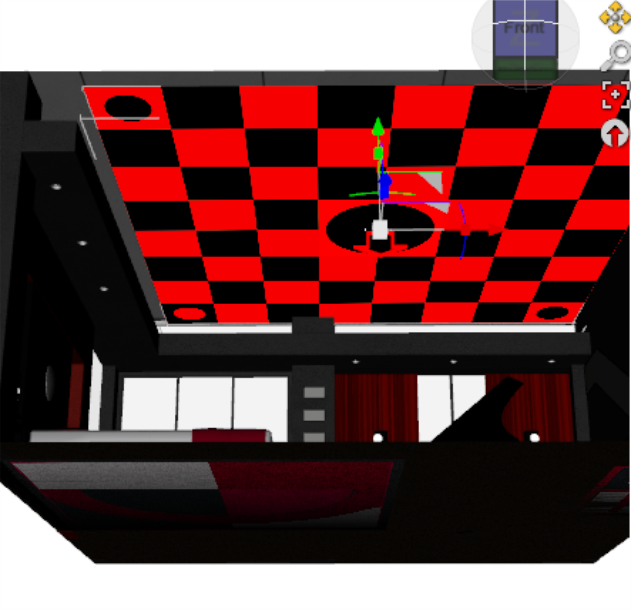
A Ghost Light Tutorial for this room: First for newbies: If you're new to Ghost Lights, this is what it looks like when you load the lights. Put them where you want them (and there's easy Bend, Swing, etc sliders.) Click Apply Before Presets, they disappear, THEN you apply your lumen, etc settings. If you don't own Ghost Lights, WISHLIST THEM. Now! (To show the red planes again, click Debug.But you don't really have to- I've mentioned this before but as a reminder- TIP: Use the Surface Selection Tool and they will outline in a nice gold, easy to see. I never Debug!
This first one is a 500k/300k selection on the lights, as you're looking at the image, the 500k is the open sided Ghost Light, the 300k is the wall. I like to (again) have a bit asymmetrical lighting and use a filler Ghost Light on the ceiling, shining straight down. The shadow you see outside the window is the BUILDING, Ghost Lights do not throw shadows.
Then an 800k ceiling light, final render. And kudos to the vendor, the white Diffuses were already a dull gray, I darkened them a bit more. For this to work, your ISO should be 135 (my standard go-to setting) with Exposure Value 13.49 I do have to wonder why a bedspread would be reflective and more like ice than a soft spread (see the black figurine/lamp reflecting? (This is out of the box, I didn't fix it.)
Okay, I very rarely try men's clothes on women, and Cool Casual works like a charm for the clothing with SY's Ultra Templates. No pokethrough, and it's so amazing to use a Genesis 3 MALE clothing set on a Genesis 8 FEMALE. I darkened the pants so the fastener isn't attention getting. Womens go to the right, men's to the left.
Cold Weather Boots WILL go under those pants, if you 1. increase the bulk of the pants 2. increase the shins of the pants. Both are in the Adjust part of Actor. (no need to go to Scene.) Vendor did a nice job on the pants. I will remind folks I did not like the jacket of the Cold Weather Outfit, IMO it had too many folds/morphs. I'd still buy it if it were grealy discounted. The shoes are usable, nice boots, pants and gloves are form fitting, nothing unusual. The boots are the main draw IMO, with the separate band and buckle.
Fabric Gazebo is excellent to fill your outdoor scene right outside a window. Note the plants extend past the piano window too. TIP: Remember to slide your grass back or it will provide a nice grassy carpet for your room! TIP For Newbies: For interest, leave little gaps showing more of the background. For instance, I rotated the camera so vegetation would show at the top of the piano, and that same window shows at the bottom, under the piano. It adds more depth to the scene.
TIP: intersect the head with a background item but don't have them line up. Note the black bar with the round lights? Her head slightly covers one of them, but I made sure it didn't look like it was attached to her head. The hair, piano, and light all "overlapping" adds depth. Had I spun the camera to my right (moving the view to our left) then that depth would be lost as her head would be in front of only a background window. Also see the itsy bitsy tip of the piano past her shoulder? That adds depth too. But we can do better.
Another example (six renders later, still tweaking) is that folding chair outside. It was being cut in half (the "x") by the window bar running vertically. Note how the chair steers clear of it.
TIP: I'll show you an example- Make sure lines do NOT line up. Look at the extended foot and the rug. That's a no no. So when I show you the improved version, trying to keep that black bar/round lights, piano, and hair together, I have to change up the foot.
Too many times I've seen things just blob together- take the time and get your figures and backgrounds DISTINCT and separated. Let's keep going, as this gal's body merges into the piano, particularly that elbow area.

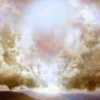
TIP: Your clothing should match your season, with the understanding it can still be green grass and fully leaved trees and drop to the forties at night. (Example, where I live, Panhandle of Florida.) But you don't HAVE to be stuck with the season of the prop. I changed from green Summer to late Summer/Fall by adding Orange and Red to the Diffuse, and dark Olive/Brown to the grass. Put in the appropriate backdrop, and what a difference!
TIP: If the hand pose isn't good with the differing camera views, MOVE THE HAND. In this case, the second example- by simply lowering it so there's more horizontal, the hand won't get lost and it's more dramatic.
How fast does this render with a character, hair, two sets? 82% in 8 minutes. 93% in 15 minutes. 96% in 18 minutes, done by 20 minutes.
Now let's talk about the changes. If you're playing with a room and a character with clothes that are blending with the room, change one, both, or the other in Diffuse.
In Diffuse, here's what was added/changed:
1. the white of the rug- gray.
2. the lights on the wall- gray
3. the piano- lightened from black to a dark gray/black
4. her pants- lightened from dark black/gray to lighter dark gray.
5. her shirt- added a bright hot fushia purple because the Diffuse was already white, no way to lighten that.Added a background to change the season. (Keeping with Autumn, it's a orange/gold scene purchased elsewhere.)
TIP: To create distance/ keep the background from becoming distracting: Added a plane in front of the gazebo, Iray UberBased it, added a glass shader so it wouldn't be grainy, lowered the opacity to 8% and made it a light gray/blue. I do this instead of messing with windows. That way, I can put vegetation in FRONT of the plane if I want to, and create a multi-layered distance effect quite easily. NOTE THE TREE BEHIND THE PIANO. It is in front of the plane. The gazebo is behind it.When you're working with windows and looking out, if you mess with opacity of the windows, everything outside is stuck with that. By creating planes and putting vegetation/props/buildings in-between, you can create the mood quickly. (Create a default scene with planes already set up, load your set and bingo, you're set up.)
TIP: Be careful- the Ghost Light should be IN FRONT OF the plane.
TIP: Put an emissive / point light behind things which need to stand out. That elbow in front of the piano has a point light between the hand/arm and the piano. See the difference? I've got to do postwork the leg pokethrough. I'm not done yet, but wanted to post what I have.
Okay, this is weird. This isn't looking at all like the popup. Click on it and the pants should be lighter, (but are showing up WAAAAY lighter than the image), the elbow shows up in front of the piano, etc. Very strange! I like that there's more ground under the piano in the background, and the dramatic sunset is off centered and in that window. The change of seasons really makes a difference, with the reds inside the room and the autumn orange outside.
 Welcome to Daz, Mousso!
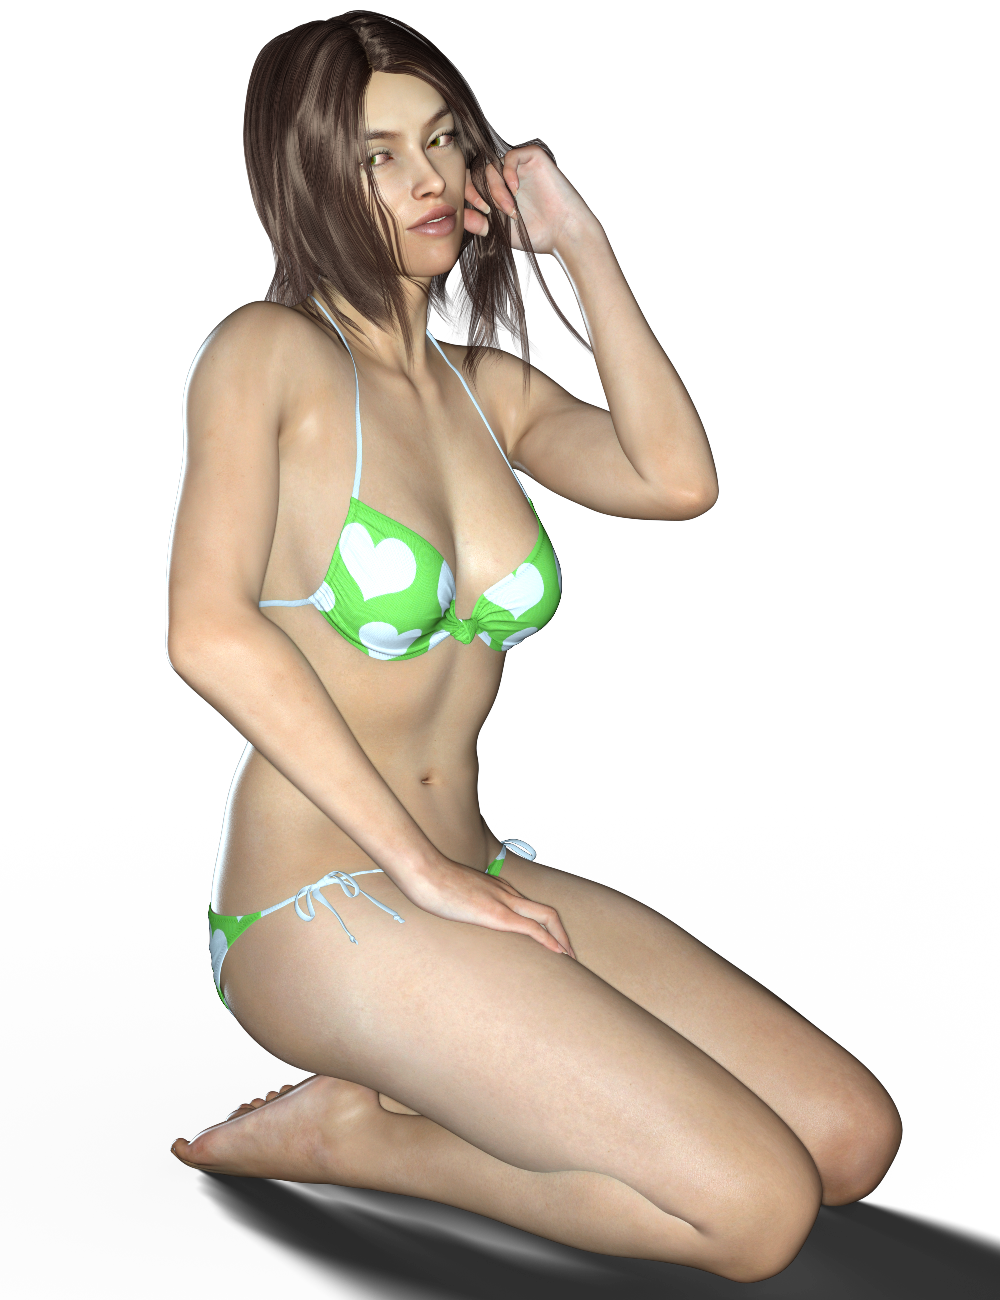
Kallisto is great! Keep up the great work. I look forward to seeing more of your characters.

@Divamakeup, you certainly have a way about you. That is, you made her skin look like I imagine Daz intended Victoria's and Stephanie's to look.
Monique 8I hope they don't ruin her shader settings like they've done with Victoria, Olympia, & Stephanie.
I wonder... could all these problems stem from the new surfaces parameters that are being used on the new Genesis8 skins? Is there a difference between using Gen8 and pre-Gen8 skins with the same lighting setup? I know lighting is more important than it was for Iray rendering; could it be differently important when the new parameters are used?
It's Daz's implementation of the surfaces parameters. Benita for Victoria 8 is one of the finest, most photorealistic, tastefully detailed skins in Daz history, second only to Darius 6, imo. Divamakeup has done some settings on Victoria and Lucas that look quite good; so, it's Daz's issue.
I get good results on the base G8F. It's the other characters that tend to turn orange. Is DT planning an update to NGS2 to account from some of these color shifts and Dual Lobe settings? I hope so. Because it makes just about everything in G3 look good. G8 has been more hit and miss with the same shaders.
Genesis 8 Fractals Set I updated with AnatomyIt seems to me that these would work most logically in the Translucency color map slot but with DAZ 4.10.x & Genesis 8 that slot is by default used by the same diffuse map used in the diffuse slot. Or it is for Michael 8 & Victoria 8 the only 2 Genesis 8 characters I have bought so far.
When I render a Genesis 8 character in DS 4.10.x without the fractal maps it renders nicely except the character skin is missing that 'nebulous softness' because the translucency slot is taken by the diffuse map giving the skin an exact hardness we don't see with our own eyes in real life. So I removed those maps before and renders at 50% translenceny weight and the skin has a soft nebulous transparent glow but unfortunately too many diffuse map from the diffuse slot details are lost that way (although maybe with a 5000 iteration render they would get sufficiently added back in) . :-(
For for this fractal map I did the same but changed the translucency strength to 30% from the medium translucency preset of 50% and then I put the fractal noise maps in for the translucency maps. I set then it to scatter & transmit intensity although I have no ideal what that means. It seems to indication light is penetrating the surface and exiting via reflection and refraction sporatically to create an illusion of light transmission. Anyway I did that, left the translucency color at white but set the translencency reflectance color directly under that to a very pale blue trending purple.
It's rendering now and it is creating a nicely mottled skin like you'd expect from veins, capillaries, fats and other stuff doctors & such would know about but I wouldn't and don't quite nicely already and I am only 3% in rendering of a 2000 iteration maximum render I a doing. Whether it it actually turns out good at 2000 iterations I must wait and see. I am using the old Phoenix66 texture set Caleb which is missing specular maps but has bump and displacement maps. Since it is a G8M there is are seams in the render since the fractal maps were created for G8F but since I was already doing a pose set I figured I'd stop & give your fractals a quick whirl & see if this way of using translucency color slot was easier than using PS, Gimp, or LIE.
Looking again at the results so far I'm thinking now maybe the mottled pattern is a bit to large in scale for the typical person. I will have to wait and see. Looking at the fractal maps directly in a picture viewer looks like the fractal noise is lbigger noise splots on the face and arms, too big. On the legs and torso though it looks better. I should of hid the clothing before I started rendering! It's very subtle. It's kind of good there is a seam for this simple test because you can directly compare with & without.
When you look at the texture maps in an image viewer it is decieving because of how the model's UVs are laid out. However at rendertime the fractals were created and have taken the UV sizes into account so that the texture is consistent across the different sized UVs. For instance, compare the head and torso maps. The small area of the head takes up more UV than the torso UV and yet size wise the head is smaller. to get the fractals to be the same, the head map fractal size must be larger. This way at rendertime, it is seamless and the same size. I hope that makes sense.
Yes, that makes sense.
There are lots of types of fractals & lots of programs to generate those different types. It's been a long time since I even wrote a simple program to do so and that was the famous obligatory fractal fern. You mind saying what fractal program you used to generate those texture maps? Is it opensource?
Thanks.
Genesis 8 Fractals Set I updated with AnatomyIt seems to me that these would work most logically in the Translucency color map slot but with DAZ 4.10.x & Genesis 8 that slot is by default used by the same diffuse map used in the diffuse slot. Or it is for Michael 8 & Victoria 8 the only 2 Genesis 8 characters I have bought so far.
When I render a Genesis 8 character in DS 4.10.x without the fractal maps it renders nicely except the character skin is missing that 'nebulous softness' because the translucency slot is taken by the diffuse map giving the skin an exact hardness we don't see with our own eyes in real life. So I removed those maps before and renders at 50% translenceny weight and the skin has a soft nebulous transparent glow but unfortunately too many diffuse map from the diffuse slot details are lost that way (although maybe with a 5000 iteration render they would get sufficiently added back in) . :-(
For for this fractal map I did the same but changed the translucency strength to 30% from the medium translucency preset of 50% and then I put the fractal noise maps in for the translucency maps. I set then it to scatter & transmit intensity although I have no ideal what that means. It seems to indication light is penetrating the surface and exiting via reflection and refraction sporatically to create an illusion of light transmission. Anyway I did that, left the translucency color at white but set the translencency reflectance color directly under that to a very pale blue trending purple.
It's rendering now and it is creating a nicely mottled skin like you'd expect from veins, capillaries, fats and other stuff doctors & such would know about but I wouldn't and don't quite nicely already and I am only 3% in rendering of a 2000 iteration maximum render I a doing. Whether it it actually turns out good at 2000 iterations I must wait and see. I am using the old Phoenix66 texture set Caleb which is missing specular maps but has bump and displacement maps. Since it is a G8M there is are seams in the render since the fractal maps were created for G8F but since I was already doing a pose set I figured I'd stop & give your fractals a quick whirl & see if this way of using translucency color slot was easier than using PS, Gimp, or LIE.
Looking again at the results so far I'm thinking now maybe the mottled pattern is a bit to large in scale for the typical person. I will have to wait and see. Looking at the fractal maps directly in a picture viewer looks like the fractal noise is lbigger noise splots on the face and arms, too big. On the legs and torso though it looks better. I should of hid the clothing before I started rendering! It's very subtle. It's kind of good there is a seam for this simple test because you can directly compare with & without.
When you look at the texture maps in an image viewer it is decieving because of how the model's UVs are laid out. However at rendertime the fractals were created and have taken the UV sizes into account so that the texture is consistent across the different sized UVs. For instance, compare the head and torso maps. The small area of the head takes up more UV than the torso UV and yet size wise the head is smaller. to get the fractals to be the same, the head map fractal size must be larger. This way at rendertime, it is seamless and the same size. I hope that makes sense.
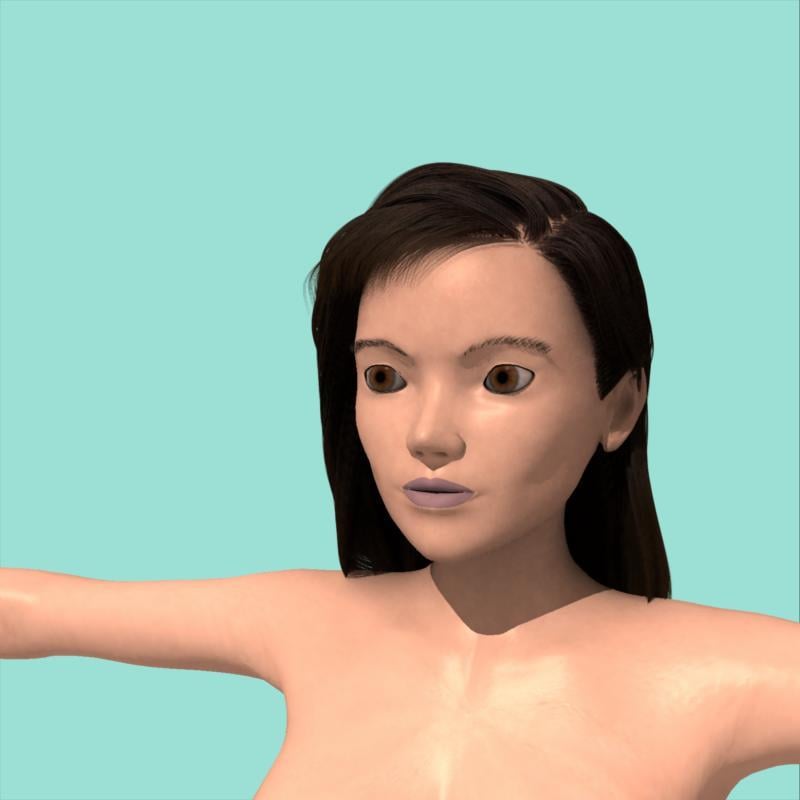
My Project: Brash Lonergan adventures - Warning AI Discussion PossibleThanks for the encouragement, PhilW. It is all your fault. Ever since I saw you rig the insect man in your tutorials I have wanted to create my own toon figures. I will get there someday.
Here is another Moxie2 test. The test here was for the eyebrows, They are Carrara dynamic hair grown on the figure mesh. Still no eyelashes though. Her skin is just the default organic skin shader that comes with Carrara. The eyeballs' shaders are based on the maps for Victoria 6.
Wanted a different cheekbone structure than I normally do. Now I may regret it, but that kind of thing can be addressed with morphs.
 Carrara Challenge #36 - Pinups and Cheesecake and Hunks - Oh My! - WIP Thread --Meet Ringo Monfort!
UunifiedBrain - Agree with everyone, that is a wonderful vote image. There is a thread in the Art Studio forum dedicated to the older generation figures. I'm sure those folks would love to see what you have done with Vicki.
Glute and Breast Control Genesis 8 (Commercial)Did you open the Puppeteer pane first?
No, but I just did this morning. Received the following error (see attached image). Then I loaded G8 into the view pane selected her and tried to load Puppeter support again and still no puppeteer window.
The log file is too long to post here. I attached it as a .txt file.
I think I know what it is. Try this. Make sure Genesis 8 is loaded in scene first before opening the pane and applying the preset.
I was doing that and it did not work. I just updated to 4.9.4.122 Pro edition and it still does not work. I open DS. I load Genesis 8 female. I double click on the breast control puppeteer support icon and get an error because G8 is not selected. I click on Genesis 8 to select her and double click on the puppeteer support icon again and the load box flashes for less than a second and no puppeteer window come up. Same thing with G8 Glute Control and G3 Breast control. I'm stumped. It has to be something with my system settings as it seems that no one else is having this issue.
Here are the last few lines if the log file after I cleared the scene and loaded Victoria 8 then clicked on the Puppeteer support Control Icon again.
2017-08-15 19:11:57.629 *** Scene Cleared ***
2017-08-15 19:12:12.667 WARNING: libpng warning: iCCP: known incorrect sRGB profile
2017-08-15 19:12:12.670 WARNING: libpng warning: iCCP: known incorrect sRGB profile
2017-08-15 19:12:12.670 WARNING: libpng warning: iCCP: cHRM chunk does not match sRGB
2017-08-15 19:12:12.672 WARNING: libpng warning: iCCP: known incorrect sRGB profile
2017-08-15 19:12:12.674 WARNING: libpng warning: iCCP: known incorrect sRGB profile
2017-08-15 19:12:12.675 WARNING: libpng warning: iCCP: known incorrect sRGB profile
2017-08-15 19:12:12.678 WARNING: libpng warning: iCCP: cHRM chunk does not match sRGB
2017-08-15 19:12:12.684 WARNING: libpng warning: iCCP: known incorrect sRGB profile
2017-08-15 19:12:12.719 WARNING: libpng warning: iCCP: known incorrect sRGB profile
2017-08-15 19:12:12.719 WARNING: libpng warning: iCCP: cHRM chunk does not match sRGB
2017-08-15 19:12:12.720 WARNING: libpng warning: iCCP: known incorrect sRGB profile
2017-08-15 19:12:12.720 WARNING: libpng warning: iCCP: cHRM chunk does not match sRGB
2017-08-15 19:12:12.721 WARNING: libpng warning: iCCP: known incorrect sRGB profile
2017-08-15 19:12:12.724 WARNING: libpng warning: iCCP: cHRM chunk does not match sRGB
2017-08-15 19:12:22.177 *** Scene Cleared ***
2017-08-15 19:12:24.201 Begin Loading Character Addons...
2017-08-15 19:12:24.293 File loaded in 0 min 0.0 sec.
2017-08-15 19:12:24.294 Loaded file: Genesis 8 Female Eyelashes.duf
2017-08-15 19:12:24.326 Loaded Morph Deltas in 0 min 0.0 sec.
2017-08-15 19:12:24.361 Loaded Morph Deltas in 0 min 0.0 sec.
2017-08-15 19:12:24.361 Loaded file: FBMVictoria8.dsf
2017-08-15 19:12:24.363 Loaded file: FHMVictoria8.dsf
2017-08-15 19:12:24.367 Loaded Morph Deltas in 0 min 0.0 sec.
2017-08-15 19:12:24.368 Loaded file: PHMMouthRealism_HD_div2.dsf
2017-08-15 19:12:24.393 Loaded Morph Deltas in 0 min 0.0 sec.
2017-08-15 19:12:24.393 Loaded file: PBMNavel.dsf
2017-08-15 19:12:24.404 Loaded Morph Deltas in 0 min 0.0 sec.
2017-08-15 19:12:24.404 Loaded file: PHMEyelashesExpand.dsf
2017-08-15 19:12:24.534 File loaded in 0 min 0.0 sec.
2017-08-15 19:12:24.535 Loaded file: Victoria 8 Eyelashes.duf
2017-08-15 19:12:24.537 Finished Loading Character Addons
2017-08-15 19:12:24.545 File loaded in 0 min 2.3 sec.
2017-08-15 19:12:24.568 Loaded file: Victoria 8.duf
2017-08-15 19:12:25.111 Loaded image Victoria8LegsD_1003.jpg
2017-08-15 19:12:25.183 Loaded image Victoria8EyesD_1006.jpg
2017-08-15 19:12:25.376 Loaded image Victoria8ArmsD_1004.jpg
2017-08-15 19:12:25.445 Loaded image Victoria8MouthD_1005.jpg
2017-08-15 19:12:25.658 Loaded image Victoria8FaceD_1001.jpg
2017-08-15 19:12:25.852 Loaded image Victoria8TorsoD_1002.jpg
2017-08-15 19:12:25.915 Loaded image Victoria8Eyelashes_1001.jpg
2017-08-15 19:12:29.692 WARNING: libpng warning: iCCP: known incorrect sRGB profile
2017-08-15 19:12:29.694 WARNING: libpng warning: iCCP: known incorrect sRGB profile
2017-08-15 19:12:35.397 WARNING: libpng warning: iCCP: known incorrect sRGB profile
2017-08-15 19:12:35.397 WARNING: libpng warning: iCCP: cHRM chunk does not match sRGB
2017-08-15 19:12:35.398 WARNING: libpng warning: iCCP: known incorrect sRGB profile
2017-08-15 19:12:35.398 WARNING: libpng warning: iCCP: cHRM chunk does not match sRGB
2017-08-15 19:12:38.980 WARNING: libpng warning: iCCP: known incorrect sRGB profile
2017-08-15 19:12:38.983 WARNING: libpng warning: iCCP: cHRM chunk does not match sRGB
2017-08-15 19:12:38.984 WARNING: libpng warning: iCCP: known incorrect sRGB profile
2017-08-15 19:12:38.984 WARNING: libpng warning: iCCP: cHRM chunk does not match sRGB
2017-08-15 19:12:41.732 File loaded in 0 min 0.1 sec.
2017-08-15 19:12:41.732 Loaded file: Breast Control Puppeteer Genesis 8 Female.duf
I have that same error, I just bought the product and I'm new to daz studio but I can't reshape the breasts or glutes but i can control the bend. How did you resolve this ?
Executable files in product?Included in Sensibility for Victoria 4
5830_SensibilityV4_v1.1_dpc.exe
5830_SensibilityV4DS_v1.1_ds.exe
What are these files and what do they do? I can't find them listed in the product readme.
Don't recall ever seeing .exe files in a product before.Genesis 8 Fractals Set I updated with AnatomyIt seems to me that these would work most logically in the Translucency color map slot but with DAZ 4.10.x & Genesis 8 that slot is by default used by the same diffuse map used in the diffuse slot. Or it is for Michael 8 & Victoria 8 the only 2 Genesis 8 characters I have bought so far.
When I render a Genesis 8 character in DS 4.10.x without the fractal maps it renders nicely except the character skin is missing that 'nebulous softness' because the translucency slot is taken by the diffuse map giving the skin an exact hardness we don't see with our own eyes in real life. So I removed those maps before and renders at 50% translenceny weight and the skin has a soft nebulous transparent glow but unfortunately too many diffuse map from the diffuse slot details are lost that way (although maybe with a 5000 iteration render they would get sufficiently added back in) . :-(
For for this fractal map I did the same but changed the translucency strength to 30% from the medium translucency preset of 50% and then I put the fractal noise maps in for the translucency maps. I set then it to scatter & transmit intensity although I have no ideal what that means. It seems to indication light is penetrating the surface and exiting via reflection and refraction sporatically to create an illusion of light transmission. Anyway I did that, left the translucency color at white but set the translencency reflectance color directly under that to a very pale blue trending purple.
It's rendering now and it is creating a nicely mottled skin like you'd expect from veins, capillaries, fats and other stuff doctors & such would know about but I wouldn't and don't quite nicely already and I am only 3% in rendering of a 2000 iteration maximum render I a doing. Whether it it actually turns out good at 2000 iterations I must wait and see. I am using the old Phoenix66 texture set Caleb which is missing specular maps but has bump and displacement maps. Since it is a G8M there is are seams in the render since the fractal maps were created for G8F but since I was already doing a pose set I figured I'd stop & give your fractals a quick whirl & see if this way of using translucency color slot was easier than using PS, Gimp, or LIE.
Looking again at the results so far I'm thinking now maybe the mottled pattern is a bit to large in scale for the typical person. I will have to wait and see. Looking at the fractal maps directly in a picture viewer looks like the fractal noise is lbigger noise splots on the face and arms, too big. On the legs and torso though it looks better. I should of hid the clothing before I started rendering! It's very subtle. It's kind of good there is a seam for this simple test because you can directly compare with & without.
Carrara is a Zombie?Howdy Folks,
It has been a little while since I posted, but I thougtht I would share this update. I had two support ticketrs filed against Carrara 8.5 Pro, one with regards to the installer missing some of included resources (which were provided to me in a zip file, and saying they would fix), and another against Genesis 3 (Victoria 7) not loading in Carrara. Both of these were 2 years ago or so, and a new person had been assigned 'on-hold' tickets. The support person (name of Jamie, not sure of gender) indicated that Carrara was no longer under development as they are focusing on Studio, and closed both of my tickets. So it looks like Carrra is un-dead, it is a zombie....
Rich S.
CC Lily for Genesis 8 Female [Commercial] (Released!)CC Lily for Genesis 8 Female is an HD human or elf character ready for any occasion -- naughty or nice. She comes with her own custom made fibermesh eyebrows and fibermesh eyelashes, each with 3 UV settings to cover any use and a variety of shaping options. Both are designed to work seamlessly with general hair product addons so all her hair can match. She also comes with 14 texture-based eyebrow color options as well.
Lily also comes with 4 custom nail shapes for both realistic and fantasy renders. She has 2 custom elf ear options as well as custom body, head and navel morphs. All morphs are separate for more versatility.
She sports 22 realistic and fantasy eye color options, 16 makeup options that range from subtle to dramatic fantasy, 2 eyeliner only options, 3 lipstick styles, 20 lipstick color presets (with the ability to use ANY color with any of the the three styles), and 18 nail color presets. All material zone options are independent, so you can mix and match to create hundreds of different looks! As an added bonus, makeup options all use diffuse overlay and are set to work on almost any skin for Genesis 8 Female.


Promo Products Used:
- dForce Romantic Dress Outfit for Genesis 8 Female
- Demure II: Poses and Expressions for Genesis 8 Female(s) and Victoria 8
- Katherine Hair for Genesis 3 Female(s)
- iRadiance - Studio HDRIs for Iray
- Lingerie Robe Set for Genesis 8 Female(s)
- Everyday Updo Hair and OOT Hairblending 2.0 for Genesis 3 Female(s)
- Scintillant Portrait Lights for Iray
- UHT2: Ultimate Color
- UHT2: Fantasy Colors
- Perrin Hair for Genesis 3 & 8 Female(s)
- LY Leonine Pro HDR Lighting
- Voss Hair for Genesis 3 & 8 Female(s)
- Geneva Hair
- Nightbird Hair
- The Sinful Witch for Genesis 2 Female(s)
- Edwardian Hair for Genesis 3 Female(s)
- Core Lighting 2
- Carefree Hair for Genesis 3 Female(s)
- Febe Outfit for Genesis 8 Female(s)
- FaerieTies Hair
- Ktarya Outfit for Genesis 3 Female(s) and Genesis 8 Female(s)
- Morning Star Wings for Genesis 3 and 8 Female(s)
- The Streets Of Venice
- Elven Weapon Spearman
- Skies of iRadiance - Sunny Sky HDRIs for Iray
- DM's All Woman Poses
- IGD Diva-Tude Poses for Stephanie 8
- DM's Sensual Grace
One Last Note: The eyes for this gal were created using DimensionTheory's fantastic Project EYEray - Next Gen and Merchant Resource for Genesis 8. This makes use of Chromatic SSS in their shader for more realistic final images, but there is a slight bug in Iray when using Chromatic SSS along with Translucency without the Iray Dome on. There is a preset to counter this issue in the eye folder (Mono SSS) if you need to render without the dome. Or, you can render with the dome on :D
How to convert a Genesis figure to a G2F figure step by step?Thanks for those links, I was also messaging with the artist directly and she was kind enough to link me to the actual products I would need, turns out I already owned one of them, "Victoria 4 for Genesis 2 Female", so I just need to pick up Genx and Genx2 add-on and then this product: https://www.daz3d.com/v4-skins-auto-converter-for-genesis-2-female-s
Hopefully they will all go on sale at the end of this PC sale, fingers crossed.
Genesis 8 and old contentFor a more complete picture here are some full body comparisons of the Muscle Maps. The Victoria 4 originals are on the left and the Genesis 8 Female with the Victoria 4 Legacy UVs are on the right.


 i13 College Uniform for the Genesis 3 Female(s) problem
I purchased i13 College Uniform for the Genesis 3 Female(s). I used it on a character based on Victoria 7. It looked fine in the program. But the blazer and shirt became all white after rendering to image. The socks and shoes have no such problem. What happened? Please help.
Daz 3D is part of

Connect
DAZ Productions, Inc.
7533 S Center View Ct #4664
West Jordan, UT 84084Licensing Agreement | Terms of Service | Privacy Policy | EULA
© 2026 Daz Productions Inc. All Rights Reserved.