Genesis 8 Fractals Set I updated with Anatomy

AbnormalPixelsAbnormalPixels Posts: 37
edited November 2017 in Freebies

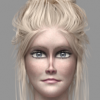
Fractals generated across all seams at render time baked to a texture map. This is not a tiled texture. Use imediately as a weight or bump map or blend in Photoshop to add variation to all of your textures. Because of how the Genesis 8 uvs are set (the face map uv is twice as large as the torso for example) the face map appears larger in the texture map or stretched but renders correctly at render time. I tried to upload a zip file but it would not let me. if you modify one texture map, write down what you do and do the same to all four to avoid seams. no copyright, no permissions, just make excellent renders. (Edit Added Set II. Have fun mixing and post the results!)
 

Edit 11.18.2017 deleted all previous maps and uploaded new set to make sure it worked with anatomy. Let me know if you have any issues. If this works for everyone I will upload Set II.

Post edited by AbnormalPixels on

Comments

  • Sfariah DSfariah D Posts: 25,703

    What does no permission mean exactly?  Does that mean for personal use only?

  • AbnormalPixelsAbnormalPixels Posts: 37
    edited November 2017

    What does no permission mean exactly?  Does that mean for personal use only?

    You may use it for personal use AND as texture in a character for sale. If you use it in a product you sell, it would be nice (not required) to acknowledge the resource (Fractals provided by AbnormalPixels). My hope is everyone will find it useful and want more options...which will encourage DAZ to want to sell it in the shop. I have submitted it in hopes to become a published artist.

    FRACTAL_PROMO_III.jpg
    1000 x 1300 - 266K
    FRACTAL_PROMO_IV.jpg
    1000 x 1300 - 360K
    Post edited by AbnormalPixels on
  • This is neat! I'm interested in more, they look like they'll be useful for adding detail to skin. I'm also curious how you got these patterns to tile seamlessly over the figure without bloating or shrinking badly, that's impressive and would be really useful for creating statues, alien and creature skin, etc.

  • AbnormalPixelsAbnormalPixels Posts: 37
    edited November 2017

    What you have is one set but the potential for more sets is limitless. It is not difficult just teedious process. Trial and error to get the fractal to generate the appearance you are looking to achieve. Once you have this then you start baking the render to texture but you have to do it 4 seperate times (one for each skin map). I use the above set to add depth to bump maps. I have been able to simulate psuedo blood vessels and then blend them into the diffuse map. I am trying to get reasonably close to veins and arteries, dial them down in photoshop so they blend in well with the epidermis skin layer. Other uses of the set you have is you can use it to add a mottling effect to your diffuse map when you turn the layer percentage low for variations in the skin color or turn it up high to add freckles.

    So far I have not received a response from DAZ so I do not think they feel it is a marketable product. I believe it is. Hopefully someone with the preliminary review team will take a second look at the potential. I am currently working on a Genesis 8 character. When it is published I will try to get another set out for free for everyone.

    Post edited by AbnormalPixels on
  • SaphirewildSaphirewild Posts: 6,648

    Well I just took the fractals and now I am going to test them out to see how easy it is to use them now I am working on a new charactor myself and was looking for a new way to have more realistic looking skin on her so I will post my results when I get it done.

  • Well I just took the fractals and now I am going to test them out to see how easy it is to use them now I am working on a new charactor myself and was looking for a new way to have more realistic looking skin on her so I will post my results when I get it done.

    just remember, if you need to change the texture, you need to do all 4 maps to keep them seamless. For example, if you want to reduce the contrast, remember the settings in photoshop what you did. Then repeat the process for all 4 maps.

  • nonesuch00nonesuch00 Posts: 17,929

    What you have is one set but the potential for more sets is limitless. It is not difficult just teedious process. Trial and error to get the fractal to generate the appearance you are looking to achieve. Once you have this then you start baking the render to texture but you have to do it 4 seperate times (one for each skin map). I use the above set to add depth to bump maps. I have been able to simulate psuedo blood vessels and then blend them into the diffuse map. I am trying to get reasonably close to veins and arteries, dial them down in photoshop so they blend in well with the epidermis skin layer. Other uses of the set you have is you can use it to add a mottling effect to your diffuse map when you turn the layer percentage low for variations in the skin color or turn it up high to add freckles.

    So far I have not received a response from DAZ so I do not think they feel it is a marketable product. I believe it is. Hopefully someone with the preliminary review team will take a second look at the potential. I am currently working on a Genesis 8 character. When it is published I will try to get another set out for free for everyone.

    What you could do is add more surfaces zones for the DAZ Models and write sets of  fractal / perlin / and other mathematical noise functions as a plugin for DAZ Studio to create completely character texture sets. Some of those transform functions you can find on the internet that look very similar but others you would have to use real images and derive general functions to create similar image patterns.

    eg,

    a) Need lots of zones for the fingers, hands, feet, and toes - front and back. Create fake finger prints, palm prints and so on via UI in D|S.

    b) Same with the face - eg nose, lips, eyelids are all differently textured

    c) arms - the smooth side of the arm versus the rough side of the arm texture wise & then the roughness of the elbows.

    d) and so on for the 'roughness textures'

    then similar functions for such surfaces zones

    a) freckles - nose and cheeks most prominently and other places less so due to clothing and so on

    b) moles

    c) birth marks such as portwine and so on

    Then once a user has created all their perlin/fractal procedural textures with your plugin and your UI has plugged those maps in the appropriate slots they can save them as material presets.

  • What you could do is add more surfaces zones for the DAZ Models and write sets of  fractal / perlin / and other mathematical noise functions as a plugin for DAZ Studio to create completely character texture sets. Some of those transform functions you can find on the internet that look very similar but others you would have to use real images and derive general functions to create similar image patterns.

    eg,

    a) Need lots of zones for the fingers, hands, feet, and toes - front and back. Create fake finger prints, palm prints and so on via UI in D|S.

    b) Same with the face - eg nose, lips, eyelids are all differently textured

    c) arms - the smooth side of the arm versus the rough side of the arm texture wise & then the roughness of the elbows.

    d) and so on for the 'roughness textures'

    then similar functions for such surfaces zones

    a) freckles - nose and cheeks most prominently and other places less so due to clothing and so on

    b) moles

    c) birth marks such as portwine and so on

    Then once a user has created all their perlin/fractal procedural textures with your plugin and your UI has plugged those maps in the appropriate slots they can save them as material presets.

    Your idea is awesome. I wish I had the skills to do a plugin. I can only go so far as provide the end result of the texture sets.


  • nonesuch00nonesuch00 Posts: 17,929

    What you could do is add more surfaces zones for the DAZ Models and write sets of  fractal / perlin / and other mathematical noise functions as a plugin for DAZ Studio to create completely character texture sets. Some of those transform functions you can find on the internet that look very similar but others you would have to use real images and derive general functions to create similar image patterns.

    eg,

    a) Need lots of zones for the fingers, hands, feet, and toes - front and back. Create fake finger prints, palm prints and so on via UI in D|S.

    b) Same with the face - eg nose, lips, eyelids are all differently textured

    c) arms - the smooth side of the arm versus the rough side of the arm texture wise & then the roughness of the elbows.

    d) and so on for the 'roughness textures'

    then similar functions for such surfaces zones

    a) freckles - nose and cheeks most prominently and other places less so due to clothing and so on

    b) moles

    c) birth marks such as portwine and so on

    Then once a user has created all their perlin/fractal procedural textures with your plugin and your UI has plugged those maps in the appropriate slots they can save them as material presets.

    Your idea is awesome. I wish I had the skills to do a plugin. I can only go so far as provide the end result of the texture sets.


    Yes, I don't think it is easy, but it is technically doable. Have fun, thanks I can't wait to see how to use your fractal textures in my renders.

  • RedzRedz Posts: 1,459

    I can see some practical use for this type of set. Can I suggest also adding the anatomical elements to each set, if you have not already done so. 

  • Redz said:

    I can see some practical use for this type of set. Can I suggest also adding the anatomical elements to each set, if you have not already done so. 

    I started out doing just that. However, everyone's character texture maps are different. So to prevent the end user from having to use the specific anatomical parts of the sets, you have more freedom if you blend in the fractals with your specific character textures in Photoshop. This seems to work using the torso map as an example:

    1. Open the torso bump map texture of your specific character in Photoshop.

    2. Open and paste the torso fractal texture as a new layer in the bump map texture.

    3. You can dial the fractal layer down, change the layer blending to "multipy", etc. to decide how much fractal you wish to add

    4. Save the PSD to speed up editing if you want to modify the result and not have to repeat the above steps.

    5. Flatten layers.

    6. Save out the new modified bump texture to .jpg.

    7. Add to bump map texture slot in DAZ Studio

    8. Test Render in DAZ Studio.

    This works for any map.

  • RedzRedz Posts: 1,459
    Redz said:

    I can see some practical use for this type of set. Can I suggest also adding the anatomical elements to each set, if you have not already done so. 

    I started out doing just that. However, everyone's character texture maps are different. So to prevent the end user from having to use the specific anatomical parts of the sets, you have more freedom if you blend in the fractals with your specific character textures in Photoshop. This seems to work using the torso map as an example:

    1. Open the torso bump map texture of your specific character in Photoshop.

    2. Open and paste the torso fractal texture as a new layer in the bump map texture.

    3. You can dial the fractal layer down, change the layer blending to "multipy", etc. to decide how much fractal you wish to add

    4. Save the PSD to speed up editing if you want to modify the result and not have to repeat the above steps.

    5. Flatten layers.

    6. Save out the new modified bump texture to .jpg.

    7. Add to bump map texture slot in DAZ Studio

    8. Test Render in DAZ Studio.

    This works for any map.

    I’m not sure you understood my suggestion. The anatomical elements I refer are the add-on anatomy provided with the adult Daz3D pro bundles, which have their own separate UV. For character makers wishing to use your sets for character creation, having a seamless texture tile for this UV would make such a product more attractive. Otherwise if they are used to modify just the torso texture, the ‘anatomical elements’ will no longer match when attached, and it would be becessary to bake new textures to match. 

  • Redz said:
    Redz said:

    I can see some practical use for this type of set. Can I suggest also adding the anatomical elements to each set, if you have not already done so. 

    I started out doing just that. However, everyone's character texture maps are different. So to prevent the end user from having to use the specific anatomical parts of the sets, you have more freedom if you blend in the fractals with your specific character textures in Photoshop. This seems to work using the torso map as an example:

    1. Open the torso bump map texture of your specific character in Photoshop.

    2. Open and paste the torso fractal texture as a new layer in the bump map texture.

    3. You can dial the fractal layer down, change the layer blending to "multipy", etc. to decide how much fractal you wish to add

    4. Save the PSD to speed up editing if you want to modify the result and not have to repeat the above steps.

    5. Flatten layers.

    6. Save out the new modified bump texture to .jpg.

    7. Add to bump map texture slot in DAZ Studio

    8. Test Render in DAZ Studio.

    This works for any map.

    I’m not sure you understood my suggestion. The anatomical elements I refer are the add-on anatomy provided with the adult Daz3D pro bundles, which have their own separate UV. For character makers wishing to use your sets for character creation, having a seamless texture tile for this UV would make such a product more attractive. Otherwise if they are used to modify just the torso texture, the ‘anatomical elements’ will no longer match when attached, and it would be becessary to bake new textures to match. 

    You are correct. I did miss that. I do need to add the anatomical elements. thanks!

  • barbultbarbult Posts: 23,155
    Redz said:

    I can see some practical use for this type of set. Can I suggest also adding the anatomical elements to each set, if you have not already done so. 

    I started out doing just that. However, everyone's character texture maps are different. So to prevent the end user from having to use the specific anatomical parts of the sets, you have more freedom if you blend in the fractals with your specific character textures in Photoshop. This seems to work using the torso map as an example:

    1. Open the torso bump map texture of your specific character in Photoshop.

    2. Open and paste the torso fractal texture as a new layer in the bump map texture.

    3. You can dial the fractal layer down, change the layer blending to "multipy", etc. to decide how much fractal you wish to add

    4. Save the PSD to speed up editing if you want to modify the result and not have to repeat the above steps.

    5. Flatten layers.

    6. Save out the new modified bump texture to .jpg.

    7. Add to bump map texture slot in DAZ Studio

    8. Test Render in DAZ Studio.

    This works for any map.

    Why not just use LIE and avoid the need to go outside Daz Studio to Photoshop?
  • nonesuch00nonesuch00 Posts: 17,929
    edited November 2017

    It seems to me that these would work most logically in the Translucency color map slot but with DAZ 4.10.x & Genesis 8 that slot is by default used by the same diffuse map used in the diffuse slot. Or it is for Michael 8 & Victoria 8 the only 2 Genesis 8 characters I have bought so far.

    When I render a Genesis 8 character in DS 4.10.x without the fractal maps it renders nicely except the character skin is missing that 'nebulous softness' because the translucency slot is taken by the diffuse map giving the skin an exact hardness we don't see with our own eyes in real life. So I removed those maps before and renders at 50% translenceny weight and the skin has a soft nebulous transparent glow but unfortunately too many diffuse map from the diffuse slot details are lost that way (although maybe with a 5000 iteration render they would get sufficiently added back in) . :-(

    For for this fractal map I did the same but changed the translucency strength to 30% from the medium translucency preset of 50% and then I put the fractal noise maps in for the translucency maps. I set then it to scatter & transmit intensity although I have no ideal what that means. It seems to indication light is penetrating the surface and exiting via reflection and refraction sporatically to create an illusion of light transmission. Anyway I did that, left the translucency color at white but set the translencency reflectance color directly under that to a very pale blue trending purple.

    It's rendering now and it is creating a nicely mottled skin like you'd expect from veins, capillaries, fats and other stuff doctors & such would know about but I wouldn't and don't quite nicely already and I am only 3% in rendering of a 2000 iteration maximum render I a doing. Whether it it actually turns out good at 2000 iterations I must wait and see. I am using the old Phoenix66 texture set Caleb which is missing specular maps but has bump and displacement maps. Since it is a G8M there is are seams in the render since the fractal maps were created for G8F but since I was already doing a pose set I figured I'd stop & give your fractals a quick whirl & see if this way of using translucency color slot was easier than using PS, Gimp, or LIE.  

    Looking again at the results so far I'm thinking now maybe the mottled pattern is a bit to large in scale for the typical person. I will have to wait and see. Looking at the fractal maps directly in a picture viewer looks like the fractal noise is lbigger noise splots on the face and arms, too big. On the legs and torso though it looks better. I should of hid the clothing before I started rendering! It's very subtle. It's kind of good there is a seam for this simple test because you can directly compare with & without.

    Post edited by nonesuch00 on
  • barbult said:
    Redz said:

    I can see some practical use for this type of set. Can I suggest also adding the anatomical elements to each set, if you have not already done so. 

    I started out doing just that. However, everyone's character texture maps are different. So to prevent the end user from having to use the specific anatomical parts of the sets, you have more freedom if you blend in the fractals with your specific character textures in Photoshop. This seems to work using the torso map as an example:

    1. Open the torso bump map texture of your specific character in Photoshop.

    2. Open and paste the torso fractal texture as a new layer in the bump map texture.

    3. You can dial the fractal layer down, change the layer blending to "multipy", etc. to decide how much fractal you wish to add

    4. Save the PSD to speed up editing if you want to modify the result and not have to repeat the above steps.

    5. Flatten layers.

    6. Save out the new modified bump texture to .jpg.

    7. Add to bump map texture slot in DAZ Studio

    8. Test Render in DAZ Studio.

    This works for any map.


    Why not just use LIE and avoid the need to go outside Daz Studio to Photoshop?

    You can. I am very comfortable in Photoshop so I tend to use it heavily.

  • It seems to me that these would work most logically in the Translucency color map slot but with DAZ 4.10.x & Genesis 8 that slot is by default used by the same diffuse map used in the diffuse slot. Or it is for Michael 8 & Victoria 8 the only 2 Genesis 8 characters I have bought so far.

    When I render a Genesis 8 character in DS 4.10.x without the fractal maps it renders nicely except the character skin is missing that 'nebulous softness' because the translucency slot is taken by the diffuse map giving the skin an exact hardness we don't see with our own eyes in real life. So I removed those maps before and renders at 50% translenceny weight and the skin has a soft nebulous transparent glow but unfortunately too many diffuse map from the diffuse slot details are lost that way (although maybe with a 5000 iteration render they would get sufficiently added back in) . :-(

    For for this fractal map I did the same but changed the translucency strength to 30% from the medium translucency preset of 50% and then I put the fractal noise maps in for the translucency maps. I set then it to scatter & transmit intensity although I have no ideal what that means. It seems to indication light is penetrating the surface and exiting via reflection and refraction sporatically to create an illusion of light transmission. Anyway I did that, left the translucency color at white but set the translencency reflectance color directly under that to a very pale blue trending purple.

    It's rendering now and it is creating a nicely mottled skin like you'd expect from veins, capillaries, fats and other stuff doctors & such would know about but I wouldn't and don't quite nicely already and I am only 3% in rendering of a 2000 iteration maximum render I a doing. Whether it it actually turns out good at 2000 iterations I must wait and see. I am using the old Phoenix66 texture set Caleb which is missing specular maps but has bump and displacement maps. Since it is a G8M there is are seams in the render since the fractal maps were created for G8F but since I was already doing a pose set I figured I'd stop & give your fractals a quick whirl & see if this way of using translucency color slot was easier than using PS, Gimp, or LIE.  

    Looking again at the results so far I'm thinking now maybe the mottled pattern is a bit to large in scale for the typical person. I will have to wait and see. Looking at the fractal maps directly in a picture viewer looks like the fractal noise is lbigger noise splots on the face and arms, too big. On the legs and torso though it looks better. I should of hid the clothing before I started rendering! It's very subtle. It's kind of good there is a seam for this simple test because you can directly compare with & without.

    When you look at the texture maps in an image viewer it is decieving because of how the model's UVs are laid out. However at rendertime the fractals were created and have taken the UV sizes into account so that the texture is consistent across the different sized UVs. For instance, compare the head and torso maps. The small area of the head takes up more UV than the torso UV and yet size wise the head is smaller. to get the fractals to be the same, the head map fractal size must be larger. This way at rendertime, it is seamless and the same size. I hope that makes sense.

  • nonesuch00nonesuch00 Posts: 17,929

    It seems to me that these would work most logically in the Translucency color map slot but with DAZ 4.10.x & Genesis 8 that slot is by default used by the same diffuse map used in the diffuse slot. Or it is for Michael 8 & Victoria 8 the only 2 Genesis 8 characters I have bought so far.

    When I render a Genesis 8 character in DS 4.10.x without the fractal maps it renders nicely except the character skin is missing that 'nebulous softness' because the translucency slot is taken by the diffuse map giving the skin an exact hardness we don't see with our own eyes in real life. So I removed those maps before and renders at 50% translenceny weight and the skin has a soft nebulous transparent glow but unfortunately too many diffuse map from the diffuse slot details are lost that way (although maybe with a 5000 iteration render they would get sufficiently added back in) . :-(

    For for this fractal map I did the same but changed the translucency strength to 30% from the medium translucency preset of 50% and then I put the fractal noise maps in for the translucency maps. I set then it to scatter & transmit intensity although I have no ideal what that means. It seems to indication light is penetrating the surface and exiting via reflection and refraction sporatically to create an illusion of light transmission. Anyway I did that, left the translucency color at white but set the translencency reflectance color directly under that to a very pale blue trending purple.

    It's rendering now and it is creating a nicely mottled skin like you'd expect from veins, capillaries, fats and other stuff doctors & such would know about but I wouldn't and don't quite nicely already and I am only 3% in rendering of a 2000 iteration maximum render I a doing. Whether it it actually turns out good at 2000 iterations I must wait and see. I am using the old Phoenix66 texture set Caleb which is missing specular maps but has bump and displacement maps. Since it is a G8M there is are seams in the render since the fractal maps were created for G8F but since I was already doing a pose set I figured I'd stop & give your fractals a quick whirl & see if this way of using translucency color slot was easier than using PS, Gimp, or LIE.  

    Looking again at the results so far I'm thinking now maybe the mottled pattern is a bit to large in scale for the typical person. I will have to wait and see. Looking at the fractal maps directly in a picture viewer looks like the fractal noise is lbigger noise splots on the face and arms, too big. On the legs and torso though it looks better. I should of hid the clothing before I started rendering! It's very subtle. It's kind of good there is a seam for this simple test because you can directly compare with & without.

    When you look at the texture maps in an image viewer it is decieving because of how the model's UVs are laid out. However at rendertime the fractals were created and have taken the UV sizes into account so that the texture is consistent across the different sized UVs. For instance, compare the head and torso maps. The small area of the head takes up more UV than the torso UV and yet size wise the head is smaller. to get the fractals to be the same, the head map fractal size must be larger. This way at rendertime, it is seamless and the same size. I hope that makes sense.

    Yes, that makes sense.

    There are lots of types of fractals & lots of programs to generate those different types. It's been a long time since I even wrote a simple program to do so and that was the famous obligatory fractal fern. You mind saying what fractal program you used to generate those texture maps? Is it opensource?

    Thanks.

  • barbultbarbult Posts: 23,155
    barbult said:
    Redz said:

    I can see some practical use for this type of set. Can I suggest also adding the anatomical elements to each set, if you have not already done so. 

    I started out doing just that. However, everyone's character texture maps are different. So to prevent the end user from having to use the specific anatomical parts of the sets, you have more freedom if you blend in the fractals with your specific character textures in Photoshop. This seems to work using the torso map as an example:

    1. Open the torso bump map texture of your specific character in Photoshop.

    2. Open and paste the torso fractal texture as a new layer in the bump map texture.

    3. You can dial the fractal layer down, change the layer blending to "multipy", etc. to decide how much fractal you wish to add

    4. Save the PSD to speed up editing if you want to modify the result and not have to repeat the above steps.

    5. Flatten layers.

    6. Save out the new modified bump texture to .jpg.

    7. Add to bump map texture slot in DAZ Studio

    8. Test Render in DAZ Studio.

    This works for any map.


    Why not just use LIE and avoid the need to go outside Daz Studio to Photoshop?

    You can. I am very comfortable in Photoshop so I tend to use it heavily.

    My thinking was that a product of LIE presets might be more familiar to customers and more likely to be accepted by Daz as a store product, since it is designed for Daz Studio. A set of textures that a user has to manually load and merge in a photo editor is not as easy for most customers to use. People seem to like point and click presets, and many get confused with something is just a JPEG texture file. I've seen that happen before with the few store products that are just textures. People assume they will be shader presets, or something like that. LIE has a downside in that it is slow, but it is pretty easy to use. Lots of Tattoo products in the store use LIE, I believe.

  • Yes, that makes sense.

    There are lots of types of fractals & lots of programs to generate those different types. It's been a long time since I even wrote a simple program to do so and that was the famous obligatory fractal fern. You mind saying what fractal program you used to generate those texture maps? Is it opensource?

    Thanks.

    3dsMax. I also use some plugins by Blur Studios for 3dsMax. As long as you use a 3D generated fractal, it will make it seamless.

  • barbult said:

    My thinking was that a product of LIE presets might be more familiar to customers and more likely to be accepted by Daz as a store product, since it is designed for Daz Studio. A set of textures that a user has to manually load and merge in a photo editor is not as easy for most customers to use. People seem to like point and click presets, and many get confused with something is just a JPEG texture file. I've seen that happen before with the few store products that are just textures. People assume they will be shader presets, or something like that. LIE has a downside in that it is slow, but it is pretty easy to use. Lots of Tattoo products in the store use LIE, I believe.

    You are correct. A set of presets would be excellent. The sets started off more as a merchant resource of textures. If everyone liked it I would take it further and have presets, sample materials, etc.. DAZ did not even respond to the concept so I am on my own to create a usable product to be sold "somewhere else" but I will keep the first two sets free and develop those out here for everyone.

    I am currently working on a Genesis 8 character and the fractals at the same time. I am in the final stages of testing the character presets, dials, making promo images etc and it takes more time than I anticipated. When I have finished and published then I can take the fractals to the next level of easier use than just for vendors and those who no how to edit them. Thanks for the input!

  • nonesuch00nonesuch00 Posts: 17,929

    Yes, that makes sense.

    There are lots of types of fractals & lots of programs to generate those different types. It's been a long time since I even wrote a simple program to do so and that was the famous obligatory fractal fern. You mind saying what fractal program you used to generate those texture maps? Is it opensource?

    Thanks.

    3dsMax. I also use some plugins by Blur Studios for 3dsMax. As long as you use a 3D generated fractal, it will make it seamless.

    OK, I will have to see about compiling a opensource fractal program & figuring out which fractals patterns to use. If Autodesk is using it that probably means a university has published research that can be found on search.

    Oddly, when I raised the translucency from 30% to 50%, keeping that fractal textures in the transparency color slot the fat/blood vessel mottled effect I was wanting to heighten decreased. I thought the transparency texture and transparency color interacted with the diffuse texture and diffuse color differently then that. sad Though a higher transparency weight does make a a much better render in my opinion - the edges on the skin aren't so hard when rendered, but the diffuse texture mostly disappears at 50%.

  • CriosCrios Posts: 2,675

    What does no permission mean exactly?  Does that mean for personal use only?

    You may use it for personal use AND as texture in a character for sale. If you use it in a product you sell, it would be nice (not required) to acknowledge the resource (Fractals provided by AbnormalPixels). My hope is everyone will find it useful and want more options...which will encourage DAZ to want to sell it in the shop. I have submitted it in hopes to become a published artist.

    Can be used for create a Freebiees?

Sign In or Register to comment.