-
Not To Worry, Friend, "There's Always Another Sale™"
Well, there were a couple of PC+ items I intended to buy that rotated off the sales page before I got them. I was looking forward to getting them in the catchup, but if Daz isn't going to apply the intro discount, I'll just wait. I can pay full PC+ price for them anytime, so there's no hurry.
Kinda sad, though, so many of the PC+ new releases from the sale aren't getting the intro discount. After all, it is the PC+ Anniversary Sale.
Yes I was sad about that too - there were two or three I didn't pick up as Debut as I was waiting in case I needed a trigger in a couple of days time for a discount on other items, but they fell off the Still New list before I knew it. Catchup (even just the current 30% less 10% for members) would have been good.
I'm seeing an intro discount on the PC items I looked at - the Newly PC do seem to be a base $1.99, but I think they were initially (and then got an extra discount in the cart).
I meant items like these, new introductions (not "Newly PC" but brand new) during the early days of the Anniversary Sale:
October 22nd (7th day of sale): https://www.daz3d.com/princess-of-darkness-2 and https://www.daz3d.com/old-metal-shaders (no discount whatsoever)
November 6th: https://www.daz3d.com/saree-for-genesis-8-female-and-victoria-8 (showing the 30% intro discount but no extra 10% members discount)Edit: If I put 2 or more in my cart I am getting the 20% discount for a multi-buy, but they are not exactly "back on sale".
Monique 8some great renders in this thread.
it's official, Monique is the figure to get me started using G8, LOL. I was relunctant since I really was heavily invested into G3 and happy with what I had. I even bought Victoria 8 and a few hairs and clothing on sale for when i did decide to use her and then along came Monique (and Imani!!!) and my will crumbled. Finally installed DS4.10, installed the G8 figures, my sparse G8 content. Used the Singular Blues script to bring over a few of my custom and Genx morphs to G8 and now I have a good starting point.
I really like what they have done with Monique 8 and especially love the Imani skin. Here is my first render with G8, Monique, Imani and a few other morphs thrown in the mix.

Supermodel! and some cocoa butter. Good one, FSMC.
Monique 8some great renders in this thread.
it's official, Monique is the figure to get me started using G8, LOL. I was relunctant since I really was heavily invested into G3 and happy with what I had. I even bought Victoria 8 and a few hairs and clothing on sale for when i did decide to use her and then along came Monique (and Imani!!!) and my will crumbled. Finally installed DS4.10, installed the G8 figures, my sparse G8 content. Used the Singular Blues script to bring over a few of my custom and Genx morphs to G8 and now I have a good starting point.
I really like what they have done with Monique 8 and especially love the Imani skin. Here is my first render with G8, Monique, Imani and a few other morphs thrown in the mix.
Wow, that skin! Well done, she looks gorgeous.
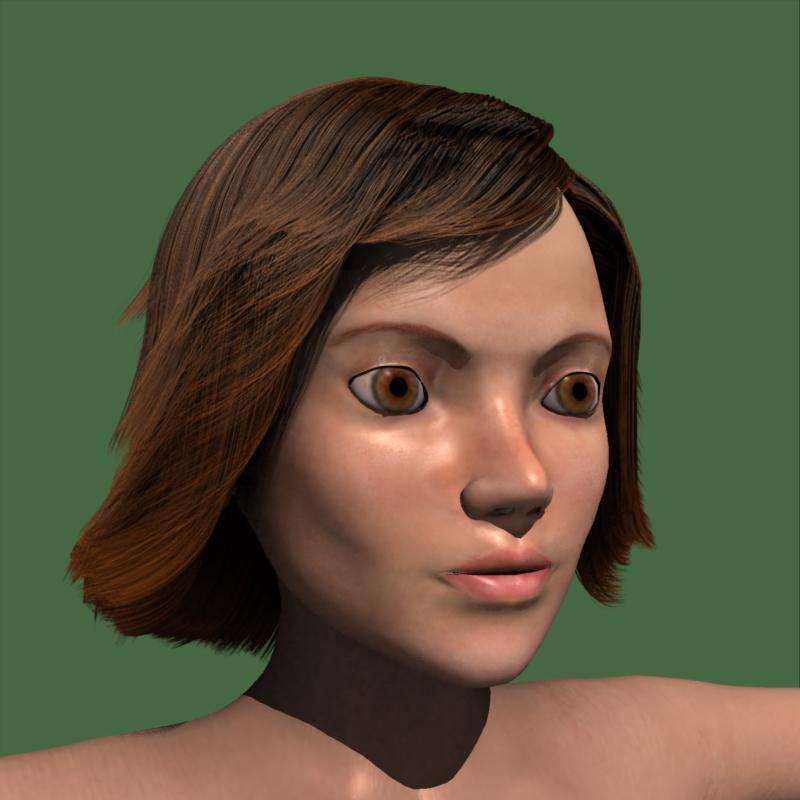
My Project: Brash Lonergan adventures - Warning AI Discussion PossibleAnd here is a version of Moxie with the Face and lips UVs adjusted to accept genesis 2 female texture maps. This is with Victoria 6 maps. Forgot the nostrils and still no eyelashes.

.
 Rigging Legacy Clothing - Resources and Tutorials
The clothing model needs to be grouped to match the Victoria 4 bones
In the Figure set-up pane Import Victoria 4 from the scene, then in the Groups area right-click and import your OBJ. Drag the OBJ onto the root in the relationships area, then discoard any unneeded bones (and remove the Victroia 4 mesh, right-click menu, from those you keep but which aren't in the clothing mesh - the general adice is to keep one dummy child bone beyond each real bone, so if your arms end at forearm keep the hand but with no geometry). Rename the figure, check the modify selected option, and click Apply (or Modify - I can't recall but it's the button at bottom-right that wa originally labelled Create). That shoudl give the base, with the Victoria 4 joint centres. Now you use the Joint Editor to tweak the plaement of the include/exclude angles and spheres. Remember that in legacy rigging the children move with the bone 100%, and that a bone cannot affect anything beyond its own parent - bending has to be handled solely in the bone's group and the parent's. Also remember that a geometry group may not touch any other group but its children's and its parent's, which is why skirts are so tricky.
Indian (India) charactor suggestions?https://www.daz3d.com/fw-sushmita-hd-for-victoria-7-and-her-jewelry
https://www.daz3d.com/draupadi-for-genesis-3-female-s
https://www.daz3d.com/brook-for-genesis-3-female-s
maybe
but just looking at all the characters several could fit the type
https://www.daz3d.com/people-and-wearables-genesis-3-female#index=351
for example even
https://www.daz3d.com/vincenzina-for-genesis-3-female
as like any region there is a fair variation of people
Monique 8some great renders in this thread.
it's official, Monique is the figure to get me started using G8, LOL. I was relunctant since I really was heavily invested into G3 and happy with what I had. I even bought Victoria 8 and a few hairs and clothing on sale for when i did decide to use her and then along came Monique (and Imani!!!) and my will crumbled. Finally installed DS4.10, installed the G8 figures, my sparse G8 content. Used the Singular Blues script to bring over a few of my custom and Genx morphs to G8 and now I have a good starting point.
I really like what they have done with Monique 8 and especially love the Imani skin. Here is my first render with G8, Monique, Imani and a few other morphs thrown in the mix.
Rigging Legacy Clothing - Resources and TutorialsAlright. I've gotten pretty good at setting up costumes for the Genesis series using the Transfer Utility. I've found it to be pretty much a piece of cake at this point. That being said, however, I've had numerous requests that I rig my creations so that they're compatible with the Victoria 4. The problem is...I don't know how. Also, I've already learned the hard way that the Transfer Utility doesn't work with Legacy Rigging the same way it does with Genesis-based products.
So if there are any tutorials, programs, and other resources that could help me convert clothing I've previous done for G2F and G3F to work with Victoria 4, I would greatly appreciate it if someone were to point me in their direction.
FORBIDDENWHISPERS What Character? Awsome Fantasy Eyes ProductI know the skin is Victoria 6. But what is the character morph and the figure? https://www.daz3d.com/awesome-fantasy-eyes
Thanks!
Daz Studio Pro BETA - version 4.10.0.123! (*UPDATED*)4.10.0.118 feedback:
I fit the Summer Sundress to Victoria 5 Supermodel. I applied dForce Dynamic Surface and simulated with default settings. I got a dialog box with hundreds of message scrolling by about collision offset. (Yes, I read about changes in the first post in this thread; it implied to me that it should help prevent explosions, but it did not.) There is no way to cancel this operation. There is no cancel button and the X in the corner did not close it. I just had to wait for it to finally finish.
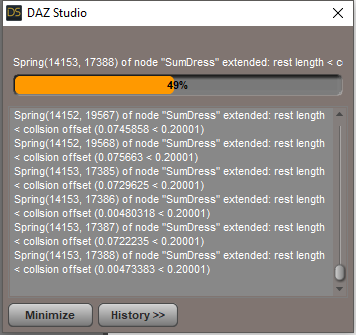
There are correspondingly hundreds of messages in the log file like this:
2017-11-18 19:10:38.262 Spring(25376, 25377) of node "SumDress" extended: rest length < collsion offset (0.048295 < 0.20001)
2017-11-18 19:10:38.263 Spring(25378, 25379) of node "SumDress" extended: rest length < collsion offset (0.0350581 < 0.20001)
2017-11-18 19:10:38.264 Spring(25380, 25381) of node "SumDress" extended: rest length < collsion offset (0.0360791 < 0.20001)
2017-11-18 19:10:38.265 Spring(25382, 25383) of node "SumDress" extended: rest length < collsion offset (0.0381764 < 0.20001)
2017-11-18 19:10:38.267 Spring(25384, 25385) of node "SumDress" extended: rest length < collsion offset (0.0350709 < 0.20001)
2017-11-18 19:10:38.268 Spring(25386, 25387) of node "SumDress" extended: rest length < collsion offset (0.0302122 < 0.20001)
2017-11-18 19:10:38.269 Spring(25386, 25393) of node "SumDress" extended: rest length < collsion offset (0.187536 < 0.20001)
2017-11-18 19:10:38.270 Spring(25387, 25392) of node "SumDress" extended: rest length < collsion offset (0.187691 < 0.20001)
2017-11-18 19:10:38.271 Spring(25388, 25389) of node "SumDress" extended: rest length < collsion offset (0.0283884 < 0.20001)
2017-11-18 19:10:38.272 Spring(25390, 25391) of node "SumDress" extended: rest length < collsion offset (0.0375987 < 0.20001)
2017-11-18 19:10:38.273 Spring(25392, 25393) of node "SumDress" extended: rest length < collsion offset (0.0350159 < 0.20001)
2017-11-18 19:10:38.275 Spring(25394, 25395) of node "SumDress" extended: rest length < collsion offset (0.0748992 < 0.20001)
2017-11-18 19:10:38.276 Spring(25396, 25397) of node "SumDress" extended: rest length < collsion offset (0.0712059 < 0.20001)
2017-11-18 19:10:38.277 Spring(25398, 25399) of node "SumDress" extended: rest length < collsion offset (0.0496475 < 0.20001)
2017-11-18 19:10:38.278 Spring(25400, 25401) of node "SumDress" extended: rest length < collsion offset (0.0538031 < 0.20001)
2017-11-18 19:10:38.279 Spring(25402, 25403) of node "SumDress" extended: rest length < collsion offset (0.0500406 < 0.20001)
2017-11-18 19:10:38.280 Spring(25404, 25405) of node "SumDress" extended: rest length < collsion offset (0.0475225 < 0.20001)
2017-11-18 19:10:38.282 Spring(25406, 25407) of node "SumDress" extended: rest length < collsion offset (0.065294 < 0.20001)
2017-11-18 19:10:38.284 Spring(25408, 25409) of node "SumDress" extended: rest length < collsion offset (0.0601416 < 0.20001)
2017-11-18 19:10:38.285 Shortest spring had length: 0.00235879After this finished, the simulation started and exploded very quickly anyway.
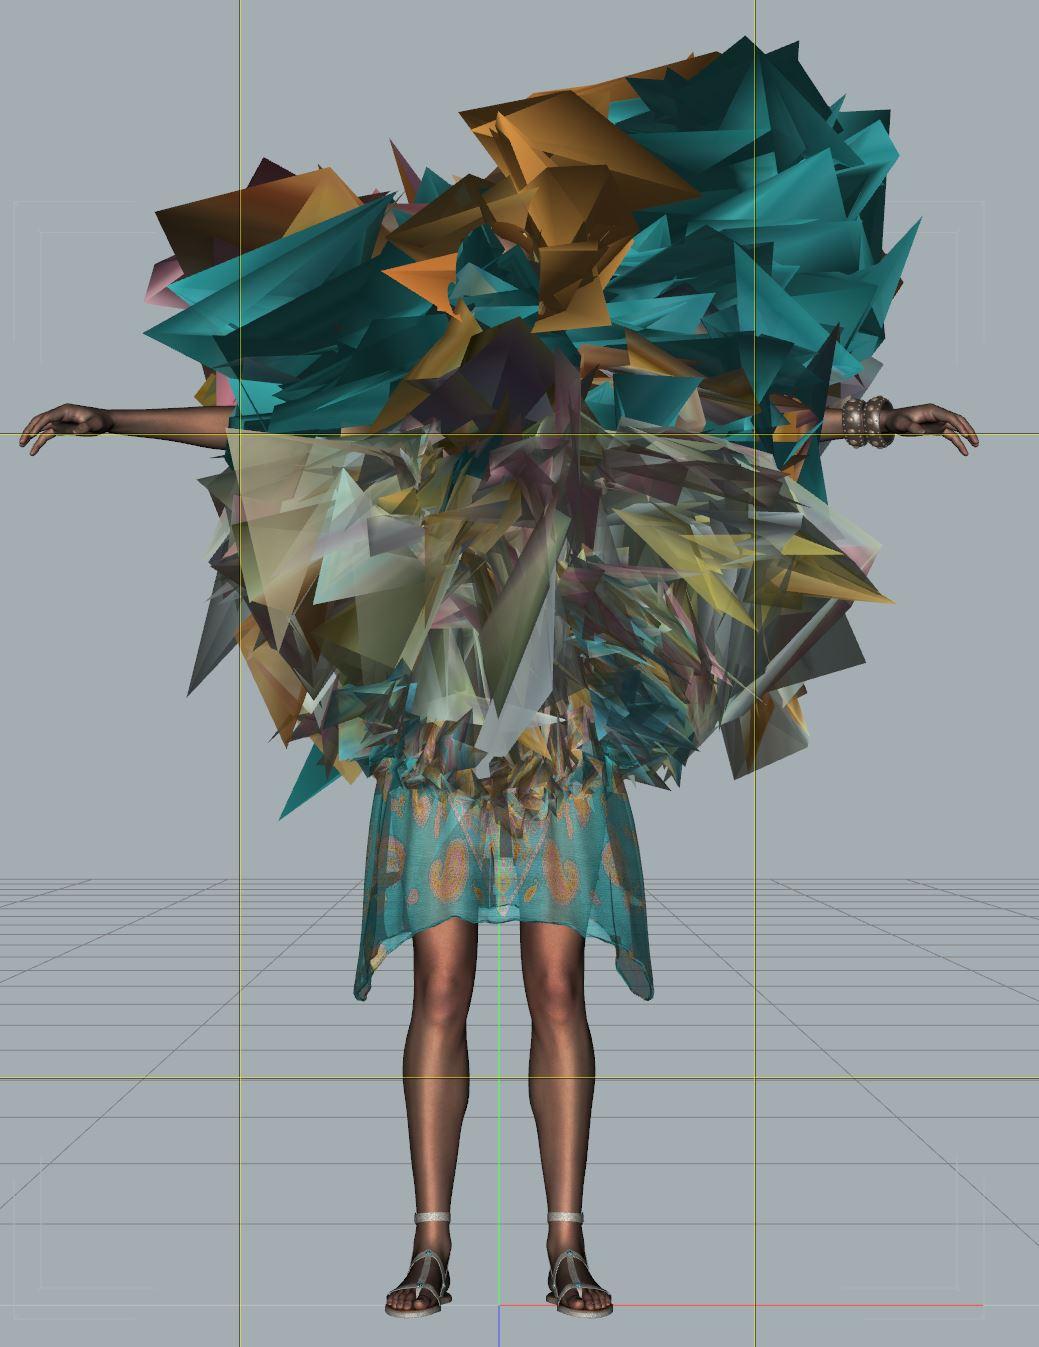
By the way, collision is misspelled in the log messages.
Carrara CharactersThis is all very interesting, though occasionaly over my head.
I understand all the resistence to this idea, but I would like to see a genesis-like character that only works in Carrara. Repeat, it will ONLY work in Carrara.
Suicide? Maybe not.
If the character was spectacular enough, and versatle enough, wouldn't that attract more people to try out Carrara?
Isn't that exactly what Daz is now trying to do with Studio?
A unique new native character in Carrara would fill a void, and help to set Carrara apart from a dependency on other content creators.
It would have to be awesome, though.
I now return you to your regularly scheduled programming.

Well, first of all I think what you might be reading as "Resistance" is actually not resisting, but rather pointing out strengths and weakness about Carrara - stuff that really needs a clear understanding before getting neck deep in a huge, time/money consuming project.
For example, to create your dream wish, a Genesis-Like figure to ONLY work in Carrara we'd either need to require that the end user owned Fenric's ERC for Carrara plugin, as already mentioned, or would require a different plugin that could be included with the figure, simply because Carrara doesn't contain the tools for creating joint-controlled-morphs or morph-controlled-morphs.
One could do all of the morph connections and rigging in either DS or Poser and use their technology to build it in, then import it into Carrara as if it was a DS or Poser figure, then save it in Carrara and sell that version, but that's kind of defeating the purpose.
MatCreator had a great idea of, instead of making a single figure that can accept morph injections and be changed into a bazillion different things, make a very specific figure - a character. Bill the Pirate, perhaps. Then Jane the Piratess. Then Polly the Parrot. That sort of thing.
Will it sell? Maybe. It would have to be really spectacular. Read 3DAGE's post above. Daz3d has the biggest monopoly on purchaseable figures on the planet. And they're dolls. Dolls with near unlimited posibilities. In truth, they hire top-notch graduates in the field to make that happen - read all of the latest tech notes as they trickle down from those leading the way... like being the first on the planet to offer Iray, for example. They use 3d scanners, hire models for textures, they are endeavoring to constantly push forward with the latest top tech, and their customer base helps them.
They started by offering a higher-end human for Poser users. Victoria, the Millennium Woman. She was amazing! When I got into it, Victoria 3 was free - the base model. Fantastic and hard to beat - maybe not as "the perfect woman figure", but certainly as "The Best morphable 3d Human Female for the masses". Tons of free clothes, hair and textures were already available for her. Michael 3 came out the same way - amazing.
Predatron's figure offerings are fantastic! They included what Daz3d's Generation 4 figures called "Morphforms" before they did - and even more of them. Instead of making "A Better Figure", they sold them as Different (Demon, Troglodytes, Goblins, Angor, etc.,) or Distant (Low Rez) - all of which are highly polished and top-notch, proving that it CAN be DONE!
Carrara-Only can be a hard sell at a publisher. I only say this because the publisher will likely question putting on their front page something brand new developed for software that they no longer wish to develop. That's a hard sell to the company that 'knows' they're not planning major development on the software (I'm not saying that they're not... just using this as an example). Rendo might be different, and go ahead and take it on. But to get it selling, one would have to do ones own marketing - promotion.
So I think where it might seem like a negative outlook, it's actually more beneficial to keeping Carrara "alive" to instead create something that is made for the software on the bleeding edge of technology, and include for free, right with it, the necessary files to 'bring it to life' in Carrara. It gets people wondering why. It's an amazing software, they know that. They've heard it before. And now they have free files for it.
My Animation Kits were made for Poser (animated PZ2), DS (aniBlocks) and Carrara (NLA Clips) and I think some people may have bought Carrara simply because of my love for it. I'm never quiet about that and, back then I was really very vocal about it - even to the powers that be at Daz3d. But many of those wonderful folks are gone now, I think.
Anyway, just food for thought, my friend.
CC Lily for Genesis 8 Female [Commercial] (Released!)OH! Are you using Victoria's eyebrows by chance? Lily has custom fibermesh eyebrows and eyelashes that I made for her, and the shaping presets go with those. In the scene tab, they should be labeled CC Lily Eyebrows and CC Lily Eyelashes. If you load the character preset, they will automatically load in. If you use the Content Library to load separately, they're in the Anatomy folder in the base character folder. If you use Smart Content they'll be under Anatomy --> External. Sorry for the confusion!
Teen/Pre-teens for other ethnicitiesI own the Growing UP for Gen 3, and have used it, but because of convenience I find that I will generally just use Princess Leila, Josie, Amber, or even Skyler when it comes down to it. I just thought it would be cool if that convenience was offered for creators who wish to do scenes set in other places, or not using the usual suspects.
I've also found out that there are less problems morphing a youthful character to a younger age, than an older character to a youthful state, another reason a teen character would be helpful.
Maybe someone will do a tutorial on the best methods to use the Growing up plug-ins, because right now it's trial and error, and time is not something all of us have to devote to figuring things out when people have already figured out ways to get optimal results.As SpottedKitty points out, dialing down the body morph for lets say Victoria 7 to where what is left is essentially Genesis 3Female with the Victoria 7 scaling and face morph applied is the best option if you want to create a teen or younger from a DAZ Original figure. Select her in the scene tab (or in the viewport), then select Currently Used in the Parameters tab to see what dials are available for adjustment.
Carrara Challenge #36 - Pinups and Cheesecake ---final days to vote...would appreciate your helpThat poster is Victoria 3. Wow. Great job, UB.
Novica & Forum Members Tips & Product Reviews Pt 10***** Tutorials T through W ******
Tutorial: Tears by SereneNight NEW JUNE 2017
Tutorial: Teeth, Getting Realistic Shapes Getting realistic teeth shapes was here and slight tweaks here.
Tutorial: Texturing Texturing With DestinysGarden is a good thread- let a pro show you how!
Tutorial: UltraScatter Advanced Instancing UltraScatter Advanced Instancing: RGcincy's handy notes, how-to.
Victoria 4 for Genesis 2 Female: How to use the product.
Tutorial: Weight Mapping: How To Smooth All Face Groups At Once (By SickleYield)
Tutorial: Windows, Making Them From Planes And Cubes Realistically Making Windows using planes and cubes, with glass panes and images!
 Novica & Forum Members Tips & Product Reviews Pt 10
********** TUTORIALS**********
Tutorial: Bus, Noggins- Converting from Bryce to Daz Studio (RGcincy) Here
Tutorial: Breast Gone- In Hexagon (Smoothing Zev0s Grow Up product even more)
Tutorial: Clothing, Making in Blender SickleYield's tutorial on Deviant Art.
Tutorial: Create Categories Using Gen2F, I showed how to Create Categories and Export to save your custom categories. (Here's WHY you may want to do that with your characters.)
Tutorial: Custom Actions In Toolbar How to Create Custom Actions In Toolbar
Tutorial: Customizing Morphs Using Morph Loader Pro New Feb 19 2018
Tutorial: D Former D Former Tutorial D Former tutorial and links
Tutorial: Depth of Field Flipmode provides a good depth of field tutorial for you.
Tutorial: Fisty's Shaders & Getting Rid of Gooey Lips This one shows you Fisty's shaders. Get rid of the overly gooey lips.
Tutorial: Fur Brushes Download and Video (Kathryn Loch)
Tutorial: Garibaldi Hair Doing a cat with Garibaldi Hair- Tutorial
Tutorial: GenX links on "how to use."
Tutorial: Generation 4 Materials on Genesis 2 This one put Generation 4 materials on Genesis 2 using Victoria 4 for Genesis 2 Female.
Tutorial: Geometry Shells How to do Geometry Shells (video tutorial the3dwizard) and doing makeup for different characters
Tutorial: Hair Shaders (Slosh, his product) explaining how to use them.
Tutorial: Iclone Iclone videos
Tutorial: Images- How To Put Them In Forum Posts Here's Putting Images in Posts
Tutorial: Instances: Using Ultrascatter
Novica & Forum Members Tips & Product Reviews Pt 10What fun, we're now in the double digits for threads. Welcome to the TENTH installment of the product showcase thread and helpful tips/tutorials!
The previous threads / views as of June 9th 2017 are shown below, let's see how we're doing. (This is a community effort.) When you show others the products, those renders get seen and you help a lot of people. The threads FOUR YEARS AGO are still being actively surfed. These are the increase in views from June 2017 to November 18th.
Thread 1 81,805 Now 82,388 (+583 new!)
Thread 2 66,316 Now 66,979 (+726)
Thread 3 77,281 Now 77,832 (+702)
Thread 4 57,095 Now 57,703 (+608)
Thread 5 51 603 Now 52,017 (+414)
Thread 6 70,937 Now 73,230 (+2,293)
Thread 7 48,944 Now 51,745 (+2,801)
Thread 8 42,300 Now 45,690 (+3390)
Thread 9 47,117 (midnight on Nov 18th) (+47,117)Total views: 554,470 New views since June on threads 1-8 only- 11,517 views, no new posts!
A few good links from previous threads:
*If you want to back up your content, SereneNight gives you a step by step. It's in the second half of the post.
*RGcincy is the creator of Shape Magic, a very neat program and if you want to try modeling, take a look!
*For examples of older content, visit these threads.
Examples of Generations 2 and 3 are here. Older sets are here. V4 and M4 Clothing Conversion to Iray is here
*To post your images in a thread and avoid attaching them below your post, here's where you can post them!*Some threads I started which will help you:
ZBrush Silo Modeling Infinito How To Use GenX2 Applying Material Presets (Skin) for GenX2 Material Zones ~ Geometry Tool TutorialFree Portrait Backgrounds Wanna Render? Iray Tutorial (one of my favorites, very detailed and goes step by step on setting up an Iray rendered scene.)
Some fun and useful threads:
Photoshop Playtime! Where we showed you some really neat plug-ins to get cartoon, oil, watercolor effects.Scripts: A one click solution to put things on your ground plane, under things, etc
Thumbnail Mastery Apparently the PDF got removed from the ReadMe, it was found online and here it is. (It may have gotten put back, don't know.) Here's a handy thread with questions. It's for DUF files.
The References links have to be expanded to several pages, believe it or not there is a limit to a post size, and we passed it. I had to trim down descriptions of existing links to add new ones, so I am scattering the References to several pages because they are alphabetical and I can't just stick new ones at the end. Whenever I add a new Reference, I always mention it in the thread.
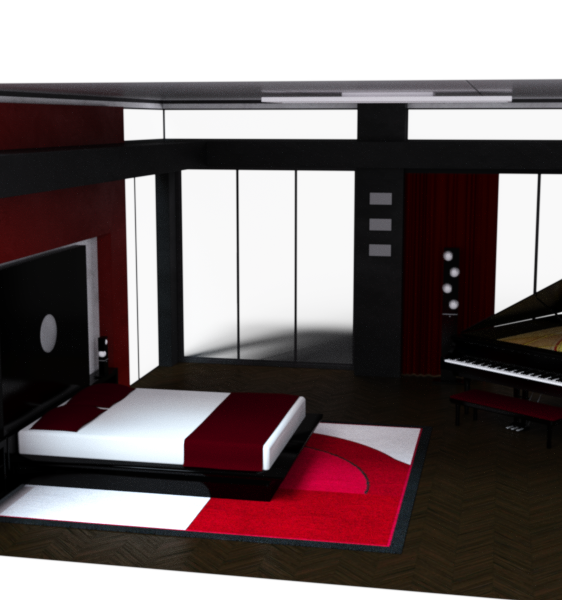
Novica & Forum Members Tips & Product Reviews Pt 9Okay, this is taking too long, aka all afternoon, into evening. Obviously, instead of a quickie, I'll give some fun tips and show you how to tweak things. Let's get quite a few products in here and spend time on it. (Started around noon.) Tackling something hard, dark room (black, gray, red) with black and red clothing. Why not? I want to chat about keeping your character separate from the background.
Modern Room Bedroom Tara 2 HD (Victoria 7/8) GeeGee Hair (Gen8F)
NOTE: Male Clothing! Cool Casual for Genesis 3 Male(s) Brrrrr for Cool Casual thanks to @sickleyield SY Ultra Templates Genesis 8 Female
Cold Weather Outfit (Gen8F) (boots only) Be Seated For Her (and tweaked a lot) Fabric GazeboI feel like I'm doing RRRR, putting things together based on the order of what I bought them. This is actually kinda fun. ( @RGcincy, remember when we did scenes based on the order we bought them? I'm at it again. And I had to laugh, Brrrrr had a RED shirt option, and GeeGee Hair had a red handband, both go with the room!)
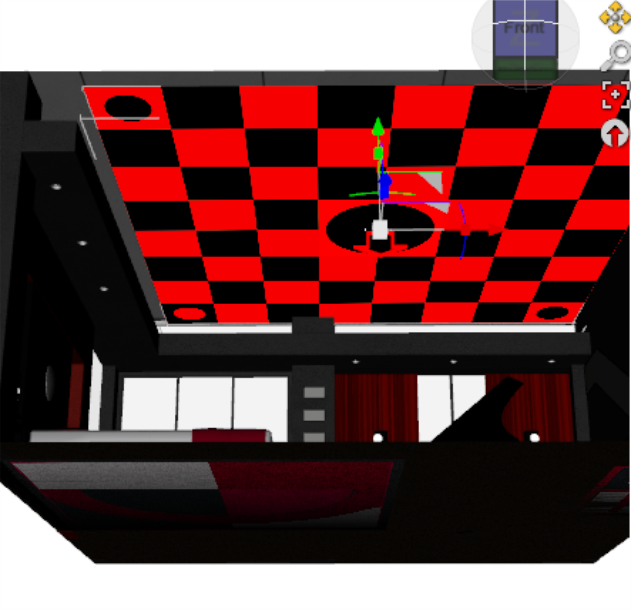
A Ghost Light Tutorial for this room: First for newbies: If you're new to Ghost Lights, this is what it looks like when you load the lights. Put them where you want them (and there's easy Bend, Swing, etc sliders.) Click Apply Before Presets, they disappear, THEN you apply your lumen, etc settings. If you don't own Ghost Lights, WISHLIST THEM. Now! (To show the red planes again, click Debug.But you don't really have to- I've mentioned this before but as a reminder- TIP: Use the Surface Selection Tool and they will outline in a nice gold, easy to see. I never Debug!
This first one is a 500k/300k selection on the lights, as you're looking at the image, the 500k is the open sided Ghost Light, the 300k is the wall. I like to (again) have a bit asymmetrical lighting and use a filler Ghost Light on the ceiling, shining straight down. The shadow you see outside the window is the BUILDING, Ghost Lights do not throw shadows.
Then an 800k ceiling light, final render. And kudos to the vendor, the white Diffuses were already a dull gray, I darkened them a bit more. For this to work, your ISO should be 135 (my standard go-to setting) with Exposure Value 13.49 I do have to wonder why a bedspread would be reflective and more like ice than a soft spread (see the black figurine/lamp reflecting? (This is out of the box, I didn't fix it.)
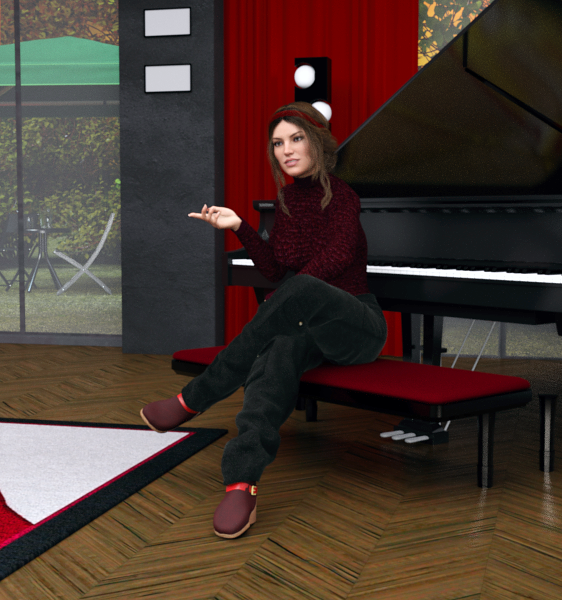
Okay, I very rarely try men's clothes on women, and Cool Casual works like a charm for the clothing with SY's Ultra Templates. No pokethrough, and it's so amazing to use a Genesis 3 MALE clothing set on a Genesis 8 FEMALE. I darkened the pants so the fastener isn't attention getting. Womens go to the right, men's to the left.
Cold Weather Boots WILL go under those pants, if you 1. increase the bulk of the pants 2. increase the shins of the pants. Both are in the Adjust part of Actor. (no need to go to Scene.) Vendor did a nice job on the pants. I will remind folks I did not like the jacket of the Cold Weather Outfit, IMO it had too many folds/morphs. I'd still buy it if it were grealy discounted. The shoes are usable, nice boots, pants and gloves are form fitting, nothing unusual. The boots are the main draw IMO, with the separate band and buckle.
Fabric Gazebo is excellent to fill your outdoor scene right outside a window. Note the plants extend past the piano window too. TIP: Remember to slide your grass back or it will provide a nice grassy carpet for your room! TIP For Newbies: For interest, leave little gaps showing more of the background. For instance, I rotated the camera so vegetation would show at the top of the piano, and that same window shows at the bottom, under the piano. It adds more depth to the scene.
TIP: intersect the head with a background item but don't have them line up. Note the black bar with the round lights? Her head slightly covers one of them, but I made sure it didn't look like it was attached to her head. The hair, piano, and light all "overlapping" adds depth. Had I spun the camera to my right (moving the view to our left) then that depth would be lost as her head would be in front of only a background window. Also see the itsy bitsy tip of the piano past her shoulder? That adds depth too. But we can do better.
Another example (six renders later, still tweaking) is that folding chair outside. It was being cut in half (the "x") by the window bar running vertically. Note how the chair steers clear of it.
TIP: I'll show you an example- Make sure lines do NOT line up. Look at the extended foot and the rug. That's a no no. So when I show you the improved version, trying to keep that black bar/round lights, piano, and hair together, I have to change up the foot.
Too many times I've seen things just blob together- take the time and get your figures and backgrounds DISTINCT and separated. Let's keep going, as this gal's body merges into the piano, particularly that elbow area.

TIP: Your clothing should match your season, with the understanding it can still be green grass and fully leaved trees and drop to the forties at night. (Example, where I live, Panhandle of Florida.) But you don't HAVE to be stuck with the season of the prop. I changed from green Summer to late Summer/Fall by adding Orange and Red to the Diffuse, and dark Olive/Brown to the grass. Put in the appropriate backdrop, and what a difference!
TIP: If the hand pose isn't good with the differing camera views, MOVE THE HAND. In this case, the second example- by simply lowering it so there's more horizontal, the hand won't get lost and it's more dramatic.
How fast does this render with a character, hair, two sets? 82% in 8 minutes. 93% in 15 minutes. 96% in 18 minutes, done by 20 minutes.
Now let's talk about the changes. If you're playing with a room and a character with clothes that are blending with the room, change one, both, or the other in Diffuse.
In Diffuse, here's what was added/changed:
1. the white of the rug- gray.
2. the lights on the wall- gray
3. the piano- lightened from black to a dark gray/black
4. her pants- lightened from dark black/gray to lighter dark gray.
5. her shirt- added a bright hot fushia purple because the Diffuse was already white, no way to lighten that.Added a background to change the season. (Keeping with Autumn, it's a orange/gold scene purchased elsewhere.)
TIP: To create distance/ keep the background from becoming distracting: Added a plane in front of the gazebo, Iray UberBased it, added a glass shader so it wouldn't be grainy, lowered the opacity to 8% and made it a light gray/blue. I do this instead of messing with windows. That way, I can put vegetation in FRONT of the plane if I want to, and create a multi-layered distance effect quite easily. NOTE THE TREE BEHIND THE PIANO. It is in front of the plane. The gazebo is behind it.When you're working with windows and looking out, if you mess with opacity of the windows, everything outside is stuck with that. By creating planes and putting vegetation/props/buildings in-between, you can create the mood quickly. (Create a default scene with planes already set up, load your set and bingo, you're set up.)
TIP: Be careful- the Ghost Light should be IN FRONT OF the plane.
TIP: Put an emissive / point light behind things which need to stand out. That elbow in front of the piano has a point light between the hand/arm and the piano. See the difference? I've got to do postwork the leg pokethrough. I'm not done yet, but wanted to post what I have.
Okay, this is weird. This isn't looking at all like the popup. Click on it and the pants should be lighter, (but are showing up WAAAAY lighter than the image), the elbow shows up in front of the piano, etc. Very strange! I like that there's more ground under the piano in the background, and the dramatic sunset is off centered and in that window. The change of seasons really makes a difference, with the reds inside the room and the autumn orange outside.
 Welcome to Daz, Mousso!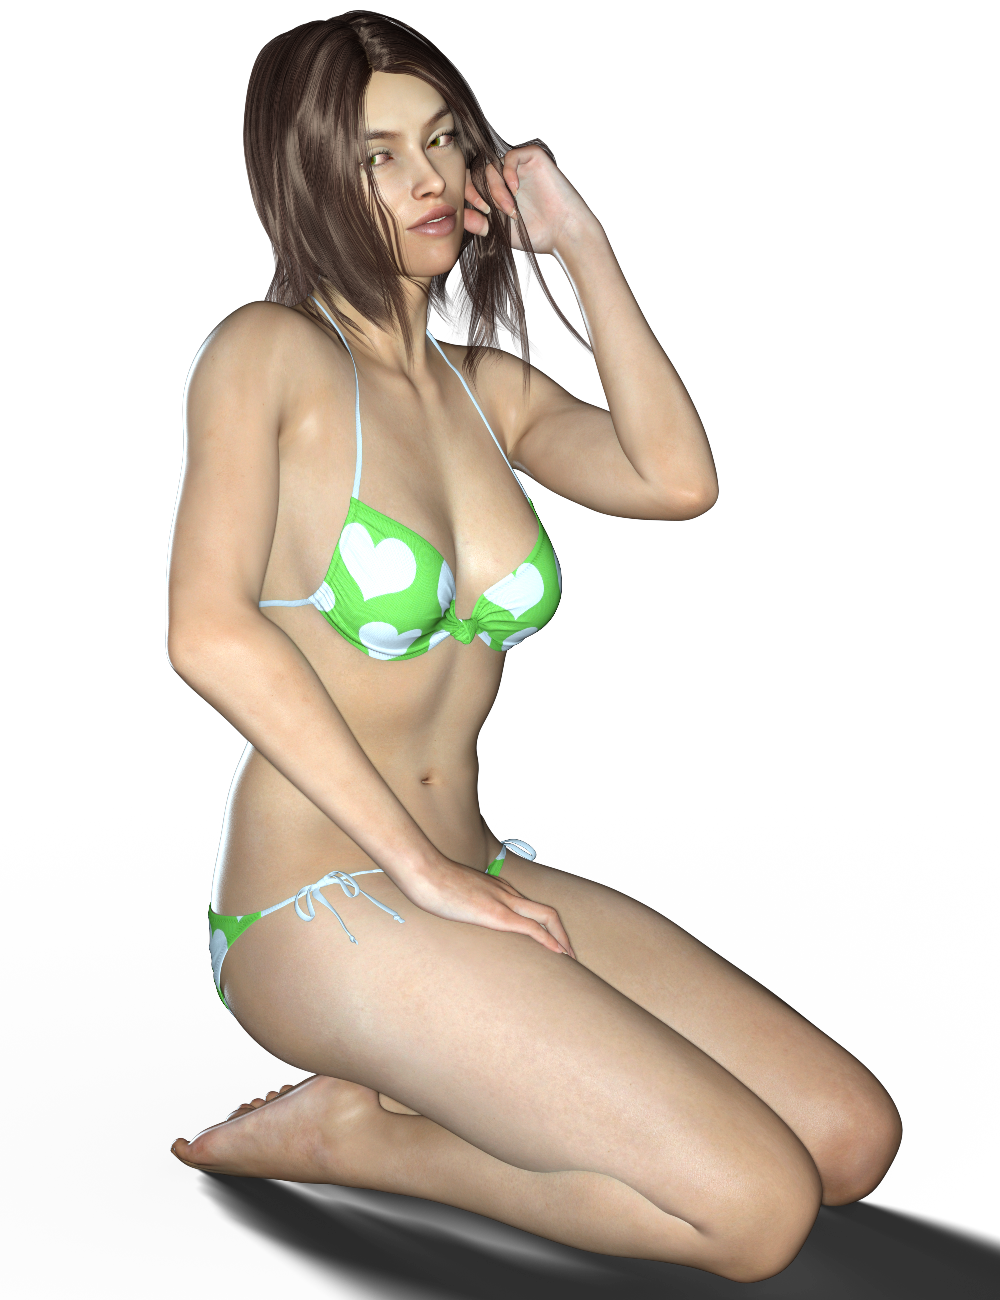
Kallisto is great! Keep up the great work. I look forward to seeing more of your characters.
@Divamakeup, you certainly have a way about you. That is, you made her skin look like I imagine Daz intended Victoria's and Stephanie's to look.
Monique 8I hope they don't ruin her shader settings like they've done with Victoria, Olympia, & Stephanie.
I wonder... could all these problems stem from the new surfaces parameters that are being used on the new Genesis8 skins? Is there a difference between using Gen8 and pre-Gen8 skins with the same lighting setup? I know lighting is more important than it was for Iray rendering; could it be differently important when the new parameters are used?
It's Daz's implementation of the surfaces parameters. Benita for Victoria 8 is one of the finest, most photorealistic, tastefully detailed skins in Daz history, second only to Darius 6, imo. Divamakeup has done some settings on Victoria and Lucas that look quite good; so, it's Daz's issue.
I get good results on the base G8F. It's the other characters that tend to turn orange. Is DT planning an update to NGS2 to account from some of these color shifts and Dual Lobe settings? I hope so. Because it makes just about everything in G3 look good. G8 has been more hit and miss with the same shaders.
Daz 3D is part of

Connect
DAZ Productions, Inc.
7533 S Center View Ct #4664
West Jordan, UT 84084Licensing Agreement | Terms of Service | Privacy Policy | EULA
© 2026 Daz Productions Inc. All Rights Reserved.