UltraScenery Experiments and Experiences

1246710

Comments

  • hacsarthacsart Posts: 2,024
    edited September 2020

    First render -- 


    ultrascenery_3_2.jpg
    1680 x 1050 - 2M
    Post edited by hacsart on
  • barbultbarbult Posts: 23,049
    hacsart said:

    First render -- 


    @hacsart You are off and running! Be sure to check out the official commercial thread for the product, too. That is the main place we have been sharing images. That is where HowieFarkes and TangoAlpha occasionally share tips and sneak peeks of upcoming products. There are several UltraScenery addons on sale today for good prices. The first post in the commercial thread clarifies some of the confusing prerequisites. (Daz originally posted the required product information incorrectly and caused a lot of confusion at the time.) The Pines addon requires the Nature Treess Pack 4 product by Andrey Pestryakov. Nature Trees Pack 4 is 70% off right now and is excellent! There is also a coupon advertised in the scrolling banner, for additional savings, if you haven't used it yet.

    Have fun!

  • hacsarthacsart Posts: 2,024

    One thing I have done is to save each of the water presets as a shader preset, makes it much easier to change the water. I'm going to try your "custom ecology" experiment, would like to add in some Rowna trees and such..

    Thanks Again!

  • DaventakiDaventaki Posts: 1,621
    edited September 2020
    hacsart said:

    One thing I have done is to save each of the water presets as a shader preset, makes it much easier to change the water. I'm going to try your "custom ecology" experiment, would like to add in some Rowna trees and such..

    Thanks Again!

    In the newest version to change the water you do not have to regenerate the scene just open the creator click the water tab select which water you want then click the settings tab and apply then close the creator.  (dont forget to have the generated ultrascene selected)

    Great render!  Will be looking forward to seeing more!  Also in the commerical thread it is a great thread to read through even with all the pages but if you want a quick guide to the tips look in my signature.


    barbult said:
     

    Barbult this is gorgeous!!

    Post edited by Daventaki on
  • DiomedeDiomede Posts: 15,026
    barbult said:

    Experiment: Create a Flower Garden (Inspired by Keukenhof) Continued

    The flowers look nice and have the dense patterned look of Keukenhof, but the scene needs more plants to add interest and look realistic.

    5) Add other plants

    1. There are two approaches that could be used to add more plants:
      • Add layers to the flowers ecology for grass, trees, river elements, etc.
        • Advantage: Being in the same ecology would allow usage of things like affinity and repel to keep elements from overlapping
        • Advantage: Being in a single ecology makes the whole process simpler.
        • Disadvantage: Either all possible other layers would have to be added, or the choice of layers would be limited (just oaks and not beech, for example).
        • Disadvantage: There would be so many layers in the ecology, it would be difficult to locate the ones you want in the Build tab and know which go together.
      • Add a second UltraScene with additional plants, leaving the flowers ecology as just flowers.
        • Advantage: All possible other layers from all ecologies would be available.
        • Disadvantage: Some layers might overlap and to prevent that would require sophisticated layer masks.
        • Disadvantage: Managing multiple UltraScenes in a single scene can be cumbersome and difficult to manage. Changing one sometimes requires changing the other.
    2. For flexibility or plant choice, I'm going to use the option of adding a second UltraScene to my scene.
      • Run UltraSceneCreator to create the flowers UltraScene. Choose the Terrain and Feature settings you want for your final image.
      • Select the UltraScene in the Scene pane.
      • Use Edit/Duplicate/Duplicate Node(s) to copy the flowers UltraScene and create the second UltraScene. This will ensure that they both use the same terrain and feature.
      • Select the second UltraScene in the Scene pane and run UltraSceneCreator on it to rebuild it.
      • Leave the terrain and Feature unchanged. Select a new ecology to get the grass, trees, and river items you want.
      • In the Build tab, select only the layers you want to add to your scene and add layer masks to control where they will be positioned.
      • Build the second UltraScene.
      • In the second UltraScene, hide the UltraScene terrain and water (we only need one terrain surface and one water).
    3. Render your final scene

    Thank you for the detail.  I need to get back to ultre-scenery

  • Sorry, I know it's kinda an off-topic question, but I'm a total noob regarding these things and I was wondering if you can export Ultrascenery scenes outside Daz or if it's something limited like what happens with Lumion?

  • barbultbarbult Posts: 23,049

    maskedlittlething said:

    Sorry, I know it's kinda an off-topic question, but I'm a total noob regarding these things and I was wondering if you can export Ultrascenery scenes outside Daz or if it's something limited like what happens with Lumion?

    Sorry, I stopped getting notifications that someone posted to this thread. I don't know what Lumion is. UltraScenery uses Daz instances. I don't know if any of the new "Daz to ..." plugins support instances. So, I'm not any help.frown

  • sandmanmaxsandmanmax Posts: 992

    Barbult, is there any documentation on the format of a json file?  The correct parameters, acceptable values, all that stuff?  I've been following your flower garden test and got to the point you said to "modify the materials[]" to add textures but had no idea what could go in that section.  I finally found another ecology file that had materials set up that I could follow but it would super helpful to know what the correct settings are.

  • DoctorJellybeanDoctorJellybean Posts: 7,845

    sandmanmax said:

    Barbult, is there any documentation on the format of a json file?  The correct parameters, acceptable values, all that stuff?  I've been following your flower garden test and got to the point you said to "modify the materials[]" to add textures but had no idea what could go in that section.  I finally found another ecology file that had materials set up that I could follow but it would super helpful to know what the correct settings are.

    Maybe someone could create a little template app, which might make it easier for rookies wink

  • barbultbarbult Posts: 23,049

    Barbult, is there any documentation on the format of a json file?  The correct parameters, acceptable values, all that stuff?  I've been following your flower garden test and got to the point you said to "modify the materials[]" to add textures but had no idea what could go in that section.  I finally found another ecology file that had materials set up that I could follow but it would super helpful to know what the correct settings are.

    No, there isn't any documentation. I do exactly what you do; I look at other ecologies for examples. I created an ecology for testing, where I change values to see what happens with things like noise and mixing.
  • sandmanmaxsandmanmax Posts: 992

    LOL!  At least I know I'm practicing a tried-and-true method...

  • barbultbarbult Posts: 23,049
    edited August 2021

    DoctorJellybean said:

    sandmanmax said:

    Barbult, is there any documentation on the format of a json file?  The correct parameters, acceptable values, all that stuff?  I've been following your flower garden test and got to the point you said to "modify the materials[]" to add textures but had no idea what could go in that section.  I finally found another ecology file that had materials set up that I could follow but it would super helpful to know what the correct settings are.

    Maybe someone could create a little template app, which might make it easier for rookies wink

    Sounds like a good job for you! You have experience with creating Daz products. 

    Post edited by barbult on
  • TotteTotte Posts: 13,473
    edited June 2021

    barbult said:

    DoctorJellybean said:

    sandmanmax said:

    Barbult, is there any documentation on the format of a json file?  The correct parameters, acceptable values, all that stuff?  I've been following your flower garden test and got to the point you said to "modify the materials[]" to add textures but had no idea what could go in that section.  I finally found another ecology file that had materials set up that I could follow but it would super helpful to know what the correct settings are.

    Maybe someone could create a little template app, which might make it easier for rookies wink

    Sounds like a good job four you! You have experience with creating Daz products. 

    I do have plans for a UltraScenery toolbox product, material settings might be a good addition to it.... 

    Post edited by Totte on
  • sandmanmaxsandmanmax Posts: 992
    edited June 2021

    Just to be sure I'm doing this right, when you said "Create a separate ecology layer for each tulip model and each color", do I need to have each color flower be a separate duf file (e.g. Tulip 01 Red.duf and Tulip 01 Yellow.duf) and then include those duf files in my layer set?  I'm not seeing an obvious way to apply a different texture map in the json file.  It seems that the ultra scenery shaders are very clever and depend on a combination of colors and not maps.

    Post edited by sandmanmax on
  • barbultbarbult Posts: 23,049

    sandmanmax said:

    Just to be sure I'm doing this right, when you said "Create a separate ecology layer for each tulip model and each color", do I need to have each color flower be a separate duf file (e.g. Tulip 01 Red.duf and Tulip 01 Yellow.duf) and then include those duf files in my layer set?  I'm not seeing an obvious way to apply a different texture map in the json file.  It seems that the ultra scenery shaders are very clever and depend on a combination of colors and not maps.

    You can specify a texture file in a materials section of propsets. I might not have known that at the time I did the flowers ecology. Look at the Aspens layer in USC Woodland 03.json for an example.

    Other ecology products also use the capability. Tangy Apple Orchard uses it. Swamp uses it. Harpwood uses it. Mossy Hollow uses it. Oaks uses it. Pines uses it. ...


  • sandmanmaxsandmanmax Posts: 992

    barbult said:

    sandmanmax said:

    Just to be sure I'm doing this right, when you said "Create a separate ecology layer for each tulip model and each color", do I need to have each color flower be a separate duf file (e.g. Tulip 01 Red.duf and Tulip 01 Yellow.duf) and then include those duf files in my layer set?  I'm not seeing an obvious way to apply a different texture map in the json file.  It seems that the ultra scenery shaders are very clever and depend on a combination of colors and not maps.

    You can specify a texture file in a materials section of propsets. I might not have known that at the time I did the flowers ecology. Look at the Aspens layer in USC Woodland 03.json for an example.

    Other ecology products also use the capability. Tangy Apple Orchard uses it. Swamp uses it. Harpwood uses it. Mossy Hollow uses it. Oaks uses it. Pines uses it. ...

    And, of course, I didn't try any of those.  cheeky

    Totte, I would definitely buy that Toolbox.  I'm totally loving Alienator Pro.  Maybe the toolbox could save a new ecology from an UltraScene modified by AlienatorPro... That would cool!

  • barbultbarbult Posts: 23,049

    sandmanmax said:

    barbult said:

    sandmanmax said:

    Just to be sure I'm doing this right, when you said "Create a separate ecology layer for each tulip model and each color", do I need to have each color flower be a separate duf file (e.g. Tulip 01 Red.duf and Tulip 01 Yellow.duf) and then include those duf files in my layer set?  I'm not seeing an obvious way to apply a different texture map in the json file.  It seems that the ultra scenery shaders are very clever and depend on a combination of colors and not maps.

    You can specify a texture file in a materials section of propsets. I might not have known that at the time I did the flowers ecology. Look at the Aspens layer in USC Woodland 03.json for an example.

    Other ecology products also use the capability. Tangy Apple Orchard uses it. Swamp uses it. Harpwood uses it. Mossy Hollow uses it. Oaks uses it. Pines uses it. ...

    And, of course, I didn't try any of those.  cheeky

    Totte, I would definitely buy that Toolbox.  I'm totally loving Alienator Pro.  Maybe the toolbox could save a new ecology from an UltraScene modified by AlienatorPro... That would cool!

    Yes, that would be very cool! 

  • RakudaRakuda Posts: 931

    Great thread! Gotta go back and walk through this and the others you linked to. Really liking the product

  • Doc AcmeDoc Acme Posts: 1,153

    In the Alienator Pro, Conversion Sets tab, there's an "Enable Undo" check box.  How/when/where is that used?


  • barbultbarbult Posts: 23,049

    Doc Acme said:

    In the Alienator Pro, Conversion Sets tab, there's an "Enable Undo" check box.  How/when/where is that used?

    I lets you undo the conversion. It is explained on page 1 of the Alienator Pro manual.
    Please take Alienator Pro questions to the Alienator Pro thread. Then other people interested in that product will see your questions and the answers. Thanks.

  • barbultbarbult Posts: 23,049
    edited June 2021

    I am now using Daz Studio 4.15.0.14 Public Beta and UltraSceneCreator 1.3.3.1 with the Accelerator 1.0.2.4.

    Experiment: Modify Feature Dirt Track 2 to Follow the Terrain

    In the UltraScenery (Commercial) thread, @ecks201 asked about making a dirt track follow the terrain instead of smoothing out the terrain. The simple answer is to switch to a different dirt track. The basic UltraScenery product comes with two different dirt track features. Dirt Track 1 follows the terrain pretty closely, and the Dirt Track 2 adjusts the terrain to make a flatter track. But let's experiment with Dirt Track 2 and try to make it follow the terrain, like Dirt Track 1 does.

    If you are in a hurry, skip all the analysis and understanding steps and jump to the "doing" step 4) wink

    Let's look at the JSON files and see what is going on:

    1) Open the JSON files for Dirt Track 1 and Dirt Track 2

    1. Dirt Track1 and Dirt Track 2 are "Features" in UltraScenery. Features modify the terrain to add things like rivers, paths, boardwalks, lakes, etc. (Ecologies on the other hand control the type of vegetation that is in the scene.)
    2. In your operating system file browser (not in Daz Studio), open your content library folder. It might be named something like My Daz3D Library, or anything you chose to name it when you created your content library.
    3. Inside your content library folder, open the folder Environments\Landscapes\UltraScenery\Features.
    4. You should see a whole list of folders. Each one represents a feature that can be selected from inside UltraSceneCreator.
    5. Open the folder USC Track 01.
    6. You should see three files - a JSON file and two PNG files. The PNG files are thumbnail and preview that are displayed for the feature inside UltraSceneCreator. The JSON file is the file that defines what the feature contains and what it does to the terrain.
    7. Open info.json in a text editor. I use the free Notepad++.
    8. Open the folder USC Track 02
    9. You should see three files - a JSON file and two PNG files.
    10. Open info.json in a text editor.
    11. Now we have both JSON files open and we can examine them. I will not list the content of the files here or attach them, because they are copyrighted purchased product files. I will discuss them in general terms.

    2) Look at the JSON file for Dirt Track 1

    1. Look at the info.json file from USC Track 01. This is the one that follows the terrain pretty closely.
    2. Observe that there is a section of the JSON file for "heightmaps" and it references a single heightmap PNG file from the runtime folder.
    3. Observe that the reference to that heightmap uses "relative" height adjustment.
    4. Through experimentation, this is what I think relative height adjustment means:  The terrain height adjustment in the JSON file will be added to the height defined by your terrain. If your terrain is 500 units high in a certain location, and you have a relative adjustment of 50, completely white pixels in the PNG heightmap will raise your terrain in that spot by 50 units (the value of the relative height adjustment in this example). Black pixels in the PNG heightmap will not change the terrain at all. Various shades or gray pixels will have gradual effect, between 0 and 50 units. Dark gray pixels have little impact and light gray pixels have stronger impact. If the JSON file has a relative heightmap adjustment of -50, white pixels in the PNG heightmap will lower the terrain by 50 units. Black pixels will not change the terrain, and gray pixels will have a varying effect between 0 and -50 units. I think of the pixel values in the PNG file as a multiplier on the height offset in the JSON file, where a white pixel has a multiplier of 1 and a black pixel has a multiplier o 0 and gray has values between 0 and 1.
    5. So, now you can see that the JSON file for Dirt Track 1 defines a pretty small relative height offset, so the the terrain will not be modified much at all.

    3) Look at the JSON file for Dirt Track 2

    1. Now look at the info.json file from USC Track 02. This is the one that smooths out the the terrain quite a bit.
    2. Observe that there is a section of the JSON file for "heightmaps" and it references multiple heightmap PNG files from the runtime folder.
    3. Observe that the reference to those heightmap uses "absolute" height adjustment as well as "relative" height adjustment.
    4. Through experimentation, this is what I think absolute height adjustment means:  The terrain height adjustment value in the JSON file will be used instead of the the height defined by your terrain! If your terrain is 500 units high in a certain location, and you have an absolute adjustment of 50, completely white pixels in the PNG heightmap will change your terrain in that spot to 50 units. Black pixels in the PNG heightmap will not change the terrain at all. Various shades or gray pixels will have gradual effect, between 0 and 50 units. Dark gray pixels have little impact and light gray pixels have stronger impact. If the JSON file has an absolute heightmap adjustment of -50, white pixels in the PNG heightmap will set the terrain height to -50 units. Water level is always 0, so -50 will be below water, like a river bed. Black pixels will not change the terrain, and gray pixels will have a varying effect between 0 and -50 units.
    5. Take a look at the Dirt Track 02 heightmap PNG files in the runtime folder. The paths to these files are listed in the info.json file.
    6. We see that the first heightmap file, USC_Track_02_heightmap1.png, has a wide white/light gray swath that is the shape of the track, but larger. It fades to gray at the edge of the swath, and the rest of the image is black. This heightmap is used with an absolute height offset, so this whole dirt track area of the terrain will be flattened to that absolute height value. The parts of the terrain that have black pixels in the heightmap will not be changed. Instead of the track following the terrain, the terrain will be flattened in the track area.
    7. Next, we see that the second heightmap file, USC_Track_02_heightmap2.png, has a huge white to light gray area, covering almost the whole terrain square. The info.json file uses that map with a relative height offset. This means that almost the entire terrain will adjusted relative to the state of the terrain after the track-area flattening caused by the first absolute terrain height setting.
    8. Finally we see a third height adjustment. It is a small relative adjustment. The heightmap, features/USC_Track_02_heightmap3.png, is a skinny white swath along the dirt track path. This relative offset will slightly raise the center of the dirt path.

    4) Make a new version of USC Track 02 to experiment with

    1. We never want to modify the original feature files. Let's make a copy to work with. It will become a new Feature that we can select inside UltraSceneCreator.
    2. In your operating system file browser (not in Daz Studio), open your content library folder again and then open the folder Environments\Landscapes\UltraScenery\Features.
    3. Copy the folder USC Track 02 and Paste it as a new folder. 
    4. Rename the pasted copy folder to something like USC Track 02 Mod. I like to use my initials (BV), so I named my copy USC Track 02 BV.
    5. Open your new folder.
    6. Rename USC Track 02.preview.png to match your new folder name. I named my file USC Track 02 BV.preview.png.
    7. Rename USC Track 02.preview.thumb.png to match your new folder name. I named my file USC Track 02 BV.thumb.png.
    8. Do not rename info.json. Instead, open info.json in a text editor.
    9. In the text editor:
      1. Change the "name" to your new folder name
      2. Change the "title" to the name you want to appear in the UltraSceneCreator list of Features. I used Dirt Track 2 BV.
      3. Change the "thumb" to the name of the new thumb PNG file name.
      4. Change the "preview" to the name of the new preview PNG file name.
      5. Save the changes to info.json.

    5) Test the new version of Dirt Track 2

    1. At this point, we've only made a copy of Dirt Track 2 with a new name, but no significant changes. It should operate exactly like the original Dirt Track 2 We want to test it, to make sure that all the renaming and text editing was done correctly.
    2. Open UltraSceneCreator and select the new feature. For me, the feature appears in the list as Dirt Track 2 BV.
    3. Select an ecology and build the scene.
    4. If all this worked, congratulations on good work!
    5. If UltraSceneCreator won't even open, you probably made a typo in the editing of info.json. Copy the contents of info.json and paste in into the JSON Validator to see if you have any syntax errors. Correct those back in your text editor and try again.

    6) Modify the new version of Dirt Track 2 to follow the terrain.

    1. We've seen that the main contributor to the Dirt Track 2 not following the terrain is that absolute height adjustment in the info.json file. Let's try deleting that and see what happens. In fact, let's delete all those terrain height adjustments and make the dirt track follow the terrain exactly!
    2. Open your copied folder of USC Track 02 (mine is USC Track 02 BV).
    3. Edit info.json again:
      1. Delete all the height adjustments in the "heightmaps" section. It should look like this when you have done that:     "heightmaps": [],
      2. Save the info.json changes.

    7) Test the new version of Dirt Track 02

    1. At this point, we've made the changes to make the dirt track follow the terrain.
    2. Open UltraSceneCreator and select the new feature. For me, the feature appears in the list as Dirt Track 2 BV.
    3. Select an ecology and build the scene.
    4. If all this worked, congratulations on good work! Does your dirt track follow your terrain now? It should.
    5. Remember to run the JSON validator if your test did not work. Correct any typos and try again.

    8) For "extra credit" create a new thumb image and an new preview image to distinguish your modified Dirt Track 2 from the original.

    Post edited by barbult on
  • FantastArtFantastArt Posts: 224
    edited July 2021

    Hi all!

    I'm experimenting with UltraScenery and there is something I need help with. I have a scene with a small river and some trees and I would like to have a dirt track at one side on the image. Is there a way to create a scene with a dirt track without using the premade feature. The one with the track that follows the river is much too curvy and I don't want trees between the track and the river. Also the dirt track always has these walls on both sides, but I want it to be flat on the terrain... I attached an image of my scene, so you can see what I wanted to do. Sorry for my poor english. I hope you understand what I mean.

    USCTestScene.png
    845 x 600 - 703K
    Post edited by FantastArt on
  • barbultbarbult Posts: 23,049

    FantastArt said:

    Hi all!

    I'm experimenting with UltraScenery and there is something I need help with. I have a scene with a small river and some trees and I would like to have a dirt track at one side on the image. Is there a way to create a scene with a dirt track without using the premade feature. The one with the track that follows the river is much too curvy and I don't want trees between the track and the river. Also the dirt track always has these walls on both sides, but I want it to be flat on the terrain... I attached an image of my scene, so you can see what I wanted to do. Sorry for my poor english. I hope you understand what I mean.

    Excellent English; I understand you. I think you would have to make a copy one of the existing features and modify your copy. It would not be trivial. You would have to edit JSON files with a text editor. You would also have to copy and modify the terrain mask and texture files. There is no documentation on the structure of the UltraScenery JSON files or the terrain mask files. You need to study the ones that come with the product and figure it out for yourself. Howie Farkes permits us to make such changes for our own use, but he does not offer support for doing so. If you decide to try this, I think it would be easiest to start with the feature that already has both the river and the dirt track (the one that is too curvy for you). That way you start a feature that already has both a river and a path, making changes easier. By modifying the mask files, you could make a straighter river and path.

  • ecks201ecks201 Posts: 437

    FantastArt said:

    Hi all!

    I'm experimenting with UltraScenery and there is something I need help with. I have a scene with a small river and some trees and I would like to have a dirt track at one side on the image. Is there a way to create a scene with a dirt track without using the premade feature. The one with the track that follows the river is much too curvy and I don't want trees between the track and the river. Also the dirt track always has these walls on both sides, but I want it to be flat on the terrain... I attached an image of my scene, so you can see what I wanted to do. Sorry for my poor english. I hope you understand what I mean.

    I've been pondering this for a couple of days (I also need a road to take a different route) and I thought that it must be possible with a bit of effort.
    So as a proof of concept I decided to see if I could strighten out the bendy Dirt Track 2.

    And the result is:


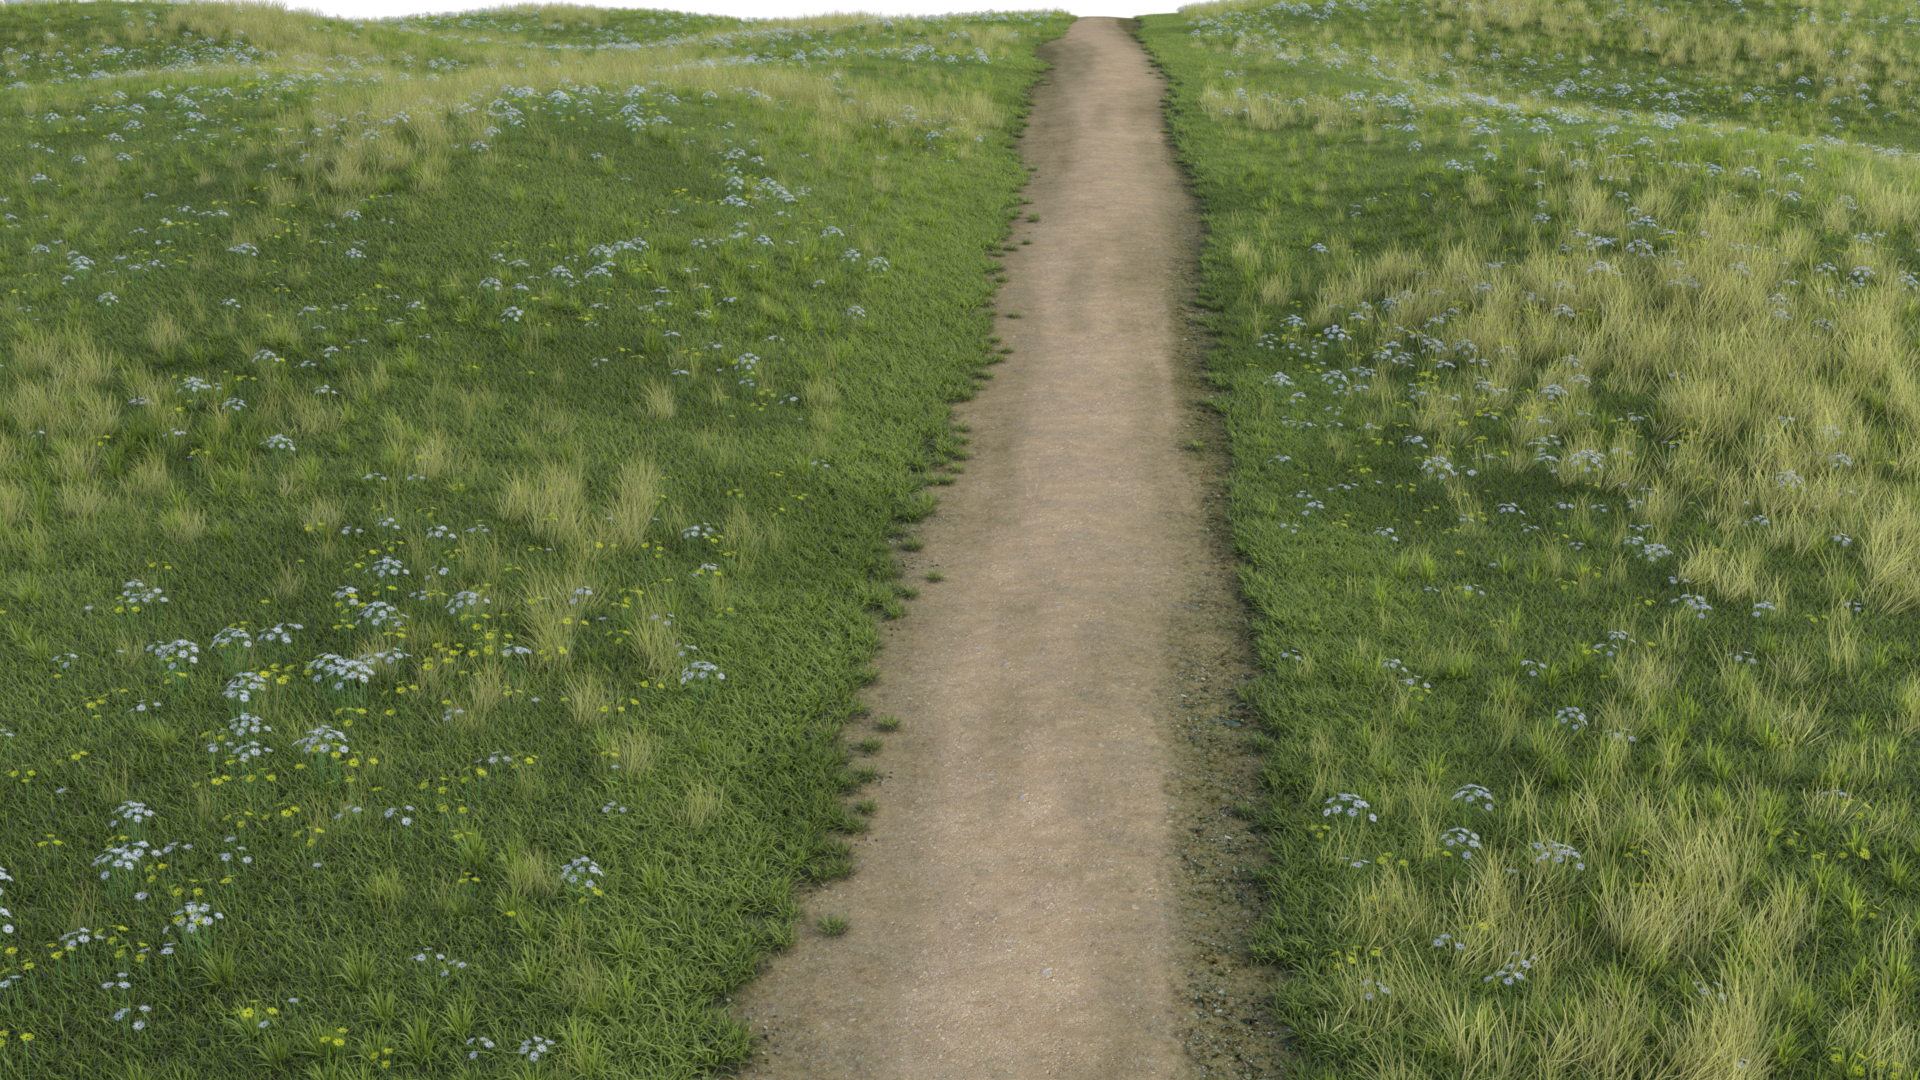
    Now it's a little rough around the edges, but I think it does the job.
    I'll explain how, if it's OK with Howie. But for now, at least you've got the inspiration that it is possible.
     

    Howie, are you OK with me doing a step by step explantion of how I did this?

    Straight Road Test.png
    1920 x 1080 - 4M
  • barbultbarbult Posts: 23,049

    Good work! I don't know if HowieFarkes follows this thread, so you may not get a reply. I don't think there is a problem with you explaining how you did it, as long as you don't post his JSON code or his image texture files or his mask files. You should never post product assets in the forums.

  • FantastArtFantastArt Posts: 224
    barbult said:

    FantastArt said:

    Hi all!

    I'm experimenting with UltraScenery and there is something I need help with. I have a scene with a small river and some trees and I would like to have a dirt track at one side on the image. Is there a way to create a scene with a dirt track without using the premade feature. The one with the track that follows the river is much too curvy and I don't want trees between the track and the river. Also the dirt track always has these walls on both sides, but I want it to be flat on the terrain... I attached an image of my scene, so you can see what I wanted to do. Sorry for my poor english. I hope you understand what I mean.

    Excellent English; I understand you. I think you would have to make a copy one of the existing features and modify your copy. It would not be trivial. You would have to edit JSON files with a text editor. You would also have to copy and modify the terrain mask and texture files. There is no documentation on the structure of the UltraScenery JSON files or the terrain mask files. You need to study the ones that come with the product and figure it out for yourself. Howie Farkes permits us to make such changes for our own use, but he does not offer support for doing so. If you decide to try this, I think it would be easiest to start with the feature that already has both the river and the dirt track (the one that is too curvy for you). That way you start a feature that already has both a river and a path, making changes easier. By modifying the mask files, you could make a straighter river and path.

    I did what you said the last days and it works very well. I still have to play with it to get the result I want. Thank you!
  • Diomede said:


    Hi,

    i am new in this thread.

    From where did you get the tulps and other flowers for US? I don't know this addon

    I think about adding some flowers with the ultra scatter (instances) to one of the UltraScenerys, but they will be random, not in such an order like in your phantastic image above.

    so how did you add a) foreign flowers in b) such an order in the US-Scene?

    Thanks

  • barbultbarbult Posts: 23,049

    Lonesome Cowboy said:

    Diomede said:


    Hi,

    i am new in this thread.

    From where did you get the tulps and other flowers for US? I don't know this addon

    I think about adding some flowers with the ultra scatter (instances) to one of the UltraScenerys, but they will be random, not in such an order like in your phantastic image above.

    so how did you add a) foreign flowers in b) such an order in the US-Scene?

    Thanks

    It is all explained in great detail in this forum thread right here.

  • barbultbarbult Posts: 23,049
    edited August 2021

    I am now using Daz Studio 4.15.0.14 Public Beta and UltraSceneCreator 1.3.3.1 with the Accelerator 1.0.2.4.

    Experiment: Create a New UltraScenery Feature (Paved Road)

    The easiest way to create a new UltraScenery Feature is to make a copy of an existing feature that contains similar elements. Some Features contiain water (ponds, streams, wetlands), some contain dirt tracks, some contain additional props (boardwalks, docks, stones), some contain a combination of these elements. I want to create a Feature with a paved road, so I will start with a feature that contains a dirt track - Dirt Track 2.

    1) Make a new version of USC Track 02 to become our new Feature

    1. In your operating system file browser (not in Daz Studio), open your content library folder again and then open the folder Environments\Landscapes\UltraScenery\Features.
    2. Copy the folder USC Track 02 and Paste it as a new folder. 
    3. Rename the copied folder. I like to use my initials (BV), so I named mine BV Road 01.
    4. Open the new folder.
    5. Rename USC Track 02.preview.png to match your new folder name. I named my file BV Road 01.preview.png.
    6. Rename USC Track 02.preview.thumb.png to match your new folder name. I named my file BV Road 01.thumb.png.
    7. Do not rename info.json. Instead, open info.json in a text editor.
    8. In the text editor:
      1. Change the "name" to the new folder name ("BV Road 01" for me).
      2. Change the "title" to the name you want to appear in the UltraSceneCreator list of Features. I used "BV Road 1".
      3. Change the "thumb" to the name of the new thumb PNG file name ("BV Road 01.preview.png" for me).
      4. Change the "preview" to the name of the new preview PNG file name ("BV Road 01.thumb.png" for me)..
      5. Save the changes to info.json.

    2) Test the new version of Dirt Track 2

    1. At this point, we've only made a copy of Dirt Track 2 with a new name, but no significant changes. It should operate exactly like the original Dirt Track 2 We want to test it, to make sure that all the renaming and text editing was done correctly.
    2. Open UltraSceneCreator and select the new feature. For me, the feature appears in the list as BV Road 1.
    3. Select an ecology and build the scene.
    4. If all this worked, congratulations on good work!
    5. If UltraSceneCreator won't even open, you probably made a typo in the editing of info.json. Copy the contents of info.json and paste in into the JSON Validator to see if you have any syntax errors. Correct those back in your text editor and try again.

    3) Modify the new Feature to become the paved road

    1. UltraScenery Feature use several height map files to control the shape of the terrain in the feature, several mask files to control where vegetation is placed, and controls for surface texture maps, tiling, and colors. 
    2. Height maps and masks must be created in an image editor. I created mine in Photoshop. I studied existing Feature info.json files and the height maps and masks they used to get an understanding of how they worked. Then I did a little research into road widths in my country. The UltraScenery terrain is 6400 by 6400 pixels, representing 6400 CM by 6400 CM, so I used that information to create my image maps to the scale I wanted to represent in my Feature. For my road base mask, I create a straight line the approproate width for a two lane road. For my road surface mask, I created a dashed line to represent the yellow lane divider on a two lane road.
    3. Then I modified my info.JSON file to use the height maps and masks that I created. For my broad swath terrain shaping height map, I set an absolute height of 200. for my road shaping height map I set a relative height of 40. I set waterway and riparian in the disable list, because my road feature doesn't have water areas. I selected a concrete texture image map from my library for my Roadbase and Roadsurface and put those into the "image" type fields in the info.json file. I set the "Roadsurface Layer Diffuse Color"  "color" type to yellow.

    4) Test and fix errors

    5) Render new preview and thumb PNG files to represent the new Feature and replace the pasted/renamed ones with the newly created more appropriate ones.

    This is a render of my new BV Road 01 Feature. It uses a sunset HDRI, so it is kind of dark.

    After successfully creating a straight road, I created a second feature, BV Road 02, with a curved road. Here is a render of that Feature:


    Post edited by barbult on
  • barbultbarbult Posts: 23,049
    edited August 2021

    I am now using Daz Studio 4.15.0.14 Public Beta and UltraSceneCreator 1.3.3.1 with the Accelerator 1.0.2.4.

    Experiment: Create a New UltraScenery Feature with Added Props (Railroad Track)

    1) Refer to the previous experiment (Create a New UltraScenery Feature (Paved Road) for info on creating a Feature.

    2) I am going to lay down my track on a flat square plane first, so I have an idea where to create the areas for my height maps and terrain surface masks. I am going to use the track pieces from Modular Railway Track Set in the Daz Store. Let my warn you right now, the curves in that set are too tight for any "real" train to navigate, in my opinion. I used nothing larger than 5 degrees, and it was still really too tight.

    1. Create an UltraScene with the terrain set to Brightness -100, _No Features, and Grassland 1 Ecology. The goal is to have a perfectly flat UltraScenery Terrain. When building the scene, uncheck all of the vegetation layers. You don't need any plants for this step; they just get in the way and make things slower than necessary.
    2. Place your selected railway track props on the UltraScene Terrain, being careful to connect them smoothly.
    3. Save your scene.
    4. Set the viewport view to Top View. Do not use a perspective camera and look down from the top. You need to use the built in Top View to get an orthographic, not distorted, view of the terrain square. Zoom out to show the whole terrain square in the viewport.
    5. Take a screenshot of the terrain square in the viewport. You want to select a square including the entire terrain and nothing else. This will be the guide for creating all of your height maps and surface masks. You can see where your train track is on the terrain.
    6. In a photo editor, use the terrain screenshot as the guide for creating the height maps and surface masks for the Feature.
    7. Edit the info.json file for the feature to use the newly created height maps and masks. I created my height maps to create a flat area where the track goes. I set the height to "absolute" 200 for my main flat track area height map and "relative" 33 for a second center-of-the-track height map to make the bed slightly humped up in the middle.
    8. Save the updated info.json file.

    3) Test the new Feature and adjust maps and masks as necessary.

    1. If you don't still have the rail road track props in your scene, open the file you previously saved with the tracks.
    2. Run UltraSceneCreator and build a scene with your new Feature.
    3. You will probably find the tracks buried below ground because of the height map settings. Raise the props up and verify that your height maps and surface masks are appropriate. I had to try and try again several times to get things to my satisfaction. It is all subjective. Just make it the way YOU want it.

    4) Add the track pieces as Props in the Feature, so UltraSceneCreator places the track in the scene

    1. Heaven forbid that we would have to manually place those track props in the scene every time we use the new Feature!!!!! We need the Feature to add the props in the right place for us!!!!!
    2. Examine the info.json file of an existing Feature that places props into the scene. Any of them with boardwalks would be a good example. Aha, we see that there is a "props" section in the file. There is a whole list of individual props and their locations (position, rotation and scale) in the scene.
    3. Copy the "props" section (many lines of code) from one of those Features and paste it into you new Feature to use as a guide to how to enter the list of props.
    4. Save the info.json file.
    5. In Daz Studio:
      • Select all of the train track props that you manually added to the scene
      • Select Create>New Group from the menu.
      • Name the group UltraScene Feature Props
      • Select Parent Selected Item(s) to New Group
      • After the group is created, make it a child of UltraScene Terrain in the Scene pane.
    6. Save the Scene.
    7. In Daz Studio, open the Parameters pane so you can see the translation, rotation and scale of selected items in the Scene pane.
    8. For each section of train track, select it in the Scene pane, one section at a time. Remember that the track props are now part of a group that is a child of UltraScene Terrain.
    9. For each section of train track:
      • update the info.json file to change one of the pasted prop "path" settings to the path of the train track piece used.
      • update the info.json file to change one of the pasted prop "position", "rotation", and "scale" settings to the values shown in the Parameters pane for that selected track piece.
      • If you need more prop sections in the info.json file, copy and paste one of the existing ones. If you have too many, delete the extra. Be careful to end the list without a trailing comma for correct json code. Use the JSON validator to check if necessary - always a good idea.
    10. Save the info.json file.

    5) Test the new Feature and be sure the track is placed correctly.

    Here is a render of my curved RR Track Feature with the Parkside Freight train on the tracks:


    Post edited by barbult on
Sign In or Register to comment.