Daz 3D is part of 
Connect
DAZ Productions, Inc.
7533 S Center View Ct #4664
West Jordan, UT 84084
Licensing Agreement | Terms of Service | Privacy Policy | EULA
© 2026 Daz Productions Inc. All Rights Reserved.
Comments
Experiment: Modify Iray Surface Settings to Get More Color Variety in an UltraScene (Continuation 2)
5) Save a Hierarchical Materials Preset
6) Test the new Hierarchical Material(s) Preset
Here is a scene with my new preset applied
Continued Below
Experiment: Modify Iray Surface Settings to Get More Color Variety in an UltraScene (Continuation 3)
Oops - U-Turn
While testing my new Hierarchical Materials Preset on a Harpwood ecology with Track 1 and Track 2, I discovered that there are additional leaf layers that only show up with certain combinations of feature and ecology. I will need to modify my composite UltraScene if I want to handle all tree and leaf layers for Harpwood ecologies. This is the kind of U-Turn that happens in real time experiments!
7) Add missing Harpwood leaf layers to the composite UltraScene
Oops again. I discovered that I somehow lost the Beech (shrub) Layer. I'll have to add it in now following the same steps above.
Here's an image I made with Track 1 and the new Hierarchical Materials Preset
And here's one with Track 2
These views both look like late autumn between the start & end of leaf drop. They are stunning. Simply the only words for it.
Regards,
Richard
Thank you, Richard. It is nice to know someone is looking!
Oh we are looking! Just beautiful!!
Looking… Lurking…
With the occasional drive by comment…
Great work Barbult, thanks
I won't be playing with JSON as he might become Adam, lol (I just saw Dark )
)
But will try all the rest, rendering now my tropical islands after your experiment
I am using Daz Studio 4.12.2.6 Public Beta and UltraScenery 1.2
Experiment: Create a Cobblestone Material for the UltraScenery Dirt Track Features
Are you tired of all of your UltraScenery renders, that use one of the Dirt Track features, having the same dirt texture? It is pretty easy to modify the texture files used in the UltraScenery Terrain Shader to use different image files. After substituting different images, save a Materials Preset to use again later. The Materials Preset will be applied after building the UltraScene but before rendering the scene. Your runtime/textures folder is probably full of interesting textures to try. You can also download interesting textures online. If you want to download texture files, check the usage license before downloading, so you know whether you can use them for this purpose. One source of free, public domain, CC0 textures is texturehaven.com.
This is the approach I am going to take:
1) Download cobblestone texture files from texturehaven.com
2) Build a simple UltraScene which we can use as a basis for changing textures
3) Modify the texture settings of the UltraScene
4) Save a Materials preset for future use
5) Apply the cobblestone Materials preset to a different UltraScene.
Now go download more interesting textures and dig through your Runtime/Textures folder to make more interesting Materials presets. It is fast and easy.
Here is a screenshot of the 5 Roadbase Layer surface settings:
Here is a screenshot of how the Materials Preset Options dialog should be filled out for this experiment:
Here is the cobblestone path on the bare UltraScene terrain:
Here is a final image with the saved cobblestone Materials preset applied to a render of the Tangy Apple Orchard using the Dirt Track 2 Hedgerow feature: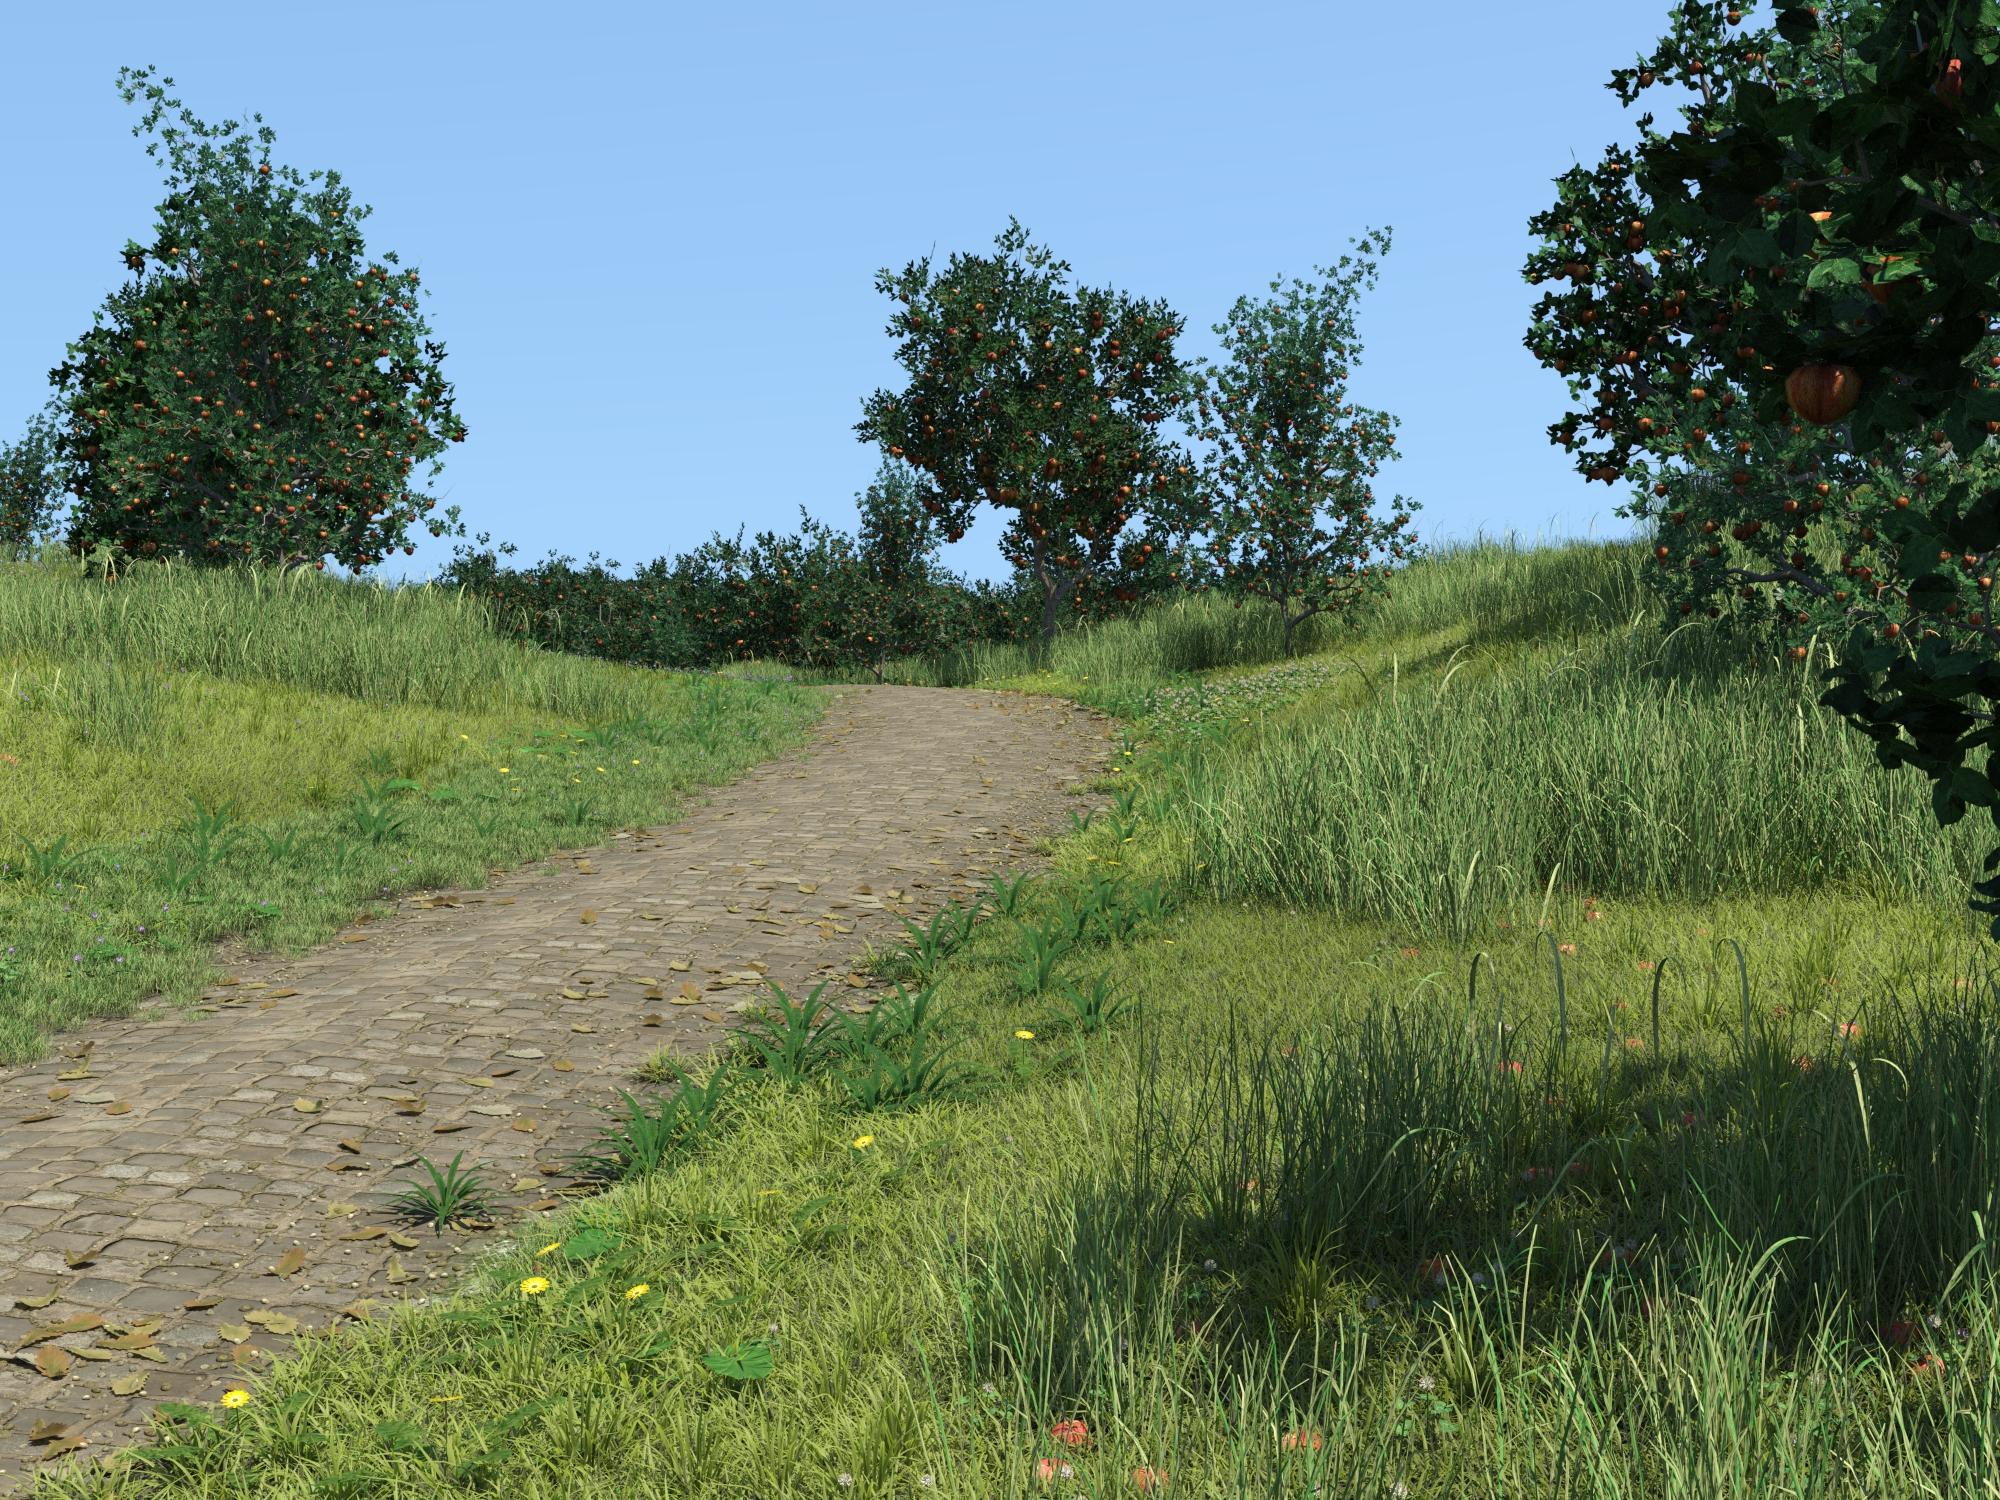
This is fantastic, Barbult! I'm guilty of purchasing UltraScenery and several add-ons, but have yet to really do anything with it. Thanks for taking the time to post/document your experiments - looking forward to seeing your render ;)
- Greg
ETA; Doh! Wasn't there as I was typing, but was there after I posted lol. Great proof of concept.
Thanks, Greg. I have to post the message and edit it several times to add images, etc. I am still building a final full image to add to the posting above. You are missing out on HUGE FUN by not playing with UltraScenery! Go make some NPR UltraScenery images.
Another interesting experiment! I tried dabbling with the surface but had not worked out the why there was a Roadbase and a Roadsurface and how they interacted. I'll have to try a few experiments of my own now.
Very useful! I'm glad you are digging into this product as much as you are, very helpful to the rest of us and expands what we can create.
Thank you very much barbult for all your invaluable experiments and their descriptions!
In my render I used https://texturehaven.com/tex/?c=terrain&t=forrest_ground_01 for the 5 Roadbase Layer
and https://texturehaven.com/tex/?c=terrain&t=sand_01 for the 6 Roadsurface Layer
I think they work together great!
Yes, that does look great! Thanks for the tip on a nice new combination.
Great work Barbult, thanks
This is an awesome experiment gone into an excellent tutorial; Many thanks
The negative height tut gave me these islands and image; thanks a lot for that great experiment :)
The image is called Smuggler and you have it with huge resolution at my DA gallery
I'm glad people are finding these experiments useful. Nice use of the negative altitude, @Jerife. I like the low camera angle, too.
And this goes for the textured road lesson
Morning light in Coast 1 with TD3 Bzone for the long distance and a couple of Xfrog trees
I tried to obtain the look you achieved in the other thread with cobblestones and dirt. I think I didn't make it
Sorry wrong post
I can clearly see the cobblestones. The vehicle shadows and grass may be hiding the dirt.
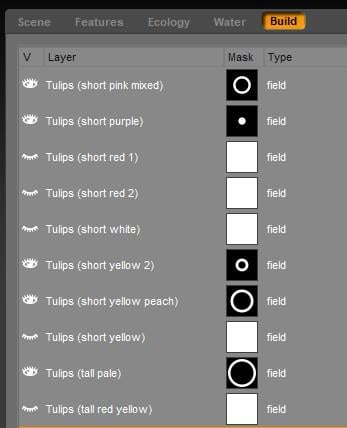
Experiment: Create a Flower Garden (Inspired by Keukenhof)
Keukenhof is an amazing place full of colorful flowers. I have a lot of flower models for Daz Studio, so I want to make a flower garden like Keukenhof with UltraScenery.
This is the approach I am going to take:
1) Select some flowers to work with
2) Create a new ecology (see experiment above for details)
3) Test the new ecology
4) Create some layer masks in an image editor, and use them to control placement of the flowers
One layer of red tulips
Two layers - pink and yellow tulips with bullseye mask
Continued Below
Experiment: Create a Flower Garden (Inspired by Keukenhof) Continued
The flowers look nice and have the dense patterned look of Keukenhof, but the scene needs more plants to add interest and look realistic.
5) Add other plants
Thank you so much for doing these, barbult.
barbult.. Thnaks for this - Looks like I may just have to get this, based on what you have shown is possible. One question - is there a way to specify the density of the scene objects, or is that baked into the ecologies?
@hacsart, the density of objects is "baked into" the ecologies, but there are at least two ways to modify the density.
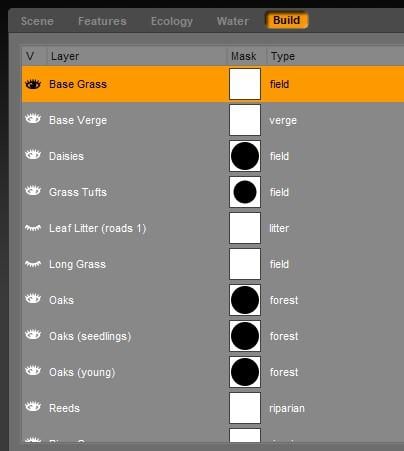
Besides density (spacing between instances), the ecology defines patterns of where instances are placed on the terrain. For example, some ecoologies use simplex or worley noise patterns to specify what part of the terrain will have instances of a given plant, and what parts will be bare. If an ecology is configured to not place instances in a certain area, no Build tab mask can make the ecology put instances there. The build tab mask can only reduce or prevent ecology instances from being used.
For my flowers ecology, I created the ecology to space flowers very close together and cover the entire terrain. Then I had the flexibility of using the Build tab mask to control the density and populated/bare areas. By using different Build tab masks in different scenes, I could use the same ecology to get very different results.
Thanks! - I see its on sale.. so......
Bought it - time to play!