Daz 3D is part of 
Connect
DAZ Productions, Inc.
7533 S Center View Ct #4664
West Jordan, UT 84084
Licensing Agreement | Terms of Service | Privacy Policy | EULA
© 2026 Daz Productions Inc. All Rights Reserved.
Comments
Here's one where I used the Lace1 LIE on the main corset and skirt. I used a dark grey and black for the Layer Color and BaseColor in the LIE window.
The gloves are the PVC Base with the Black Base color and the Scales Bump.
OK, maybe I should stop posting now.
I really want to thank barbult for answering so many question so well on this thread.
THANKS BARB!!
You're the best!
Here's an interesting thread about saving LIE presets. I tried it with Eva7's Iray skin and it worked great.
http://www.daz3d.com/forums/discussion/22551/can-i-save-a-lie-layered-image-editor-preset
My apologies; I just realized that I posted in the wrong thread. It's not your shaders with the missing file, it's the FabTex shaders.
LIE and pattern masks are fun. I do this a lot with paisley and other patterns.
You should see this as a launch point for incorporating other patterns you can either make or get from other resources. Sometimes I go through various outfits to look for patterns I can mix and match -- Supersuit for Genesis, for example, has a load of cool patterns/textures that can work in much different venues.
PD, your black and grey corset and skirt render is spectacular. Great final textures. Pattern on the gloves is masterful. This package is really beyond amazing.
I agree. That is a really stunning image and it really shows off your product. Post more!
Ok, thanks for letting me know.
Thanks!
Thanks! This one is all PVC using Arki's great Rune outfit, which has lots of surfaces, so you can do a lot of different things with it. The hair is ElorOnceDark's XTech Dreadlocks.
Okay started reading this thread out of curiosity and well I bought and paid for it. I must stop reading these threads. I can't wait to try these out this weekend and the tips on L.I.E are great as I have yet to figure that one out.
Wow, that's exotic! My renders are more mundane and everyday.
OK, I tried the Geometry Shell bra. I'm not sure it is any easier than the LIE method. It does allow the mesh offset to be set so that the bra sits further from the body for a more truly 3D look, if you are rendering it where it is visible. However that also means that you need to remember to set the smoothing collision to the Geometry Shell instead of the model or you get poke through.
Here used the silk 1 and one of the pattern textures in the bump channel on the bra.
Greetings,
Just to note, I was set to pass this one by, but the comments, renders (and especially the comparisons to Fabricator), as well as a 10% off coupon, made me give in and buy it.
I'm always happy to see folks excited about a product...
Damn this product rocks so much I could almost buy it twice. :)
Seriously though, great product; and great promo images here and on the product; they make it easier to understand and for those undecided, a good help in hand; something other products often need.
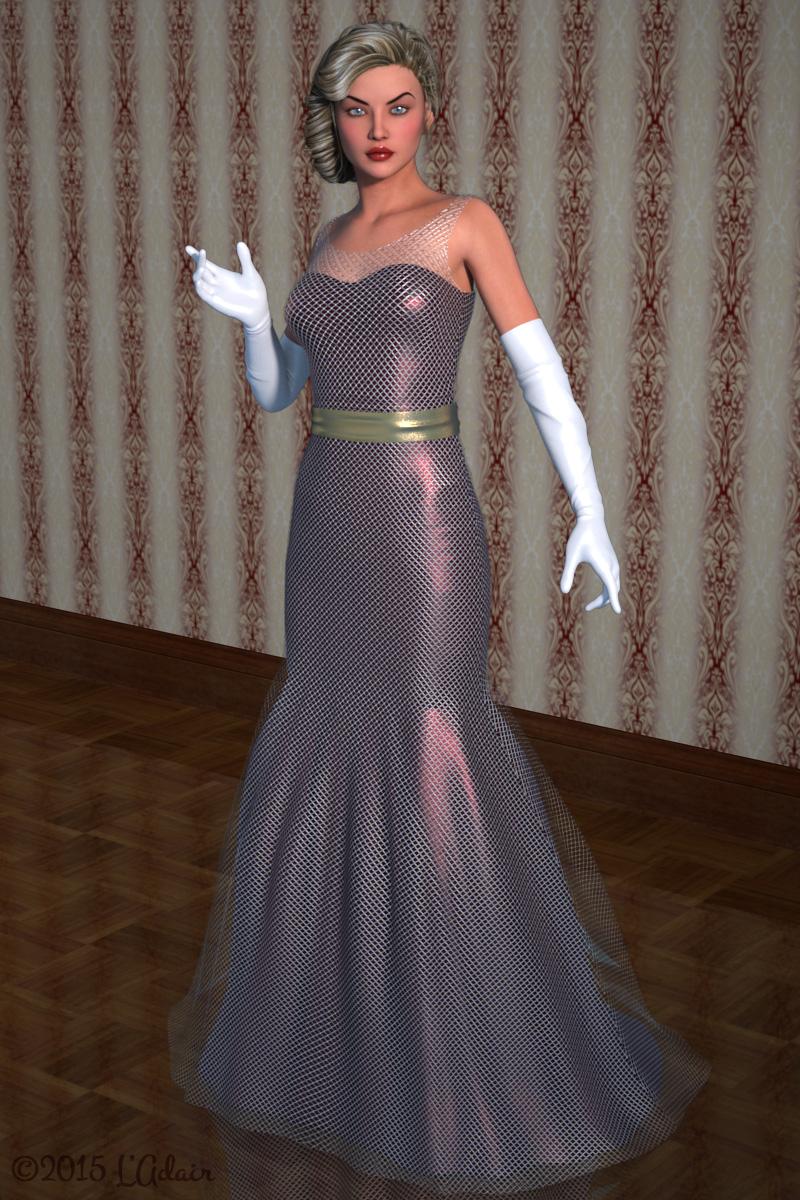
I'm loving these shaders, but not all clothing items play nice with shaders. The Evening Gown for Genesis 2 Female(s), (and I assume, it's predecessor, Evening Gown for Genesis) has a nice edging on the semi-opaque overdress, but it's part of the texture, not the object. So when you apply a shader to the overdress, you lose the edging. I think it depends on what shader you use for the overdress, and how close your camera is to the dress, whether or not it looks okay. The shrug would have covered some of it, but I didn't use it in this scene.
All of the fabric uses Silk 2 Base and Silk 2 Bump. The underdress adds a deep red color. The gloves add a white color. The overdress adds the Tulle Gold Dots pattern. And the belt uses Metallic Color Gold at Strength 1.0.
The figure and dress were rendered in Iray with no background. The background, (Easy Backdrops, with my own wallpaper) was rendered in 3Delight, (unenclosed, it was taking forever to render in Iray.) I composited the two images in Photoshop, using a second layer of the iray render to create the reflection on the floor.
I've decided that Geometry Shell is the better way to go (instead of LIE) for the pseudo-bra. I started having trouble with the LIE version on some skins, because there were too many maps to mask. Some had images in translucency, glossy layered weight, etc. Not masking those caused something that looked like show through. Plus, the bra I drew in Photoshop was for the G3F base UV. It doesn't fit well on other UVs, like Teen Josie 7. With a Geometry Shell, it can use the G3F base UV even if the character it is applied to uses a different UV.
L'Adair, that evening gown is very nice looking, almost iridescent. If you are energetic, you could use the geometry editor to create additional surfaces in it.
What did you mean when you said:
Sounds like something I need to know about. :)
This is slightly technical, but if you know how to use Photoshop or Gimp, it should make perfect sense:
I hope you find this level of detail useful/helpful.
-Anita
Edit: If I got click/double-click wrong anywhere, I apologize. I did the above from memory, without PS open for reference.
To be honest, I've never had much luck selecting polys for the geometry editor. Large sections, no problem, but something like the edging for the dress? Not so much. lol
I'd have better luck adding an edging in Photoshop.
If it were me, I'd probably take the dress texture and try to extract stuff like edging to use with masking to transform into other patterns.
@L'Adair
TY, I've combined layers, but not using masks, I must try that. A friend is doing a course at uni on 3D graphics, I'll borrow his laptop as he has photoshop on it - I just can't get the hang of Gimp.
I tried that first, Will. However, tiling becomes an issue. The bump maps, for example are set to 2. And the patterns I toyed with go as high as 20. But the image maps need to be at 1.
I've since thought about a second instance of the overdress with the transmap set to hide everything but the edging. I'd have to scale it up slightly so the shader processed layer wouldn't show through...
I'll report back here if that works or not.
-Anita
Having worked with PS for years, I could never get the hang of Gimp, either. Too bad, though. The price of Gimp is much easier on the wallet. (Though I don't subscribe to any of the CC programs. I have CS6.)
Okay. It works like a charm. Of course, one needs to be proficient enough to create the transparent map with the edging in pure white and the rest of the image pure black. If I get permission from the ptb, I would be happy to share mine.
It's pretty simple. Load the evening gown twice. Apply the fabric shaders to one copy. Select the second copy and in the parameter, scale both the X and the Z to 101%. In the Surfaces Editor, select the second evening gown. Under Cutout Opacity, click on the image, browse to the location of your modified trans map, and select it. Your done. And if you forget to convert the second evening gown to iray, it will look fine... I just noticed I did these without converting the second dress.

As well as showing the edging, this image shows how different a single change can be. All dresses have the Tulle with Gold Dots pattern applied to the overdress. On the left, the tulle is white, the middle has black tulle, and the right dress has pink tulle. I swear, this is more fun than playing with my Barbie dolls ever was. And more addictive.
For those who can't get the hang of gimp (holds hand up) you can photoshop elements for much much less than the full cost of photoshop and can do 90% of what the full version does. I have no problem doing what's described in most of the discussions about postwork and modifying etc in the elements program. Its less than $100 for the elements program.
Hello! I did some of the promo works for this and I loved this right from the beginning, when I started the testing.... what I love most about it is the endless possibilities and also the fact that we can easily customize the shaders for new looks and color combinations.
Here for example I tweaked the metal overlay to a dark green by simply changing the color of the metal flakes:
See what I mean? Since I have these shaders, I keep on using them constantly. Also - some of the options also work great in combination with other sets. If you for example own the Mec4D metal shaders for Iray, you can use those with the bump options of this set.... tried that and had great results for sci-fi related pictures.
Can you save the combinations that you come up with in a personal library? So you can apply the same surface to a different item a couple of weeks later, or is it rebuild from scratch each time?
Did not think about it yet but maybe it works if it is simply saved as a normal shader preset? Will give it a try when I have Studio running.
That's kind of what I was thinking. I'm used to saving seamless tiles from packages as presets for Fabricator. And it would make sense when you had something that you really liked to be able to do the 'Copy Selected Surface', slap it onto a flat plane for the camera, and save it out in your own library. If, that is, one can be sure of getting all of the bits and bobs that go into it with a basic copy/paste.