-
Torso UVs for Genesis 9 Anatomical Elements
I won't be surprised if someone else has already done the same, but some time ago I created UV sets for the Genesis 9 Anatomical Elements that allow them to use texture/surface settings from the torso, and it seems other people have a need for the same reasonably often, so I'm sharing them here.
Obviously, there are limitations, particularly regarding stretched textures on the male anatomy (no geoshell overlays such as those used by 3rd party anatomies are provided), but it will at least provide something that matches without seaming issues if a character does not come with their own textures for the elements.
If you wish to take it further, you can use these UVs to go through Map Transfer to put the textures on the elements' own UVs, and then use an image editing tool to mask in/colour match the textures from another character to provide the missing details.
https://www.mediafire.com/file/8bg0k5kkuao3vd1/G9F_Genitals_Torso_UVs_20230722.zip
https://www.mediafire.com/file/f0jsj3th9sogvl5/G9M_Genitals_Torso_UVs_20230927.zipIn any case, please don't post renders of you using these, I'm probably on shaky enough ground posting these as they are.
Freebie Challenge June 2025 - "Summer and Piracy!" - Entries ThreadShiny!
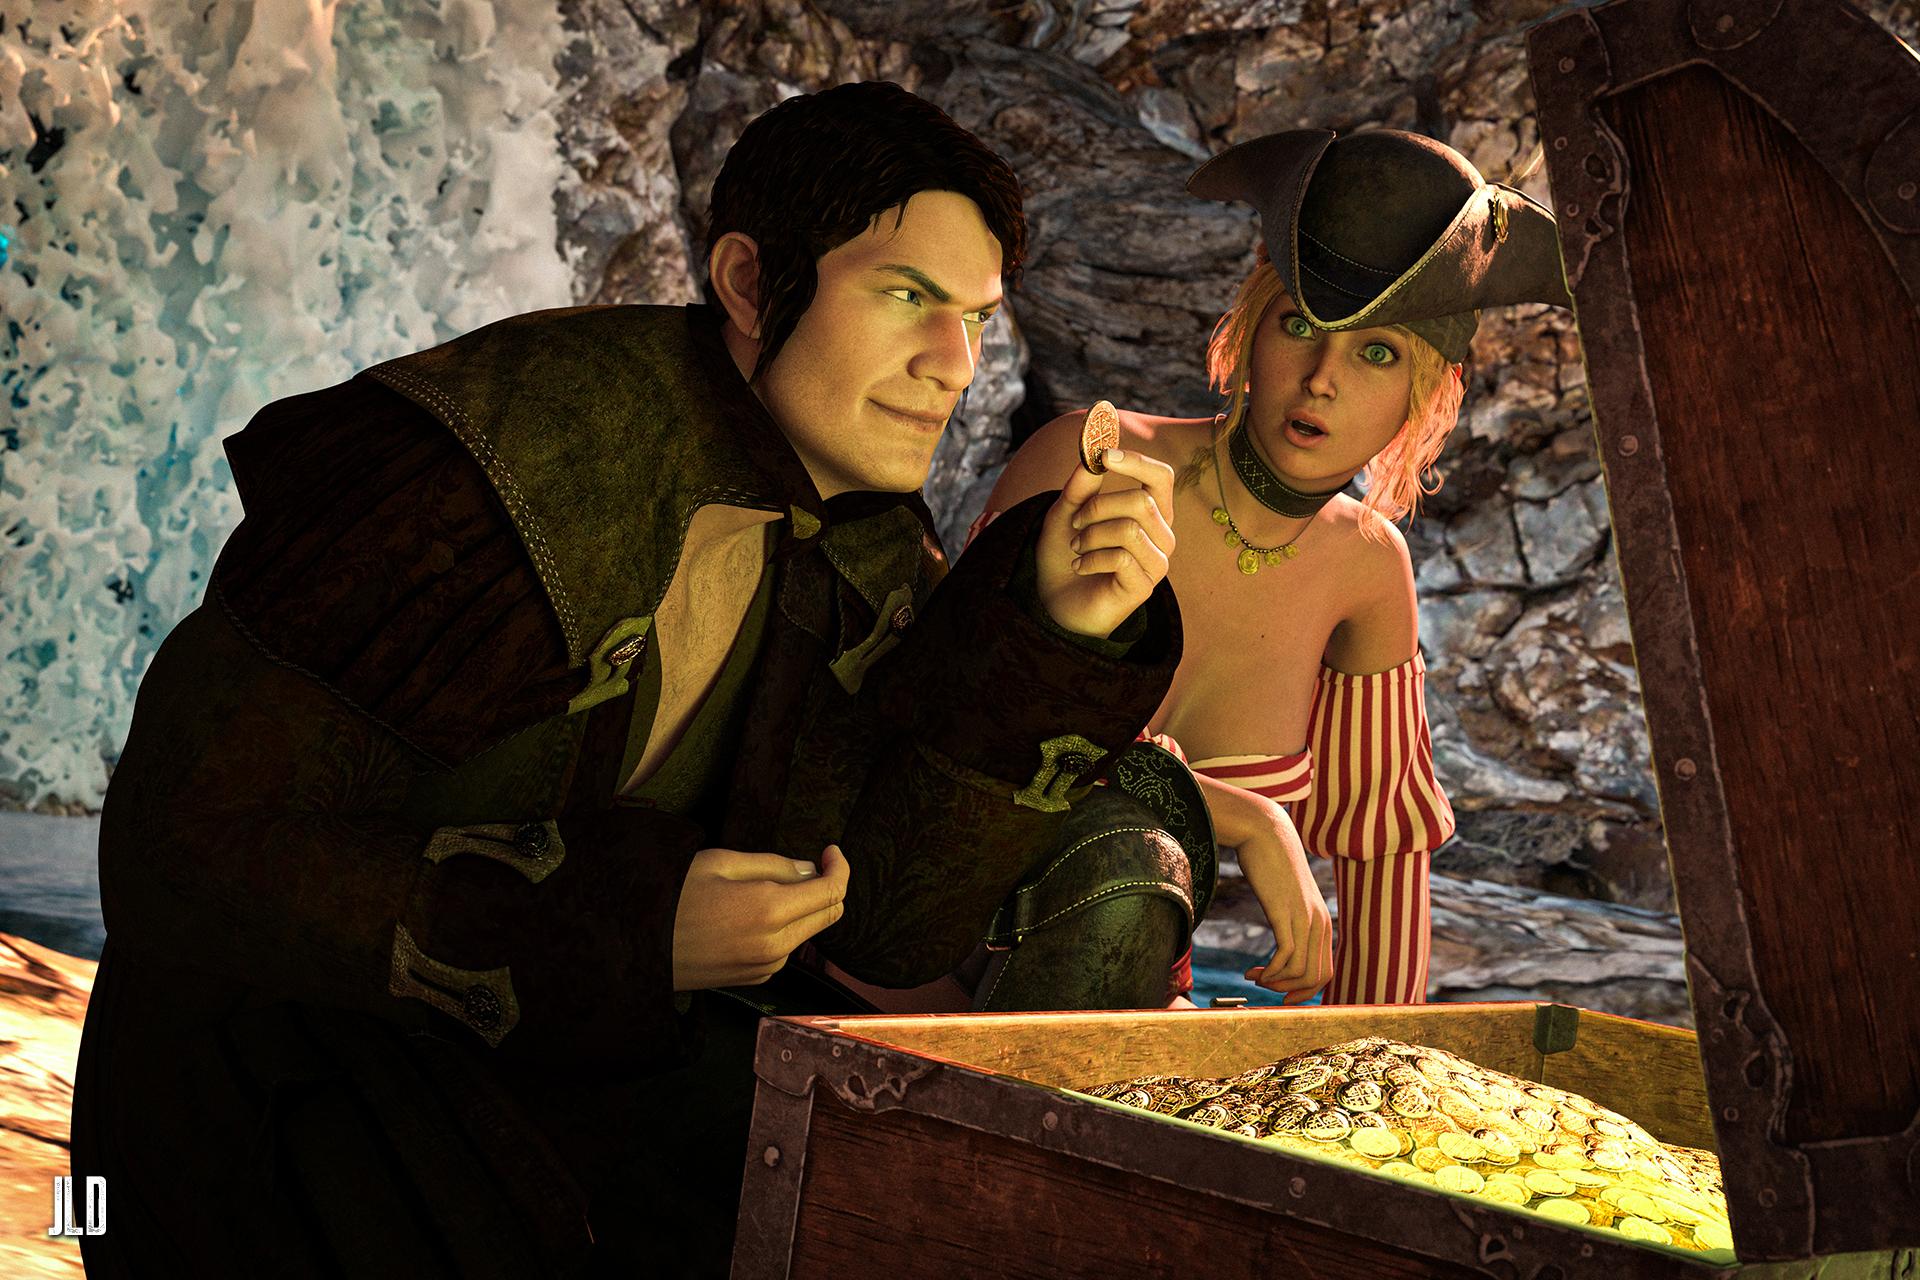
Rendered in Daz with some slight retouching in Photoshop. Raw render is attached.
Freebies:
-
AGD Erik Character Morph for G8M & G8.1M: https://www.renderhub.com/aglassdarkly/agd-erik-8-morph-only
-
S3D Briana Morph for Genesis 9: https://www.renderhub.com/soft3d/s3d-briana-morph-for-genesis-9
-
Crystal Falls For DAZ: https://www.renderhub.com/shredder/crystal-falls-for-daz
-
Testing Hair for Genesis 8 Male: https://www.renderosity.com/freestuff/items/85638/testing-hair-for-genesis-8-male
-
Pirate Outfit for Genesis 8/8.1 Female: https://www.renderosity.com/freestuff/items/96578/pirate-outfit-for-genesis-881-female
-
Treasure Chest: https://polyhaven.com/a/treasure_chest
Paid items:
-
Crimson Seas for Genesis 3 Male(s): https://www.daz3d.com/crimson-seas-for-genesis-3-male-s
-
HS Mirage Strands Hair For Genesis 9, 8, and 8.1 Females: https://www.daz3d.com/hs-mirage-strands-hair-for-genesis-9-8-and-81-females
-
Treasures: https://www.daz3d.com/ancient-treasure
-
Paper Tiger's Fantastic HDRI Lighting: https://www.renderosity.com/marketplace/products/135115/paper-tigers-fantastic-hdri-lighting
3D Universe DAZ Studio Utilities [Commercial]Hi all,
We've had many questions and requests regarding the utilities that we've brought out for DAZ Studio, so we figured we'd start this post to break down what each of the utilities do and how they can help your DAZ Studio artistic workflow.
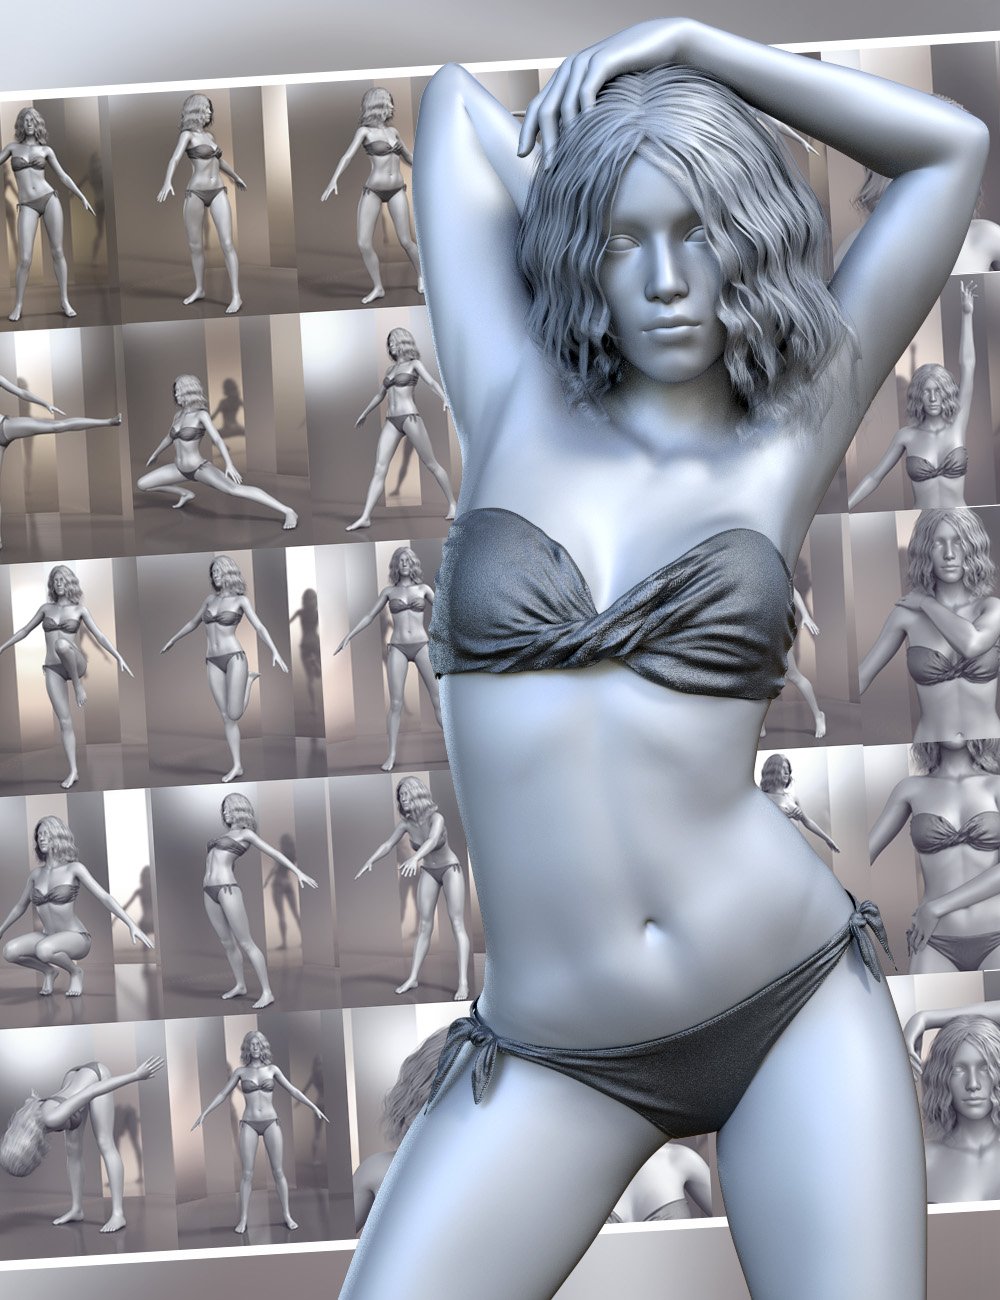
Pose Architect
Pose Architect makes creating realistic body poses as easy as 1-2-3. The included animated pose-control dials take the figure's body center-of-balance into account to keep the figure well-balanced. These pose-dials use natural animated movement instead of stiff joint rotation.- For Genesis 8 Female(s) - https://www.daz3d.com/pose-architect-for-genesis-8-females
- For Genesis 8 Males (s) - https://www.daz3d.com/pose-architect-for-genesis-8-males
- For Genesis 3 Female(s) - https://www.daz3d.com/pose-architect-for-genesis-3-females
- For Genesis 3 Males (s) - https://www.daz3d.com/pose-architect-for-genesis-3-males
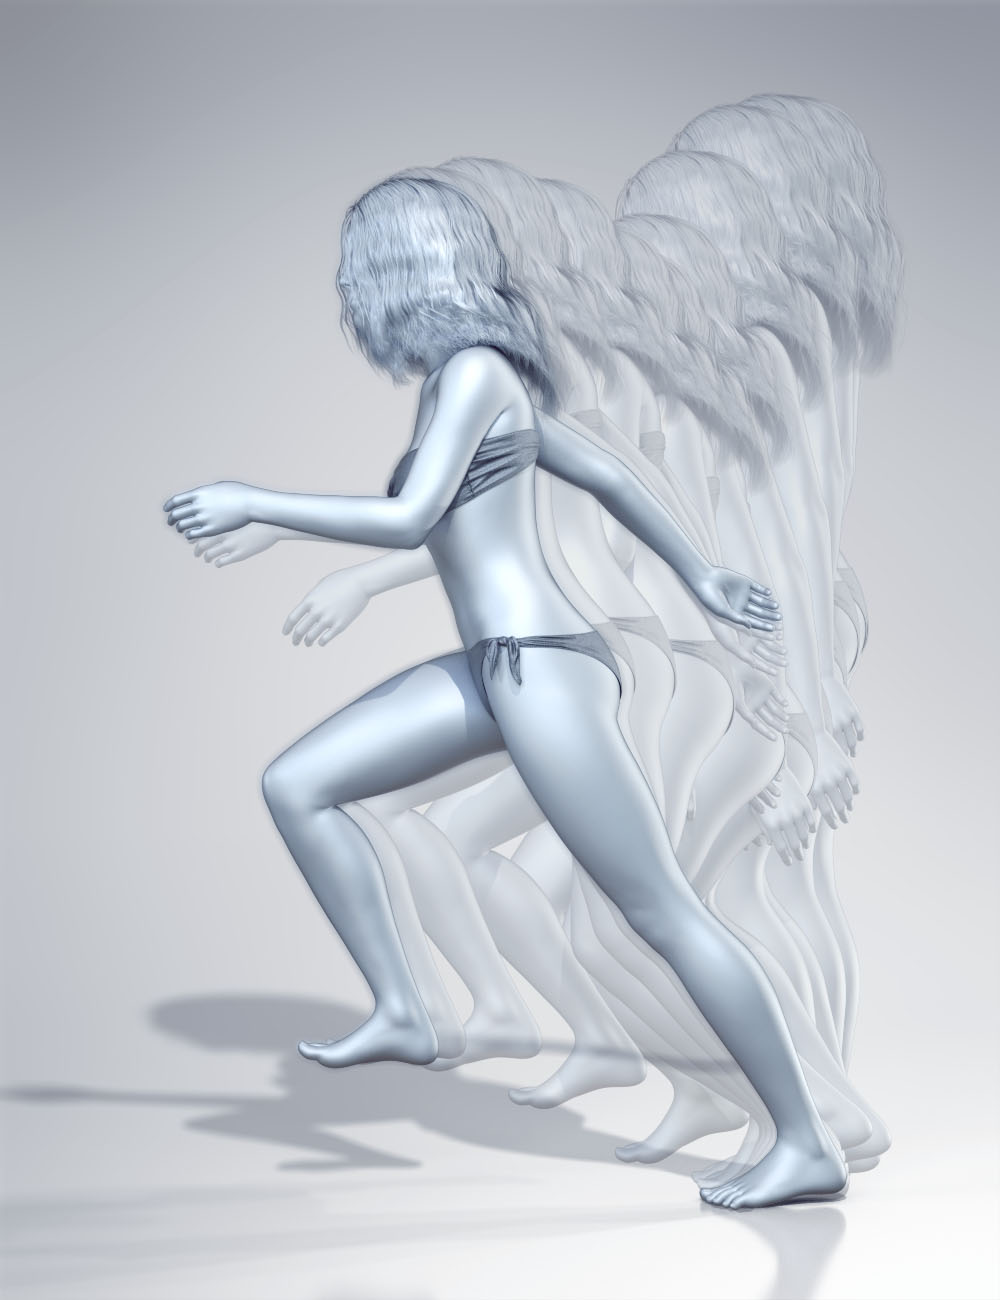 Glue to Floor Utility for Genesis 8 Female(s)
This powerful utility can quickly fix the issue of sliding feet by moving the position of the hip element of your Genesis 8 Female figure to ensure that the selected foot remains in place through-out the animation. Glue to Floor can be run on an entire animation, selected frame range or even a single frame. Simply choose which foot you would like to keep in place and run the utility for a perfect animation.
https://www.daz3d.com/glue-to-floor-utility-for-genesis-8-females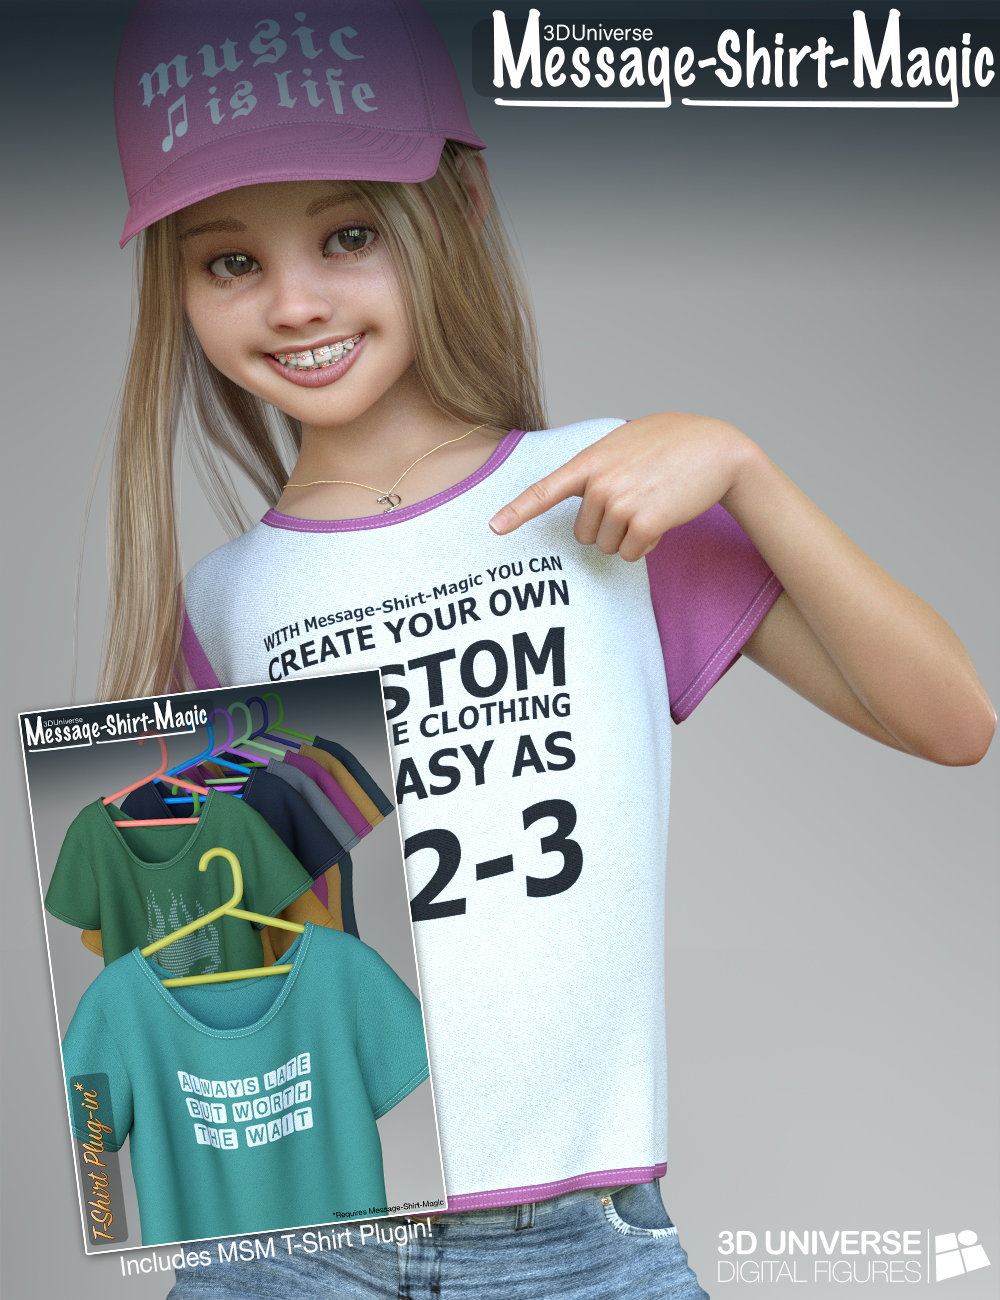 Message-Shirt-Magic for Genesis 8 Female(s)
Message-Shirt-Magic is a revolutionary product that allows you to create your own custom message textures on the included dForce clothing. Message-Shirt-Magic uses plugins which each include a different styled dForce clothing item. Additional plugins purchased will appear automatically in the interface. The interface is intelligent enough to automatically find Message-Shirt-Magic compatible items in your scene to make it easy to customize different clothing items.Using the simple interface, you can change text, font, colors, size, formatting, etc. all while seeing a real-time preview of the final texture result. Presets that you like can be saved for later use right in the interface.- Plugins: Camisole Plugin - https://www.daz3d.com/message-shirt-magic-camisole-plugin-for-genesis-8-females
- Tank-Top Plugin - https://www.daz3d.com/message-shirt-magic-tank-top-plugin-for-genesis-8-females
- One-Piece Plugin - https://www.daz3d.com/message-shirt-magic-one-piece-plugin-for-genesis-8-females
- Baseball Cap Plugin - https://www.daz3d.com/message-shirt-magic-baseball-cap-plugin-for-genesis-8-females
- Vest Plugin - https://www.daz3d.com/message-shirt-magic-vest-plugin-for-genesis-8-females
- Message-Shirt-Magic Bundle - https://www.daz3d.com/message-shirt-magic-bundle-for-genesis-8-females
https://www.daz3d.com/message-shirt-magic-for-genesis-8-females
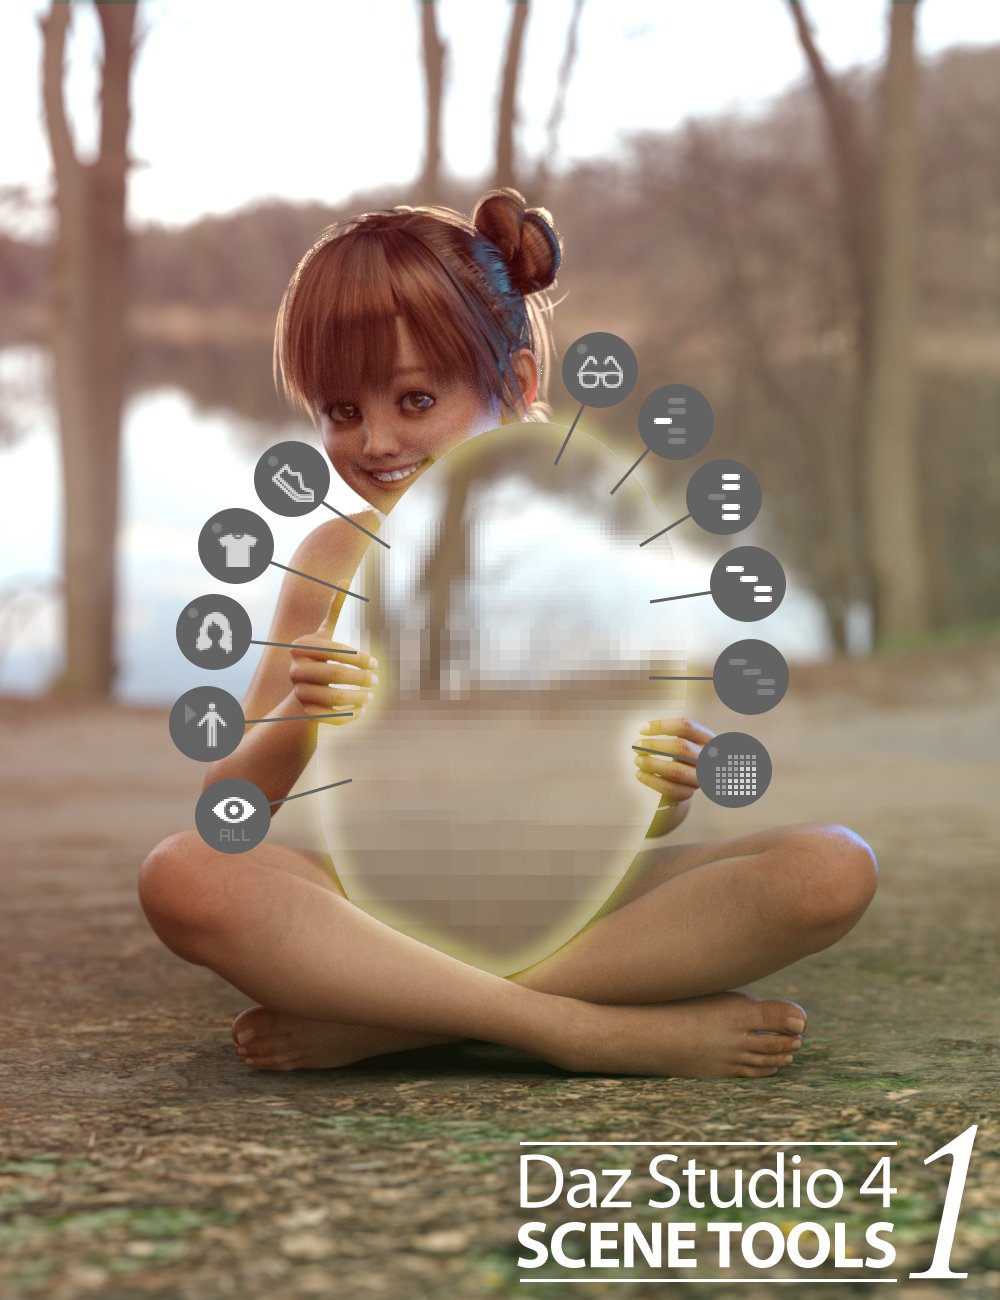 Daz Studio 4 Scene Tools Set 1
When working on complex scenes with several figures, hair, clothing, and props - the Daz Studio interface can slow down making it fairly difficult to pose items smoothly. To speed the interface up, you can hide items that aren't needed, but it can be annoying to locate the items you wish to hide in the scene tree view.
This product is a custom toolbar we use ourselves that adds several quick-access buttons to your Daz Studio 4 interface. These buttons can be used to quickly hide and show various content types in your scene to speed up the interface. It also includes buttons to set the mesh resolution of all the items in the scene to their lowest or highest subdivision setting.
https://www.daz3d.com/daz-studio-4-scene-tools-set-1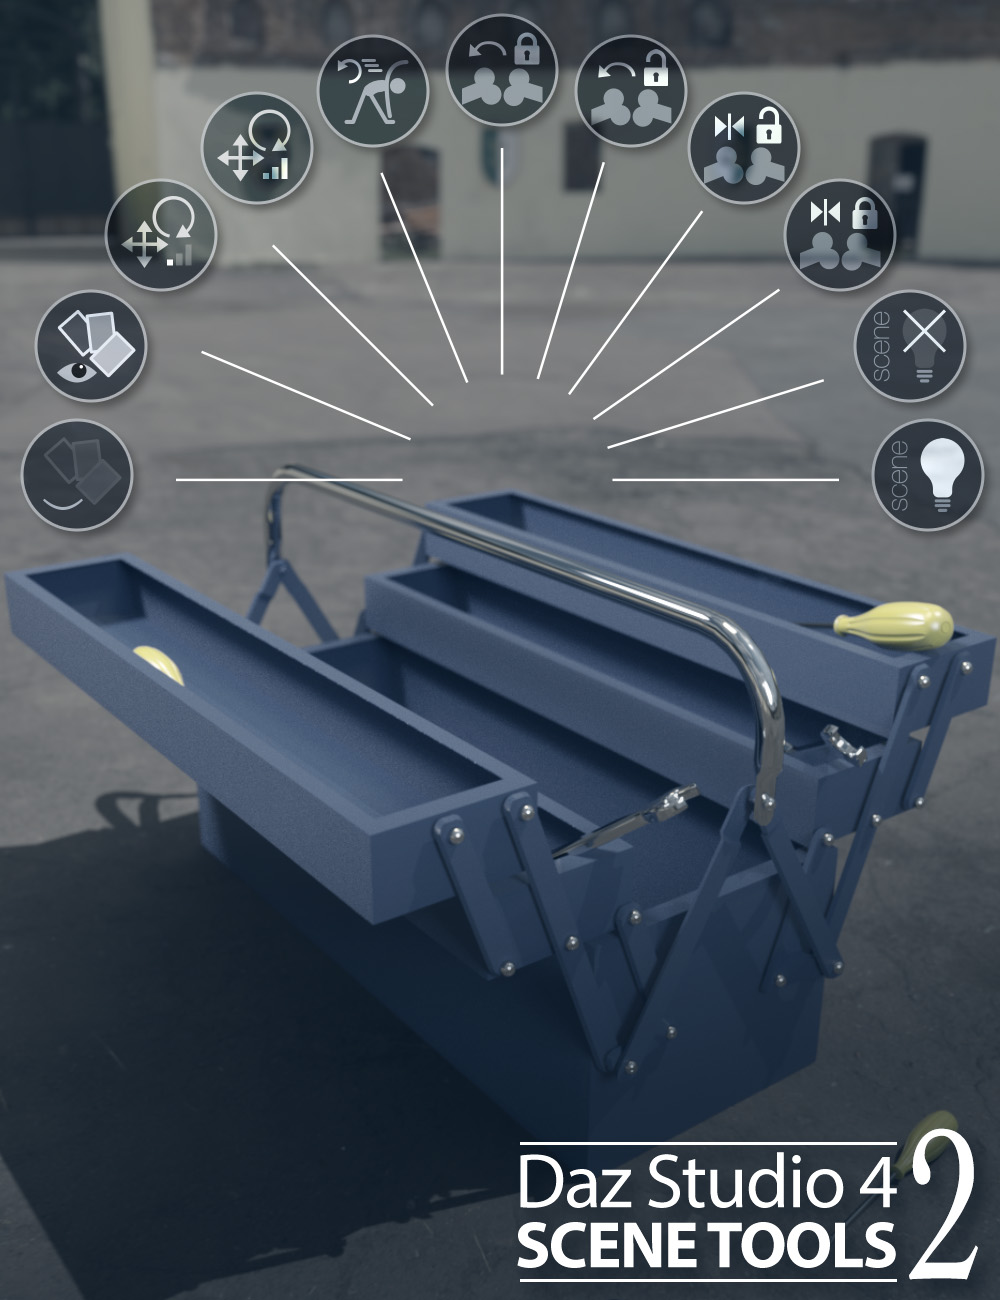 Daz Studio 4 Scene Tools 2
Single-click buttons include:- Quickly hiding or showing the geometry assigned to selected surfaces.
- Adjust the sensitivity of the translate and rotate dials for more accurate adjustments, and then set them back in a simple click.
- Reset, Lock or Unlock the selected node and it's descendants pose to default.
- Hide/Show any scene lights (including mesh-lights)
https://www.daz3d.com/daz-studio-4-scene-tools-set-2
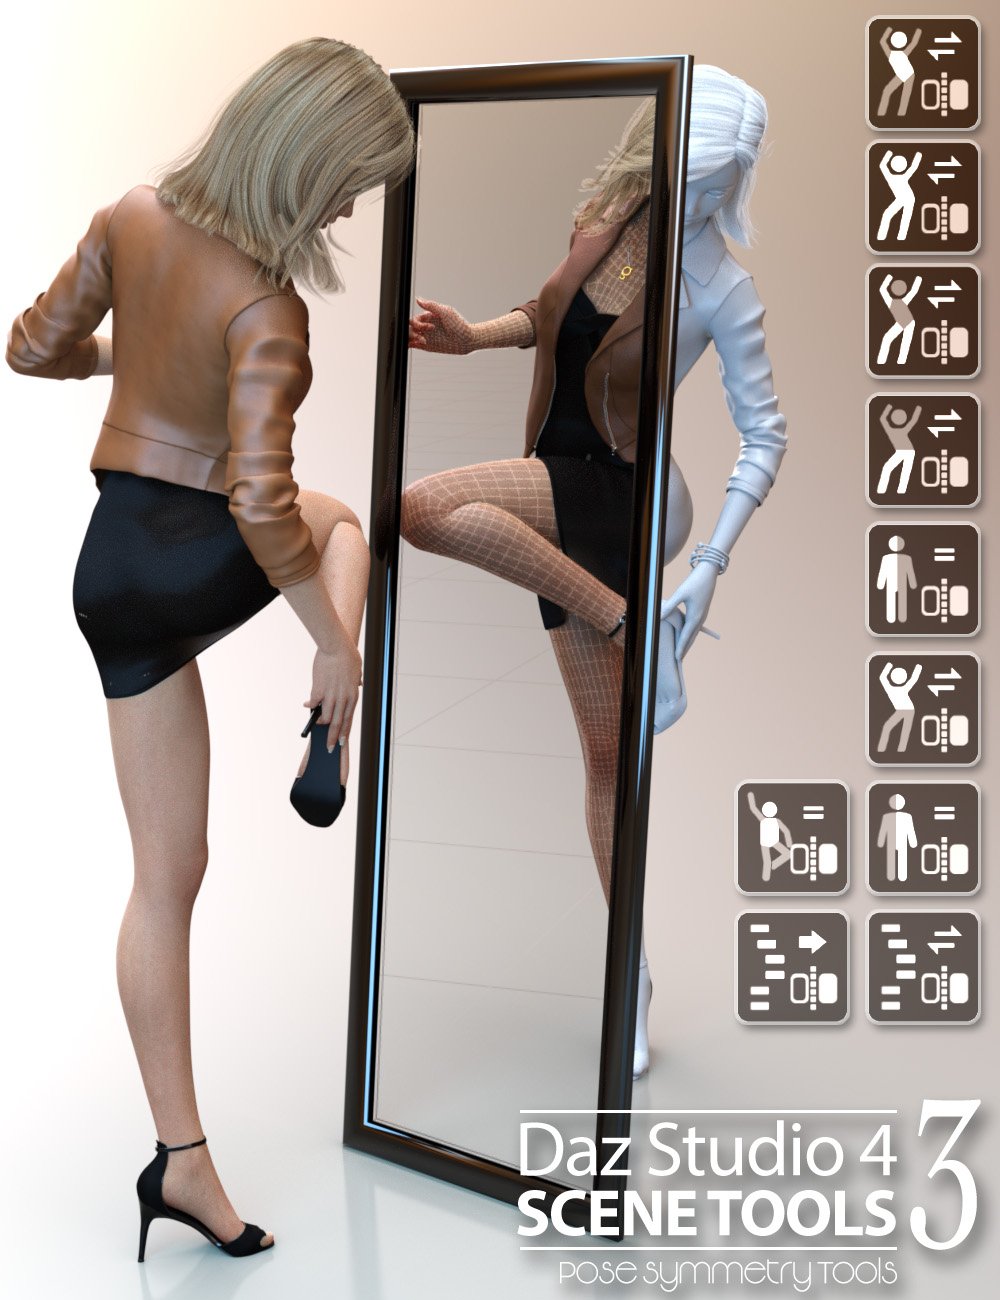 Daz Studio 4 Scene Tools Set 3 - Pose Symmetry
Make it easier with Pose Symmetry! This is 3D Universe's third Scene Tools pack containing DAZ Studio scripts accessed quickly from a custom toolbar.
Single-click buttons include options to flip/mirror the full figure pose, flip/mirror only certain regions of the figure pose or flip/mirror selected items and their children.
These tools also take into account pose controlling dials and will bake the controller dials into the pose as part of the mirror or flip action.
From simply flipping the figure's pose from left to right, to customizing poses by flipping the arms, legs or upper body - this set of tools is a real time-saver!
https://www.daz3d.com/daz-studio-4-scene-tools-set-3--pose-symmetry Character Mixer for Genesis Figures
Character Mixer makes the most out of the Daz characters that you own, allowing you to quickly create unique characters by randomly, yet intelligently mixing-and-matching morphs from multiple Artists.
Using a powerful yet simple interface, you select which morphs you'd like to include in the randomization process. You can even save favorite selections to presets for easy loading at a later time.
Control the style of random character, which artist morphs to include or exclude, how many morphs to randomize and many other options to create the most unique characters possible with the characters that you have in your library.
This application will automatically include all the relevant morphs in your libraries, so if you add a new character - it will be included automatically!
Best of all - the script works on most Daz Studio figures Genesis through Genesis 8!
https://www.daz3d.com/character-mixer-for-all-genesis-figures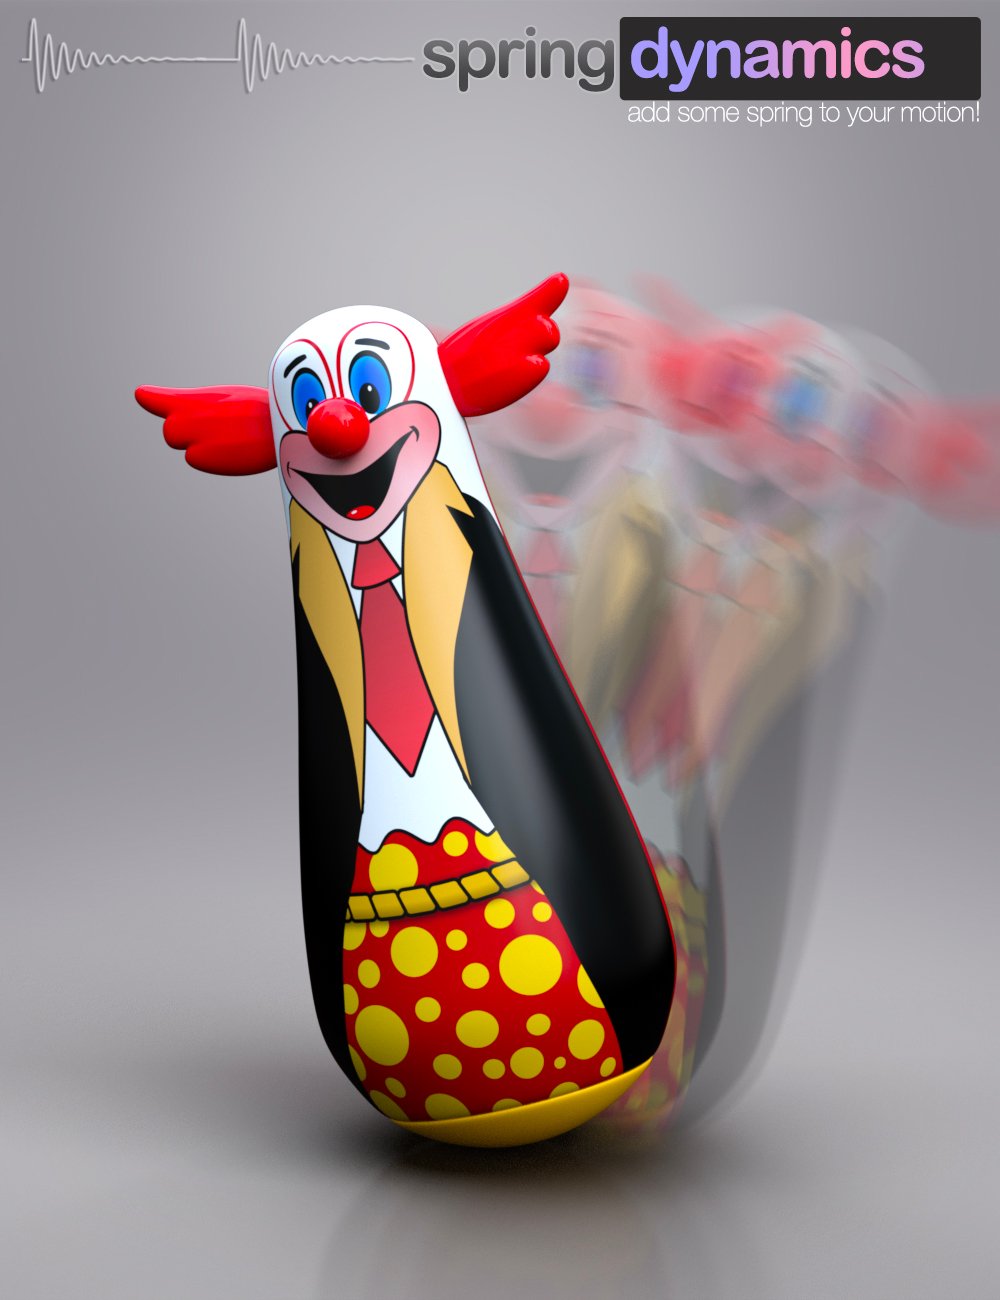 Spring Dynamics for DAZ Studio
In short, simply selecting a bone that you wish to add movement to and running Spring Dynamics will result in automated animation of the bone (and potentially it's children).
https://www.daz3d.com/spring-dynamics-for-daz-studio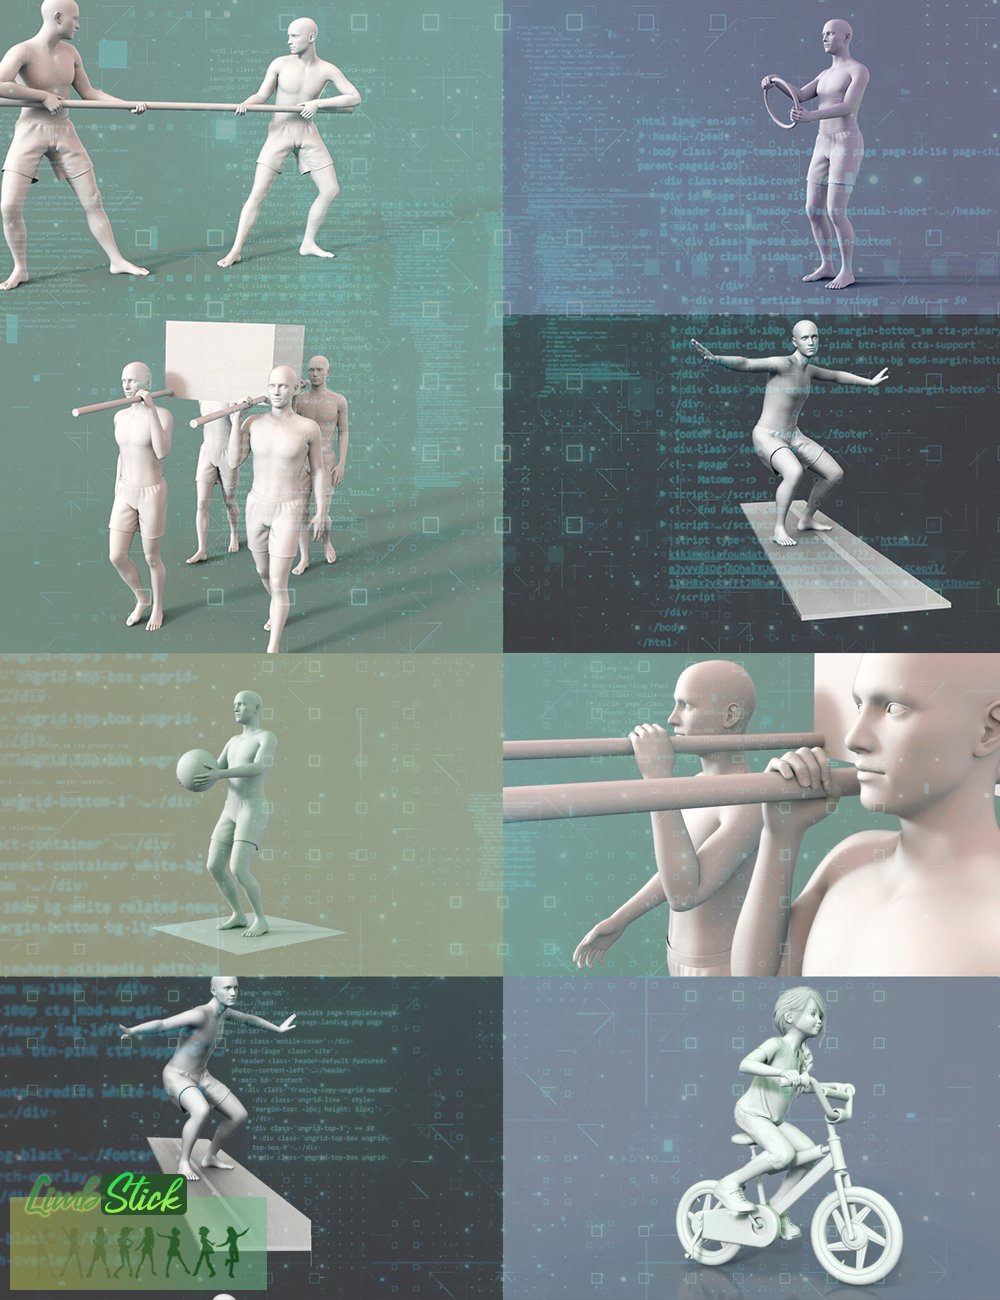 LimbStick for Genesis 3 + 8
Similar to inverse kinematics, LimbStick is a utility that uses a mathematical process of calculating the joint parameters needed to place an appendage (hand or foot), in a given position and orientation relative to the node selected to follow. The calculations are made across a partial or full animation to ensure that the selected appendage perfectly follows the selected target node.
The short version: Click on a hand or foot followed by a target, and run the utility to magically have it stay attached to the target.
https://www.daz3d.com/limbstick-for-genesis-3-+-8Daz Studio Animation Tools - Set 1
Daz Studio Animation Tools - Set 1 is a set of four tools that can help in the process of creating animations in Daz Studio.
This set contains the following tools:- Animation Stripper - This utility will “freeze” the selected objects at the timeline frame the script was run on.
- BODY2Hip - will transfer the position and rotation that has been applied to the [Body] of a figure to the [hip] node of the same figure for a single frame, custom range, or an entire animation.
- Camera Follow Focus - This utility allows you to easily set a camera to keep its focus perfectly on a specific object throughout the animation timeline. This can include depth-of-field settings as well as camera aiming.
- Path Plotter - This utility will draw the path of a specified object in 3D space across the specified animation range. The path can include frame dots which will indicate where a specified object is at a particular frame in the animation.
https://www.daz3d.com/daz-studio-animation-tools--set-1
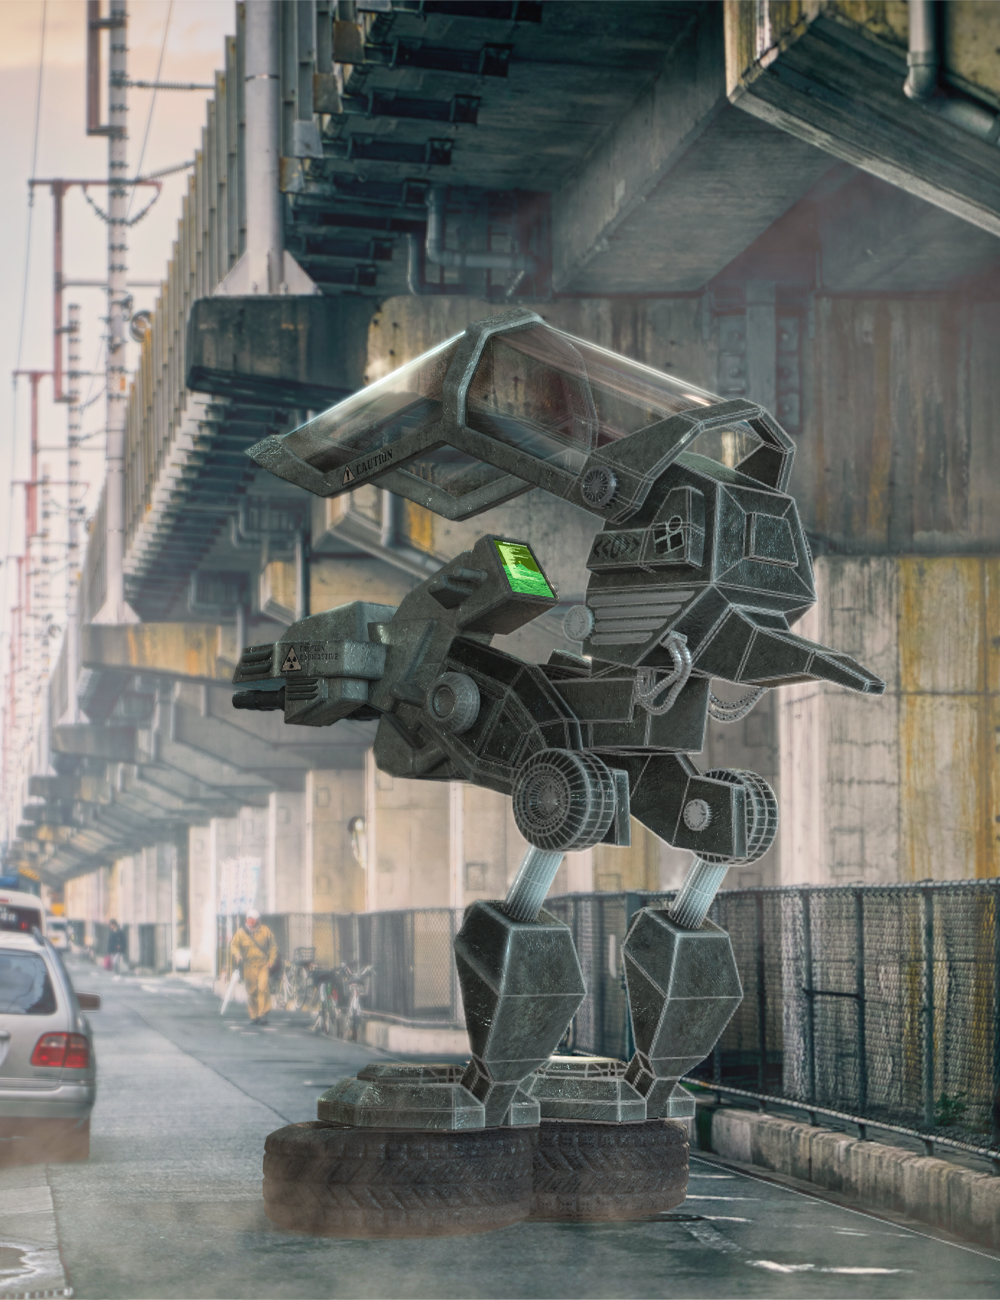 fSpy Project Importer for Daz Studio
The Open source fSpy application by Stuffmatic is a utility that uses vanishing points on an image to calculate a 3D camera's approximate focal length, orientation, and position in 3D space required to produce the image. This technique is called Camera matching. fSpy is made specifically to simulate a 3D camera in Blender.
With "fSpy Project Importer" for DAZ Studio, you can directly open an fSpy project file and recreate not only the camera view, but also floor planes and a lot more. Our utility automatically sets up your 3D viewport to the correct aspect ratio, loads the image data into the background, creates the 3D camera, and for the Iray render engine, even creates shadow/reflection catching planes in your scene at the click of a mouse.
https://www.daz3d.com/fspy-project-importer-for-daz-studio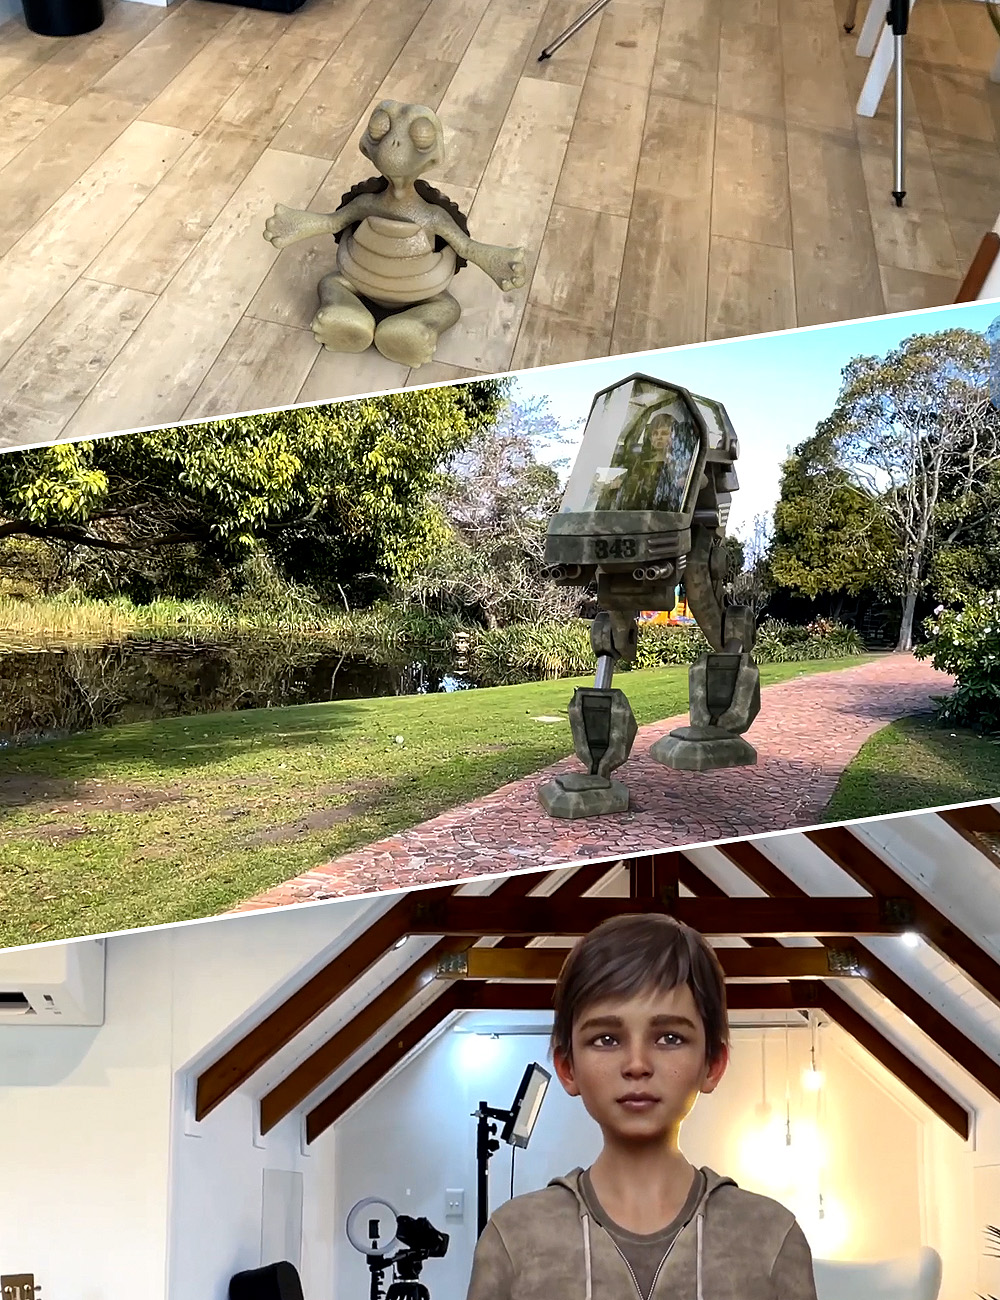 Camera Tracking Importer for DAZ Studio - HitFilm Composite Shot
Using the free CamTrack AR app for iOS, video is recorded along with the real-time camera motions.
Our utility will take all this information and recreate the exact camera with animated motion in DAZ Studio. Additionally, this amazing utility can also:- Create 3D anchor points from the points created in Camtrack AR in your scene that don't appear in your final render. These are perfect for placing the 3D objects exactly where you want them.
- Translate and rotate the scene to match your lighting direction and DAZ Studio scene center.
- Create a shadow/reflection-catching surface that will help your 3D objects cast shadows in the final video and make the integration more realistic.
- Set up all the relevant render settings to enable you to easily render out a sequence of images with transparent backgrounds for easy integration with your video.
https://www.daz3d.com/camera-tracking-importer-for-daz-studio--hitfilm-composite-shot
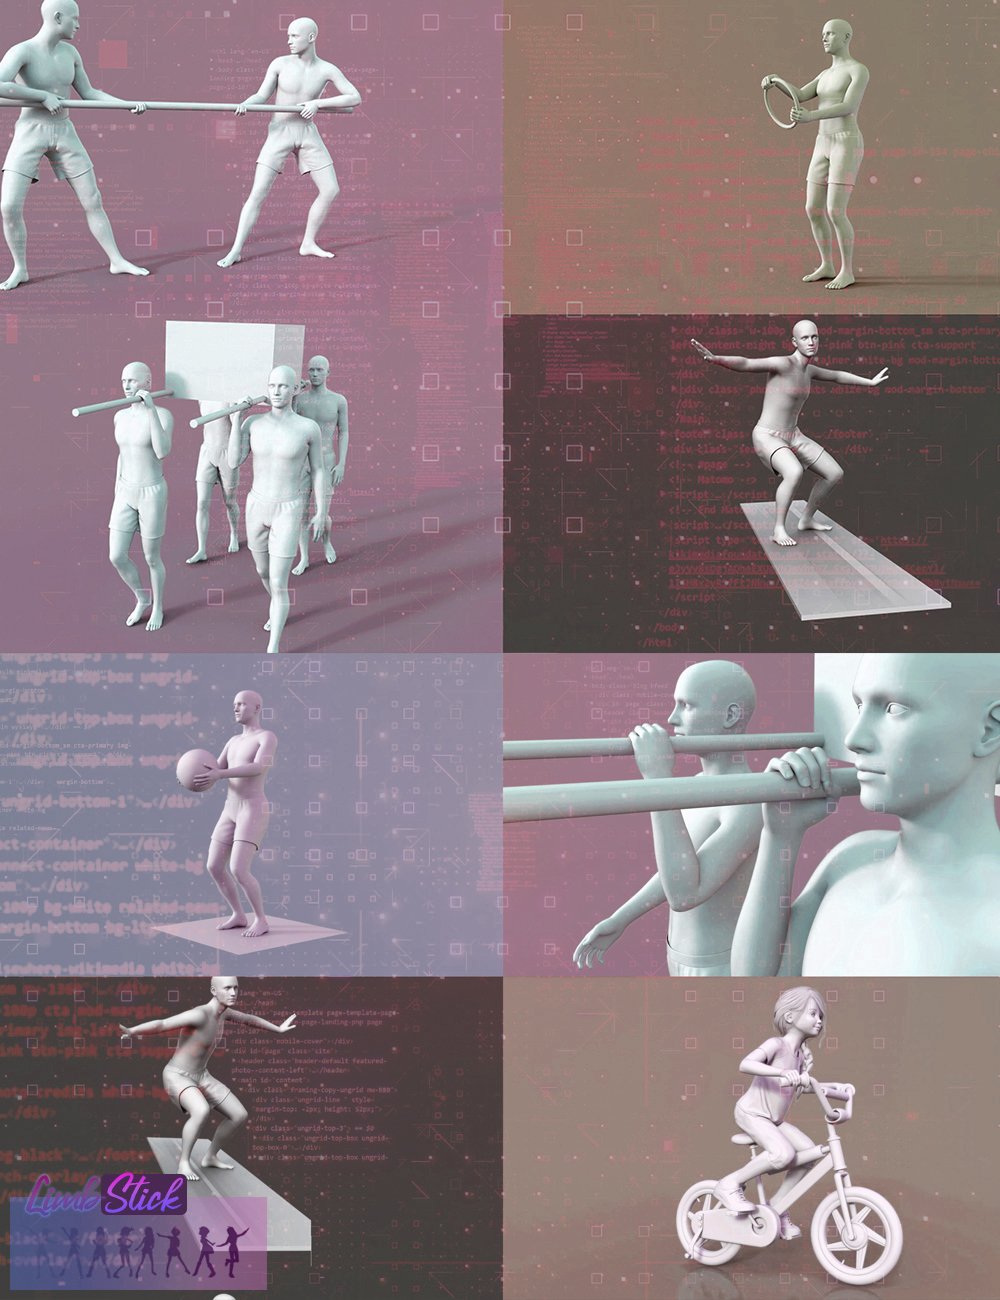 LimbStick for Genesis 9
The short version: Click on a hand or foot followed by a target, and run the utility to magically have it stay attached to the target.
The long version: Similar to inverse kinematics, LimbStick is a utility that uses a mathematical process of calculating the joint parameters needed to place an appendage (hand or foot), in a given position and orientation relative to the node selected to follow.
https://www.daz3d.com/limbstick-for-genesis-9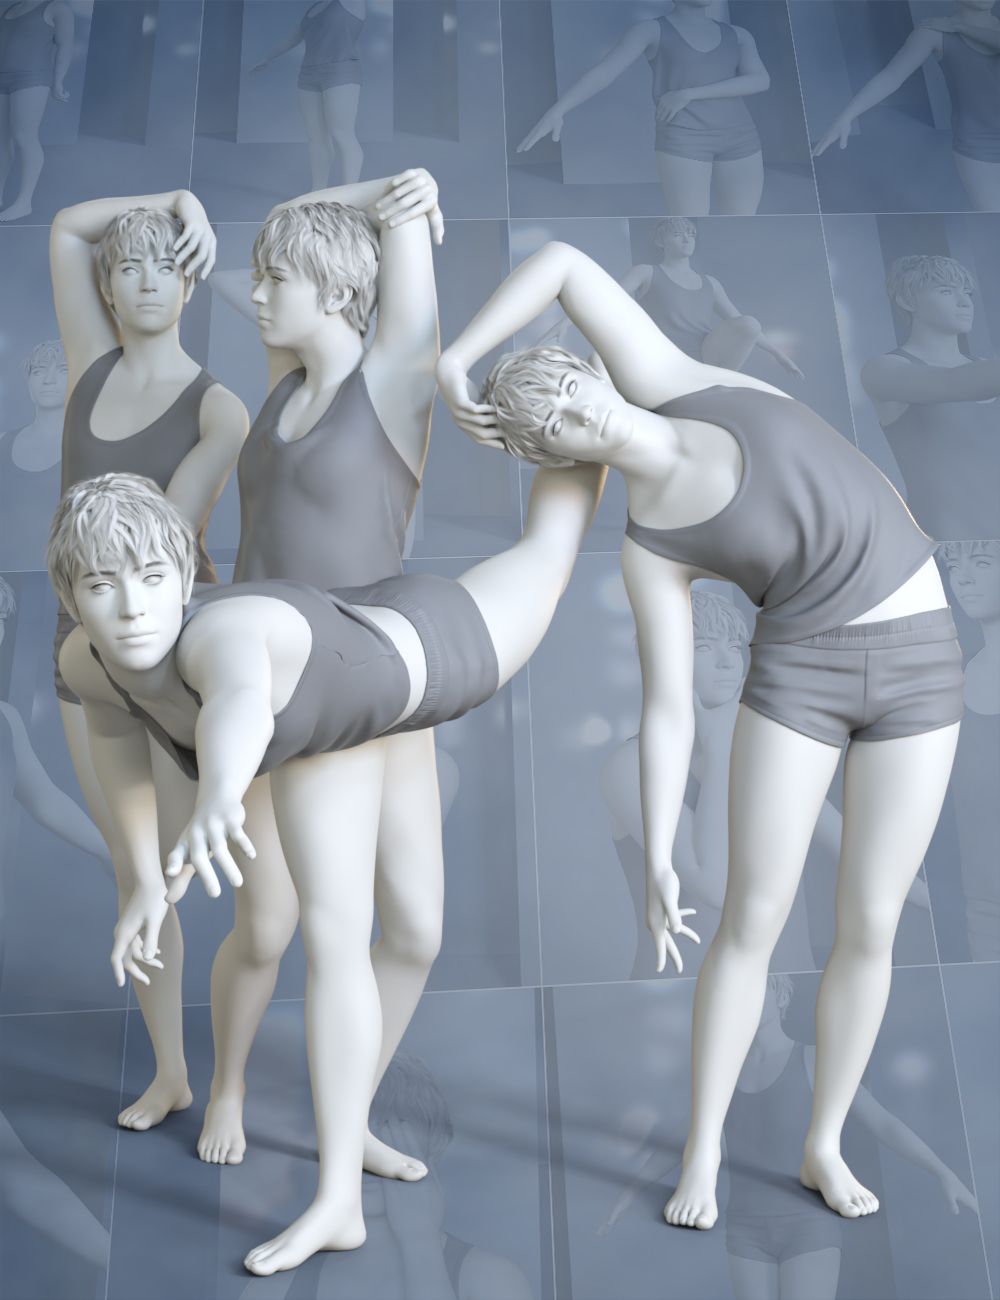 Pose Architect for Genesis 9
Similar to inverse kinematics, LimbStick is a utility that uses a mathematical process of calculating the joint parameters needed to place an appendage (hand or foot), in a given position and orientation relative to the node selected to follow.
The calculations are made across a partial or full animation to ensure that the selected appendage perfectly follows the selected target node.
The short version: Click on a hand or foot followed by a target, and run the utility to magically have it stay attached to the target.
https://www.daz3d.com/pose-architect-for-genesis-9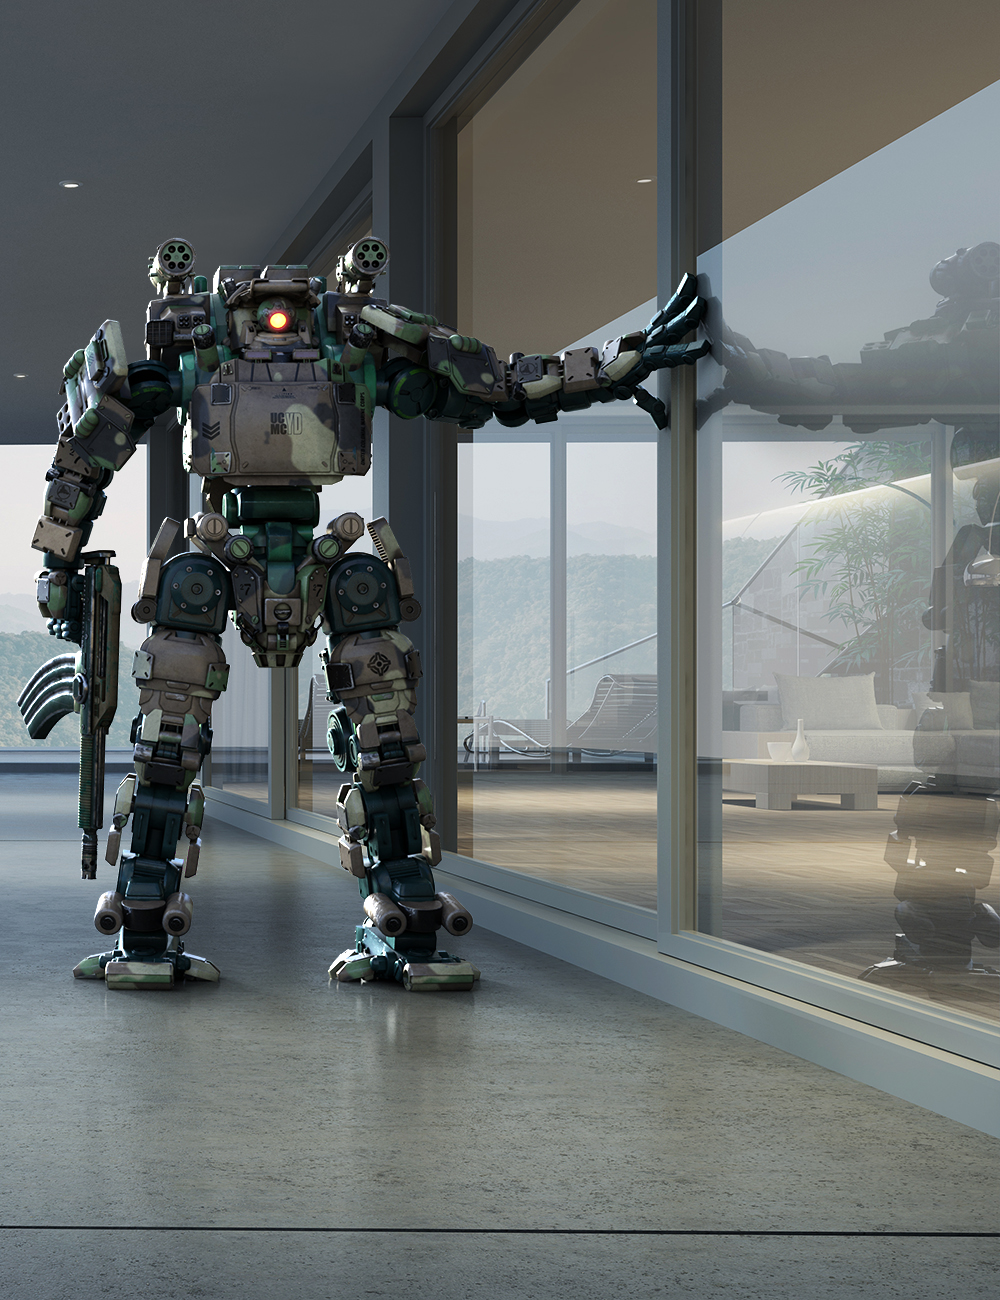 Catcher Plus - Shadows and Reflections for Iray
Being able to recreate shadows and reflections in your 3D scenes enables you to insert 3D content into photographs and make it look like it belongs there.
Catcher Plus is a utility that makes it very easy to catch shadows and reflections leveraging the powerful Iray render engine. Floor and Wall planes can be easily created, and even existing geometry in your scene can be converted to catch shadows, reflections, or both.
The utility allows you to adjust the reflection amount, as well as the reflection blur to match up with the existing reflections in your background photograph. Simply selecting any catch you've created and running the script again allows you to make changes to the settings.
Catcher Plus is an excellent utility to add to your toolbox if you enjoy merging 3D items into existing still photographs.
https://www.daz3d.com/catcher-plus--shadows-and-reflections-for-iray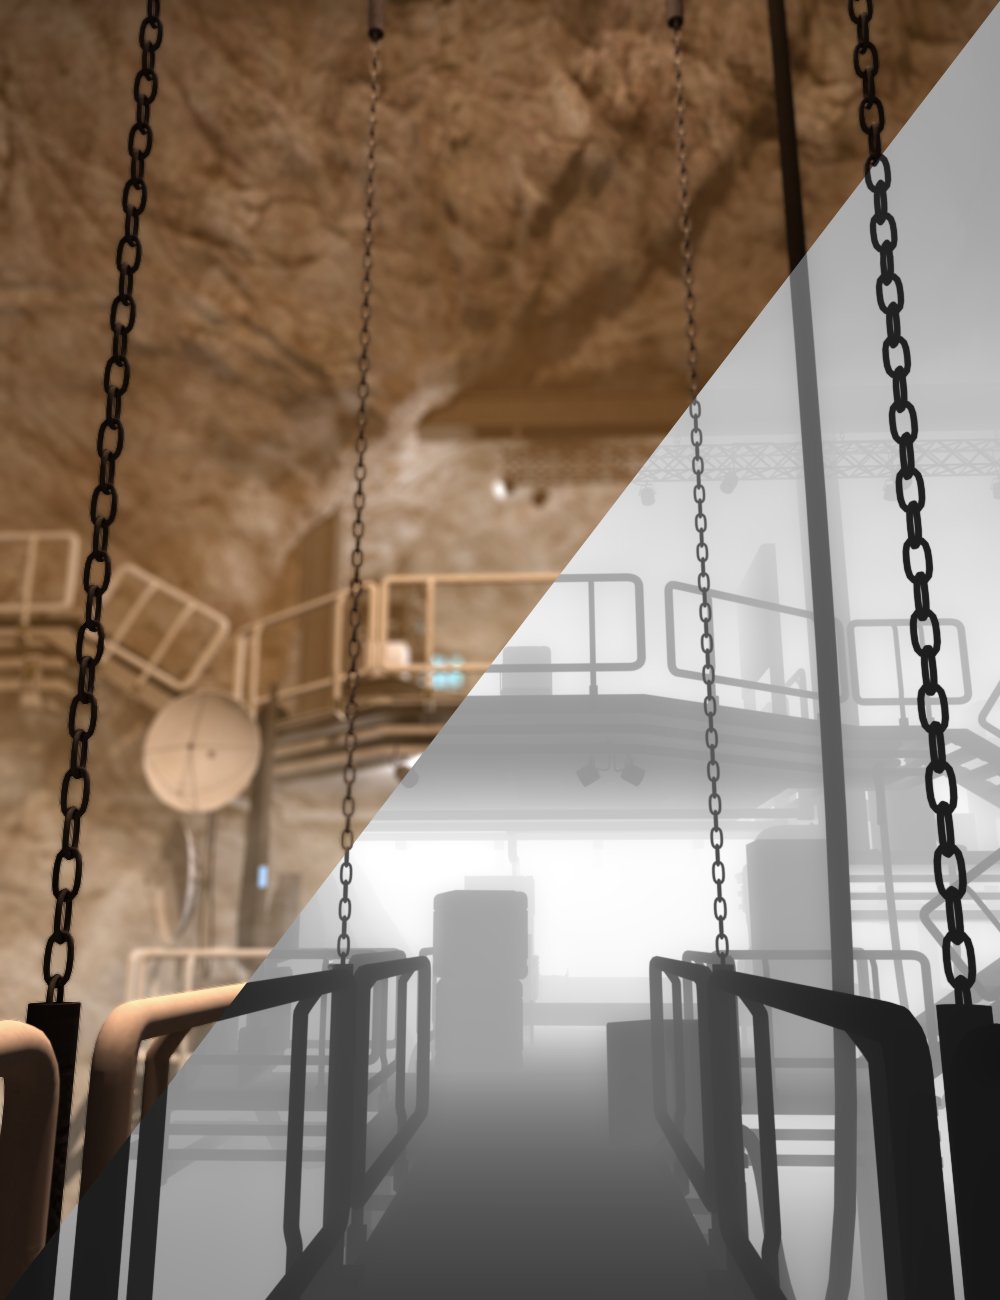 Basic Depth Map Maker for Daz Studio
A depth map is typically presented as a two-dimensional grayscale image, where each pixel corresponds to a point in the observed scene. The intensity or color of each pixel in the depth map encodes the depth or distance information of the corresponding point in the real-world space.
Depth maps can be used to adjust the focus or depth-of-field of a rendered image, simulating realistic lighting and shadows, and adding details like fog and smoke that integrate with your scene.
Basic Depth Map Maker for Daz Studio makes it very easy to create depth maps from DAZ Studio scenes. Whether you need a depth map of the full scene or a custom range, Basic Depth Map Maker has you covered.
https://www.daz3d.com/basic-depth-map-maker-for-daz-studio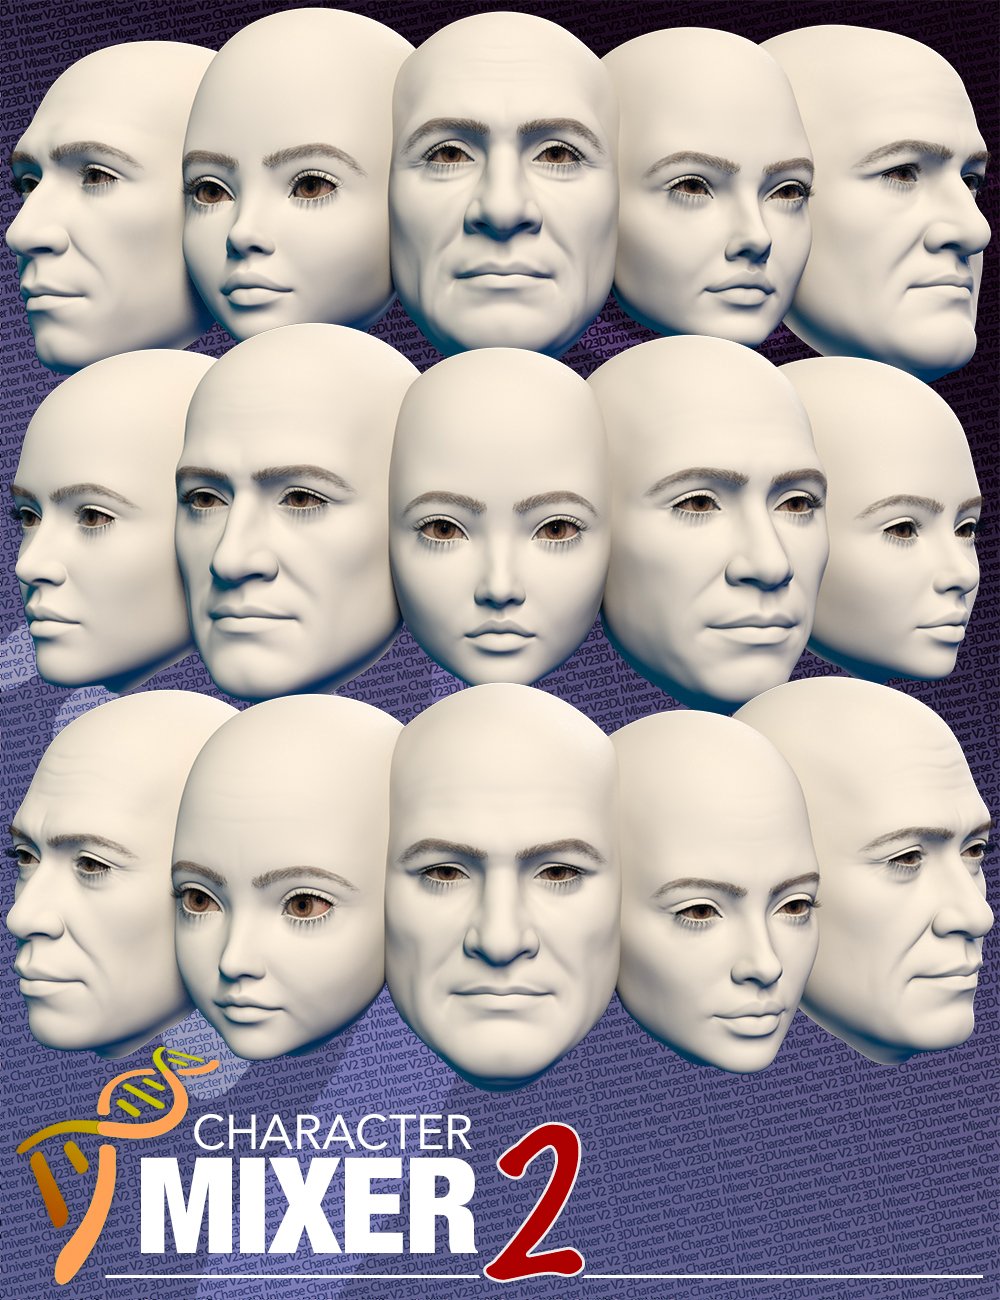 Character Mixer Version 2 for Genesis 8 and 9
Character Mixer Version 2 has been updated to make better use of Genesis 9's non-gender-specific body.
By simply running the utility, Character Mixer V2 will extract all the head and body shapes you have installed in DAZ Studio and allow you to randomly mix and match any number of them to create a totally unique character. You can make the most out of the Daz characters that you own, allowing you to quickly create unique characters by randomly quickly, yet intelligently mixing and matching morphs from multiple Artists.
https://www.daz3d.com/character-mixer-version-2-for-genesis-8-and-9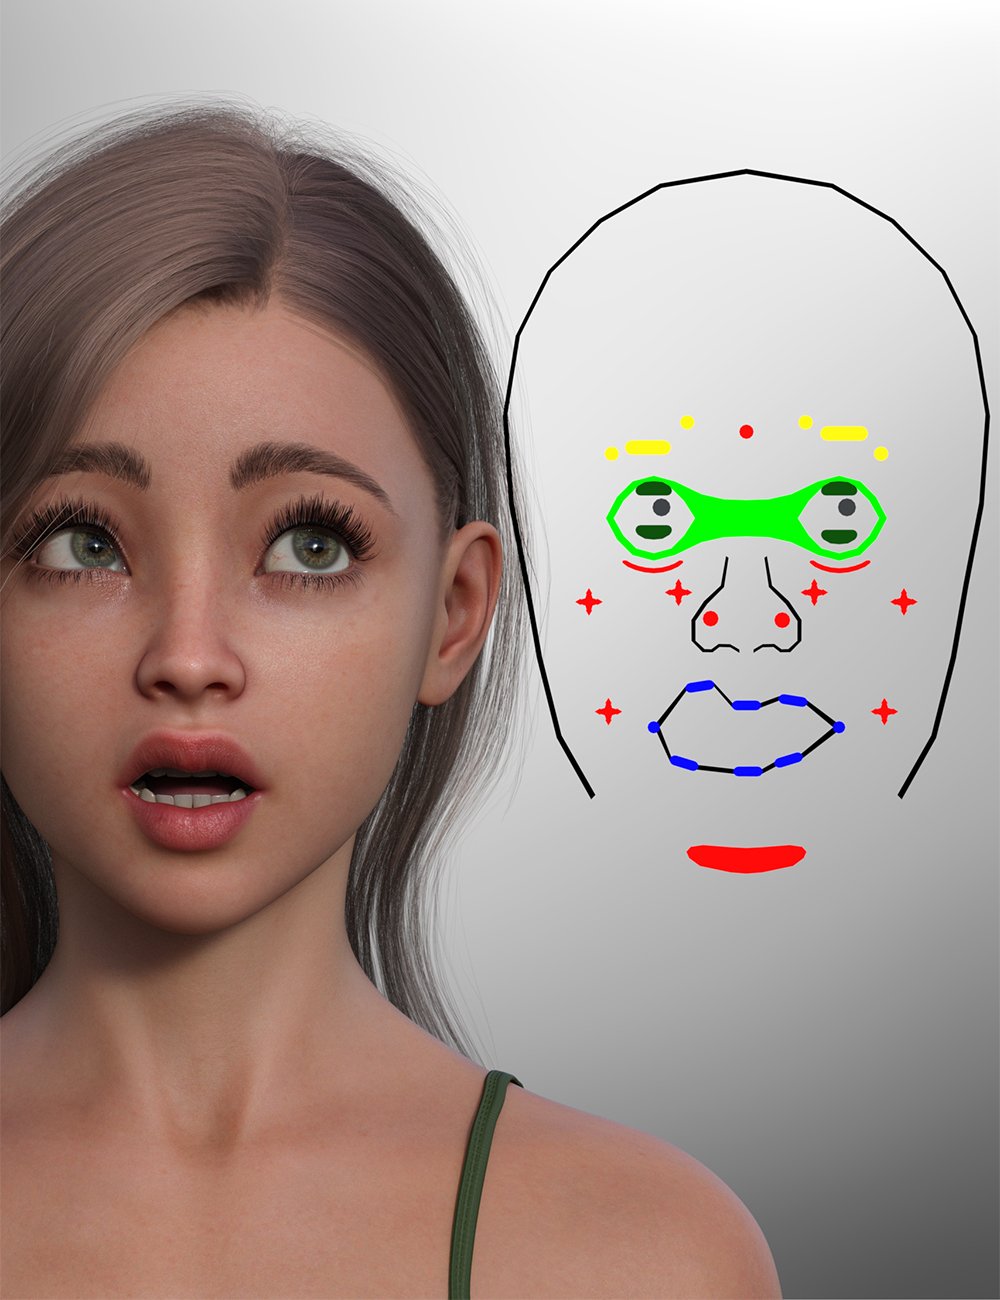 Face Control for Genesis 9
Face Control for Genesis 9 is a handy tool to make quick changes to Genesis 9's expression in an intuitive way with immediate feedback.
The utility creates a controller that sits next to the head giving quick access to all of Genesis 9's facial bones as well as creating a cameo view that frames the head and controller perfectly for the best view.
Simply use the "Translate" tool to quickly adjust the facial bones to customize the expression perfectly.
The utility also includes a controller to adjust both eyes at once making it easy to change where the character is looking in a realistic way.
https://www.daz3d.com/face-control-for-genesis-9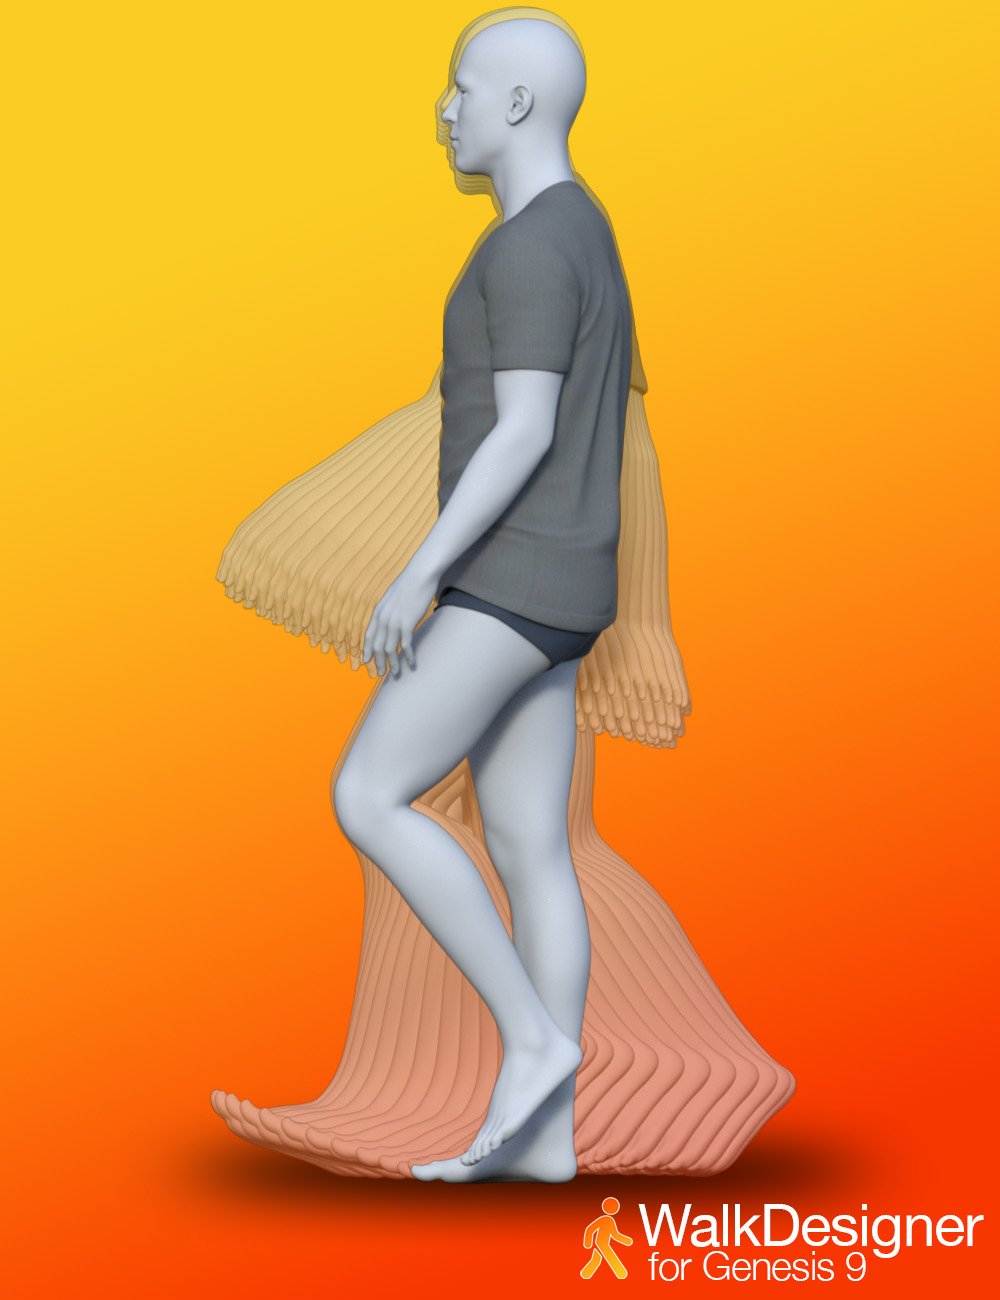 Walk Designer for Genesis 9
Craft & preview a the walk loop in real time. Simply hit - to see every tweak in motion before you commit.
The included presets give you a quick start with styles like Walk Default, Confident, Angry, Sexy, Zombie and more.
Fine-Tune everything with 15 ergonomic sliders - hips swing, stride length, shoulder height, head bob, torso twist - you can dial in personality with surgical precision.
The included Hand presets let you add relaxed hands, clenched fists, and claw shapes with one click.
Floor-Smart The optional floor-offset allow you to adjust the height above the ground plane. The figure position is automatically adjusted to ensure that the feet remain in contact with the floor. One-Click Clear Animation wipes the slate so you can iterate fearlessly.
https://www.daz3d.com/walk-designer-for-genesis-9genesis 9 anatomical elementsnatwilaniwartri_5e27fce9e1 said:
well not sure if this right place but question me strange one .. but hear we go is there way to like outmatic fit textures of main gen 9 so like maile we are matching skins that would be match origginal skin for male gen 9 genitials or skin match for like non umman skins like lizard or other human creature as trying like change the grey morph standered then edit just that to fit takes long time to make skin match but as its just using original and making large but then you doint realy get corect look.. so be very nice for quick and easy skin match for any human and no human skins. like make tool or utility to say make this skin match it as if was real looking
Short answer - that's not a feature of the DAZ made gens, BUT several of the second party created gens sets (mostly sold at Renderotica) come with built-in workarounds that let one create matching textures for the male gens from the existing figure's torso texture, and/or come with a library of starter textures to make acheiving a match much easier. In fact, the latest product from 3Feetwolf can actually create new male gen textures from the original character textures automatically with fairly seamless results, and those new textures can then be even further alterered and refined using included overlays on geoshells. And then there are also a couple of vendors at Rotica who specialize in making alternate gen textures that are sold either in sets or individually.
That said, if you want to stick with the DAZ product, the most reliable alternate that I've found is to find an existing gen texture set that's fairly close, then alter that texture in photoshop (or gimp or whatever you use) to match the skin tones of the figure that you're using, and then swap out the altered texture in DS using the surfaces tab. Realistically, the only part that has to be a dead-on match is the section of torso skin that covers the blend area. as in real life it's typical for the gens themselves to be somewhat darker than that of the belly and pubis.
Do you use characters as they come or do you modify?I fight with textures in scenes with various people. They take the iRay light so differently. Person A's skin gives hard edges to shadows, like plaster. Light shines through person B like candle wax. Person C has teeth and eyewhites that are radioactive. Person D needs the translucency channel tinted to avoid looking like a gray corpse next to the others. Different PA's, different shading approaches. Mixing and modification are necessities.
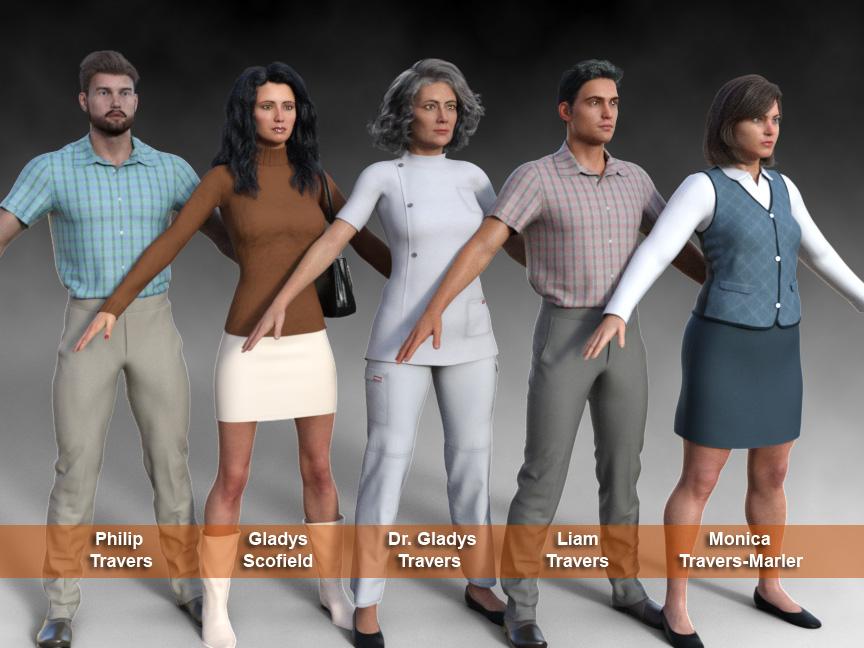
If one of my cast stands alone, an unmodified character can do just fine. If more than one are related (family, age progression, disfigurement) then I can't modify them enough. I'm always wishing for one more morph. In the image are designs for the family members in my concept. The parents in their younger years are on the left, their offspring on the right. Only Feng Adelia in the middle is unmodified... in the face, at least.
[Edited for image.]
Hallelujah!
Disciplegenesis 9 anatomical elementswell not sure if this right place but question me strange one .. but hear we go is there way to like outmatic fit textures of main gen 9 so like maile we are matching skins that would be match origginal skin for male gen 9 genitials or skin match for like non umman skins like lizard or other human creature as trying like change the grey morph standered then edit just that to fit takes long time to make skin match but as its just using original and making large but then you doint realy get corect look.. so be very nice for quick and easy skin match for any human and no human skins. like make tool or utility to say make this skin match it as if was real looking
Corrective Morphs for Pose Control ItemsI may be wrong, but loading a morph into a "slot" that is already occupied by an auto-generated morph projected from the base figure has failed to clear the geneated, and so temporary, flag or whatever does the job from the morph for me in the past so it seems worth checking
Corrective Morphs for Pose Control ItemsHi Richard, I'm trying to do a corrective morph on my mask.... Much in the same way I do Bodyshapes or Breastshapes....
If I clear the morph AFTER using the control slider THEN load my new morph to fit over the expression... Is this what you mean? This isn't the method I use for correcting Bodyshapes or Breastshapes... But I'll try it for these facial controls...
The "Animators Assemble!" thread for Daz animation WIPs, clips, and tipsFrankTheTank said:
Does anyone know are there mimic files for Daz Horse 2?
Not that I'm aware of. The DAZ Horse 2 doesn't have any phonemes, but you could take a Mimic .dmc file and edit it (it's a simple text file) to match some of the DAZ Horse's mouth morphs (there's "Open Lips", "Open Lips2", "Open Mouth", "Open Mouth 2", "Part Lips", different smiles (open and closed), etc..
You can also use the same morph at different amounts (e.g. 50%, 100%) for different phonemes to have some variety.
It'll take a little experimentationg, but it's pretty quick and easy to do.
Corrective Morphs for Pose Control ItemsI think tha if you are replacing the generated morph and it is still seen as a generated morph it will be cleared (those do not save, by design, since they will regenerate when needed); you might try resetting the pose and then using Edit>Figure>Shape>Clear Generated Morphs before loading your morph.
Corrective Morphs for Pose Control ItemsI'm creating a mask that gets distorted when using any of the "Pose Controls" such as "Pose Controls>Head>Brow>Brow Squeeze Left". I created a corrective morph, save it as "facs_bs_BrowSqueezeLeft", use Morph Loader Pro. Test it. It works. Save it using "Figure/Prop Assets".... Everything still cool. Close studio. Open studio. Go to test it again. It's not there. I open up the DATA morphs folder for the mask. My corrective file isn't saved. I figured this would work much the save way a "Bodyshape" or "Breastshape" morph would work. So I followed the same method to no avail. Is there a way to save these type of corrective morphs?
Considering M4 Mac MiniOstadan said:
Actually, I have a Windows box with a (now somewhat obsolete) graphics card, as well as my iMac, so setting up and test-rendering at low res on the Mac and transferring to the Windows box is what I used to do before some hardware issues made that less practical. It's a snap to keep the Studio assets on both systems and just transfer the finished scene (and local assets like home-edited textures).
I just want to make sure nothing will break, and that Studio will run without annoying problems.
How do you like the mini mac? I'm thinking of getting this set up.
Mac mini
Hide product details
Hardware
- Apple M4 Pro chip with 14‑core CPU, 20‑core GPU, 16-core Neural Engine
- 64GB unified memory
- 8TB SSD storage
Walk Designer for Genesis 9wolf359 said:
Watching the demo video, I'm not overly keen on some of the results as-is. But I'm confident that those results are incredibly similar (improved even) to those of Mimic Pro, and that with additional "Attention to detail" work after the fact should produce excellent results.
@Dartanbeck
I have Anilip 2 the default results are pretty robotic as there are no automatic eye blinks or slight head movement that we had at minimum with Mimic pro 3.Also if you look at the MIMIC pro 3 interface image I posted you see there were also expression tracks inside the program that you could insert in the linear timeline at any point to match the emotional context of the audio.
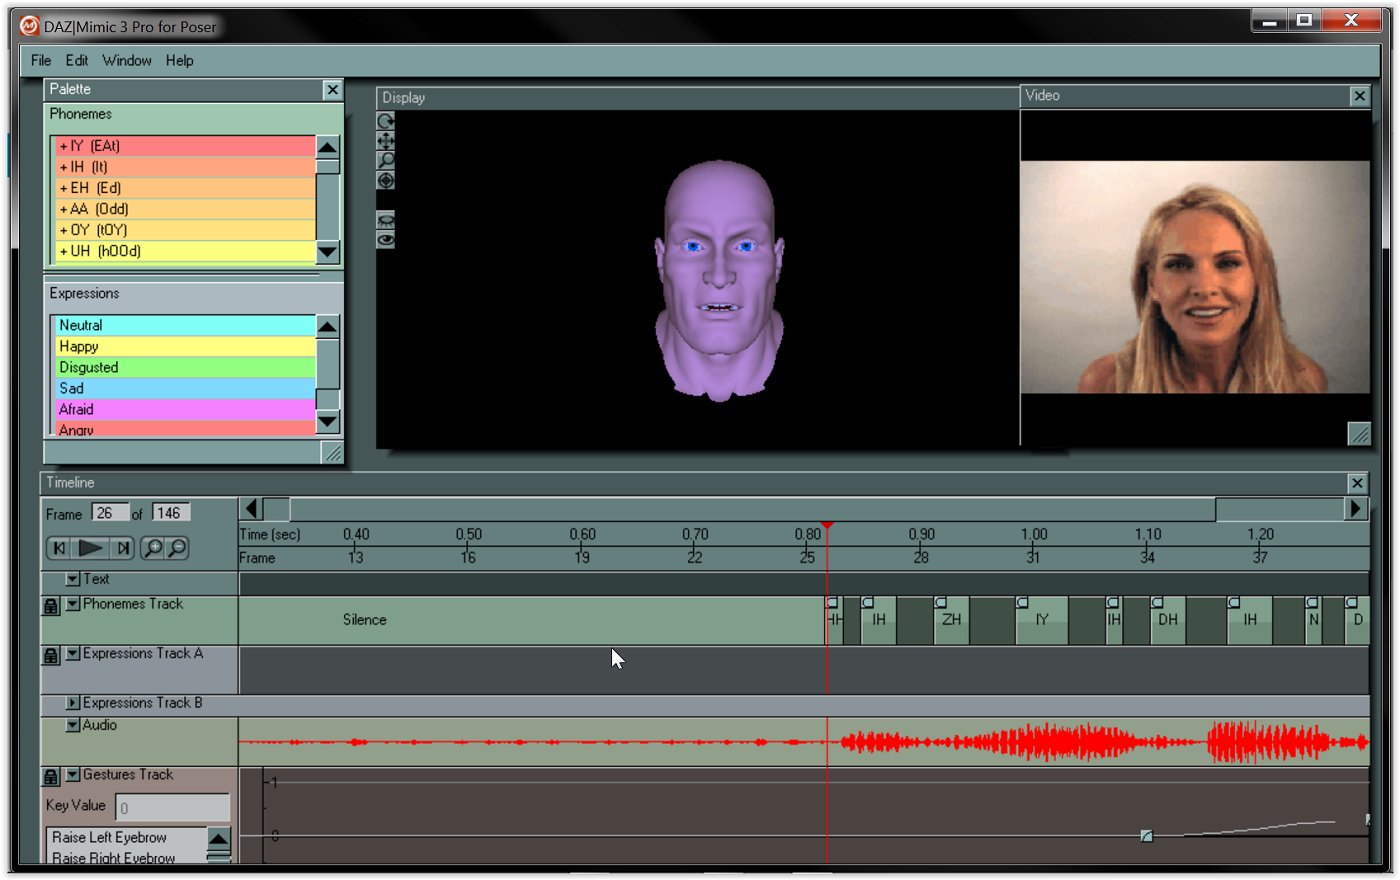
With Anilip2 any additional facial animation must be done manually with morph sliders or you could just layer on some facial expressions with facial expression aniblocks if you have them for your figure generation.
But what really interested me is that, in the video they show a graph editor tweener spline curve example - and it appears to me that they've unlocked the missing tweener that is in Daz Studio, but there is no user-facing access to it. I think that it may have been added to Daz Studio via GoFigure's aniMate 2, since that tweener is demonstrated in a GoFigure "New to aniMate 2" video, which might also help to explain why it never became a user-facing choice amongst the selection of interpolation methods.(second thing he demonstrates - "Cubic Interpolation" - I wish that we had access to that for other animation interpolations!!!)
There is no “missing cubic tweener” being “unlocked” by Anilip2.Not really sure what is being mocked up in that demo image you are showing.

Additionally that old animate video you have posted before, is showing GoFigure’s own basic spline graph editor for fine tuning aniblocks as no such feature existed in Daz studio
way back in Daz studio version 2.6 when Animate ‘basic" and "Animate + " was released.
This basic spline graph is ,of course, still available in Animate2 today and it has only ONE interpolation type.
“Cubic” to ,prevent overshoot, but
(as I explain below) you already have a superior form of “cubic” in the main Daz studio Graph Editor and Dope sheet.
The Daz studio timeline and graph editor gives you access to every animated parameter in your scene including the animation Data track created by an Anilip2 lipsinc animation.
Look at this screenshot of an Anilip 2 animation
exposed in the Daz studio graph editor& Dope sheet
Note the areas I have circled in RED
you see all of the animated visemes in the Dope sheet (top)
and their corresponding spline key frames in the spline graph editor (bottom)
These are custom visemes that install with the Anilip 2 product.Also note the three spline interpolation types
from which you can choose (at the lower right.)
TCB ,Linear , ConstantTCB is actually the same as “cubic” interpolation in that they both clamp any key to its maximum value
(preventing spline over shoot), but with even more fine tuning controls of the curve as “TCB means “Tension Continuity & Bias”
So again nothing is “missing” from Daz studio graph editorThese are the same industry standard keyframe interpolation types we have in Maya, Max Blender, C4D, Iclone.
The main difference being we have many spline filtering effects options in the big pro apps like jitter, oscillation and key frame reduction tools to make mocap editing managable in your spline graph editor.
Cascadeure’s powerful
“unbaking mocap” feature is vital to editing spline graph animation from motion captured data
or motion clips like aniblocks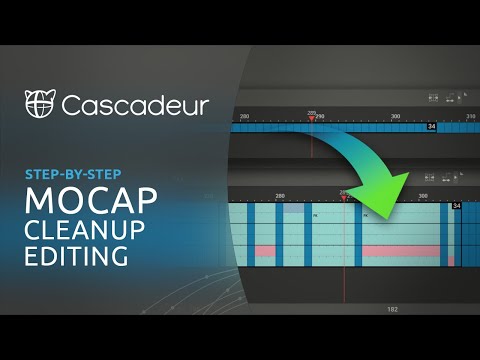
MCJ’s key reduction script serve a similar purpose for Daz studio
https://sites.google.com/site/mcasualsdazscripts/mcjdecimate-for-ds-12-3
Aslo Daz studio animators can easily add such spline filters as well with MCJ’s FREE “cycler” utility for automaticaly creating a HUGE variety of effects such as bouncing balls, auto Rotating helicopter blades or vehicle tires or animation of body morphs to create the appearance of soft body simulation (Fat Jiggles)

Other than a proper IK/FK foot/hand contact solver/switcher (like you have seen in cascaduer)
Daz studio has everything you would need to make some decent FK body animation however, IMHO, the facial animation system just needs a modern day functional equivalent of the Mimic Pro 3 for G8-9.
so if 3DU can pull that off he will make a fortune!!!Hey Wolf359! Quick question, how did you get your TCB to not overshoot? Is that something that Daz has changed in a new version? Mine has always overshot and I could never figure out how to stop that other than adding another keyframe or two between the stop and start and setting those keys to constant.
Is the Bridge changing the initial mesh during the CD4 creationI have a new computer and had with a new install of DAZ3D and the latest Bridge and have a problem I didn't have before using the same version of Cinema 4D V21.
When the Bridge creates a new Cinema 4D file, the Genesis 8 Female is created with no errors and the JCM morphs work. The new problem I'm having is if I export a FBX from the exact same file in DAZ3D that the Bridge used except with a face or body morph and add it to the Cinema4D morph tag, the entire Genesis 8 Female mesh has other deformations such as the teeth, ears, etc.
Even if I export the Genesis 8 Female with no morphs applied at all, within Cinema 4D the same Genesis 8 Female mesh deformations occur.
If I do the same thing manually not using the Bridge (meaning I don't get the benefit of Bridge JCM creation tools) I do not get the Genesis 8 Female mesh deformations. This implies the Bridge is some how making small mesh changes during exporting process it didn't do before.
Walk Designer for Genesis 9Watching the demo video, I'm not overly keen on some of the results as-is. But I'm confident that those results are incredibly similar (improved even) to those of Mimic Pro, and that with additional "Attention to detail" work after the fact should produce excellent results.
@Dartanbeck
I have Anilip 2 the default results are pretty robotic as there are no automatic eye blinks or slight head movement that we had at minimum with Mimic pro 3.Also if you look at the MIMIC pro 3 interface image I posted you see there were also expression tracks inside the program that you could insert in the linear timeline at any point to match the emotional context of the audio.
With Anilip2 any additional facial animation must be done manually with morph sliders or you could just layer on some facial expressions with facial expression aniblocks if you have them for your figure generation.
But what really interested me is that, in the video they show a graph editor tweener spline curve example - and it appears to me that they've unlocked the missing tweener that is in Daz Studio, but there is no user-facing access to it. I think that it may have been added to Daz Studio via GoFigure's aniMate 2, since that tweener is demonstrated in a GoFigure "New to aniMate 2" video, which might also help to explain why it never became a user-facing choice amongst the selection of interpolation methods.(second thing he demonstrates - "Cubic Interpolation" - I wish that we had access to that for other animation interpolations!!!)
There is no “missing cubic tweener” being “unlocked” by Anilip2.Not really sure what is being mocked up in that demo image you are showing.
Additionally that old animate video you have posted before, is showing GoFigure’s own basic spline graph editor for fine tuning aniblocks as no such feature existed in Daz studio
way back in Daz studio version 2.6 when Animate ‘basic" and "Animate + " was released.This basic spline graph is ,of course, still available in Animate2 today and it has only ONE interpolation type.
“Cubic” to ,prevent overshoot, but
(as I explain below) you already have a superior form of “cubic” in the main Daz studio Graph Editor and Dope sheet.
The Daz studio timeline and graph editor gives you access to every animated parameter in your scene including the animation Data track created by an Anilip2 lipsinc animation.
Look at this screenshot of an Anilip 2 animation
exposed in the Daz studio graph editor& Dope sheetNote the areas I have circled in RED
you see all of the animated visemes in the Dope sheet (top)
and their corresponding spline key frames in the spline graph editor (bottom)
These are custom visemes that install with the Anilip 2 product.Also note the three spline interpolation types
from which you can choose (at the lower right.)
TCB ,Linear , ConstantTCB is actually the same as “cubic” interpolation in that they both clamp any key to its maximum value
(preventing spline over shoot), but with even more fine tuning controls of the curve as “TCB means “Tension Continuity & Bias”
So again nothing is “missing” from Daz studio graph editorThese are the same industry standard keyframe interpolation types we have in Maya, Max Blender, C4D, Iclone.
The main difference being we have many spline filtering effects options in the big pro apps like jitter, oscillation and key frame reduction tools to make mocap editing managable in your spline graph editor.
Cascadeure’s powerful
“unbaking mocap” feature is vital to editing spline graph animation from motion captured data
or motion clips like aniblocksMCJ’s key reduction script serve a similar purpose for Daz studio
https://sites.google.com/site/mcasualsdazscripts/mcjdecimate-for-ds-12-3
Aslo Daz studio animators can easily add such spline filters as well with MCJ’s FREE “cycler” utility for automaticaly creating a HUGE variety of effects such as bouncing balls, auto Rotating helicopter blades or vehicle tires or animation of body morphs to create the appearance of soft body simulation (Fat Jiggles)Other than a proper IK/FK foot/hand contact solver/switcher (like you have seen in cascaduer)
Daz studio has everything you would need to make some decent FK body animation however, IMHO, the facial animation system just needs a modern day functional equivalent of the Mimic Pro 3 for G8-9.
so if 3DU can pull that off he will make a fortune!!!more....Wacky Modelling ~ In Carrara ~great to see all your interpretations


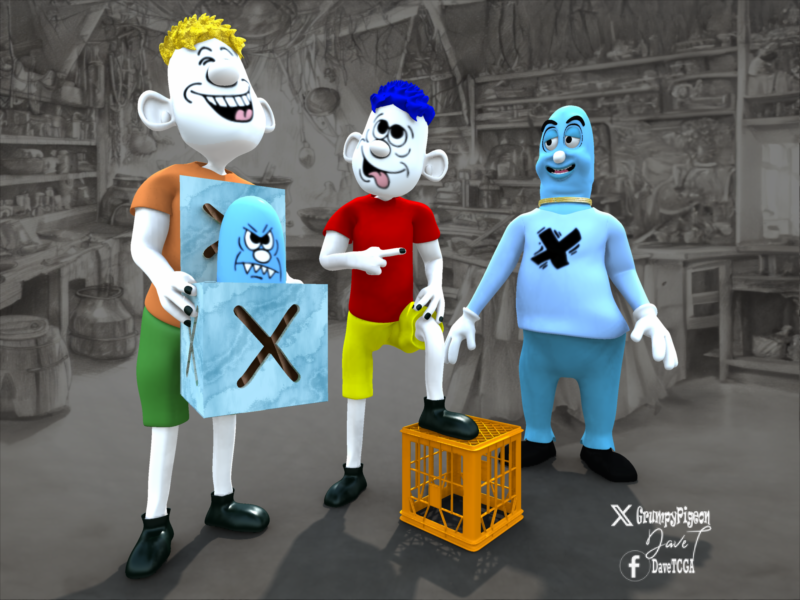
something different today on 'Mad Monday'
I modelled a fun bod from the cube and boned it and added a morph... but then using Co-Pilot in MS Edge I asked it to toon my render.
Here is the result ..original render and CoPilot imagining

 Marahzen's Musings on Creating Characters (and other matters)
I've finally circled back to something that I spent a lot of time studying years ago, before I wandered off down the path of creating "insta people" for product tests. Yes, my "insta people" are very satisfying: by definition, they are quick and easy to make, and many of them are pretty nice and close to what I had in mind for those characters. Ultimately, it really doesn't matter if I continue to create my own personal characters that way for motivational illustrations that no one but me will ever see. But it was high time that I took a minute to look under the hood of what went into the creation of the characters that I'm borrowing and slapping my Face Transfer 2/FaceGen textures on. That was my excuse for buying all of these characters - to analyze their textures and configurations to see what I like and then create my own.
I set up a simple scene and then created more than a half-dozen versions of Tai, my story's main character, with varying PA/Daz core characters underneath. I rendered the same view and took note of all of the skin settings.
Behind the scenes, there's a lot of similarity. In this test, I specifically picked numerous commercial characters from different PAs as well as a couple of Daz core G9s. There were some PAs that I didn't study here: CynderBlue comes to mind first. I love the CB characters and literally have all of the G9 ones, but none of them work well with Tai. I found out early on that a character doesn't have to be a dead ringer for my character in order to apply that character's mat files and replace with my textures, and get something that doesn't look weird, but if there's a significant difference in skin tone or age, I can assume it's going to be a bad match.
I'm not going to share any sort of proprietary info about commercial characters, but I will say that SC Isla, whom I picked up a couple of weeks ago, was significantly different in construction than the others that I tested in this particular round of research.
Having analyzed all of surface settings, I sat down and did texture editing on Tai's FT2-generated texture for ... well, for about the first time in years: removing eyebrows, fixing glitched eyelids (which both FaceGen and Face Transfer do) and retouching face stains a bit, which even FT2 still does to some extent. Luckily, I had notes for doing all this in Photoshop; it's been a long time. Also with Photoshop, I created an SSS version of fixed diffuse texture. I then gave Materialize a go and created, to the best of my first-time-I-really-sat-down-and-tried-to-use-it ability, a full set of height, roughness, specular, normal and AOs. This created a bunch of mat files that are way below professional caliber, but one has to start somewhere.
This is the original render using CS Isla, with my original diffuse textures from FT2:

This version uses all of the configurations, while replacing all of the CS Isla map files (except for a couple of Detail maps) with the ones I created with Materialize from my character's fixed texture:

I went as far as doing head, body and arm files. Here's a render I did looking for obvious ugly seams, at least up here where those come together:
 Transferring G8 morphs to G9
...I think I'll wait until Zev0 comes out with an updated XTransfer utility. The really nice thing about the G8 version is it also accommodates any morphs through other morph kits and plugins (including GenX/GenX2) as well Hence I have G1 and G2 available to use with G8 as well.
Makes for one heck of a huge "gene pool" to work with for character design..
Celebrity Look-a-Likes for 3D figures Part 4bigoskar00 said:
does anyone know if it exist an Allison Harvard look alike out there?

I bet if you start with a Wednesday Addams/Jenna Ortega character and mix in some morphs from a face morph kit you could get pretty close. They have a really similar look.
Walk Designer for Genesis 9Anilip 2 looks like it has a very Mimic Pro-like system with a Ton of tools for post-processing the results of the automated lip sync.
Along with the added controls I was mentioning above, I intend to start working with Anilip 2 very soon here. I don't really do dialog in my videos, but I'm going to (finally) try Anilip 2 just to see how it all works - because it looks like they've put a lot of heart and soul into the project.
If you watch as I mess with my facial musculature controls in my videos, you'll notice that I have a set of purple viseme dials. Those came with Anilip 2 - Augmented Visemes for Genesis 8, and I love using them for helping to shape the lower section (jaw, lips, etc.,) of the face. I love that they go past the boundaries of the standard viseme set as well as separating the lip portion of the morph from the jaw control as individual dials - very handy for "individualizing" facial characteristics.
Example: I use "K - Lips Only" augmented viseme for several of Rosie's facial musculature dials because of how it shapes the lips - one dial that does a lot of what I was trying to perform using many others in the Mouth section - so it saves time and I like the results better.

AA - Jaw Only is also an excellent dial for opeing and closing the mouth.


Another note that feels important to me about Anilip 2:
Watching the demo video, I'm not overly keen on some of the results as-is. But I'm confident that those results are incredibly similar (improved even) to those of Mimic Pro, and that with additional "Attention to detail" work after the fact should produce excellent results.
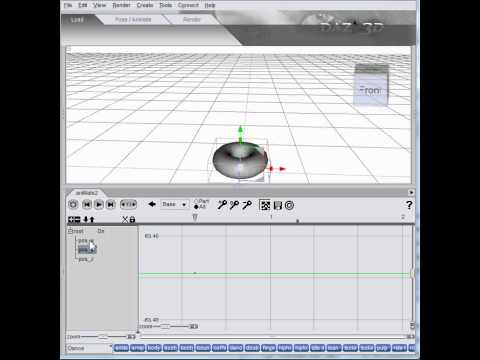
 But what really interested me is that, in the video they show a graph editor tweener spline curve example - and it appears to me that they've unlocked the missing tweener that is in Daz Studio, but there is no user-facing access to it. I think that it may have been added to Daz Studio via GoFigure's aniMate 2, since that tweener is demonstrated in a GoFigure "New to aniMate 2" video, which might also help to explain why it never became a user-facing choice amongst the selection of interpolation methods.
(second thing he demonstrates - "Cubic Interpolation" - I wish that we had access to that for other animation interpolations!!!)
Daz 3D is part of

Connect
DAZ Productions, Inc.
7533 S Center View Ct #4664
West Jordan, UT 84084Licensing Agreement | Terms of Service | Privacy Policy | EULA
© 2026 Daz Productions Inc. All Rights Reserved.