February 2023 - DAZ 3D New User Challenge - Lighting and Light Effects
 Linwelly
Posts: 6,070
Linwelly
Posts: 6,070
Sponsored by DAZ 3D
Are you new to the 3D World? Are you at the beginning stages of learning 3D rendering? Have you been around for a little bit but feel you could benefit from some feedback or instruction? Have you been around awhile and would like to help other members start their creative journey? Well then come and join the fun as we host our newest render challenge!
Each month, there are two different challenges: A Beginner Challenge and an Intermediate Challenge.
So which "Challenge" should you choose?
Follow the Beginner Challenge if you are:
- New to the New User Challenges
- New to Daz Studio
- Newer to 3D Rendering in General
- Or if you have not participated in the February Lighting Challenge
Follow the Intermediate Challenge if you have:
- Participated in the New User Challenge for awhile
- Know the basics of Daz Studio and would like to learn more in depth topics
- Been using 3D Rendering Applications for awhile and feel comfortable with learning Intermediate Topics
- Or if you have all ready participated in the February Lighting Challenge
*Please be sure to list in your post which Challenge you are participating in*
Also please note that there has been an update to the rules: Challenge Rules
more specifically:
(...)
YOU MAY:
1. Make revisions (...)
2. (Updated to Clarify: January 8th, 2023) Use any 3D program you choose to create your image. That said, the artwork created has to be made by you in a 3D Application. AI Generated artwork is not allowed since the point of the challenge is to learn and apply different skills, highlighted in each Challenge, and show an understanding of how that skill can be used.
3. Post-work your image. (...)
Daz 3D is part of 
Connect
DAZ Productions, Inc.
7533 S Center View Ct #4664
West Jordan, UT 84084
Licensing Agreement | Terms of Service | Privacy Policy | EULA
© 2026 Daz Productions Inc. All Rights Reserved.
Comments
Beginner Challenge:
"Lighting"
This month's focus will be on how you light your image. Lighting is what defines and enhances the viewer's experience when looking at an image. Lighting helps a viewer to "see" the story. The presence of light, or the lack thereof, provides us with the ability to believe the world we are looking at. It can tell us if an object is round, whether it is close or far away, what colors were used and even if the surface is reflective. As an artist, it will be your ability to master the use of light, that will set you apart from the others. Below is a source list of lighting tutorials, articles and videos that will help you understand how to use your software, the different techniques used to light a scene, and the theory behind why lighting is needed. This list is not comprehensive; it is just a starting point.
Also, keep in mind the topics we've covered during previous challenges. Build upon what you have learned to create a compelling image to light this month.
This year of New User challenges is just getting started. So far this year we have covered :
Composition
Inspiration:
Check out the amazing entries and discussion in last year's Lighting Challenge.
Other Helpful Links:
When following tutorials, be cognizant of the different applications (Bryce, Daz Studio, Poser, Carrara Blender, etc.) and different render engines (3Delight, Iray, Reality, etc). Techniques for one may not apply directly to another.
How to Use Your Software:
DAZ Studio
VII - Lights
Daz 101: Lighting (video)
Point Lights, the Basics
DAZ Studio Lights Tutorial - Presets - 3D Software (this contains undressed characters that's why it has a warning at the start, just so you know)
3Delight IBL or HDR type lighting environments
UberEnvironment2 - Made Easy
UberEnvironment2 Basics
Learning UberEnvironment 2 Return to Topic
Uber Area Lighting: The Basics
commercial for 3Delight
IBL Master (store link) IBL Master Discussion (forum discussion)
Iray
Creating and Lighting a Scene with Iray in DAZ Studio by SickleYield
Lighting and Tone Mapping in Iray by SickleYield
commercial for Iray
Emission Profile Master (store link) Emission Profile Master Discussion (forum discussion)
Regarding ghostlights which had some changes since we last had this challenge: https://www.daz3d.com/forums/discussion/551301/ghost-lights-what-s-happening-and-what-s-next/p1
Poser
Poser Pro 11 Tutorial: Lighting, Part 1 https://www.youtube.com/watch?v=ZjCkDHWX6VM
Poser Pro 11 Tutorial: Lighting, Part 2 https://www.youtube.com/watch?v=J_paY90kz40
POSER Tutorial Lesson 3: Lights https://www.youtube.com/watch?v=v3m4Xy5lPrE
Bryce
Artist’s guide page 125
Thoughts on Lighting in Bryce 7.1 by Rashad
Bryce: http://www.youtube.com/watch?v=C772CuZ6RgI
Bryce: http://www.bryce-tutorials.info/bryce-tutorials/lighting-and-skies.html#
Bryce: https://www.youtube.com/watch?v=e-Pe-IVp_dY
Theory:
Mastering Lighting in Blender the first 25 minutes of the video is relevant for everyone not just blender users.
Lighting Basics:
http://www.amaanakram.com/lightingT/part1.htm
http://www.3drender.com/light/3point.html
http://bensimonds.com/2010/06/03/lighting-tips-from-the-masters/
I will be checking in as will the rest of the Community Volunteers to try and help with anything you all may need.
For a list of the current contest rules, please see this thread: Challenge Rules
Closing Date: February 28, 2023
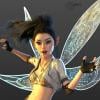
one example for the use of lights
Intermediate Challenge:
"Light Effects"
This is a general render challenge with the focus on using varous Light Effects, such as Gels and Gobos. We are providing you with some links on the topics from a variety of sources.
Gobos can be used to make interesting shadows and patterns, such as leaves, window blinds, geometric shapes, etc. Your imagination is the only limitation.
Gobos and Gels can be used in both 3Delight and Iray. There are many products in the DAZ Store or, if you are really adventurous, you can try to make your own.
This is as well where you can play around with bloom and all the fancy sliders in the tone mapping and environment settings
Gobo and Color Gel Lights Definition, Explanations and Examples
Gobo / Gel Light Definition
Color Gel
Gobo Light Portrait Examples
Gel Light Portrait images Examples
Gobo vs Light Gel
Gel Light Tutorials:
DAZ Studio Tutorial – Light Gels and “no poke through”
Daz Studio Lighting Tutorial - Gel Lights https://www.youtube.com/watch?v=L-BUXBjeQ9w
Daz Studio Iray Tutorial: How to Make Your Own Gel Light - text tutorial
Tone mapping and environment:
Tone Mapping DAZ Documentation
DazStudio Iray Render Settings - Tone Mapping - Guide With Examples (DAZ Forum Discussion)
Daz3d Tutorial | How To Use Tone Mapping (youtube by Steven Davis)
[Tutorial] Lighting and Tone Mapping In Iray (DeviantArt tutorial by SickleYield)
Environment (DAZ Documentation)
Closing Date: February 28, 2023
gobo -gel light combinatioin in action
I'm able to be rendering once again now that I've got a new laptop.
So here's my start for the beginner challenge.
My idea is for the subject to be primaraly lit by the screens of the computer he's standing at, though I'm going to see about using some of the other locations in the set to add some more light if need be, this is after all my start for the month.
welcome back Shinji yes, the idea is neat I like that as well. I did this thing some years back where I used the screen to actually project something on her face, but to make that work I had to crank the emissive up very much
It's good to be back Linwelly, it's good to be back.
Anyhow here's version B of this months project. I did some texture work getting more light in the area, and changed the texture of the background to one for Iray.
Title: Beatriz
Level: Intermediate
Combination of gel lights and gobo. I used a product called Metallic Gel Portrait Lighting for Iray https://www.daz3d.com/metallic-gel-portrait-lighting-for-iray
As usual all critiques and suggestions welcome.
Beginner challenge... Hi. First time poster! I have been intersted in Daz/3D modelling for awhile now, but have only this last month been actually learning the Daz Studio software. I have experience in studio photography, so a lot of the concepts are familiar to me, it's just needing to learn my tools. Here I was trying to learn about luminence levels balanced agaist camera settings, clearly not normal lighting, I wanted the drama. :) I can see I have a lot of work to do on it, as the highlights are blown out, and the shadows are pixelated. Constructive feedback appreciated!

Version C here.
I did some tweeking to the various light sources I'm using on this (Upped the luman on the screens and lowered the luman on the overhead lights), and added some sources on the computer rig.
I decided to change my characters pose so we could see his reaction better, though I found myself changing his shirt becouse the first one was looking out of wack on the colar area. I also gave him some dogtags and a pair of goggles that are letting us have a glimpse of what he's reacting to.
Welcome to the challenge! So happy to have you here

On the pose, you did an excellent job (thats not an easy pose). I also agree on the light/shadow comments you mentioned. I would lower the light down some or change the shade a smidge which can make a difference sometimes and to help with the shadow, possible consider adding a soft fill light (generally when the shadows pixelates its just a tinge too dark) If you want to make it less destracting you could try like a light pink/soft fill that goes with the main color you chose. Or you could just go for very soft/low white/grey light as well and that should resolve the shadow issue. You could also try adjusting things a bit (or playing a bit) with exposure in the Render Tab as well. Very well done on your first challenge entry! Feel free to rework and repost and experiment. We hope you enjoy the challenge!
interesting choice on the lights and I like that detail that the flower lights up her eye like that, I would suggest to add a little fill light from the right side of the image so we can see a little more of her face, still in the shadow though
nice improvements, the glasses are a good idea to catch more aspects
Title: Encounter in the corridor
Level: Beginner
Major Items:
https://www.daz3d.com/hm-bellah-hd-for-genesis-9
https://www.daz3d.com/dforce-hm-almira-outfit-for-genesis-9
https://www.daz3d.com/hm-bellah-makeup-for-genesis-9
https://www.daz3d.com/sci-fi-kit-2016
Supporting Item:
https://www.daz3d.com/ashendun-hair-for-genesis-9
http://docs.daz3d.com/doku.php/public/read_me/index/88390/start
https://www.daz3d.com/hm-bellah-makeup-for-genesis-9
Additional Helpful Resources:
https://www.daz3d.com/killer-lighting--lighting-for-photorealistic-renders-bundle
Your suggestions for improvement are (as always) welcome.
The wizard cast a spell
This is my entry for the intermediate challenge.
I used the Advanced spotlight with a Zigzag Gobo from https://www.daz3d.com/film-noir-iray-portrait-studio-vol-ii
I also used a special effect from SY Magnificent magic for the swirl around the body of the wizard
I would welcome any constructive criticism.
looking good so far, I like the reflective parts on her suit. I think the light reflecting on the entrance is taking away the attention from the character, so it gets a little unclear what story you would like to tell here since she's as well looking away from the opening/closing entrance
I assume you are still using 3dlight renderer, since the magic effect here is missing the glow it would have if you used iray. So we need to find a way to make it a nice effect in 3dlight, which si a bit a challenge. using the gobo lights is already a good start but you need to increase them I think to make the whole scene a bit brighter. As well I suggest you use linear point lights in combination with the magic sparkles and maybe a spot light coming from below the magic swirling around. As well you could adapt the surcaces of the macig to have a powerfull ambient channel (feed the opacyty or the base map into the ambient channel and chank it way up). There is a tool by Marcian reflective radiance that helps with that but you don't actually need it.
My entry in to the new user beginner light challenge. Theres a small amount of noise still in the image, but after 4 attempts and several hours of render time, Im submitting it before i go nuts trying to eliminate the noise. No post work. Figure is a G9 character (Nikolai Hd), with some G8 clones thrown in (The brute 8, Maxx HD, Ezra 8 and Bruce HD (8.1). Scene is Winterfell house maniuplated for the image. Credit to the artists who made the characters and the scene for their art work.
Welcome to the NUC and very good work with the different light sources the outside in warm tones shining on the photo and him sitting in the darker place with the cold light, Love as well how heÄs hugging that cushion, very well done!
just a note on the side, I found that the genesis 9 figures are an incredible resource hog on the computer, I had mine fall back to CPU render with 1 G9 on one G3 character and not that much other objects and I don't have a bad rig, so I can relate to why the render is still grainy. Additionally for Iray darker scenes or partially darker scenes will take far longer to render than bright ones. So for the future you might consider taking out the HD, using lower texture settings of characters or a different generation in order to get a render done in reasonable time.
title:light fantasies
intermediate .Lightning effects
program: Daz Studio Iray
It's about caustics, reflections and refraction.
If I find time, I will try some variations like colored glass or stronger caustics.
lovely experiment with quite awesome results, one thought though, you might want to try with a different floor shader, I like it in the back but I think it swallows some of the caustic effects we would otherwise see on the floor
My target was actually getting the floor dark like the background, but with strong caustics. Just getting strong caustics is quiet simple with a black shader but with something more unusual like a colored pattern it becomes very complicated.
The bright color at the floor comes from the strong light which I need for the caustics. Darkening the diffuse ore glossy channel darkens also the caustics. Before I get rid of the floor shader, I will experiment a little bit with this shader.
Here's the second version of "The Wizard casting a spell"
I added an extra spotlight pointing up from where the wizard is standing.
I also added the Ultrueviolet Shader to the helix around the wizard.
Constructive feedback is welcome
Hi all. I'm new to the New User Challenge, and still relatively new to DAZ. Making slow but noticeable progress, and thought I might try one of the challenges. Below are my working notes for the render (converted from markdown)
"End of the Watch"
Description
About
General
Rendered with Iray. Created for the Feb 2023 Daz 3D New User Challenge - Lighting and Light Effects.
The image concept is a story prompt for the SCP universe - the sealing of a Foundation site, for unspecified reasons, to contain an unspecified anomoly. To contain the anomaly, something happens, sealing the site just before a total solar eclipse takes place overhead.
Lighting
The lighting setup is very straightforward; the render options are set to include both dome and scene.
The HDRI in use provides environmental lighting and background terrain for a general-purpose outdoor, afternoon scene. There is also a single distant light in the scene to cast shadows in the mid- and foregrounds.
In the midground, the Bighorn Patrol vehicle surfaces related to lights were set to emissive, and window glass surfaces set to use a refractive index of 5, providing nice reflective windows and avoiding additional geomtery putting a driver in the seat.
Finally, in the render settings, the Envrionment Tint is set to 0.77,0.28,0.0012 (orange) in an effort to simulate a pending total eclipse of the sun.
Renders and Compositing
The final image merged 3 source renders at Quad HD resolution, with the rendering quality set at 4. Multiple source renders were used to avoid undesired reflections from the foreground visible on the shockwave shells.
The renders were imported into as layers into a new Gimp image, the layers flattened and a gaussian blur applied (Size X,Size Y=1.1) to deal with some minor render artifacts and improve the blending of the explosion billboard into the background. The image was then finally scaled down to HD resolution for sharing.
Known Issues / Future Steps
Assets
title:light fantasies
intermediate .Lightning effects
program: Daz Studio Iray
I've tried a darker shader for BG and floor.and some colored glass.
Image title, "Classroom".
Entry for Feb 2023 INTERMEDIATE Lighting and Light Effects contest.
This image had so much stuff in it that my computer kept black screening on me.
I could have rendered this with my PC, but this image took over 6000 iterations on my GPU and still the granularity of the atmosphere can be detected.
Instead of a gobo I used the classroom windows as the gobo.
I set three spotlights, one each, on the outside of each window to create a very slight ray effect coming through the glass.
This alone was not enough because my figures in the room were dark with the window rays alone.
So, I had to use scene overhead lights to enhance the ambiance of the room.
It took a balance of the scene lights and the lights through the windows to give the room a subtle dichotomy of light sources.
This gave the scene a filtered, subtle, dreamlike look of realism.
Each character, their clothing and hair had to be set to base resolution to fit them into the scene.
Unseen walls had to be replaced with planes and the scene scrubbed of all extraneous items.
The scene took a big hit also due to the HDRI outside the windows.
Their poses are done mostly manually.
Every 10 tries after much tweaking, one try would maybe actually render.
I had to constantly restart my PC to empty out the video ram.
This scene could take up to 15 minutes to load in Daz.
Often it would just sit there and not load at all.
I wanted to add more books, maybe beverages, laptops, phones and some bookbags clothing over the seats but I could not fit even a single plane more or I would have spent two weeks rendering this on CPU.
I rendered this with 2x3090s in SLI, but memory pooling does not work currently in Daz.
Lighting a room full of characters is an interesting project.
Luckily the ambiance of the lighting seemed to do the trick without any need for more precise lights up close.
Best of luck everyone! I love the other entries so far!
RexRed
title:light fantasies
intermediate .Lightning effects
program: Daz Studio Iray
Now a new shader for the ground and more spotlights instead of point lights.
I like how the sparkles look already very much, for the bands, they still look a bit bland?they couls use some more colour maybe? Also I notice that you might have turned off shadows in the render settings?
welcome to the new user challenge, quite a setting you have chosen for the start and very clever to split it up tinto single renders and unite them.
While we are trying to encourage doing most work in the 3d program in this rare cae I would suggest for you to do the shockwave in Gimp as well, there is a very nice filter for that I can try and find what it's called if you're interested. Though you already did a really good equivalent here in DAZ studio.
There isn't much I could say about the light settings, they are already pretty neat, you could try to increase the burn highlights and crush blacks to have harder contrasts (this is in tone mapping settings) or try using bloom to give a feel of radiance from the explosion.
pretty impressive work with these many characters and your work on the light is really nice, therefore my input will mostly go to additional ideas for handling large secenes
use instancing whereever possible (here the desks if you didn't instance them already).
for characters which are partly or mostly covered with clothes you can close the eye icon on all bones that are covered by clothes (like feet and legs in trousers and shoes)
instead of using HDRI, use a plane with an image of the outside places strategically placed with a bit of distance from the windows (maybe even make a rendered image of the HDRI if you like that scene and use that image) you could combine them in postwork as well, add a slight blurr to the image so it looks out of focus. If you use the plane in the render make sure to reduce gloss to minmum and feed the image into the emmissive channel as well with a low amount of emissive power.
remove the bump, displacement and normal maps from the characters and clothing in the back (for this and other texture reduction there is a neat tool available in the shop called scene optimiser, this helps when you plan on more scenes which challenge your system.
render in layers is another option
wow, yes! now this pops, well done
Here is the latest iteration of this image.
A lot has been done to improve it.
I had hands going through clothing, changed some of the clothing itself.
None of them have teeth anymore. lol
I had to change Victoria 9's skin to regular Genesis 9 skin.
I deleted bump and normal maps in a few characters in the back.
And yes, I did instance the desks.
I did not think of turning off body parts under clothing but that would be the next thing if I had not gotten a fraction of headroom to render.
Victoria got a pair of glasses, and they swallowed up the headroom I garnered.
It took 45+ minutes to load the scene so I had to turn off thousands of Geneses 8 morphs.
Now it loads in about 3 minutes. This image made it to about 8000 iterations before completing.
The light is finer looking now and the atmosphere a bit less granular.
I also changed poses to a lot of the figures, made them look ahead more instead of into the camera.
A lot of the clothing had poke through some of the dresses were not even wrapped around the figures and George had a straight jacked his arms got surrounded by his waist clothing, that got fixed as well.
Some of the books were floating off the desk.
My VDB particle field was not filling the whole room, I was able to make the VDB a bit bigger to encompass the entire room.
There are two Genesis 9 figures, the male and female in the forefront of the image. They still have their morphs.
There is a lot of fiber mesh hair going on in this scene, I assume that took a huge amount of resources as well. I lowered subd in many instances.
Everything in the entire scene is base resolution even eyelashes, except Redz Kaz's shirt in the forefront it was too wrinkly, so I had to turn up subD and set the definition to high.
Turning off morphs did not create much render room, it just lowered scene load times immensely which was absolutely necessary.
Right up to the end I still had to reload the scene to clear out the video ram quite frequently.
I encountered the black screen a few hundred times with this scene.
I had to get rid of the billboard guy in the back of the room, he looked terrible and I could not secure enough video ram to load another figure in the far corner.
(Please give us memory pooling that works in Daz.)
This scene I will perhaps revisit when I can double my memory footprint.
A few laptops, some deforce clothing strewn around, backpacks, food items more books and maybe someone will be allowed to open their mouth and smile.
Thank you Linwelly for your awesome tips as well!
I had not thought of shutting off body parts under clothing, If I revisit this scene that is where I am going.
I think this scene is done for now, it has been a fun project and I have learned a lot in the process.
I feel I have become acquainted with some new friends as well. And Mabel does not look as depressed anymore.
I will refer to this scene as Classroom (Day 2)