Show Us Your Bryce Renders Part 10
This discussion has been closed.
Daz 3D is part of 
Connect
DAZ Productions, Inc.
7533 S Center View Ct #4664
West Jordan, UT 84084
Licensing Agreement | Terms of Service | Privacy Policy | EULA
© 2026 Daz Productions Inc. All Rights Reserved.
Comments
Hansmar - both renders are superb, I like both of them.
"Dancing Aliens" render? Looks beautiful both in colours and shapes :) Are both left and right things... life forms? Chinese lanterns (i thought they are shacks) reminds me my favorite videogame, Populous the Beginning (by the way, in that game user had some terramorphing, changing of landscape was important for strategy) as it had a bit similar looking watch towers.
Been looking at some of threads and galleries (i'm just a random stranger from D|S land yet, but got very interested in Bryce lately...), so i wanted to ask what are "key" conditions for situations in which renders take "days" and in which take "hours"? I noticed in Slepalex' gallery (for example) that some renders were 40 hours and some were 7 hours , both were landscapes with lots of vegetation.. Curious (and a bit afraid what could happen if you dont have perfectly stable electricity in house).
Sorry if i shouldn't have asked this here. And i only now notice "many small parts in the aliens’" explanation.
"Spike City" is also inspiring! Reminds me a tale about city made of swords, daggers... Lava swallowed that one, though.
I played a bit around with Wings3D, watching one of David's videos. Now this elaborate looking shape is actually quite simple, as the anaglyph shows. BEWARE, the corner jumps about 10 cm / 4 inches out of the screen.
Shape and camera positions are the same, materials and HDRI are different.
Wow Horo both are awesome. I like the effect of the anaglyph, moving away from the monitor, the object elongates outwards, if this makes any sense to you.
Here's a simple abstract using the Alien Hdri and a Wings 3D object.
mermaid - thank you. Yes, interesting effect how it stretches out if you increase the distance to the monitor plane.
Your Wings3D object looks awesome, great contrast between the silvery parts and the dark colours behind.
Very cool Horo - the 3D one would look awesome in, say, an animation.
Mermaid, the object in the centre of the image reminded me of the robot in the 1979 version of The Black Hole (link to YouTube)
Jay
Horo : superb image and anaglyph !
mermaid : awesome abstract !
Thanks Jay and Adbc
akmerlow:, I hope that Horo and Rashad will answer on the duration of rendering question, because they have much more expertise in this, than I do. Thanks for the comments on my work too.
What can I say? The duration of the render is too big a topic, for which you need to create a separate thread on this forum. Maybe she's here, look!
If you often turn off the electricity (this I have also happened!), That is, the possibility of rendering in parts. You can stop the render, save the current state, then continue the render from the saved state.
akmerlow - render time. It's always too long, people want a result in a few minutes even though they worked on a scene for several days. It is not easy to give you a straight answer.
Many lights with soft shadows take time. Doubling the IBL quality about doubles the render time, if soft IBL shadows are used, yet very much longer, but without IBL shadows at all the render is fast. Transparent materials take a lot of time. If rendered regular, depending on the lights and materials used, anti-aliasing may be faster than the render itself, or up 12 times longer. But Anti Aliasing can be adjusted: Radius, Rays and Tolerance.
Super quality mode is extremely slow. Premium can be faster than Regular but also longer, or much longer. Each higher Rays per pixel (rpp) setting about doubles the render time. An average render works fine with 9 rpp, True Ambience usually needs at least 64 and often even 256 isn't good enough. But adding more options in the Premium Effects doesn't prolong the render very much. Maximum Ray Depth also increases render time. Default is 6, usually 3 to 4 is enough. However, if you use opposite mirrors, mirroring the mirror, you may go up to 100 or more.
Each doubling of the document size quadruples the render time.
My strategy is, once happy with the scene I check the render time on a small document size. If I think it's going a bit long, I start eliminating lights and reduce quality and see if the end result changes. Often enough, there's more in the scene than necessary and these things may make the render longer.
That's it in a nutshell.
I experimented for the first time seriously with the dForce Simulation in Daz3D. As a result, this lady came out. I gave her a fine day on a nice beach.
You might also find the fullsize picture here:
https://www.daz3d.com/gallery/#images/651156/
Super, Elvis...I always love & look forwards to your works - particularly when they involve characters
On the render-time issue, Akmerlow - I'm currently running (right now) an animation that is taking 1 day & 20 hours and counting down. I'm breaking it up into several small time-period units (~ 3 hours): where Bryce allows me to stop such an animation in its tracks, save such a portion (as a new title - important), and then continue on, for another day, from where I initially stopped at: a newly-portioned title appropriate to the normal rendering processes.
When all is ended, I'm guranteed the final works can be merged (using a graphics softeware).
Jay
Thanks for replies and sharing thoughts on your workflow, i quoted answers here https://www.daz3d.com/forums/discussion/279381/on-rendering-time so it won't get lost in render thread. Ability to stop render, switch computer off, and next day continue render after loading scene, seems very helpful. No more sleepless nights due to noisy computer sounds!
No worries, Akmerlow...while an anmation is running, I simply click anywhere on the screen, a Stop/Resume app pops up, I then click on Stop - that's it.
Important at this stage, if you want to continue on from where you ended - on another day - is to click File, Save as (rename the file - say, Ani-1 to Ani-2) and Save. When next you want to continue-on with further development of the 'paused' render, is to open Bryce, and then select the Ani-2 file - from there File, Render Animation - where it then continues on from where it stopped last (the process will obviously have to be adjusted for producing a non-animated image with large MPs etc.,, - which I've never done, but you get the general drift - maybe experiment etc.,).
Jay
Electro-Elvis : awesome image, the sky, the beach, the lady ..... very well done.
Electro-Elvis - very beautiful render. The lady with her hair looks excellent and she's in a very nice place.
akmerlow - not for an animation as Jay explains, but for a still render there is also the possibility to plop render parts, save each part and assemble the final image in a graphics application. This is helpful if the mains power is not reliable and the render is going to take long. This idea actually came from c-ram a while ago and I wrote a PDF (https://horo.ch/docs/mine/pdf/Plop-Mask.pdf) which features a link to an easy to use plop mask.
I played again a bit around with Wings3D, watching one of David's videos, though I took some liberties. The anaglyph is not that impressive as the last one above, but nice nevertheless.
In this scene I have used the boutique shared here earlier this month. Unfortunately Bryce went out of memory and I could save the image though. I have the same scene saved correctly without the building in the far left background. That building and textures was just too much it seems for Bryce to handle. As far as I remember I have 'LAA' installed some months ago but this time it run out of memory.
All objects used, including street and car, are Sketchup models.
Thanks, i quoted that part into "on rendering" thread as well.
Ok, anyway, i'm finally starting learning! Is there a thread for novice users or it's ok to post&question here as well? I'm gonna go through David's videos (sometimes a bit hard to follow when he shows and talks stuff very quick), so one of very first tutorials already made me questioning..
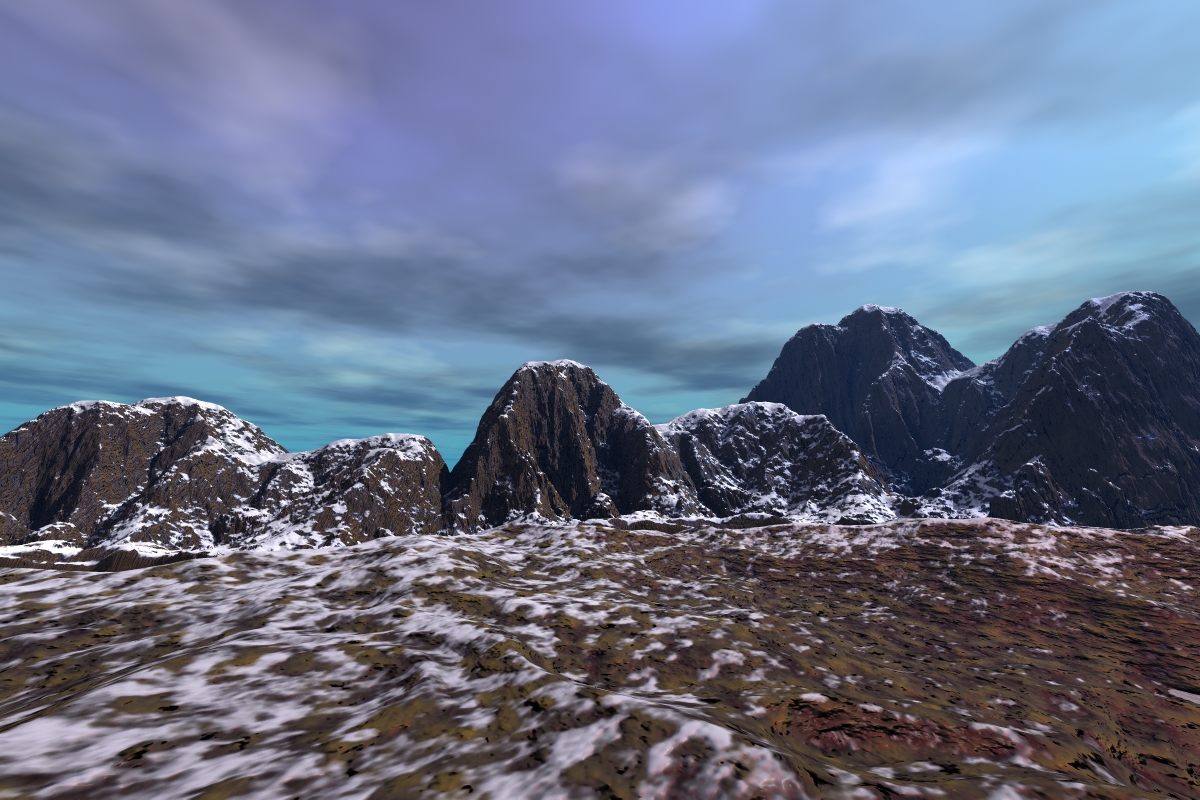
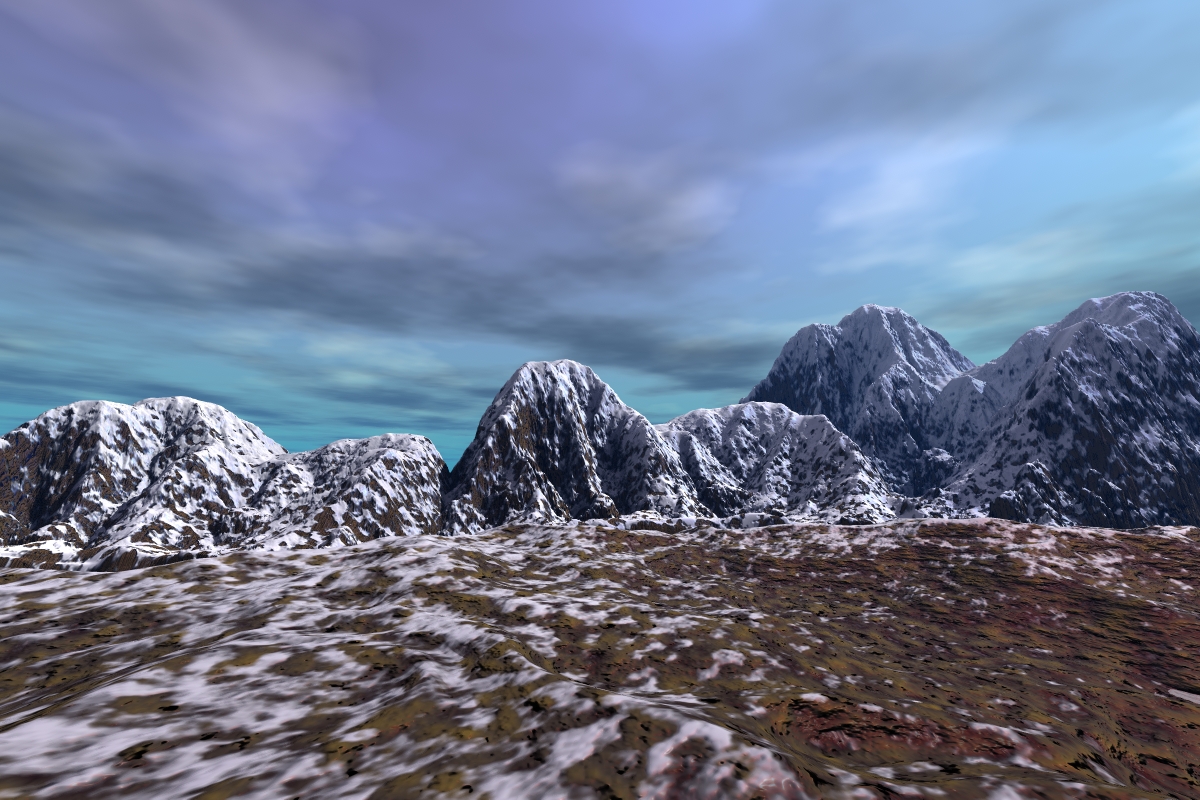
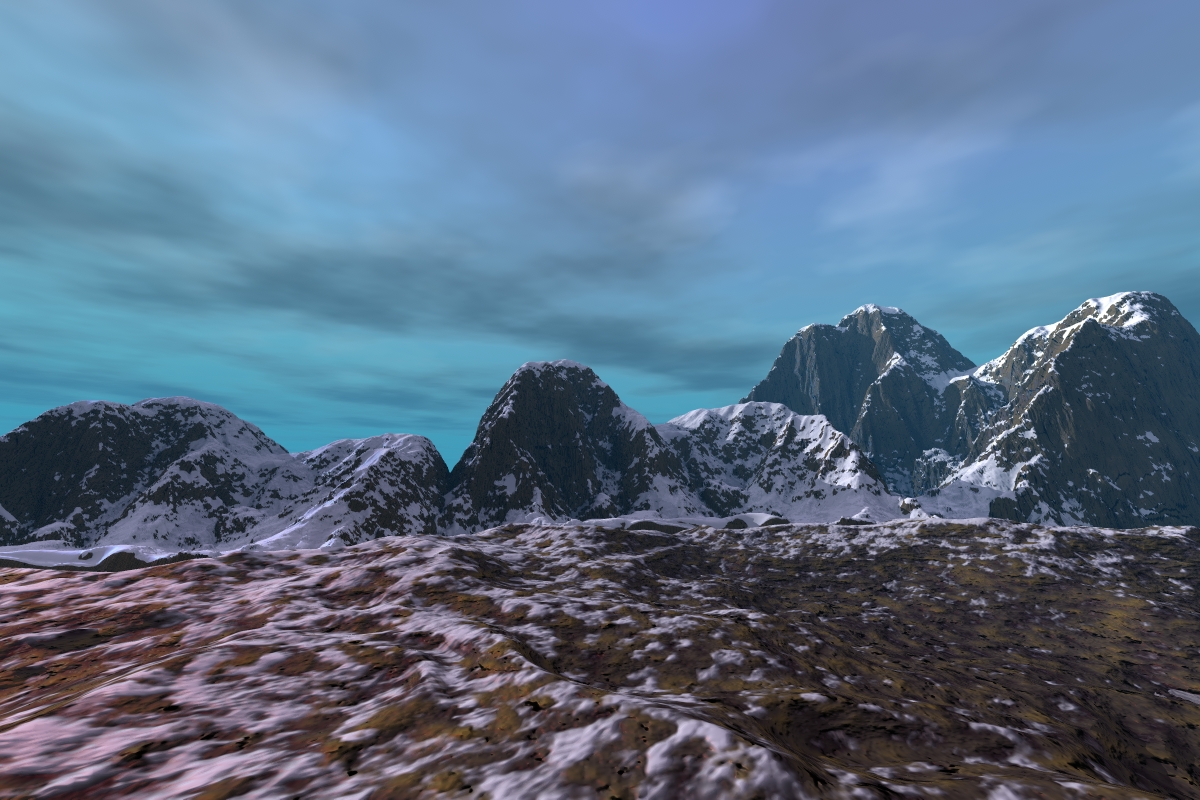
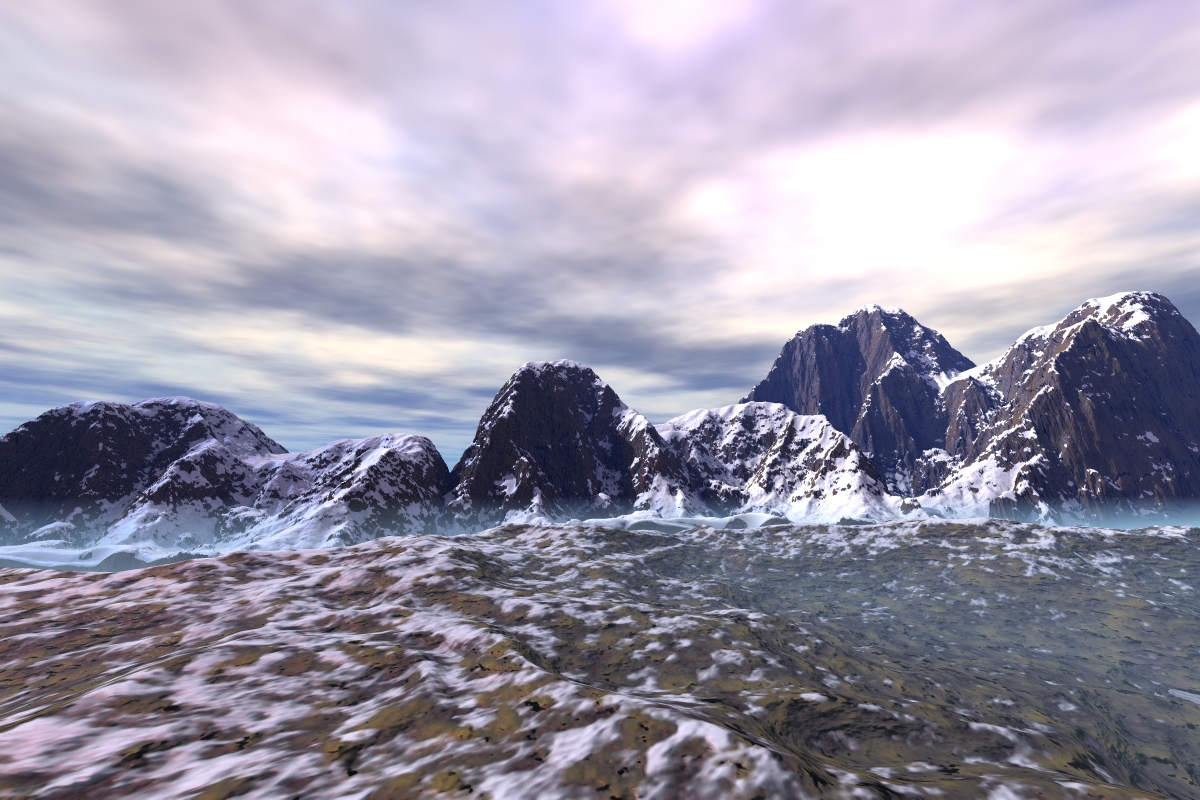
So, about snow. As far as i understood, the key to snow on mountains is Filter (with "snow puddle" curve ) in DTE. I've read on Robin Wood's site that a,b and c functions influences things, one of which defines if we have snow on slopes or only on flat.. Other one changes "cap" of placement.. What puzzles me, i can't input numeric values for them? Only mouse drag away? Also i thought there would be "soft caps" (like limits in Daz on body limbs movement) so you'd know how far is too far. I guess all that stuff is looked at more detailed in further tuts, huh (?). Another mystery was, for me it was like the main thing that sculpted sky colour... was haze, and not "sky colour". But now i understand that you need to redo IBL from sky when you change "sky colour".
akmerlow - there's no rule where questions must be put. Just ask, chances are that someone answers your questions. Some know this better than that.
Yes, sometimes videos are difficult to follow. For most of those few I recorded I also have transcripts (asked by "Brycers" with hearing impairment).
What I can answer: DTE Filter a, b and c values can only be set by pressing the left mouse button and move the mouse. BUT - move to near the value you wish as possible, then let go of the mouse button and press it again. Then the moves are smaller. Repeat this and you can adjust the value precisely up to the 4th decimal place (e.g. 2.000). As for Phase, which can also be only adjusted by moving the mouse with the LMB pressed or by clicking on the arrows. This is not precise BUT you can move the mouse to an arrow and right click to adjust in one increment. For the Frequency the left mouse button works on the arrow for one increment and if you use the thumbnail left of the word Frequency you can adjust all three values together.
I didn't understand your question about the Sky and IBL. Make sure you have Custom Sky selected. In the main window on top select Sky & Fog, below the left most thumbnail is an arrow, click on it and select Custom Sky.
Electro-Elvis - superb render, great lighting, beach and overall setup.
Horo- another set of awesome still and anaglyph.
Launok- a beautiful boutique, very nice setup.
Akmerlow - David's video tutorials are a bit fast, but it's worth the efford to rewind and review, eventually you will get used to his way of working and it will not be so bad. Robin Wood's, David's and Horo's tutorials are the way to go. Horo has an awesome pdf on the DTE.
Yeah, i rewind several times until i understand, also YT's automatic subtitles sometimes help.
Just passing through... Have looked at the last 6 or 7 pages and think all are still doing great work... Also great to see new faces, sorry I'm not around much anymore to help out a bit... I've tried to answer a few questions raised in other threads while I'm here.
My latest: Whitechapel
Some old houses I can't remember where I got them from that i've used in the past in various configurations.
My 2D face Moon that I always use when I need a moon (set to track camera so it's always facing the right way)
I made the pub and street signs specially for this scene
Daz M4 in the background wearing some freebie victorian clothes and the top hat from Skullduggery and Daz V4 in the foreground wearing Black Pearl outfit.
Scene lit by Bryce sun (made blue to simulate night), A bit of one of Horos HDRIs from the Sunless Skies set to give some ambience and 6 radial lights all ranged to only probide light onto the bits that I wanted them to light.
Render time: 3 hours.
This one I call, "Born This Way"... :)
It's simple but profound in its own way.
Looks like Jack is on the hunt again ...but Dave...the Moon, the Moon...needs to be flipped on the vertical axis.
Nice one RexRed
Jay
Dave Savage, great atmosphere you have on your scene! Very immersive, reminds me Jack the Ripper times. And details like raven...
RexRed, tree of life symbolism?)
launok, cool to see "fashion" stuff going even here, to Bryce. Thanks for sketchup mentioning
Horo, are those impossible figures.. something you also did inside Bryce, but now use outside modelling software due to workflow?
launok - well done. If the objects use image textures, you can make them smaller and use less memory,
mermaid - thank you.
Dave - Whitechapel is a really nice scene and exquisitely lit.
RexRed - nicely done.
akmerlow - yes, I sometimes use Wings3D to create shapes to use in Bryce.
Horo : great objects in wings3d, awesome colours and very nice anaglyph.
Launok : very detailed beautiful scene.
Dave Savage : Very nice lit scene.
RexRed : Nice image, beautiful colours and reflection.
Horo, Mermaid: very nice abstracts.
Electroelvis: very nice render with the lady on the beach. I guess the power (or telephone) lines are a bit dangerous like that, though.
Launok: very nice clothing shop scene.
Akmerlow: Nice looking snowy scenes.
Dave Savage: What a fantastic sene, your Whitechapel. Wonderful atmosphere.
RexRed: Interesting scene.
I made two new ones. I first made a scene with two warped landscapes and a ship. I call it ‘dangerous passage’. The other one was playing with the DTE in Bryce. I used a combination of ‘blob maker’ and ‘mounds’ and some erosion. I added a ‘Supergirl’ from DAZ and Creech from Poser in a confrontation.
First one looks better, Hansmar - perhaps, the ship needs to stand out more (darken, larger, don't know)...sooth-down the sea wavelets etc.
Jay...always a critic that needs ignoring.