Morphs from G3 to G8

1356771

Comments

  • Redz said:
    AllenArt said:

    Here's Josh Crockett's Hag for G3F....turned out great....er, awful. Beautifully awful. LOL Even the more extreme morphs come over nice. Thank you again Redz! :D

    Laurie


    Hehe oh my she's scary!! If only the Hd morphs were transferable, but hey, I'm thrilled with the HD expressions

    Yeah, great transfer.  I do wish that Daz would include a base HD morph.  But, I get that they want you to buy the HD content.

  • 3Diva3Diva Posts: 11,276
    AllenArt said:

    Here's Josh Crockett's Hag for G3F....turned out great....er, awful. Beautifully awful. LOL Even the more extreme morphs come over nice. Thank you again Redz! :D

    Laurie


    That came out so cool. The texture and the anatomy look so realistic! Well done!

  • 3DLoki3DLoki Posts: 16
    Redz said:

    This is my alternative method, but I've found it better than the transfer utility for body morphs especially

    Tutorial and helper scene/morphs included

    DOWNLOAD HERE

    Thanks so much for making this!   worked like a charm for me (well like 95% but DEFF close enough lol)
    I JUST started creating G3F characters for commercial sale (other places) and not 2 weeks after my first one released we have G8 lol

  • nonesuch00nonesuch00 Posts: 17,890

    Really cool transfers.

  • Redz!!!! Thank you SO MUCH!   Spent an hour and a half trying to build up a Blender file for morphs (still haven't figured out the proper vertex count) - never dreamed it would be so easy to tranfer my old ones (and now with better expressions)!   Also my Headshop investment is not obsolete! Thanks again!!! 

  • murgatroyd314murgatroyd314 Posts: 1,431
    Redz said:
    Ati said:
    It's going to be a pain without GenX, but SickleYield's tutorial still seems to work from G3 to G8 with the Transfer Utility (http://sickleyield.deviantart.com/journal/Tutorial-Transferring-Character-Morphs-G1G2G3-409437916), at least with V7. Just substitute G2 to G3 instructions with G3 to G8.
    Ati said:

    (Renders: Left side is G3 with V7 mats and V7 morph (not HD) dialed in, Right side is G8 with V7 mats and V7 morph (not HD) dialed in.)

    I'm following this tutorial to the letter, and it ALMOST works, except I end up with distorted arms and hands, like this:


    Any idea what I could do to correct these?

    I  think the provided G3F clone just isn't up to the job. If you're reasonably confident with the techniques and using the transfer utility as per Sickleyield's tutorial, a way to do this is to make a better clone of G3F, One way is to load the G8F_G3FMorphs.obj ( export it from my downloadable tutorial file ) onto G8F using morph loader pro. In the parameters choose your new morph and set path as hidden-clones and type as modifier/Clone. Save the morph and reopen Daz. Now when using the transfer utility as per Sickleyield's tutorial choose your new clone instead of the default one for G8F. I've found the transfer of body morphs much better, though a few extreme face morphs don't transfer well. 

    I've found a method that seems to work nicely using Transfer Utility. It's almost the same as Sickleyield's, except for one critical detail:

    If converting from Genesis 2 to Genesis 3, under the Target dropdown choose "Clone" and "Genesis 2" either Male or Female depending which you are converting from.  Leave the left dropdown blank.
     

    Do NOT use the clone. Instead, take advantage of the fact that Genesis 8 is really Genesis 3.5, with an almost identical mesh. Pose a freshly-loaded G8F as follows:

    • Right Shoulder Bend: Bend = -45.5
    • Left Shoulder Bend: Bend = 45.5
    •  Right Thigh Bend: Side-Side = 6
    • Left Thigh Bend: Side-Side = -6

    In the Target Item Shape drop-down, choose Current.

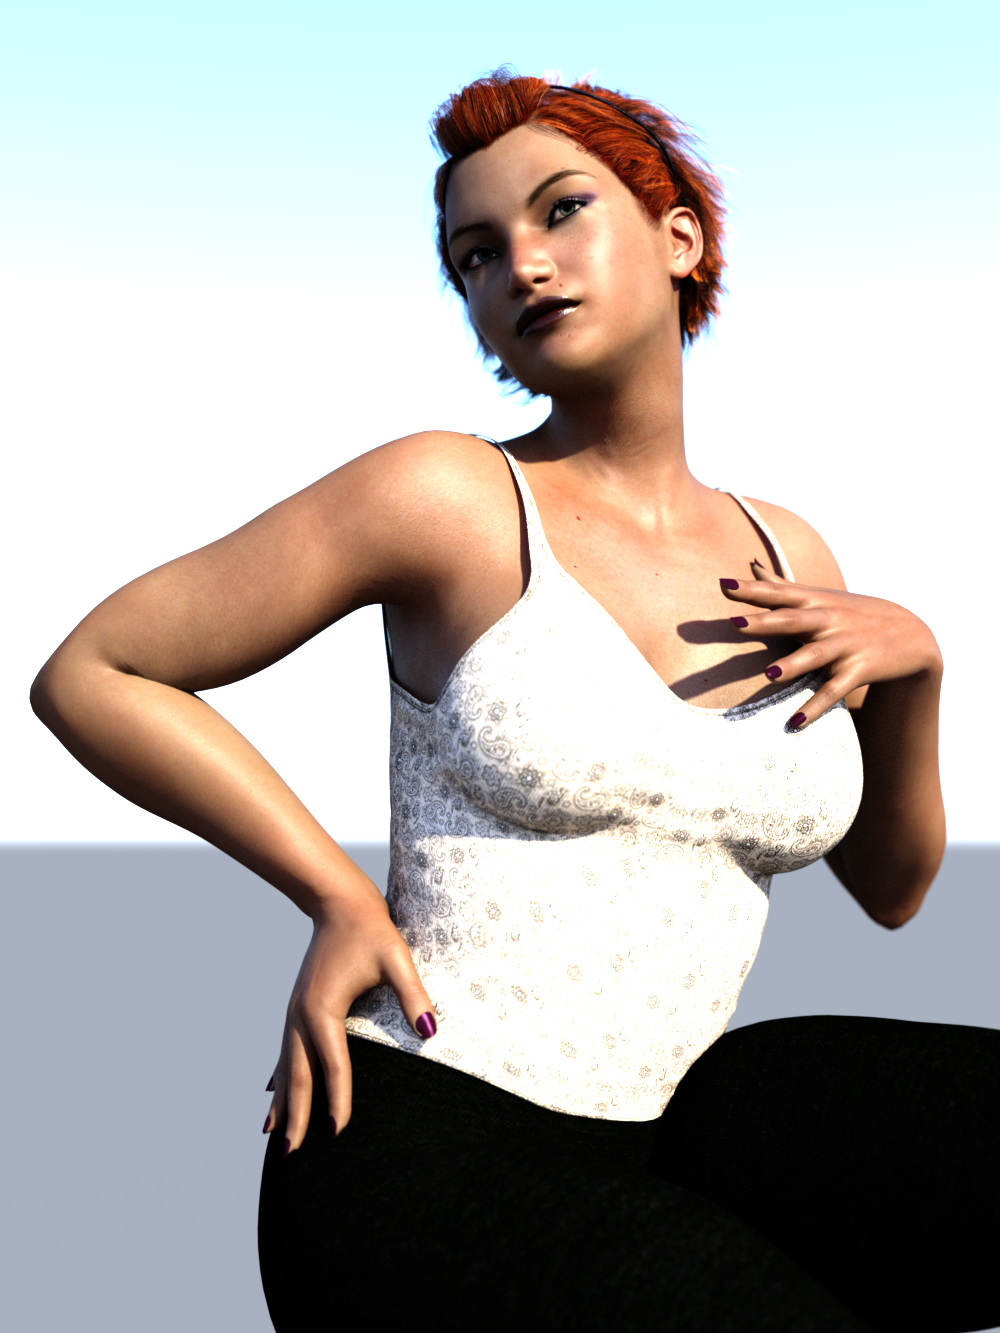
    Here's Amber, who I just converted with this technique:

    G8Amber.png
    620 x 874 - 392K
  • JamesJABJamesJAB Posts: 1,760
    edited June 2017

    Here is Genesis8 pretending to be Bethany7

    Genesis8Beth01.png
    1000 x 1333 - 1001K
    Post edited by JamesJAB on
  • LlynaraLlynara Posts: 4,770
    edited June 2017

    Here's Ceridwen. She came out perfectly. Maybe I goofed up something with Anneka, not sure. Very happy with how these are transferring over! 

    G8-Ceridwen.jpg
    1500 x 1200 - 323K
    Post edited by Llynara on
  • Redz said:

    This is my alternative method, but I've found it better than the transfer utility for body morphs especially

    Tutorial and helper scene/morphs included

    DOWNLOAD HERE

    Redz said:

    This is my alternative method, but I've found it better than the transfer utility for body morphs especially

    Tutorial and helper scene/morphs included

    DOWNLOAD HERE

    This is working fantastic! Thanks :D

    Good to hear :) The tips of the fingernails sometimes come out a little distorted. Not sure that can be helped. 

    Thank you very much!!!!!!!!!!!!!!!!!!!!!!!

  • grifflinggriffling Posts: 3

    I used Redz' transfer method to transfer my G3F character to G8F, and it looks great until it comes to posing. I used Adjust Rigging to Shape with the bottom three checkboxes checked to get rid of the horrifying alien arms, but now the arms are stiff and have lost their range of motion, and the elbow and shoulder still deform. The legs mess up a bit too. I dunno what to do. Anyone have suggestions?

    daz.jpg
    915 x 847 - 97K
  • AllenArtAllenArt Posts: 7,140
    griffling said:

    I used Redz' transfer method to transfer my G3F character to G8F, and it looks great until it comes to posing. I used Adjust Rigging to Shape with the bottom three checkboxes checked to get rid of the horrifying alien arms, but now the arms are stiff and have lost their range of motion, and the elbow and shoulder still deform. The legs mess up a bit too. I dunno what to do. Anyone have suggestions?

    Did you do the ERC Freeze before you saved as a Morph Asset?

    Laurie

  • LlynaraLlynara Posts: 4,770
    edited June 2017

    Quick test render of CynderBlue's Imani on G8F. Beautiful! Will do more with her tomorrow. Time for bed. 

    G8 Imani.png
    2000 x 1600 - 3M
    Post edited by Llynara on
  • grifflinggriffling Posts: 3
    AllenArt said:
    griffling said:

    I used Redz' transfer method to transfer my G3F character to G8F, and it looks great until it comes to posing. I used Adjust Rigging to Shape with the bottom three checkboxes checked to get rid of the horrifying alien arms, but now the arms are stiff and have lost their range of motion, and the elbow and shoulder still deform. The legs mess up a bit too. I dunno what to do. Anyone have suggestions?

    Did you do the ERC Freeze before you saved as a Morph Asset?

    Laurie

    I did, and I did the whole process over again just to be sure--same result :(

  • RedzRedz Posts: 1,459
    Redz said:
    Redz said:
    Redz said:

    This is my alternative method, but I've found it better than the transfer utility for body morphs especially

    Redz said:

    Tutorial and helper scene/morphs included

    DOWNLOAD HERE

    Thanks! smiley 

    When I try to export and choose To: Daz Studio and uncheck 'Write Groups' the to changes to: "custom". If I choose to: Daz studio again the White Groups becomes checked again. Is it supposed to work like this or am I doing something wrong?

    No just leave it at custom after you've chose Daz and unchecked write groups. 

    Thanks for the reply! :) What does zero the figure mean?

    Select G8F in the scene. Over on the parameters tab click the box with four lines and an arrow, and select Zero = Zero Figure. It just makes sure you're loading your morphs onto a clean, unmorphed G8F

    Thank you so much for the tutorial and the replies! smiley I'm a beginner at Daz but I could easily follow the tutorial, I have succesfully transfered my Lara morph to G8, she seams to be in working order except for the distortion in the wrists as you can see in the render:


    G3 on the left, G8 on the right

    Is there a way to make the transfer without the distortion? 


    Very welcome. It all comes down to how well the G3F and G8F shapes match up to begin with, Some shapes are trickier than others. Here is an alternative file you can use with the tutorial which may give you straighter wrists, but I can't guarantee without having the character to test.

    Alt Clone File Download

    griffling said:
    AllenArt said:
    griffling said:

    I used Redz' transfer method to transfer my G3F character to G8F, and it looks great until it comes to posing. I used Adjust Rigging to Shape with the bottom three checkboxes checked to get rid of the horrifying alien arms, but now the arms are stiff and have lost their range of motion, and the elbow and shoulder still deform. The legs mess up a bit too. I dunno what to do. Anyone have suggestions?

    Did you do the ERC Freeze before you saved as a Morph Asset?

    Laurie

    I did, and I did the whole process over again just to be sure--same result :(

    Not sure if it'll make a difference, but the third box on the adjust rigging dialogue box, Adjust Orientation, if unchecked by default. You might try with that unchecked to see if it makes a difference?

  • BeanoutbackBeanoutback Posts: 61
    edited June 2017

    Hmm - I've been trying this too and it almost works. However, in the "When the export dialogue box pops up choose To: Daz Studio and uncheck 'Write Groups'. Click Accept." part whenever I click on the uncheck write groupsit switces my Daz Studio option back to custom. Any ideas?

    (Oh - unless the idea is just to make it go to 100%)

    Post edited by Beanoutback on
  • 3Diva3Diva Posts: 11,276

    Hmm - I've been trying this too and it almost works. However, in the "When the export dialogue box pops up choose To: Daz Studio and uncheck 'Write Groups'. Click Accept." part whenever I click on the uncheck write groupsit switces my Daz Studio option back to custom. Any ideas?

    (Oh - unless the idea is just to make it go to 100%)

    It switches back to custom - that's fine. It did that to me and it still worked. :)

  • Hmm - I've been trying this too and it almost works. However, in the "When the export dialogue box pops up choose To: Daz Studio and uncheck 'Write Groups'. Click Accept." part whenever I click on the uncheck write groupsit switces my Daz Studio option back to custom. Any ideas?

    (Oh - unless the idea is just to make it go to 100%)

    It switches back to custom - that's fine. It did that to me and it still worked. :)

    Thanks for that. Thanks to Redz too. Seems to work on most!

  • Kristinka VlasovaKristinka Vlasova Posts: 16
    edited June 2017

    With the scene tab open, click on this box in the top right hand corner of
    the scene tab
    (with four horizontal lines and an arrow)
    and select
    Assets - Transfer Utility

    After all this, her fingers


    Post edited by Kristinka Vlasova on
  • Cris PalominoCris Palomino Posts: 11,142
    ratz43 said:

    I was able to use ZBrush to transfer a character from G3 to G8. It took about 15min but you get good results. This works because the G3/G8 use the same mesh topology for the head, torso, & most of the leg.

    The process goes something like:

    1. Load G8 & your morphed G3 character.

    2. Adjust the scale of one of the characters to more closely match the size of the other. I would say match the arms as closely as you can.

    3. Adjust G8 arms & legs position to closely match the G3.

    I figure this is being done in Studio.  Query: why are you matching the position of G3 if you're making the morph on G8?  Wouldn't you want to match to the target?

    ratz43 said:

    4. Send both of them to ZBrush and save each as its own OBJ.

    Are you using GoZ?  I exported OBJs from Studio as I don't normally use GoZ.

    ratz43 said:

    5. Import the G3 OBJ back into ZBrush & set poly groups to = UV groups.

    6. Hide all poly groups except for the Head and store as a morph target.

    How are you storing a morph target of the head as I've only ever been able to morph target the entire mesh?

    ratz43 said:

    7. Import your G8 OBJ. Do the same as above set the poly groups as the UV groups. Hide all Polly groups except the head and apply the morph. You should see the morph take place. 

    So you're storing the Morph Target of your modified G3 and overwriting the G3 mesh with G8's when you import over it?  Here's where I lost you.  How are you applying the morph?  What functions are you using?

    ratz43 said:

    8. Export the morphed G8 and over write the G8 OBJ file.

    Wouldn't you want to create a new file named G8 <your morph>  (or something) and preserve your G8 OBJ?  Especially since you plan to continue the process?  I may be wrong, but your steps seem to be driven possibly by the GoZ workflow?

    ratz43 said:

    9. Import the G3 OBJ do the process again except this time do the torso.


    The Legs are a bit different.

    1. Import the G3 and do the process again leaving only the legs visible. Now hide the foot starting at just above the ankle where the first complete edge loop goes around the leg.

    2.Store this as your morph target.

    3. Import the G8 OBJ and perform the same visible masking as before and apply the morph.

    4. Select the feet and move them into place.


    The arms cannot be morphed at all but you can use ZProject to re-shape them to a sub tool aka the G3 mesh.

    The eyes and mouth will need to be moved into position manually but this is easy to do. The mouth may be morphable but I have not tried it yet.

    Next send back to DAZ and update your G8 figure as a morph. Dial in the morph and set the rig to match the new shape. 

    Dont worry about the eye lashes if you save the morph as a morph asset then they will conform on load.

    So the things that are confusing me are how you're making a morph target from a partially visible mesh and what is the process and functions used to achieve "apply morph".  In the last section you say re-shape to a subtool, are you separating the arm or how?  By mouth, I am guessing you mean the inner mouth and not the lips which are part of the face, yes?

    Thanks for taking the time to write out your workflow, and if you could answer my questions, I'd be most appreciative.

    Cris

  • BlueIreneBlueIrene Posts: 1,318

    I had the thing with the fingernails when I did my first body morph (Bethany) last night. I think it's to do with where G8's geometry in that region has changed drastically in comparison to the changes made to the rest of the figure. It was only noticeable once I'd dialled the morph past 20-25% or so, so I dialled it back a tiny bit to where it wasn't an issue and gave Bethany the rest of her curves using G8 body morphs and thought she looked just as good. I'm not expecting everything to transfer over perfectly, but I'm ecstatic that so much of it does and that there don't seem to be any problems at all with the head morphs.

  • RedzRedz Posts: 1,459

    Hmm - I've been trying this too and it almost works. However, in the "When the export dialogue box pops up choose To: Daz Studio and uncheck 'Write Groups'. Click Accept." part whenever I click on the uncheck write groupsit switces my Daz Studio option back to custom. Any ideas?

    (Oh - unless the idea is just to make it go to 100%)

    With the scene tab open, click on this box in the top right hand corner of
    the scene tab
    (with four horizontal lines and an arrow)
    and select
    Assets - Transfer Utility

    After all this, her fingers


    Yes it's not perfect, and works better on some morphs than on others. The nail geometrt has changed from G3F. You could try aligning the fingers better with the base G3F before performing the transfer utility. For example if you have the body mirpgs, the finger length adjustments might get you a better alignment. But not everybody will own those, so I didn't put them into the tutorial file. I expect, as with other genertikns, that a PA may repease legacy shapes with corrections

  • KatteyKattey Posts: 2,899

    It is immensly nice to see that people still continue DIY transfers which once were considered impossible. 

  • WendyLuvsCatzWendyLuvsCatz Posts: 37,712
    edited June 2017

    Kattey you started it and were my original source of how I did it.

    heartyes

    Post edited by WendyLuvsCatz on
  • Singular BluesSingular Blues Posts: 737
    edited June 2017

    Okay, there's an easier and so far better way to do this.

    Transfer utility.

    I know, I know. You're thinking, "This fool don't know. We been there and it's lame." (Or you're new to this and thinking tell me more, but I digress).

    The thing is, Genesis 8 IS Genesis 3. Just a few more polygons and new backend (Supporting files, not her bum). This means, unlike every other figure transfer, she's actually 100 percent perfect for using TU to exchange morphs.

    Now, the most straight forward method requires a whole bunch of editing duf files, so I won't go into that.  The key thing here is you need a means to dress G3 in G8 as accurately as possible. Since they are, topolgically, the same mesh, almost, the issue is the difference between the A and T pose.

    Those of you who have looked at the G8 clones have probably noticed that, unlike all previous clones, G8 remains in her rest pose and dones not adopt G3's when you dial the clone. If you have watched autofit run, you've noticed that G3 clothing adopts the A pose. I don't know why, but we're going to exploit that to make a G8 Clone for G3.

    You see, all clothing is just a figure that has a skeleton matching that of the figure it is meant to be worn by. G8 and G3 have a bone-for-bone match.

    If you fit G3 to G8, G3 reacts just like any G3 clothing and adopts G8's A pose.

    Nifty.

    DON'T DO THIS. Really. Don't. You gotta do something else first. 

    1) Load G3.

    1.1) Set to Base resolution subD 0 and export as wavefront object.
    1.2) Import the .obj and use transfer utility to fit it to G3.
    1.3) Hide G3 and unfit the copy of her you just made.

    2) Load G8.

    2.1) Fit the new figure you made to G8 (Why? The figure has no morphs. If you just fit G3 to G8 directly, Daz will try to copy all of G3's morphs to the new figure, which is waste of time and cpu.) You can and should use autofit here as opposed to TU. It's faster. When it asks who this item was originally for, pick G3, obviously.
    2.2) Hide G8. Your scene should now be an unsubD copy of G3's mesh in exactly G8's A pose.
    2.3) Export. Name this G8 Clone or somthing.

    3) Unhide G3.

    3.1) Use morph loader to add the G8 Clone object you just exported to G3 as a morph.
    3.2) Find that morph in the properties list, click the gear Icon and change the type to Modifier\Clone. Feel free to move the morph to Hidden\Clones as well, though this is not necessary.
    3.3) File > Save as > Morph Assets. Find the Clone (either in Morphs\Morph Loader or whereever moved it to). Checkbox it and accept to save the clone.

    Now G3 can wear clothes made for G8. And she can wear G8.

    From here you might go many ways. I, personally, just  find the morphs I want to transfer and favorite them. Then launch transfer utility, Source G3, Item Shape G8 Clone, Target G8.  Show Options. Check UV Space. Uncheck everything but Morphs. Select Morphs and on the right change the drop down to Favorites and sub components. Make sure Fit to is NOT checked.

    Run TU.

    All the morphs favorited and their components are now in G8. 

    If you are into duf editing, you could Save as morph assets at this point. They won't work because by using TU, G8 is no longer fully recognized as G8. So the saved dufs are missing some pointers that tell them to attach to G8 when she loads. Also ERC links are broken so they'd need to be recreated. But all the morphs are there. Set G8 to Base reso, subD 0, dial in the morph and export. If you are okay with duf editing, though, G8 is still partially recognized as G8, so saving the morphs will place the resulting dufs in her Morphs folder under whateve vendor and product name you enter. The offending line in the duf will be the "parent" declaration. It will either read "parent" : "#Genesis8Female" or "parent" : "#geometry" It needs to be: "parent" : "/data/DAZ%203D/Genesis%208/Female/Genesis8Female.dsf#Genesis8Female" or "parent" : "/data/DAZ%203D/Genesis%208/Female/Genesis8Female.dsf#geometry" respectively.

    You'll need to clear the scene or restart Studio if using 4.9.4. You want to make sure you have a completely clean G8 loaded when you import the morphs with Morph Loader. I've had issues with Studio refusing to clear the morph data even if I reload a new G8 in the same scene. Made me think it wasn't working. I know SickleYield has mentions similar behavior out of studio in the past, so this is not a new bug.

    At no point should you save G8 as a figure in the process. You've got the clone saved in G3. That's all you'll need. Once you do this once, you can lways load G8 and use TU to move morphs from G3. How you save the mophs is going to be a matter of taste.

    If you really must use the Copy G8 method and import that, it's still worth while to create a a G8 Clone as above. Because, A) G3 can wear G8's clothing, and B) You can fit the copy of G8 to G3 using the G8 clone and get a much better fit.

    G8 and G3 do have minor topogy differences at the upper cheek near the outside corners of the eyes. You'll probably get better results if you correct that in 3rd party editor, because autofit won't correct it. I've not got 'round to that myself. I just want to prove the concept.

    Edit: I should add, in my test case (custom figure transfer) there were no issues with fingernails. Just checked.

    Post edited by Singular Blues on
  • RedzRedz Posts: 1,459
    edited June 2017

    Okay, there's an easier and so far better way to do this.

    Transfer utility.

    I know, I know. You're thinking, "This fool don't know. We been there and it's lame." (Or you're new to this and thinking tell me more, but I digress).

    The thing is, Genesis 8 IS Genesis 3. Just a few more polygons and new backend (Supporting files, not her bum). This means, unlike every other figure transfer, she's actually 100 percent perfect for using TU to exchange morphs.

    Now, the most straight forward method requires a whole bunch of editing duf files, so I won't go into that.  The key thing here is you need a means to dress G3 in G8 as accurately as possible. Since they are, topolgically, the same mesh, almost, the issue is the difference between the A and T pose.

    Those of you who have looked at the G8 clones have probably noticed that, unlike all previous clones, G8 remains in her rest pose and dones not adopt G3's when you dial the clone. If you have watched autofit run, you've noticed that G3 clothing adopts the A pose. I don't know why, but we're going to exploit that to make a G8 Clone for G3.

    You see, all clothing is just a figure that has a skeleton matching that of the figure it is meant to be worn by. G8 and G3 have a bone-for-bone match.

    If you fit G3 to G8, G3 reacts just like any G3 clothing and adopts G8's A pose.

    Nifty.

    DON'T DO THIS. Really. Don't. You gotta do something else first. 

    1) Load G3.

    1.1) Set to Base resolution subD 0 and export as wavefront object.
    1.2) Import the .obj and use transfer utility to fit it to G3.
    1.3) Hide G3 and unfit the copy of her you just made.

    2) Load G8.

    2.1) Fit the new figure you made to G8 (Why? The figure has no morphs. If you just fit G3 to G8 directly, Daz will try to copy all of G3's morphs to the new figure, which is waste of time and cpu.) You can and should use autofit here as opposed to TU. It's faster. When it asks who this item was originally for, pick G3, obviously.
    2.2) Hide G8. Your scene should now be an unsubD copy of G3's mesh in exactly G8's A pose.
    2.3) Export. Name this G8 Clone or somthing.

    3) Unhide G3.

    3.1) Use morph loader to add the G8 Clone object you just exported to G3 as a morph.
    3.2) Find that morph in the properties list, click the gear Icon and change the type to Modifier\Clone. Feel free to move the morph to Hidden\Clones as well, though this is not necessary.
    3.3) File > Save as > Morph Assets. Find the Clone (either in Morphs\Morph Loader or whereever moved it to). Checkbox it and accept to save the clone.

    Now G3 can wear clothes made for G8. And she can wear G8.

    From here you might go many ways. I, personally, just  find the morphs I want to transfer and favorite them. Then launch transfer utility, Source G3, Item Shape G8 Clone, Target G8.  Show Options. Check UV Space. Uncheck everything but Morphs. Select Morphs and on the right change the drop down to Favorites and sub components. Make sure Fit to is NOT checked.

    Run TU.

    All the morphs favorited and their components are now in G8. 

    If you are into duf editing, you could Save as morph assets at this point. They won't work because by using TU, G8 is no longer fully recognized as G8. So the saved dufs are missing some pointers that tell them to attach to G8 when she loads. Also ERC links are broken so they'd need to be recreated. But all the morphs are there. Set G8 to Base reso, subD 0, dial in the morph and export. If you are okay with duf editing, though, G8 is still partially recognized as G8, so saving the morphs will place the resulting dufs in her Morphs folder under whateve vendor and product name you enter. The offending line in the duf will be the "parent" declaration. It will either read "parent" : "#Genesis8Female" or "parent" : "#geometry" It needs to be: "parent" : "/data/DAZ%203D/Genesis%208/Female/Genesis8Female.dsf#Genesis8Female" or "parent" : "/data/DAZ%203D/Genesis%208/Female/Genesis8Female.dsf#geometry" respectively.

    You'll need to clear the scene or restart Studio if using 4.9.4. You want to make sure you have a completely clean G8 loaded when you import the morphs with Morph Loader. I've had issues with Studio refusing to clear the morph data even if I reload a new G8 in the same scene. Made me think it wasn't working. I know SickleYield has mentions similar behavior out of studio in the past, so this is not a new bug.

    At no point should you save G8 as a figure in the process. You've got the clone saved in G3. That's all you'll need. Once you do this once, you can lways load G8 and use TU to move morphs from G3. How you save the mophs is going to be a matter of taste.

    If you really must use the Copy G8 method and import that, it's still worth while to create a a G8 Clone as above. Because, A) G3 can wear G8's clothing, and B) You can fit the copy of G8 to G3 using the G8 clone and get a much better fit.

    G8 and G3 do have minor topogy differences at the upper cheek near the outside corners of the eyes. You'll probably get better results if you correct that in 3rd party editor, because autofit won't correct it. I've not got 'round to that myself. I just want to prove the concept.

    Edit: I should add, in my test case (custom figure transfer) there were no issues with fingernails. Just checked.

    Very clever indeed! Yes this is the perfect way to get G8/G3 aligned in order to make a clone fpr morph transfers, whichever method. And once the G8 clone is made you can also repeat the process to get an almost perfect G8F clone of G3F.  I will experiment more :)


    Post edited by Redz on
  • PlatnumkPlatnumk Posts: 663

    Hi Redz, I wanted to give your Tutorial a try but the download link gives a 404 File Not Found

  • RedzRedz Posts: 1,459
    Platnumk said:

    Hi Redz, I wanted to give your Tutorial a try but the download link gives a 404 File Not Found

    Hi. I decided to pull it for now as I think with Singular Blues' method above, there's a way to get the morphs across without any hand/finger distortions. I don't have time today but I will see about updating it for a better transfer. 

  • PlatnumkPlatnumk Posts: 663
    Redz said:
    Platnumk said:

    Hi Redz, I wanted to give your Tutorial a try but the download link gives a 404 File Not Found

    Hi. I decided to pull it for now as I think with Singular Blues' method above, there's a way to get the morphs across without any hand/finger distortions. I don't have time today but I will see about updating it for a better transfer. 

    Thanks for letting know :) 

  • Singular BluesSingular Blues Posts: 737
    edited June 2017

    While I'm breaking my arm (to quote noted pilospher James Tiberius Kirk) patting myself on the back for my ingeniuity, I actually have figured out, and tested, a method for bring over morphs with ERC intact, but it is (to borrow a term from the world of Games Workshop) beardy.

    As in super beard.

    Basically You copy the dsf files from G3, with their folder structure intact (you don't need to go higer than the vendor folder, but you need the rest or it gets that much more dificult).

    You then use mass file editing to replace all references to Genesis 3 with Genesis 8 (Genesis3 becomes Genesis8 and Genesis%203 becomes Genesis%208). I use a program called FAR (Find And Replace, iirc) to do this. This requires renaming all the dsf files as txt because FAR won't edit anything it isn't sure is an ASCII file. For compressed dsfs this means uncompressing them first. Of course, they have to re-renamed to dsf once the edits are done.

    Now copy those folders into Genesis 8's folder.

    At this point, you proceed as above, but when you get to bit about transfering morphs, make sure "overwite existing" is checked. Also (and this important) at no point should you touch the sliders of the copied morph beofre doing the transfer. Bad things may happen. Until you do the transfer, the morph values are pointed at the wrong vetex order and in the wrong direction.

    When TU overwites an existing morph, it does not change that morph's ERC links.

    Things then proceed as they would above except if you choose the export and then import via morph loader method, you need to name the export file with the internal name of the morph, and then, when you morph load it, make sure Overwrite Existing is changed from Make Unique to Deltas Only.

    This will overwrite the bad vertex ordered morph with the correct order.

    Told you it was beardy.

    Post edited by Singular Blues on
  • RedzRedz Posts: 1,459
    edited June 2017
    Platnumk said:
    Redz said:
    Platnumk said:

    Hi Redz, I wanted to give your Tutorial a try but the download link gives a 404 File Not Found

    Hi. I decided to pull it for now as I think with Singular Blues' method above, there's a way to get the morphs across without any hand/finger distortions. I don't have time today but I will see about updating it for a better transfer. 

    Thanks for letting know :) 

    Will test more and update

    Post edited by Redz on
Sign In or Register to comment.