Daz 3D is part of 
Connect
DAZ Productions, Inc.
7533 S Center View Ct #4664
West Jordan, UT 84084
Licensing Agreement | Terms of Service | Privacy Policy | EULA
© 2026 Daz Productions Inc. All Rights Reserved.
Comments
2015-11-17 - Updated Female(s) with Genesis 3 Male Clone. Added Genesis 3 Male(s) product files.
That's interesting. I wonder if that will help with transferring items over from female to male?
(Maybe I'm really slow and there was a daz G2M for G2F built in, but if there was, I'm not aware of having it.)
I'm working on a new character for G3M, but it will take some time to finish :) I am using Silo and Hexagon for the sculpting.
Don't get frustrated now! It seems like you are done, or close to it. When you say nothing happens when you pose, did you make sure the converted vest was "fit to" the male figure when you completed the transfer utility? Your vest should already be functional for your own use; now it is just a matter of making sure that it can be used by others, monitoring the behavior of the buttons, and adding detail if desired.
For example, here is an early stage application of my CRAPPY meshes with no surface textures. See how they can already pose and can be integrated with other content (in this case R-75 moto)? Now, I am replacing with less crappy meshes, adding detail (like wrinkles and folds) and making sure they bend fluidly.
Your mesh was never crappy. I'm sure your vest would look great in a render right now.
lx said "Thanks for the tutorials - I've been watching them and honestly I'm still completely lost. I autofit the vest and got weight panting panting onto the vest, but nothing seems to happen when I adjust morphs or posing at all. I'm pretty sure I just don't understand it at all, and rigging seems to be one of those things that really doesn't come naturally to me. It just feels like a million concepts already in their advanced state at once."
Excellent news! Can't wait to see.
.
Oh, I'm sure it works fine for my purposes and I could easily go back and make a texture or just apply some shaders and get by fine to do a nice render of it. The problem comes when I dial in say M6, who is much taller and musclier, the vest deforms to get that stupid shrinkwrap following the crests and valleys up the chest/shoulder/neck look (that pretty much all the bikinis on sale have.) There's also the button issue which I'd like to be able to fix but I'm less bothered about.
Here's what I've been doing:
1. Stick G2M in scene
2. Import vest into scene
3. Object > Transfer Utility, base G2M Target Vest, type: Shirt
The vest is now fit fine and mostly fixes itself for morphs, aside from the abovementioned issues.
4. Select Vest, Tools>Node Weight Map Brush. Tool Settings>'unused maps: Rigid (hit Add Map then select it)' then paint onto the vest. The blues and reds come up as expected, but nothing happens. They don't affect morphs at all as far as I can see, which leads me to believe I don't really understand the purpose of the weight map brush (I thought it would make morphs move the vertices less where the weight was higher) or I'm otherwise doing something wrong.
For fixing M6 shrinkwrap neck looking stupid I'm assuming the answer is to go back to Blender and resmooth the model to fit M6 nicely then import it in as a morph under whatever fancy name it was meant to have as mentioned in an earlier tutorial. Which is fine, except a. I don't have the other G2Ms and b. I can't be bothered :p
Mostly I just want to understand how to edit how much the rigging affects various parts of the mesh, but everything I've read and watched on the subject just goes in one ear and out the other.
Is this what you're looking for, lx?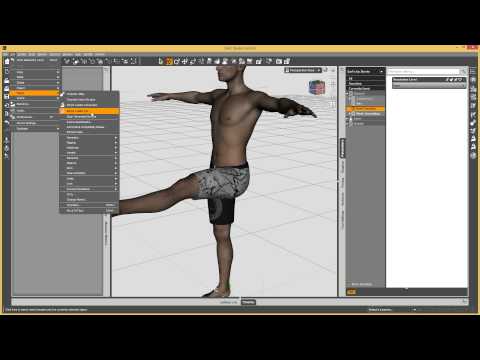
No, but G3M should come with a G3F clone that will. The clone is on the destination figure, the shape is that of the source figure.
Okay that was perfect, thank you!
Suddenly I feel like I understand the amount of work to make clothing look perfect on all the figures and morphs. I can see why all the usual issues appear on clothing I've bought in the past.
BRB running away and never rigging anything again~
Ohh, it's just for transfer utility? That'd explain it.
I believe that AutoFit uses the transfer utility code, yes - it saves having to configure options.
lx, this is sometimes why you see PAs and others tell people to try and make them for themselves. It does begin to give some perspective. :)
I have a very fundamental question for those more experienced with clothing and footwear creation. Do you use reference materials when creating your items (photgraphs, actual physical items, etc.) when creating your meshes? Here and elsewhere it is not uncommon, in my experience, to see tutorials or examples which seem to suggest that the meshes are being created entirely from memory or imagination without any mention of reference materials.
No, we use lots of references. I generally collect a folder full of pictures of any given thing from Google before I start. This is allowed because these are not things to trace or edit directly in, just to look at for planning and inspiration (when my mind goes blank on where a buckle goes, etc.). Of course you have to choose not to slavishly copy something copyrighted.
Now for texturing clothes I sometimes use my scanner on clothes that I own or have bought for the purpose. I cut up some male underpants from the store to help texture the jock straps with. This was worth it because it cost me $12 but the product made a lot more back.
The other answer is "it depends". Some things modelers use tons of reference, others use reference for how wrinkles and folds look, but not necessarily the clothing itself if you're not recreating something and designing it yourself. Reference can never hurt and if you're not familiar with clothing, draping and how materials (leather vs. silk) hangs or wrinkles, it can be critical to use it. I have run into a few people who just know what they're designing and just create. For the better part, I am not one of those, though I have a pretty good understanding of some things, and I look for reference to make sure I make it look right.
SixDs - If you look through the early parts of the thread, there was quite a bit of encouragement for people to spend time collecting reference materials before finalizing the idea for a project.
lx and Chris, yes, absolutely. From the beginning, I wanted to convey that creating custom content takes a lot of hard work - which is different from saying only a few people have the talent to do it.
I said " OK - these are crappy gloves. But it illustrates the simplest workflow. We will learn how to make these much, much better at every step. And that will be just as much a matter of hard work and patience as talent. This exercise is not meant to fool anyone that quality stuff can be done easily. Quite the contrary, it is meant to illustate that Daz has made the basic steps open to everyone. Quality stuff will be largely a matter of effort and frustration and perseverence. Yes, talent will help a LOT. But effort will help just as much, if not more. Your content creators work hard."
lx, this is sometimes why you see PAs and others tell people to try and make them for themselves. It does begin to give some perspective. :)
I might as well write a little summary now, so that my earlier comments aren't too misleading.
First, I didn't expect it to be easy (or not a lot of work.)
1. The modelling part is really easy for me, and I really enjoy it. Obviously I'm a beginner but moving dots around just feels great to me, and I think each of the things I've made so far has been considerably better and faster than the previous one. I hate UV mapping and I both love and hate creating textures, but mostly I just don't like spending time in Photoshop at the moment because it means spending time away from Blender.
2. Using the Transfer Utility to turn an OBJ into a piece of clothing was the part I knew nothing about, and honestly thought was going to be a much harder and longer step, but Studio's autofit is really impressive. For my personal use, this combined with small morph/remodelling adjustments as needed for specific pieces are plenty.
3. Creating a clothing item that works on everything in every pose is a nightmare. I still don't understand Studio weight painting at all, and I haven't tried making my own bones yet, but I understand how to make custom morphs (though I'm not sure about the JCM naming requirements, if they exist.) As someone who wants clothing to work perfectly, the sheer number of morphs I'd be required to make and the amount of figures I'd have to own to test on that I don't is just no. I suppose I could just make a few simple adjustment morphs the way most do, but I wouldn't really be happy with that, you know?
4. STUDIO TO BLENDER BRIDGE, PLEASE. Exporting/Importing is very easy, but also irritating to do over and over and over and over and over just to make minor adjustments.
5. I think that covers everything? For the sake of completion I'll tidy up the vest a bit more and then post a finished version when I stop being distracted by my current project.
Yes there was and long lost in the dark hole of wherever old threads get lost into ;-) A little outdated now too as 4.0 was just coming out when I started that one. It was tucked in Nuts 'n Bolts which few ventured into.
This thread in the Commons is doing a lot better so far and it's nice to see so many interested and contributing ideas :-)
There was one modeling tip I illustrated which seemed to trigger a flurry of new types of skirts which was nice. Everything doesn't have to be from a solid circle. So I will show that here too.
For a full skirt one would make the full circle of course, for this I just made the one section thinking more of a loin cloth type item.
That is not possible. It helps if the item stays within the parameters of the main bones to be moving in the figure. i.e. for long items, not to cross over into the "foot" area.
You find which way works best for you ... some work the rigging to their satisfaction, others make lots of morphs, some do a combination thereof.
This is great. Thank you for the loin cloth example. That same idea might help with a cloak or cape or mantle. Also, I hope people take a close look at your 5th pic which discusses the minimum number of lines required to hold shape when smoothing is applied. Important consideration.
I'm working on this, but in my current state of mental health I can't make any promises. Already got a script that exports the currently selected item and opens it in Blender, but there's a lot more to be done Might sell it if it turns out fully functional and polished, otherwise it'll be a freebie.
That would be amazing. I would offer to help, but unfortunately I don't know anything about scripting.
I'm looking for some modelling help. There are probably better places to ask, but this thread is kinda home, so...
I want to know if it's possible to do this (in Blender or in some other 3d software)
Say I make a checkered scarf as a flat mesh, all perfectly straight, perfectly even quads. Is there a way to then manipulate that mesh by moving each vertex or similar to then be able to manually wrap it around or scrunch it up without each edge changing in length as it would if you did it the standard way? I know about making the mesh follow a curve, but this would be considerably more intensive since I'd want to reposition each little part precisely. Running a clothing physics simulation would also be impractical for this.
Basically I want to know if there's a way to treat a mesh like a physical item (the way a physics simulation would) in order to keep its dimensions as is while manipulating the object the way you could a physical item.
I don't think so, short of straight up rigging it with bones in Blender.
This was really helpful. Thanks for posting it. I was wondering how to make pleats as my Great Kilt will need pleats for at least one of the morphs. I love the step by step pictures. I'm a very visual learner so this will be really useful. I had heard of this thread in Nuts and Bolts and some of the tutorials that were on there. I didn't make the connection that you had started it. It is nice to know that diomede started us off with this after all of the discussion in the original thread, It's Not Raining Men started by gerterasmus. With all of my research try to figure out how to make clothing for my own use because I wanted several outfits that were nothing like anything in any of the stores, I was disappointed that the old threads were gone and I was having to start almost from scratch. I was frustrated that there wasn't still a thread about this topic and that a lot of the links to the old tutorials always came back broken because the links no longer worked. However, after many months of doing all of this research and trying to figure it out on my own, I never once started a thread for this purpose because I'm usually one of those people who likes to lurk in the background watching everyone else. I'm very greatful to diomede and gerterasmus for starting both threads. I think the timing couldn't have been better. I think it is safe to say that we might manage to keep this thread going for awhile given the response. I hope so anyway.
Well that's a shame, since the number of bones to make a giant grid skeleton would be a bit ridiculous.
It's also kind of dumb in my mind that there's still no basic collision option i.e. an option that will stop you from dragging a mesh into another mesh; like snap but you could freely move an object, just that when it hit another object's face you couldn't go any further.
It's something we all want, but it's also very hard for programmers to do.
Hm really? I mean obviously flawless detection is difficult, but wouldn't the program just need to map out the general areas meshes occupy as collision detection (with either basic or use mesh as physics simulation current does) and simply forbid the active mesh from entering that zone? I know it's very simple in 2D, and if you can simulate 10,000 pebbles smashing into each other then it seems like a simple 'do not enter' for one object would be much simpler than calculating interactions and reactions for thousands of objects at a time.
Actually I just had an idea, although I don't know how practical it is: make a copy and scale, or extrude along normals to make a bigger version of the G2M (or whoever) and use that as your snap to base (since subd and smoothing tend to shrink your mesh and constantly rescaling is annoying and imprecise.) I realise this is probably painfuly obvious to everyone else but this thread is meant for beginners so it might benefit someone (like me, who gets annoyed with constantly resizing strip modelled smoothed items.)
Anyone tried doing any morphs yet for GenMale3? I've just had a quick play in Zbrush and I'm noticing even when I have the rest of the head masked that creating ear morphs seems to move the lips apart slightly and same with other morphs. Any suggestions for avoiding this?
Did you make sure the HD mouth and navel morphs were off before export? They are dialed in on load.
Pen, set up the Genesis 3 Male without the HD mouth and navel and save as a preset duf. You want to make sure you also add your morph with MLP with this zeroed out duf. Export and import should match.