Strand-Based Hair Mini-Tutorial
 3Diva
Posts: 12,058
3Diva
Posts: 12,058
I thought I'd put together a mini-tutorial on Strand-Based Hair, for those who might want to see a quick walkthrough of the basic steps. Disclaimer: This is just how I personally do it, there are probably easier or better ways. So, of course, feel free to point out easier/better ways if you've found some - Strand-Based Hair is still quite new and we're all learning as we go. So feel free to share what you all have learned and any tips/tricks that you've discovered that might make things easier. :)
Load the figure you want the hair added to (in this walk-through I'll use Genesis 8 Male).
Select the figure in the scene tab and then go to Create >> New Strand-Based Hair.
1. The Strand-Based Hair Editor should pop up - select Torso and Face.

Then go to the Paint Tab.
2. Paint where you want the hair to grow. Slide the "Value" to 0.0% for areas you want to "erase" - slide it back to 100% to paint in white the areas you want the hair to grow out from. (Edit: Thank you to L'Adair for pointing out that you can "erase" by holding down "Alt" - no need to slide the Value to 0. Thank you for the great tip, L'Adair!)

Then go to the Distribute Tab.
If you see any strands growing out of any funky or weird areas go back to the Paint Tab and paint them out with the "Value" at 0.0%.
3. Set the "Density" (I usually set it to 50-60 for longer hair but since this is short hair I went with 100). Set the Width (I usually set the Base at .18 and the Tip at .08), but you can always adjust it later if you want thicker or thinner hair strands. Same with the Density, which you can tweak later if you want thicker or thinner hair growth.

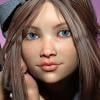
4. Go to the Style Tab and scroll to the bottom and select "Show Hairs" and (this is optional) turn the "Amount" to 100%. Depending on your machine though (and personal preference) you might keep it at 20% or slide it to 50%. I like to see all the hairs that I'm working with, and luckily my machine can handle it, so I usually have it at 100%.
5. The "Comb Curves tool" should be selected (it looks like a little comb) if it's not selected, select it. Adjust the Strength, Radius, and Fall Off to suit your taste. I usually like to start out with the settings of Strength 100%, Radius around 100, and Fall Off at 0%. I also recommend setting the Auto Parting around 90.
Start shaping the hair how you want it - adjust the Strength, Radius, and Fall Off to suit your taste. I like to zoom out a bit so that I can get better control over the entire hair and start to "rough out" the general shape that I want. (You can zoom in and use a smaller brush Radius when you're ready to make more minor adjustments.) But for now, keep a focus on the general shape that you want.

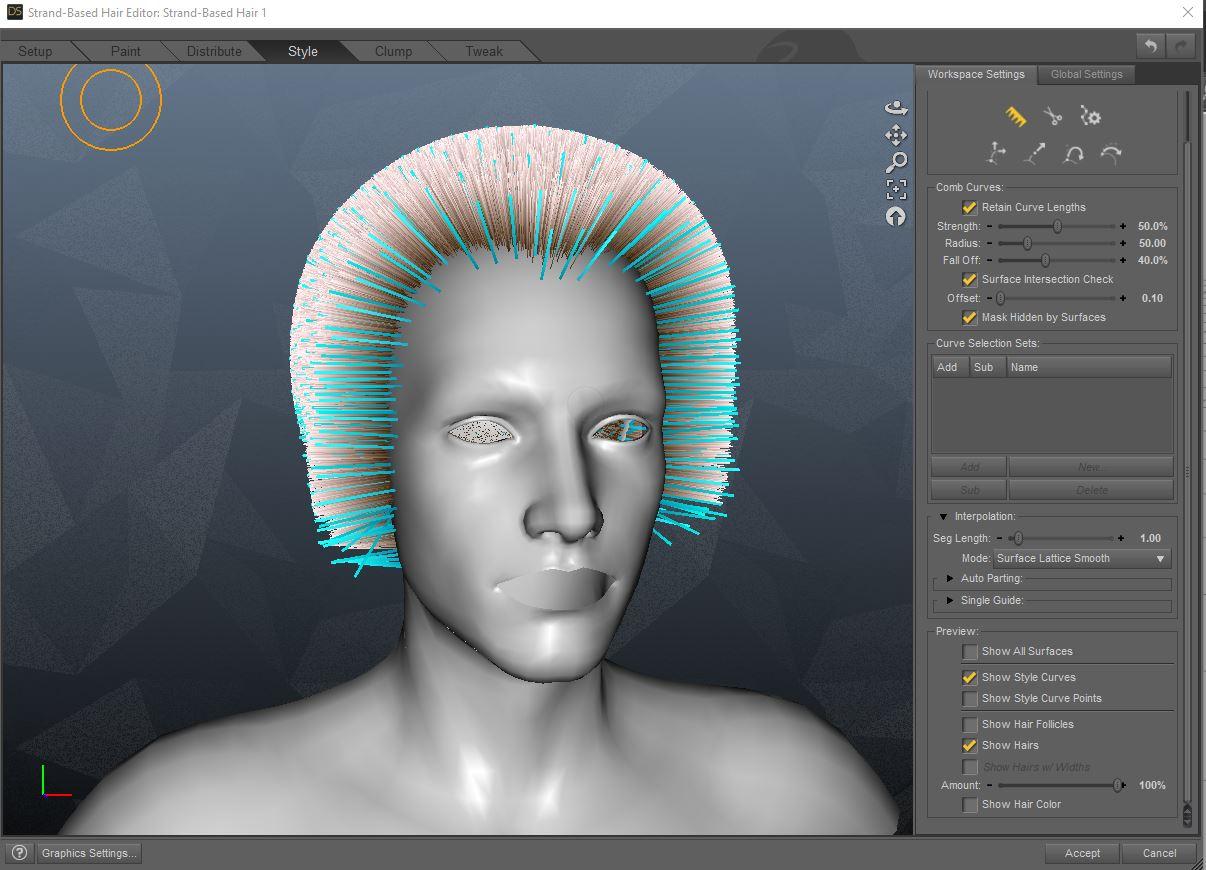
6. Once you have the general shape you want, use the "Scale Curves tool" (the one with two arrows coming out of it) to extend the hair length to the general length that you prefer.
7. Now go in and start refining the shape. This is where I start to zoom in a bit more, using a smaller brush, and tweaking the Strength, Radius, and Fall Off as needed. For more subtle changes you might use a lower Strength with a higher Fall Off, but use the settings you, personally, find easiest to use.

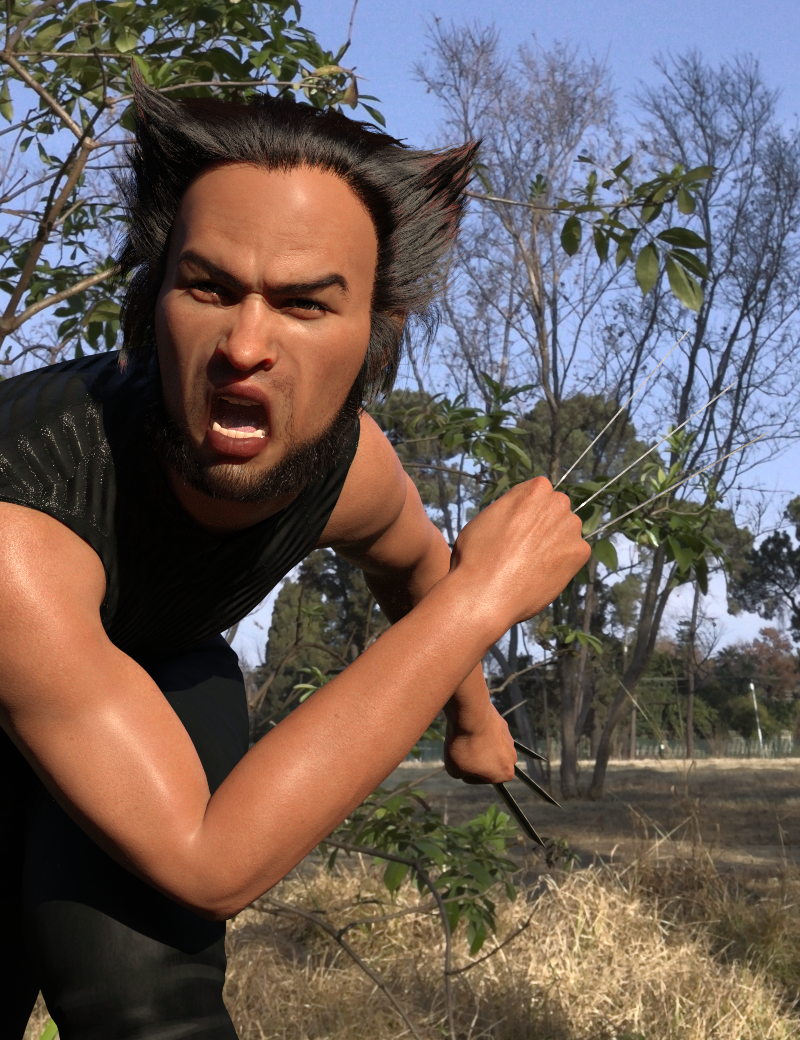
8. Once you have a general shape down I recommend hitting Accept and then saving the scene. You can call it "Strand Hair Wolverine WIP 1" or whatever helps you remember. I like to save often and at various stages so if I REALLY get funky with it or mess it up badly, I can just reload a previous save. So I'll usually end up with "WIP 1", "WIP 2", "WIP 3". But that's just my own preference.
9. After you've saved go back into to the Strand-Based Hair Editor (make sure the "Strand-Based Hair 1" is selected in the scene tab then go to Edit >> Edit Strand-Based Hair).
Refine the shape until you have a general shape that you like. If you find you've pushed the hair into the scalp, you can use the Comb to fluff it up and out of the skull or you can use the "Curl Curves tool" (looks a bit like a fish hook) at a negative value to pull the hair out of the scalp. Tweaking and refining the general shape can take a while, so be patient. This is you pretty much sculpting the hair, it may take a while to get it to where you want it. If you find you've really messed up you can just hit "Cancel". If you accidentally hit Accept and don't like the changes, just reload the previous save of the scene.
If you want to make any parts longer you can uncheck the "Retain Curve Lengths" option and use the comb to "pull out" longer strands. You can also increase or decrease the length with the "Scale Curves tool" (the tool with two arrows coming out of it), or if you want to just shorten a specific area you can trim it with the "Cut Curves tool" (it looks like a pair of scissors).

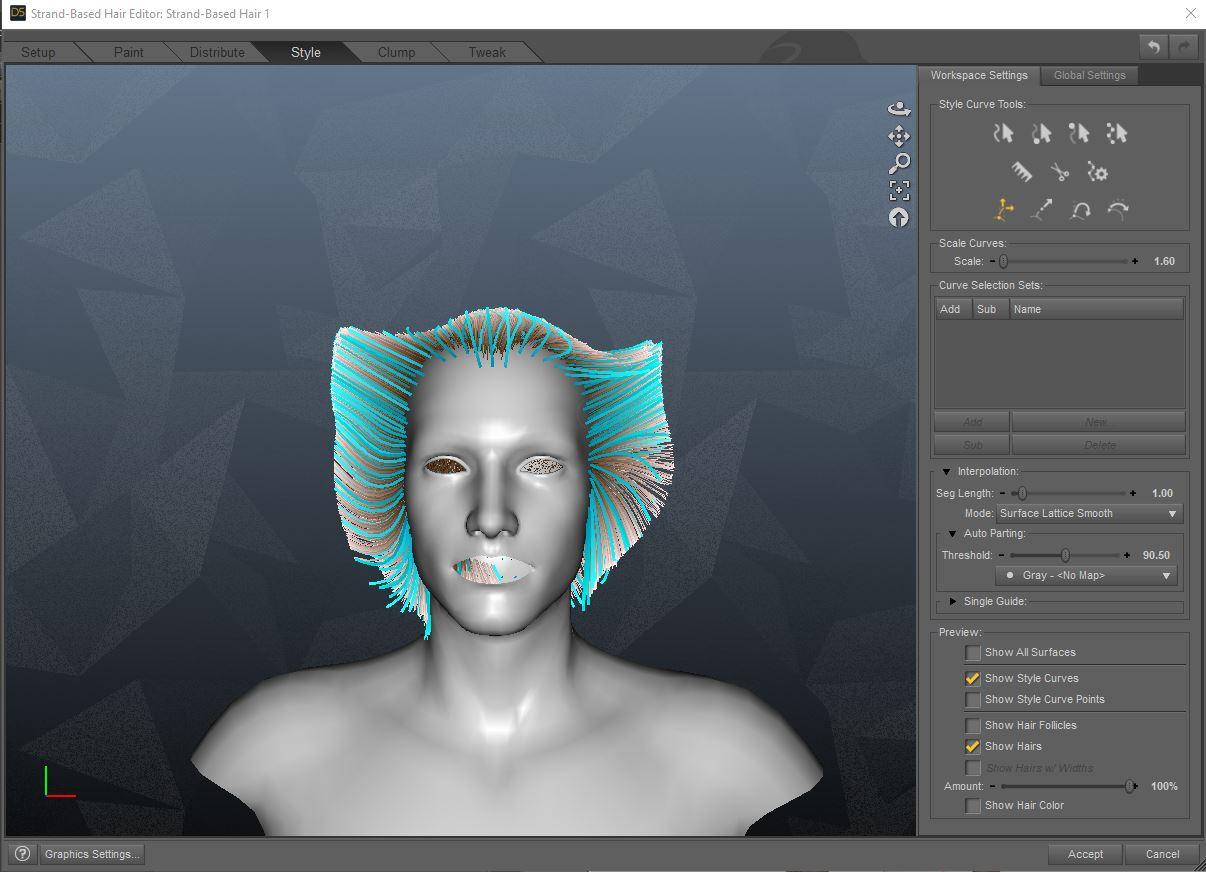
10. Once you have the general shape down in the Style Tab I recommend adding some Clump and Tweaks.
Here are the settings I used for Clump:
And the settings I used for Tweak:

This is just a quick walk-through and doesn't go super in-depth. Hopefully, though, it can be of help to those who are wanted to get started with learning how to make Strand-Based Hair. Feel free to experiment with the different settings and tools once you're more comfortable with the basics.
Anyone else who has tips and advice, feel free to leave your comments. We're all just learning how to do this, so sharing what you've learned would be greatly appreciated. :)
Daz 3D is part of 
Connect
DAZ Productions, Inc.
7533 S Center View Ct #4664
West Jordan, UT 84084
Licensing Agreement | Terms of Service | Privacy Policy | EULA
© 2026 Daz Productions Inc. All Rights Reserved.
Comments
That's cool. Diva.
Nice job Divamakeup, you covered everything :) we're all learning little tips and tricks that can be added as people get more familiar with the editor. For example perhaps after step 5:
5. [ --- above --- ]
- tip 01 use the curve selection tools so that you comb only sections that you want to work on at a time
- tip 02 save your curve selection so that you can go back and edit just that section again easily, these saved selections will be useful in the following steps too.
Notice in your image, directly below the Value slider is an Alt Value slider. (This is releatively new.) When you hold down the Alt key while painting, the Alt Value will be used. It's really easy to paint and erase when all you have to do is hold or release the Alt key! Default values for Value and Alt Value are 100% and 0% respectively.
This is a really nice introduction to using SBH and I think it's so nice you used Wolverine's hair as an example so at the same time, you are helping out the user who asked in another thread.
thank you so much Diva, I'm usually struggeling very much when I try to make the hair longer, as they start flying in every diretion and with more combing it just gets worse
Hey really nice work! and super cool example! You got that wolverine look down pretty great.
Edit#2: Deleted my wondering question. Realized wrong place & time to ask this. Sorry.
Thanks for making this excellent contribution to the very very important 3D hair evolution !
I think you should do a video series and put it up at the store, looks like you have a good handle on it !!!
Excellent work :)
Thanks for this, Diva.
Any tips on the right "line tessellation?" The hair geometry is coming in at 2 GB!
Amazing work and the most needed, Diva. Thanks a lot for your time.
I took the liberty to add a link to this to the Tutorial collection in the Art Section of the forums
Very nicely done, Diva! Thank you for the run-through.
Thank you, Diva, for the minitutorial. Much appreciated.
Excellent tutorial Diva, very concise and useful.
One question: From what I've read, to re-use a hair you create on a different figure, it's best to work with a skull cap as a base. Is that correct, and if so where would that fit into the work flow you've described?
Thanks Diva for this. I really was pretty dumbfounded as to where to start. But I must say, I like hair props that have a realistic hairline and there's something about the hairline here that looks odd to me. Does this work with a haircap?
Could someone please explain what are the differences between this addition to DAZ Studio and the old Garibaldi hair product? I ask because I have that Garibaldi plugin (the full purchase, not the Express version) but I am far away from my PC for the next few weeks so can't check it out for myself.
For one thing it works in Iray. It's also had work done on the UI, and bugs fixed.
I'm just starting to play with the SBH stuff so this tutorial will definitely come in handy! Thanks @Divamakeup. Great job. :)
you are life saver thanks
Thank you for the tutorial. Nice looking hair.
Thank you very much!
Very cool Diva. Thanks for the tutorial!
The Strand based hair editor is the new and improved Garibaldi. NOt only does the SBH render in Iray, the editor can paint properly on G3 and G8 which Garibaldi cannot. There are interal bug fixes too to make it more stable.
Good tutorial, but there is one small, but I think important, point that needs to be addressed.
In the distribute tab, you refer to the amount as a percent. Since this is based on Garibaldi, the amount is actually the number of hairs generated per square centimeter. The percentage of coverage is managed by the density map.
Using the default of 10, any part of the map that is painted full white will attempt to generate 10 hairs for each square centimeter. An area painted 50% grey will only generate 5 hairs per square centimeter while 70% grey will generate 7, etc.
Nice work Diva!!
Selection was also reworked, and the whole thing made moe consistent with the way DS works (though that isn't done yet).
Great Tips! Thank you, AprilYSH! :)
Ahhhh This is going to be a BIG time saver in the "painting" process! Thank you for point this out! :D
Thank you. I'll give it a whirl when I get a chance. I gave up on Garibaldi because the combing and styling was so unpredictable and also because of the lack of IRay support.
You might try turning "Auto Parting" down to "1.00" - its lowest setting and see if that helps.
If that still doesn't help and you can't seem to smooth out the hair that's flying around, you can try a start over by increasing the Strength and Radius of the comb all the way up and the Fall Off all the way down and comb all the hair in the same direction - that should smooth out any hair that's getting tangled and you can start again. If all else fails and you want a complete reset you can use the "Style Curve" (looks like it has a little gear next to it) to Reset Curves. That will take it back to the base settings and give you a fresh start.
For longer hair I try to gradually increase the hair length as I work on the general shape. That way if the hair starts to act off, you can decrease the length a bit, comb out the "tangles" (for lack of a better word), and increase the length again. Maybe that will help?
I remember your original comment. It's fine. :) Real head hair is often super fine strands and dense growth:
For close-ups one might try increasing the growth density and lowering the strand thickness. That might help. I'll have to experiment with it. ;)