Carrara Challenge #40 NOIR WIP - A warm welcome to our PA sponsor, Fenric

145791015

Comments

  • UnifiedBrainUnifiedBrain Posts: 3,588

    EP, you are absolutely smoking it!

  • Bunyip02Bunyip02 Posts: 7,524
    Vyusur said:

    @Bunyip02, very touching picture, and characters are with obvious likeness. The only thing I lack in your picture is a bright dramatic rim light (with soft shadows of course).

    Thanks Vyusur, have had the dreaded "end of file error again" so will redo the scene with the rim light !!!!!

  • Bunyip02Bunyip02 Posts: 7,524

    @Bunyip02, are you using shadow buffers on your lights or maybe less than 100% shadow intensity? I like the concept, it is pretty cool. Blade Runner is the perfect mix of sci-fi and nior. To me, the lighting is flat and the open mouth on the Rutger Hauer inspired character looks like his mouth is lit from within- a telltale  sign of using a shadow buffer. Take a look at the picture of Rutger Hauer you posted, and you will see a rim light on the right side of his head, and a light source coming in from the left that illuminates maybe 3/4 of his face. The rest is in deep shadows. Keep in mind the scene layout you have is different, so what works for the reference image may not work for yours. The idea though, is to provide seperation from the background.
     

    Thanks EP, I reduced my light to about 30% with the shadow intensity to about 35%, have had the dreaded "end of file error" again so will redo the scene with Vyusurs and your comments to improve the scene.

    Love your femme fatale/car/bridge scene !!!!!

  • StezzaStezza Posts: 7,757

    that's no good bunyip... eof errors seem to be popping up regular for you...

    great image .. will be even better with the rim lighting adjustments .. keep at it yes


    Bunyip02 said:
    Vyusur said:

    @Bunyip02, very touching picture, and characters are with obvious likeness. The only thing I lack in your picture is a bright dramatic rim light (with soft shadows of course).

    Thanks Vyusur, have had the dreaded "end of file error again" so will redo the scene with the rim light !!!!!


  • DiomedeDiomede Posts: 15,026

    Oh no - so sorry for you, Bunyip02.  EOF errors seem pretty frequent.  Hope you get it sorted out soon.

    Great WIPs all around.  I still have to ration my internet time until the techies get it sorted out,so no time to comment on all.  I do want to give a special shoutout to @Selina and @EviProducer for their detailed explanations.  Very informative and much appreciated.

  • evilproducerevilproducer Posts: 9,040

    Bunyip02, I'm so sorry you are having problems! Do you have any plugins installed that may be causing the problem? Especially plugins that may be for an earlier version of Carrara?

  • evilproducerevilproducer Posts: 9,040
    edited May 2018

    Here is my lastest WIP. I still want to do some lighting work to simulate reflected light from the roadbed. I have also adjusted the pose for the left hand. I'll post my lighting set up soon. I'm still testing my idea for the shaders. I may leave that for a scene where it will be more visible.

    Oh, if anybody wants to use the bridge that I built, I've uploaded it to ShareCG. Feel free to use it wherever you want. Even in this challenge if you think it will work for you.
    https://sharecg.com/v/91494/gallery/5/3D-Model/Gilman-Bridge


    figure test02.png
    1280 x 720 - 799K
    Post edited by evilproducer on
  • HeadwaxHeadwax Posts: 9,921

    Here is my lastest WIP. I still want to do some lighting work to simulate reflected light from the roadbed. I have also adjusted the pose for the left hand. I'll post my lighting set up soon. I'm still testing my idea for the shaders. I may leave that for a scene where it will be more visible.

    Oh, if anybody wants to use the bridge that I built, I've uploaded it to ShareCG. Feel free to use it wherever you want. Even in this challenge if you think it will work for you.
    https://sharecg.com/v/91494/gallery/5/3D-Model/Gilman-Bridge


    we


    welcome back evil, nice render you havent lost your evil touch :)


  • HeadwaxHeadwax Posts: 9,921
    Bunyip02 said:
    Vyusur said:

    @Bunyip02, very touching picture, and characters are with obvious likeness. The only thing I lack in your picture is a bright dramatic rim light (with soft shadows of course).

    Thanks Vyusur, have had the dreaded "end of file error again" so will redo the scene with the rim light !!!!!


    hya sorry you have that. my most consistant cause was running out of disc space , or being close to the edge and maybe having eg photoshop elements eating up the available spavce short term as a swap drive - so I was consistently getting end of file errors - you think carrara cwould have been made to tell you when a file doesnt save properly


  • HeadwaxHeadwax Posts: 9,921
    Varsel said:

    Making a camera-prop.

    Hopefully I will be able to find time to enter in something this time.

    Using my old Minolta camera as a reference. 

    wonderful stuff Varsel, I've been using a lot of your sharecg stuff lately - thanks for the kindness


  • HeadwaxHeadwax Posts: 9,921
    Bunyip02 said:

    Excellent work by everyone !!!!!!

    Homage to Blade Runner

    Carrara setup


    Raw render


    Post work


    wonderful, I have that on my board in the art work, 

    I've seen things you people wouldn't believe.

    Attack ships on fire off the shoulder of Orion.

    ..........................................

    All those moments will be lost in time, like tears in rain.

    Bunyip02 said:


  • HeadwaxHeadwax Posts: 9,921
    Selina said:

    ..I'm having too much fun with Procedural shaders that I thought I'd share some with you all...

    By using a pattern in the Translucency channel, I created my lamp shade which will throw the pattern on other objects in the shade from the attached bulb. This scene comprises one cone, one bulb, one sphere and one plane. No Ambient lighting and, although it is not necessary for this test, Indirect lighting to add interest to the sphere as it rolls along... To allow the 'throw pattern', Light through Trans. is also enabled.


    Selina

    loving the video, they are good tips too thak you


    Diomede said:

    Portrait category - how about the femme fatale's ex husband?    - not an entry

    Wanted to try some caustics with the glass, liquid, and ice cubes.  G2M with Air Defender turtleneck and jacket.  

    Hair modeled in the dynamic hair modeler on a custom hair cap.   Cigarette and other props modeled in the vertex modeler.

    B&W is a result of the GMIC film filter, using the Kodak TMax 3200 preset.  

    Some postwork in Photoshop elements to reduce brightness and increase contrast, which I guess could also have been done with GMIC filters.

    My cable TV and internet service is knocked out, so I have to go out to get internet access until it gets fixed.  Holiday here in the States so no luck scheduling an appointment.

    Worst customer service, ever!  They actually hung up on me.  No, I was not ranting or otherwise rude when it happened.

    Simple 3 point lighting setup.


    that's a classic image Ted, he could be out of a classic movie, the Guns Of Navarone


    Diomede said:


    Mistara said:

    wip 1

    the charmed hair went on Janette like a charm.  
    heaven sent projected no fuss, but then i havent activated any body morphs
     

    next steps
    try to simulate a breeze on the hair
    do a gel i'm happy with
    mebbe add a couple Aikos 
    fix the ground


    eek almost 1am, shoulda been asleep an hour ago  doh


    this is a selfie I take it? HGreat to see your experiments - what an inquiring mind you have!


    Stezza said:

    @Varsel that looks pretty cool - both of them yes

    EP great wips ... great radiators wink

    @selina c'mon.... catch up .. great animation examples.. @diomede that's one creepy looking dude!

    Misty... this is coming along nicely.. I like your thought processes. 

    Card Shark
     

    used gels, replicators for the munnies the building render from earlier images.. recycling smiley
    and Ron's brushes.


    haha Stezza, I laughed out loud so hard my false teeth nearly fell out... then I remembered I'd lent them to the lady next door because she was on a hot date


  • HeadwaxHeadwax Posts: 9,921

    Looks like everyone has been busy making some great renders.

    @UnifiedBrain - love the graphic style and colors in the second image. As for the first one regarding the infrared scope - maybe he travelled through time from the last challenge. ;)

    @MDO2010 - nice sculpting - I have never sculpted anything other than picking at Carrara's native Displacement tools in the model room, which isn't really 'sculpting' like other apps.

    @Ooseven - looking good. I like the diagonals and the stairs leading up into the mysterious darkness.

    @Stezza - clever render - I love the rabbit. :)

    @Selina - I hope you get the coat to drape the way you want. Can't wait to see more renders of your cruisin' mannequin.

    @head wax - those are all cool 'noir' renders. Have to agree with others the first image works best, but I do like the long cast shadows in the second image.

    @Mistara - cool you are experimenting with your own light gels - so much fun.

    @Diomede - Your characters are so awesome - great coat. Looking forward to this heist at the North Pole.

    I didn't have much time this week to do anything, but today I made some buildings inspired by expressionist images I found  searching the net. And I'm working on some hairdos for the lego character(s). But I'm still without a real idea, lol. Maybe something inspired by the movie 'Dark City' which I watched this week for the first time in years, hoping for an idea to land in my head.


    heyDesrtdude, thanks. These building and the lego chap are just wonderful. The Lego feel has been captured to a tee !


  • Persona Non GrataPersona Non Grata Posts: 1,365
    edited March 2021

    .

    Post edited by Persona Non Grata on
  • evilproducerevilproducer Posts: 9,040
    edited May 2018
    Selina said:

    Thanks to EP for introducing me to the Curve Filter...


    Hi Selina, did you mean to thank 3Dage? I know he mentioned the curve filter in relation to shaders on the last page. He is truly a great font of Carrara knowledge and wisdom. Also a really nice person and a patient teacher.

    Post edited by evilproducer on
  • evilproducerevilproducer Posts: 9,040
    edited June 2018

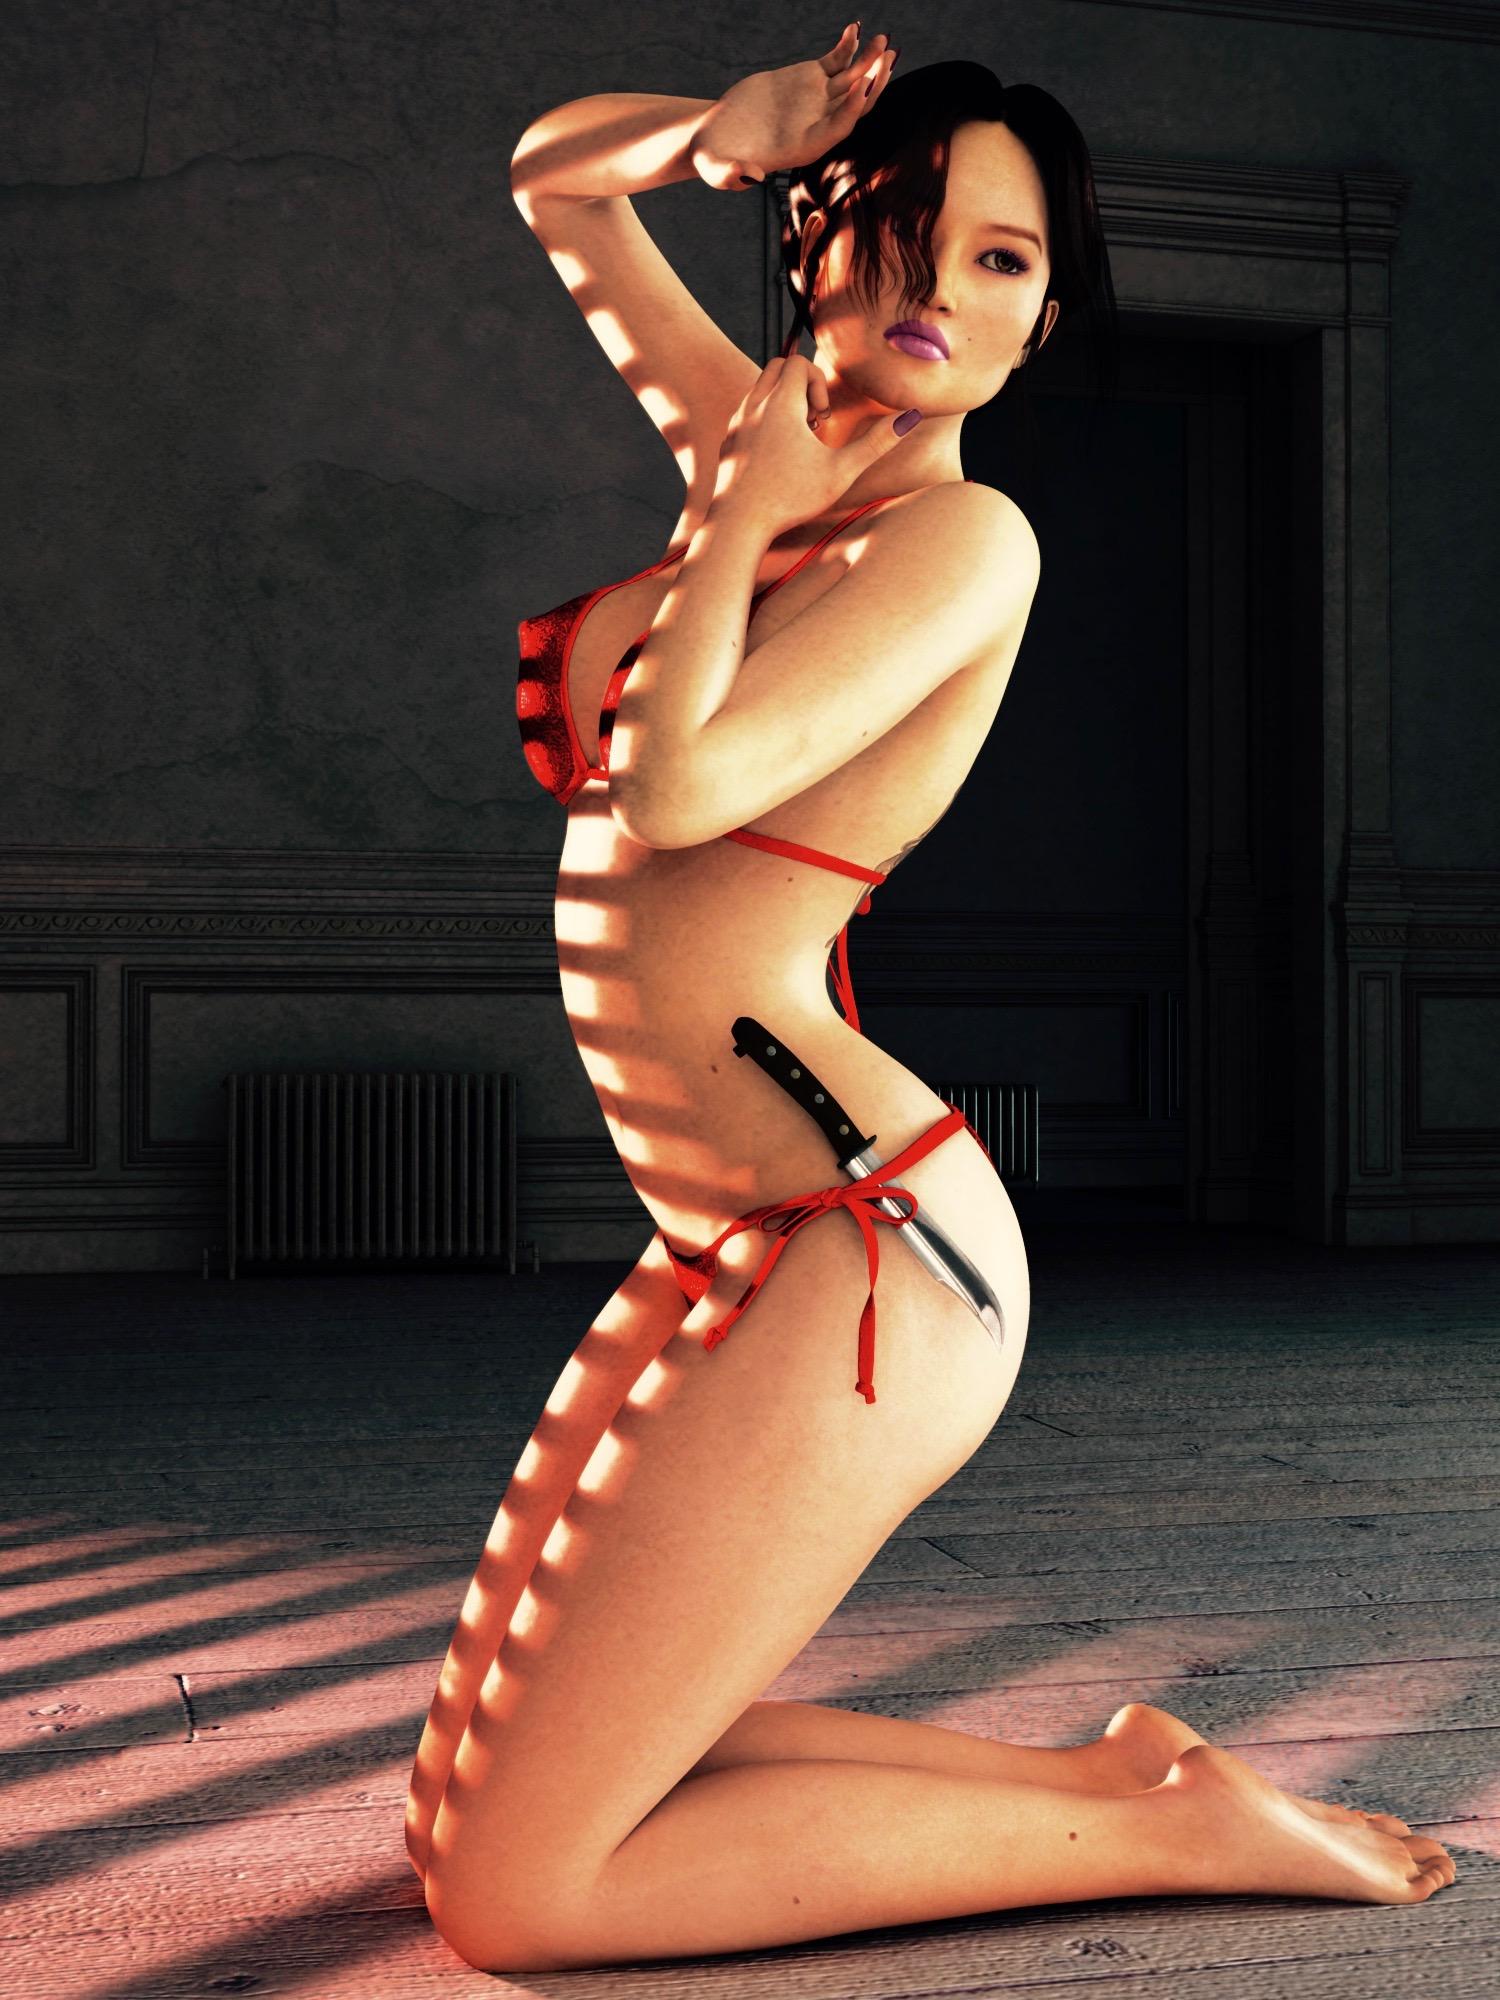
    So, I've been going back and forth with my Nior Fetale picture. I really like the warmth and the way the colors pop in the Technicolor style transfer version, but this black and white with only the bra and panties having color is striking. I also added a vignette and gave it a bit of a sepia tint. Which do you all think is better?

    Femme fatale pin-up-postwork transfer filter.jpg
    1500 x 2000 - 609K
    Femme fatale pin-up-red.jpg
    1500 x 2000 - 474K
    Post edited by evilproducer on
  • Persona Non GrataPersona Non Grata Posts: 1,365
    edited March 2021

    .

    Post edited by Persona Non Grata on
  • evilproducerevilproducer Posts: 9,040
    Selina said:

    Hi Selina, did you mean to thank 3Dage? I know he mentioned the curve filter in relation to shaders on the last page. He is truly a great font of Carrara knowledge and wisdom. Also a really nice person and a patient teacher.

    Yes, I meant to thank 3DAGE - just having a "senior" moment...

    They occur more often since I passed 50 - angry


    Selina

    Gotta love senior moments. I'll be hitting the big 5-0 towards the end of July.

  • 3DAGE3DAGE Posts: 3,311

    I'm used to senior moments :) 

    no worries selina :)

    the BW version with the red. EP,. thats the one.

    Cake noir.,    ...and something for the romantic cubist


    noir cakekexp.jpg
    1280 x 720 - 565K
    noir prim.jpg
    1280 x 720 - 42K
  • evilproducerevilproducer Posts: 9,040
    3DAGE said:

    I'm used to senior moments :) 

    no worries selina :)

    the BW version with the red. EP,. thats the one.

    Cake noir.,    ...and something for the romantic cubist


    Great cake. Now I'm hungry!

  • evilproducerevilproducer Posts: 9,040
    edited May 2018

    We'll see how this goes. wink

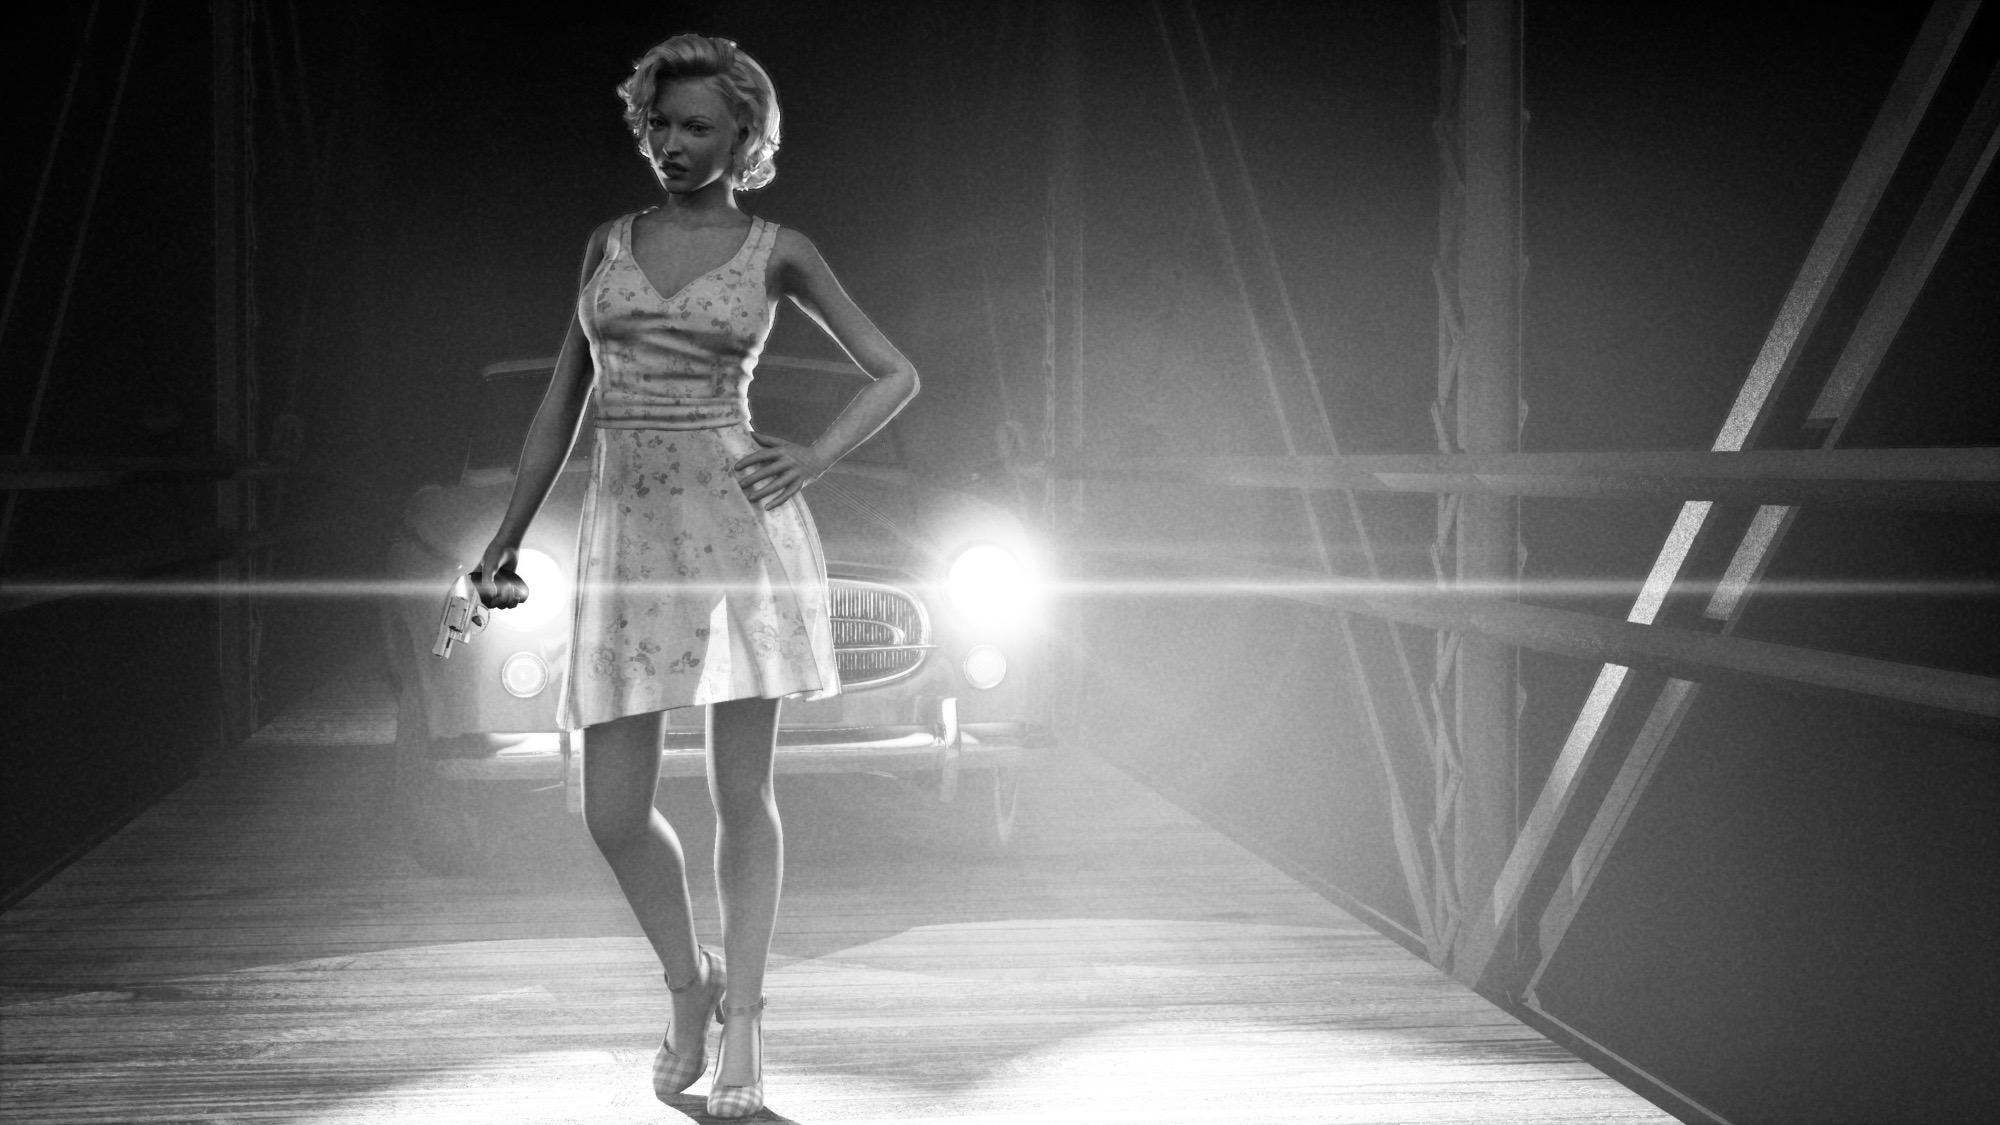
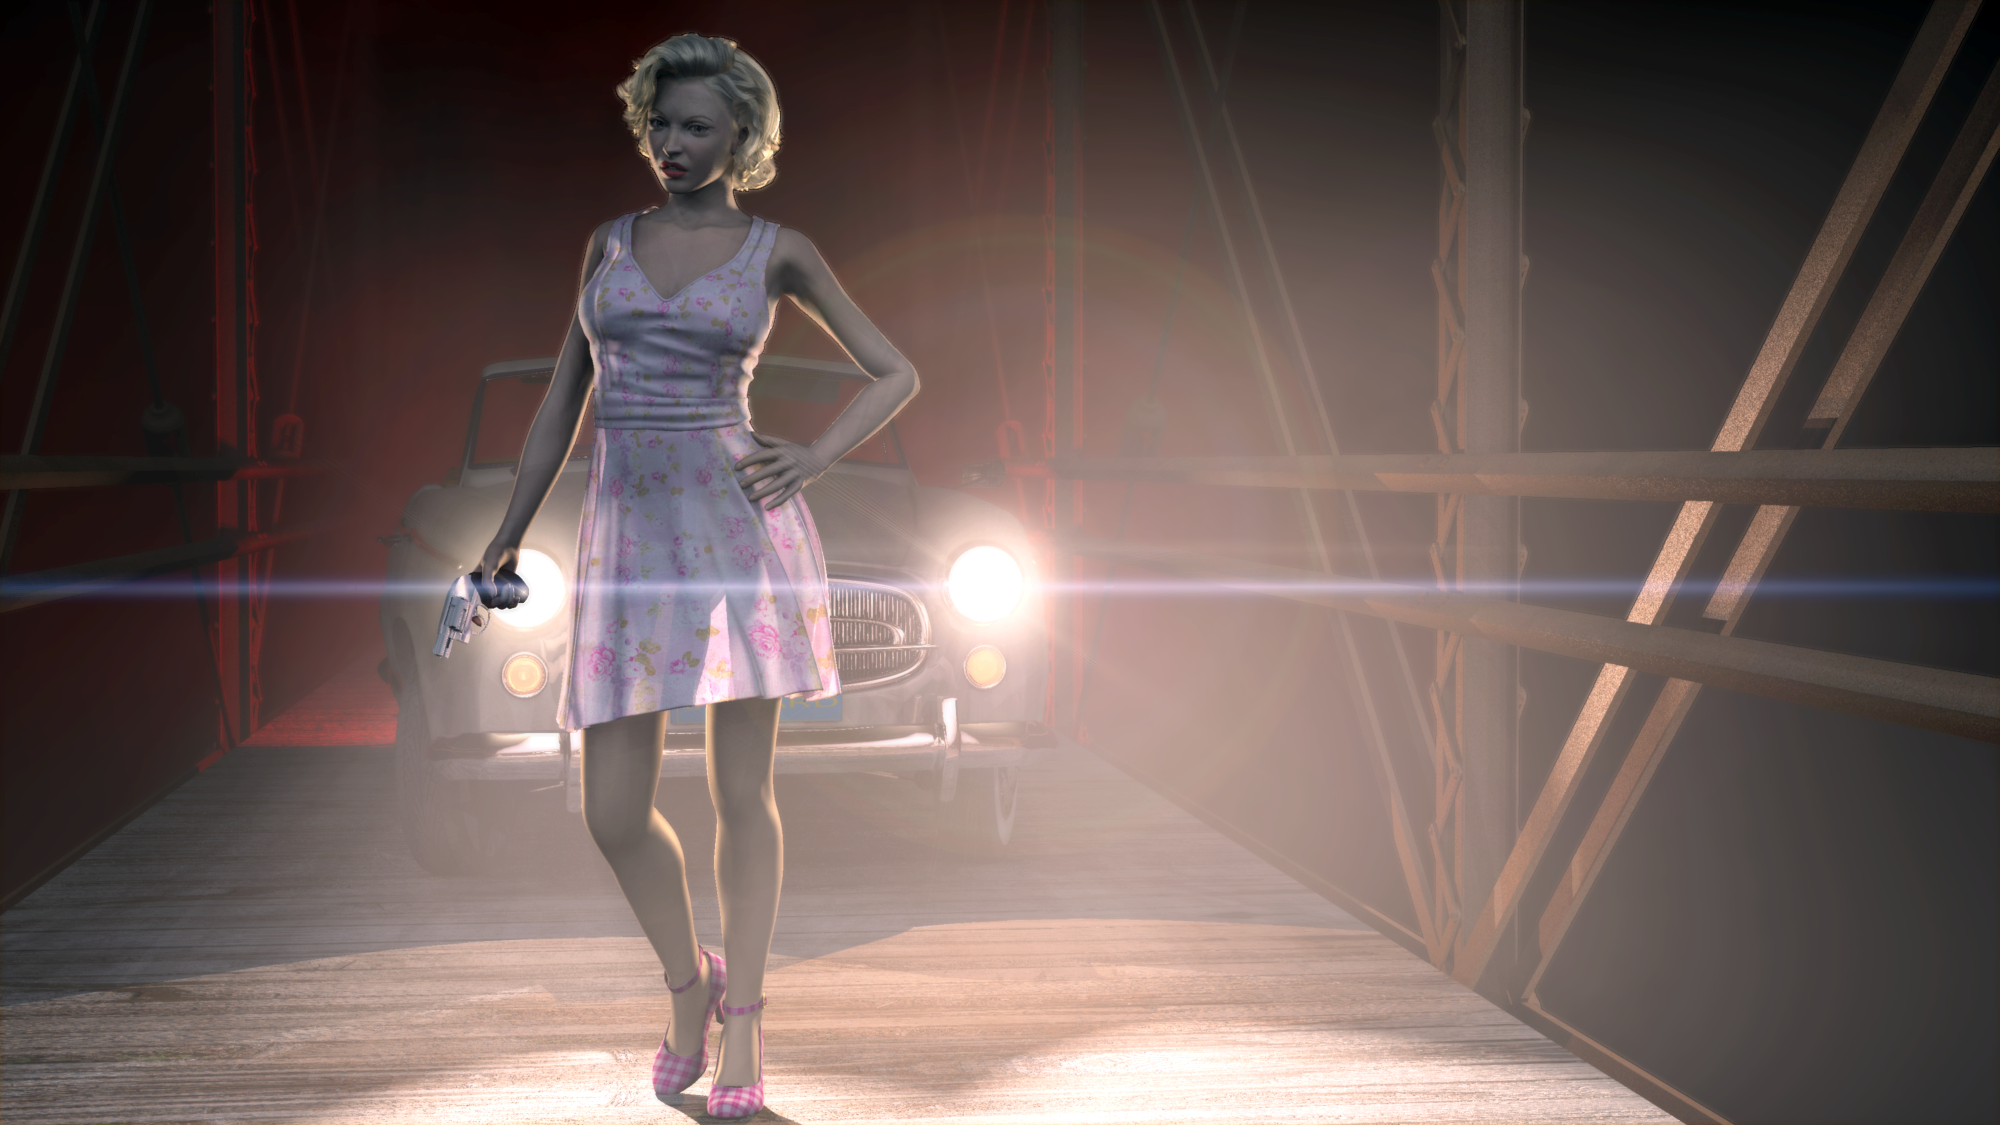
    Click the imges below to see the full sized and bigly versions.

    The bridge scene I'm working on makes heavy use of light linking to get the effects I want. Below is the render out of Carrara.

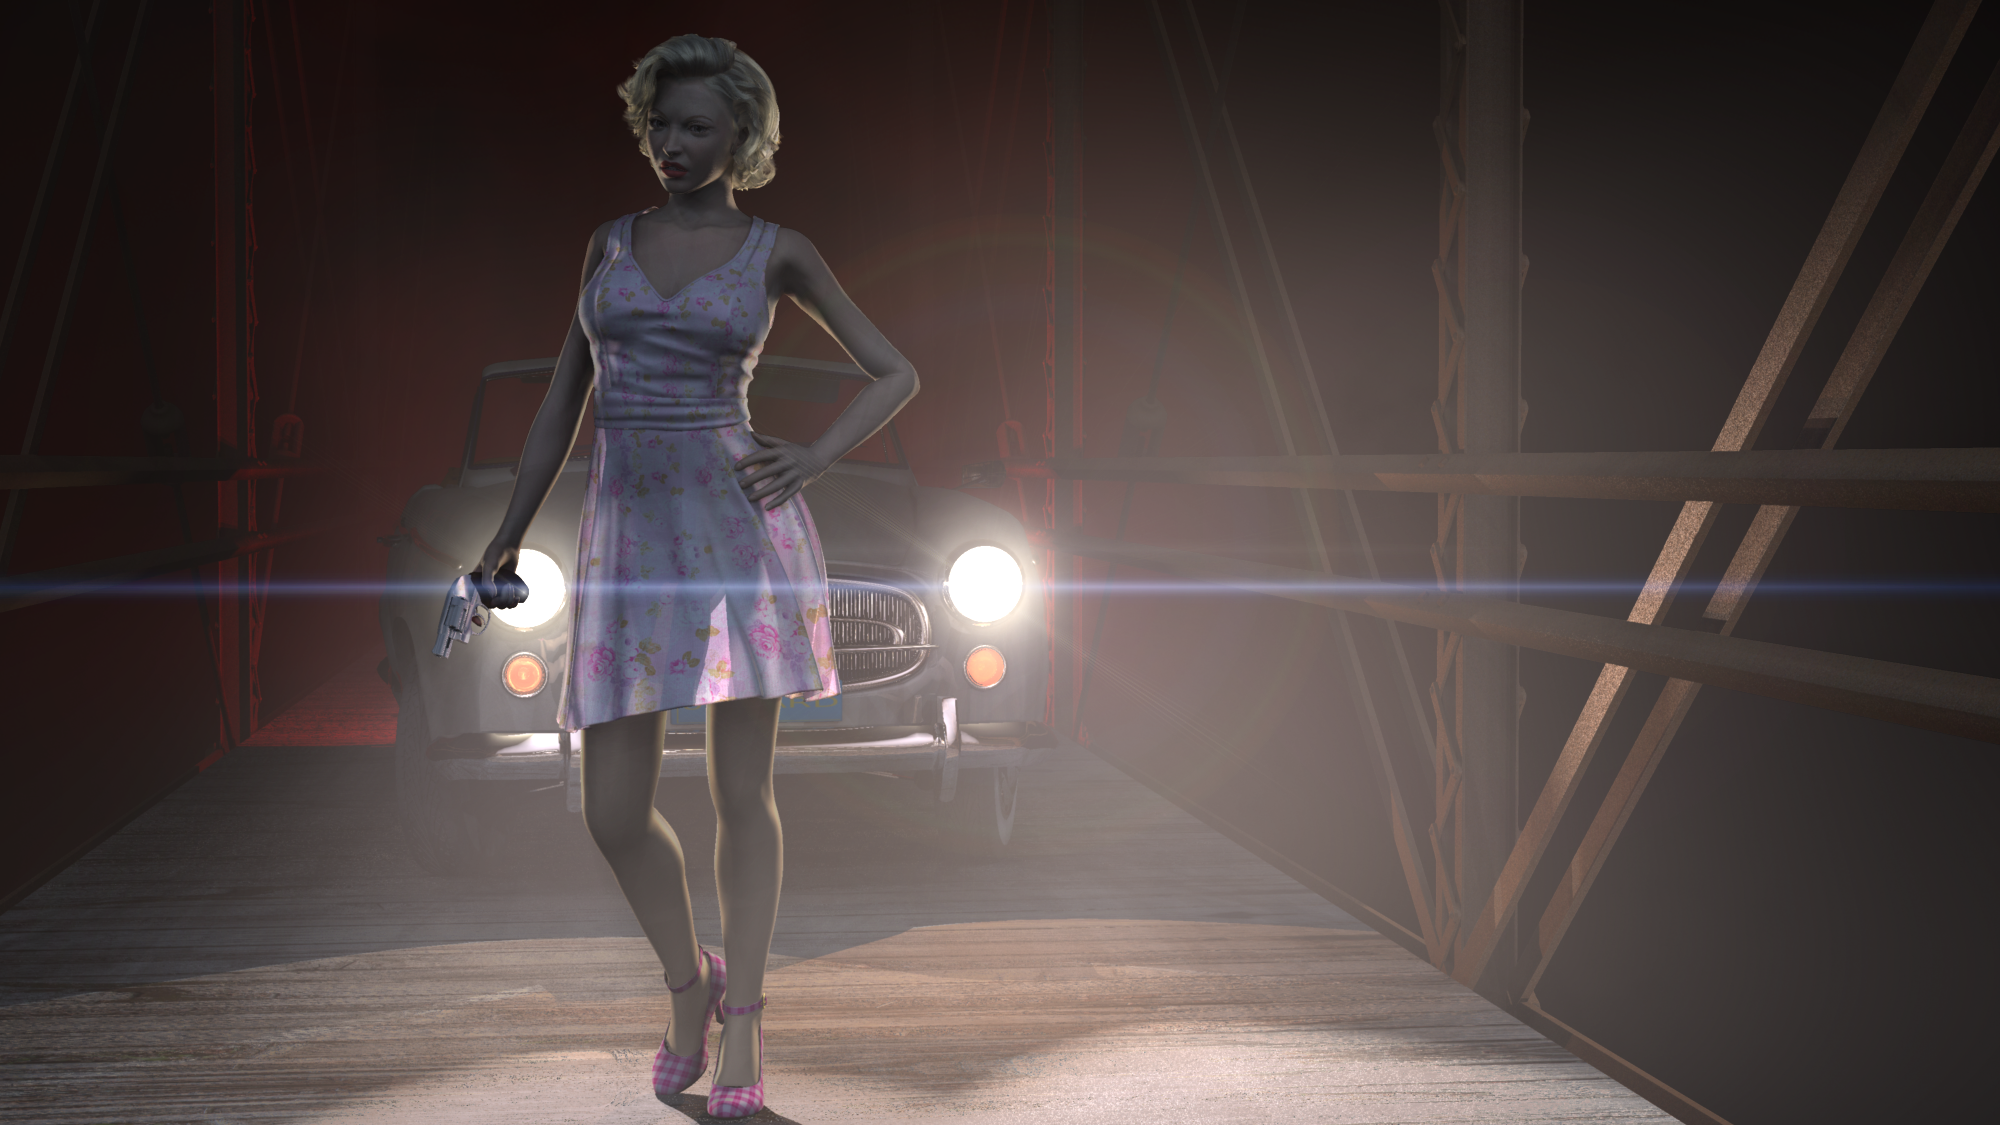
    I was getting an okay rim light on one side of my female figure, but it just didn't give it enough seperation. So I set up a spotlight, with Point At modifier to point at her chest. I set up the color, intensity, range, the position, etc. to get the look I wanted. Then I duplicated the light and moved it to her other side and tweaked the postion slightly. The two light emphasize the rim light I wanted to give her from the headlights behind her. To eliminate the lights shining on objects I didn't want (and thus ruining the effect), I set the light to only light the figure, her clothes, and her hair.


    I used a home rolled light dome/rig for the night lighting. I built a slightly more than half shere in the VM, hid it, and replicated a distance light 75 times on the surface. I set the light at 3.5% (shows as 4%) as the light is cumulative. After some experimentation, I excluded the volumetric cloud that I use for fog from that light, as it was too bright looking.


    I used a shape light under the bridge that was set to only illuminate the bridge model. I wanted an indirect light effect for the under side of the bridge railings from the reflected headlight beams hitting the road bed. I played with a spot light a bit, and instead opted to use a shape light. I set the range short and the falloff high. I also use distance squared. I set it to use soft shadows, and I set the shadow intensity to 60% and the light intensity to 60%. I figured (perhaps wrongly) that I would then get at least 30% of the light passing through the solid bridge pieces. It seemed to work and provided the effect I was looking for.


    The lights on the car are all white with the exception of the headlights which have a slight yellow tint. The color for the running lights is achieved purely through the translucency in the light lenses on the model car. Those lights are simple bulb lights. The headlights are spotlights.


    Screen Shot 2018-05-31 at 12.48.50 PM.png
    4032 x 2074 - 2M
    Screen Shot 2018-05-30 at 10.31.25 PM.png
    4024 x 1772 - 923K
    Screen Shot 2018-05-31 at 12.17.55 PM.png
    4018 x 2126 - 1006K
    Screen Shot 2018-05-31 at 12.16.24 PM.png
    4028 x 1808 - 945K
    road block-raw render.png
    2000 x 1125 - 2M
    Screen Shot 2018-05-28 at 11.35.05 PM.png
    4020 x 1880 - 1M
    Screen Shot 2018-05-31 at 12.15.37 PM.png
    4004 x 1786 - 912K
    Post edited by evilproducer on
  • evilproducerevilproducer Posts: 9,040
    edited May 2018

    To get the fabric on the dress I wanted (which by default used an alpha channel for the effect), I ditched the alpha and used a tiny amount of refraction, a 1% transparency and a 1% Freznel in the transparency shader. I added the color image map to the translucency channel and dialed down the map intensity to 60%. I should also note, that by default, I always change any image maps I am using from the default mip-map to sample. I just think it looks better.


    I wanted to try an effect, but I think I will need to see how effective it is in a different scene that is set up to highlight the effect. First a little preamble. I bought the Reby Sky Elite character some time ago. The character comes with very high resolution optimized Carrara and Poser/Studio image maps for their respective shaders. As most of you are aware, Carrara can't use image maps in the SS channel. Well, digging around the included image maps I found two image maps for each shading domain that didn't load in the Carrara optimized shaders. Looking at the maps, they looked like they were meant to define SS in Studio and/or Poser. One map was in color, and the other grayscale. With my old computer, SS took an extremely long time to calculate, so what I did was to multuply those two maps in the Glow channel, adjusting the brightness of each map to fit the scene. The effect was pretty good, but it was faked. The advantage was that it rendered stupid-fast. See the example below.


    My recent idea was to try the multiplication trick with those two maps in the Translucency channel to see if it would react well to lighting. I think I see a little of what I am looking for, but I think another scene may give me better answers and allow me to tweak the effect.


    babydoll-large.jpg
    4096 x 2304 - 1M
    Screen Shot 2018-05-31 at 12.22.05 PM.png
    3456 x 1680 - 2M
    Screen Shot 2018-05-31 at 12.22.15 PM.png
    3442 x 1616 - 2M
    Screen Shot 2018-05-31 at 12.24.57 PM.png
    3408 x 1550 - 1M
    Screen Shot 2018-05-31 at 12.25.07 PM.png
    3410 x 1558 - 1M
    Post edited by evilproducer on
  • evilproducerevilproducer Posts: 9,040
    edited May 2018

    A couple versions of the scene with different post work.


    Black and white:


    Color:

    road block (1).jpg
    2000 x 1125 - 423K
    road block02.png
    2000 x 1125 - 2M
    Post edited by evilproducer on
  • evilproducerevilproducer Posts: 9,040
    Vyusur said:

    Carrara's native render, G'MIC BW, no post work.


    I really like this one!

  • evilproducerevilproducer Posts: 9,040

    The Lookout


    Big doin's at Rick's tonight.  A meeting of the bosses.

    Rendered in Carrara with no postwork (except sig).

    That looks great. Nice lighting on the man's face as he lights his cancer stick.

  • evilproducerevilproducer Posts: 9,040
    head wax said:

    quickie from me, will visit tomorrow and comment

    beaut to see al the modelling going on - lovely Radish Mistara :)

    just a few shots of one scene -  interesting when you are doing a narrative to break up angles


    the big news Sand Filter won't work in my car 8.5 just 8.1 

    the sand in these is done in post 

    fill a layer with grey uses parameter overlay then add noise -

    erase bits as necessary

    primoval smoke, gives weird effect when hitting transmaps?  ?? eg eyelashes and hair 

    lighting is in the main three spots all with cone effetct reversed 

    the cig smoke is from a plane with a smoke png  textured to it


    Really great stuff!

  • VyusurVyusur Posts: 2,235

    Evilproducer, thank you!

  • 0oseven0oseven Posts: 626
    edited June 2018

    This is cropped from my scene which I hope to finish soon so posting this to keep you ----- posted surprise

    and thanks to Evil for the bridge !yes

    Sc1 Tk 7 HR2 crop.png
    376 x 668 - 160K
    Post edited by 0oseven on
  • MistaraMistara Posts: 38,675

    it looks the darkness of the blinds gel is lightened by the shadow intensity of the lightbulb

  • MistaraMistara Posts: 38,675

    wip2

    the flow force was a lill too forceful, next challenge i''ll try a different force smiley
    the gif zipped is 12mb, i'll load it to stash after the challenge over, iffn anyone wants to see it

    took about 20 renders to line her up with the blinds bars
     

    scene stuff:
    Janette in V4's heaven sent
    water is from the Hemloch Folly pond
    stone wall from old english village, i changed the tiling, original looks much better


    40wip2.JPG
    1508 x 1024 - 185K
    40wip3.JPG
    1745 x 1022 - 207K
Sign In or Register to comment.