Daz 3D is part of 
Connect
DAZ Productions, Inc.
7533 S Center View Ct #4664
West Jordan, UT 84084
Licensing Agreement | Terms of Service | Privacy Policy | EULA
© 2026 Daz Productions Inc. All Rights Reserved.
Comments
Your economy is better than here in the states too. More envy but happy for you and your fellow Germans. I'm 1/2 German and I'm happy about that! :-)
Believe it or not, sometimes I wish I would live in the States :-)
LOL It's always the way it is isn't it!
Jep! :-)
Now my computer is rebooting by itself. I'm on hold with EVGA to troubleshoot this or return my shiny new card for a refund then I got back to my slower card I guess...
When I bought my PC last year, I had it specially built for my DAZ work. After Iray came out, I run into massive Problems. The Computer was jumping in between the Store and my house I don't know how many times. They changed the Card and gave me a GTX 750 for testing which is smaller then my Card GTX 670. They tested my Card and they could not find any Problems. So they switched again and Crash again. After I guess 5 times of switching Cards they found out that my GTX 670 had a Problem with the OpenGL. Finding out that they sent the Card in and at the same time also the GTX 750 started to create crashes until I found out about that famous corrupted OBJ file. Right now I am still waiting for my own Card. I am still running on the GTX 750. But I never had my PC rebooting by itself. Only DAZ was shutting down completely.
Coming back to my original issue with the grainy Iray images... I think I got it now!
It takes a very long time to render but... it seems that the grainyness is down to a minimum.
What did I do? Nothing special! In the optimization settings, I hit both architectural sampler AND caustic sampler. All other render settings (beside max. render time 259200 and max. samples 15000) are on default.
Somewhere I read that Iray is made for semplicity and there is no real reason to play around with all the sliders. And I guess that was right. All manual settings on all the other filters I applied (beside of the bloom filter) did not change a thing in the final result.
After about 26 hours, the render is up to 28% now, very very slow. But the grainyness seems to be gone :-)
Image size is 1600 x 900 px.
So, for interior renders where the sun is coming through the windows and you got some lights added and if you got a lot of time and you want a really clear Image, this is the solution :-)
Yea, that's what got me to call EVGA.. the guy immediately said.. yea, sounds like the video card esp if you've not had these sorts of issues before. He's aware of CyberPower the group that builds my computer and likes what they do so I have the RMA and have to get the card down to UPS to send back and keep my fingers crossed. Back to using 3Delight for now with no issues! Sorry to hijack this thread with all this... :-(
Have you tried to add more lights to the scene? From what folks are saying in other threads it helps speed things up allot. I know your new card when you get it will give you a great speed boost but it's good to know your beating down the graininess but boy you have the patience of a saint... Oh, that's right, you have two computers running... ! :-)
Haha! You're so funny! Yeap, I got two of them running, one just for DAZ and the other one for the rest of my stuff.
Yes I tryed adding more light but that is not what I want because the Scene changes it's flair. I want it this way so I have to wait a "little" longer :-)
Was just thinking about a "trick" ... add the lights but turn them way down... maybe that would do it! You know.. barely there mood lighting! ;-)~
In within this Scene it's a bit hard to put more light. It's the inside of a travel trailer. No much room to put any light without hiding the front wall of it. But if I do so, the sunlight shines right in and I don't want that. :-)
Ah, totally understand now...
Here is a purely CPU iRay render of Dusk with my Tunic Set I'm making for him (taking forever) and my Bruno Skin. Everything has the iRay base applied. Rendered quite quickly actually but funny thing was it was rendering black at first and then got frustrated and just "reset" to default settings and BAM.. rendered this. OK. Maybe not mess with the setting so much then?? LOL Just one spotlight on him and you tell the direction!
It looks pretty good! When you applyed the Iray character base shader, did you select everything? Because it looks like the shader didn't get applyed to his fingernails. ;-)
Yes, everything. Actually I left out the belt buckle because I'd want to apply a proper metal iRay shader to that.
Did you apply the "Iray Optimized Genesis 2 Male MAT" or the "Iray Uber Base" to your character?
Did you apply the "Iray Optimized Genesis 2 Male MAT" or the "Iray Uber Base" to your character?
Just the iRay Base because this is Dusk from Hivewire, not a Genesis figure... but that same base I applied to the clothing too since it's sort of the default base I guess for everything...
Try adding the "Iray Optimized Genesis 2 Male MAT". Maybe it will work even for that character. I had a couple of characters wich got way to glossy so they needed adjustment in the top coat reflectivity. The "Iray Optimized Genesis 2 Male MAT" shader makes the eyes look way better!
Try adding the "Iray Optimized Genesis 2 Male MAT". Maybe it will work even for that character. I had a couple of characters wich got way to glossy so they needed adjustment in the top coat reflectivity. The "Iray Optimized Genesis 2 Male MAT" shader makes the eyes look way better!
OK. I'll give that a try. I gotta run out to work now. Have fun! :-)
Update on this one.
It turned out that with both, architectural sampler AND caustic sampler selected, the render was going on and on and on and after 7 days of continuous rendering it was up to 50%. I decided to stop it and give a new try.
This time I used only the architectural sampler. The render was done completely in 4 days and about 40.000 iterations, almost no grainyness.
The only values I changed were the time, the max. samples and I added the architectural sampler.
Ok, the render time was very long but I am happy with the result. :-)
http://www.daz3d.com/gallery/#images/76450
I'm not entirely sure if this will help anyone (i also am having unbelieveably craptastic results from iray) but i heard someone mention tone mapping.
Since tone mapping has to do with camera/ photography that is an area that i am most familiar with as a professional photographer.
(outdoor camera settings with either hardlights "spotlights/ pointlights/ distant lights) f/stop 22- ISO 100- shutterspeed 500+... i call this "outdoor" camera settings because all lighting is constant like the sun which is always on and never adjustable (you have to adjust camera settings to compensate...will explain later)
(STUDIO camera settings) f/stop 10- ISO 200- shutterspeed 200...in the studio there is no light unless you ad it yourself like softboxes etc. These softboxes you have to adjust manually to light the subject and once its lit the way you like...you tweek camera settings to get the result you want.
I am using primitaves with emusive shading as softboxes to light my "studio" scenes with beautiful results {except} for niose and some fireflies (not my tutorial here...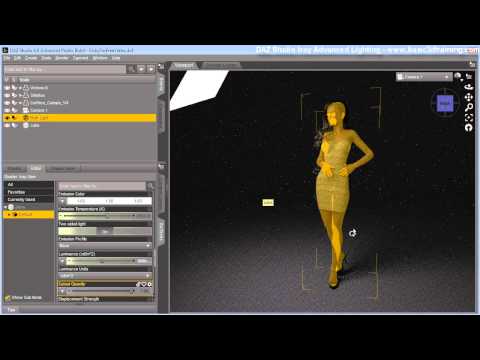 )
)
overall camera familiarity...f/stop usually means depth of field..the higher the number the more of the entire scene is in focus (ie the background usually landscape is also just a in focus as the subject) however higher f/stop values also limits light so a higher f/stop needs higher ISO and lower shutterspeed
ISO controls light entering the camera...higher values increase light lower values decreases however higher values increase noise
Shutterspeed...lower values ad blur to moving objects and freezes objects in higher values which is completely irrelevant in this medium...so a lower value will increase light and a higher one will decrease light.
as you can see...this is a result after a 12hr render...if i can just get this noise/ firefly thing figured out >.<
Image removed - see http://www.daz3d.com/forums/discussion/3279/
Since I am not able to see your image, I am just guessing. Did you try to add "architectural sampler"? It helps alot in interior scenes.
The grain and noise is related to bounce light, it's worst in those areas. (Below) The yellow from the sphere is bouncing onto the wall. In testing the noise filter (render settings) I have three results: Noise filter off, Filter on (defaults), and filter on with three channels at mid-way settings. All of these took the same time to render. I cant detect a difference between them.
I keep hearing that having more lights is better but at least with my set-up (MAC/CPU only) the render time is longer with more lights (point and spot) and there is no effect on grain and noise.
So far I'm going to rest on what others have concluded- to bump up max time and samples.
While it could be used as a stylized look see Daveyabbo's intruder series in the gallery the grain can come from just about anything. I noticed that in your interior scene in the trailer with vicky it looked like you were using the bloomfilter. If your not then my bad but, play with the pixel radius the default is a little high and can cause grain. Also i been playing with the other setting in the optimization settings the pixel fill radius setting under the bloom filter. By default its set to 1.5 which is adding a gaussian blur....i find if i set it to 1 or lower it really crisps up the render in a dramatic way. Just something to consider.
Daniel
See the bottom of this page for some additional information on the noise and degrain filters:
http://www.migenius.com/doc/realityserver/latest/resources/general/iray/manual/concept/integrated_noise_reduction.html
Be aware that there seems to be some compatibility issues between some, and perhaps all, of the pixel filter settings and the degrainer. Turn degrain on, do a quick render using any of the pixel filters, then check the log. You'll may see Iray has thrown a (non-fatal) error, apparently falling back to some undetermined noise filter state (the log doesn't show which filter won the battle).
I haven't tried all combination of the five degrain filtering modes, and the five pixel filters (box, gaussian, etc.). If anyone takes this on, it would be nice if you could post your results.
On the "lights vs light" issue with Iray: The more photons in the scene, the faster the pixels are converged (Iray has more definite pixel data to work from), so the sooner rendering is finished. I know people do say it, but it's not accurate that rendering is necessarily faster and/or less noisy when adding more *lights*. You can have 100 very low level lights in your scene, and because the overall lumens are low, you'd still have incomplete pixel convergence, plus a really slow render. Each light requires a separate set of ray tracing paths.
You've proposed a tough scene for Iray. Really the only way to battle it is to have sufficient cores for a faster render, and like you've mentioned, bump up the settings in Progressive Rendering.
tone mapping is key to images that have lower light. and once you "master that" so to speak you can get very awesome photos in "low light"
Honestly a vast majority of daz studio iray pictures ive seen so far have been in brighter light setups but I think Iray also excells in low light setups too just remember more so if you have something like a lamp or such lighting a dark room you will def need to adjust mainly i use the exposure value settings seem to work the best. :-)
I just noticed this is an old thread. This is like the third old thread I have seen resurrected today.
I set the quality to 3. And up the other values by a lot. I usually enter a bunch of zeroes for sample values, etc., to numbers like 150,000. It never gets that far, the most have been a little over 5,000 samples. I just make sure they don't stop the render and leave it to the quality setting to decide when it is done.
Here's how clean they come out.
Somehow, so far, I got to manage the graininess in some renders. But still, I don't really get what all those sliders are intended to do. Is there anywhere a description for what exactly they are doing? By example, I remember I had some good results in dark scenes using the "architectural sampler" but, I have no idea why and also I have no clou when I am supposed to use it. Also these other filters, it would be so nice to find a tutorial that shows in pictures what they do going in one direction or the other. I know SickleYield has some good explanations but unfortunately nothing about graininess or filters. Well... maybe someone of you guys has found some more information somewhere?
I have this picture, by example, the lower part of the pumpkin and the candle is grainy. I am trying to get rid of it but... no luck. The scene is lit only by the candles and the environment is set very low at 0.02. I don't want to encrease or add more lights, I want it to be dark. If I encrease the tone mapping like ISO or exposure, like someone suggested, it gets to bright. So, how would you guys manage this?
I'm not sure if any of these will help or cause confusion. I just take the bits that I know from DAZ Studio Iray and try them
http://www.irayrender.com/fileadmin/filemount/editor/PDF/Preparing_Content_iray_24.pdf
http://help.autodesk.com/view/3DSMAX/2015/ENU/?guid=GUID-7A77F5E1-5F70-484E-8F27-C8535459D0A3
http://blog.irayrender.com/post/51722647664/the-architectural-and-caustic-samplers