Iray Decal Kit - Make your own decals Tutorial! (Commercial)
 KindredArts
Posts: 1,353
KindredArts
Posts: 1,353
Hi guys!
Iray decal kit dropped onto the store today, and i've seen quite a lot of people asking about making their own decals. So i'll write up a quick tutorial here, using the decal kit as a framework for your own.
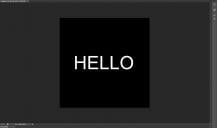
TEXT
Firstly you'll need either photoshop or gimp to create the transparency map in most cases. I'll start with text -
-
Open photoshop or any photo editor -
-
Create a new image and keep it to the following size pattern 512x512, 1024x1024, 2048x2048, 4096x4096. I'm going to use 1024x1024 for this example.
-
Set the background colour to black, and your text colour to white.
-
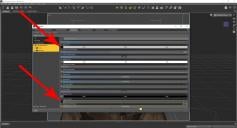
Save the image into your My library/runtime/textures/KindredArts/IDecalKit folder. You can drop them anywhere into the textures folder, i'm just putting them here as an example.
-
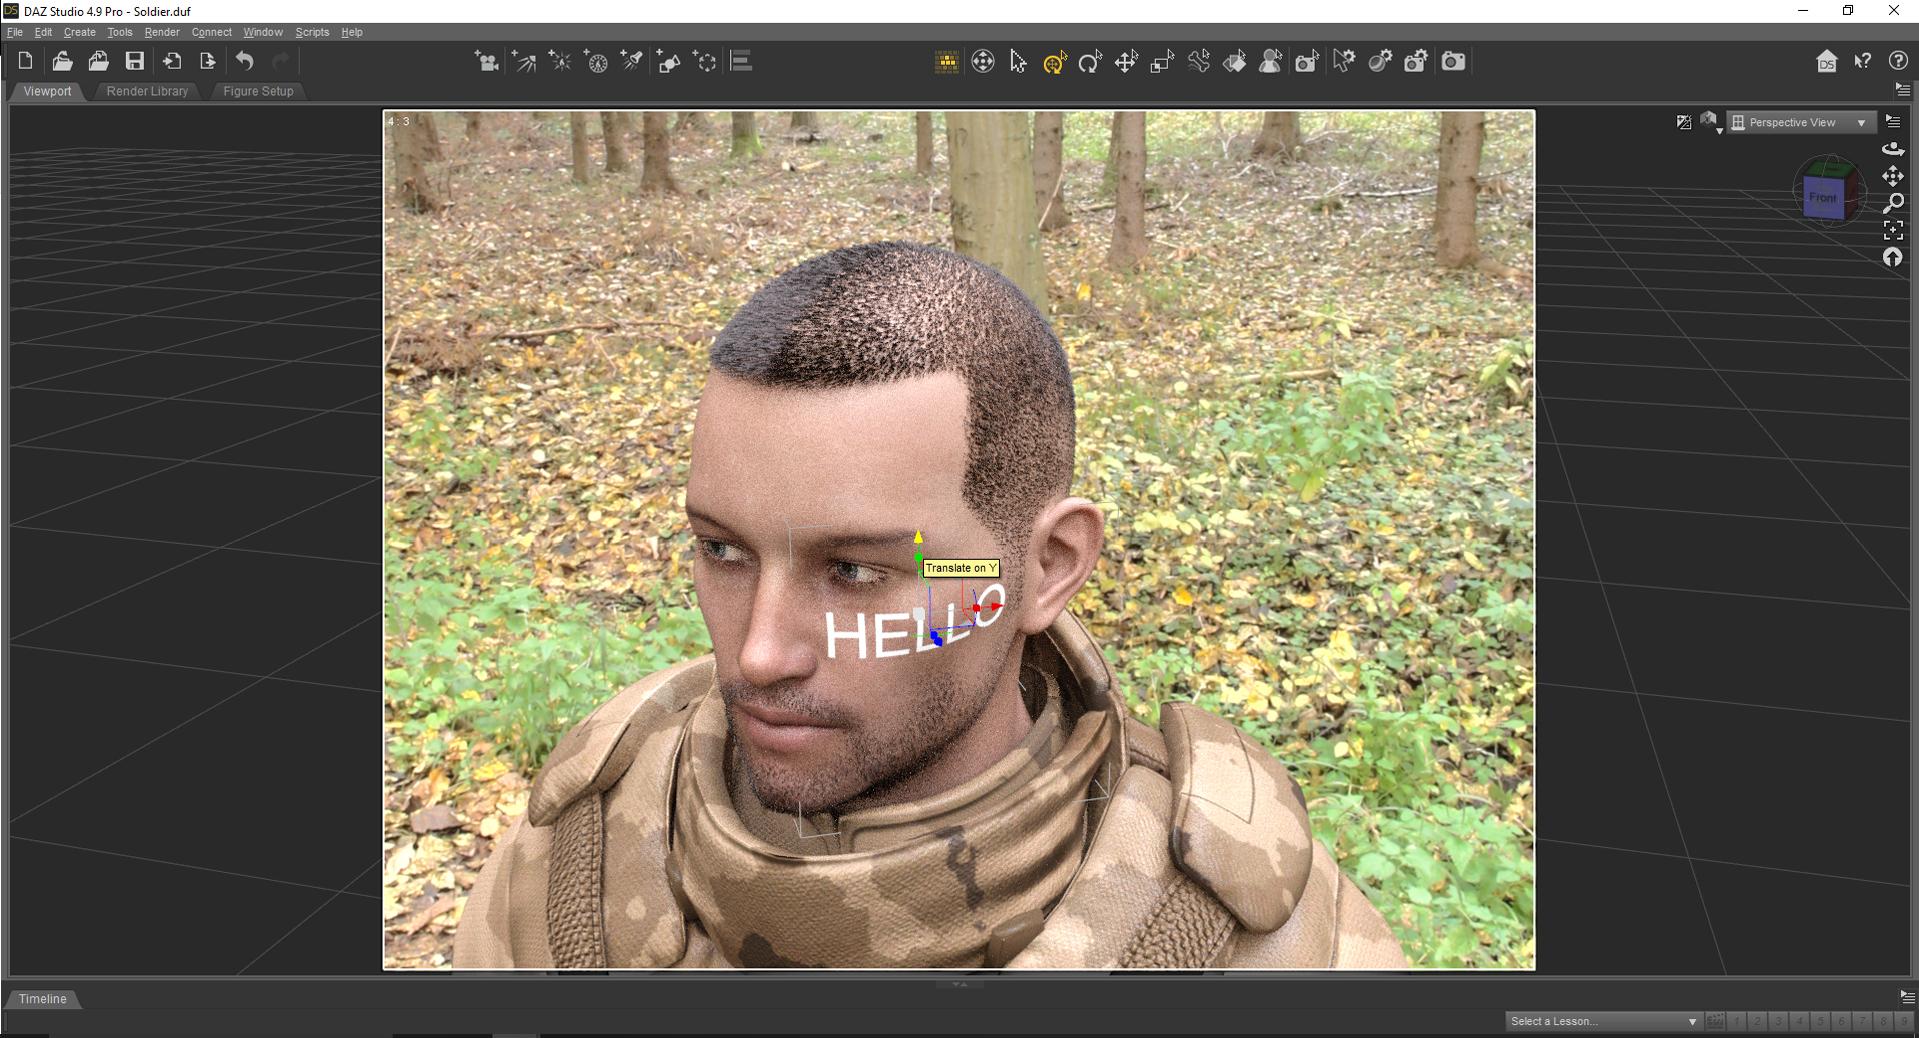
Open daz studio, and drop a character or object into the scene.
-
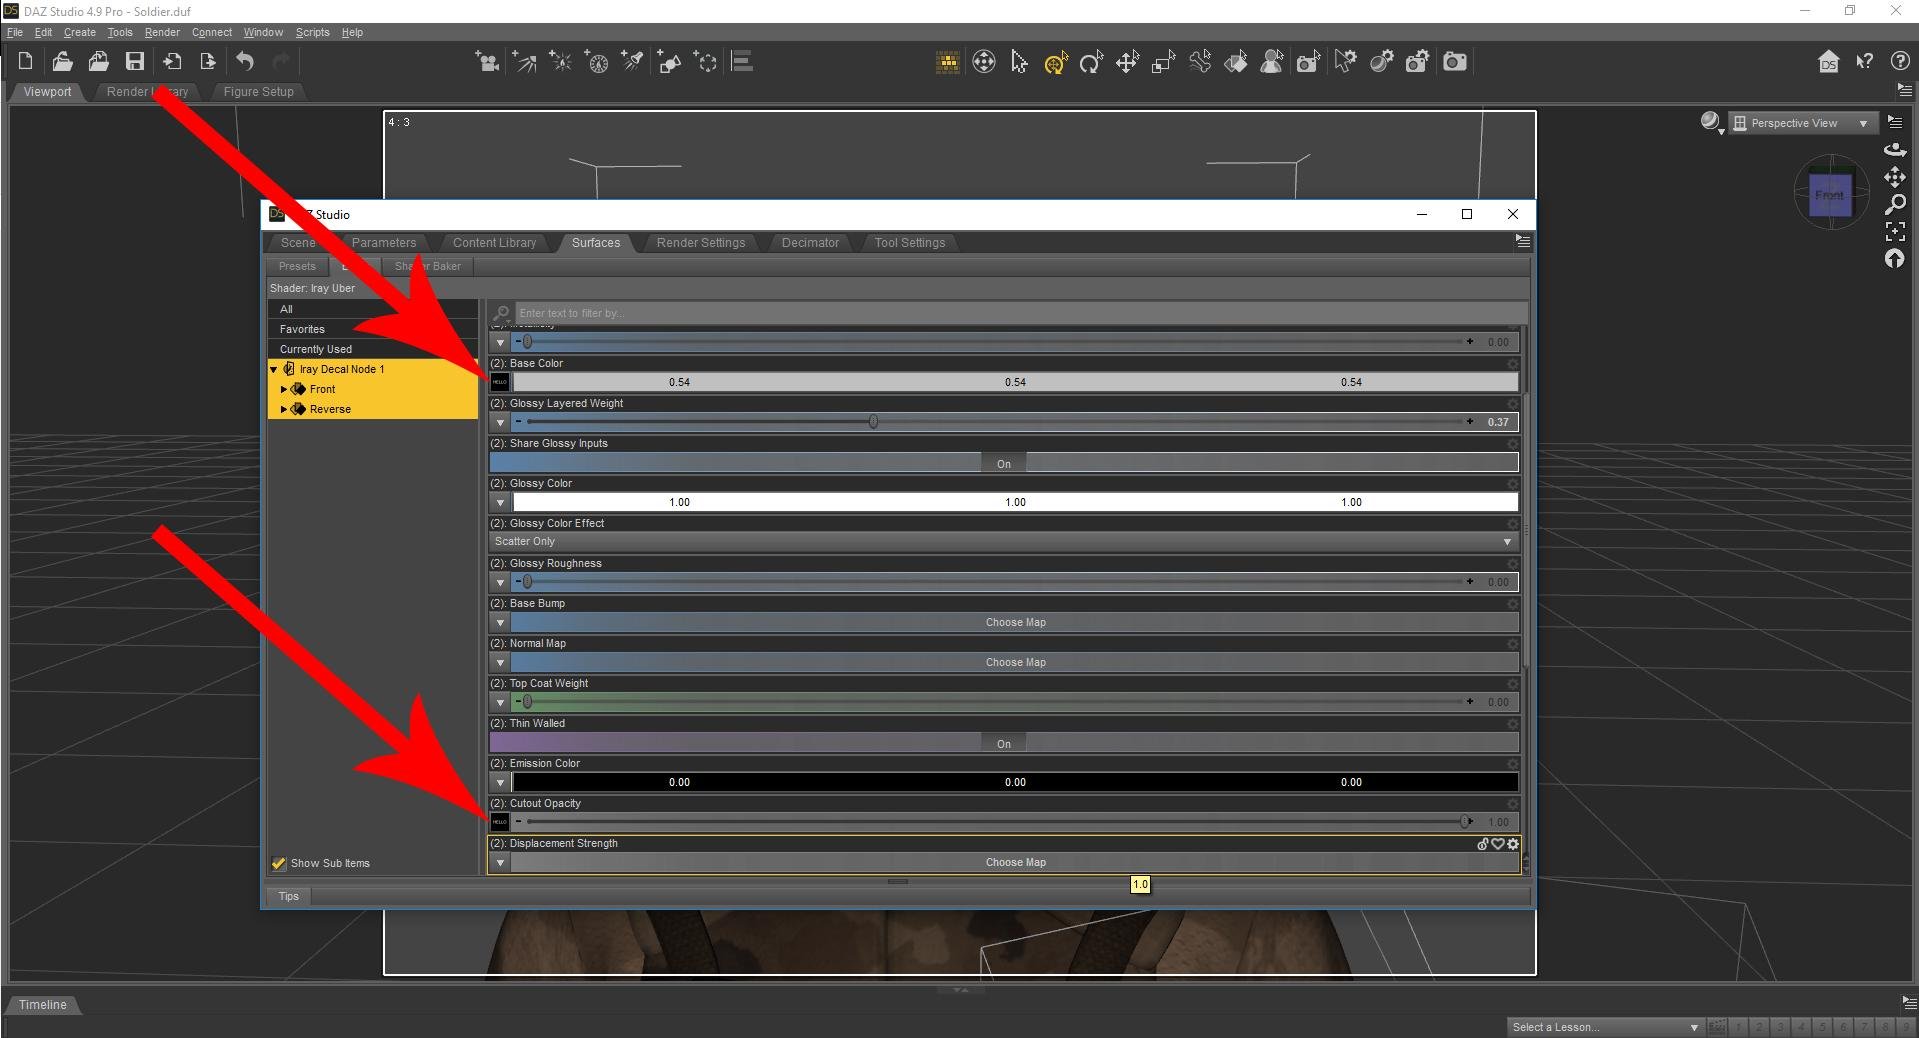
With your character/prop selected, go to create/New Iray decal node
-
With the node selected, go to the surfaces panel, and select Iray decal node (Or whatever you named the node)
-
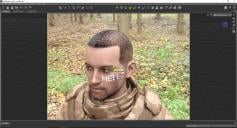
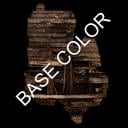
You should now have the decal appearing on the character/prop. If you'd like to change the color, you can do so with the base color selection bar.
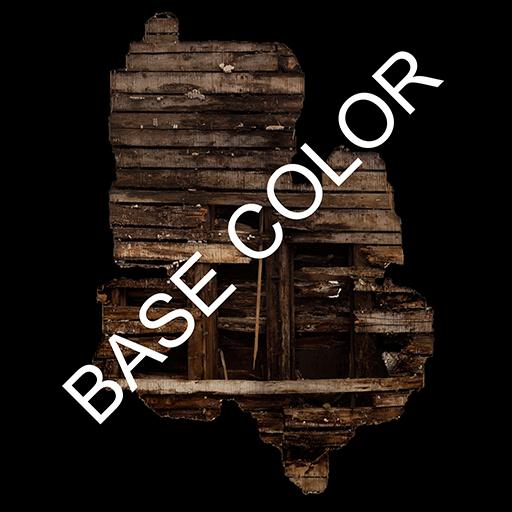
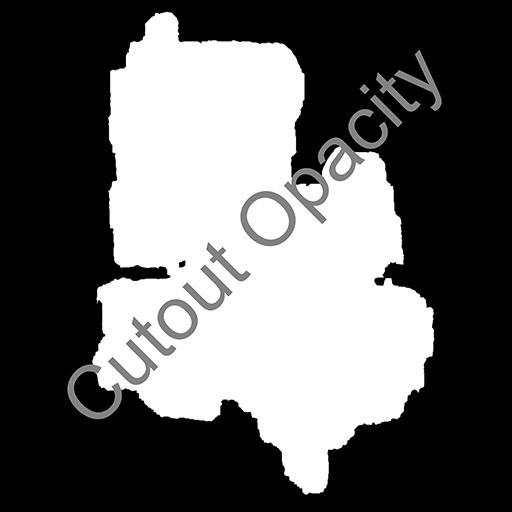
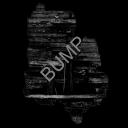
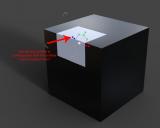
TEXTURES
With textures, you'll need to follow the same steps as above. You can apply one of the decals used in Iray decal kit for examples of what you'll need, but so long as you follow the tips below, you shouldn't have any issues. You need the following
-
A diffuse map for the base color slot
-
A transparency map for the cutout opacity slot (Remember: White is visible, black is invisible)
-
Optionally you can generate your own bump/spec/normal etc. maps for the rest of the shader network. That is beyond the scope of this tutorial, but you an find tutorials on this elsewhere.
Here are some examples:

I hope this helped, let me know if you need any more assistance. A big thank you to anyone who purchased the kit, I sincerely hope you enjoy it!

Daz 3D is part of 
Connect
DAZ Productions, Inc.
7533 S Center View Ct #4664
West Jordan, UT 84084
Licensing Agreement | Terms of Service | Privacy Policy | EULA
© 2026 Daz Productions Inc. All Rights Reserved.
Comments
Great post.
I'd passed over even looking at it; this post made me look, and now I've bought it.
Hey nicstt, thank you for picking it up, much appreciated! It's a bit of a bare bones walkthrough at the moment, but as i get questions roll in i'll expand the tutorial to support everyone. If there's one thing i've noticed with these utility packs, it's that people don't often use them in the way i think they're going to use them. I'll keep my eyes on the suggestions
Wishlisted for sure. KindredArts, thanks for the tutorial. Im wondering if you could give a brief explenation about pattern sizes. Specifically what size pattern should be used for what situation and why. I have a vague idea but it would be nice to hear from someone who knows.
Thank you for this, KA. It's in my cart, but I wasn't sure until now. For the record, I'm looking to add personalization (unit, rank, etc.) on military gear as well as some grunge and signage.
Hi @AnotherUserName glad to be on the wishlist :) I'm not sure how applicable the power of 2 is to render-time engines, but i find it good practice. In terms of render performance, GPU's are generally faster at dividing by 2 rather than uneven numbers. This is often more relative to game engines and the usage of mip-maps etc. It's about affording the compute process a simpler operations pipeline. Modern GPU architecture and incredibly clever optimizing compilers have made this process a bit outdated, but i feel the thought process is still sound and i still find it good practice.
It isn't just about texture processing performance either. In photo editors i (and a lot of other artists) use a 128x128 grid to work on texture maps, and dodgy sizes tend to give me problems, especially when i'm working on atlases.
Hi @Etrigan, thank you for your purchase. What you want to do is absolutely possible, and there's no messing around with LIE or texture maps either. If i could give you some advice though: When you parent the decal to the figure or clothing you want the decal to show up on, you make sure the decal is parented to a bone.
Lets say you want the insignia or rank to show up on a jacket arm. Find the "upper arm" bone in the jacket hierarchy, and parent the decal to it. That way the decal will move with the jacket arm.
You may have already known this, i just wanted to make sure. If you have any problems with this, just let me know and i'll add it to the tutorial.
Cheers!
So, when an image is created, lets say for the purpose of displaying in the foreground, midground or background is there a preffered texture size to use? Or am I missing the point? ....confused....
Please explain what makes this better than just using LIE. Is it just easier to use?
I'm sorry, i'm not a graphics programmer so a lot of it goes over my head as well, you're not alone When i try to simplify things though, i often get accused of over-simplifying, so i'm often in hot water either way. The long and short of it is - Older gpus (and even engines) would only support power of two textures, therefore, if you threw a non-power of two texture size at it, they would often re-scale to a power of two. So if if an older card came across a 600x600 texture, it would re-scale it to 1024x1024. This obviously adds the memory overhead (Not good), and it does this for several reasons, mostly mip-mapping. In a game-engine, when you get further from a texture, the mip-map would cycle backwards through power of two texture sizes. So if a brick texture is 1024x1024 when you're rubbing your face against a wall, it would fall back to 512x512,256x256,128x128 as you move further and further away. This saves on drawing high-resolution textures for geometry that's far away from the camera. So it's easier for the engine/GPU to divide 1024x1024 than it is to divide 1394x295. Again, i'm not sure if daz even does this, it's just general practice that's been the norm for a long time.
So! On to texture sizes. It really depends on how close the camera is going to get to a texture. If you are working on a texture that's going to cover a large area (like a non-tiled wall) you should use a 4k (4096x4096) texture. If you are working on a small tattoo on a character, it can be as small as 512x512, or even smaller. It's all about how close you want to get to it. The closer you get to a low resolution image, the fuzzier it will become. Daz artists tend to use 4k across the board, because we don't generally have FPS and memory to worry about, nor are we generally drawing a very large area.
I hope any of that helped. Perhaps if you gave me an example of what you want to do, i could give you a better run-down.
You know, I could probably have really used this yesterday when I was working on some blood splatter for my latest render! If only the kit had come out a day earlier! {{sigh}} I've never done anything with decals yet. I guess I'm going to learn cause I just got the kit so I'll have to figure out ways to use in my next render whatever that might be. I'll be taking a look as soon as I get it installed. :)
Cool, I get that. Thanks for boiling it down for me and thanks for taking the time to do so. Appreciated.
Thanks for the reminder. I sort of knew this from parenting objects to clothing. But, having never used LIE or other decal methods I might have missed the step.
Sure! I'll use a dirt example - If you want to have dirt that runs across both the arm and torso, you have to take the figure into a painting application, paint the texture, generate a transparency map in photoshop/Gimp and port the maps to LIE in daz. You would have to do this with 2 or more UVs because the standard figures are split into several uv zones. Once this is done, the texture cannot be moved unless you go an re-paint the texture.
Decals are based on projection however, so you can have the Dirt/tattoo/blood/stain/whatever on whatever region of the body/prop you'd like and move it around in real-time. There are of course limitations to this too, since decals aren't great at projecting around sharp corners. A simple tattoo or stain on a body part is a piece of cake though. Just apply the decal to a surface, and parent it to a bone so the decal will move with it. Decals can even be used on surfaces that don't have UVS or have odd tiling without any issues. It also has it's own shader so you don't have to use LIE for the diffuse/spec/bump/metal/ etc. It's far easier for the standard daz users who don't have expensive programs to paint texture maps, or those who are short on time to use decals. It's simply another tool in the creative arsenal.
@Knittingmommy , yes! I saw that, the blood on the boardwalk right? I spotted the post in your thread but i didn't want to promote in there. It's a great tool though (i'm biased, i know), and i really hope you get some use out of it. If you need any help, i'm here as usual. :)
Yes, exactly, that freaking blood on the boardwalk!!!! Yikes!!! :) I never regret getting any of your products, I'm sure it will be very useful. :)
Picked it up myself, and was wondering how to add my own. Thanks for the explanation.
Could you show some of the other options that come with this but are not in the package images? More specifically Trash, Papers, Wall Safe, Rug. I'm on the fence about buying...
I'd had the same question but didn't have a chance to ask earlier. Thanks for the concise explanation. I also appreciate how responsive you always are to everyone's questions. Although I don't have any immediate need for this product, I like supporting vendors such as yourself who go that extra mile. I've added it to my cart for purchase tomorrow (hoping to combo it with something new and interesting!).
Sure, no problem! It's very late here though, i'll post sometime tomorrow.
Thanks pds, i try my best! Thank for picking it up, it's very much appreciated :)
thank you for the great explanations. Two more little things to ask: The graphic files are all .jpegs, not .png's?
And if I want to make a tattoo that way, I follow the steps above but would you consider them a text example (where I just change the base colour) or is it better as a texture approach? I find straight black and white is too harsh looking and doesn't appear really sitting in the skin. So, without blending the colours somehow this would not work well?
I attached an image of some of the Trash/papers/rugs as you asked. They're all on a blank background for you.
I don't use png's, i generally use jpgs. As far as i know, daz doesn't use png cutouts, so you'd have to have two maps anyway. Or you can just use one if you're leaving the diffuse color up to the color bar (I.E. No texture)
I'm really not a tattoo guy, i don't know much about them. I called my friend who is a tattoo artist, so most of the advice here is coming from him.
1. Never use jet black, ink doesn't sit that way once it's set, cleaned and healed. You want a very dark grey and possibly a touch of blue/green if the ink has faded. Or perhaps prison ink?
2. Ink is sub-dermal, so set the overall opacity to 0.9 and use a touch of pink translucency to fake this effect.
3. If possible, a tiling greyscale skin texture would help with bump/spec mapping. It would be useful to replicate pores.
I tried the tips and came up with the image below. Again, tattoo's really aren't my strong suit, but with a bit more attention to detail, i don't see why it can't be photo-realistic. I used a very dark blue (RGB 22,34,38), a little bit of pink translucency (RGB 255,105,105) and a hint of top coat with a skin map. In hindsight, i should have used slightly more spec, but i was just trying to match the skin. Also, a photo-reference tattoo would help matters instead of just a black template, but it can work all the same. Hope this helped!
Thank you!
Welcomes
Your tattoo looks pretty nice. Is that a decal? If she posed, would the tattoo move with the pose? I'm still a bit unclear on the projection stuff, even though I've done a few decals in the past.
I've always heard that decals don't 'stick' well when posing or animating. Perhaps that's solved by parenting to the bone as someone mentioned.
It really depends on the size of the tattoo/decal and where you parent them. I don't animate at all, so i can't really speak to that subject with any sort of accuracy. If you parent a very large back tattoo to the upper chest, it will probably distort when moving the hips, since the bones are reasonably independent from each other. The decal doesn't cling to the body shape, it simply moves with the parented bone. Modest sized tattoo's with logical parenting shouldn't cause an issue however. I took the same shot from before and re-posed the girl without moving nor re-parenting the decal. I think it came out fine (below), but obviously your mileage may vary, it just takes a bit of pre-planning.
Yes, that posed girl with the tattoo looks good, too. This kit is sitting in my cart right now, waiting to see if I need to add more stuff before checkout. Thanks for responding to my query. I'm looking forward to trying this out.
Great, thanks barbult! As i've said, i'm not much of a tattoo expert, but i'm here if i can be of any help. Good luck, i hope you enjoy it!
Excited to try this. Will be a couple of days yet, I have some testing I promised to do and I would like to finish my Carrara entry for the month at least semi close to on time lol. Those two projects will take up my play, I mean rendering time. This looks like it will be incredibly useful. While I love postwork and really enjoy it, the more I can do before I bring it into photoshop the better. Looks like another great product!
I bvought it, but I haven't tried it yet. Too many new toys!