-
(solved) having problems creating morphs in blender to daz
felis said:
I don't know what can have happended.
But maybe from your original mesh try to move just a single face, and then make a morph to see how that works.
And how does it look in blender?
it looks fine in blender and i tried not changing anything same problem
Genesis 9morrisonmp said:
I have been experimenting with Genesis 9 characters (Michael, Minerva, Victoria, and a couple others) and while the textures are good and the facial improvements are excellent... I still hate the bodies. Gen9 is weirdly doughy and roundy and the proportions just "feel" wrong. I have not been able to make a G9 character yet (and I bought several of the morph sets as well) that I actually like having in a scene. And to me, YMMV, they don't fit well in scenes with G8/G8.1 models because the entire approach to making them just feels so very different.
I'd love to see some new sculpts using the G9 innovations that are not so odd-bodied.
Sorry for the rant... but the G9s just feel super weird to me.
I agree. G9/V9 is a bit too pudgy and short for my taste and the arms seem too long and legs too short. Some characters seem to have the head too small for the body. I know I can change all that but if I want to use stock poses it's extra work to make them work with proportions I use. I already make most G8 characters taller with longer legs and G9 needs even a bigger stretch. The only advantage I see now are the eyes and quick load time because I have very few G9 characters. It is kind of fun creating more characters from scratch though with G9 because I often get lazy mixing several G8 characters together rather than work on individual morphs. G9 will take longer to morph/pose but I'll probably be more creative doing it.
Head gamesAllenArt said:
Let's see those custom G9 faces folks, now that the morph packages are out ;).
One of my favorite things (when my muse is away) is making faces on my 3D characters. Seems I'm always rolling a new one. I bet I'm not alone. So let's see those faces! :D
Here's mine (so far). Someone remind me to make an "Ears Rotate In and Out" morph. I was kinda surprised there wasn't one in the Essential morphs ;) BTW, the nose here is pretty much custom. All else are Daz morphs.

Edit: just had to rotate his ears back a bit. What do ya think? Out or in? LOL
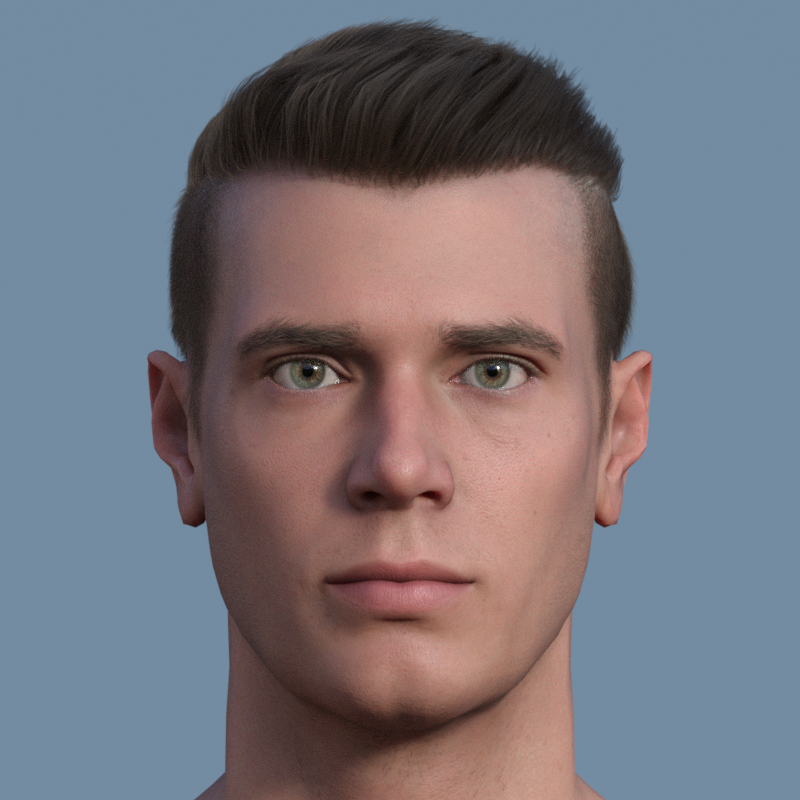
How did you get the ears to look like they do in the second image? Both faces are excellent!
Genesis 9I have been experimenting with Genesis 9 characters (Michael, Minerva, Victoria, and a couple others) and while the textures are good and the facial improvements are excellent... I still hate the bodies. Gen9 is weirdly doughy and roundy and the proportions just "feel" wrong. I have not been able to make a G9 character yet (and I bought several of the morph sets as well) that I actually like having in a scene. And to me, YMMV, they don't fit well in scenes with G8/G8.1 models because the entire approach to making them just feels so very different.
I'd love to see some new sculpts using the G9 innovations that are not so odd-bodied.
Sorry for the rant... but the G9s just feel super weird to me.
(solved) having problems creating morphs in blender to dazIf the character you exported to Blender, already had some morphs applied, then you must select "Reverse deformations" when importing the morph back to DS
Unless "Reverse deformations" is used, the morphs are applied to the base mesh, which means that any and all morphs that were active on the model exported to Blender, gets their effect applied twice as strong.
GenX2 Genesis Basic Child to G3M transfer arrives UPSIDE DOWN! :OI decided to redo the transfer again.
I am completely new with using the Genx2 stuff. Bought it and a bunch of it's add ons ages ago but never really got around to using it until now.
Anyway, to the best of my understanding, I go to the GenX tab/pane, select the Source button, select (for instance) Genesis from that, it loads all the relevant bits and bobs for that particular generation base character. You then load into the scene the (for instance) Genesis character you want to convert to a later Genesis generation, then click the Select button on the GenX pane and pick (for instance) .Get Values from Figure in Scene. but when I do that, I get an error telling me Some morphs were not found in the figure. If I instead, next try clicking Select and pick Transfer: On for All Non-Zero Values, it doesn't give any error. If I then uncollapse each of the items listed in the GenX pane, I notice that the only thing checkboxed on the left most column is 4 items under the (region) Actor section: each of the ones named Basic Child
In any event, I have Target set to Genesis 3 Male, and when I hit Transfer, it does a quick flurry of stuff in the window that pops up, and then the window disappaers. Now when I load the G3M base character, and in the Parameters for him go to the Actor on that and dial in Genesis and dial in Basic Child, the G3M takes on the right shape, but doesn't reduce down in scale ro match the original, I have to manually set him to Scale 54%, but he at least doessn't arrive upside down and undernerath the floor-plane this time around.
On the other hand, if I apply any kind of pose, he distorts. It's as if none of the JCMs transfered,
Incidentally, at the start of this, when I went to Source and loaded Genesis, I got the following output:
GenX - Loading figure: Genesis

Loading figure ...

C:/Users/David/Documents/DAZ 3D/Studio/My Library/data/DAZ 3D/Genesis/Base/Genesis.dsf

Loading morphs ...

Error reading morph file:

E:/Public Documents/My DAZ 3D Library/data/DAZ 3D/Genesis/Base/Morphs//askance/CloneDawn.dsf

Analyzing dependencies ...
Any idea what is going on here? This is really frustrating.
(solved) having problems creating morphs in blender to dazI don't know what can have happended.
But maybe from your original mesh try to move just a single face, and then make a morph to see how that works.
And how does it look in blender?
Baking Displacement: bloated meshMatt_Castle said:
Displacement can be funny about seams, particularly as different programs may interpret the maps in specifically linear or gamma colour spaces.
When I'm exporting displacements from Blender, I always use floating point EXR files, as the two programs agree very closely about how to interpret those (and once converted to 16-bit greyscale, the files aren't actually that large).
Yes, I'm using EXR. However, I found a solution.
I baked the displacement two times. One time with the HD morph and one time only the bash mesh with the same subdivision level.
Then I use both layers and do in Affinity Photo a Difference blend layer, which gives me the result I want.PrefoX said:
grey means no displacement, white positiv, black negative displacement
Not necessarily. For some reason I don't understand is the recommendation to use 32bit EXR displacement at a midlevel of 0:
This means black is no displacement. But I have no idea how negative displacement should work.(solved) having problems creating morphs in blender to dazI exported a g8f to obj then imported into blender. then when I made the changes I wanted I exported it back and used morph loader pro but when I put the morph to 100% I noticed the whole figure was changing for some reason I tried to export without sculting in blender and still had the same problem. the body gets slender, breasts lift up, and face changes. below is a picture at 0% and 100%
Genesis 9von Hobo said:
I wonder if any of these morph products will work on Genesis 9
Morphs for a figure won't work on a different figure.
File Attachments to posts not workingRichard Haseltine said:
This has just received a bit of attention and I was able to attach an image to my test post.
I was able to upload the two files as attachments to my post on that G8-G9 Pose Transfer thread. So, I would say it's working now... hope it stays working!
thanks,
/t
Buy Something That Doesn't Work in Carrara? Post your Questions and Workarounds here. (please)I have Daz Stduio 4.21 installed. Generally, it has not interfered with my use of Carrara. I am most likely to use the two together if I am using the Studio transfer utility, converting something to blended weight, or similar. I have had some problems in both Daz Studio and Carrara, but am reasonably confident those problems are not related to 4.21. Instead, my problems started when I had a hard drive die and I transferred my backup to a new drive with a new drive letter. Mostly little things like a texture map not being found on default load, and having to be loaded manually. Occasionally a more serious issue.
I was an early adopter of Genesis 9, but am back to Genesis 2 in Carrara (or my silly figures), and Genesis 8 in Studio - unless the situation calls for a Rawart monstrosity of some sort.
DAZ Log File?I keep getting errors when loading G8F about duplicate errors, and to check the log. For the life of me, I cannot seem to fing the log. WHere may i find the log, and which log file shall I be checkign for the morph collission?
Thanks,
-David
Baking Displacement: bloated meshHello,
Maybe one of you has a clue what's going on here.
I got zBrush a few days ago and want to bake in zBrush die HD morph of an expression to a displacement map.
But what ever I do, the height map also bloats the mesh additionally. Here in DAZ Studio: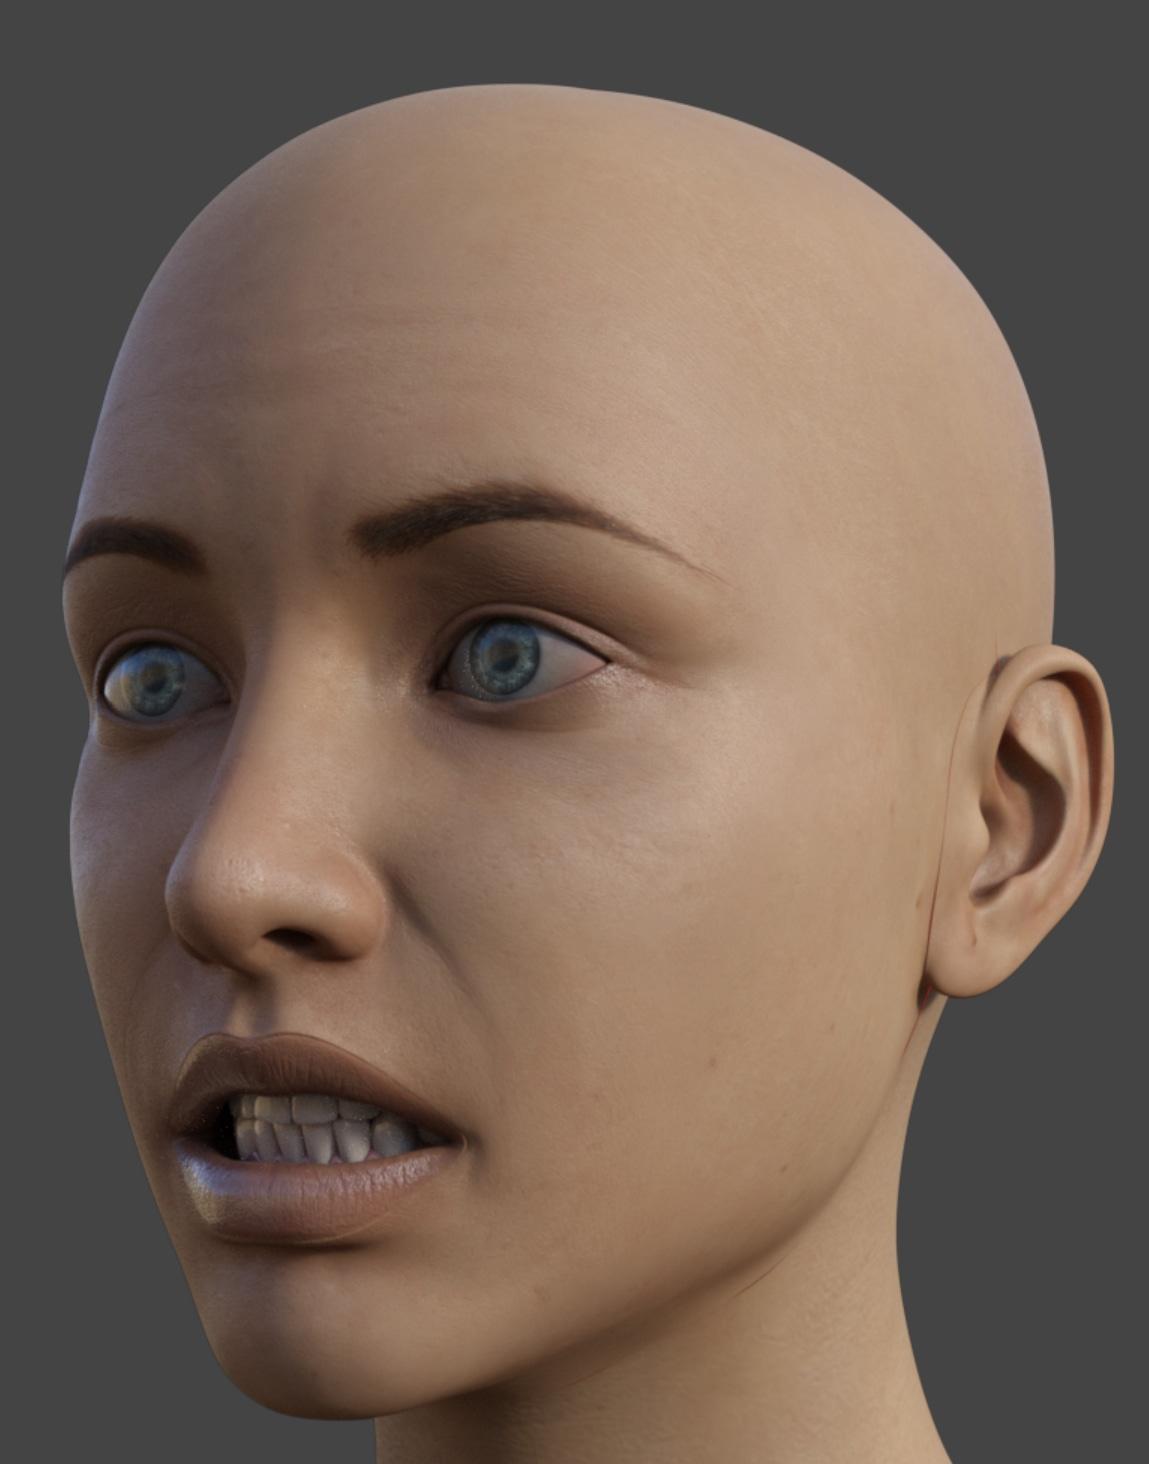
It's clearly visible that the displacement causes seams. The Displacement is only applied to the face. The seams are the result of the displacement maps adding height, in places it shouldn't.
Here the same map used in Blender: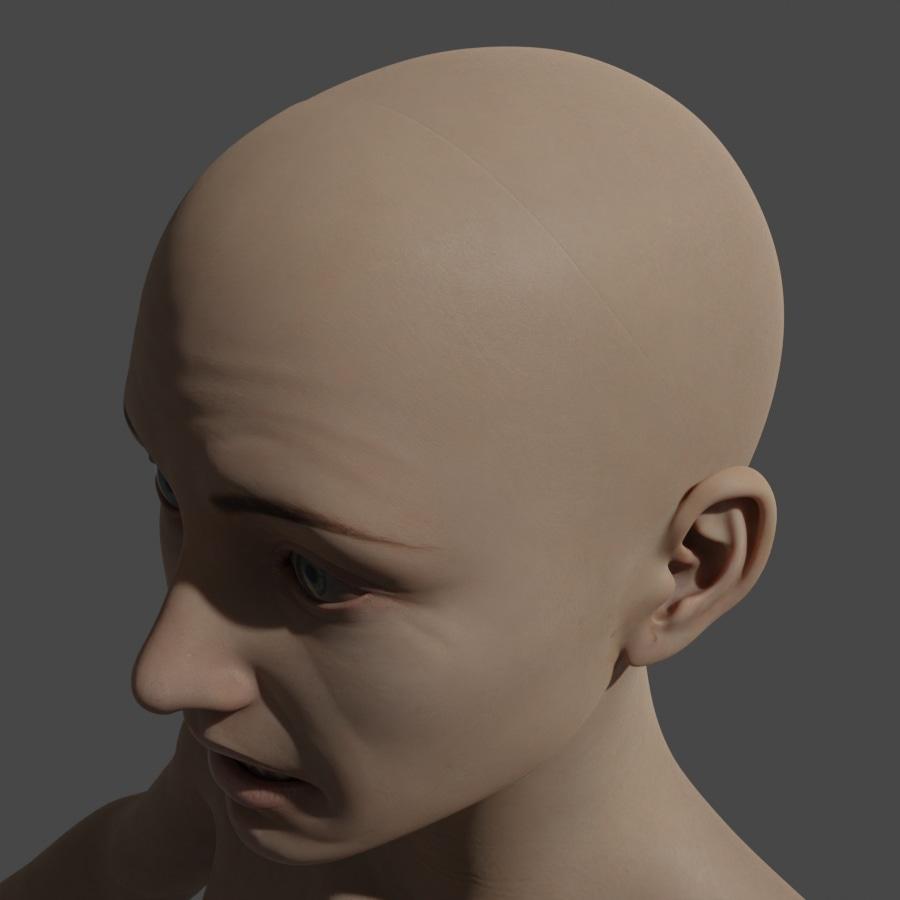
And just for comparison without any displacement: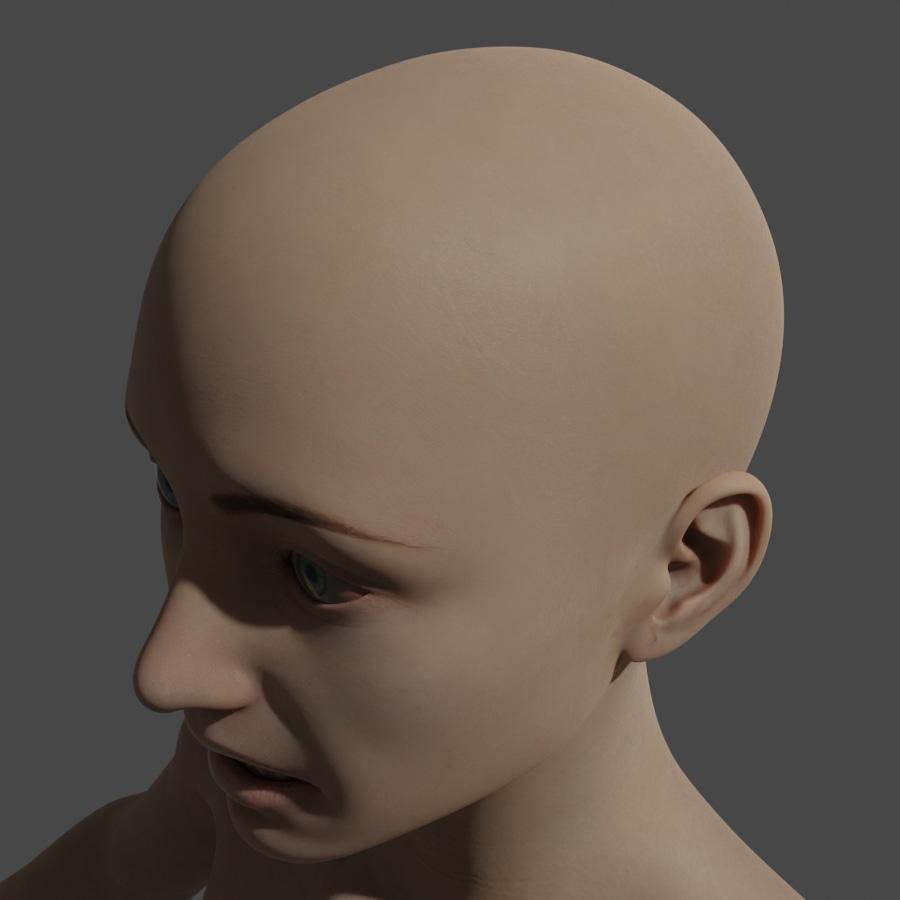
If I look on the map, it's clear why this happening. Even if there is no HD information, the mesh is overall grey instead of black on non affacted parts.
This is clearly obvious in the ears. They should be completely black, but they are gray. Even if I bake a mesh without any HD information I get a grey map which bloats than the mesh.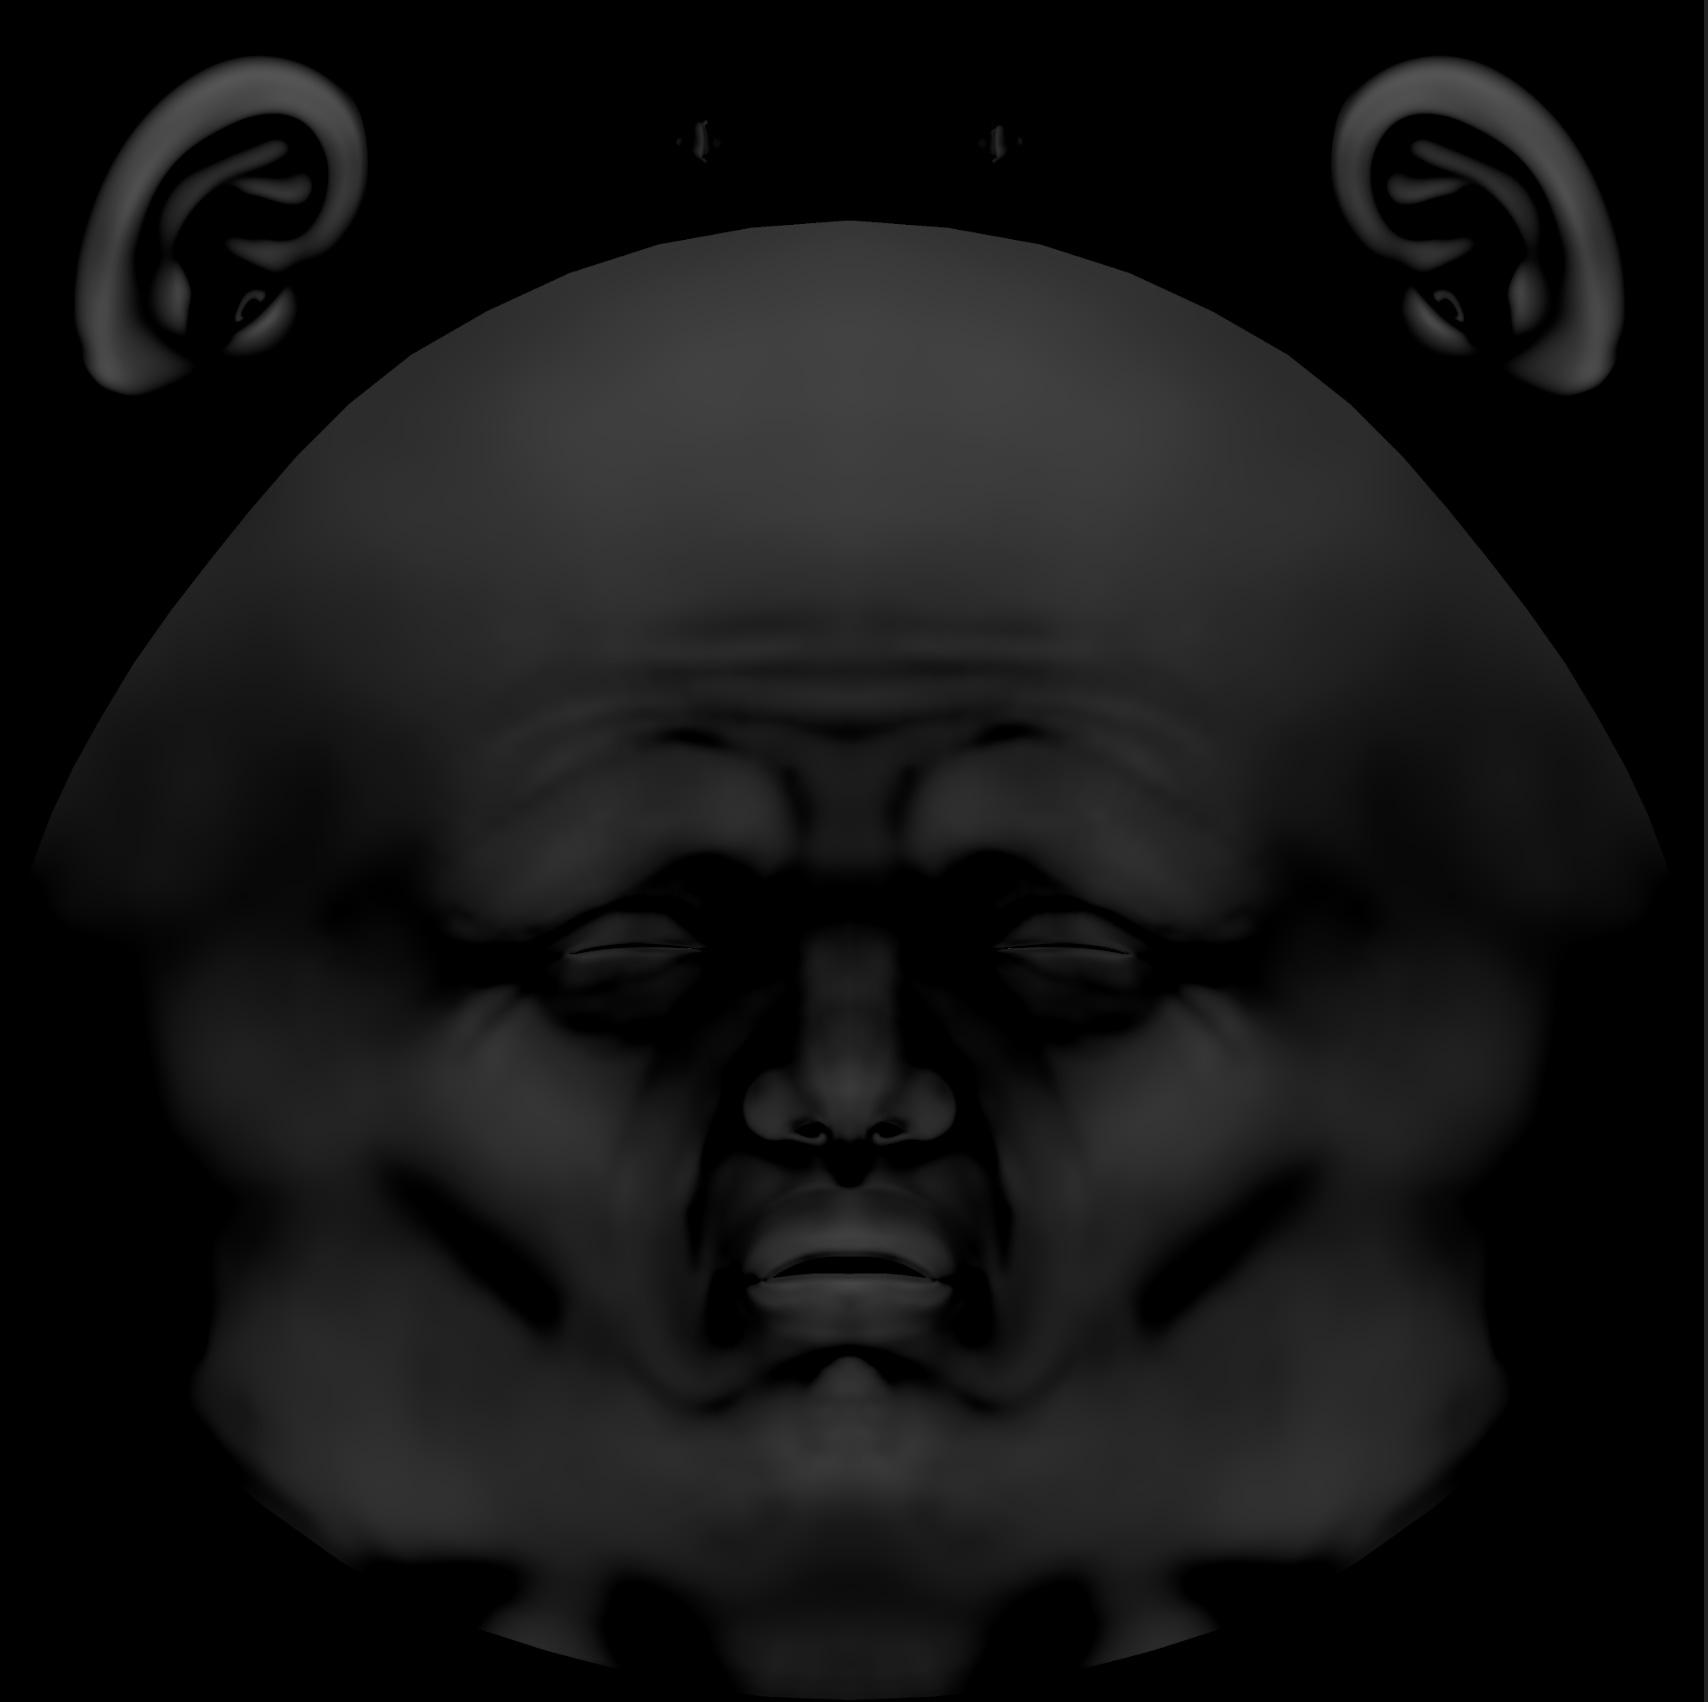
Here as a comparison the mesh without any HD information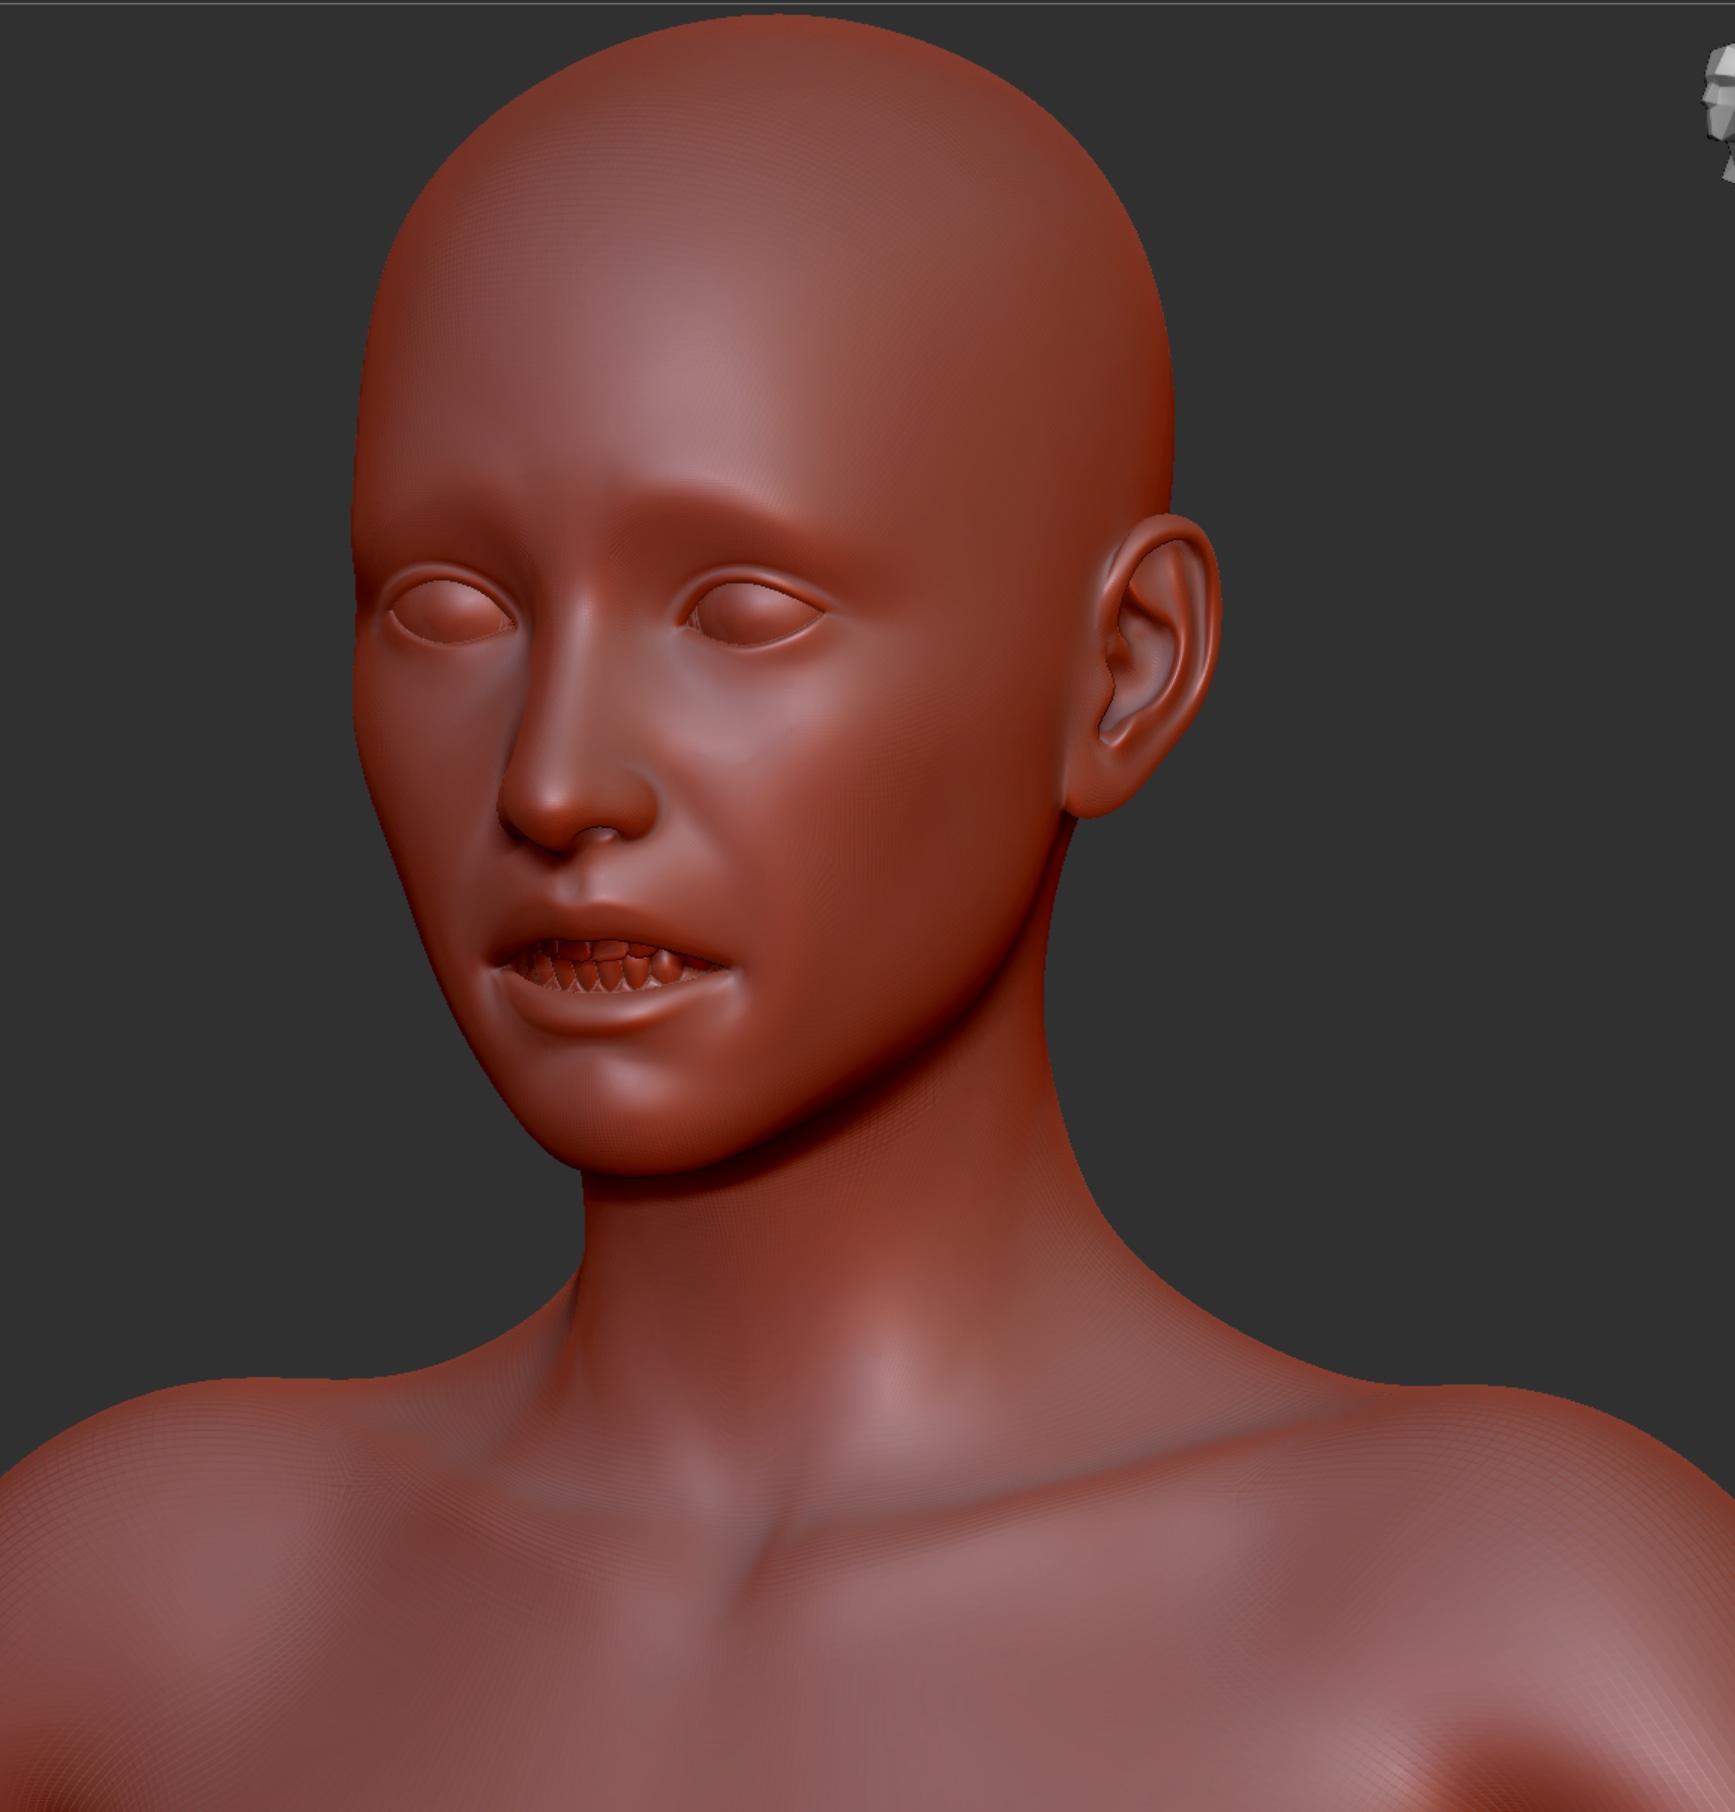
And here with (I managed to project a layer):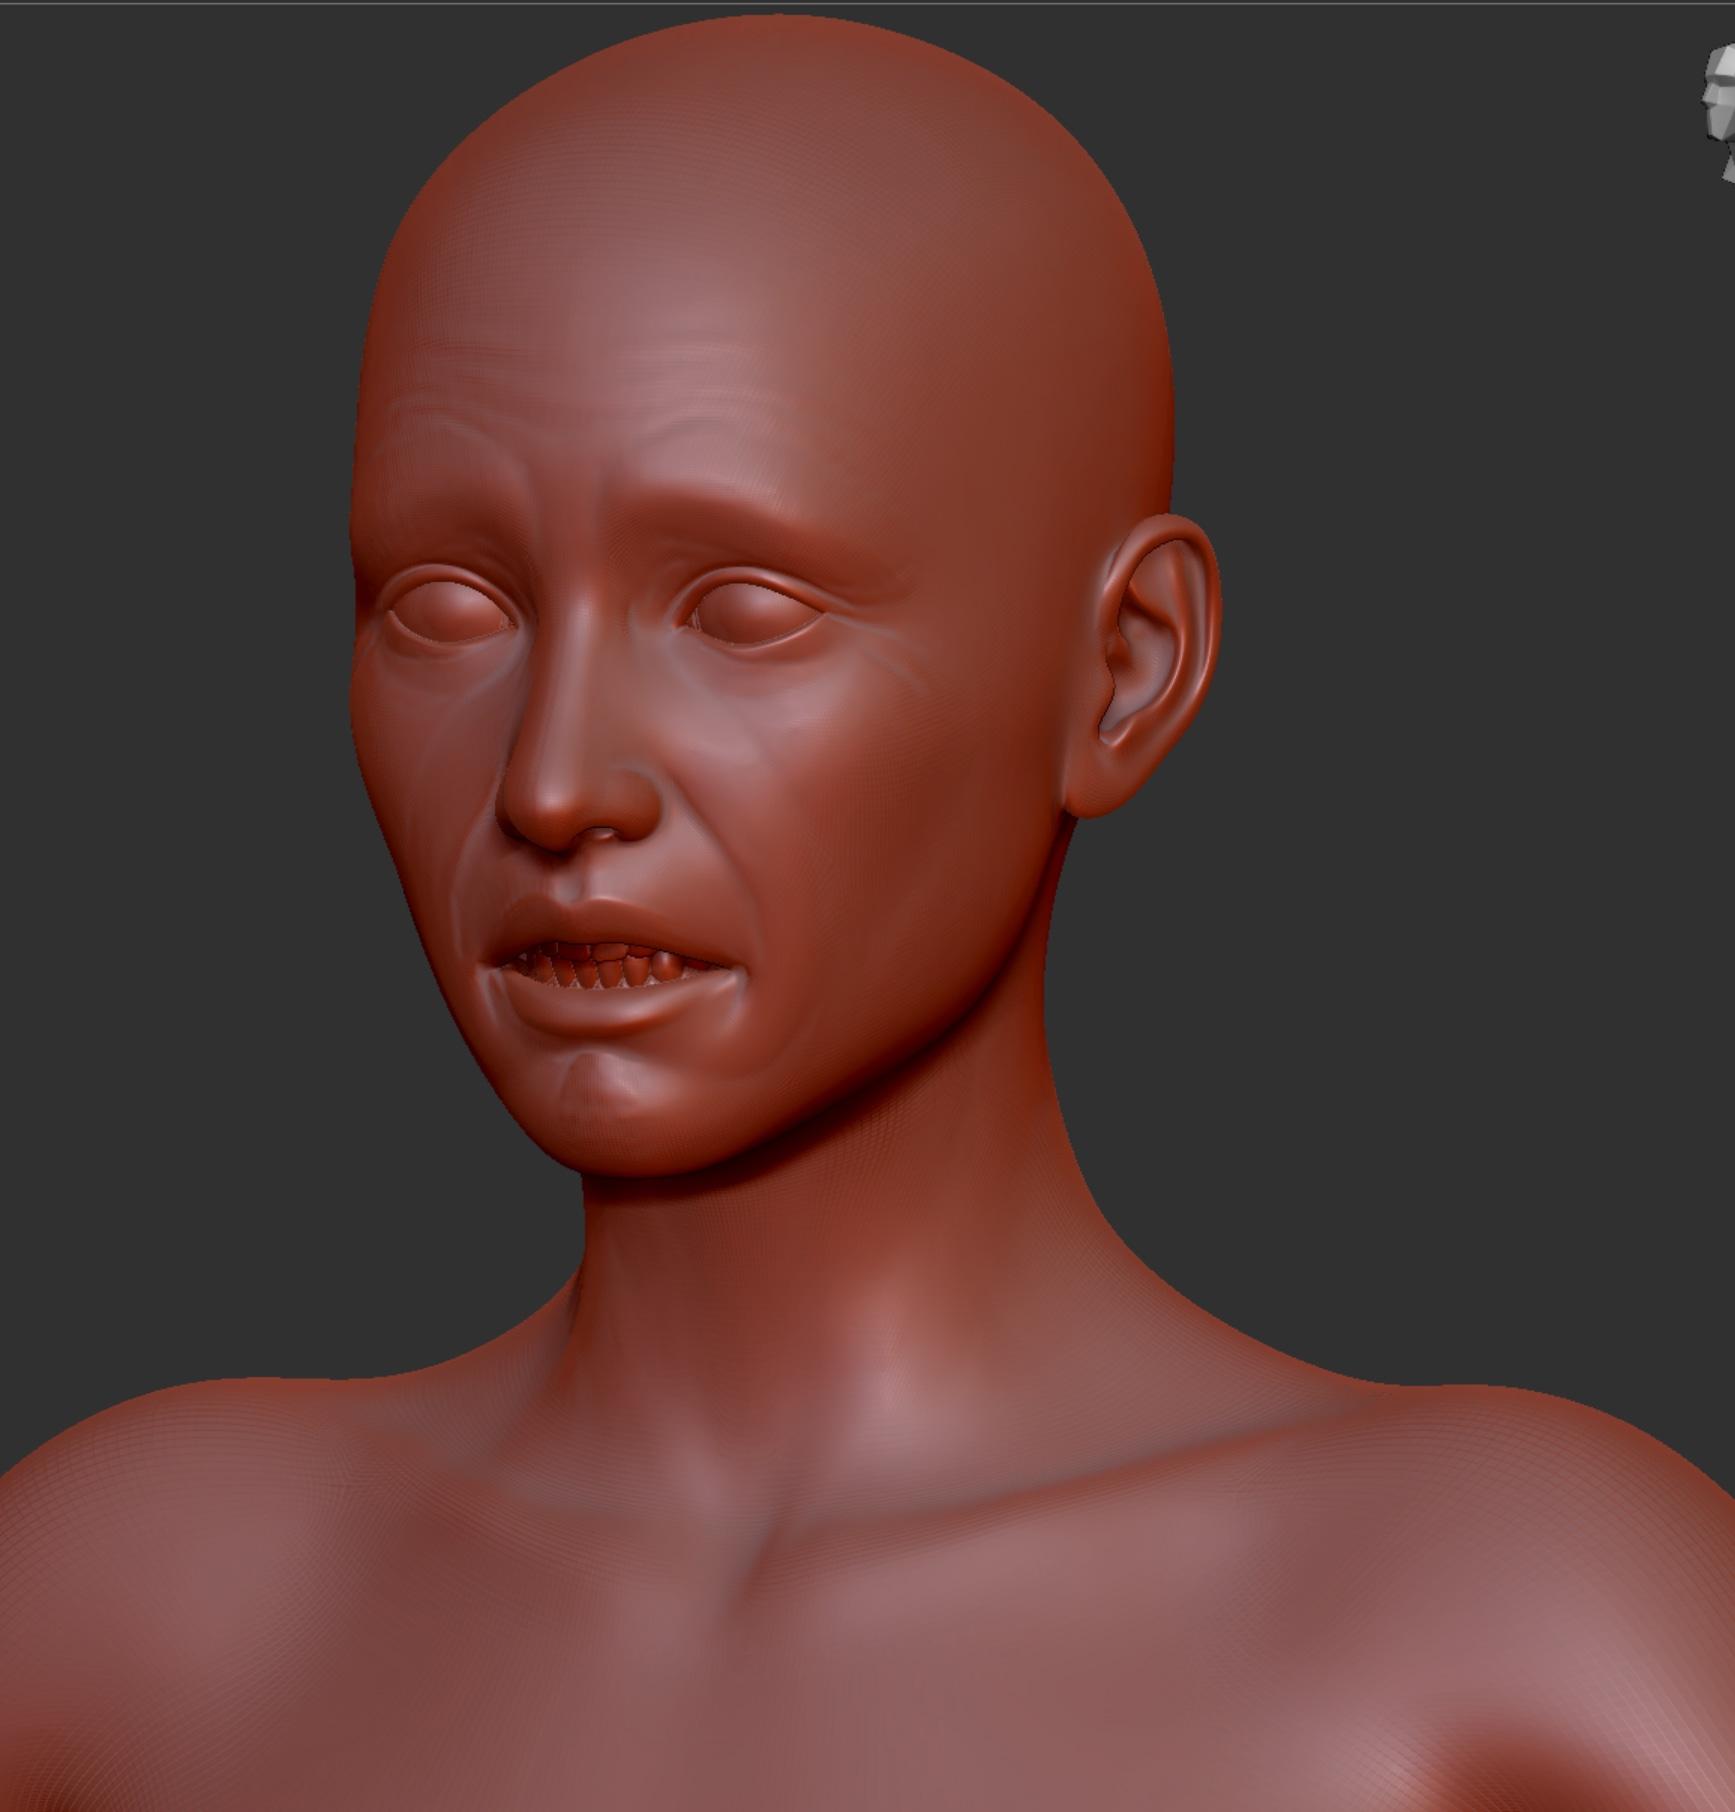
This seems to be a pretty basic problem in that it seems not to be possible to generate a displacement mesh that has only the diff between two meshes.
Any idea how I achieve this and why has a displacement map some kind of default grey?
I guess that be caused by thegeometry of the basemesh is too different from the subdivded mesh?
Genesis 9I wonder if any of these morph products will work on Genesis 9:
https://www.daz3d.com/cartoonized-for-genesis-8-female
https://www.daz3d.com/musculature-hd-morphs-bundle-for-genesis-8
https://www.daz3d.com/auto-muscle-enhancer-hd-for-genesis-8-males
https://www.daz3d.com/z-slender-model-shape-preset-and-poses-for-genesis-8-female
https://www.daz3d.com/z-strong-within-shape-and-pose-mega-set
I have a few other morphs, but the PAs have released G9 versions for those luckily.
IM Tennis Outfit Top missing MorphsOn inspection, can confirm no morphs, including any corrective fit morphs for specific shapes or characters, are visible for the top. The cause is unclear; all the morph files are on disk on a seemingly corrrect path.
[Fisio SB addOn released] Fisio: Physics SimulatorArtini said:
I have to test https://www.daz3d.com/shape-splitter
as it says "Work with any object that contains a morph, figure, clothes or prop."
Maybe that one could be used for disassembling.
That would be worth getting if it did
What's Your Favorite Eight Year Old Girl and Boy Character?Well, are you talking about a morph or a skin? When you talk about looking like plastic, that sounds more like a complaint on the skin textures or settings. Just look for your favorite realistic skins and start from there. You can mix and match textures if you think a certain skin looks too weathered. Base textures that do not bake too much detail are ideal here.
My advice is take a bluejaunte character, remove the normal maps, and dial back the bump map strength. This should give a youthful look that still borders on realistic. The problem with a lot of skin textures is many are too flat, this makes them toonish. The bluejaunte models do a few things. The base color is not flat and has variance. Then the dual lobe textures do a great job emulating the unique pattern of human skin, and how that skin reflects light. Even most G9 characters don't do this as well, imo.
These elements can blended in with all sorts of characters to add that realism you seek.
For a boy, there are no bluejaunte males. But you can use the UV swap product to use a female skin on a male (assuming this is G8.) I took the extra step of converting a set for G8M, allowing me to mix these with other existing G8M textures. With G9 this not necessary, and bluejaunt has a G9 character.
File Attachments to posts not workingRichard Haseltine said:
We are told this should be fixed.
This problem still exists. I cannot upload a png image nor a small zip file with a script, to a post I just made. It either says "Uploading..." forever, or sometimes says "[filename] failed to write to disk" (approximately).
Using chrome or Firefox, on Windows 10.
I made a huge improvement to the G8 to G9 transfer script and want to share it, but, I cannot upload either the screen shot (59k) or the zip file (11k). https://www.daz3d.com/forums/discussion/598316/g8f-m-pose-transfer-to-g9#latest
How do other users manage to upload files? Is this failure "intermittent"?
G8F/M Pose Transfer to G9Richard, thanks again for making this script available!
I sent you several emails (per the note included with your zip) about changes I made; I've gotten no reply and so, I am posting here.
I wanted to use this script to substitute in a G9 figure through the animation range. I wound up making an extensive transformation of the script, although I did not (intentionally, at least) make any change to the functionality at the bone-and-property level (even though nearly all of the code is refactored). I thought it was easy enough to require the user to first select two firgures in the scene hierarchy panel, so, I dropped the hip selections from the dialog. This made room for the options that popped out as making sense to me, as I worked on it. I wound up with the dialog looking like this:
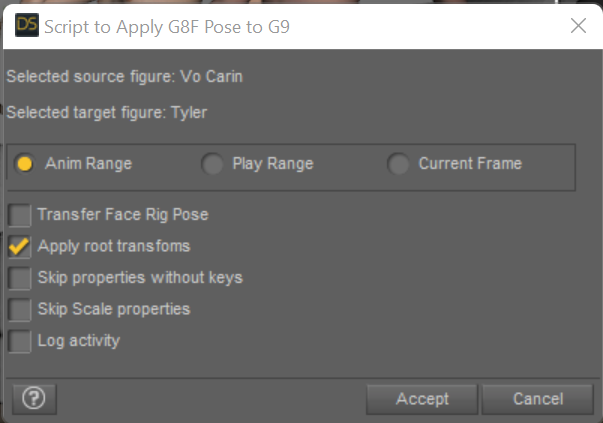
You can choose to process the entire timeline range (default), or limit it by setting the Play Range on the Timeline panel, or just process the current frame. The option to Transfer face rig pose is retained. To get the new figure in the same place in the scene as the old one, check the Apply root transforms option. If your timeline is an animation that you created by setting keyframes, the process may be faster and the result more flexible if you select the option to Skip properties without keys, which will check for a key in the G8 figure in each property in each frame, and if none is found then skip setting the corresponding G9 property in that frame (NB: the process of accessing keys by property has been made much faster in a recent DS release; this option might be very slow on older versions...) It seemed unlikely to me that I would want to transfer scale settings, so, I added the option to Skip Scale properties; finally, the option to Log activity, property-by-property, into the DAZ log file (quite a bit slower, if checked).
I've used this modified script on a 60-frame "photoshoot" and it took about 11 seconds to complete; small manual adjustments were then needed in about half the frames, such as bending an arm to get the G9 figure's fingers out of another figure's arm. This seems reasonable to me, and, the results on a single frame look the same to me as the result from (Richard's) original script. I also used it on 3800 frame animation, with the fastest options selected, and it took about 11 minutes and 16 seconds. From other tests I saw that the slowest option settings will slow it down from about 5.5 FPS to about 1 FPS.
It took several tries and a late visit but it seems I've finally gotten the files attached.
To use the script first just unzip it somewhere in your library where you can find it in your Content Library tab. Select the two figures in your scene hierarchy panel, first the G8 that is posed the way you want and second the G9 figure to be posed to match it, then launch the script to get to the options dialog. Set the options you want and click accept. The progress dialog is displayed and you can cancel if you want; on cancel it asks if you want to keep or undo the frames completed to that point. All effects from the script are part of a single undo scope and can be undone / redone from the regular DAZ Studio edit menu.
If you want to use the play range to limit the processing, set that on the Timeline panel before starting the script.
As for animations of your G8 figure, they either have to have been created in the Timeline or, if using aniblocks, those have to be baked to Studio Keys in order to be seen as bone poses tha can be transferred to your G9 figure. A good clue that your animation has not been baked is, if the script says it completed all the frames, seems to run very fast, and your G9 figure is not doing anything as you step through the timeline.
/t
NOTE added 27 Jan 2023, I hit a problem in the script a revision 104 is attached to another post a bit later in this thread.
Daz 3D is part of

Connect
DAZ Productions, Inc.
7533 S Center View Ct #4664
West Jordan, UT 84084Licensing Agreement | Terms of Service | Privacy Policy | EULA
© 2026 Daz Productions Inc. All Rights Reserved.