-
Genesis 8 Fractals Set I updated with Anatomy
It seems to me that these would work most logically in the Translucency color map slot but with DAZ 4.10.x & Genesis 8 that slot is by default used by the same diffuse map used in the diffuse slot. Or it is for Michael 8 & Victoria 8 the only 2 Genesis 8 characters I have bought so far.
When I render a Genesis 8 character in DS 4.10.x without the fractal maps it renders nicely except the character skin is missing that 'nebulous softness' because the translucency slot is taken by the diffuse map giving the skin an exact hardness we don't see with our own eyes in real life. So I removed those maps before and renders at 50% translenceny weight and the skin has a soft nebulous transparent glow but unfortunately too many diffuse map from the diffuse slot details are lost that way (although maybe with a 5000 iteration render they would get sufficiently added back in) . :-(
For for this fractal map I did the same but changed the translucency strength to 30% from the medium translucency preset of 50% and then I put the fractal noise maps in for the translucency maps. I set then it to scatter & transmit intensity although I have no ideal what that means. It seems to indication light is penetrating the surface and exiting via reflection and refraction sporatically to create an illusion of light transmission. Anyway I did that, left the translucency color at white but set the translencency reflectance color directly under that to a very pale blue trending purple.
It's rendering now and it is creating a nicely mottled skin like you'd expect from veins, capillaries, fats and other stuff doctors & such would know about but I wouldn't and don't quite nicely already and I am only 3% in rendering of a 2000 iteration maximum render I a doing. Whether it it actually turns out good at 2000 iterations I must wait and see. I am using the old Phoenix66 texture set Caleb which is missing specular maps but has bump and displacement maps. Since it is a G8M there is are seams in the render since the fractal maps were created for G8F but since I was already doing a pose set I figured I'd stop & give your fractals a quick whirl & see if this way of using translucency color slot was easier than using PS, Gimp, or LIE.
Looking again at the results so far I'm thinking now maybe the mottled pattern is a bit to large in scale for the typical person. I will have to wait and see. Looking at the fractal maps directly in a picture viewer looks like the fractal noise is lbigger noise splots on the face and arms, too big. On the legs and torso though it looks better. I should of hid the clothing before I started rendering! It's very subtle. It's kind of good there is a seam for this simple test because you can directly compare with & without.
When you look at the texture maps in an image viewer it is decieving because of how the model's UVs are laid out. However at rendertime the fractals were created and have taken the UV sizes into account so that the texture is consistent across the different sized UVs. For instance, compare the head and torso maps. The small area of the head takes up more UV than the torso UV and yet size wise the head is smaller. to get the fractals to be the same, the head map fractal size must be larger. This way at rendertime, it is seamless and the same size. I hope that makes sense.
My Project: Brash Lonergan adventures - Warning AI Discussion PossibleThanks for the encouragement, PhilW. It is all your fault. Ever since I saw you rig the insect man in your tutorials I have wanted to create my own toon figures. I will get there someday.
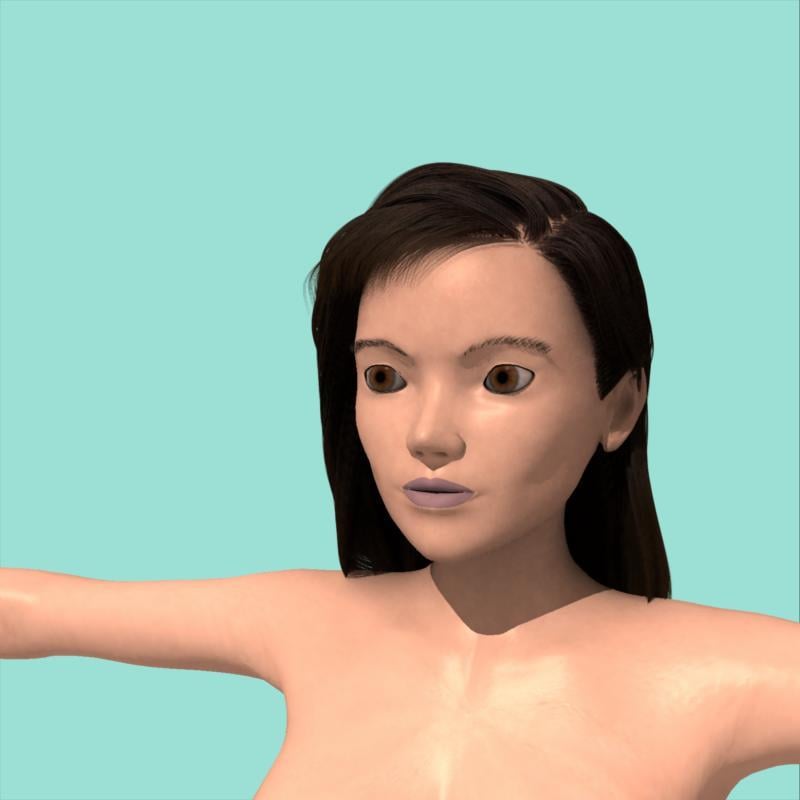
Here is another Moxie2 test. The test here was for the eyebrows, They are Carrara dynamic hair grown on the figure mesh. Still no eyelashes though. Her skin is just the default organic skin shader that comes with Carrara. The eyeballs' shaders are based on the maps for Victoria 6.
Wanted a different cheekbone structure than I normally do. Now I may regret it, but that kind of thing can be addressed with morphs.
 Carrara Challenge #36 - Pinups and Cheesecake and Hunks - Oh My! - WIP Thread --Meet Ringo Monfort!
UunifiedBrain - Agree with everyone, that is a wonderful vote image. There is a thread in the Art Studio forum dedicated to the older generation figures. I'm sure those folks would love to see what you have done with Vicki.
Glute and Breast Control Genesis 8 (Commercial)Did you open the Puppeteer pane first?
No, but I just did this morning. Received the following error (see attached image). Then I loaded G8 into the view pane selected her and tried to load Puppeter support again and still no puppeteer window.
The log file is too long to post here. I attached it as a .txt file.
I think I know what it is. Try this. Make sure Genesis 8 is loaded in scene first before opening the pane and applying the preset.
I was doing that and it did not work. I just updated to 4.9.4.122 Pro edition and it still does not work. I open DS. I load Genesis 8 female. I double click on the breast control puppeteer support icon and get an error because G8 is not selected. I click on Genesis 8 to select her and double click on the puppeteer support icon again and the load box flashes for less than a second and no puppeteer window come up. Same thing with G8 Glute Control and G3 Breast control. I'm stumped. It has to be something with my system settings as it seems that no one else is having this issue.
Here are the last few lines if the log file after I cleared the scene and loaded Victoria 8 then clicked on the Puppeteer support Control Icon again.
2017-08-15 19:11:57.629 *** Scene Cleared ***
2017-08-15 19:12:12.667 WARNING: libpng warning: iCCP: known incorrect sRGB profile
2017-08-15 19:12:12.670 WARNING: libpng warning: iCCP: known incorrect sRGB profile
2017-08-15 19:12:12.670 WARNING: libpng warning: iCCP: cHRM chunk does not match sRGB
2017-08-15 19:12:12.672 WARNING: libpng warning: iCCP: known incorrect sRGB profile
2017-08-15 19:12:12.674 WARNING: libpng warning: iCCP: known incorrect sRGB profile
2017-08-15 19:12:12.675 WARNING: libpng warning: iCCP: known incorrect sRGB profile
2017-08-15 19:12:12.678 WARNING: libpng warning: iCCP: cHRM chunk does not match sRGB
2017-08-15 19:12:12.684 WARNING: libpng warning: iCCP: known incorrect sRGB profile
2017-08-15 19:12:12.719 WARNING: libpng warning: iCCP: known incorrect sRGB profile
2017-08-15 19:12:12.719 WARNING: libpng warning: iCCP: cHRM chunk does not match sRGB
2017-08-15 19:12:12.720 WARNING: libpng warning: iCCP: known incorrect sRGB profile
2017-08-15 19:12:12.720 WARNING: libpng warning: iCCP: cHRM chunk does not match sRGB
2017-08-15 19:12:12.721 WARNING: libpng warning: iCCP: known incorrect sRGB profile
2017-08-15 19:12:12.724 WARNING: libpng warning: iCCP: cHRM chunk does not match sRGB
2017-08-15 19:12:22.177 *** Scene Cleared ***
2017-08-15 19:12:24.201 Begin Loading Character Addons...
2017-08-15 19:12:24.293 File loaded in 0 min 0.0 sec.
2017-08-15 19:12:24.294 Loaded file: Genesis 8 Female Eyelashes.duf
2017-08-15 19:12:24.326 Loaded Morph Deltas in 0 min 0.0 sec.
2017-08-15 19:12:24.361 Loaded Morph Deltas in 0 min 0.0 sec.
2017-08-15 19:12:24.361 Loaded file: FBMVictoria8.dsf
2017-08-15 19:12:24.363 Loaded file: FHMVictoria8.dsf
2017-08-15 19:12:24.367 Loaded Morph Deltas in 0 min 0.0 sec.
2017-08-15 19:12:24.368 Loaded file: PHMMouthRealism_HD_div2.dsf
2017-08-15 19:12:24.393 Loaded Morph Deltas in 0 min 0.0 sec.
2017-08-15 19:12:24.393 Loaded file: PBMNavel.dsf
2017-08-15 19:12:24.404 Loaded Morph Deltas in 0 min 0.0 sec.
2017-08-15 19:12:24.404 Loaded file: PHMEyelashesExpand.dsf
2017-08-15 19:12:24.534 File loaded in 0 min 0.0 sec.
2017-08-15 19:12:24.535 Loaded file: Victoria 8 Eyelashes.duf
2017-08-15 19:12:24.537 Finished Loading Character Addons
2017-08-15 19:12:24.545 File loaded in 0 min 2.3 sec.
2017-08-15 19:12:24.568 Loaded file: Victoria 8.duf
2017-08-15 19:12:25.111 Loaded image Victoria8LegsD_1003.jpg
2017-08-15 19:12:25.183 Loaded image Victoria8EyesD_1006.jpg
2017-08-15 19:12:25.376 Loaded image Victoria8ArmsD_1004.jpg
2017-08-15 19:12:25.445 Loaded image Victoria8MouthD_1005.jpg
2017-08-15 19:12:25.658 Loaded image Victoria8FaceD_1001.jpg
2017-08-15 19:12:25.852 Loaded image Victoria8TorsoD_1002.jpg
2017-08-15 19:12:25.915 Loaded image Victoria8Eyelashes_1001.jpg
2017-08-15 19:12:29.692 WARNING: libpng warning: iCCP: known incorrect sRGB profile
2017-08-15 19:12:29.694 WARNING: libpng warning: iCCP: known incorrect sRGB profile
2017-08-15 19:12:35.397 WARNING: libpng warning: iCCP: known incorrect sRGB profile
2017-08-15 19:12:35.397 WARNING: libpng warning: iCCP: cHRM chunk does not match sRGB
2017-08-15 19:12:35.398 WARNING: libpng warning: iCCP: known incorrect sRGB profile
2017-08-15 19:12:35.398 WARNING: libpng warning: iCCP: cHRM chunk does not match sRGB
2017-08-15 19:12:38.980 WARNING: libpng warning: iCCP: known incorrect sRGB profile
2017-08-15 19:12:38.983 WARNING: libpng warning: iCCP: cHRM chunk does not match sRGB
2017-08-15 19:12:38.984 WARNING: libpng warning: iCCP: known incorrect sRGB profile
2017-08-15 19:12:38.984 WARNING: libpng warning: iCCP: cHRM chunk does not match sRGB
2017-08-15 19:12:41.732 File loaded in 0 min 0.1 sec.
2017-08-15 19:12:41.732 Loaded file: Breast Control Puppeteer Genesis 8 Female.duf
I have that same error, I just bought the product and I'm new to daz studio but I can't reshape the breasts or glutes but i can control the bend. How did you resolve this ?
Executable files in product?Included in Sensibility for Victoria 4
5830_SensibilityV4_v1.1_dpc.exe
5830_SensibilityV4DS_v1.1_ds.exe
What are these files and what do they do? I can't find them listed in the product readme.
Don't recall ever seeing .exe files in a product before.Genesis 8 Fractals Set I updated with AnatomyIt seems to me that these would work most logically in the Translucency color map slot but with DAZ 4.10.x & Genesis 8 that slot is by default used by the same diffuse map used in the diffuse slot. Or it is for Michael 8 & Victoria 8 the only 2 Genesis 8 characters I have bought so far.
When I render a Genesis 8 character in DS 4.10.x without the fractal maps it renders nicely except the character skin is missing that 'nebulous softness' because the translucency slot is taken by the diffuse map giving the skin an exact hardness we don't see with our own eyes in real life. So I removed those maps before and renders at 50% translenceny weight and the skin has a soft nebulous transparent glow but unfortunately too many diffuse map from the diffuse slot details are lost that way (although maybe with a 5000 iteration render they would get sufficiently added back in) . :-(
For for this fractal map I did the same but changed the translucency strength to 30% from the medium translucency preset of 50% and then I put the fractal noise maps in for the translucency maps. I set then it to scatter & transmit intensity although I have no ideal what that means. It seems to indication light is penetrating the surface and exiting via reflection and refraction sporatically to create an illusion of light transmission. Anyway I did that, left the translucency color at white but set the translencency reflectance color directly under that to a very pale blue trending purple.
It's rendering now and it is creating a nicely mottled skin like you'd expect from veins, capillaries, fats and other stuff doctors & such would know about but I wouldn't and don't quite nicely already and I am only 3% in rendering of a 2000 iteration maximum render I a doing. Whether it it actually turns out good at 2000 iterations I must wait and see. I am using the old Phoenix66 texture set Caleb which is missing specular maps but has bump and displacement maps. Since it is a G8M there is are seams in the render since the fractal maps were created for G8F but since I was already doing a pose set I figured I'd stop & give your fractals a quick whirl & see if this way of using translucency color slot was easier than using PS, Gimp, or LIE.
Looking again at the results so far I'm thinking now maybe the mottled pattern is a bit to large in scale for the typical person. I will have to wait and see. Looking at the fractal maps directly in a picture viewer looks like the fractal noise is lbigger noise splots on the face and arms, too big. On the legs and torso though it looks better. I should of hid the clothing before I started rendering! It's very subtle. It's kind of good there is a seam for this simple test because you can directly compare with & without.
Carrara is a Zombie?Howdy Folks,
It has been a little while since I posted, but I thougtht I would share this update. I had two support ticketrs filed against Carrara 8.5 Pro, one with regards to the installer missing some of included resources (which were provided to me in a zip file, and saying they would fix), and another against Genesis 3 (Victoria 7) not loading in Carrara. Both of these were 2 years ago or so, and a new person had been assigned 'on-hold' tickets. The support person (name of Jamie, not sure of gender) indicated that Carrara was no longer under development as they are focusing on Studio, and closed both of my tickets. So it looks like Carrra is un-dead, it is a zombie....
Rich S.
CC Lily for Genesis 8 Female [Commercial] (Released!)CC Lily for Genesis 8 Female is an HD human or elf character ready for any occasion -- naughty or nice. She comes with her own custom made fibermesh eyebrows and fibermesh eyelashes, each with 3 UV settings to cover any use and a variety of shaping options. Both are designed to work seamlessly with general hair product addons so all her hair can match. She also comes with 14 texture-based eyebrow color options as well.
Lily also comes with 4 custom nail shapes for both realistic and fantasy renders. She has 2 custom elf ear options as well as custom body, head and navel morphs. All morphs are separate for more versatility.
She sports 22 realistic and fantasy eye color options, 16 makeup options that range from subtle to dramatic fantasy, 2 eyeliner only options, 3 lipstick styles, 20 lipstick color presets (with the ability to use ANY color with any of the the three styles), and 18 nail color presets. All material zone options are independent, so you can mix and match to create hundreds of different looks! As an added bonus, makeup options all use diffuse overlay and are set to work on almost any skin for Genesis 8 Female.


Promo Products Used:
- dForce Romantic Dress Outfit for Genesis 8 Female
- Demure II: Poses and Expressions for Genesis 8 Female(s) and Victoria 8
- Katherine Hair for Genesis 3 Female(s)
- iRadiance - Studio HDRIs for Iray
- Lingerie Robe Set for Genesis 8 Female(s)
- Everyday Updo Hair and OOT Hairblending 2.0 for Genesis 3 Female(s)
- Scintillant Portrait Lights for Iray
- UHT2: Ultimate Color
- UHT2: Fantasy Colors
- Perrin Hair for Genesis 3 & 8 Female(s)
- LY Leonine Pro HDR Lighting
- Voss Hair for Genesis 3 & 8 Female(s)
- Geneva Hair
- Nightbird Hair
- The Sinful Witch for Genesis 2 Female(s)
- Edwardian Hair for Genesis 3 Female(s)
- Core Lighting 2
- Carefree Hair for Genesis 3 Female(s)
- Febe Outfit for Genesis 8 Female(s)
- FaerieTies Hair
- Ktarya Outfit for Genesis 3 Female(s) and Genesis 8 Female(s)
- Morning Star Wings for Genesis 3 and 8 Female(s)
- The Streets Of Venice
- Elven Weapon Spearman
- Skies of iRadiance - Sunny Sky HDRIs for Iray
- DM's All Woman Poses
- IGD Diva-Tude Poses for Stephanie 8
- DM's Sensual Grace
One Last Note: The eyes for this gal were created using DimensionTheory's fantastic Project EYEray - Next Gen and Merchant Resource for Genesis 8. This makes use of Chromatic SSS in their shader for more realistic final images, but there is a slight bug in Iray when using Chromatic SSS along with Translucency without the Iray Dome on. There is a preset to counter this issue in the eye folder (Mono SSS) if you need to render without the dome. Or, you can render with the dome on :D
How to convert a Genesis figure to a G2F figure step by step?Thanks for those links, I was also messaging with the artist directly and she was kind enough to link me to the actual products I would need, turns out I already owned one of them, "Victoria 4 for Genesis 2 Female", so I just need to pick up Genx and Genx2 add-on and then this product: https://www.daz3d.com/v4-skins-auto-converter-for-genesis-2-female-s
Hopefully they will all go on sale at the end of this PC sale, fingers crossed.
Genesis 8 and old contentFor a more complete picture here are some full body comparisons of the Muscle Maps. The Victoria 4 originals are on the left and the Genesis 8 Female with the Victoria 4 Legacy UVs are on the right.


 i13 College Uniform for the Genesis 3 Female(s) problem
I purchased i13 College Uniform for the Genesis 3 Female(s). I used it on a character based on Victoria 7. It looked fine in the program. But the blazer and shirt became all white after rendering to image. The socks and shoes have no such problem. What happened? Please help.
GENERAL FREEBIE REQUESTS Part 2I purchased Michael 4 base recently, and i'd like to ask, are there any free clothing and hairstyles for Genesis 3 Male and Michael 4 to download, other than those listed in the PoserDAZResources Wiki?
Also, are there any free dancing, running and walking animations (preferably AniBlocks) for Victoria 4, Michael 4, and Genesis 3 Male and Female?
One of the nice things about PoserDAZResources Wiki is they list the links to a creator's freebie content. So instead of having a link to just one product the user can click on the creators name. Which takes you to their page and their page will be listed where the creator offers access to their freebies.
an example:
So I select the G.O.D. Bodysuit by StudioArtVartaian and at the bottom of the page I see the category StudioArtVartaian. Clicking on that link gets me the
StudioArtVartanian's creator page here: https://poserdazfreebies.miraheze.org/wiki/G.O.D._Bodysuit,_Poser_M4_Dynamic_%26_DS4%2B,_Genesis.
On this page at the top you can see a link to their free stuff on Renderosity and Sharecg. Click on the Renderosity link and it will take you to all of their freebies. You can do this for any of the artists that have been catalogued here: https://poserdazfreebies.miraheze.org/wiki/Category:Creator
You might try some of these for your animations: http://www.posermocap.com/category/download/ or here: https://www10.sharecg.com/search/index.php?ps=15&q=AniBlocks&ps=50&m=any&wm=wrd
dForce Verified Functional Clothing [Out of the Box]I have a request. If someone has Sensibility (either the V4 version or the G2F version) - could you test it in dForce? I'm tempted to get it but only if it works in dForce, as older dresses tend to not transfer very well to newer generations.
I tried the Sensibility dress (not got an image, sorry) and it stayed together but slid down the shoulders in a way that was a bit daring for the era and there was a lot of fabric pooling around the hem on the floor. Somebody (and I've forgotten who - again, sorry) corrected a similar shoulder issue with the Platinum Cocktail dress, and I think weight mapping was involved. That should solve that problem, if you can find the post. I haven't had nearly enough time to mess around with dForce, but I think you can add 'stiffness' (for want of a better word) to the fabric and so that might stop it stretching like a giant piece of elastic and gathering on the floor.
I just did a quick test raising the friction on the dress trims and I still lost a shoulder when I put her in a pose. It works, in that it drapes, but you're going to want to fiddle with fabric settings and/or weight maps and dynamic strength settings depending on the pose.
dForce Verified Functional Clothing [Out of the Box]I have a request. If someone has Sensibility (either the V4 version or the G2F version) - could you test it in dForce? I'm tempted to get it but only if it works in dForce, as older dresses tend to not transfer very well to newer generations.
I tried the Sensibility dress (not got an image, sorry) and it stayed together but slid down the shoulders in a way that was a bit daring for the era and there was a lot of fabric pooling around the hem on the floor. Somebody (and I've forgotten who - again, sorry) corrected a similar shoulder issue with the Platinum Cocktail dress, and I think weight mapping was involved. That should solve that problem, if you can find the post. I haven't had nearly enough time to mess around with dForce, but I think you can add 'stiffness' (for want of a better word) to the fabric and so that might stop it stretching like a giant piece of elastic and gathering on the floor.
'
T'was moi, and the post with the Weight Mapped dress is here: https://www.daz3d.com/forums/discussion/comment/3025316/#Comment_3025316
I haven't posted the weight maps yet, Diva I'll PM you some links.
dForce Verified Functional Clothing [Out of the Box]I have a request. If someone has Sensibility (either the V4 version or the G2F version) - could you test it in dForce? I'm tempted to get it but only if it works in dForce, as older dresses tend to not transfer very well to newer generations.
I tried the Sensibility dress (not got an image, sorry) and it stayed together but slid down the shoulders in a way that was a bit daring for the era and there was a lot of fabric pooling around the hem on the floor. Somebody (and I've forgotten who - again, sorry) corrected a similar shoulder issue with the Platinum Cocktail dress, and I think weight mapping was involved. That should solve that problem, if you can find the post. I haven't had nearly enough time to mess around with dForce, but I think you can add 'stiffness' (for want of a better word) to the fabric and so that might stop it stretching like a giant piece of elastic and gathering on the floor.
dForce Verified Functional Clothing [Out of the Box]I have a request. If someone has Sensibility (either the V4 version or the G2F version) - could you test it in dForce? I'm tempted to get it but only if it works in dForce, as older dresses tend to not transfer very well to newer generations.
Getting skin to look more realistic. Maps?I am by no means any kind of expert, but in my experience, there is no "real world difference" between jpg and other formats for textures when rendering with Daz Iray. Yeah, jpg is lossy and loses some detail...
See my post above you. You are not taking into account the need to edit the texture. jpg is just a terribe format for editing.
There are Victoria 4 skin maps that are still some of the most amazing skin maps ever made. Like those by danae at the other store. "London" is just amazing.
I agree. Metropolitan Series of figures are my favorite textures by far.
You have NGS2 which is pretty nice. Don't forget that NGS2 has a number of options to tweak the look further, like brightness. I almost always click the max brightness option every time I use NGS2. There is also Iray Smart Converter, which seems to not get as much love as NGS2, but IMO it offers more nuanced results out of the box so to speak. Being able to pick between cold and warm skin with one click is convenient. These two products do a great job and compliment each other very well...if one doesn't look great on a figure then often the other will. And if they don't get a great result, they will get you pretty close.
It is also worth noting that there is a NGS3 in the works that could possibly blow all the previous Iray skin converters away. DZ has taken lessons learned from NGS2 and has been taking his time trying to perfect 3. Keep an eye out for it.
NGS is ok, for an EZ dial. But it doesn't teach you anything about what is going on underneath. As an artist, you learn nothing about how to make good skin. And even NGS has to work with the spotty quality jpg's. And in my opinion, NGS doesn't even produce realistic skin (my definition of realistic), just perhaps better looking. Like a fashion magazine. It is always better to educate yourself so that you can make your own creative decisions.
Please take a PNG or whatever lossless skin texture map character and render them at 1080p. Then convert all those textures to JPG. Re-render. Lets see the result. Also, record your VRAM usage, and then consider that most users probably don't have the same equipment you do.
I've edited textures. Saved them as jpgs. I guess I fail. <.<
And I gotta disagree on NGS making people look like fashion magazines. NGS highlights the very imperfections that a magazine would photoshop away. So that is a gigantic difference in style right there. If a model looks like a fashion model after NGS, then that is because the original model looks like a fashion model. That's like...Daz's biggest market, LOL.
Look, I do not have the time to learn every single thing about Daz Studio. I have a demanding job and a family, I'd be lucky to spend more than a few hours in an entire week with Daz Studio. So with limited time there is only so much that can even be done. It is a hobby. So please forgive me if I don't have the overwhelming desire to learn its every last detail. There's already enough on the plate to figure out. Daz Studio exists IMO, to make life easier for its users to get into 3D in the first place, and as a place for people who don't want to get their hands too dirty in it. If you want more, you can get more, but lets be frank, you'd be better off creating all these things yourself in whatever expensive 3D program you like, not Daz Studio. Daz Studio offers presets for nearly every single task it does, from characters, lights, poses, cameras, even full scenes can be bought and downloaded by users. These things exist for a reason, to reduce the barriers so nearly anyone can get in. But even as easy as Daz is, there is still a ton of things for a user to learn about it. Think about all the different aspects of Daz Studio that a user needs to learn to take advantage of them. Users will, time and again, choose EZ.
I seriously doubt the majority of Daz's users ever edit their skin textures in any way. Does that make them all terrible artists? Do painters need to create their own paints to paint to be considered a painter? Its like PC gaming and modding. If you want the most out of PC games, you do modding. I've done some modest modding. That's what led to me coming here. But the vast majority of players do not mod their games. That does not mean those players are doing it wrong, that is their their choice.
Here is London for V4 using the apparent sin of Iray Converter for Generation 4, and with 3 lights. That's all. I accidently made one of the lights too bright, but the render had already taken a good while before I noticed it and I didn't want to do it over again at this time. But I purposely used an unaltered texture to demonstrate Iray Converter for the person who created the topic so they can judge for themselves what they might want to do.
 Getting skin to look more realistic. Maps?
You really don't need an expensive program. The texture maps that Daz creates are often detailed enough. Occasionally they need slight adjustments with Photoshop or Gimp or pretty much any photo editing program - but most of them are detailed enough "out of the box". The problem is their Iray settings are usually pretty bad, imo. You just have to learn how iray settings affect the look of the textures and adjust accordingly.
It depends on your definition of "detailed enough". The DAZ tex maps I've seen are jpg (!), so you are already talking about a lot of loss of fidelity from the start. JPG files are lossy and only 8 bit, so you are already starting out on the low end of the spectrum. But a good knowledge of how textures work in relation to realistic skin is a must.
That sounds a bit condescending. I think my definition of "detailed enough" would cover many (most?) people's idea of "detailed enough".
This is Victoria 7's textures - with no changes made to the texture maps (click for full size):
Most people aren't going to need more detail than that. The only things I changed where her Iray settings, added displacement maps, and Duel Lobe Specular bumps.
And as I said earlier, lighting and render settings can play a big role in adding realism.
Skin looks fantastic, Diva! Was just checking out your flavor of Lee 6, too, which also looks really good.
- Greg
Thank you, Greg! :D I adore, Lee 6! He's one of Daz's best, imo.
You really don't need an expensive program. The texture maps that Daz creates are often detailed enough. Occasionally they need slight adjustments with Photoshop or Gimp or pretty much any photo editing program - but most of them are detailed enough "out of the box". The problem is their Iray settings are usually pretty bad, imo. You just have to learn how iray settings affect the look of the textures and adjust accordingly.
It depends on your definition of "detailed enough". The DAZ tex maps I've seen are jpg (!), so you are already talking about a lot of loss of fidelity from the start. JPG files are lossy and only 8 bit, so you are already starting out on the low end of the spectrum. But a good knowledge of how textures work in relation to realistic skin is a must.
That sounds a bit condescending. I think my definition of "detailed enough" would cover many (most?) people's idea of "detailed enough".
This is Victoria 7's textures - with no changes made to the texture maps (click for full size):
Most people aren't going to need more detail than that. The only things I changed where her Iray settings, added displacement maps, and Duel Lobe Specular bumps.
And as I said earlier, lighting and render settings can play a big role in adding realism.
I can totally see the DL specular bump at work! Gotta love those scattered shines on the skin

Right!? I'm so excited that they added Duel Lobe to the Iray shader. :)
You really don't need an expensive program. The texture maps that Daz creates are often detailed enough. Occasionally they need slight adjustments with Photoshop or Gimp or pretty much any photo editing program - but most of them are detailed enough "out of the box". The problem is their Iray settings are usually pretty bad, imo. You just have to learn how iray settings affect the look of the textures and adjust accordingly.
It depends on your definition of "detailed enough". The DAZ tex maps I've seen are jpg (!), so you are already talking about a lot of loss of fidelity from the start. JPG files are lossy and only 8 bit, so you are already starting out on the low end of the spectrum. But a good knowledge of how textures work in relation to realistic skin is a must.
That sounds a bit condescending. I think my definition of "detailed enough" would cover many (most?) people's idea of "detailed enough".
This is Victoria 7's textures - with no changes made to the texture maps (click for full size):
Most people aren't going to need more detail than that. The only things I changed where her Iray settings, added displacement maps, and Duel Lobe Specular bumps.
And as I said earlier, lighting and render settings can play a big role in adding realism.
wow, looks wonderful! I guess I need to do some reading up on maps and bumps and figure out how to change them in PS..but yes, I have noticed lights play a huge role..
Thank you! :D Before doing anything else, I highly recommend playing with Tone Maping first. Bumping up the Crush Blacks can really bring out the details in skin. :)
Getting skin to look more realistic. Maps?I am by no means any kind of expert, but in my experience, there is no "real world difference" between jpg and other formats for textures when rendering with Daz Iray. Yeah, jpg is lossy and loses some detail...
See my post above you. You are not taking into account the need to edit the texture. jpg is just a terribe format for editing.
There are Victoria 4 skin maps that are still some of the most amazing skin maps ever made. Like those by danae at the other store. "London" is just amazing.
I agree. Metropolitan Series of figures are my favorite textures by far.
You have NGS2 which is pretty nice. Don't forget that NGS2 has a number of options to tweak the look further, like brightness. I almost always click the max brightness option every time I use NGS2. There is also Iray Smart Converter, which seems to not get as much love as NGS2, but IMO it offers more nuanced results out of the box so to speak. Being able to pick between cold and warm skin with one click is convenient. These two products do a great job and compliment each other very well...if one doesn't look great on a figure then often the other will. And if they don't get a great result, they will get you pretty close.
It is also worth noting that there is a NGS3 in the works that could possibly blow all the previous Iray skin converters away. DZ has taken lessons learned from NGS2 and has been taking his time trying to perfect 3. Keep an eye out for it.
NGS is ok, for an EZ dial. But it doesn't teach you anything about what is going on underneath. As an artist, you learn nothing about how to make good skin. And even NGS has to work with the spotty quality jpg's. And in my opinion, NGS doesn't even produce realistic skin (my definition of realistic), just perhaps better looking. Like a fashion magazine. It is always better to educate yourself so that you can make your own creative decisions.
Getting skin to look more realistic. Maps?I am by no means any kind of expert, but in my experience, there is no "real world difference" between jpg and other formats for textures when rendering with Daz Iray. Yeah, jpg is lossy and loses some detail...but the amount of detail lost is pretty pointless if the resulting render is at a resolution of 1080 by 1920 pixels. Now if you desire to make really, really massive renders, then and only then do the less lossy texture formats have any kind of impact. You will not see the fidelity otherwise. Also, using jpg is helpful because that texture data can really eat up your highly precious VRAM. That is why jpg is used to begin with, the file sizes. Genesis 3 and 8 already take a considerable chunk of VRAM, if you use less compressed and lossless textures then you run a very real risk of running out of VRAM and unable to render with a GPU! So trust me here...you probably want the standard jpgs for most instances. The compression of the textures used is probably the LAST thing to go looking for realistic skin. There are so many other things that will impact your render more that can be done first. Like lighting, you could have the most perfect skin and shaders ever but poor lighting can still make them look bad.
There are Victoria 4 skin maps that are still some of the most amazing skin maps ever made. Like those by danae at the other store. "London" is just amazing. She was made for Poser but translates beautifully to Iray with a few adjustments. London works great because her texture is one of the most true to life ones around, with photo referenced imperfections and all. So many Daz textures are just straight up cartoony, which is fine if that is what you want.
You have NGS2 which is pretty nice. Don't forget that NGS2 has a number of options to tweak the look further, like brightness. I almost always click the max brightness option every time I use NGS2. There is also Iray Smart Converter, which seems to not get as much love as NGS2, but IMO it offers more nuanced results out of the box so to speak. Being able to pick between cold and warm skin with one click is convenient. These two products do a great job and compliment each other very well...if one doesn't look great on a figure then often the other will. And if they don't get a great result, they will get you pretty close.
It is also worth noting that there is a NGS3 in the works that could possibly blow all the previous Iray skin converters away. DZ has taken lessons learned from NGS2 and has been taking his time trying to perfect 3. Keep an eye out for it.
Daz 3D is part of

Connect
DAZ Productions, Inc.
7533 S Center View Ct #4664
West Jordan, UT 84084Licensing Agreement | Terms of Service | Privacy Policy | EULA
© 2026 Daz Productions Inc. All Rights Reserved.