-
How do you Remove The Six pack looking abs most G8F Characters have?
Oh, in addition to what I said in your other post - a G8F loading with an enhanced-althletic shape might be an indication that you have a morph diallyed into 100 by default. That means that one of the products you have installed is enforcing it's morph on every G8F as soon as it is loaded.
Check this thread for instructions to fix that: https://www.daz3d.com/forums/discussion/428921/every-character-i-have-loads-with-unwanted-extra-morphs-by-default
How Do you Actually Make A Realistic Female G8 Shape?I would say that most morphs don't aim for "realistic" - they are more pitched towards "idealised". However, they should still produce the results in the promo images if all is well. As you seem to be having issues with multiple products, do you definitely have the prerequisites downloaded and installed. The first two that you mentioned have a dependancy on Genesis 8 Female Body Morphs - have you purchased that and is it correctly installed? If that is not the case then this will definitely cause them to not work as expected.
If you think all is correctly installed then check the log file to see if relevant errors are reported - I think for missing morph dependancies then you'd probably see a bunch of "missing formulas" but I could be wrong there. Maybe open the log and wipe the contents, then load a G8F and re-open the log to limit the log entries to things relevant to loading of that figure. Alternatively, wipe the log after loading the G8F, apply a morph that does not seem to work and then check the log again and it would hopefully just list things relative to the misbehaving morph.
I do have the products you mentioned and so could dig into them myself after lunch if there is anything more specifc I could test.
How do you Remove The Six pack looking abs most G8F Characters have?Most G8Female Characters i buy ( even before applying their texture) . look as if they were athletic females with six packs or very very slim with visible six packs. In reality not all females have visible six packs. Not even males all of them have visible six packs. I'm looking to create More of a ballroom dancer or office girl or just regular lady(married or whatever who's not a gym goer) instnead of a crossfit trainer or marathon runner or Gym goer but it's like all of the females i buy have six pack abs or very close to them. I have the Daz 3D Body morphs and Head Morphs but there is no morph that reverses this and creates a more smooth abdomen. I could add the Heavy one but that just make her a bit overweight so that doesn't work. I could also add the Body Size one but that thtickens the whole body.. In G8M with the Daz3D Body morphs there's a "Stocky" morph but that doesn't exists for Females and also it's not really what i want.
And it's not just Characters. I specifically am using Full body morphs ( Shapes) packages to create my own characters and those tend to ( if it's a slim kind of voluptous character) put six pack on her. Anyways, anybody know how to rever the look and put a little fat( not make her overweight) so you don't see defined muscles in the abdomen. Cause i'm a guy, i'm pretty confused that I do plenty of exercise and i don't even have any visible abs, yet all these Daz girls have six packs.
And also i want to explain. i'ts not a super defined Six pack but it's pretty athletic and it looks like a hard wall in the abs as in this image found for a promo pic of a Z Curvy product in the daz store. This is how many of the characters i buy are
https://gcdn.daz3d.com/p/86953/i/zcurvybeautyshapeandposemegaset00maindaz3d.jpg
How Do you Actually Make A Realistic Female G8 Shape?The Daz store and third party stores are flooded with products that promise Full Body morphs that convert your plain unrealistic default Genesis 8 Figure into a realistic attractive woman and the vendors even post tons of pictures that look realistic. But when you get those products and apply those full body morphs, they don't look at all like the promo pics.
For example Z Curvy Beauty Shape and Pose Mega Set Has a Full Body morph and in the promo pictures they post it as if that's what it's gonna look if you apply it to the default G8. But that's now how it looks at alll. All the morph does is Shape the hips , add some to the upper thighs. That's basically it. It doesn't do anything to the calves or shins. Doesn't add nothing to the buttocks, the arms remain Twigs just like the default Genesis 8 Female is.
[...]
I got other products that promise things and have all these promo pics depicting great shapes but then you get the product and it doesn't really make your figure look that way:
Z Calendar Girl Shape and Pose Mega Set for Genesis 9 and 8 Female
Z Glamorous Curves Shape and Pose Mega Set
Z For the Love of Curves Shapes and Poses
How do you then , create a realistic Female? I know i have the DAZ3D Body morphs and even EJ Body morphs for editing body parts morphs individually but I'm not an expert in anatomy and i have tried dong it that way and everything turns out looking a bit good but not realistic.
By the way here's a picture that shows How my default genesis 8 Female looks after i apply the product Z Curvy Beauty Shape and Pose Mega Set. Notice how the arms remain twig like, nothing changes, calvese, shins remain twig like. About the only thing that change is the hip widened and upper thighs got alitle wider. That's it, not even the Buttocks got any bigger.
And whenever i try to add stuff on my own( increase size in shins, calves, Thihgh back, and add one morph for Buttocks that i bought), it ends up looking bad and not natural. Then the head also starts looking like out of place like it's too small.
Also when i add my third party Buttock morph it messes with the Hip look and it adds padding like it makes it very round( making the girl look like a stuffed doll). I have no clue how to achieve something Realistic looking.
If anyone has any tips. Please post below.
By the way someone recommended this product, that it's better than using any of the mentioned products above: Body Diversity for Genesis 8
https://www.daz3d.com/body-diversity-morphs-for-genesis-8-females
But it's confusing because, it seems to be a product that only contains a set of Full body morphs But it also says it contains morphs to shape the legs more realistic( all at once instead of dealing with calives, shins, thigh individually), etc and i don't find those morphs at all( i actually got this product too ) in the Content Library/Genesis8Female/Shapes/BodyDiversity. All there is in there is the Full Body Shapes.
Anyway if anyone can help. I'll leave you with a picture of Genesis 8 Default and then Genesis 8 with added ZCurvyBeautyShape so you can see the advertising promo pics doesn't do justtice.
Gen 8 Morphs to Gen 3hi,
If your morphs Gen 3 save with defaut g8 pose its normal that it isn't working properly
If you use a clone for creat a morph its better to save with T pose, plus use "bake joint rotation" in "tool settings/Joint editor" before save, this thing adjust skeleton for a better morph. (Delete G8 char or restart daz for reset rotation)
And you need to use "Adjust rigging to shape" after slide at 100% if use a clone obj (even without that, sometimes you just have to do it).
Creating Animations on Blender then exporting to Daz3DPadone said:
In your video it is not clear how you animate the feet, as the ik controls don't move. If you animate mixing ik and fk controls then bake ik to fk I guess the addon is trying to preserve your fk animation, possibly altering the end result. This looks like a bug. If you can explain the steps to reproduce your animation I can try it myself and eventually prepare a bug report for Thomas.
However, if you use the IK controls to animate the feet, as it's usually done, then everything works fine here. I attached the videos for IK and baked FK, where you can see I use the IK controls to animate the feet. Just remove the zip extension to watch the mp4 videos, as the forum doesn't allow to upload mp4 directly.
note. important. If you imported the figure with locks and limits, then the daz FK limits may come in the way when switching IK or baking, as IK has different limits than FK. To prevent this it is best to import the figure without locks and limits, so just disable them in the global settings. May be this is what happens in your example if you didn't animate the feet on purpose.
https://github.com/Diffeomorphic/import_daz/wiki/Setup_Rigging
Ty for the video example and explination, so far things are working fine atm, I have to pay attention to where the shins are postioned terms of rotation, if they aren't placed properly they will be gittery. Luckily after I figured that out the animations are not gittering and it's working really well especially after I export to daz, it's 1:1, previous tool i used looked like it worked properly but it didn't after daz export, great work you two! I intentionally have strechness to 0, because I want to have things exported to Daz, I haven't planned to move to Blender yet, from what I've seen however when I ported my models it worked quite flawlessly.
But my question is which might be difficult. What would you recommend that I do before importing my model and settings I should go for if I want to import back to Daz animations? Also if I pose in FK, I can't seem to find a bake option, at least with IK I can just do IK transfer to FK and it bakes, but there isn't one where FK just bakes unless I'm missing something. I've been trying to go through the wiki here but sadly no clue https://github.com/Diffeomorphic/mhx_rts/wiki/Animation
I'll try and recreate it again the issue for you today or tomorrow then share steps on how I did it!
Parameter slider customization question, also other questionsDrunkMonkeyProductions said:
barbult said:
Leana said:
barbult said:
Why would someone want to enable or disable Auto-Follow on Environment Lighting Blur?
You might want to disable auto-follow on one morph for a given scene if the automatic morphs give you weird results and you'd rather adjust the fitted items yourself. If you have many fitted item it will likely take less time to do that on the source morph rather than zeroing the automatic morphs on each item.
I eat and like various kinds of cheese, not sure which I would call my favorite. Probably brie or beaufort.
I still don't understand how Environment Lighting Blur (part of Render Settings) would affect any clothing or any morph.
(And I hate cheese.)It's just a standard part of any propety when in the parameters pane, if edit mode is enabled.
If you check the parameters settings, the check box is missing for enabling or disabling auto-follow, meaning it's a null switch that does nothing.
Thank you for the clarification.
Daz Studio BETA - version 4.23.0.4! (*UPDATED*)I have one more question, and this might be a silly one. Why doesn't G8F have a footwear profile in the Transfer Utility (like G9 does)? Without that, the shoes end up with weights and groups for every toe segment on the figure, which I have to clean up afterwards EVERY time. Can I create my own profile by hacking some file?
I would appreciate any hints on that. :)
Parameter slider customization question, also other questionsbarbult said:
Leana said:
barbult said:
Why would someone want to enable or disable Auto-Follow on Environment Lighting Blur?
You might want to disable auto-follow on one morph for a given scene if the automatic morphs give you weird results and you'd rather adjust the fitted items yourself. If you have many fitted item it will likely take less time to do that on the source morph rather than zeroing the automatic morphs on each item.
I eat and like various kinds of cheese, not sure which I would call my favorite. Probably brie or beaufort.
I still don't understand how Environment Lighting Blur (part of Render Settings) would affect any clothing or any morph.
(And I hate cheese.)It's just a standard part of any propety when in the parameters pane, if edit mode is enabled.
If you check the parameters settings, the check box is missing for enabling or disabling auto-follow, meaning it's a null switch that does nothing.
May 2026 - Daz 3D New User Challenge - Using Props and Push Modifiers/Deformersgarrett_3d said:
I moved the lamppost to try and get some more lighting wash around the girl and added a point light in the shop doorway, shop front emissives didn't make a lot of difference.
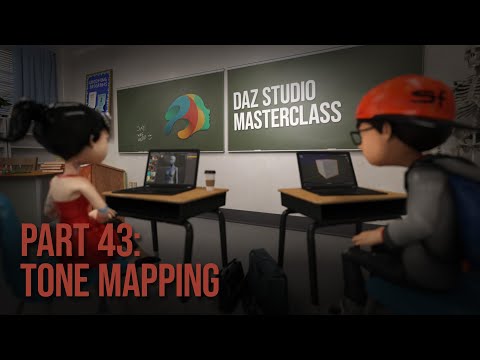
You can maybe try to add more lights and then get back the overall darkness of the scene by playing with the Tonemapping Options. Jay Versluis has a long video on the subject in the Daz Masterclass:
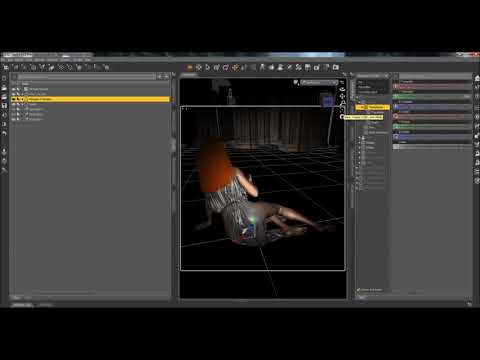
Sickleyield has a tutorial on night lightning (it's been a while since I have seen it, so I don't really remember it):
Sunkissed Papayas said:
Beginner
Olivia was in school for Photography and had aspiring dreams of becoming a professional photographer of nature. So, she took a little sabbatical from school to travel to the jungles of South America. Each picture is shown with the dome changed.
Personnaly, I like the third one the most.
If you didn't change the default value for Burn Highlights (in the Tonemapping Options), it's by default set to either 0.25 or 1 (depending on which version of Daz Studio you're using): if you want to get back details in the area around the character's shirts, you could try lowering Burn Highlights. It's also explained in the Masterclass video.
yuyu.atem said:
Title : The Death's Master
Biginner challenge
For the sword, I used an amathyst shader preset that I slightly modified to imprive its realism.
For the AV Wings, I used a map that I created for a completely different project: a science project plotting the clustering of celestial bodies (it's surprising how scince can become art, sometimes... )
)However, I have an issue when I apply the dForce simulation (see second render) : it seems that the place of the bruch on the cape doesn't stay "with the bruch", and it creates this artefact on the cape...
Thus, I also created a render without dForce simulation, but the cape does not fully match to the character's shape... I don't know how to fix it.Anyway, I hope you'll enjoy it!

Did you try to pose the sword in a way that would only hide half the character nose? It's usually how this kind of framing is done.
If you tried and hit a wall trying to pose the sword while keeping it in the character's hand, as you're not showing either hands, you can cheat and place the sword where you want
(within reason of course, but moving it a couple of centimeters to reveal the character's nose should not make the overall pose look weird)For the cape, what cape did you use?
If the brooch is an independant object, you should be able to move it where you want.
Another possibility if the brooch is not an independant object but if the brooch has independant surface(s):
- Duplicate the cape
- Hide everything except the brooch on the duplicated non simulated cape setting Cutout Opacity to 0 on the surfaces not related to the brooch.
- Hide the brooch on the simulated cape, setting Cutout Opacity to 0 on the surfaces related to the brooch.
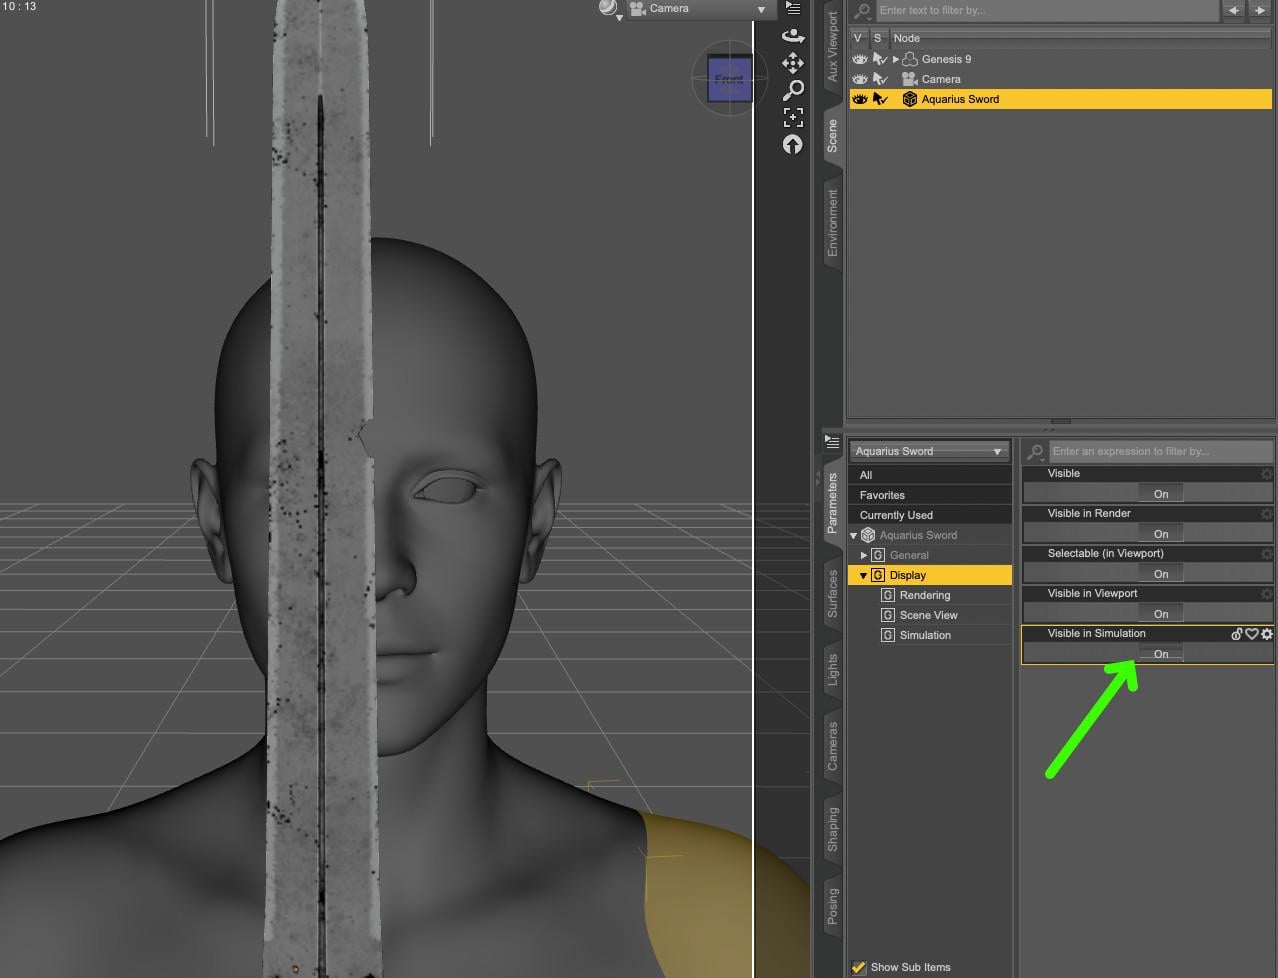
Note: Don't simulate them both at the same time: you should either fully hide the duplicated cape during simulation or simply set Visible to simulation to Off.
Without having the cape, I don't know if it'll look good or not, but this way, the brooch will stay at its starting position because it's on another cape.
To show you want I mean with the first suggestion, and where to find the Visible to Simulation setting:
Possible solutions, if you want to tackle an intermediate challenge, either use a push modifier to push the non simulated cape toward the character's body (using a negative value) or maybe a D-Former could help move the brooch (if it's not an independant object), with a pivot point placed at the correct position, whose influence is controlled by a weight map (100% on the brooch's geometry, 0% on the rest of the cape's geometry).
For completion sake (at least to list all ideas I know about), it's always possible to create a morph using an external modeller like Hexagon, Zbrush, Blender, etc but if you don't know how to use one, learning to use either of them takes time.
Parameter slider customization question, also other questionsLeana said:
barbult said:
Why would someone want to enable or disable Auto-Follow on Environment Lighting Blur?
You might want to disable auto-follow on one morph for a given scene if the automatic morphs give you weird results and you'd rather adjust the fitted items yourself. If you have many fitted item it will likely take less time to do that on the source morph rather than zeroing the automatic morphs on each item.
I eat and like various kinds of cheese, not sure which I would call my favorite. Probably brie or beaufort.
I still don't understand how Environment Lighting Blur (part of Render Settings) would affect any clothing or any morph.
(And I hate cheese.)Celebrity Look-a-Likes for 3D figures Part 4nullvoid808 said:
not the typical kind of celeb for this thread, though there's been a handful. Does anyone know of a character that gets close to Hannahowo? (originally popular on Tiktok, currently on hiatus)


this video has a mostly unmakeup'd shot near the beginning
I looked around and discovered that she's had an interesting... alternate career. Quite pretty, so I can understand your interest. The suggestions given sound fairly solid overall, with Mousso being more likely - or possibly even Magic Brush. Though for a texture that matches I'd favor one from perhaps Chrryt or Magic Brush, or there's one on the Hub of Render: Amouretluxure that migh have the look you're seeking, perhaps even a close morph, though I'm not solid on that.
Parameter slider customization question, also other questionsbarbult said:
Why would someone want to enable or disable Auto-Follow on Environment Lighting Blur?
You might want to disable auto-follow on one morph for a given scene if the automatic morphs give you weird results and you'd rather adjust the fitted items yourself. If you have many fitted item it will likely take less time to do that on the source morph rather than zeroing the automatic morphs on each item.
I eat and like various kinds of cheese, not sure which I would call my favorite. Probably brie or beaufort.
morph loader pro crashes DazRichard Haseltine said:
Do you get a crash report dialogue? Doe Morph Loader Advanced open OK?
No, and there's nothing helpful in the log file. Morph Loader Advanced opens fine.
I ended up installing Daz on my slower laptop with minimal content and it's working okay. I just have to move the morphs I did already over since some of them I need to reverse deformation from.
morph loader pro crashes DazDo you get a crash report dialogue? Doe Morph Loader Advanced open OK?
Gen 8 Morphs to Gen 3Hello,
Just wondering if anyone can help, I was creating a morph in gen3 from a gen8 character
I've been following this guide, except for the process
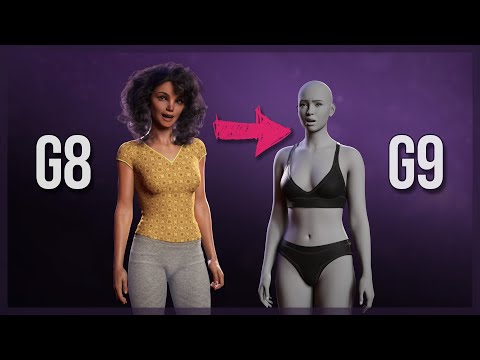
But one issue I have is that my morphs also end up adjusting the pose, it applies the gen 8 default pose when applied to the gen 3 character, this means that when I apply both a head and body morph it doubles (i think) whatever it's doing there and the character starts to resemble a horror monster character.
I'm assuming i've missed something when exporting or importing, becuase once i apply either of the morphs, if I click restore figure pose nothing changes (when normally it would reset gen3 to the T pose, so i'm thinking it's somehow overwriting this, because when you look at the shoulder bend etc it still displays as 0 which for gen 3 would usally be the T pose rather than the gen8 pose it's mimicking
Thank you
Creating Animations on Blender then exporting to Daz3DPadone said:
IK stretch can be disabled and keyframed in the MHX panel. For best viewport performance enable the solid mode with matcap, also use simplify. Eventually use collections to hide complex geometry not needed for the specific animation, until rendering.
As for sliding feet, if you disable IK stretch there's no way to avoid it, as IK will try to stay as close as possible, but it could not depending how you manipulate the figure. The only way to always avoid sliding is to use IK stretch, thus also unlocking the figure in daz studio. Or you must be very careful, when animating, not to pull IK targets too much. This is the same with any IK rig, being it MHX or rigify or whatever, it is a IK inherent limitation.
For animation in blender you can use any rig you want. To load and save pose presets for daz studio MHX is better as more compatible with the daz rig.
Gotcha, I noticed the shin arrows need to be postioned properly so that FK chain doesn't slide, but I'm curious on the IK strech, was i the this?,
This is what I edited. I plan to use MHX since you said it's better.
Workflow for me is like this, pose the model. doing my best not to overdo it, I have strechness set to 0.
Bake it and see if the feet slide then try and fix it, Ik chain it doesn't slide, but as soon as I bake it I have to figure out why the model's feet's are sliding, from what I understand it's all because of the shins.
I bake it from FK to IK
But are you suggesting that IK strechiness would be better set to 1, because even then wit hit on after I "Transfer IK => FK" and it's baked, it still slides, I'm not pushing it to the extreme? I of course unlock bone limitations on daz always am when it comes to animations just so you knowThis is the issue I'm currently facing, did a squat ish animation, but got problems As you can see in attached, IK is fine, but in FK I've got issues
IK:
https://gyazo.com/757c0d4f55d55ed39b8eb8f7584c4524
FK:
https://gyazo.com/cf06f0c8d5d937f364494e08564b6ba8
I understand there can be limitations, just wanna make sure this is one of them. At least it's better than the Daz Alternatives, has a such a great animation tool that I just want to only create animations there, then export to Daz.
I wanna say thanks again for helping out!Edit: added links for FK and IK in Gyazo, GIF didn't work
morph loader pro crashes DazI think the only change I'd made to the computer is installing the newest version of Blender.
Every time I try to start morph loader pro, Daz freezes and then crashes before the window can open. I'm trying to do it to G8M, but I tested it with Genesis and it also crashed.
I've tried:
- reinstalling Daz Studio 4.24 64-bit
- restarting my computer (multiple times)
- increased the amount of free drive space to 150 G
I'm on Windows 10. It was literally working one day and then stopped working the next. Ideas?
Creating Animations on Blender then exporting to Daz3DPadone said:
steps:
- convert to mhx
- animate
- mhx > animation > transfer ik to fk
- runtime > export > save pose preset
If you used any ik stretching you need to unlock the figure in daz studio.
https://github.com/Diffeomorphic/import_daz/wiki/Posing_Save_Pose_Preset
Hey Padone I have a follow up question if you don't mind, I can't find an effective way (unless I'm missing something)
To make it so that the legs or arms for example don't strectch but actually has limits and also is there a way where the model doesn't make blender lag a lot?
Edit: Figured out how to solve the strechness and also the blender lagAIUTO...CHI CONOSCE L’ITALIANO? PARTE QUATTORDICIIo preso due morph dei cani e l'Hankileg di Sixus1 (al cuore non si comanda)
Daz 3D is part of

Connect
DAZ Productions, Inc.
7533 S Center View Ct #4664
West Jordan, UT 84084Licensing Agreement | Terms of Service | Privacy Policy | EULA
© 2026 Daz Productions Inc. All Rights Reserved.