-
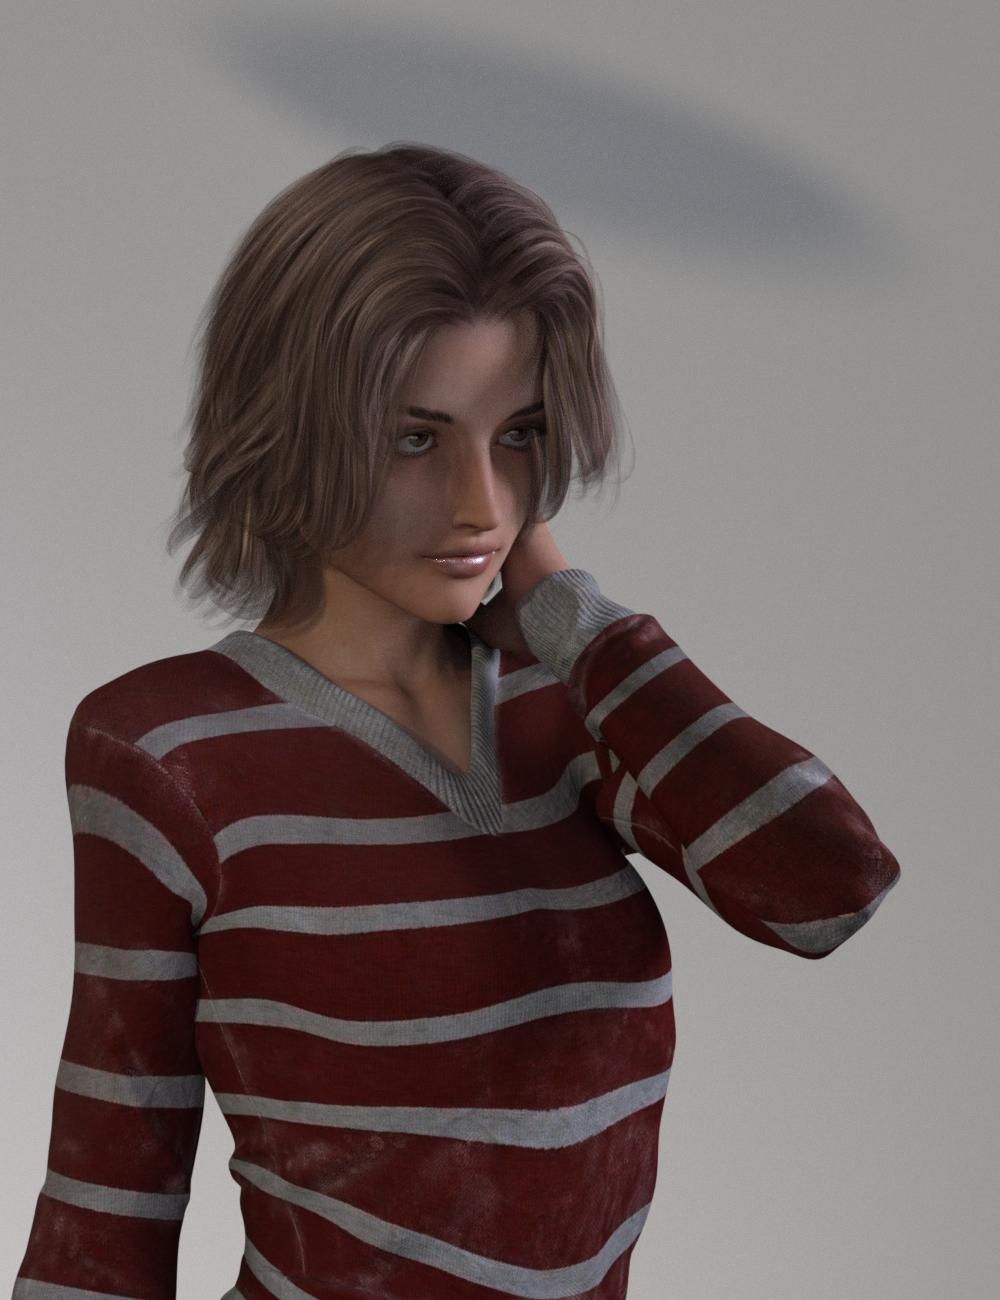
Help me find a hairstyle for Genesis 3 Fimale Little Girl model.
You might be able to do something with this one. https://www.daz3d.com/dforce-greyson-hair-for-genesis-8 It's for both male and female characters.
It's not exactly like the one you're looking for, but it might be worth a try since it has a lot of morph options and it goes on sale pretty often. It's dForce hair, but short, so shouldn't be too heavy.
What's shown in the video clip is nice. I would buy a hair like that.
Edit: Turns out I did already. This is Alex Hair for G2M/G3M. I tried it fit to a G3F. It looks good, but not exactly the same.
 [Released] Character Converter from Genesis 2 Female to Genesis 8 Female [Commercial]
I've been trying to convert Giselle 6. I've messed with the tolerance (moved it up and down) but I keep getting these hour glass eyes. Kind of warped.
Any thoughts?
I find the best results are using the 2020 method in options. Make sure Hide Eyes is UNCHECKED. Turn down the tolerance (0.0005). Close DS, delete the FHM morph for Giselle, restart DS and the script and immediately convert.
Hi!
First, thank you so much for your reply!
I've got a question...sorry if I missed it somehow but how do you delete the FHM morph? I checked the location listed in the PDF but I couldn't find one.
Are you still able to load the G8F with Giselle morphs (even if bad)? If not, maybe you already deleted it?
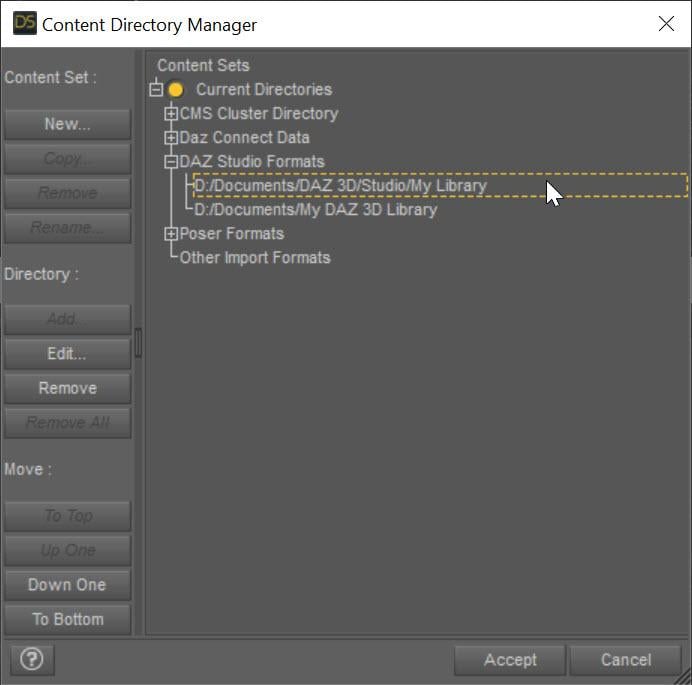
The converted morphs go in data/DAZ 3D/Genesis 8/Female/Morphs under the FIRST directory for Daz Studio Formats specified in the Content Directory Manager (F2->"Content" tab->"Content Directory Manager..." button)
 [Released] Character Converter from Genesis 2 Female to Genesis 8 Female [Commercial]
I've been trying to convert Giselle 6. I've messed with the tolerance (moved it up and down) but I keep getting these hour glass eyes. Kind of warped.
Any thoughts?
I find the best results are using the 2020 method in options. Make sure Hide Eyes is UNCHECKED. Turn down the tolerance (0.0005). Close DS, delete the FHM morph for Giselle, restart DS and the script and immediately convert.
Hi!
First, thank you so much for your reply!
I've got a question...sorry if I missed it somehow but how do you delete the FHM morph? I checked the location listed in the PDF but I couldn't find one.
Character Mixer for All Genesis Figures; If anyone buy it, I'd like to ask you one thingI just don't get why anyone would want randomly generated characters. For me, the most creative aspect of this hobby is to slide those morph adjusters to make a character that is unique and convincing. That's probably 80 percent of the reason I indulge in this hobby. I'll go further and say that I rarely, if ever, use a commercial character "out of the box". Those I buy serve as the basis for my own variations.
It's a good basis for getting something unique and that we like.
I certainly don't want my characters looking like everyone else's.
Converting Michael 4 to Genesis 8 Problems and HurdlesVWrangler wrote:
Well ... that's because it's not really possible to get 100% of the original M4 into any Genesis. According to another thread: The base model of Genesis is 18-19k polygons, Genesis 2 is in the 21-22k area. Genesis 3 was around 17K polygons, and Genesis 8 is slightly less than that.. The Genesis generations use SubD to create higher resolution characters on the fly (... sort of), but they don't start there. V4 & M4 are in the 66-67k polygon count area, G8 and the other Genesis generations don't have as much to work with, so it can't be absolutely faithful.
RexRed comment:
Thanks again for all of the info here...
I stumbled across a slider in my Genesis 8 actor morphs for Michael 4. The conversion process must have worked.
It works sort of but looks weird and does not give me the skins for 8.
His eyes seem enlarged...
I guess we will have to wait for Genesis 9 when the Genesis figures may catch up to the Generation 4 figure's polygon count.
It also seems evident now why it takes longer to load a Michael 4 figure.
This lowered polygon count in the Genesis 8 figures may also account for why I am drawn so much to the Michael 4 figure.
It might be also considered that a lower polygon count also means a lower texture quality because the texture quality is a direct ratio of the texel count. (Correct me if I am wrong in any of my assumptions here.)
None of the morph converters (Character Converter or XTranfer or GenX) handle the textures. They're not designed to do anything but the morphs. You need to handle the textures on your own, either by using one of the Cayman Studios Legacy UV products (that would use the original textures with some geografts to help it put things in the right places - there's a PDF at the bottom of the readme that tells you how the product works) or something like Texture Transformer (from Renderosity) that remakes the texture itself from the old UV and makes a new copy to the new UV. (There's an extremely manual process for remapping and rewriting the textures using Blender -- I think -- that's somewhere in the forum, but I don't remember the name of the thread, and it's not easy.)
And Genesis 9, whenever that arrives, almost certainly will not have anything like the M4V4 polygon count. Daz is focusing much more on game development using its existing figures, and that simply won't work with a figure that's four times the poly count of Genesis 8.
ISO Long Hair with a Crazy Amount of Movement Morphs [Solved]Hey 3Diva! Janet Hair can be made to reach past the shoulders, and it has several pieces with 3 movements each. If you double it up, you can get even more movement. It is a great hair for action scenes since you can get almost any movement you want. Here are the pieces and movements:
lBack01-Bend, lBack01-Side-Side, lBack01-Twist
lBack02-Bend, lBack02-Side-Side, lBack02-Twist
lBack03-Bend, lBack03-Side-Side, lBack03-Twist
lBack04-Bend, lBack04-Side-Side, lBack04-Twist
lSide01-Bend, lSide01-Side-Side, lSide01-Twist
lSide02-Bend, lSide02-Side-Side, lSide02-Twist
lSide03-Bend, lSide03-Side-Side, lSide03-Twist
lSide04-Bend, lSide04-Side-Side, lSide04-Twist
lSide05-Bend, lSide05-Side-Side, lSide05-Twist
lSide06-Bend, lSide06-Side-Side, lSide06-Twist
lSide07-Bend, lSide07-Side-Side, lSide07-Twist
lSide08-Bend, lSide08-Side-Side, lSide08-Twist
rBack01-Bend, rBack01-Side-Side, rBack01-Twist
rBack02-Bend, rBack02-Side-Side, rBack02-Twist
rBack03-Bend, rBack03-Side-Side, rBack03-Twist
rBack04-Bend, rBack04-Side-Side, rBack04-Twist
rSide01-Bend, rSide01-Side-Side, rSide01-Twist
rSide02-Bend, rSide02-Side-Side, rSide02-Twist
rSide03-Bend, rSide03-Side-Side, rSide03-Twist
rSide04-Bend, rSide04-Side-Side, rSide04-Twist
rSide05-Bend, rSide05-Side-Side, rSide05-Twist
rSide06-Bend, rSide06-Side-Side, rSide06-Twist
rSide07-Bend, rSide07-Side-Side, rSide07-Twist
rSide08-Bend, rSide08-Side-Side, rSide08-TwistThanks, xyer0! I think I need something a bit longer, though. I didn't get as many suggestions as I was hoping for so I did some digging and I'm thinking of going with this one: https://www.daz3d.com/wild-wind-hair-for-genesis-8-females
It comes with over 100 movement and wind morphs plus is rigged with 13 bones. I'll experiment and see if the morphs move it enough for my needs. Unless the morphs don't "do much", in which case, this one might work: https://www.daz3d.com/super-sleeky-hair-for-genesis-3-female-s-and-genesis-3-male-s-and-oot-hairblending-2-0 (It says it comes with 193 morph dials! Whoa!)
I THINK one of those should work.
Thank you for the suggestion, it made me look at OOT's catalogue here to see if there was something that might work. The Super Sleeky one might be the way to go. I'll have to test both that one and the Wild Wind hair out. :) Between the two, I'm willing to bet one of them will do the trick! *crosses fingers*
Thanks again for the suggestion! :)
I can not find 'pose morgh tag' in C4DIf you locate the skin nodes and look at the parent mesh node, you do not have a pose morph tag there ? could you show a screenshot of the object manager ?
Victoria 4 clothingI know this is a really old post but it helped me imensely with rigging clothing I created in Blender (version 2.82) for a Victoria 4 model in DAZ3D (Version 4.12). I ran into some issues even with this extremely useful thread and wanted to share the complete steps I used which are a slightly altered version of stwbcsuv_12364ebef4's steps mentioned earlier. The first issue I ran into was the clothing wouldn't fit to the figure properly (i.e. she'd be wearing the shirt on her face). The solution for this problem is detailed in step 7. The next issue I ran into was massive clipping even though the clothing mesh was custom made for this particular figure. The solution for this issue is detailed in steps 8-13. These settings worked for a relatively form fitted piece of clothing and may need adjusted per clothing article. I'd do more testing, but it's late. I'll update if I run into any more issues or discover more helpful tips.
1. Zero the pose of your V4 Figure.
2. Convert V4 to a TriAx-weight mapped figure [Right click Scene (Tab)->Edit->Rigging->Convert Figure to Weight Mapping->Check TriAx weight Mapping)
3. Import the .obj file modelled for V4 in zero pose.
4. Open the transfer utility (Scene (Tab)->Assets->Transfer Utility)
5. As Source, select your V4 weight mapped figure and change "Item Shape" to "Current".
6. As Target, select your .obj prop
7. Click the "Show Options" button and check the following:
8. Check "Reverse Source Shape From Target"
9. Check "Add Smoothing Modifier"
10. Leave all other options as default and press accept....Wait for magic to happen...
11. Under Parameters Tab, Navigate to "Mesh Smoothing" subgroup and make the following adjustments:
12. Change "Smoothing Type" to "Generic"
13. Set "Smoothing Iterations" to "6"
14. Turn "Interactive Update" on
15. Set "Collision Iterations" to "2"Ta Da!
i13 100 Essential Expressions for Victoria 7 - GONE - OTHERS AS WELLThis should now be fixed, so all of the products should show up in Daz Connect as they were previously.
Here's the nitty gritty about what happened: I am currently moving the download location of all of the product files from our old machines over to a new cloud-based file provider. While new products have been getting transferred from the new provider for a few weeks now I just started transferring existing products earlier this week. I was cautious with the initial transfers, starting with just a hundred products or so, then moving on to everything with a SKU above 70,000. After checking in with customer service and not hearing any complaints I went bigger and did everything above SKU 60,000. Once again, there were no complaints in either the forums or directly to customer service. So this weekend I was going to be doing some other work anyways so I lined up a big transfer and selected everything with a SKU above ~15,000. Unfortunately it looks like the store software had a bug in it that was fixed but it caused the data on the store side to be missing important pieces of information, it seemingly affected products in the mid 20,000 to the low 30,000's but was fine after that. This went unnoticed because the store software managed to get that information over to the durable cache of the download servers before losing bits of data on it's end. Well, when transferring the products the store data was updated with the new storage locations and caused the cache of the download servers to be refreshed with the missing data. The silver lining of this cloud is that fortunately this all happened in preparation for moving to the new store software so I was able to write some little programs this weekend to fill back in the blanks based on the source files on the old download servers.
Facial expression when exporting modelFor the DaztoBlender8 bridge, I don't know how much support there is. I know there was a way to import poses, but it did not always work. That was prior to the most recent updates, so maybe that is fixed.
I use Diffeomorphic which has an in-depth manual on how to use. Version 1.5 is the most recent. You can import a character pose and then import a facial expression, just be mindful of the options box that pops up when importing the second pose/expression. You can also save your imported poses in Blender, although I have not done it yet. Importing works so well I have not needed to.
I was trying to install Diffeomorphic but I ran into a couple of issues, however, I was able to learn a bit about Morph exporter. After watching a couple of videos I found that the expressions in blender are located in the object data properties. I really appreciate all the help, thank you.
SereneNight's Sci-Fi Fun Thread 2Not sure it will do smoothing and collision since it's not weightmapped. The fitting it to a GM8 cap has helped greatly, so far I have been able to reduce the Hiro 4 morph which fixes the ear weirdness a considerable bit. Mesh Grabber is on my list so if I don't catch it before PA sale ends I'll surely have it when PC Anniversary starts. Thanks for all the help so far!

Are you using the Hiro4 morph for the head size? If so maybe you could usr the Head Propagating dial instead ,if not then just ignore me ....
 CC#54 WiPs ~ What is it that you truly desire? after party Chit Chat
Stezza - The speed at which you model always amazes me. Super Duper!

Here we have a try...
Might not be totally political correct...
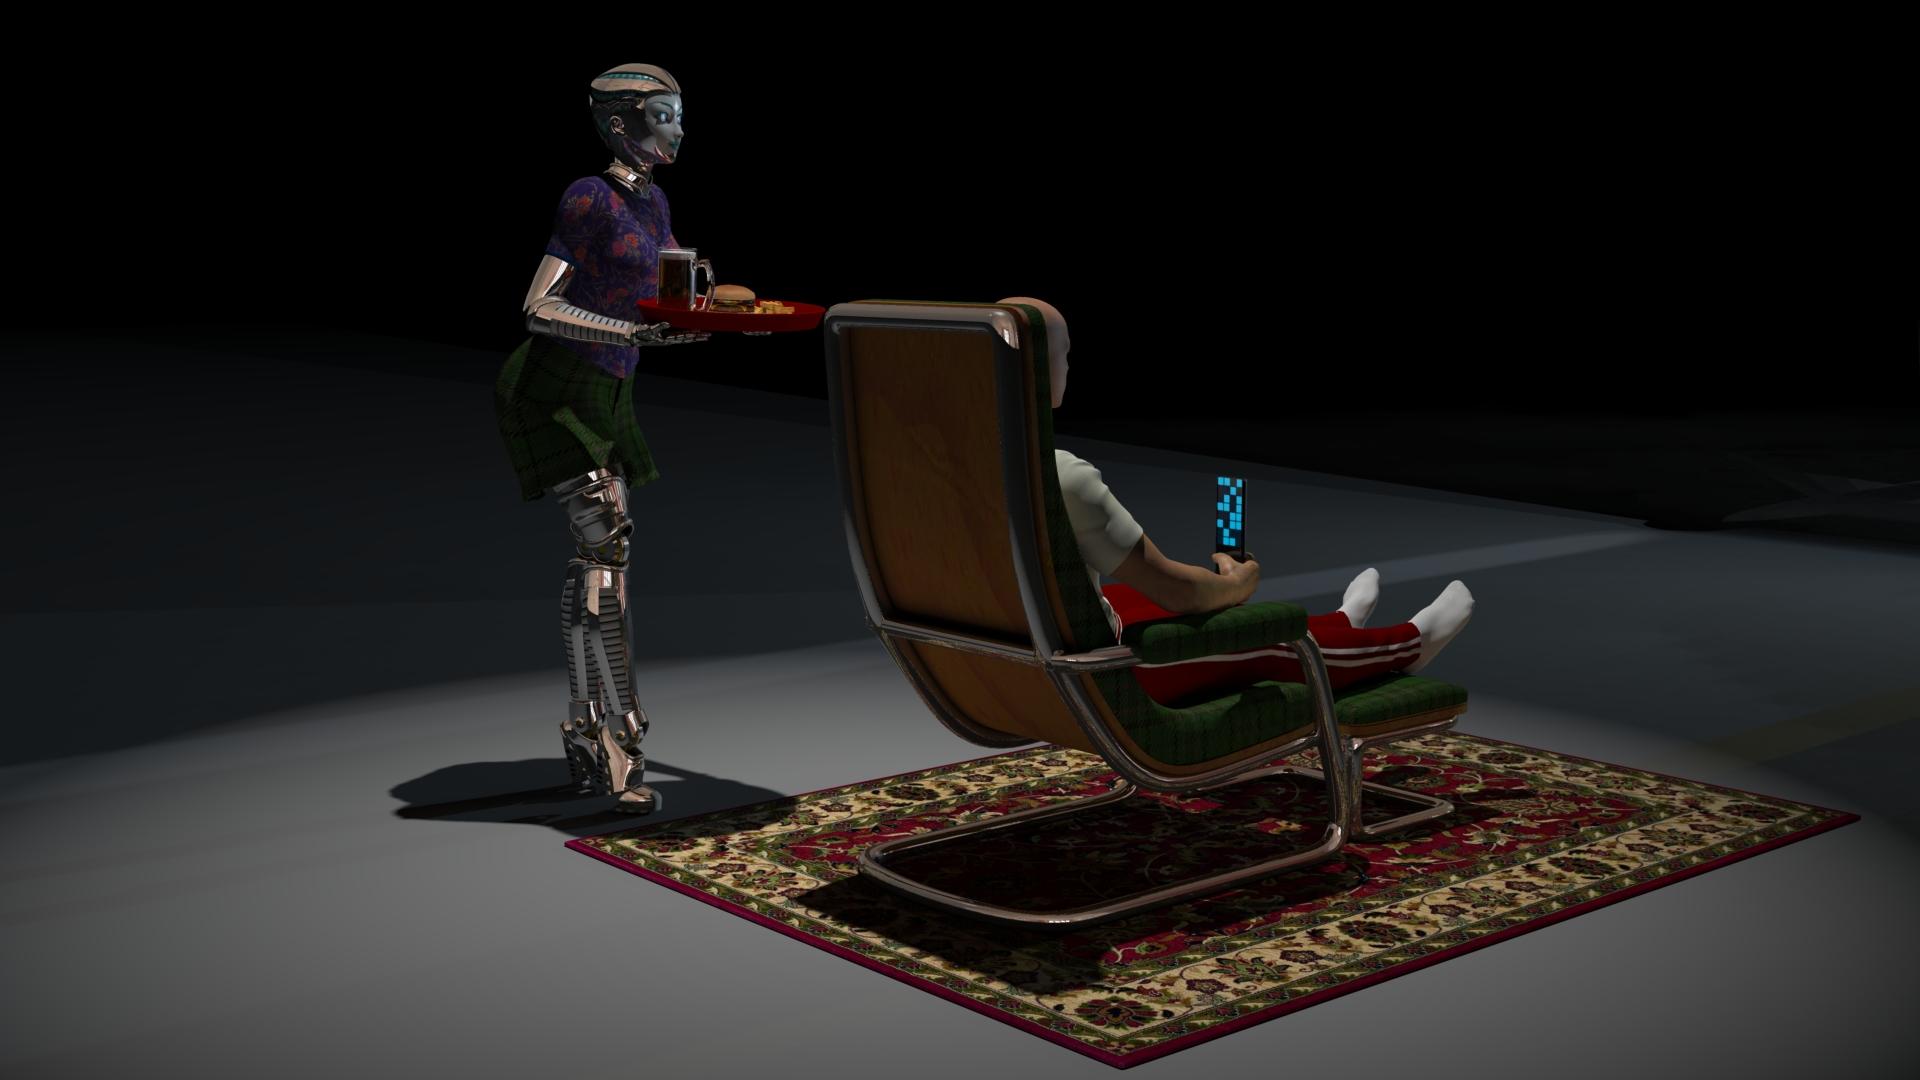
Very clever image Varsel. I like the sense of that large empty space.
Wish my cats would treat me that way.
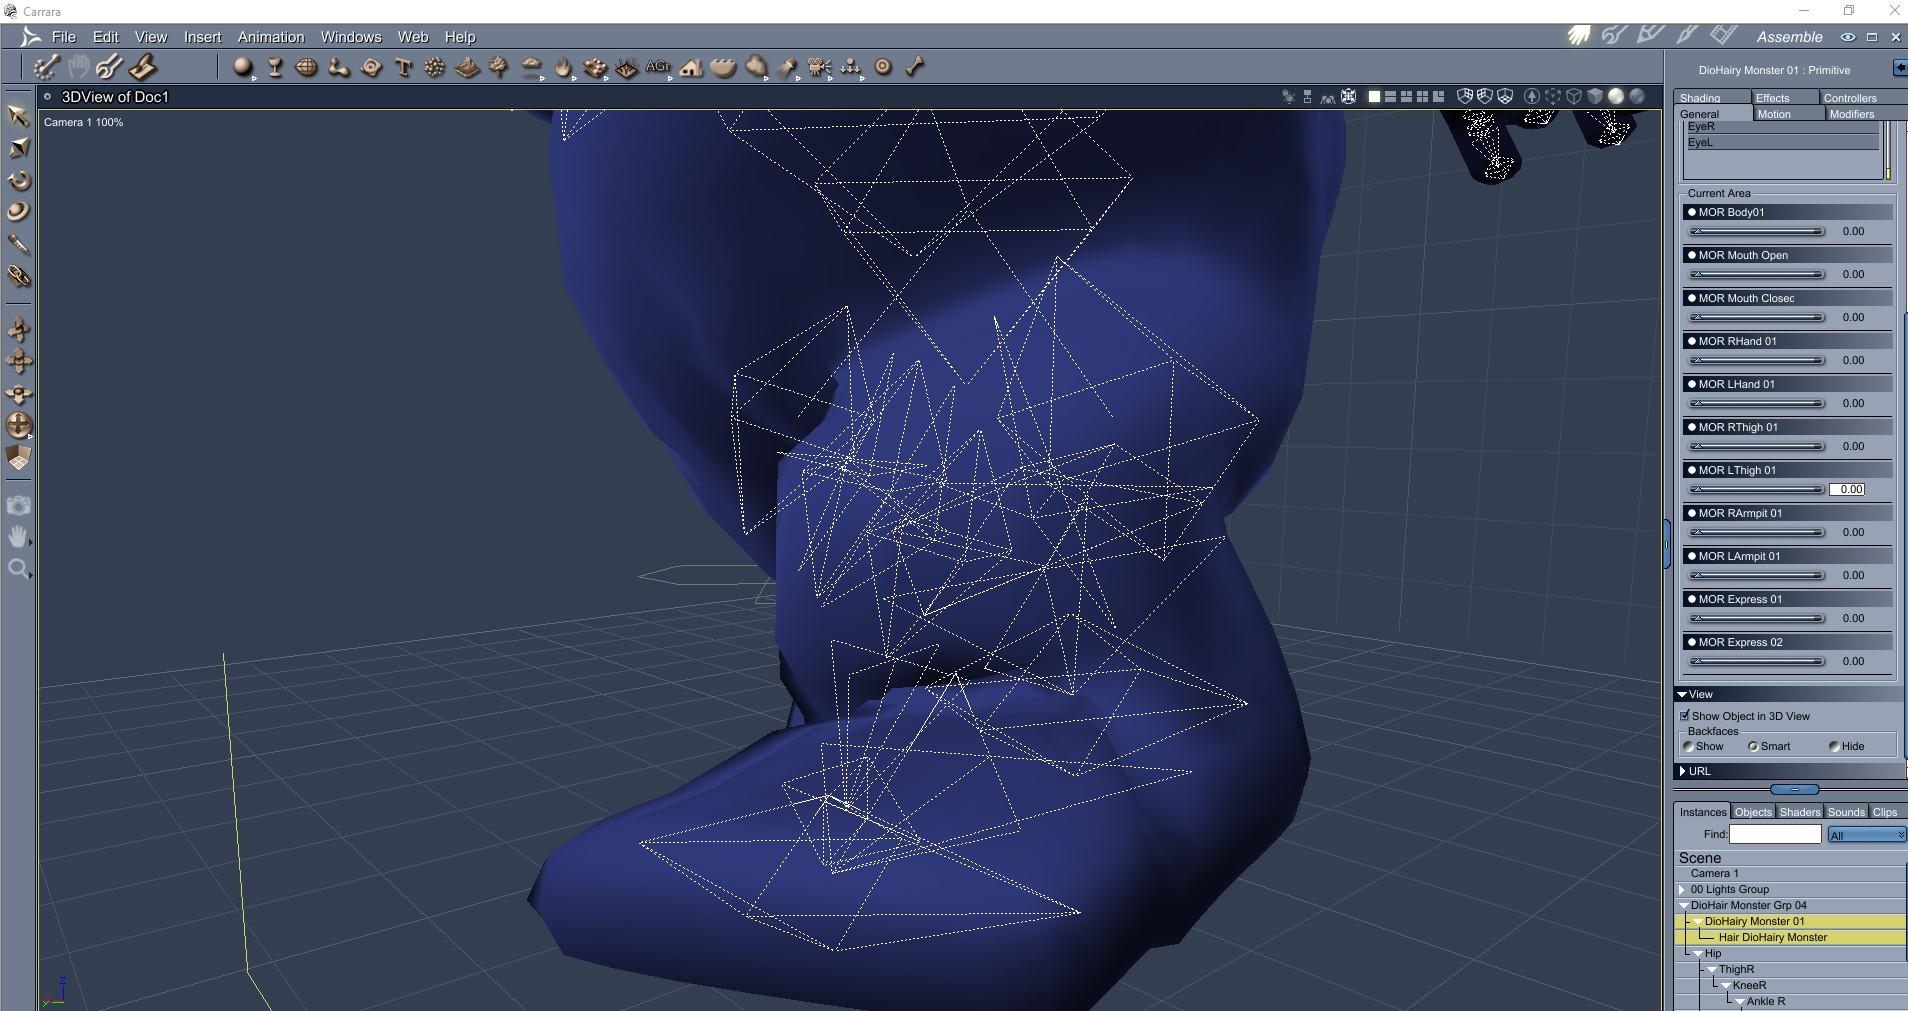
Some tips for correcting poorly rigged and badly weightmapped figures like the DioMonster
The DioMonster comes with some BLANK morphs for the body. To improve a pose, you have several choices that can be found in the modeling wrench room under in animation mode (looks like a torso, arms, and head middle option at top right).
1) After posed, in modeling room animation mode, under bone tab, can select individual vertex, or groups of polygons, and use sliders to adjust bone weights.
2) After posed, in modeling room animation mode, select the weight brush from the top menu, and select the bone from properties tray on right to increase or decrease weights on figure
3) After posed, in modeling room animation mode, under morph tab, select morph area and specific morph, click EDIT and the morph area turns green, use modeling selection and translation/rotation tools to adjust model as desired. Click validate when finished. Morph is set to zero, return to assemble room and slide morph as desired up to one for fix.
4) Like (3), except use the Displacement Brush tool from the top menu to do the correction. The displacement brush has a SMOOTH options which is very sueful.
With left thigh bone rotated forward up and knee bent, the left leg crumples undesireably. I used the tips above to edit the MOR LThigh 01 morph to smooth the crumples.
Correction morph at 0
........................................................................
Correction morph at 1
DioMonster is awesome Diomede!
The tip for smoothing out wrinkles using a Morph and Displacement is so awesome. Thanks for explanations. Another great tip to explore.A Sudden Desire to Rip a Bodice

This is another one for the ladies... although you never know. :)
Haha UnifiedBrain, perfect encapsultion of a paperback 'dimestore' romance cover. Water refletions are awesome.
I worked for about 4 years in my teens as a page at our local library and, paperbacks like these weren't catalogued. Hundredds passed through, lol. And yeah, you never know...Custom Morphs from Daz into BlenderOkay, so I have been researching all day and have come up with very little, so I don't know if no one has run into this or if there's a term that I don't know about that I should be googling, I really, really hope someone out there has an idea. Okay, so I have Facemotion which takes an fbx file and turns that into facial movements on a Daz character. The keyframes show up under properties, morphs, FaceCap and then there's a bunch of settings for the entire face like shapes_cheekpuff for example. Since these are not bones, if I export a pose animation, they do not get saved in the pose file and won't show up in Blender through diffeomprhic if I import pose action. Now I just discovered that in diffeomorphic, if I clicked on import custom morphs, I can bring in all of the morphs from Facemotion and they show up on the bottom. So now how would I go about getting the keyframes from daz with all of these morphs to get written into keyframes that would be importable to diffeomorphic through the import action option (or something else that I might not be aware of) in order to get it to read the keyframes and use the custom morph for the facial animation? I hope this makes sense.
Now I have tried this at length with FBX's, so I don't think that is an option. Thank you so much for any and all help!
SereneNight's Sci-Fi Fun Thread 2Not sure it will do smoothing and collision since it's not weightmapped. The fitting it to a GM8 cap has helped greatly, so far I have been able to reduce the Hiro 4 morph which fixes the ear weirdness a considerable bit. Mesh Grabber is on my list so if I don't catch it before PA sale ends I'll surely have it when PC Anniversary starts. Thanks for all the help so far!
Buy Something That Doesn't Work in Carrara? Post your Questions and Workarounds here. (please)I installed Studio 4.12 and when I openend it it gave me an error, "a valid Postgre CMS connection could not be established". I know DAZ changed their database after 4.8. I stuck with it because I'm afraid that it will break content in Carrara. So, I'm giving up with Incognito and asking for a refund. Thanks everyone for your help!
Did you also update Postgre and such?
Wow. My workflow for that clothing issue is quite different.
I only convert to blended weights and save to my own library. Then in Carrara I go:
- Edit > Fenric > Unlock Figure
- Animation > Detach Skeleton
- Drag Actor out of the hierarchy and rename Actor to the name of the clothing
At this point the clothing is just a static prop. Now I bring in my character and use the modeling tools in the Assemble Room to shape the clothing how I want it on my figure - then save it to my browser.
After animating the character (I always begin animations at 1 second, leaving the default T-Pose on frame 0, and make an intermediate pose half a second along the timeline) I use VWD to attach the rigid bits, set the cloth dynamic properties and friction of the character, etc., and run the simulation. It's been so much less of a headache for me to work in this way lately that I think I may actually be getting younger! LOL
Anyway, I have a bunch of information regarding the kinds of things you're working on.
- Modeling for Genesis - Getting used to the process of going back and forth between Carrara and Daz Studio, etc.,
- Content Creation Tools - From Basic to Advanced procedures in Daz Studio to prep clothing and other items - getting familiar with the tools
Since I've also been trying to get Genesis 2 and 3 clothing to work on Genesis, I've also purchased several of SickleYield's clone, etc., tools. She provided some amazing info in her included tutorials that come wih those products - info that helps the whole process even further.
One that I don't forget anymore, for example, is to save the clothing item immediately after using the Transfer Utility. If we happen to maneuver a morph dial or a bone before saving/reloading, we'll often have to delete and start from scratch. For certain things, of course. But whenever I use the Transfer Utiliy, I always save as figure asset, delete, and reload before testing my work.
New Parameter Property"any and all answers" ... what if I'm wrong? [I hope not]
... number 2. Will I be doing this for both the Male and Female or will it be fine to CREATE under one and SAVE as both?
The morphs are made for the wings. IF you are putting the exact same figure on the male as on the female, then a normal saved morph would still work on either 'cause it's the same wing. But control morphs are different.
Safest bet would be to create 2 wing sets. One for the female and one for the male. Then make the control morphs for one of the figures and save the morphs. While making those morphs keep aside the .obj used for creating the morphs. When done with the wings on one figure; work on the next figure loading their wings on. Make the control morphs for that figure [whether or not the previous .obj for morphs will be adequate or not you'll soon enough find out].
{disclaimer: I have not created ERCs since ever learning enough about them to know that if one doesn't know what they're doing one [as in me] could really mess up their figures [and I don't want to do that].} [I'm working on a project now bravely hoping to get a handle on making pJCMs]eta: VERY important if saving the same model [i.e. the wings] for two different figures, save them to DIFFERENT data folders or one will overwrite the other.
((I somehow complete messed up this thread))
So a part b question to this is:
If I create the morphs for the individual wing, not as part of the figure, does this also create issue for the Data folder re: G3/8/M/F?Morphs for the individual wings have nothing to do with what goes into the data folder for any figure.
Where control morphs come into play - has something to do with when morph A kicks in, it triggers morph B to work. I hope these are fantastic wings :-)
Now, if/when the wing is posed/morphed [to do whatever] and that action makes the figure's body do something strange. Then one makes a morph to that figure, a correction morph, and one could connect the pose/morph of the wing to trigger that new morph that was made for the figure [not a law that one has to]. That morph for the figure would be stored under the the morphs folder for the concerned figure [main folders are selected by D/S, we just name the folders "vendor" and for "product" ...
[and given the number of shapes the Genesis clan can have, the above method can be limiting obviously. Hence some products are sold aimed for certain characters of the clans. Like if you were making wings specifically for the Yeti they'd be a lot different than wings for the faeries ;-) ]
Note: Before making any correction morphs and connecting them, all these new morphs must first be saved. After making changes, save them again to the SAME subfolders.
If posing the figure makes the wings do something strange, then one finds the hidden morph of the figure that's in play, find on the Parameters Tab the same morph that was autodialed into the wings, and dial it down or whatever. Again one needs to make a morph to correct the appearance when that particular hidden morph of the figure is used. Before bringing the correction .obj back into D/S to make the morph, on the Parameters Tab make note of the EXACT name of the naughty morph, and change the name of that morph and its label [something like "delete this" so you remember which morph not to save] ... then you can bring in the correction .obj and make the morph naming it EXACTLY the same as that hidden morph in the figure. Put all the figures back to default poses, i.e. zero out the morphs, Save the New Correction morph.
Might want to reload the figure and wings to be sure everything is working as expected before making more. As you pose the figure to trigger that hidden morph that caused issue, it will automatically dial in the correction morph that was made for the wings!
Hope this helps, my eyes are getting fatigued too.
Oh yes, in making morphs, if they move the mesh away from the bones, morph dialed in 100% - then one uses the geometry editor brush, right-clicks on a bone, select the option to adjust rigging to the mesh, then over on the Parameters Tab [in edit mode], on the concerned slider get the Parameters options appearing and click on ERC. I usually have all three of the bottom options selected and touch NOTHING else, click accept. Then zero the morph and save it.
To make one morph control another morph ... well I have nothing for examples right now. It's not super hard. Maybe someone else has a ready example.
(Solved, hidden morphs OP) Models having weird looking mouthsThis is weird because only these 3 models have that issue, and I've checked all the morphs, they're all at 0 right nowIt might be a hidden morph that's normally auto-controlled by a visible one. Go up to the top of the Parameters pane, open the Options menu, and select Show Hidden.
It's in a Preferences sub-menu now
Oh my god, it works. I've found the hidden morphs! Thank you guys so much! <3
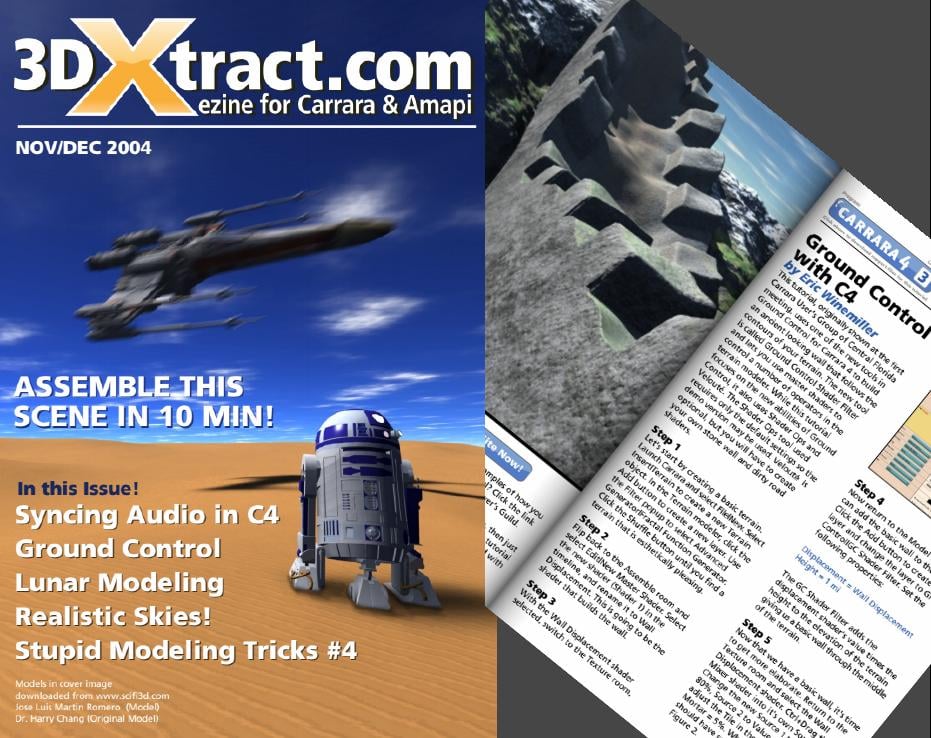
3DXTRACT 10th anniversary coming up!Download 3DXTRACT PDFS AND SUPPORT FILES
http://www.NiceGuy.com/transfer/3dxtract_all.zipHey all,
I was just talking on the phone with Andrew Turner and he reminded me that back in 2002 (was it then? so long ago... can't remember... any way...) my wife "allowed" me to purchase Carrara for X-mas! I enjoyed it so much and couldn't wait to learn more and more. After reading the manual I couldn't find any tutorials or additional content online, so I decided I had to provide it. I launched 3DXTRACT and I offered $50 (USD) payment for each tutorial submitted and took the time to read, edit, and as it interested me, step through the tutorials. I wrote articles, interviews etc. and I learned a lot from the experience. I enjoyed every issue and interaction to say the least. For those that contributed, thank you so much! It was an awesome time! For those that read and purchased it, thank you even more! For those that never had the chance to be a part of all the typos and improper English... well, you can now re-live the early 2000's all over again by downloading the link above. All the issues are provided and searchable using the PDX file contained within. 500MB in all. Surprisingly, a lot of the tutorials still apply to Carrara 8.5! Some things never change ;)P.S> I still love my wife, I have had 2 more children since then... and I did upgrade to Carrara 8.5... Still learning as always.
Download 3DXTRACT PDFS AND SUPPORT FILES
http://www.NiceGuy.com/transfer/3dxtract_all.zipThe link he included in his post was active for a number of years, but alas - no longer.
It feels sad to let something this special pass into inaccess, and it sounds to me like he wanted to share this treasure with the Carrara world, so I'm hosting them here for all of us late-bloomers and veterans alike to enjoy and learn from.
Enjoy!
 Updating exported objects?
Thanks for the information so far. I'm actually not sure how to use shape keys with two objects, I only know how to use them like morph dials (create a base key and new key, then select new key and edit the mesh). The method I mentioned above using Object Data Properties seems to work really well, I just don't know if it will lead to issues later on as work progresses.
Oh man, thank you for the tip on copying materials from one object to another, Krampus. Having to set many materials for similar objects was something I was dreading about potentially doing more serious work in Blender.
(Solved, hidden morphs OP) Models having weird looking mouthsThis is weird because only these 3 models have that issue, and I've checked all the morphs, they're all at 0 right nowIt might be a hidden morph that's normally auto-controlled by a visible one. Go up to the top of the Parameters pane, open the Options menu, and select Show Hidden.
It's in a Preferences sub-menu now
Daz 3D is part of

Connect
DAZ Productions, Inc.
7533 S Center View Ct #4664
West Jordan, UT 84084Licensing Agreement | Terms of Service | Privacy Policy | EULA
© 2026 Daz Productions Inc. All Rights Reserved.