-
Daz Studio 6 Beta - version 6.25.2026.14722! (Updated May 28, 2026)
TimberWolf said:
Daz have said that Studio v.4.whatever will *always* be available for download and therefore anything we have bought and functions properly in that version will continue to do so. I see no reason to doubt that. As for the future my opinion is that software-as-a-service (i.e. a subscription model) is very much here to stay - read into that what you will.
There is nothing to stop you using Daz 4 to create a scene and drop-kick it over to 2025+ for rendering should you so wish. No one is going to try to recompile or re-jig plugins at this point and if I was the creator of one I would be loathe to say if it would even be possible until things have settled down. I wouldn't hold your breath waiting for a definitive answer this early in the process.
Without any hint of exaggeration I could also teach you, in less than 5 minutes, how to replicate all of the functionality in Mesh Grabber (and more), in Blender, even if you'd never seen it before, and that software is free. The Daz ecosystem is changing, that's for sure.
How did you integrate blender functionality into the Studio UI?
Or are you;
exporting obj from Studio
importing obj into blender
fiddling in blender
exporting new obj from blender
importing new obj to Studio
applying new obj as morph to clothes/character/whatever in Studio?
Don't get me wrong, I would be very interested in something like this
Right now, mesh grabber is the only tool of it's kind that I know of in Studio and it's one of the few on the "I can't live without it" list.
Ethin's Art and ... stuff.Ethin said:
Redfern said:
Ethin said:
Low effort "M'Ress" scene.
Yeah, something akin to that. Well, I have my own custom head morph I'd use, but yeah, something similar.


... However my aesthetic might not be the best for Trek art. lol

hahah Great meme!
Off Topic Thread #2
There were some plugins, like a fluid one there that looked interesting. Hopefully, they have been salvaged elsewhere.therixx said:Well, it seems that the hunt is over.
ShareCG is officially closed.
There were still lots of items I would have downloaded, but I cannot complain too much. I got most Carrara related stuff and a ton of other things.
I hope there will be a huge content transfer to other sites, as they suggest in their final message.Relaxing clothing on modelsIn addition to what Linwelly said, you can try to dForce it - just stopping the dForce early after it's smoothed just a little bit. You could also try using Mesh Grabber if you have it. But since you're porting over to Blender anyway, you could also do a little smoothing there if you prefer.
If you plan on using the uniform a lot, I recommend making any adjustments to it while the figure is in the default pose, and create and save a morph for the uniform.
Daz Studio 6 Beta - version 6.25.2026.14722! (Updated May 28, 2026)Ainm said:
Had a quick play around. Initial thoughts:
- Character load with a lot of morphs is quicker. Not lightning by any means, but a decent improvement nonetheless
- My viewport appears to be broken. I can only see a lit scene in filament mode and toggling preview lights does nothing
- My viewport navigation appears to be broken. Keystrokes don't repeat. I don't know if I turned that on somewhere in my Studio 4.X install, but if so, I can't find where I can turn it on in 5.X
These could be GPU related, I suspect. Certainly WASD navigation is working for me - but you are not the only one for whom it isn't.
- Restore pose makes me very, very happy. With a huge morph library, this was taking a few hours in 4.X and was unusable. It now takes a few seconds
- One of my biggest peeves with 4.X is how the smart content tree is deleted and rebuilt each time you select a new scene node with Filter by context checked. This behaviour is the same in 5.X. I'm hoping 5.X won't be a direct port of features like this and that time will be taken to improve the user experience too. For example, when a new scene node is selected, the tree ought to really be rebuilt in place, keeping nodes expanded that were already expanded and, if the context includes the same selected branch as the old context, that ought to also persist. I waste a lot of time in Studio re-exexpanding this tree - very frustrating
- The interface feels snappier
- On first startup, only one of my content libraries was automatically recognised. When I added the others and hit Accept, Studio crashed. On restart, my other content libraries persisted, but if I continue to go into the content directory manager and hit accept, the crashes continue
I had a crash exiting Preferences - I noticed that there is some activity (spinner next to mouse cursor, UI refreshes) as it updates the content panes. I didn't get a crash if I waited until that was done. Still, if you get a crash report please upload it (here or to a ticket) to prove I was not imagining the issue (Daz couldn't reporduce it).
Daz Studio 6 Beta - version 6.25.2026.14722! (Updated May 28, 2026)Had a quick play around. Initial thoughts:
- Character load with a lot of morphs is quicker. Not lightning by any means, but a decent improvement nonetheless
- My viewport appears to be broken. I can only see a lit scene in filament mode and toggling preview lights does nothing
- My viewport navigation appears to be broken. Keystrokes don't repeat. I don't know if I turned that on somewhere in my Studio 4.X install, but if so, I can't find where I can turn it on in 5.X
- Restore pose makes me very, very happy. With a huge morph library, this was taking a few hours in 4.X and was unusable. It now takes a few seconds
- One of my biggest peeves with 4.X is how the smart content tree is deleted and rebuilt each time you select a new scene node with Filter by context checked. This behaviour is the same in 5.X. I'm hoping 5.X won't be a direct port of features like this and that time will be taken to improve the user experience too. For example, when a new scene node is selected, the tree ought to really be rebuilt in place, keeping nodes expanded that were already expanded and, if the context includes the same selected branch as the old context, that ought to also persist. I waste a lot of time in Studio re-exexpanding this tree - very frustrating
- The interface feels snappier
- On first startup, only one of my content libraries was automatically recognised. When I added the others and hit Accept, Studio crashed. On restart, my other content libraries persisted, but if I continue to go into the content directory manager and hit accept, the crashes continue
Cloth not following breast graft pose morph.I have breast graft - breastacular for G9.
The pose is a character folding her arms, pushing big breasts.
Something like this: https://prnt.sc/aSVaBGauizY7
But the cloth doesn't follow the breast graft pose morph.
It seems ti follows the shape of morph of the original breast.
What is the solution?Deforming a mesh using another objectRiversoft Art also have products to take care of hairs and hats:
https://www.daz3d.com/hat-check-for-genesis-9
https://www.daz3d.com/hat-check-for-genesis-8
https://www.daz3d.com/hat-check-for-genesis-3
https://www.daz3d.com/hat-check-for-genesis-2
And there is also a free solution for hat and hairs by @mCasual:
Based on smoothing modifiers, @matew has Morph Master:
https://www.daz3d.com/morph-master
Free Toon Characters coming July 1st, early download available nowStill waiting on permission to include clones with the Omnitoons, and waiting to check on rigging as well. Ten business days down...
If permission to use clones is denied, people might have to make their own clothing clones or make their own clothing.
Here's a quick and only lightly-detailed example of how to make clothing from any figures. There are much better video tutorials on Youtube that you can check out for more details. This sample will use the female base Omnitoon figure.
First, load the female figure into a new scene, select the character, and make a standard geoshell:

I generally unparent the geoshell and move the actual character off to the side. I find this makes it easier to select and delete the character once we move to a modelling program, and by moving the character the geoshell stays in place.
Many people keep the character in place so that in the modeller they'll be able to get a better idea of how their clothing will fit and work. Because I'm just doing a basic bodysuit, I'm only going to want the geoshell. Use the base model without any morphs applied.
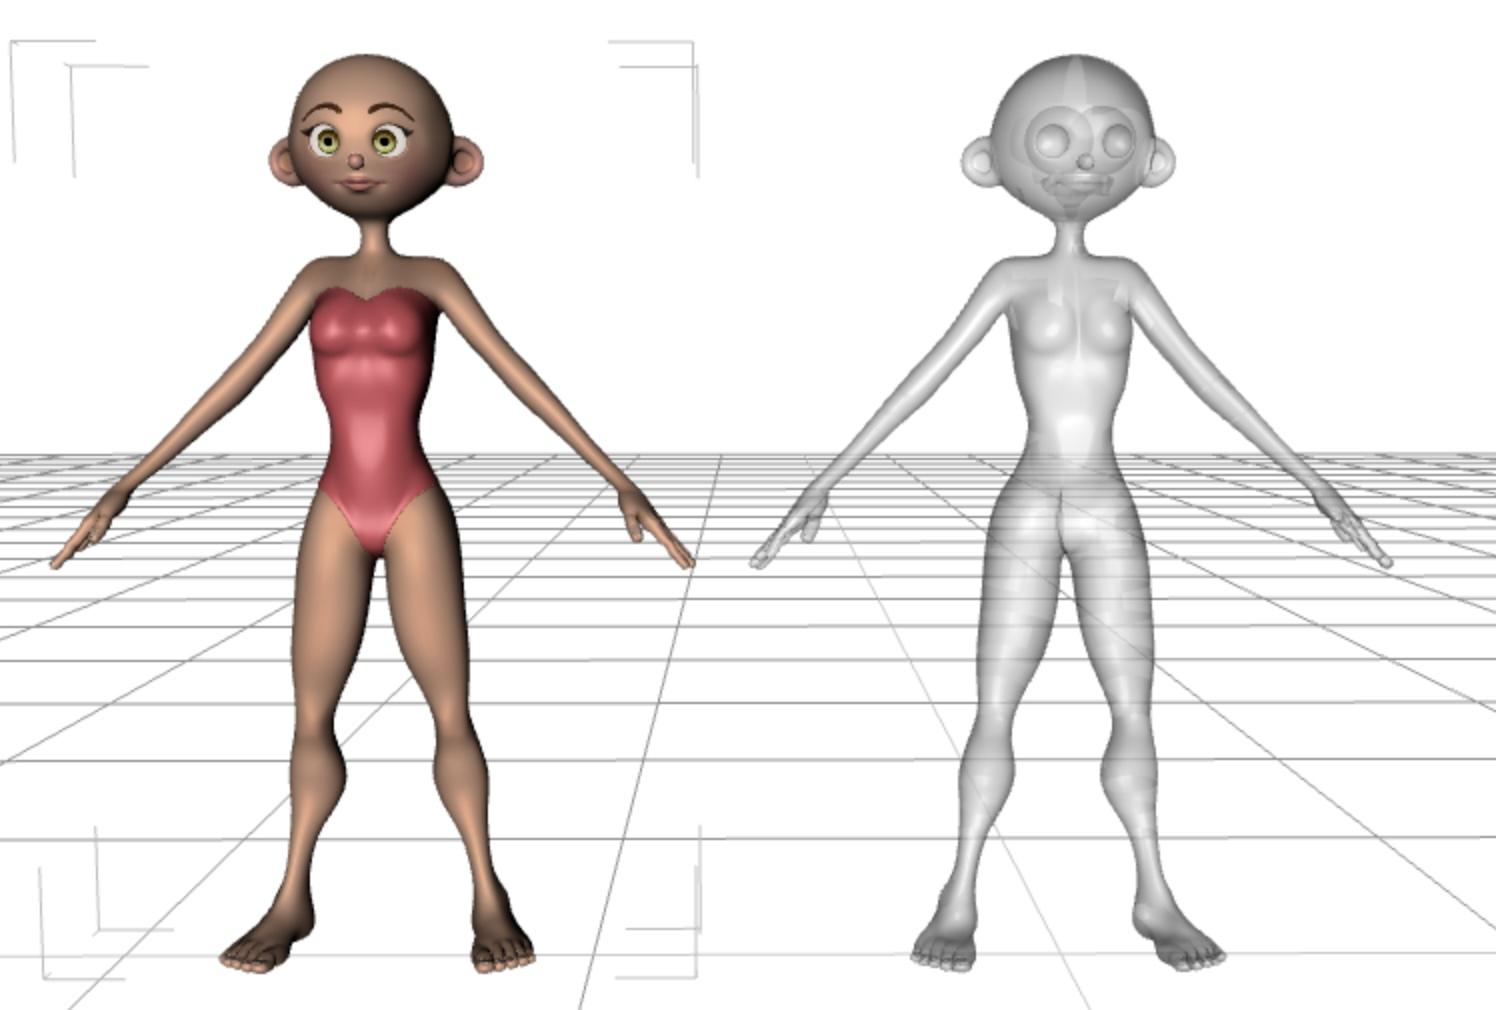
Export the scene in either .obj or .fbx format, either will work fine. It's important to note the settings you use, as you want to duplicate them when importing the geoshell back into DAZ Studio.
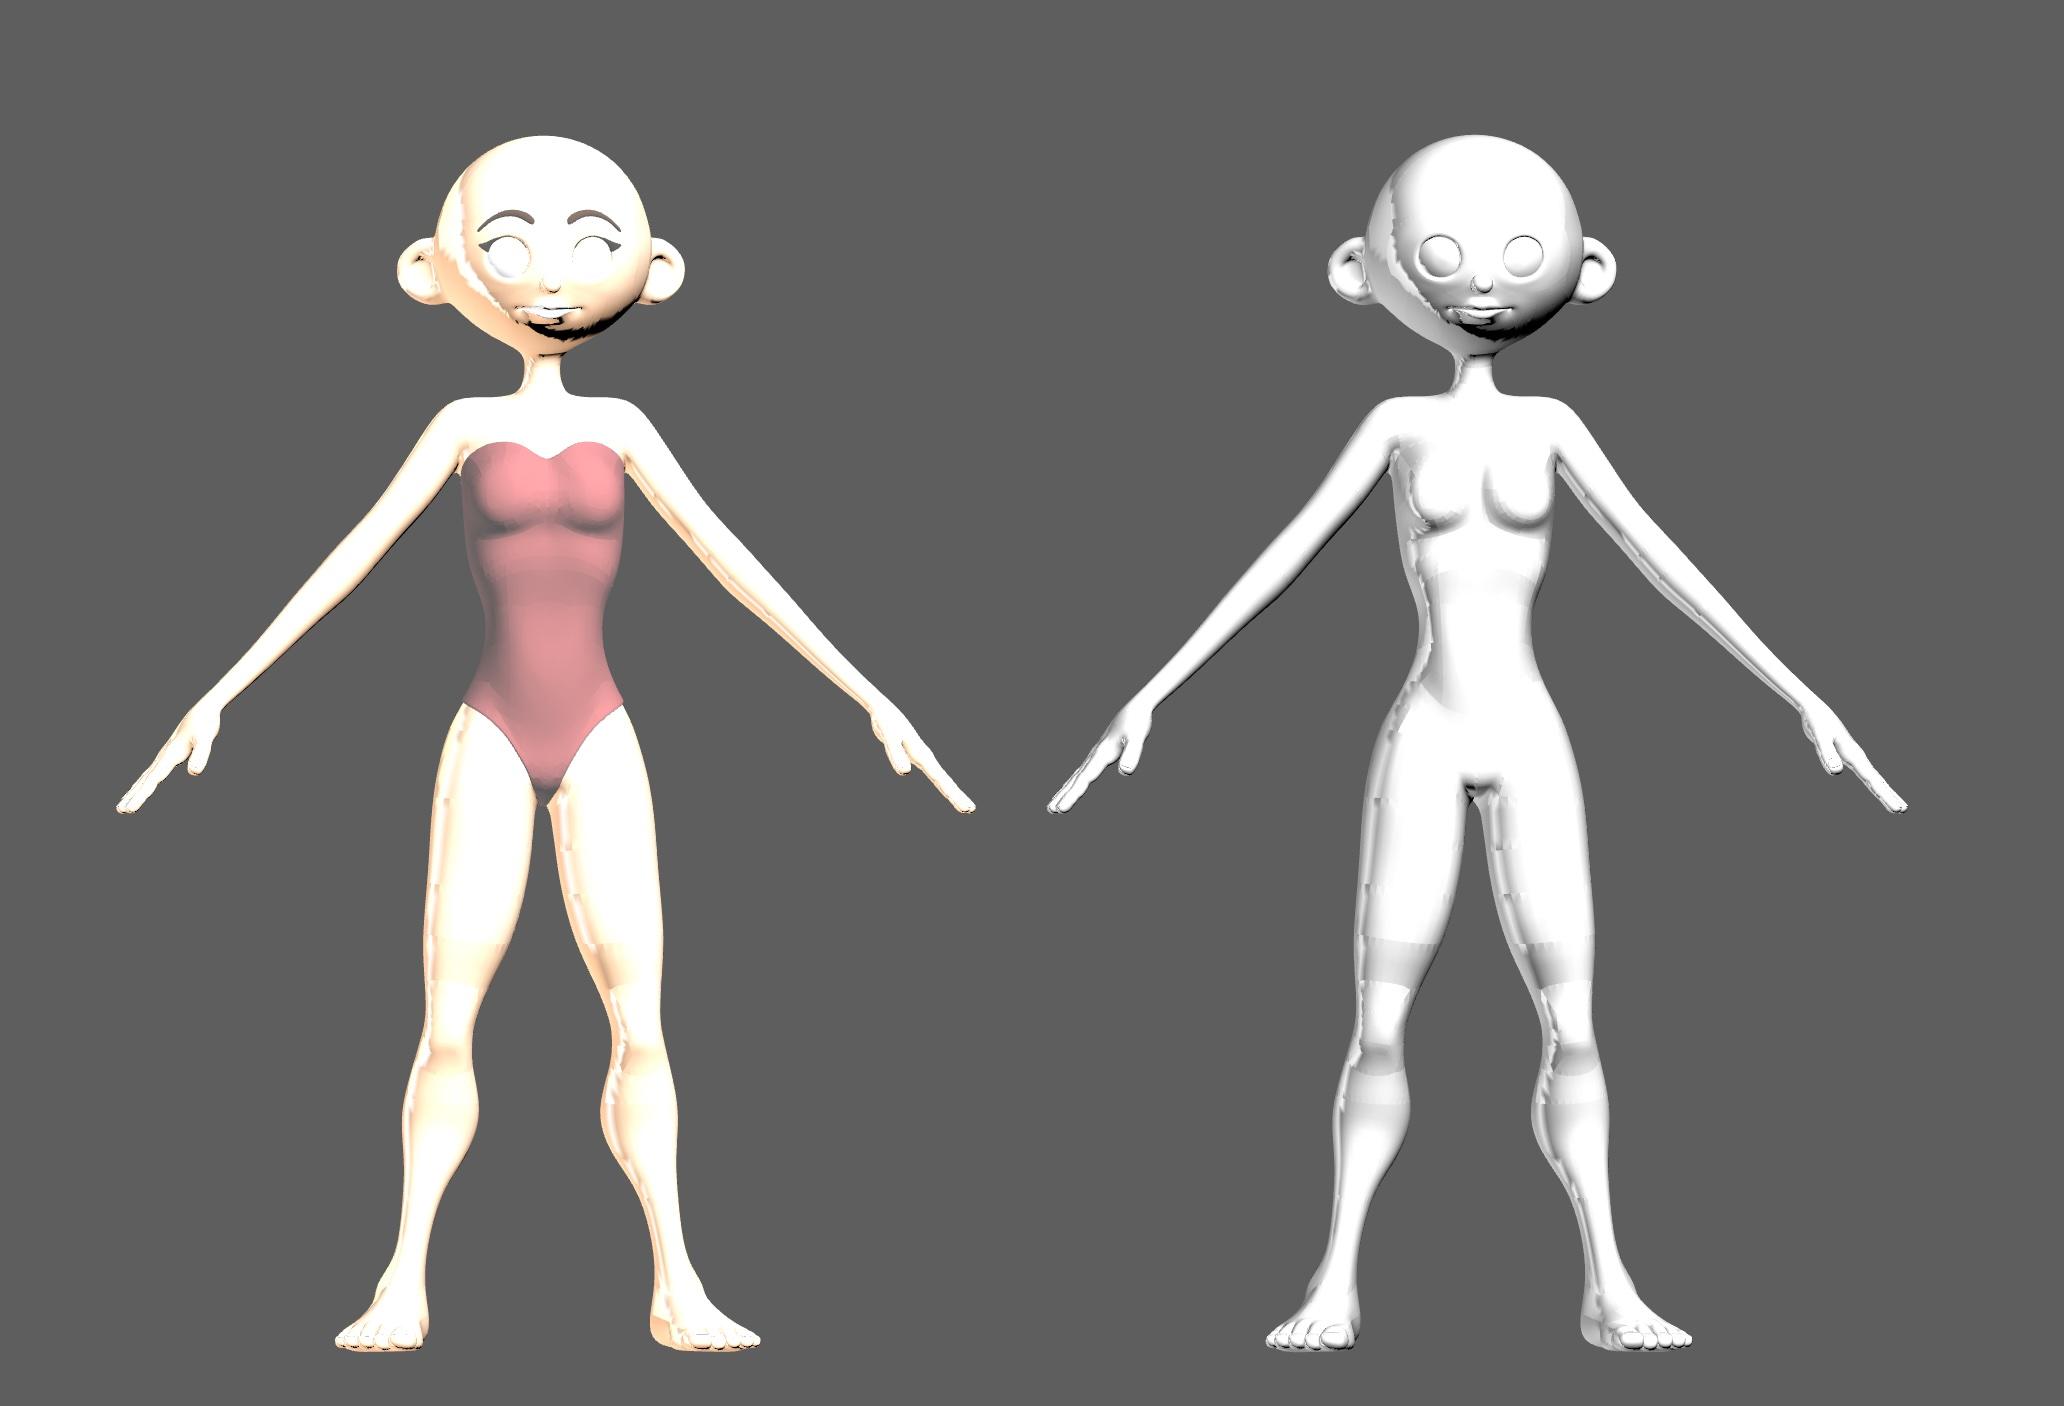
As mentioned, since I'm just making a basic bodysuit, I select the actual character and delete it.
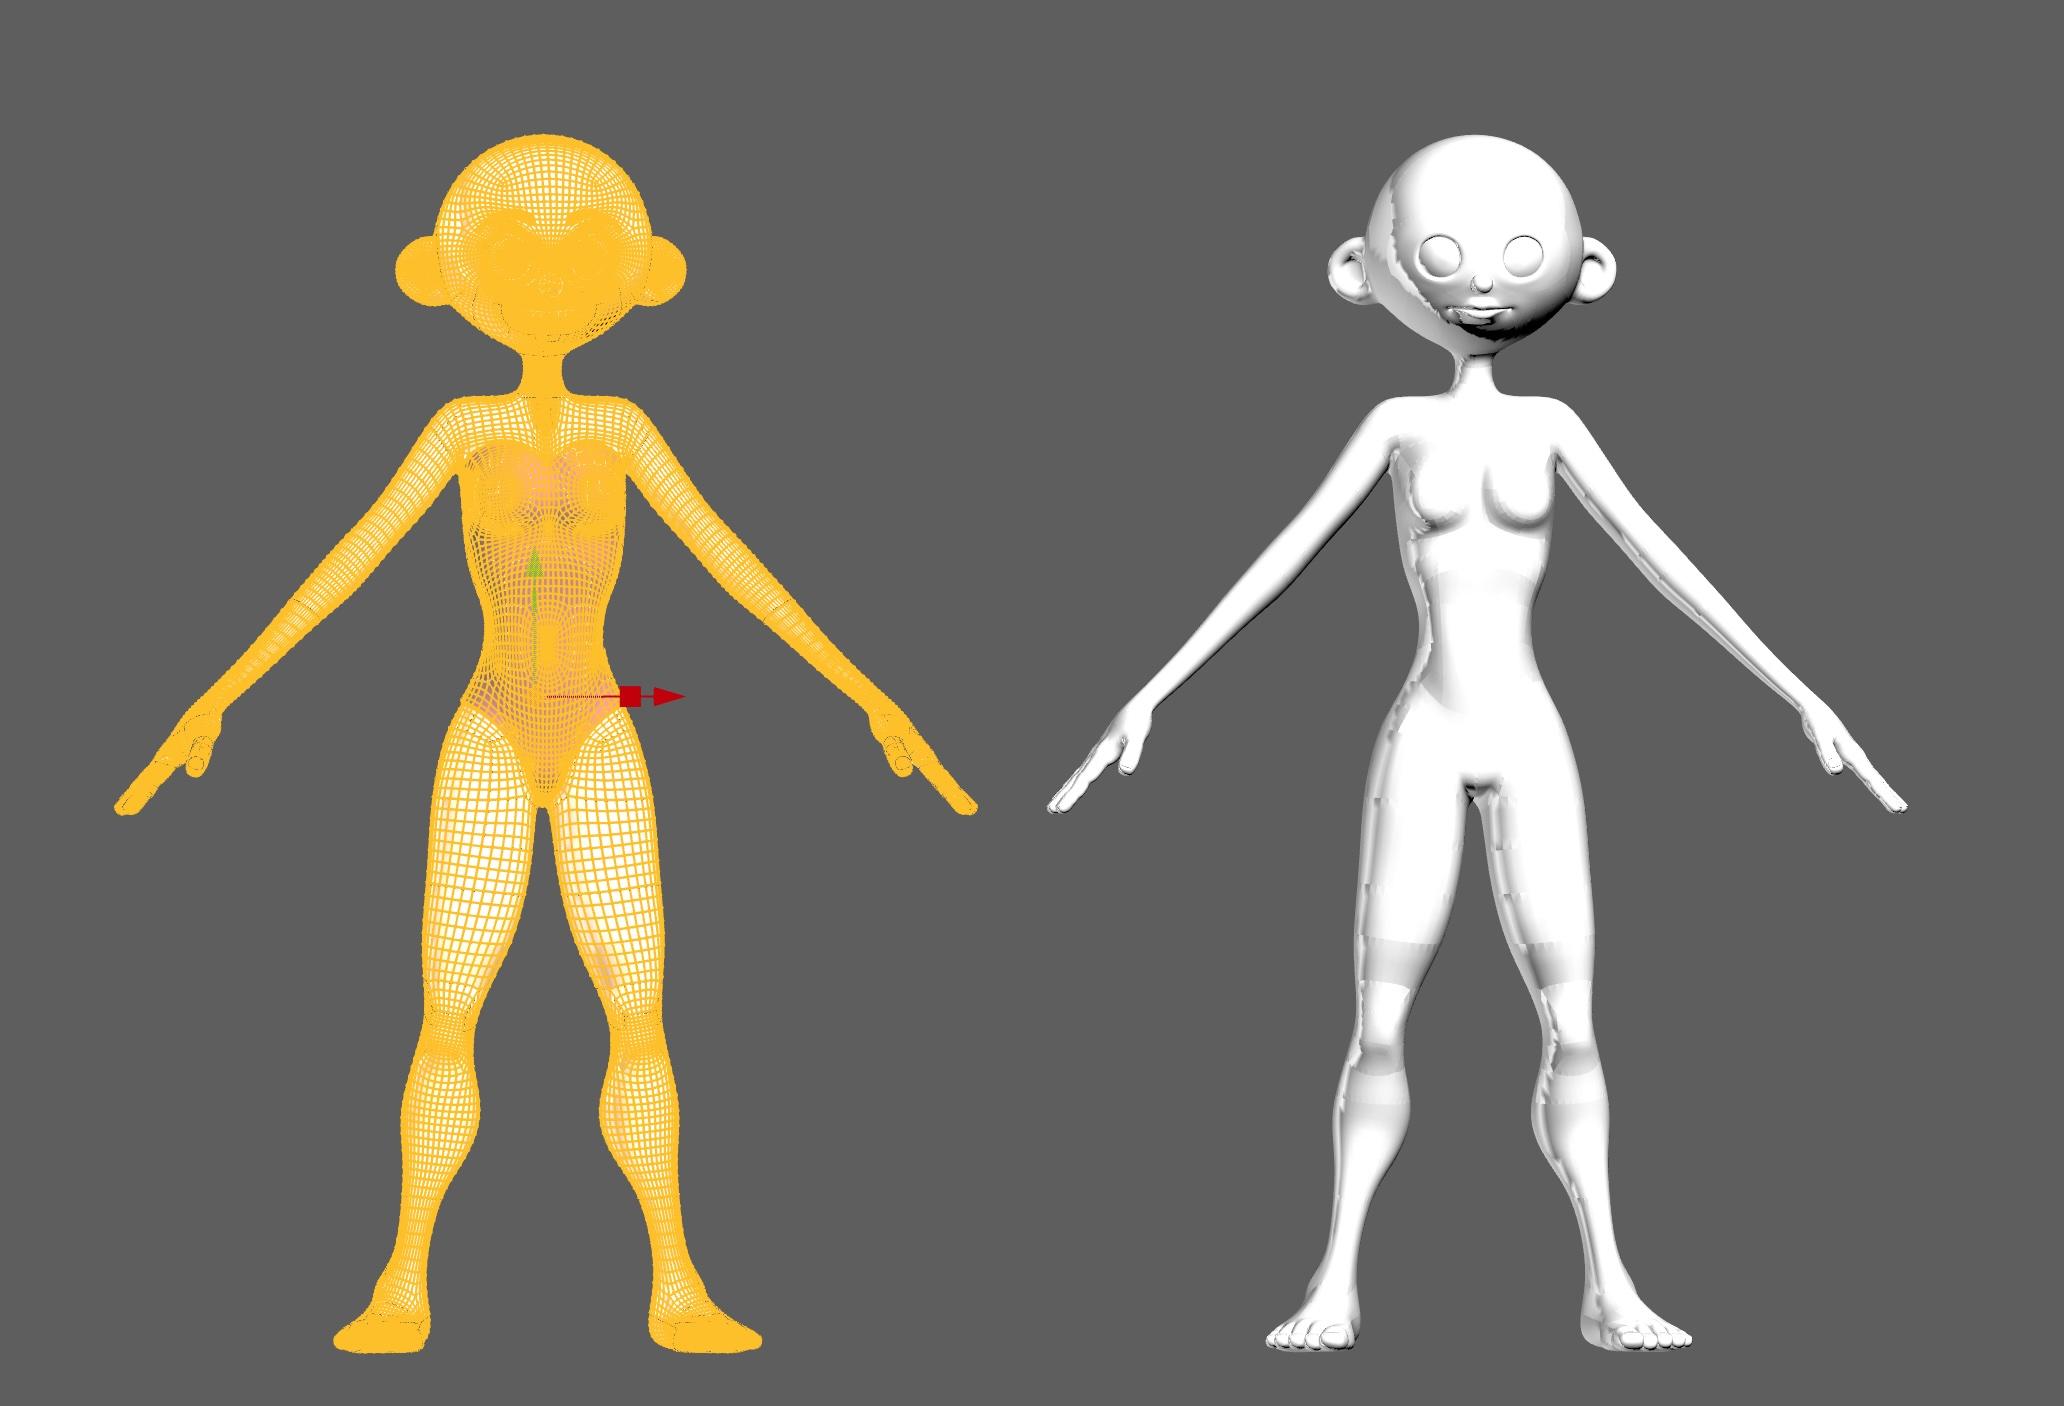
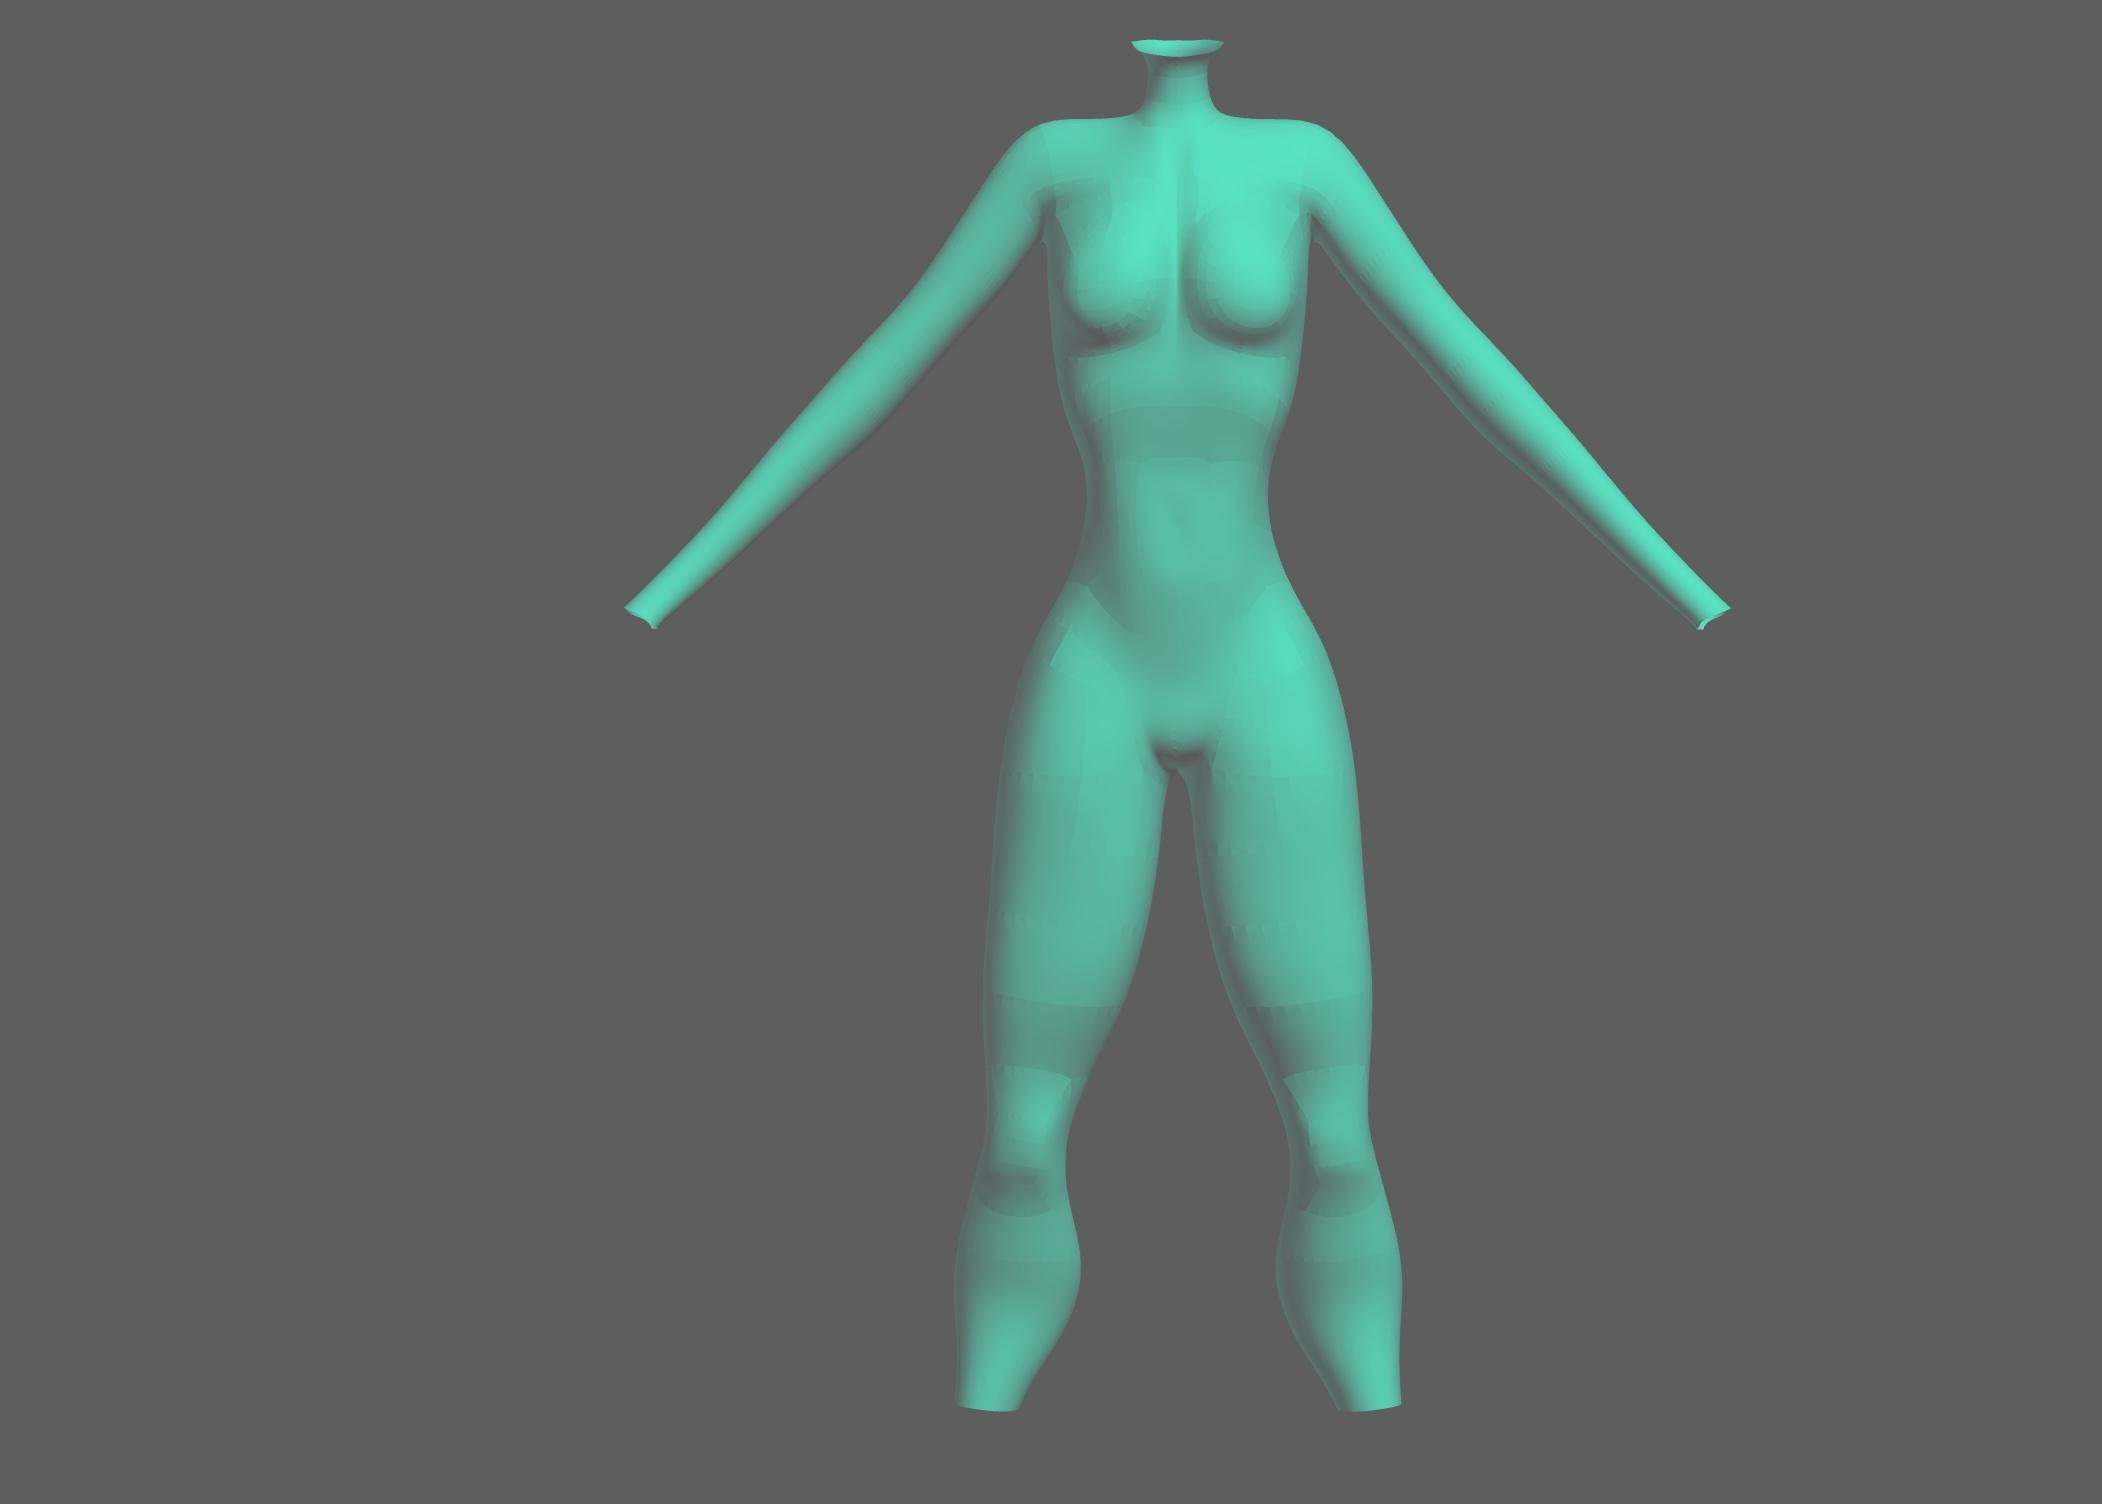
Once we have just the geoshell, I select and cut any parts I don't want, like the head, hands and feet. At this point, if you just want a shirt or pants, you can delete everything that's not part of the clothing you want. Here is where you can also edit your clothing to punch it up with details like trims, piping, seams, wrinkles, etc. As well, you can select parts of the clothing to create new shader or texture zones. When we're done, export the clothing as an .obj or .fbx file, whichever format you exported from DAZ Studio.
Back in DAZ Studio, delete the geoshell and move the base female back to the zero point.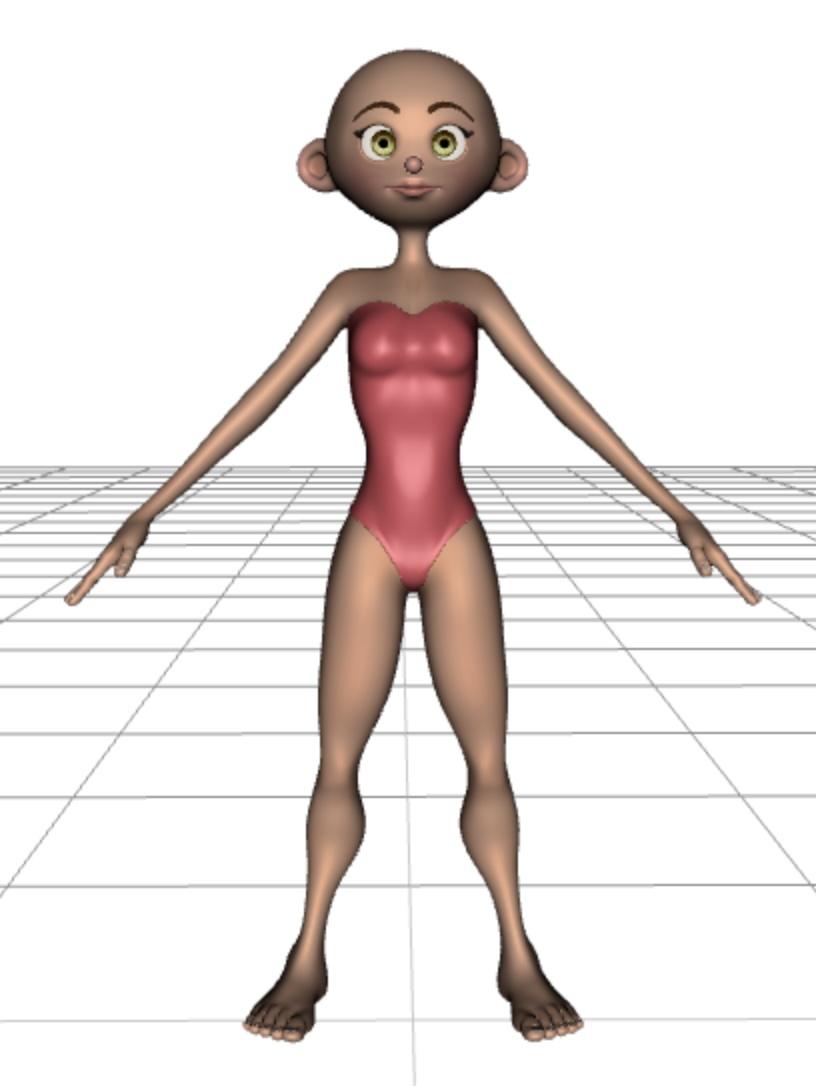
Import the edited clothing file using the same settings you used to export the file originally (e.g. 1 in = 1 cm)
Once you've imported it, select the bodysuit and apply the DAZ Ubershader to it to make it view and render properly.
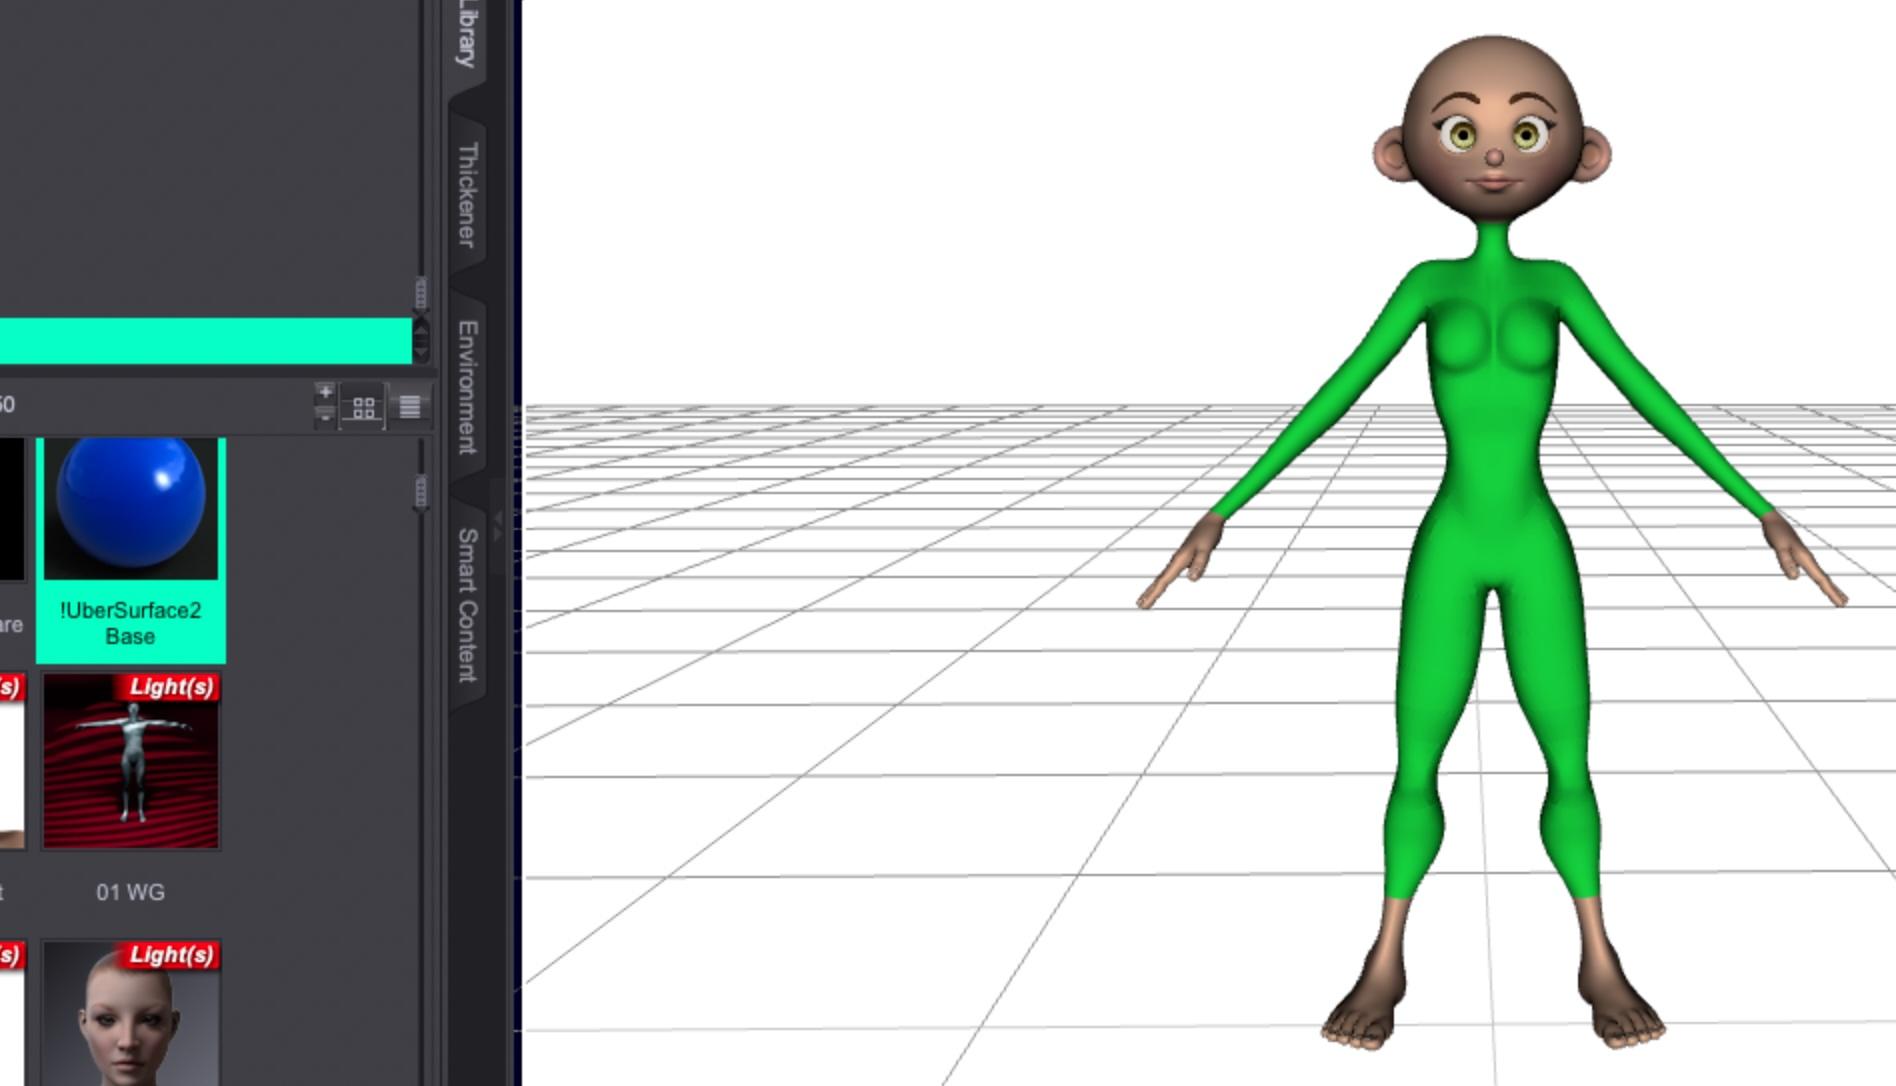
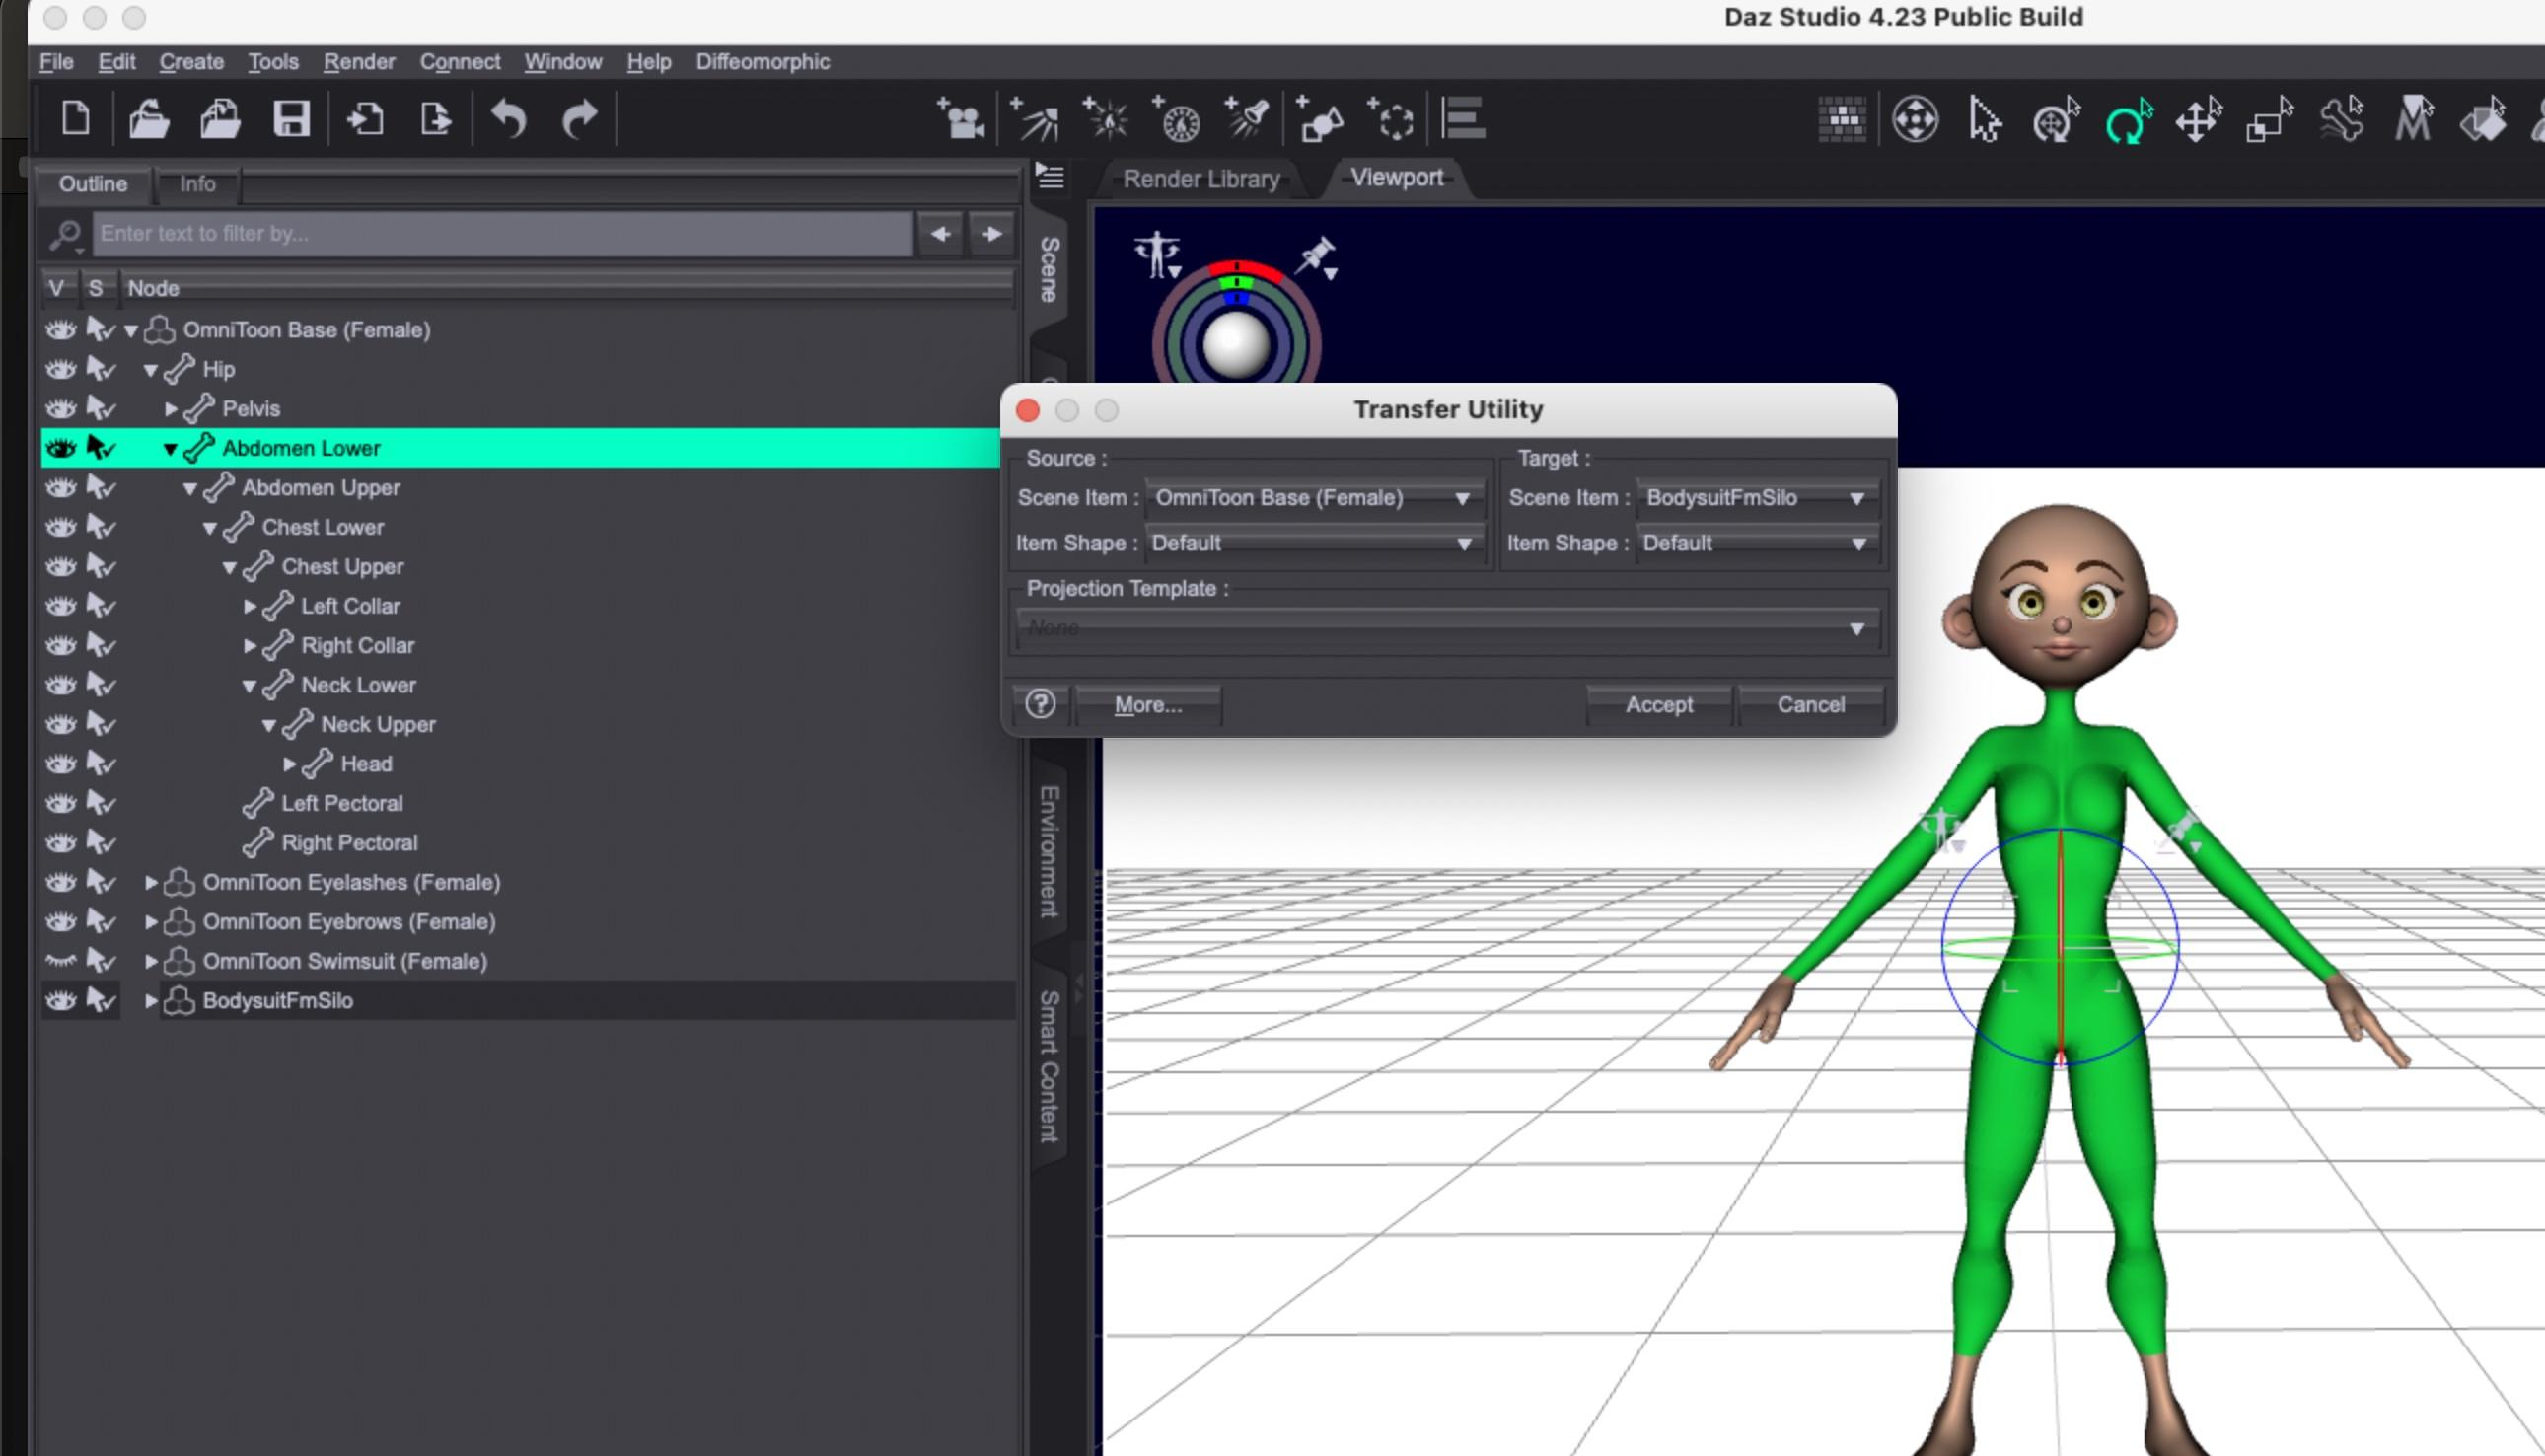
Using the Object Transfer Utility under the "Edit" menu, you can select the Omnitoon character and the bodysuit and transfer the rigging info.
If you find you run into any issues with body poke-through, you can experiment with adding a smoothing modifier.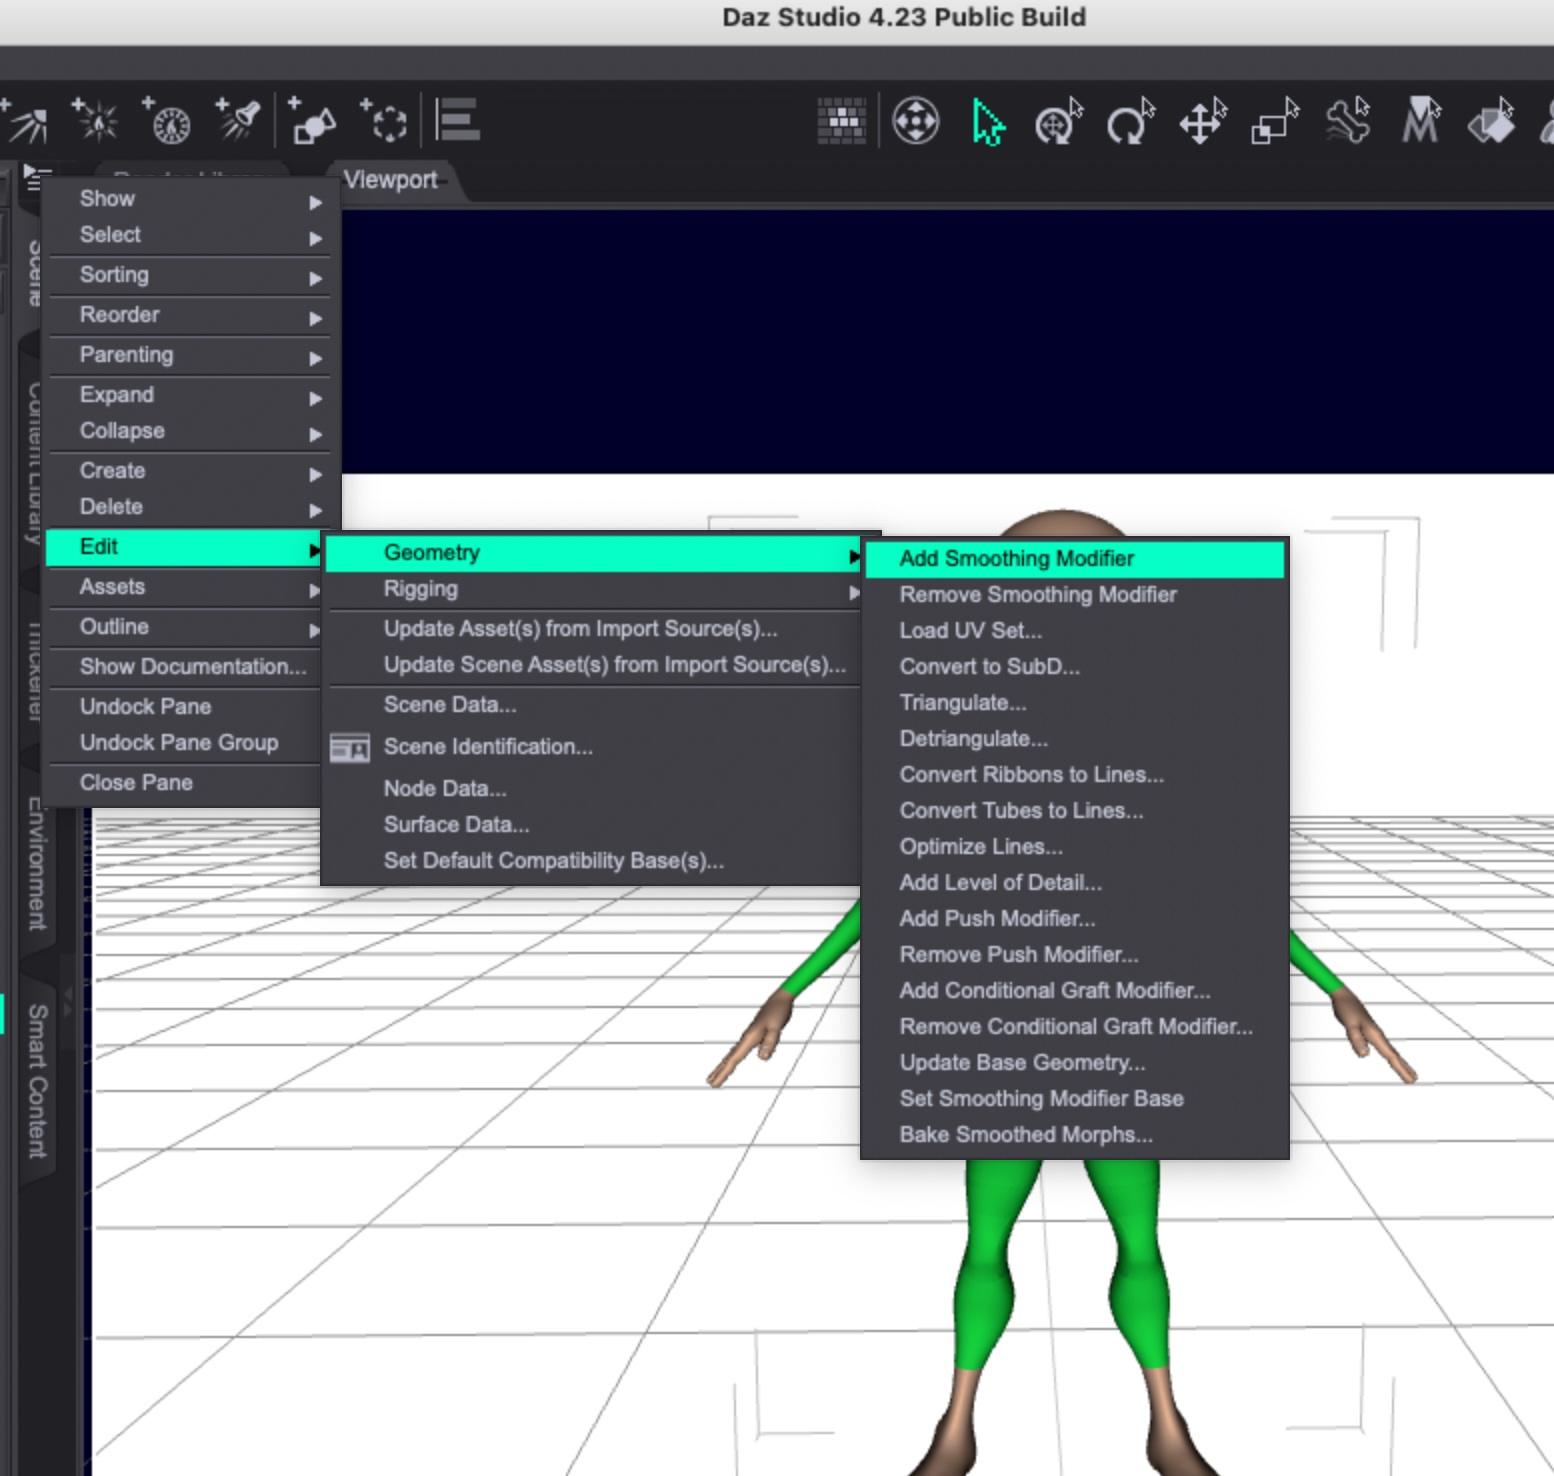
Once you've used the transfer utility, you should be able to apply morphs to the Omnitoon and the bodysuit should match it. Some very extreme morphs might require smoothing or, easier in some instances, hiding the body part poking through the clothing.
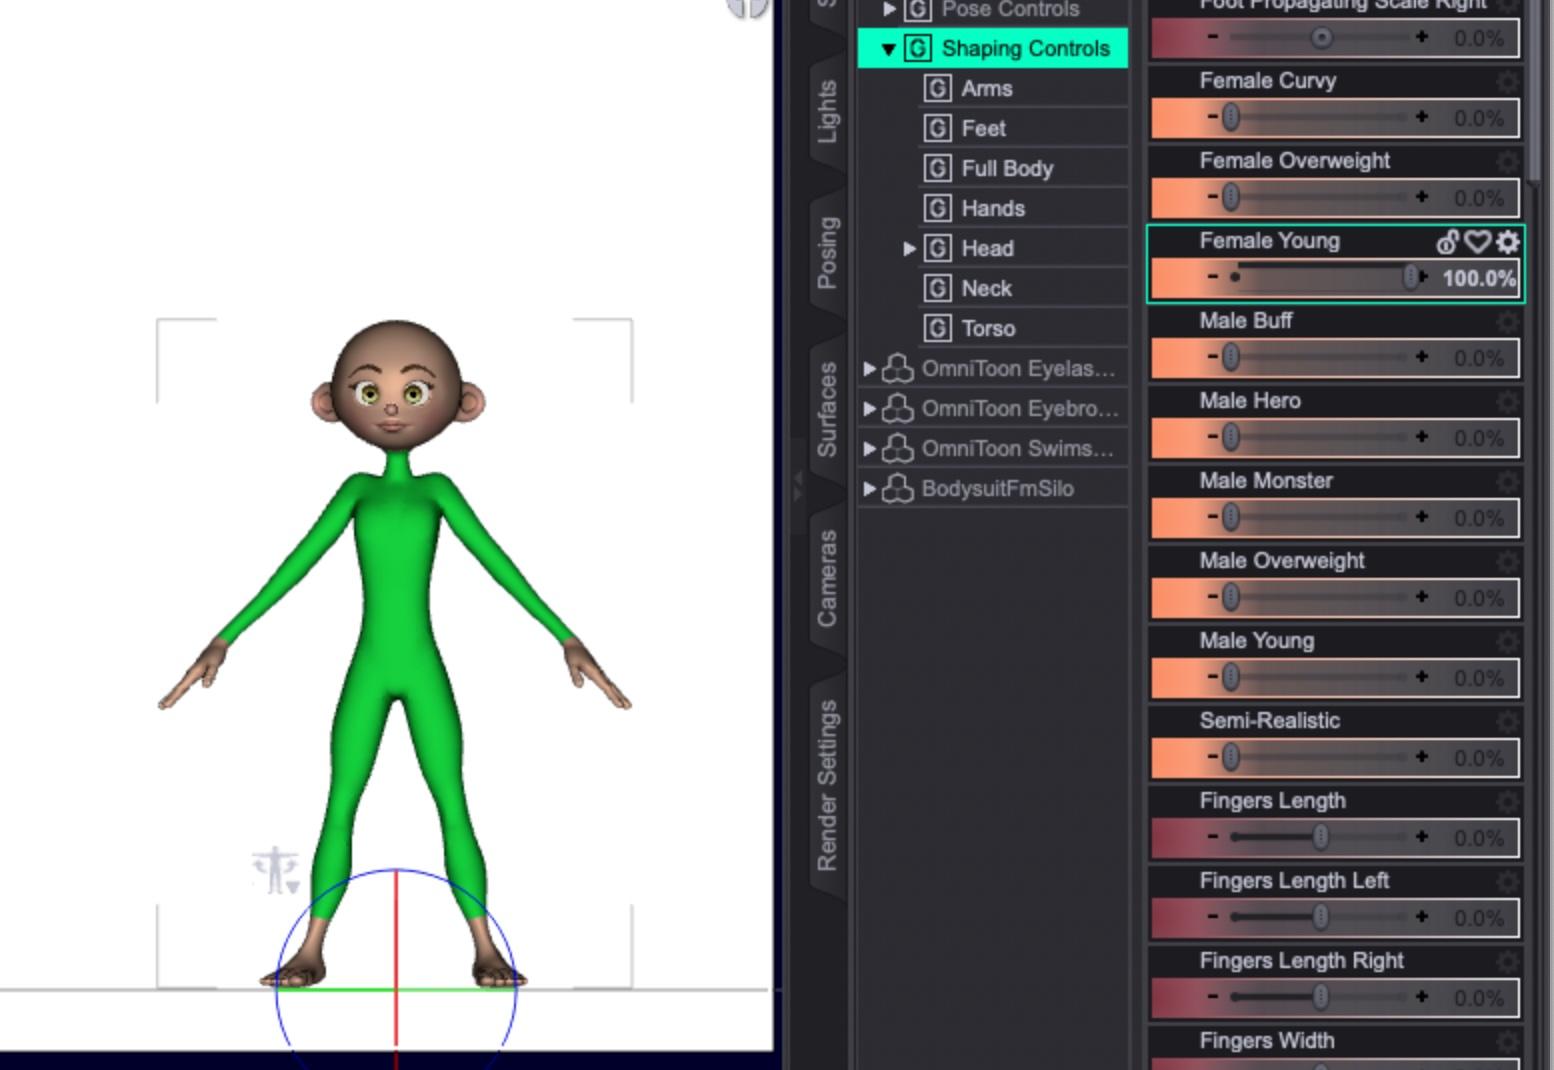
Here's the Young morph applied:
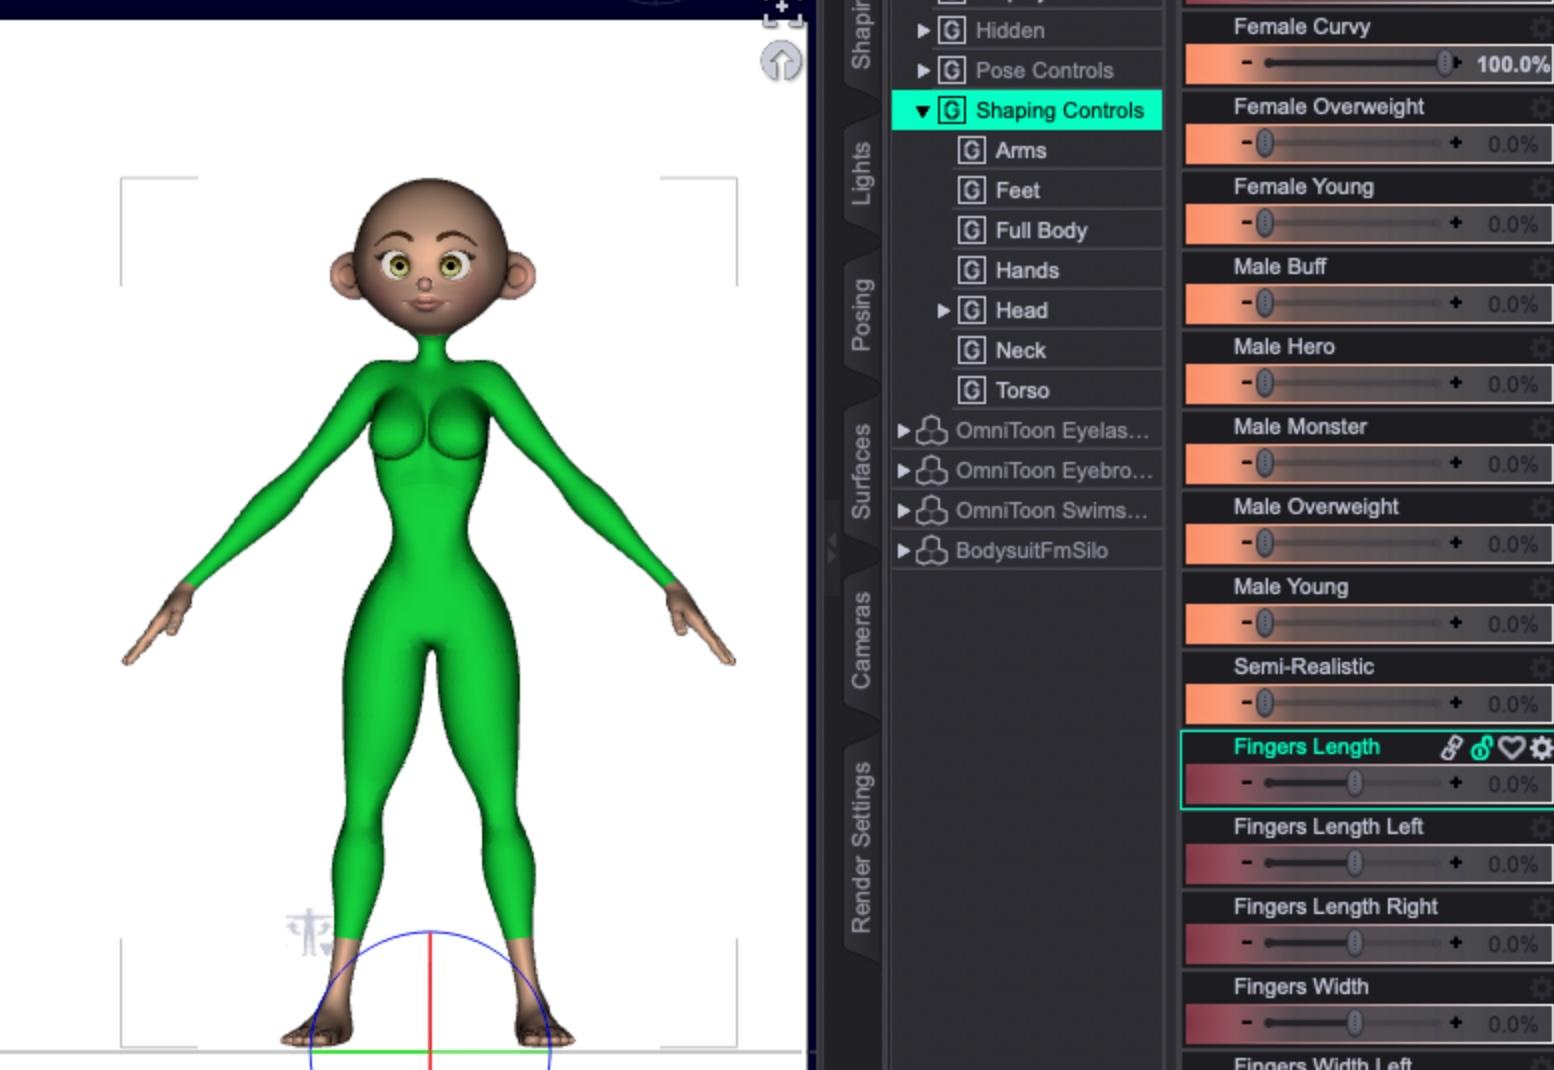
Curvy:
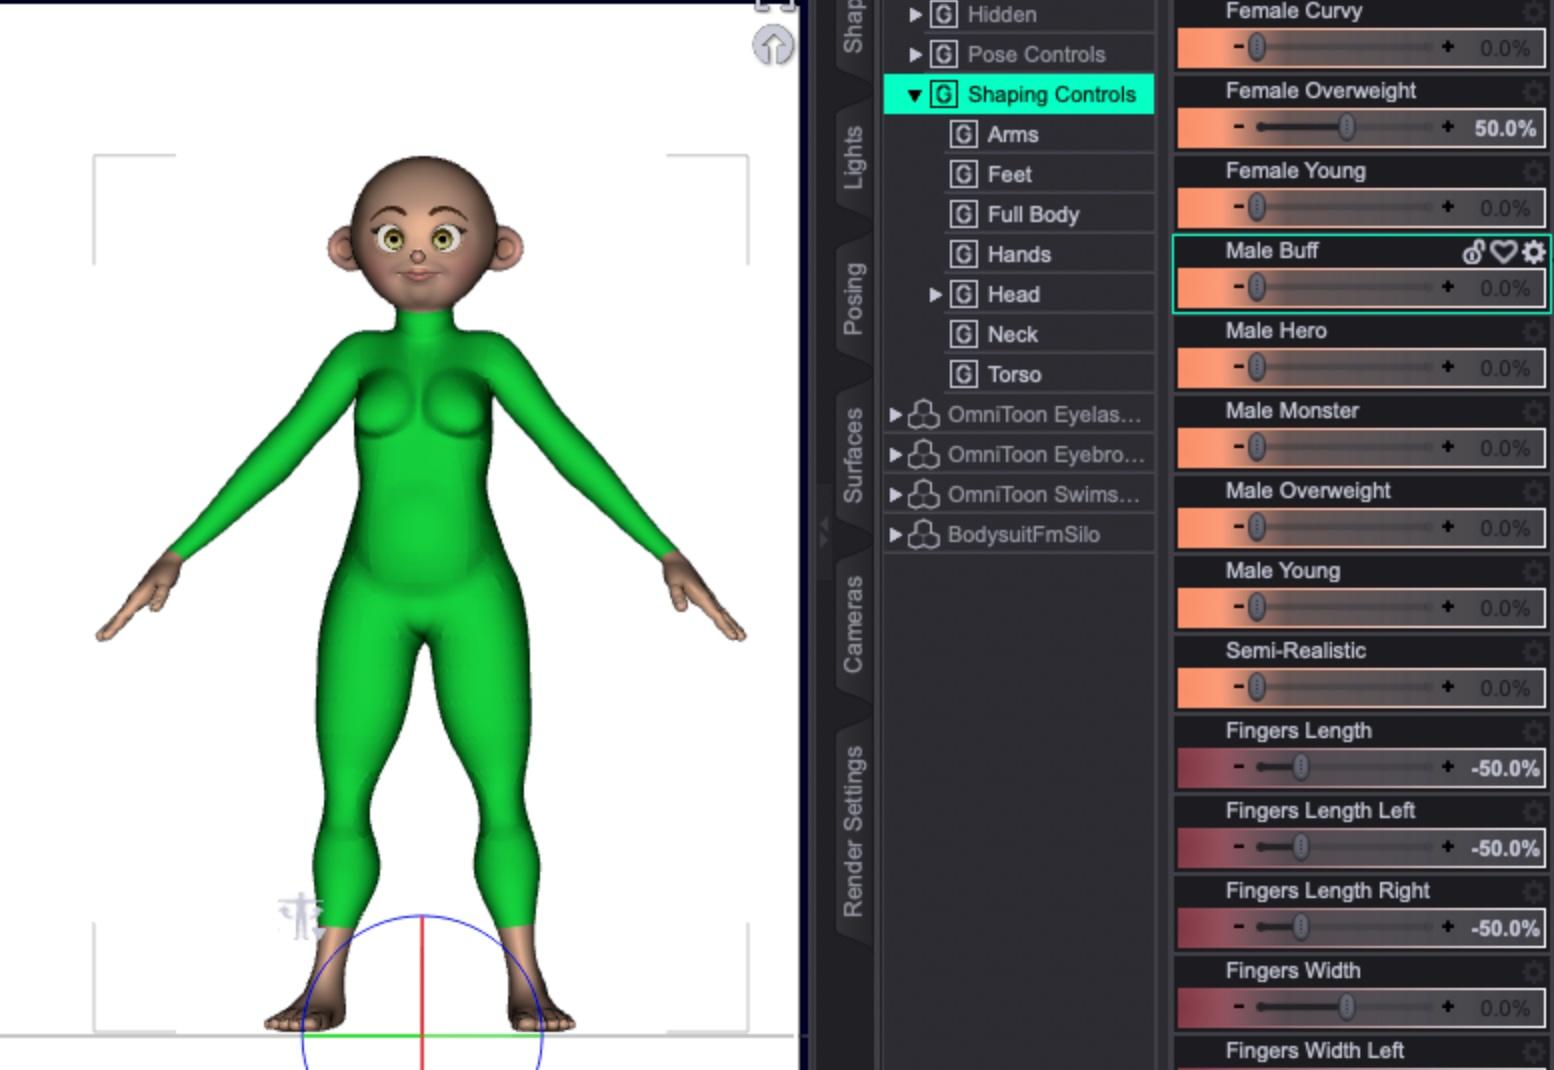
Overweight:
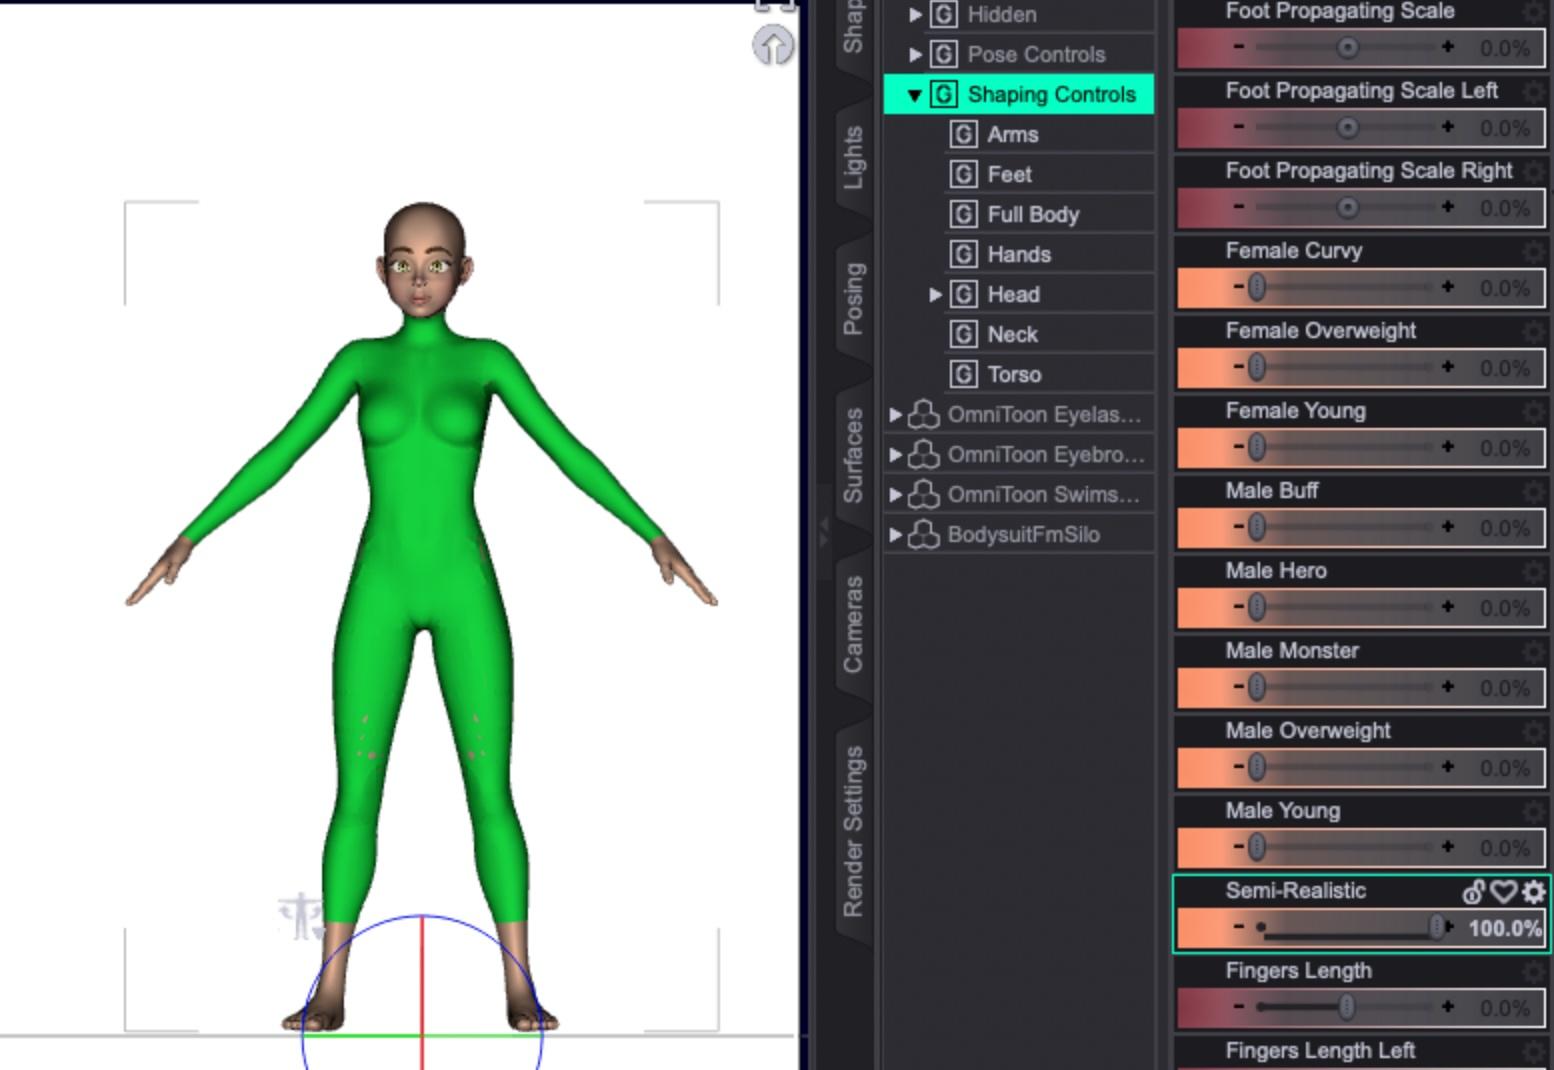
And semi-realistic, to try out a few.
If I'm allowed to distribute the model without re-rigging, you can get close results using Genesis 8 poses:
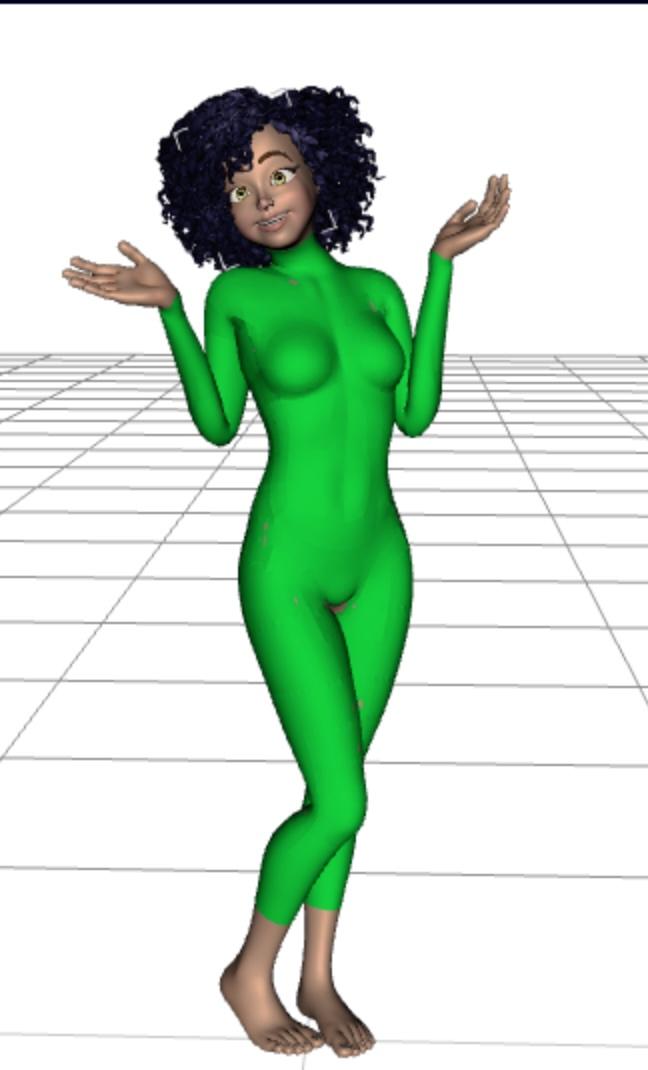
And if you just need some quickie custom clothing, you can just hide parts of the bodysuit:
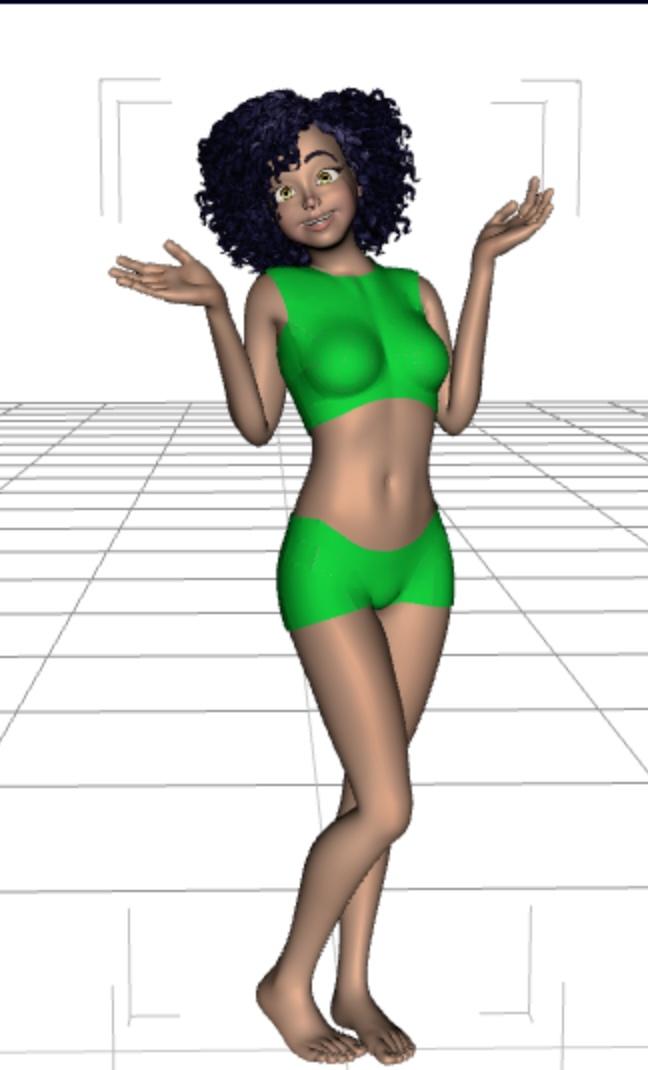 Let's appreciate/discuss today's new releases - more ongoinger thread
So here’s the Holy Family wardrobe with some different actors:
- Mary is D.E.M Rima with HS HoneyHeart Hair and a chest smoother morph (hard to tell with the shiny cloth glare)
- Joseph is Edan for Dasan 8 with the same M3D Victorian Hair that seems to be used on Walter in the promo; I’ve applied some aging morphs (I don’t remember which package exactly) and V3D Wet and Tanned Skins to get Edan’s skin tone close to Rima’s
- Baby Jesus is Baby Sam wearing Samuru’s skin from Small World for Caryn and Tobyn
- The poses are from Mix-n-Match Nativity Poses (with adjustments)
 Ethin's Art and ... stuff.
Redfern said:
Ethin said:
Low effort "M'Ress" scene.
Yeah, something akin to that. Well, I have my own custom head morph I'd use, but yeah, something similar.
... However my aesthetic might not be the best for Trek art. lol
The Sky is Falling Complaint ThreadNon-complaint: This week's mini-adventure is a trip to the laundromat tomorrow. Morning bus to laundromat, then deposit laundry into washers, then breakfast at Burger King. Then back to laundry to transfer wet stuff into dryers, then a visit to the CVS drugstore to snarf up some cheap post-Easter chocolate bunnies(or whatever's left), then a toddle to the grocery store for the last things on my grocery list, and then back to the laundry to fold clothes and call an Uber to go home. All within a one block radius. Wheee..., an easy and uncomplicated, and immensely satisfying mini-adventure.
After that, no scheduled doctor appointments or other necessary trips for three weeks. And then a trip to the dentist in mid May. Perhaps I can save a little money this month.
 Ethin's Art and ... stuff.
Ethin said:
Low effort "M'Ress" scene.
Yeah, something akin to that. Well, I have my own custom head morph I'd use, but yeah, something similar.
SOLVED - Carrara Not Loading getting MCX errorssearching for mine, I see you too have been here before
https://www.daz3d.com/forums/discussion/369756/problems-installing-plugins-vwd-bridge-hd-morph-gmic
the identifier was the problem with the Sparrowharke and Philemo plugins for me, cannot find my thread
A little help please.https://www.daz3d.com/gurumarra-the-australian-aboriginal
The product page doesn't mention an FBX file being included, and I can't think of a single character for DS that includes an FBX (though there are some Daz characters available in the store as FBX models). Sometimes environments include an OBJ, but generally speaking, content in the Daz store is made for use within DS. You can look at the Compatible Software listed on the product page, and sometimes that will list other programs (e.g. Blender, Maya, etc.), which means that the purchase includes native file formats for those; otherwise, if it just lists "Daz to ____ Bridge", as this product does, then you'll need to open it in DS and either export as FBX or use the free Daz to Unreal bridge to transfer it to Unreal.
tl;dr - yes, you'll need to export from DS first.
Hooking up a morph to a Bend rotation@ Richard .... hmmm, the bend under the Scruff's Head area is zeroed out so not sure if dragging the fix morph to that will do anything.
@ Barbult .... Yes, same sort of thing!
Hooking up a morph to a Bend rotationIs this technique something different than creating a hidden corrective morph for clothing when a character's bone bends?
Hooking up a morph to a Bend rotationYou link the morph to the bend, for example by dragging the bend into the morph's Controllers>1st Stage in the Property Hierarchy while the Parameters pane is in Edit mode, and set the Scalar value to 1/30 (so that when the bend is 30 the morph will be 1, that is 100%.
Hooking up a morph to a Bend rotationHooking up a morph to a Bend rotation
I discovered an issue with my Scruff conformer for G8M. When I bend his head back to the -30.0 degree the Scruff become loose under his chin and around his upper neck. So I took that into ZBrush and created a fix morph. So I need a reminder of where to hook this up ... can't remember if I hook it up under the Scruff dependencies or what?
On a side note, how the hell do I turn down the select color? That bright blue is too much, I'd like it made almost fully transparent, it's too much in the way of my work when I'm hovering over body parts. I don't like it.
Thanks so much
Richard
Is it possible to make a JCM for more than one joint at a timeI mean I havent looked into what Crosswind posted, but just understand that the process is really not that complicated. Go into Property Heiarchy and set your controllers for your morph as required, following SIckleyield's video. She uses Add and Keyed options in 1st Stage for controllers, but I think she should put one of them in the Multiply option in the 2nd stage controller. Free country though, you can do as you wish.
Relevant part of video is at 16:03
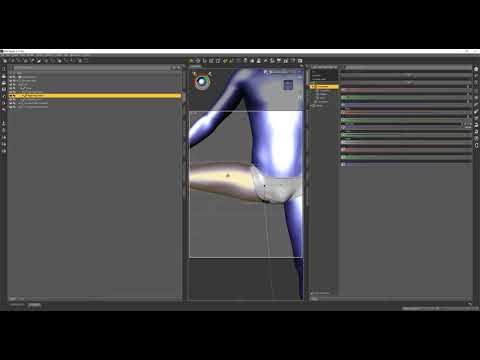
I doubt people can tell you what is or isnt in 4.11 of the top off their head. Just look for yourself in Property Heirarchy and you will know soon enough if you can follow the processes
Daz 3D is part of

Connect
DAZ Productions, Inc.
7533 S Center View Ct #4664
West Jordan, UT 84084Licensing Agreement | Terms of Service | Privacy Policy | EULA
© 2026 Daz Productions Inc. All Rights Reserved.