-
Where is the scene?
Artini said:
Please also look at the answer by ARealiti in the thread:
https://www.daz3d.com/forums/discussion/718061/sending-a-set-to-unity#latest
So things must have changed either with the new Daz or the new Unity (6). Even though i made everything but the original instance of the first prop i wanted to transfer over invisible, everything came over. they became prefabs in Unity. Right now I'm working thru placement and getting them textured with the Unity mesh (if that's the right way to put it). i really wish Daz would get involved and update us on these changes.
Mesh grabber for Daz 2025 Alpha?Squishy said:
Richard Haseltine said:
The plug-ins that were purchased by Daz and developed into the Premier plug-ins will not be getting updates other than to the Premier vesions, I'm afaid. they will of course work in DS 4, and aside from needing to bake the Mesh Grabber Modifier to a morph or shape (and render Queue, obviously) their effects should then be savable and openeable in DS 2025.
this sounds pretty explicit to me
Daz bought what was supposed to be Mesh grabber 4, as well as a bunch of other ManFriday plugins. Those plugins now belong to Daz, and Daz can decide whether they will get a DS2025 update (the older standalone plugins won't, only the Premier plugins based on them will).
However Daz didn't buy Mesh grabber 3, which is still sold in the store as a PA products. ManFriday still owns them, and can decide whether to update them for DS2025 or not.
Mesh grabber for Daz 2025 Alpha?Richard Haseltine said:
The plug-ins that were purchased by Daz and developed into the Premier plug-ins will not be getting updates other than to the Premier vesions, I'm afaid. they will of course work in DS 4, and aside from needing to bake the Mesh Grabber Modifier to a morph or shape (and render Queue, obviously) their effects should then be savable and openeable in DS 2025.
this sounds pretty explicit to me.
The dForce Hair ThreadOh, I remembered another trick. If you simulate with the Geometry Editor tool selected, the hair seems to lose its baked in stiffness and will drape a lot. That's really the best way to make upside down morphs or droopy wet looks, I think. You don't even need a modeler for this. Just simulate, export and import to morph loader pro (or use MorphMaster, which is fabulous).
Edit: And always select another tool, like the Node Selection Tool, before Iray rendering. The dForce hairs won't render all the strands with the Geometry Editor (or Mesh Grabber, etc.) tools selected.
The dForce Hair ThreadSquishy said:
No, the geometry is there, which is why you can export it back out to OBJ. They've had 8+ years to add features to the user side to make this easier to work with if they wanted to.
e: the geometry is there in the form of vertex data, the same as polygons, just with no face data.
barbult said:
With Geometry Editor tool active, you can export the "curves" hair, move the vertices in a modeler, and with the Geometry Editor still active, import your modified OBJ to DS to create a morph. You do not have to be a PA to do that. I have made several morphs for PA dForce (strand-based) hair products that way. I have posted this in the forums a couple of times at least. You can even simulate in DS and export that and reimport it as a morph. The key is to have the Geometry Editor tool active during export and import. There can be millions of vertices in some of these hairs, so the morph creation can take some time.
This is a cool trick, never would have thought to try something like this. Thanks! Is there documentation on details of this or anything? What else can be done?
e: being able to make a few morph targets really would be great, e.g. with that particualr hair I love the way it looks from the front but not so much from the back. would be nice to be able to customize!
I don't know of any documentation on this. I don't even remember how i learned it. I may have discovered it by accident or maybe someone else told me. I started doing it years ago, starting when Neroli Hair was released.
The dForce Hair ThreadNo, the geometry is there, which is why you can export it back out to OBJ. They've had 8+ years to add features to the user side to make this easier to work with if they wanted to.
e: the geometry is there in the form of vertex data, the same as polygons, just with no face data.
barbult said:
With Geometry Editor tool active, you can export the "curves" hair, move the vertices in a modeler, and with the Geometry Editor still active, import your modified OBJ to DS to create a morph. You do not have to be a PA to do that. I have made several morphs for PA dForce (strand-based) hair products that way. I have posted this in the forums a couple of times at least. You can even simulate in DS and export that and reimport it as a morph. The key is to have the Geometry Editor tool active during export and import. There can be millions of vertices in some of these hairs, so the morph creation can take some time.
This is a cool trick, never would have thought to try something like this. Thanks! Is there documentation on details of this or anything? What else can be done?
e: being able to make a few morph targets really would be great, e.g. with that particualr hair I love the way it looks from the front but not so much from the back. would be nice to be able to customize!
The dForce Hair ThreadSquishy said:
WendyLuvsCatz said:
maybe it should be called iray curves
they are just curves, the iray part comes in as the material applied to them. the geometry that make them up can be exported in OBJ format and taken into modeling apps (e.g Cinema, here) where you can see they're just splines. There is a little more going on, in that there's selection grouping that lets the artist set stuff like stiffness via point weights but it's not tied to the render engine.
unfortunately this is a one way operation, you can't get it back into D|S in this state without the proprietary import tool, you have to convert the splines to polys - roughly quadrupling the vertex count, which is already over a million verts just for this hair. if you ever wondered why this type of curve based hair feels so heavy to work with, yeah that's why (the G8 characters themselves are 16.5 thousand vertices)
With Geometry Editor tool active, you can export the "curves" hair, move the vertices in a modeler, and with the Geometry Editor still active, import your modified OBJ to DS to create a morph. You do not have to be a PA to do that. I have made several morphs for PA dForce (strand-based) hair products that way. I have posted this in the forums a couple of times at least. You can even simulate in DS and export that and reimport it as a morph. The key is to have the Geometry Editor tool active during export and import. There can be millions of vertices in some of these hairs, so the morph creation can take some time.
Morphs, textures, oh my. Variety neededkyoto kid said:
...I live by morph and skin resource sets. As I've mentioned before I have an extensive library of them going back to G2. Two of the assets I use are Generation X2 and Zev0s XTransfer. Using both in sequence I can actually transfer G2 morphs and morph resources to G8. which further expands the resources I have available.
The same goes for hair as I have all of Slosh's UHT kits as well as a couple others which saves me a bundle on separate hair colour/texture add on content.
I also use Zev0's Skin Builder8 along with the Ultimate Iray Skin Manger by V3Digitimes to develop more variation in skin appearance (for example, someone who is very fair skinned with freckles or a realistic albino skin).
This is partially why I have not fully adopted G9 (save for unique characters by artists like RawArt that are pre-sculpted).as there are no conversion resources like this (likely due to the androgynous figure base) only ones for the existing base characters.
There are plenty of conversion options for G9. I even use X2 in my workflow to transfer ancient characters and morphs to G9. Plus - spoiler alert - most of the convertor products are nothing more than macros on things you can already do in studio.
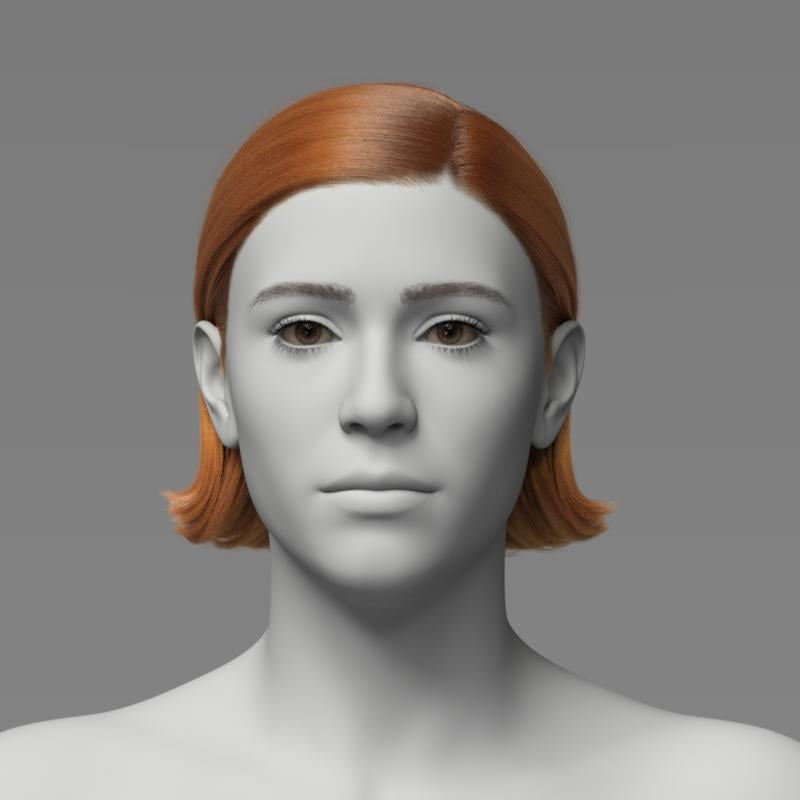
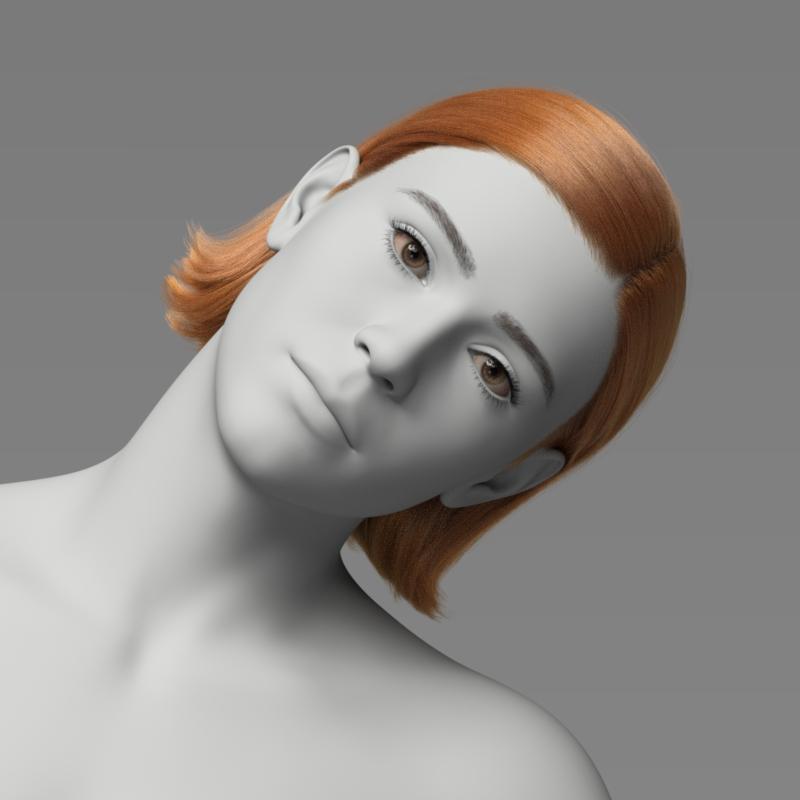
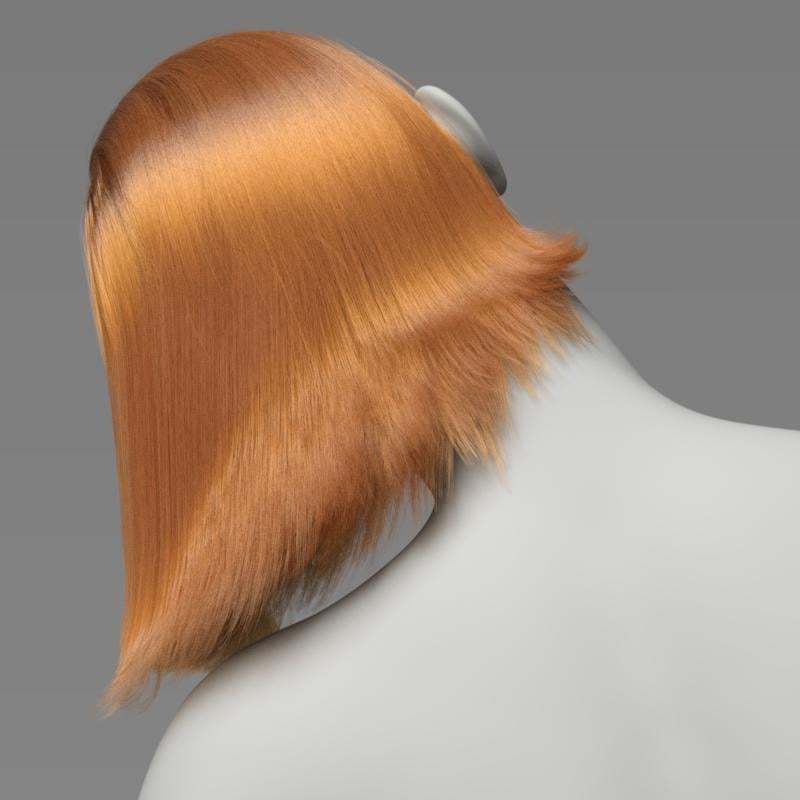
Morphs, textures, oh my. Variety neededI must admit I don't use the morph resources for G8F as much as I could. I think I have found the range of the characters I want to play with now, and want to develop them largely as they are. They have been tweaked from their original form using the morph resources, and as such I'm not sure I could do the same customisation with G9 characters. For the type of images I do, I'm still unconvinced G9 adds anything new that's not also possible with G8 - or with a user updated V4, for that matter.The dForce Hair ThreadThe most recent dForce hair I purchased is Toyen's dForce Linet Hair for Genesis 9. The attraction of that hair is that it is a simple style not overly puffy. It looks like a real person's hair.
Here is Linet Hair as loaded, before simulation:
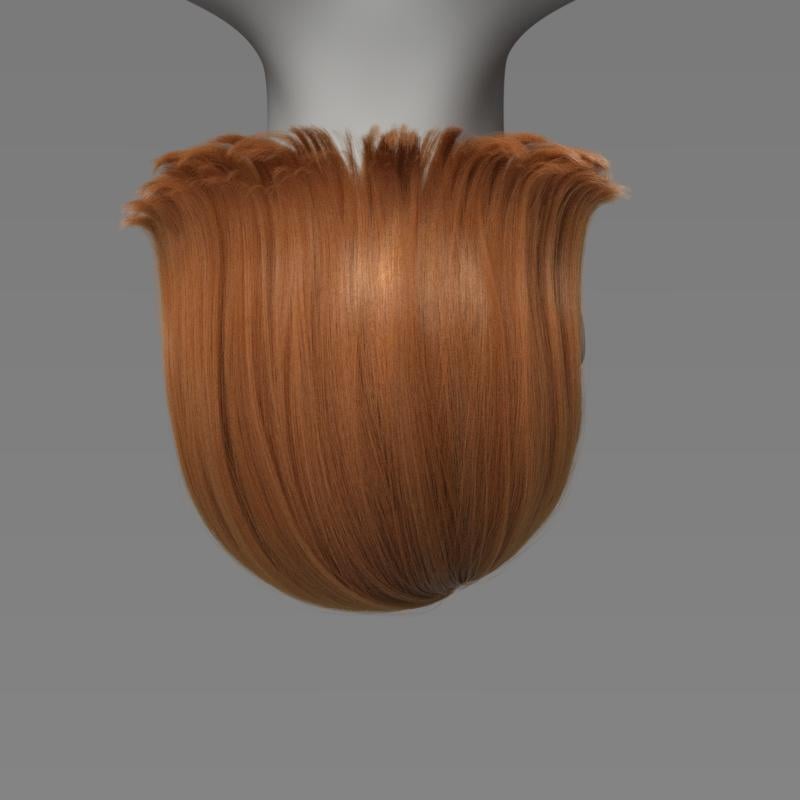
Here is Linet Hair after simulating with the simulation settings provided with the product. You can see that there is a slight movement due to the simulation.

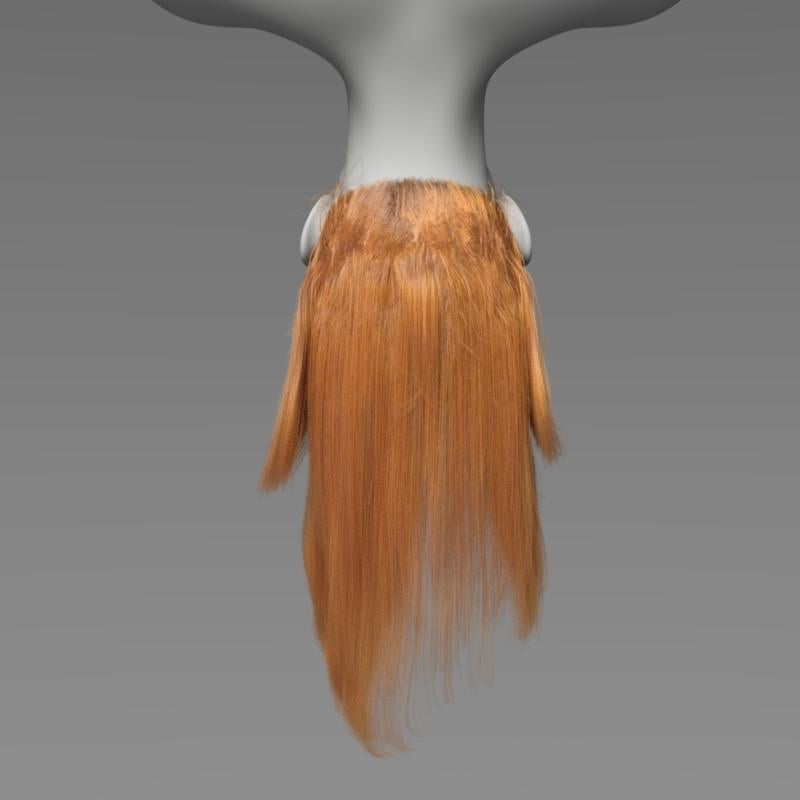
Here is Linet Hair after simulating with G9's head, neck and torso tilted to the side - not much movement of the hair toward the side. (There is a wind left morph in the product, but I did not apply it here. This is just simulation results.)
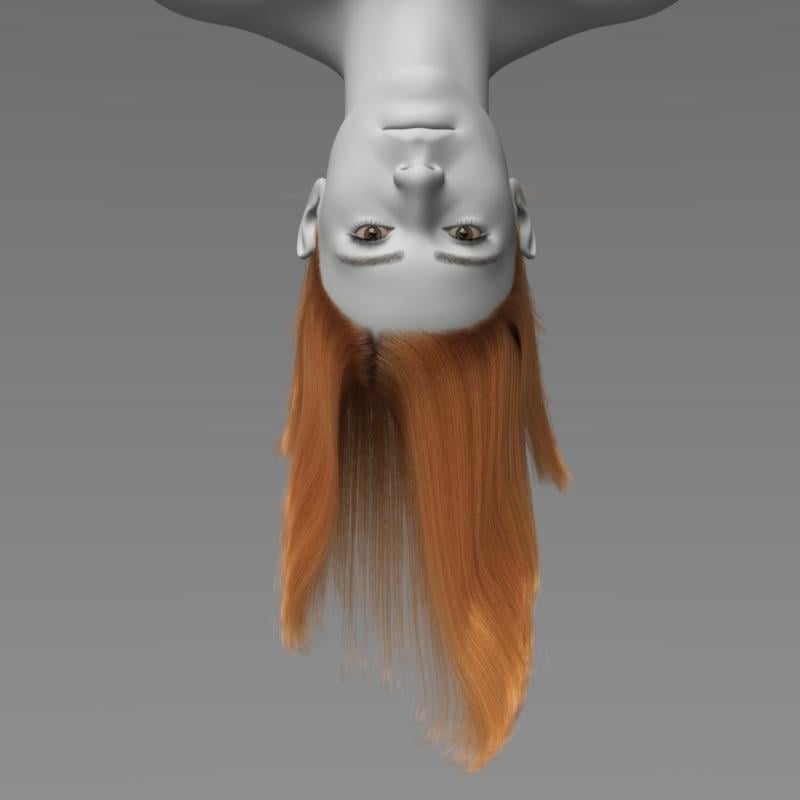
Here is Linet Hair after simulating with G9 upside down - not much movement toward the ground. Even setting gravity to 2 instead of 1 did not make much difference.
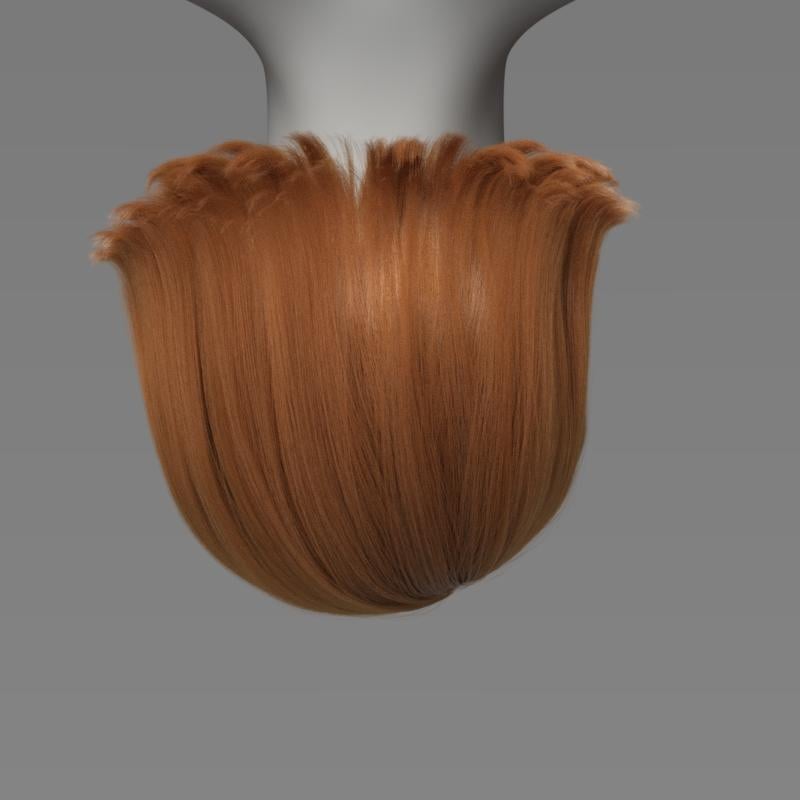
However, it is possible to change dForce parameters in the Surfaces pane to get more movement out of this hair. Lowering the Local Constraint strength is one parameter to experiment with. Changes to the Simulation Settings can also make a difference (gravity, subframe parameters, etc.) It takes experimentation. I tried lots of combinations.
Here is Linet Hair with changes to surface and simulation settings.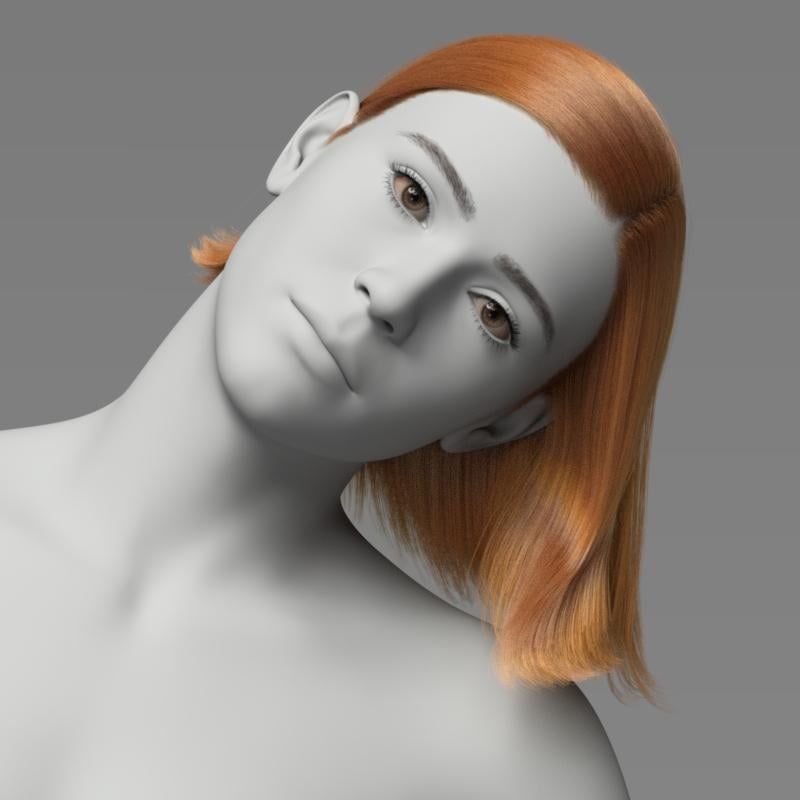
 StickyChain - pose tool [Released]
jmucchiello said:
it remained relative to the figure wherever the figure was moved or rotated.
To position the chain, the plugin gets the global position of the StickyChain, which should be parent position + StickyChain's local translation(i.e. 0,0,0).
A test would be to select the Hand node in the Scene pane and see where it is in the Viewport pane. Then select the StickyChain node and see where it is in the Viewport pane. If the StickyChain's local translation is 0,0,0 then they should be the same position.
When ON the StickyChain should try to move the EndChain node to the same position as the StickyChain node, which if with 0,0,0 translation should be the hand node's position.
INFO NOTE: the StickyChain gets the Hand node's position not the mesh's position. The mesh attached to the Hand node can use a morph to put the mesh at a distance from its node position however, it is rare for that to be the significant distance as in your attachment. A morph could also be used to put the mesh of the chain nodes at a distance from their node positions however, again unlikely in your attachment.Diffeomorphic to Cascadeur?Hi, is there any Diffeomorphic to Cascadeur workflow?
From Daz to Blender:
Using Genesis 9 imported into Blender via the Diffeomorphic plugin (Blender 4.2).From Blender to Cascadeur:
Exported the Daz rig into Cascadeur. (I also tried Convert to Rigify option in Diffeomorphic)
In Cascadeur, I ran "Generate Rig" after import.Export from Cascadeur:
I exported the whole scene in FBX (as suggested by the official tutorial).Problem:
After bringing the data back into Blender, the rig scale is completely wrong compared to the mesh.
(Mesh dimension is correct, but Rig dimension becomes tiny.)
And also, when I transfer the action(motion) in the rig from Cascadeur's to Blender's rig, most of the motion has gone.Has anyone experienced this?
Any advice on how to correctly export/import between Diffeomorphic and Cascadeur?Thanks a lot!
Morphs, textures, oh my. Variety neededkyoto kid said:
...I live by morph and skin resource sets. As I've mentioned before I have an extensive library of them going back to G2. Two of the assets I use are Generation X2 and Zev0s XTransfer. Using both in sequence I can actually transfer G2 morphs and morph resources to G8. which further expands the resources I have available.
The same goes for hair as I have all of Slosh's UHT kits as well as a couple others which saves me a bundle on separate hair colour/texture add on content.
I also use Zev0's Skin Builder8 along with the Ultimate Iray Skin Manger by V3Digitimes to develop more variation in skin appearance (for example, someone who is very fair skinned with freckles or a realistic albino skin).
This is partially why I have not fully adopted G9 (save for unique characters by artists like RawArt that are pre-sculpted).as there are no conversion resources like this (likely due to the androgynous figure base) only ones for the existing base characters.
I've fallen into quite a few G9 characters now, lots of them go for a decent price, low. Overall I even preferred V4 more than 9...probably more for its uniqeness at the time, but I had way more fun then. G8 I actually like a lot more than 9. G8.1 just threw another block into the overall flow, at least for me. So yeah, G8 , and I have a lot more resources for that generation for sure.
Morphs, textures, oh my. Variety needed...I live by morph and skin resource sets. As I've mentioned before I have an extensive library of them going back to G2. Two of the assets I use are Generation X2 and Zev0s XTransfer. Using both in sequence I can actually transfer G2 morphs and morph resources to G8. which further expands the resources I have available.
The same goes for hair as I have all of Slosh's UHT kits as well as a couple others which saves me a bundle on separate hair colour/texture add on content.
I also use Zev0's Skin Builder8 along with the Ultimate Iray Skin Manger by V3Digitimes to develop more variation in skin appearance (for example, someone who is very fair skinned with freckles or a realistic albino skin).
This is partially why I have not fully adopted G9 (save for unique characters by artists like RawArt that are pre-sculpted).as there are no conversion resources like this (likely due to the androgynous figure base) only ones for the existing base characters.
Morphs, textures, oh my. Variety neededWell I've thought the last bunch of characters, from DAZ 3D at least, have been very average in body type, meaning they look skinny, but not muscular, to modern day averages in the USA at least, and average looks, which actually means they are attractive.
Male-M3dia | Daz 3D though has done several sets of sculpted morph characters and they are quite good too. They are more of the sculpted, physical types though, like if you were casting the sport stars of your college or high school play, well except the sets he did of kids and teens, who just look slightly chubby and average, on average. You will have to mix and match texture sets, or use Colm Jackson's Skin Detailer For Genesis 9 Merchant Resource | Daz 3D, or make of your own of shaders adjustments, or a mix of all three to make textures for his morphs though.
Fill by Bone 4.23If you have polygon groups set up to match bones (whether by hand if it's a standalone figure or automatically created during the transfer utility's run, for conformers) you can select geometry by those face groups and then Weight Editing-> assign weight to selected, with the relevant bone/weight map selected, if that helps.
Hair in MSO Nelly Main Promo?I thought so too but couldn't find any hair that draped over like the bangs in that image. What makes it hard is it could be a morph within the pack, so wouldn't show up on the main promo.
AIUTO...CHI CONOSCE L’ITALIANO? PARTE QUATTORDICIFai così: contatta il creatore del modello e "assumilo" per crearti il morph/rig che ti serve, su RHub si può fare. Diversamente puoi sempre contattarlo per chiedergli di darti una licenza custom, che magari ci scappa pure gratis. E per estremo puoi anche contattarlo per chiedergli espressamente il permesso di inviare il file ad un collaboratore esterno per le modifiche, magari accetta senza fiatare.
Can't get dforce to workcrosswind said:
nimonsi said:
I just put the dress over the seat and simulate it, it's just fall through seat like there was nothing (i added static dForce to Shinkansen Seating_225640)
Firstly, you need to select Shinkansen Seating_225640, in Parameters pane, make sure Visibile in Simulation is turned On. (ss1)
Secondly, with a dForce modifier + Weight node on the seats, and a Timeline simulation, Gravity = 0, you'll get a natural collision as well as the sunken seat when the figure sits down. (ss 2 ~ 3)
You also can go for two times' simuation, firstly for the seat, with Gravity = 0, then keep the deformed shape on the seat (Freeze Simulation or export / import as a morph). Then simulate again with Gravity = 1, to have more draping on the clothing.
Oh my god!!! Visible in Simulation ON is helped!!!
I knew it was something very easy
THANK YOU SO MUCH!!!

What the site is it i can't give a like or heart to someone who helped me or tried to help ?
 V3Digitimes Daz Studio 2025 (6) compatibility StatusThanks. Well i must admit that so far i was surprised by how well Daz Dev team had managed to transfer a maximum of elements to maximise compatibility. This is far from perfect but i anticipated something much more complicate... well maybe some updates will make me tell the opposite but for now, nothing was impossible to solve, even if sometimes it was difficult.
Daz 3D is part of

Connect
DAZ Productions, Inc.
7533 S Center View Ct #4664
West Jordan, UT 84084Licensing Agreement | Terms of Service | Privacy Policy | EULA
© 2026 Daz Productions Inc. All Rights Reserved.