Simple Bone/Model Question
 StevieD
Posts: 103
StevieD
Posts: 103
Ok - I'm not a modeler. I don't really want to be. I get the concepts but I have some mental blocks. I had been looking all over for a Rigged Keyboard - couldn't find one on DAZ. I looked other places couldn't find. To make a long story short the only ones that I could find that actually came into DS was not rigged but at least the keys were seperated individually. Great! I moved all the pivot points so that with X Rotate each key could be played. Great!! Not really rigged but it would work, except.
I was going to use Puppeteer to program in various chords and playing positions but the keyboard in itself seems to not be a figure. So Puppeteer wouldn't allow you to program more than one key at a time. I look at the Scene Pane (shown below) Everything seems to be just listed below the 88 Keyboard parent and I think are technically children but DS doesn't treat it like one figure, just 88 seperate objects under the 88 Keyboard Parent.
The question is How can I make this one complete figure so that Puppeteer will see it as such to program in key movement all together as a morph or puppett setting?? So that I can use puppeteer to form chords. Does this make sence? I hope I don't have to put in 88 bones, one on each key because it will move just as I need it to without the bones.
Also PS... nothing to do with the above. I've never seen this explained ANY Where. The columns on the Scene Pane are "V | S | Node". Under the "S" column there is an "Up Arrow" with either a "check" mark or "X" mark. What does this mean and what is the difference between the "check"mark or the "X" mark. I could never figure this out.
Thank You
Steve
Daz 3D is part of 
Connect
DAZ Productions, Inc.
7533 S Center View Ct #4664
West Jordan, UT 84084
Licensing Agreement | Terms of Service | Privacy Policy | EULA
© 2026 Daz Productions Inc. All Rights Reserved.
Comments
You need the model as a single OBJ with groups - exporting from DS with the use Node Names option for groups may work. Then in the Figure setup pane right-click in the Geometry List area on the left and Add Geometry... to import your OBJ (using the same preset as you used on export), drag onto the Geometry entry in the Relationships area on the left, and drag the key boness onto the main body. You probably want to set the Order, by right-click, to ZYX (Z is along the keys, which would be twist if you enabled it, and X is the main rotation you want though the precise order for relatively minor movement like this doesn't matter so much). Click Create to create the new figure, make sure it is the right size and orientation (it should be with the presets matching). You can use the Joint Editor to place the end points of the boens as you did with the sepearate OBJs, then for soemthing like this switch to the Node Weight Map Brush tool, right-click, and Weight Editing>Fill Bone Selection Groups. That should pretty much do the job.
Interesting idea to use Puppeteer - I would like to help you as I can with that project.
And no you don't have to rig all 88 keys one by one that would be a stupid penal labor and a punishment for not knowing it better .
.
Also something similar had allready been created by mCasual:
BTW I'm pretty shure it would be great to write a script to read in MIDI files like music sheets to control the pianokeys that gets pressed like a Pianola / Player Piano (Wiki Link).
[Edit]: OK now I found this mcjMidiKit you can link a DazStudio property (like the piano key rotation) to a MIDI channel and trigger it by that. An Example Youtube Video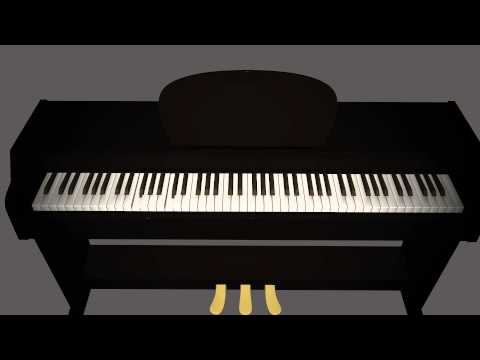
[PS] click the video and enjoy the music while continue to read this post.
mCasual's official thread for mcjMidiKit: First mcjMidiLoad Beta Available - Midi File loader script for Daz Studio
Otherwise
Your question may be simple but the process of achieving this isnt that simple but I try to keep the instructions as simple as possible I will start with the C1 piano key but I see you can also start with A0 - this is up to you.
There are some automations that can help you with that - I think of the Joint Editor Tool action Adjust Rigging To Shape and the Node Weight Map Brush Tool action Fill By Bone Selection Group(s) but first you have to create some bones and Face Groups with matching names and assign the Bones to a Selection Group to use this Adjust Rigging To Shape that will automaticly snap the bones to the Face Groups / Geometry position and Fill By Bone Selection Group(s) to autmaticly let DazStudio paint the Weight Maps for you.
To pose the figures hands / fingers and play chords with it in Puppeteer is also something that I dont have any practice with - Im more a Guitar / Bass player myself.
My approach would be to think of it like in an object orientated programming project. First create a prototype of the major white key then crate a prototype of the minor black key. After that create a section of one octave with the white major piano keys C'1 / D'1 / E'1 / F'1 / G'1 / A'1 / B'1 and the minor black keys c#1 d#1 f#1 g#1 a#1 all together 12 piano keys. Then use instances to repeat that one octave section as often as you like.
Wiki Link: Musical keyboard
Other link explaning the 88 keys, containing 7 1/3 octaves
Create a single static Prop
But I see you allready have a good starting point in your scene - so as I sayed I would fist delete all other keys and create a rigged figure with the one octave of 12 piano keys. Later you can use instances - bake that instances groups and rename the piano keys / bones to make them unique.
Once you have deleted all other props (keys) and you only left with one octave 12 piano keys in your scene use File>Export choose Wavefront Object OBJ - select Preset DazStudio.
Then use File>Import choose Wavefront Object OBJ - select Preset DazStudio.
Now you get a single prop of one octave of 12 black and white piano keys.
Create the Face Group(s)
Next switch to the Geometry Editor Tool and have a look at the Face Groups (open the Tool Settings pane for that). The goal here is to name the Face Groups like the piano keys for every single key. If your left with just one face group after the import process - dont worry we can splitt them up quiet easily. First use the mouse right-click at the viewport and make shure the Geometry Editor is set to Selection Type: Polygon Selection and Selection Mode: Drag Selection. Then select some polygon(s) of the the leftmost C'1 key and use the action Select Connected use the magic shortcut Ctrl+* or the right-click menu Geometry Selection to do this.
Now the whole C1 piano key should be selected / highlighted - if not we have a problem in the geometry topology with unwelded / unconnected faces / polygons - I would fix that with a geometry editor first - also checking for and deleting loose geometry (unconnected vertices) is allways a good advice to prevent some unpeasant surprises later.
Then right-click Geometry Assignment>Create Face Group From Selected - name it like the piano key C1. So much for the first Face Group before you go any further and start the tedious creation of all the other 11 Face Groups I would create a C1 Bone and test if you have mastered your first rigging approach.
Convert Prop To Figure
Untill now the object in the scene is just a static prop but now its time to change that - therefor select the prop and go to Edit>Object>Rigging>Convert Prop To Figure. You can choose between different Rigging Types but I would suggest you to choose TriAx Weight Mapping because this is the native rigging method in DazStudio and it will ensure that you can: 1st later save yourself a figure asset of this to your library and - 2nd make shure it will work with Puppeteer. You get a hip bone as a starting point and your object name gets a "Figure_" pefix but you can rename both as you like. The initial hip bone should be placed like the center rotation / pivot point of the whole instrument - keep in mind to place it at the bottom of the instruments body / housing in the Joint Editor because then later you can use the action Move(drop) to Floor Ctrl+D to place it on the foor or to a specific height in your scene.
Create the Bone(s)
Now switch to the Joint Editor Tool select the single (hip) bone you have and create your first bone with right-click @ viewport and choose Create>Create Child Bone. In the following dialogue you have to enter a Bone Name and a Bone Lable. If you want to make this figure compatible to Poser you have to make shure the Bone Name is written in lowercase letters and dont contain spaces. Name the first bone name/lable c1 / C1. You dont have to care about the rotation order by now this is something that you can test and switch later. Also ignore the placement of the bone - as you remember we want to tell DazStudio to place our bones automaticly later.
Link the Bone to the FaceGroup (define a Selection Group)
Switch to the Joint Editor Tool - select the C1 bone in scene pane - go to Tool Settings click the Selection Group dropdown and assign the C1 bone to the C1 FaceGroup. This should make shure that whenever you hover the mouse over the Bodypart / Pianokey with the Universal Tool (and others) it should be highlighted and selectable. Next right-click the Viewport and choose Edit>Adjust Rigging To Shape you will get a dialogue showing you some options - but because your figure is that simple you dont have to change anything just hit accept. And ta-da now the bone C1 should be snaped to the position of the C1 FaceGroup.
Create the Weight Map
Now its time to do the Weight Map to define how much the geomerty polygones should be moved / rotated by the bone. In our case this is also easy because the single piano key should be fully controlled by the bone and we dont want to have any bending deforming piano key. Also with defining the Selection Group we told DazStudio which bone belongs to which Face Group. Now you can simply switch to the Node Weight Map Brush Tool - right-click the Viewport and select Weight Editing>Fill By Bone Selection Group(s). You should see that the piano key is now fully red filled - that means the bone will have full control / influence of the geometry movement - rotations and scaling.
Or at least it should have - to check this go to the Tool Settings pane with the active Tool Node Weight Map Brush and have a look at the Weight Maps: X / Y / Z Rotations and the Scale Weights. If something isnt filled up bright red by now you can select the map that is filled up with red - right-click and select Copy Selected - change to the others and right-click Paste Selected.
Another method would be swich to Geometry Editor make a polygon selection come back to the Node Weight Map Brush (the polygon selection will still be active) and right-click the Viewport and choose Weight Editing>Fill Selected 100%. All selected Polygons should now be flood filled in red. The default Weight Map Display is defined with the red color for full influence and the blue color for the lowest influence or no color for no influence - sounds logical right?
Setup the Rotation Order - test the bone and define rotation limits
Finaly you can test the rig (the C1 piano key) you have created with the transformation Properties in the Parameters pane. Until now we have ignored the Rotation Order but you can test and define it just choose some setting: XYZ / XZY /... in the Tool Settings - Active Tool: Joint Editor - then dial the X / Y / Z Rotation transformation Properties in the Parameters pane and define which Rotation you want to manipulate to have the piano key pressed. Once you have choosen the Rotation Property open the Parameter Settings dialogue of this Property (the little gear symbol on the slider dial) and define a range of movement so the key cant spin in any degee of freedom anymore. You can also switch the Parameters pane to Edit Mode (right-click) Shift / Ctrl select all other transformation Properties then right-click and choose Lock>Lock Selected Properties now the piano key is only allowed to rotate in a limited range of degee in one axis and not allowed to get moved (transformed in any direction) anymore - just like a real piano key.
Conclusion
OK enought for this post - I hope you get an idea of how to rig things in DazStudio by now - you can repeat these steps for all other remaning keys of one octave or adapt these methods descriped for other things. The Instances function that I mentioned earlier can be found here: Edit>Figure>Instances but honestly I never used Bake Instances before. But after that you may just have to rename the Bones (dont forget there is a name & lable) - the FaceGroups ect.
I hope I could give you some ideas how to archive this - maybe other forum members are kind enougth to jump in and give other suggestions - or correct me if I descriped something wrong.
Geetings
Syrus
Oh I forget to mention the X after the mousecursor symbol in the scene pane is for to make that node unselectable in the Viewport. Can be handy if you have many props in the scene and you dont want to select / manipulate them with the Unsiversal Tool. These settings can also be found in the Parameters pane - Property Group: Display>Scene View. Good to have them there especally if you make multible selections Shift / Ctrl + Select and like to mass editing Properties.
Look what I have found here:
[LINKS] Musical Instruments and Music-Related Items - Free Resources
Still I cant find any Hand Poses for Daz Figures playing Piano Chords.
Gad! What a wealth of infomation!!! This is going to take a few hours/days for me to go through this. THANK YOU.
I believe I saw that guy's youtube video before but My only thought is where did he get that keyboard? I hadn't seen that downloadable keyboard. Because up till now I'd have never seen (at least not in DAZ or renderosity) a keyboard which was rigged. I got mine from TurboSquid but I had a lot of failures (converting them for Daz) before I found one that was at least split up into Single object Keys (not reaally rigged). That's where I came in with the above post. All the other wealth of info is cool and I have to sort through it. I'll let you know how I do.
Thanks Again
Steve
Yea! I did it. However I can't tell you exactly how I did it because I had to try 20 or 30 different things. I didn't do the 1 octive split up because I had it all there with key names, etc right how I wanted and basically the movement worked. It was just not one complete "Figure". So Puppeteer saw all the objects(the keys) as seperate figures. So I took the 88 key keyboard objects under ONE group and I exported them together to OBJ. Then did the Figure Set up "Add Geomitry" to set up bones (which it did automatically perfectly all together after I slowley picked the right settings). I had to experiment with the different settings over and over until it began to work as I wanted. Meaning making one change at a time and seeing what it did. I was encouraged because it looked like it was going to work the first time I tried because the keys remained seperate and they showed up in puppeteer under the single group all working and I could make different combinations of keys. The movement wasn't right at all at first but it was clear that the settings weren't exactly right. It took a long time but again I saw that it was going to work so I just kept trying. Slowley the correct movement appeared. I was luckly that I only needed bend up and down. (Key OnOff). So I only needed one field to work. I locked the other two fields off.
I can say that I used Parametric(Legacy) mode in Figure Setup. I don't remember why, It just seem to work right. I also had to play with the XYZ settings on the Export as Wavefront Obj step and of course get the size right. I exported the group containing all the keys, which I put in order and named exactly how I wanted first. Actually the hardest part to get right was the Export. The Figure setup wasn't too hard to do. I did have to re-texture it but that was easy - Black and white solids.
Thanks to everybody and thanks for all the links. I down loaded 6 guitars, some amps, the synths and some other cool models. That guys models work better than alot of models that I paid money for and they look great. The Scripts probably don't work. They're PC. I'm Mac. I sent the guy $25 or so. Good Site. I'm still going through the music links some cool stuff there as well.
Thanks, Again
Steve
I'm glad to hear you making progress.
So you took the "Figure setup pane" workflow that Richard suggested. The Parametric weight map mode is a bit ancient and limited because it dosnt support gradients in weigtmaps - but maybe is the best for simple mechanical objects. The big difference of using the Figure Setup pane and the method I descriped is that you can setup IK chains in Figure Setup - as far as I know you cant do that with the method I've desciped.
Yeah as I started with modeling / morph creation for DazStudio I had the same issues figuring out the right Import/Export settings - but as I sayed I just choose "Preset DazStudio" all the time and now I dont have to care about the size or orientation of the OBJ geometry anymore.
I spread the word for mCasuals google site here in the forum and the scripts are a must have for easy animations in DS. I once did a donation aswell he does a great job.
Did you know about the Mac "Boot Camp" method to install the Windows operating system beside the macOS (Mac with Intel-CPU needed + 55 GB spare space needed on the boot drive)?
Keep up the good work and I hope you get your music video project done somehow.
Greetings
Syrus