Features of procedural texturing of plant models in Bryce.
 Slepalex
Posts: 911
Slepalex
Posts: 911
Features of procedural texturing of plant models in Bryce.
How I do it.
This thread is primarily an answer to the question mermaid010, as well as for those who are interested in this topic.
Mermaid, it's very simple, when you do a thousand trials and mistakes. You need to know the features of modeling and (more importantly!) the features of procedural texturing in Bryce. For this, you need to know and feel the Materials Laboratory and DTE well. I recommend watching the lessons of David Brinnen.
Step 1. Create a model and export it as OBJ.
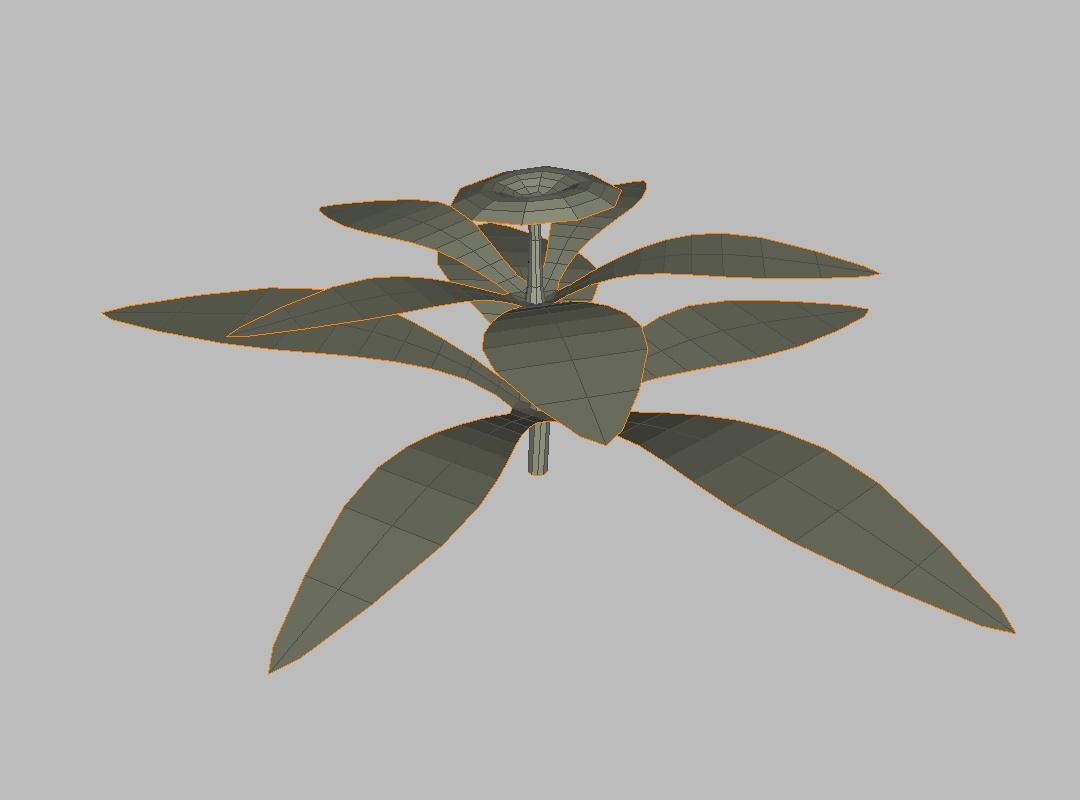
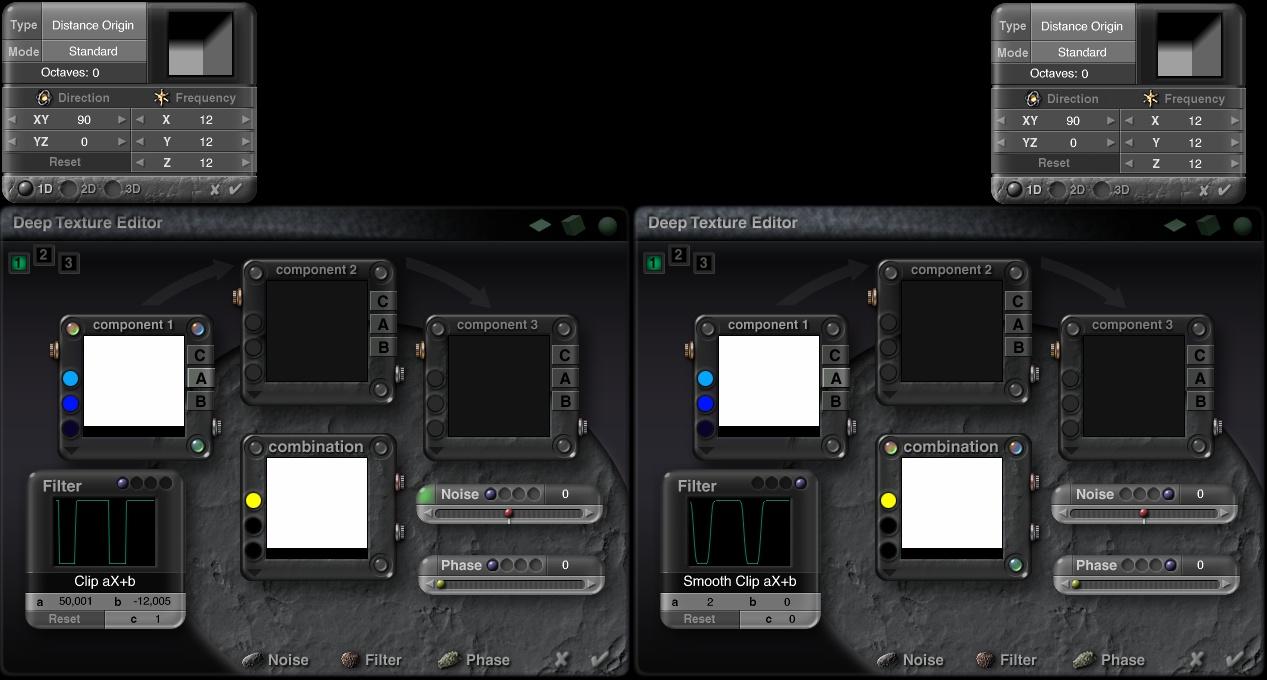
Step 2. Import the model in Bryce and create a complex ABC texture. The peculiarity of this texture is that we load a procedural alpha mask into the "C" texture source, which will adjust the texture (and color) ratio in the sources "A" and "B" in height.
I will not go into details here, as I created a similar texture. Just if someone is interested, ask me right here. I will say only one thing. For our purpose, we need a sharp boundary between black and white in the alpha channel. There are two possibilities for this: a) do this in DTE, b) do this in Edit Texture. It is better to do this here and there. The easiest way to make the border color sharper is to increase the % by Y in Edit Texture. To raise / lower the border, pull the Y slider in Edit Texture or enter numeric values ??from the keyboard. These values ??can vary in different limits, for example from -1000 to +1000.
The texture is assigned in the object space.
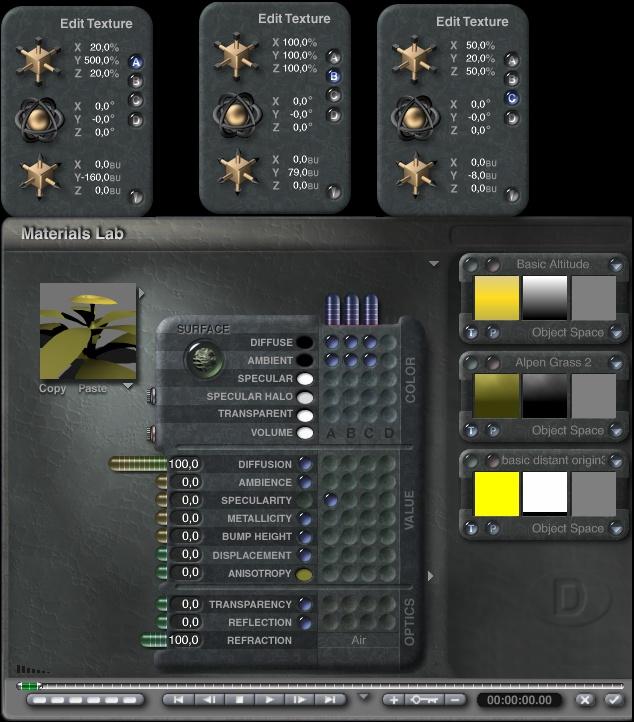
Now you can easily change the color of the leaves and the flower by changing them in the sources A and B of the texture.
To be continued...
Daz 3D is part of 
Connect
DAZ Productions, Inc.
7533 S Center View Ct #4664
West Jordan, UT 84084
Licensing Agreement | Terms of Service | Privacy Policy | EULA
© 2026 Daz Productions Inc. All Rights Reserved.
Comments
Very nice trick, Alex!
Cheers, Slepalex...very useful...
Jay
We complicate the task.
We want to make a flower two-colored. For example, the petals are white, and the core is yellow. To do this, we need a bitmap texture like this:
Since we do not use a close-up, the resolution of 256x256 is enough for this low-poly model. I did not do UV-mapping for this model in order to use procedural textures.
Because the model does not have parametric coordinates for the texture, now we will be projected a raster image in Bryce.
For convenient work, we will select the option "Actual Selection" in the preview window of the texture. By manipulating the Ctrl, Alt, Spacebar individually or together with dragging and dropping the LMB, we position the object in the preview window in the proper way.
Choose the way to project the Object Top and put all the necessary checkmarks as in the picture. As the petals are not in the center of the flower and the scale of our bitmap texture does not match the scale of the entire facility, we will manipulate the scale and offset texture in Edit Texture. After some manipulations, we chose a scale for all axes of 30% and a shift of -25 BU along the X axis.
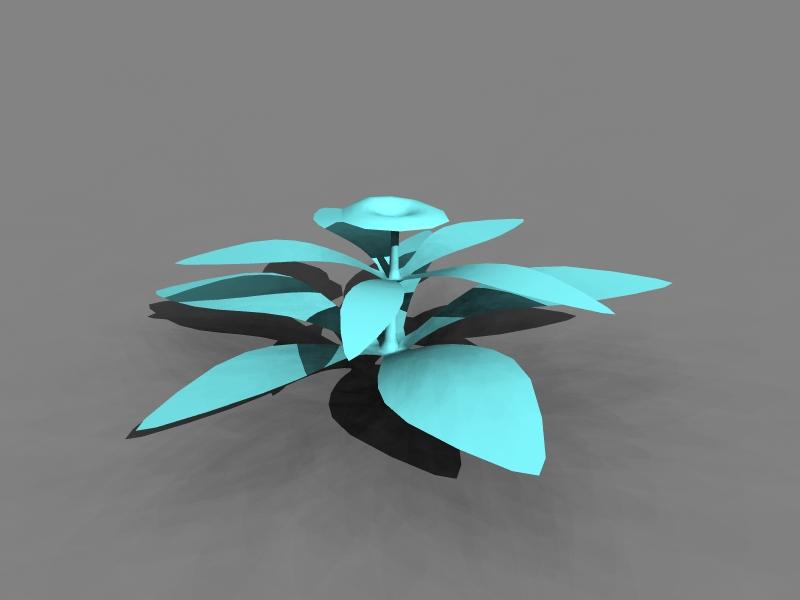
Now we must color the leaves of the flower in green. To do this, load the ABC texture. In source A, we have a bitmap texture, source B loads any texture for the leaves and we load the procedural alpha mask into source C. Now we need to clarify that the color and bump play no role in the source C, but only the black and white alpha channel matters. If the color in the alpha channel is black, then it gives an advantage to the source A, if the color is white, then only the B-texture is skipped. The shades of gray in the alpha channel blend the textures A and B in the appropriate proportions.
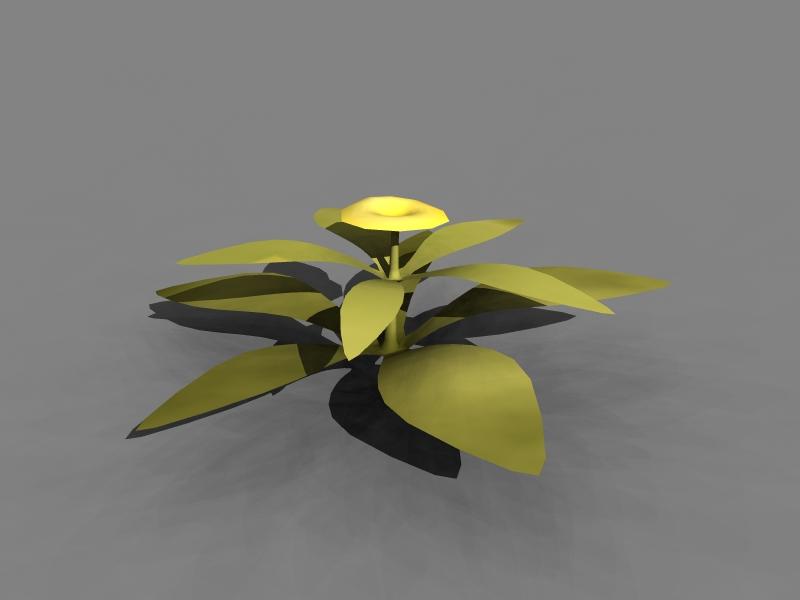
Thus, we have created a procedural texture that can be applied, for example, to a chamomile.
It should be noted here that this method can only be applied to a single object. If we have a group of plants as one object, then it is necessary to use the method from the previous message, that is, by dividing the color in height.
If someone has questions or comments, then please post them right here.
Thanks a Zillion for this thread I really appreciate it.
My attempt on applying the textures, I think I got it right except my models are not so great for this example. I’m hopeless when it comes to modeling except if I find a good tutorial, unfortunately David did not make any flowers in Wings 3D and those available are too fast without vocal explanation.
Thanks Slepalex for taking the time to explain your technique.

Slepalex - thank you for your kindness to share your texturing methods for plants. This is of great help and inspiration.
Mermaid, it is obvious that my method of procedural texturing is completely inappropriate for your group of plants. Your flowers and grass are at different heights, so the method of dividing the textures in height is not acceptable. Therefore, individual flowers that are in the lower zone have a foliage material. My method can be applied only to a single flower, or to a group of flowers that do not differ greatly in height. This method is good for general plans. It saves space in memory and on disk compared to raster textures, but not always applicable to the foreground. These low polygonal plants with procedural textures are well suited for large areas with the help of Instancing Lab.
I remind you that a plant should be a single object, but not a group.
Here are two more examples.
1. There is one flower, it has 1358 polygons. The petals are textured this time exclusively with procedural textures. In the texture source A, I loaded a procedural texture with red and pink hues. I made 1000 copies (clones!) in the Instancing Lab. Total, in the scene 1001 flower. The file size is 1.35 MB.
2. This is an example of group texturing. Here several (namely, 10 pieces) of flowers were created in Wings 3D as one object. The object has 11,980 polygons. Therefore, the texturing method is selected as in the first message. I can not here make the petals a two-color projection from above. Although, provided that if all plants have the same height, then it is possible to separate the color of the petals in height only in DTE. I specially created a group of plants in Wings 3D that differ in size and rotation angle in Y. This looks more natural in terms of realism.
I made 100 copies (clones!) of this object in the Instancing Lab. Total, in the scene of 1010 flowers, but the file size is 831 KB.
Compare both results and draw your conclusions. In both scenes, approximately the same number of identical plants, but in the second case, the savings are obvious. Rashad Carter spoke about this, too. That is, the file size of file in memory and on the disk when using Instancing Lab is affected not so much by the number of polygons as the number of objects in the scene. A great influence on the file size is also the use of raster textures, especially large ones. I try, where possible, to replace raster textures with procedural textures. You can make a comparison of the file size in both cases.
Slepalex - I realised that when I was experimenting with this method that the heights must be the same too, besides being one object. (image attached), but this method is so cool if one wants to use it for special effects, sci-fi or the surreal.
I always wondered how you make so complex, detailed scenes, but your file size is always small. Now we know.
Thanks once again for taking the time to explain your method of texturing and how you use plants in your scenes.
Slepalex: Great examples with the fields of flowers. Really well done and very useful technique.
Mermaid: Now that's creative! Using the idea for other purposes; well done.
Hansmar - thanks
This is an excellent demonstration, SlepAlex! I always love learning how you operate. I can even see you developing this into a set of products for the store. Could sell well I'd think. Great work!