JamesJAB's Art Studio Full of Renders and Incomplete Projects!
 JamesJAB
Posts: 1,766
JamesJAB
Posts: 1,766
Guess since I've been a member since 2003 and now 17 years later renders take a matter of minutes instead of hours.....
This space is open for critiques and suggestions. Tell me what you like and tell me what you don't like, and feel free to make suggestions for render, camera, light, and shader settings.
I've been playing with Daz3D models since before they where Daz3D.... (Millie officially named Victoria from a company called Zygote) Back when Poser was little more that a digital version of those poseable wooden figures artists have on their desk.
But enough giving people hints about my age.
Onward to the renders and work in progress models.
Daz 3D is part of 
Connect
DAZ Productions, Inc.
7533 S Center View Ct #4664
West Jordan, UT 84084
Licensing Agreement | Terms of Service | Privacy Policy | EULA
© 2026 Daz Productions Inc. All Rights Reserved.
Comments
First up here is a little render that I did playing with Iray's ability to calculate light bounce. There is one single light source in this render, the setting sun. The color of the emitted light is pure white, but the temperature is lowered to 1100k to give it that very warm sunset look. The sky was added in post processing along with the bits of the bloom effect that touch the sky. The sun itself is a 300m light emitting sphere set at 1,000,000,000w at 100% efficiency
Resolution : 1920x1080
Total Render Time : 20min
Iray GPU only : Quadro K5000M 4GB
Next up is a current project that I'm working on, the female uniform dress from Star Trek the Original Series. The dress itself is built in Marvelous Designer based on the actual dress pattern. The current production stage is focused on setting up the shaders and texture maps. There is a big picture issue I'm having with it though, Daz Studio has no good way to get it imported as a dynamic cloth item. For now, here are a few renders showing it off.
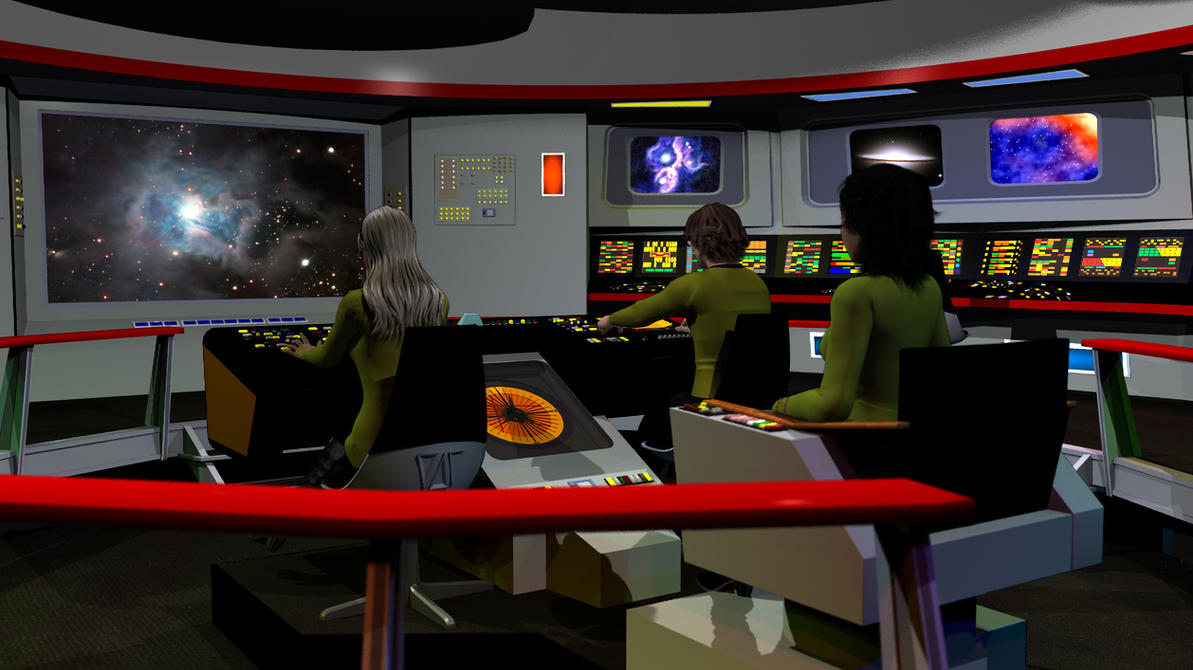
Here we have my big ambitious 3d modeling project. The theatrical version of the USS Enterprise bridge (Star Trek IV version)
This started seven years ago as a project to recreate the Star Trek the Motion Picture Entreprise bridge for use in Poser and Daz Studio.
https://www.sharecg.com/v/87595/view/5/3D-Model/Star-Trek-1-3-Enterprise-Bridge
Here's a link to the original project on sharecg. It was all built in a polygon based modeling program called metasequoia.
As I worked on it, made mistakes, learned from them, made more mistakes, learned from them, and eventualy got frustrated and distracted by other projects.
This was then shelved and sat unreleased for seven years
Fast forward to earlier this year! I was exploring the wonders of Iray and shaders. The concept of emissive surfaces solved one of my biggest issues with Daz Studio and Poser rendering in the past. I dusted off this old set and applied emissive shaders to the light fixtures and redered it.
As a test I went and built a simple light fixture in Hexagon and placed it on the set for a few renders. I experimented with setting reflective serfices inside the housing like there would be in real life. Here was the result. The housing had both a white and a red emisive surface that would be strengthened as needed.
To be continued:
Great stuff @Jamesjab The first one is very realistic and I can almost feel the heat of that sun. As for your Star Trek renders and project, they are wonderful.
Welcome! I'm thinking I may be asking you for advice lol. I'm a huge Star Trek fan so I will be watching with a great deal of interest!
So at this point, I have owned Hexagon for several years (picked it up on a rediculous sale) and need to learn how to use it. I built the Enterprise bridge light fixture at a much higher detail level than the one on my old bridge set.
I was looking at it liking how it turned out and thought, I should try again and build the whole Enterprise bridge, but this time it will be based on the Enterprise A bridge. The version that's shown in the last scene in Star Trek IV. After doing a little work on the wall sections, I decided that while there where parts of my old bridge that I hated, there where also parts that turned out very nice. I imported it into Hexagon, and chopped out all the bad parts (The walls). Here was the first completed wall section that acted as the template for all the others.
They are all built at the 12 o'clock then rotated into place in Daz Studio. Hexagon has an odd issue with setting custom object centers, so I had to devise a workaround for the rotating plan in Studio It is Illustrated in the next image. Every section of the bridge is exported with this rig as part of the object set at world center so that the Y pivot point is correct.
Around the bridge the building continued. The whole bridge is designed around being modular. So parts can be swapped out and rotated to alternate locations. Along with easy pallate swapping as is shown in the next few images. And setting the lighting to red alert is also simply a material setting too.
Here is a Spherical render of the bridge in its current unfinished state. This image is meant to be viewed in a VR app where you can look around in any direction.
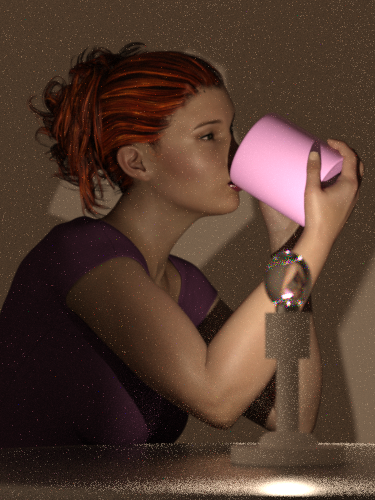
Here are a couple of renders that I did today. The first is a portrait using a single light source.
I placed a torus around the camera lens and parented to the camera, then set it as an emissive object. The effect being a ring light.
The second render I created a strong distant light set to a warm temperature, moved the ring light off to the left of the camera and changed the temperature to a cool setting. Not sure what happened with the shadow on the sleeve, but overall I think it turned out pretty good.
wow you build all that bridge with Hexagon? how many times did that crash... Honestly I am impressed, I took one first jump at hexagon some time ago and as it was not love at first sight and crashed a lot I never bothered to install it again on the new system. I might though, after seeing what you made.
How did you do the texturing if i may ask?
The only things on my Bridge set that have textures are the floor, the consoles, and the screens. Everything else is done with shaders.
Hexagon has a built in UV mapping tool, all of the mapping was done using that. Then the individual .obj files are imported into UVMapper and adjusted if needed, and templates are created from there.
In Hexagon, I minimized the crashing in Windows 10 by going into Hexagon's settings -> 3D Display -> OpenGL optimization and changed it to No optimization.
Here are a few coffee themed renders. All of these are single light source renders.
The first one is a quick little render illustrating what can be built with primatives and shaders. The Lamp, Lightbulb and Table are just primatives positioned together.
Now onto the serious renders.
Same render as above with postprocessing added.
So, from beauty to the beast. I did a little kitbashing with Creech G3F and Bethany 7.
Combined the Face texture with Bethany7, Her face morph is 50% Creech 100% Bethany and played with some morphs to make her nose a little more human.


Another render of my Creech x Bethany kitbash. With this one I took it a bit further and combined their face normal maps.
This time I used the default color, instead of the green tint version.
Love the Creech renders! Really like the coffee one where she is seated at the table as well.
Another single light source portrait render.
'Creech Looking Pretty For The Camera"

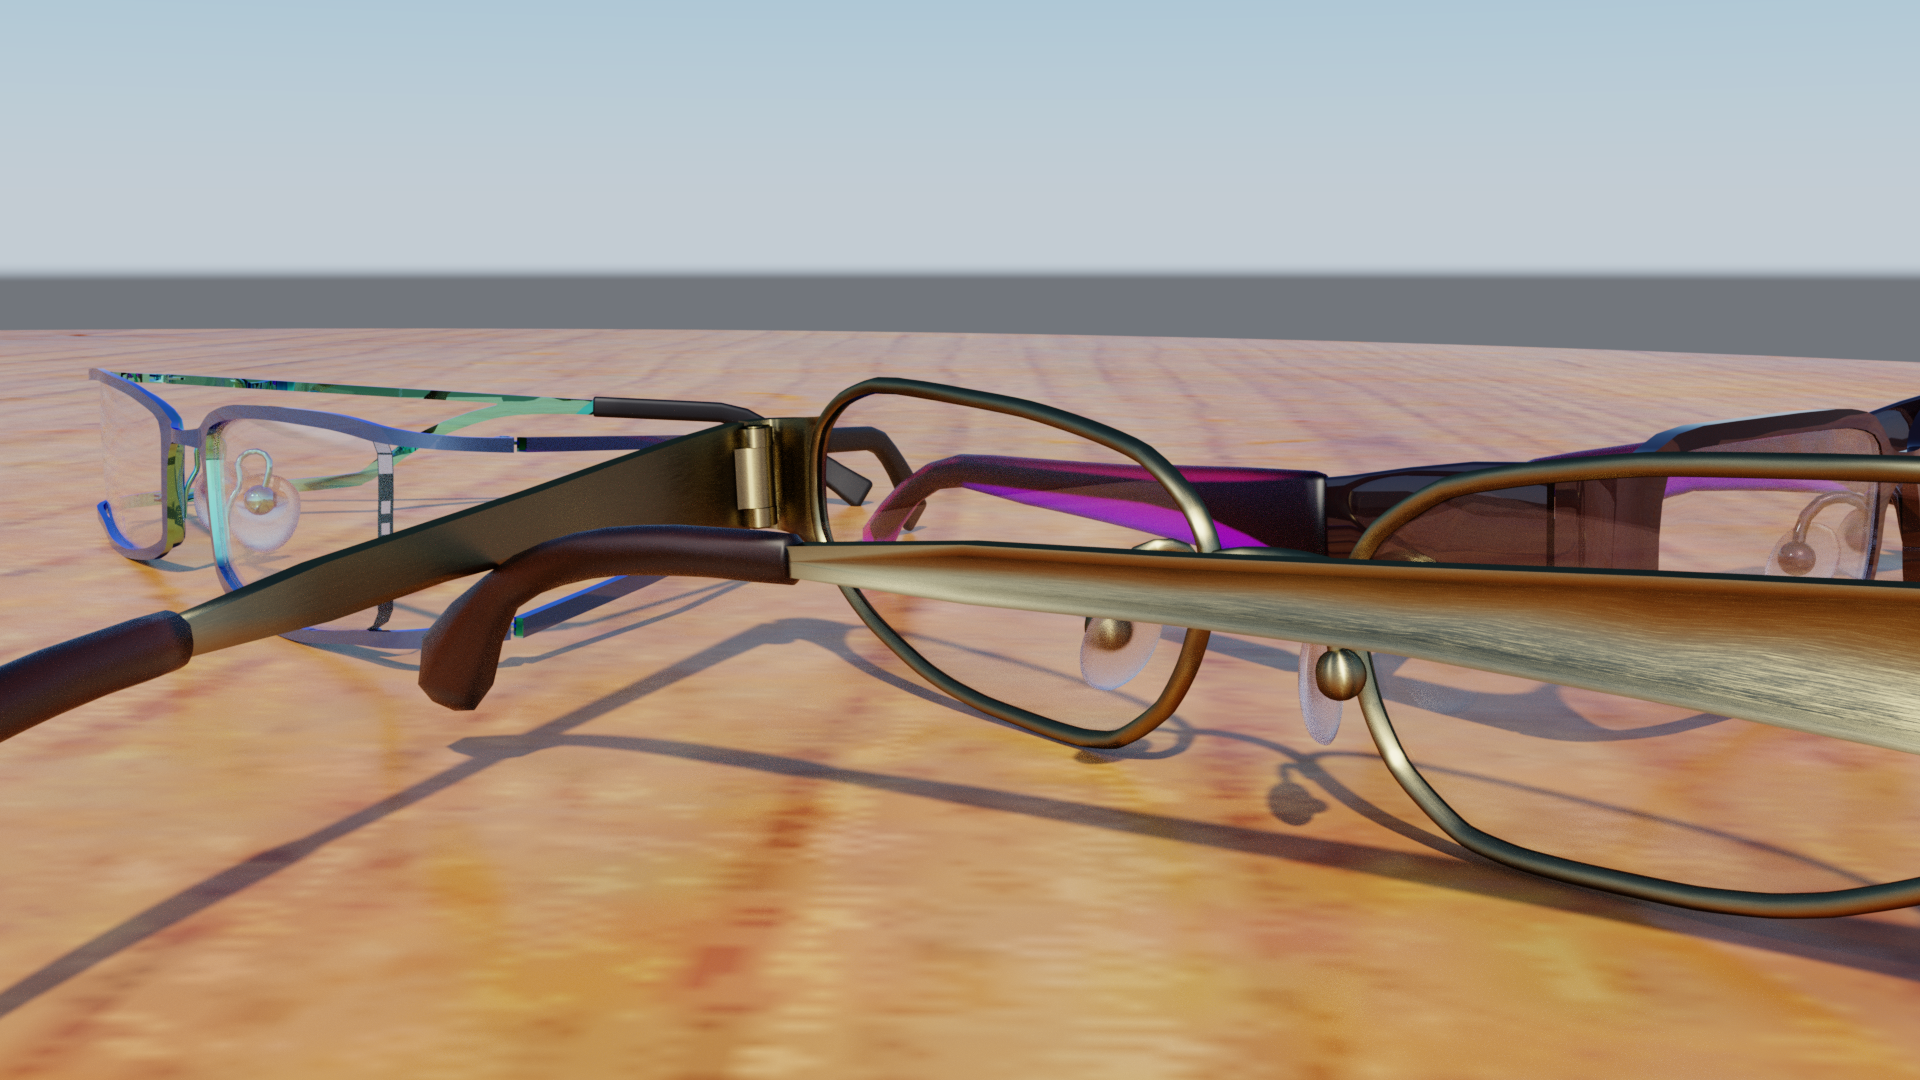
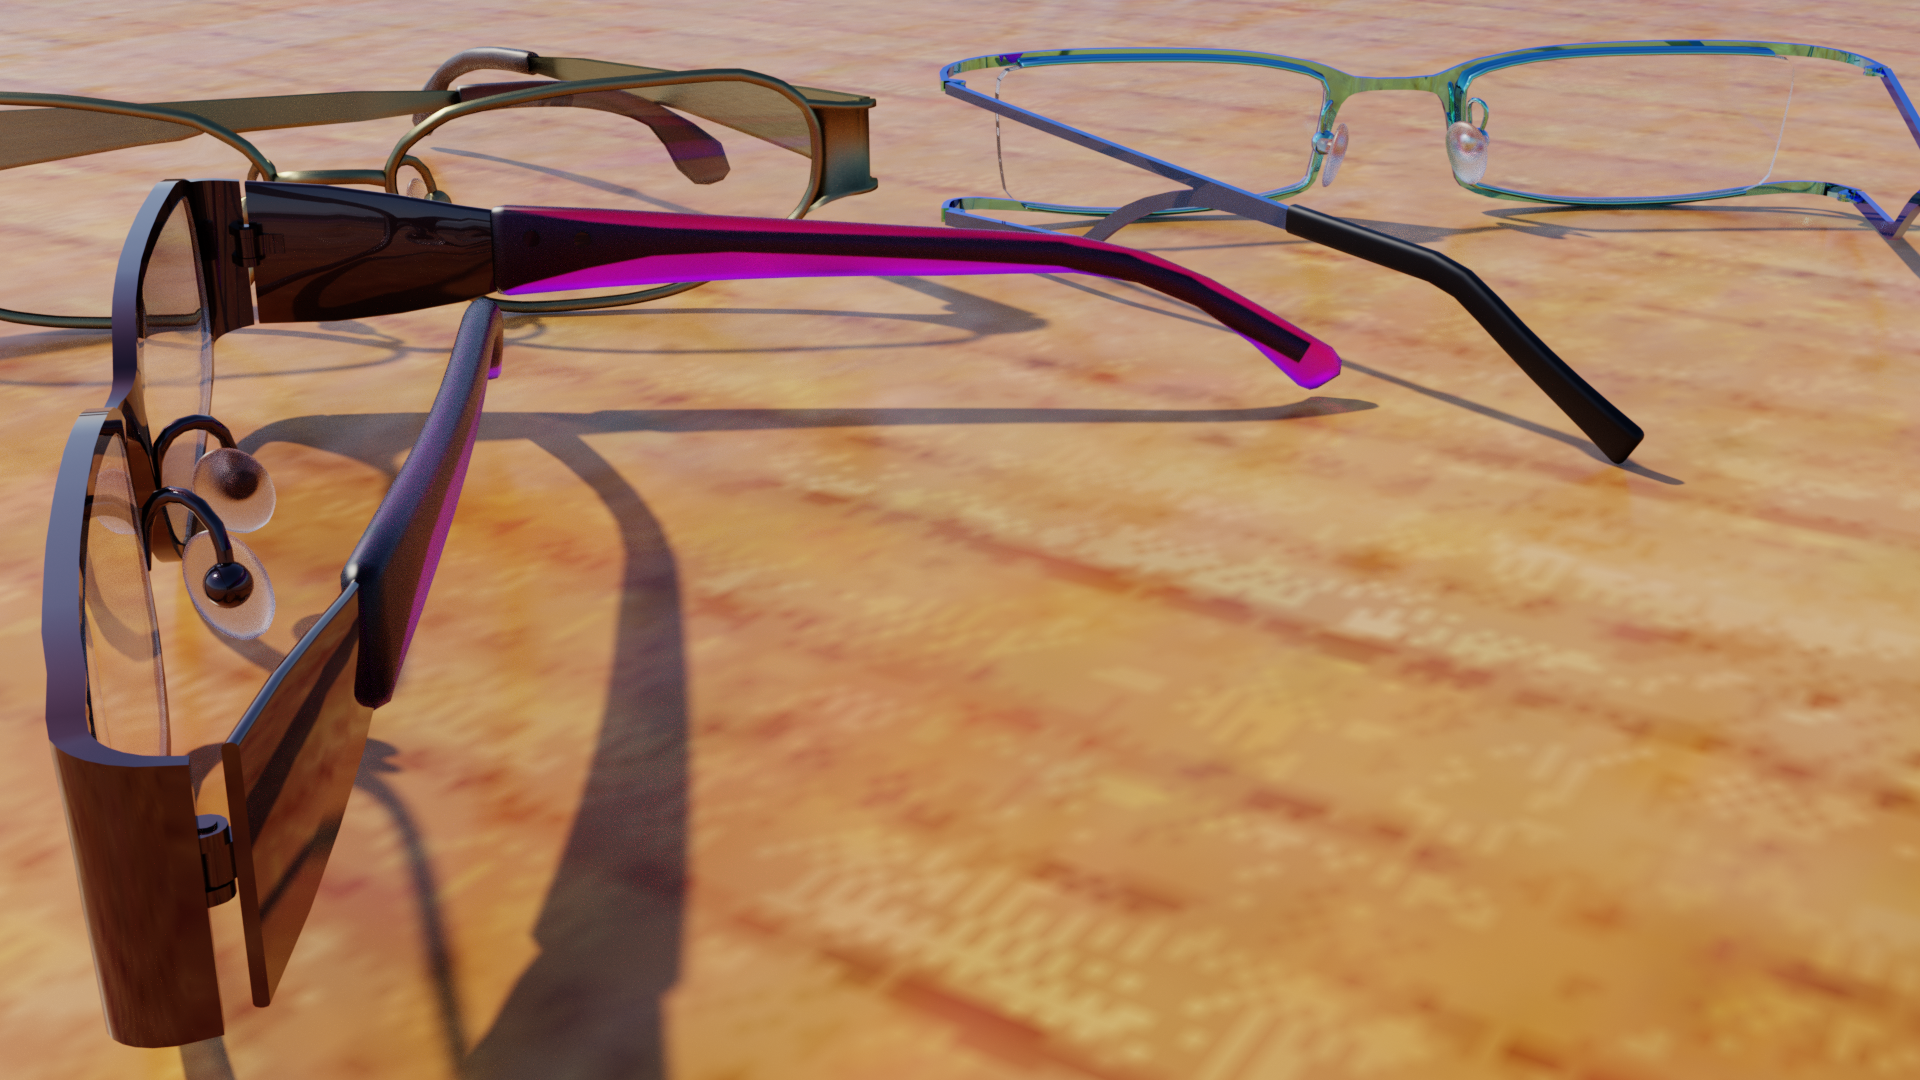
Next up is part of a project that I was working on long long ago. There was a time when the only glasses that you could get for Daz Studio and Poser where either super clunky nerd glasses or overly complex and only usable with the bundled outfit. There where no normal stylish glasses like what you would see at your optometrist office.
I set out to solve that issue by creating several sets of glasses. My first two I put up for free on sharecg.


These renders show off the second pair of glasses in the set with Iray shaders added.
While I'm waiting for something to finish rendering, here is a throwback to 2009.

This was one of my early Daz Studio renders. It's V4 witha bunch of morphs a couple of lights and quite a bit of postwork for the eyes, lips and hair.
Here's another oldie but goodie from 2010.
This one is Ptrope's Star Trek Original Series Enterprise bridge with a 22 light setup that I made.
The characters are V4 and M4, wearing my retextures of Courageous, Valiant, and Queen of Ages.
This is rendered in Daz Studio (pretty sure it was still 3Delight back then)
Another project from 2010. This one was a Star Trek Original Series style interperetation of the Miranda class star ship.
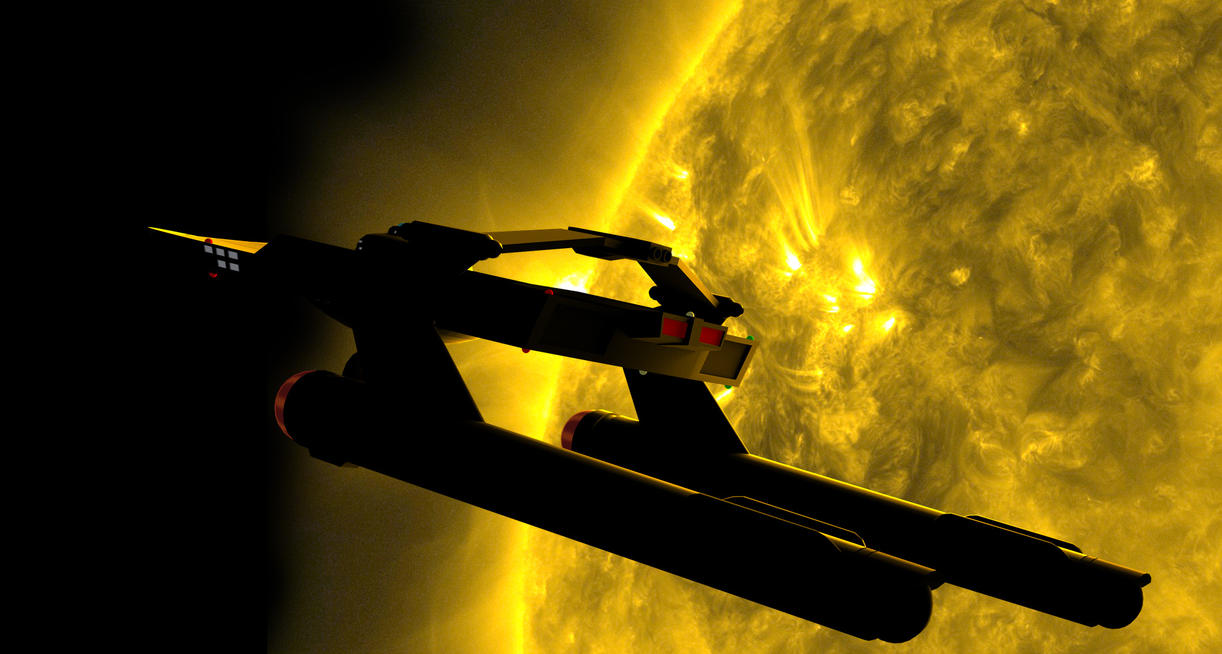
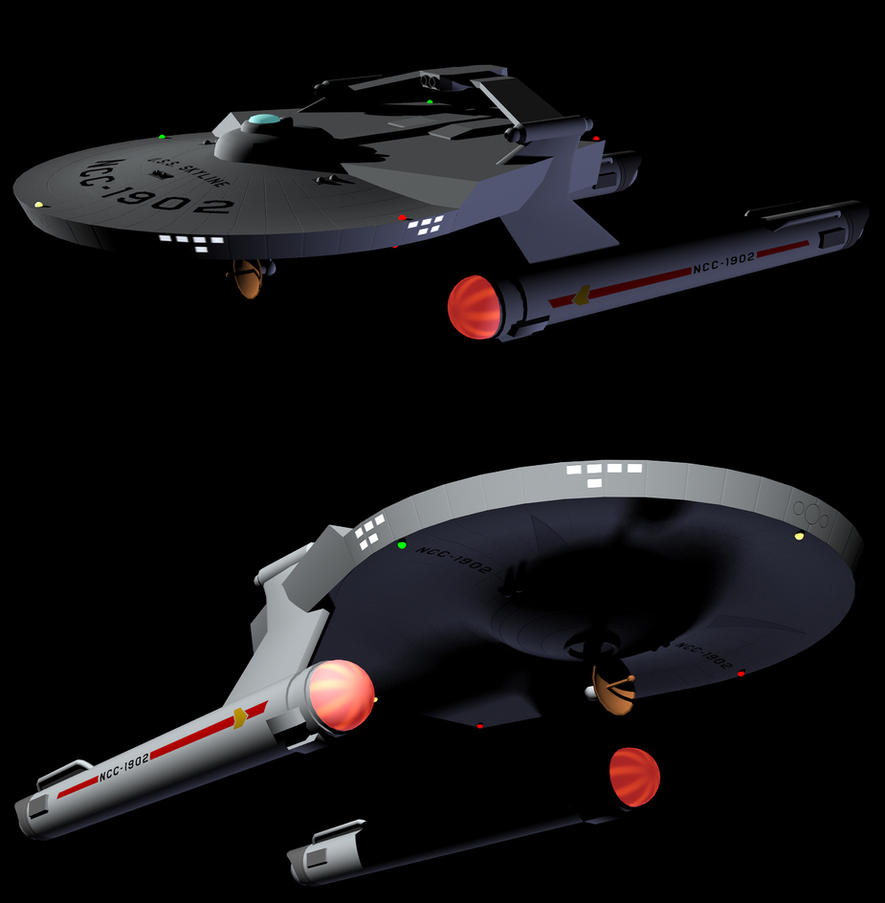
I built this in a polygon based modeling program called Metsequoia. Unforunately, I do not know what happened to the texture maps I made for this model (they may be lost forever or hidden in with some random files on a hard drive somewhere.)
The background is a photo from NASA's Solar Dynamics Observatory, and the render was done in Daz Studio.
And here are a couple of renders showing the details and textures on the model.
And here is the first pair of Daz People glasses that I made.


It is up on sharecg for free.
***I made a third pair of glasses that I put up for sale on renderosity, but it's no longer avaliable there and I am not sure where my original files for it went***
***If anyone purchsed them and still has the files, I would love to get them back again*** (Here's a link to a preview pic that I have up on deviantart)
Its really cool to see renders from peoples archives so to speak. Those glasses look great, I am going to have to grab those (although I may have them already lol). I really like what you've done with the Star Trek stuff, I have been browsing the Star Trek thread off and on for quite some time. And of course, I love your Creech render
Here are a few renders I did while playing with Bethany7, shape shift, and the Aging morph pack for G3F.


I'm quite impressed with the quality of the celulite and stretchmarks morphs when your turn the sub division levels up on G3F.
It very much enhances your ability to create more "average" looking characters.
You have some really nice renders in here. I love your lighting in most of them. Really stellar job! Bethany is one of my favorite characters and you showed her off really well. :)
So, I was going through one of my external HDDs and found it! The glasses that I had up on renderosity are no longer lost.


Here is Bethany modeling them with Iray materials added.
On a side note. I have discoverd a nice way to get Iray renders to "pop" without post-processing. By default Iray has the "Gamma" setting @ 2.20. If you set this to 1.00 and adjust the ISO, F/Stop, and Shutter settings, your images will come out at a much more pleasing contrast between light and dark.
Here are a few examples of what I'm talking about.


The left is the raw render @ 2.20 Gamma - The middle was after post-processing in Photoshop - The right is a raw render @ 1.00 Gamma
Here's a render of Bethany 7 with some extra curves from The Shapeshift morph pack and G3F body morphs.

So here are all three of my pairs of glasses laid out on a table so you can take a look at the level of detail that went in to them. It's all about the little things, like the hinges and nose pads.
Fun with lighting
Here are the important parts of the render settings to get this effect:
- Tone Mapping Settings -
Burn Highlights : 0.30
Crush Blacks : 1.00
Saturation : 1.40
Gamma : 1.00
- Filtering -

Bloom Filter Enable : On
Bloom Filter Radius : 0.012
Bloom Filter Threshold : 20000.0
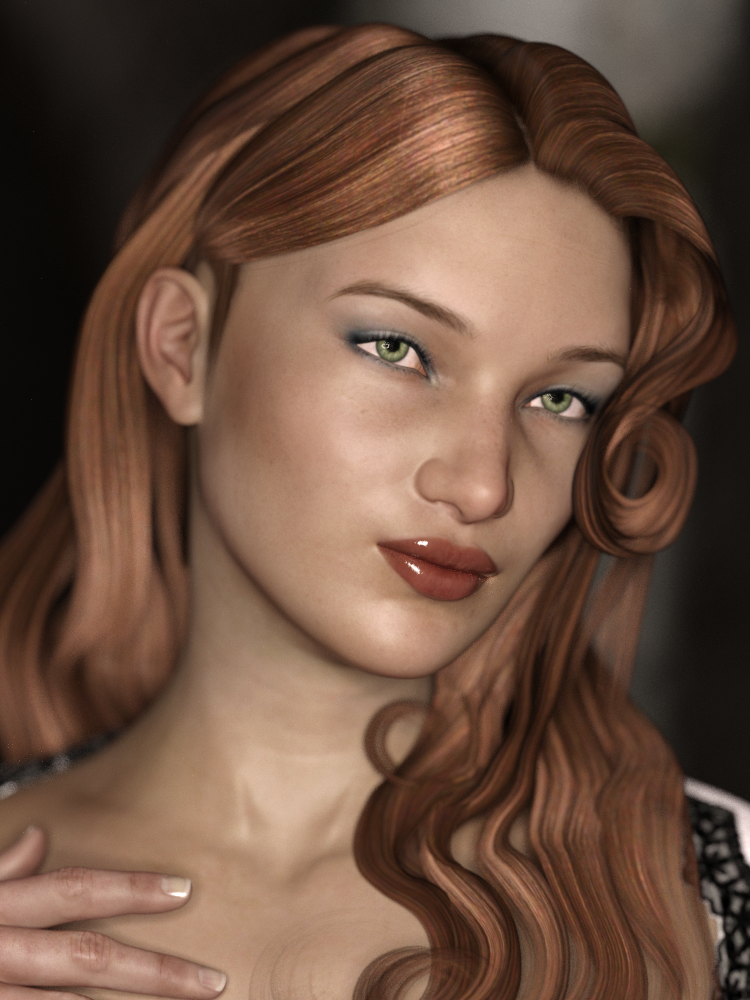
Just picked up Kalea 7 and her HD morphs. She renders up quite nice.
Here are the render settings for both renders
Tone Mapping :
Shutter Speed (1/x) : 600
F/Stop : 1.80
Film ISO : 100
Burn Highlights : 0.15
Crush Blacks : 0.40
Saturation : 1.20
Gamma : 1.00
Filtering :
Bloom Filter Enable : On
Bloom Filter Radius : 0.050
Bloom Filter Threshold : 20000.0
Bloom Filter Brightness Scale : 1.00