Hexagon general problems
 MJW
Posts: 540
MJW
Posts: 540
Yesterday, following the tutorial at 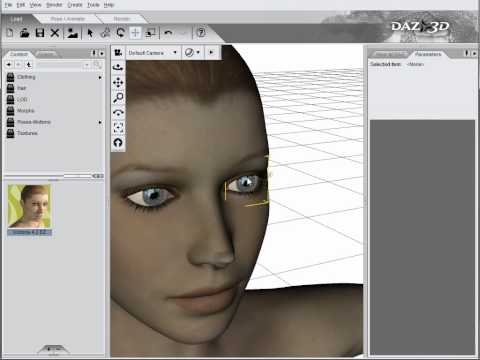 (Daz Studio, Hexagon bridge. Hexagon tutorials (dh)) I had no problem exporting V4.2 to Hexagon, and not many problems tweaking the figure, but when I returned the figure from Hexagon to Daz (4.8, but I don't see why that should matter) the morph was very different.
Then it crashed.
Today, I cannot send V4.2 over to Hexagon at all, let alone revisit the problem.
Can anyone suggest a solution, please?
I was beginning to enjoy playing with Hexagon (although I haven't managed to fathom out the UV side at all) but it is looking like the Hexagon program is seriously flawed. Any ideas on a reasonable (and idiot-friendly) alternative, please? I want to create accessories and morphs.
Daz 3D is part of 
Connect
DAZ Productions, Inc.
7533 S Center View Ct #4664
West Jordan, UT 84084
Licensing Agreement | Terms of Service | Privacy Policy | EULA
© 2026 Daz Productions Inc. All Rights Reserved.
Comments
I learnt how Hexagons UVmapping worked by following the tutorials by Gary Miller over at GeekAtPlay.com, the one with making a tree stump and the other where he made a crate where very helpful.
It should not matter which version of Daz Studio you are using, but I have no problems with the latest version - DS 4.9.3.166.
The bridge between DS and Hexagon is flakey. I find I need to have Studio open first, then open Hex, then export anything to Hex to activate the bridge. If all else fails, quit both programs and restart them. Barring that skip the bridge, save a zeroed out V4.2, t-pose, and at base resolution as an .obj file. Open a new Hex file and import the .obj, make your changes and save as a renamed .obj. Then, in Studio with your zeroed V4.2 model on the "stage", import the modified .obj with MorphLoader Pro (the widget that looks like an arm flexing with a "p" on it. From there, you can create and name a custom morph for the figure.
I don't play with the V4.2 figure, but in general you have problems with morphs if you break the mesh in any way. You can move verts around, but you cant change the vert order.
Hex is a great little program for making stuff, pretty intuitive and easy to use interface, but it is long in the tooth and prone to crashes. Save often. The other modeling app I attempt to use is Blender, but frankly it is vry unintuitive UI and steep learning curve make it uninviting for me. I only play around on occasion, and you have to use Blender a lot to use it well, plus need a full keyboard with num pad and multi button mouse. I find I have to re-learn everything every time I use it, and I'm usually on a laptop, which makes Blender a royal pain, since it depends on hotkeys so much.
Have you tried quitting and relaunching Studio? On my system, I've found that the Hexagon bridge only works once per Studio session.
I wonder if I am getting a similar result. When I read lexbaird's comment that the bridge is "flakey" I thought "well it seems to work for me in DS 4.8" but yeah, maybe it has a sort of limited shelf life, during any one given session.
As Wee Dangerous John has mentioned, you sort of have to learn to understand respect Hexagon's quirks, and save often. As for Blender, one thing to consider is that there *are* lots of tutorial videos on Youtube, more than for Hexagon I should think. I have download a vast selection of them, along with just about anything on Hexagon that I could find, and I'm slowly chipping away at the pile.
I experienced a sudden onset of "black" areas in some recent work in Hexagon. I had created a row of planks, like to make a boardwalk or the side of a barn, and I tried to split and "notch" them, as one might to make a "dovetail". I am using mostly Free Tesellate on the edges here. Notice how a sort of black "floor" facet has popped up here, in my triangular dovetail area... also at least one connecting face is all black as well.
The black faces might indicate your normals have flipped. There is a tool to unify the normals that will let you see which way they are facing with red arrows. If I get this with only a couple faces, I find it is fastest to just delete the face and re-bridge a new one in.
You are right Lexbaird, it is a Normals problem. Also Roman, you are going to run into problems with Ngons, it is best to to keep the number of points that make up a face to four.
I think I get it - avoid having 5 points. Didn't quite see where I had some of this sort of situation cropping up.
So the term "normal" is related to... single-sided and doubled-sided polygons then? I see there is a tool in the Utilities, to "Orient Normals".
Not sure what I may be doing wrong, to get to the point where "the normals have to be oriented".
To check how the faces are pointing (also see the Show/Hide Backfaces button at bottom of screen) select your object, click on the "Orient Normals" tool and in the properties tab, choose the icon with 1 arrow and the All button. Pressing the Space bar scrolls through the options.
When a normal is facing the wrong way it is either Red or Yellow facing inwards, press the Space bar till the Yellow arrows are pointing outwards.
Show/Hide backfaces, if you select this option then the front faces will vanish instead of the back ones, which means they are pointing the wrong way.
One of the ways Normals occur is when you go against the direction intended. If you have a cube and delete the top face, select all the lines on top and use CTRL + manipulator to add faces going up in steps but decide you've gone to far and move back a step and carry on up again. All well and good, but when you made the mistake you did not take your finger off the CTRL key you would have created a face(s) pointing the wrong way.
That's a problem with a non-manifold geometry or an extremely stressed n-gon or face. This can also occur with overlapping faces that have different normals.
Info: https://blender.stackexchange.com/questions/7910/what-is-non-manifold-geometry
Just in general:
All faces must either have only three or four vertices for each face. Normally, you want to keep everything consistent, so pick either all tris or quads. Preferably, for Poser and DS, quads are used. If you're modeling for these things, that's what you want to use, always, with, perhaps, only a few very few instances where you've used a tri in order to make certain topological changes. Any face that is not three or four verts is normally called an "ngon" and life hates ngons, so you should, too. :)
First - Fix your geometry. Using the "Selection" tool, you can highlight any faces that have 3 verts or more than 4. (Or, just select all faces = 4 verts and see which ones don't get highlighted and fix those.)
On "normals" - A normal tells the camera what direction a two-dimensional "face" is pointing. It basically says "This is the front." In 3D, faces are two-dimensional things and since most camera systems don't bother with the "backs" of faces, as a way to save processing time, for useful "tricks" and/or because those "backs" don't really EVER exist, since you can't ever see the back AND front of a bit of geometry that only has 2 dimensions to begin with... For these reasons, we have "normals."
In any group of geometry, there is usually a shared normal direction. ie: All the faces in the object are oriented with their "fronts" facing a certain general direction from the object's aggregate group center. Usually, this is towards the camera, since we like to see 3D objects. But, that's not always the case. Sometimes, it's possible for a normal to get "flipped" and end up facing the wrong way. This is highly unusual, since most programs have safeties built in that prevent this from happening. However, faces in different groups can have different normals. But, if they're contiguous (connected) to other groups, that's highly unlikely to happen as a general occurence. (ie: Somebody or something has to make that happen.)
Whenever you are creating a face, a normal is automatically generated in the following way: If the vertices that make up the face are created in a "clockwise" direction from the view of the camera, the normal will be generated so that the face is oriented towards the camera. If, however, a face is created by ordering the vertices of it in a counter-clockwise manner, then the face's normal will be generated pointing away from the camera. It is possible to, eventually, using automated or freehand processes to "confuse" the winding order of a face, resulting in a flipped normal for what is, essentially, a newly generated face, but may not appear to actually have been newly generated, depending on the operation you're using.
Ho boy, this is gonna take me a while... see you in September LOL!
You will learn by doing. That's it, really. Despite living in a 3D world, it can be difficult to understand "3D" art, since that's not true 3D, but just a representation of 3D on a 2D surface. Because it's all a "lie", there are a number of tricks used to make that "lie" happen.
Once you start thinking about the conventions your program demands in order to create 3D art, you'll be fine. Most programs that are used to create 3D polygonal art obey the same set of standard conventions. If they didn't, the stuff they generated might not even be rendered by people's vidcards. As you "do 3D" you'll see those conventions in action. As you become familiar with them, you'll be able to apply that knowledge cross-platform, even understanding how your chose rendering app really works or how to more easily use more advanced modeling/creation applications.
Just keep "doing 3d" and you'll see a littany of repeated, predictable, results start to accumulate. Then, you'll start gaining "true knowledge" and you'll be fine.
Nicely put, thanks. I should send you some money as this has been most helpful.
By the way the link about the manifold geometry touched on something I've wondered about for a long time, and that is "internal faces".
Specifically that (Blender tutorial-type) page said that internal faces are to be avoided - that they are not a good thing and so on.
For example, I have thought about making the sculpting metaphor more like digital building blocks if you will... and that would mean quite a bit of shared faces and vertices if we did it that way.
For instance I have been playing around with two cubes at a time... lining up the "shared face" to make a brick, and how does this relate to Tesellation say, if you started off with a brick in the first place.
If I weld or otherwise connect the two cubes together, is that legal? What happens to the "internal face" in such a combined object.
Note that when I put the two cubes close together, I took the numbers of the closest vertex to the camera in the first cube, and entered them for the "adjacent" vertex of the second cube... so in at least one "point", both cubes share the exact same space. Bingo, your link calls that "non-manifold geometry".
Another thing I did, perhaps inadvertently, was I selected the rightmost face on a similar cube and I happened to push it to the left, all the way through the cube and out the other side! So the cube or brick no longer has a face on the right, and there is now a disassociated face hanging way out in space to the left, connected only by... gossamer threads??? Do those "threads" or invisible lines have a name and are they good for anything, or bad to have lying around, or...?! Your link specifically mentions a concern about "loose geometry".
Taking things a bit further with the "building blocks" approach. This may not be the right way to go but it is helping me to "think like a Hexagon modeller", ergo looking at this I can see some of the directions I'd have to go if I went back to the beginning and began extruding the entire thing from a single block.
This screenshot is at the moment of doom by the way - if I try ANY free tesellation here, Hexagon crashes. (In a perfect world, I'd like to try modifying the dog's nose area.) It probably has something to do with my having dozens of web pages open in tandem, and I'm watching some video etc. My bad!
The dog is a small terrier btw. I already have all of the DAZ Dobermans. I want a different shape!
Never, ever, under any circumstances, in any 3D polygon modeler, do this: http://i.imgur.com/bqEB3ho.jpg
I dug that image up from when I had created it 2011 in response to similar questions. :)
You do not want verts sharing those sorts of edges.(https://blender.stackexchange.com/questions/7910/what-is-non-manifold-geometry)
It's important to note that non-manifold geometry applies only to "contiguous geometry." That's geometry that is actually connected together and NOT geometry that has separate groups where it only "appears" as if it is all connected.
For instance, take your "building blocks" example. In that exampe, if each individual building block is, indeed, separate geometry and the six vertices of each block constitute its entire group of vertices, then there is no 3D limitation in creating a "wall" from such "blocks", even if some faces between blocks actually share the same coordinates. BUT, if the blocks actually "shared" the exact same faces (ie: Connected to them), then it'd be A Bad Thing ™.
However, keep in mind that you're always going to be modeling for a renderer when using Hexagon. 3D objects are "rendered" in some way - They don't actually exist, otherwise. So, what are the needs of your chosen rendering application? For instance, most renderers would have extreme issues with properly rendering two planes that occupy the exact same coordinates. For a test, construct two faces and then, using the coordinate positioning tools in the upper-right, enter the exact same cooridates for each relative vertice so that the planes occupy the exact same space. Export that object into your chosen renderer. (Make sure it has a simple UVMap.) Now, render one version with a texture and another that only has generated dynamic materials. Does it render well or do you see stipling or shading problems? Does smooth shading muck it up? Does it render the surface normal correctly? Etc.. Now, try it with two separate blocks (each is its own group and not connected to the other), each having one face that occupies the same space as a face on the other, and what happens to that area? Does it cause shading problems? (Maybe, maybe not)
As above, with "3D Law", obey the "law." :) But, always model for your chosen rendering application, so know its laws, too. :)
Ah, I see. You know what though, when I make a maquette (small model of an idea for a object or a cartoon character say) I often go no further than large block-like representations done in clay or plastic foam and put together with toothpicks. I was so impressed from the get-go with the way Hexagon can do similar except the result floats in space and can be precisely manipulated, that my thinking often doesn't go beyond just creating something for reference, for a 2D drawing or illustration. If you have ever worked with a live model they get tired, they need to take breaks and go chase the squirrels, whatever. Holding up a maquette at a certain angle gets tedious; your hand gets tired and so on. Sure you can stick clay on a peg board but try getting a "looking down" shot or a "below ground level and looking up" shot from that. Hexagon is very cool for this.
Lack of knowledge, lack of a desirable "stock" model, lack of cash and so on can skew your priorities... little thoughts creep in like "I wonder how far I can get if I try to make my own digital actor(s) for this project?"
SOMETIMES there is something, some object or character, in the DAZ store that works well for me in Studio; of recent I have been able to "MAKE MY OWN" objects in Hexagon here and there, like the doghouse in this sample scene. This here is my first-ever completely digital maquette for example; it was for a cartoon story line where the arrogant, ungrateful, mean little dog is trashing his house... I used the digital maquette to figure out the best angles... once I had worked out the basics of how I wanted it to look, I did a pencil sketch. Then I scanned the sketch (darkening my very faint pencil lines causes the thing to be heavy on the gray scale) and I cut it up into pieces in an image editor, and assembled them into "final story board rendering". One person said it was too violent so I changed the "axe" to a large mallet.
So sometimes I cross over boundaries between applications... so caught up in my desired end result (and limited by my lack of knowledge and skill on the 3-D side of things) that I forget about 3-D rendering entirely! So your point is well taken: some of my ideas will never work in 3-D! Thanks.
The history of DS builds off of the history of Poser. Poser was intended as a "digital maquette" for artists, just like yourself and for exactly the reasons that you state are the difficulties and shortfalls of working with "live" or otherwise "real" models as a reference. Poser started as a way for artists to create easily posed (ie: "Poser") and manipulated references for artists. As it expanded into the general "3D Hobbyist" realm, it became something much more than just an artist's reference tool. Being able to take a model or a scene, move things around, pose figures, and then add lighting effects, all on an easily portable 2D screen, render that for an artistically accurate representation and then take that further in whatever medium that was wanted turned out to be very popular with artists across mediums. Eventually, such software became it's own sort of "creative medium", one which was price-accessible to hobbyists. (As opposed to existing programs, like 3DSMax and other professional-only sorts of tools.)
Anything that you can visualize that is "3D", as in "visual", you can create in a digital 3D program. AND, you can create a lot of things that you can't ever really "see" in real life, too.
In regards to "sculpting" - Hexagon is a "subdivision polygon modeler." IOW, one creates objects by creating "faces" (polygons) and connecting them together. Hexagon's subdivsion capabilities help to increase mesh density, easily, making the rather tedious task of creating high-definition models a heck of a lot easier once the base topology has been finished.
However, there is also another 3D standard besides "polygon" modeling and that is "nurbs" modeling. You can think of nurbs as being much like digital "clay." For instance, in Hexagon if you want to "sculpt" you can select from a variety of tools. But, lets' say you want to remove some "mass" from an object, just like you would when modeling clay and figuring out you have too much mass in the head portion, for instance. OK, well, in Hexagon, if you delete a bunch of faces, there's a big hole now.. In polygon modeling, objects are not "solid." Instead, they are defined by their outside (face normal direction) surface.
That's not true for Nurbs modeling! Nurbs behave much like "real life clay" modeling and, if that's your background, you may want to take a look at some nurbs modeling applications. (Some can be quite expensive, however.)
You can also look at applications that have mechanisms much more natural for sculptors to use. "Sculptris" is free: http://pixologic.com/sculptris/ , "Mudbox" is not free :) http://www.autodesk.com/products/mudbox/overview ,"3DCoat" isn't free, but isn't extremely expensive, either: http://3dcoat.com/home/ Any of these, and several others, could be very enjoyable for you to play around with, much like a sculpting studio turntable sort of envirnoment.
Do these "replace" Hexagon? Maybe, maybe not, it all depends on what you need to do. People who've used Hexagon keep coming back to it for quickly creating 3D objects, from simple to complex. IMO, Hexagon is the most powerful 3D modeler for its price-point IF one considers how user-friendly it is and how quickly a novice can get started in creating high-quality 3D models. Blender, of course, is off-the-scale on "value for cost" since it's free and very powerful, but it's barrier for entry is that one has to deal with a U.I. that is, at best, "non-intuitive" for a novice and, at worst, "hair-pullingly frustrating and overly complicated" for others.. At least, in comparison to Hexagon, in my opinion. But, if you've spent any amount of time here on the Hex forum, you'll know that people often keep Hexagon somewhere in their workflow, even after all these years and even with the advent of many more powerful 3D modelers. There's a reason for that, of course - It's easy to use, quick to work with and a highly capable polygon modeling and "sculpting" tool.
You've got your favorite sculpting tool, right? When you're crosshatching something, do you always use that shiny new rake you bought or the old favorite one that, for some reason, just always "fits" better in your hand? There ya go! :)
I used to do some clay sculpting a long time ago. That experience served me fairly well in understanding shapes and spacial relationships of objects. (At least, that's how I explain it to myself. :) That experience fueled a creative desire to work in a much more capable medium that didn't require me to invent the darn thing... :) So, here I am. :)
On Nurbs: I didn't list the applicable modelers because the best are quite expensive and many high-end 3D modelers have NURB capability. It should also be noted that one can, in many situations, convert a NURBs model to a polgyon model. (The reverse is not always true, however.) Nurbs, by their nature, are much more dense and the resulting topology may not always be suitable for DS/Poser use. But, NURBs are more alike to clay sculpting than traditional polygon modeling. Yet, the programs I listed give you many of the benefits of that sort of environment/mechanism without the technical hurdles of true NURBs modeling.
Bwah-ha-hahaha! Redemption!!! And here all this time I was thinking I was just weird. (I used to go "off the grid" a lot in Zork too.)
Thanks for the info. You know I was AWARE of Poser fairly early on but big hassles at that time with other stuff, like digital cameras were starting to get really useful and so on... I'd do stuff like I'd take a hike to Santa Monica to see what King Lee (Quarterdeck - windows before "Windows") was up to... all of the screenshots of Poser I'd seen were of a "silver surfer"-like character... I had NO IDEA that you could actually kill the silvery surface, and achieve life-like textures and characters on high-resolution figures. Of course at the same time I was *mystified* at what the process was, for doing the creatures in "Jurassic Park" and "The Abyss" and stuff like that... I even spent a couple of hours on the phone with the Alias guy one time - but we didn't discuss 3-D modelling! I would look at the latest Silicon Graphics workstations but again - no digital modelling was to be seen. Ha.
I think early on Turbosquid might have called their stuff "dinosaur model kits" or something like that... what did the "kit" consist of, I thought. Again it was absolutely beyond me, what the 3DS Max people were up to, and what Maya was.
I finally figured out that something was going on when a local furniture retailer incorporated a rather crude, but fully animated "T-rex" into his TV commercials... aha, so computer animation was not just for Pixar and ILM!
By the way deleting faces (and getting a big hole as a result) was one of the first things I noticed, in Hexagon. I guess NURBS is what I really want... nice to be able to put a name on it, and to relate it to what's going on in Hexagon.
Re: "Mudbox is not free"... ha ha, ya think??? Ha ha! I'm actually aware of that one because of a big write-up in the local newspaper that told of the Mudbox guy's success. It stressed that he was rich, relaxed and taking it real easy after selling out to Alias or Autodesk or Pixar or whoever he sold it too.
Wish I had a piece of that action.
Sometime around the last few months I realized I needed my own render farm, sigh.
Btw I couldn't locate the exact Mudbox item but this article in the U.K. is datelined "summer 2007" which sounds about right, time-wise.
Hmmm, tried Sculptris... ok so it's a sort of "lump of clay" metaphor -- always begins with a sphere. Ok, in less than 60 seconds I was able to make a fairly complex (in Hexagon terms) object, a sort of old man's face. Wanting to extrude the "chin" a bit, I exported as an .OBJ file and imported into Hexagon. Wow, hundreds, if not thousands, of polygons get assigned to any area that you are "working" on!!!
I wasn't able to latch onto the chin area and my extrusions came out looking like a beard or something. And it got duplicated for some reason. Off to Youtube!
You are likely to be eaten by a grue... :)
Sculptris is a sort of unique animal. I used it a bit waaay back when it first came out. (Bought if off the shelf.) There are some fun thing you can do with it and its interesting, but it's not really a standard polygon modeler and its not a standard nurbs modeler. Basically, it takes the sometimes messy work of actually creating faces/topology and simplifies it, doing it for you, continuously following your sculpts and subdividing (tris) as necessary in order to keep a consistent mesh resolution for the details that you add to the model. (You can increase/decrease mesh density in any areas you wish, though, by using a separate tool/command.)
It's not entirely the best choice for creating models for DS/Poser, though. I could be wrong, but I don't know much about it anymore. Your mileage may vary. However, it might be fun for someone with a sculpting background to play around with and you can certainly jump straight into "creating" a mesh rather than fussing around with micro-managing a mesh while you're creating it. For more advanced packages that have somewhat similar approaches, 3DCoat might be worth looking at.
A note on "organic" vs "inorganic" models - Organic models are, as the name implies, organicly looking.. They don't have sharp geometric shapes, but tend to have lots of curves, soft surfaces, etc. Inorganic models tend to have "hard" surfaces, sharp angles, flat areas, shapes not frequently represented in nature, etc.. For organic modeling, Sculptris might do "OK" for some forms. But, for inorganic modeling, it wouldn't be a good choice. If you want to make a human cartoon character, Sculptris could be used for that. If you wanted to make a desk, Sculptris would not be a good choice.
Disclaimer - Many models have both organic and inorganic geometrical components. For instance, a model of an automobile may have a great number of organic-looking surfaces. A nice aerodynamic shape, smooth lines, curves, really sexy looking, etc.. However, it's also going to have sharp edges, some decidely inorganic geometry, lots of straight lines, here and there, etc. So, it's not always possible to declare one "form" as being either/or. That's why there is a minority of modeling apps that are firmly in one camp or the other, with the majority providing tools for both organic and inorganic modeling. Hexagon, for instance, is a polygon modeler with subdivision and sculpting capability, giving you a very broad selection of tools for modeling all sorts of 3D objects.
Have fun - That's the only rule! Use whatever you wish to create what you want! The trick with getting into 3D modeling is, actually, "getting into it." Once you develop the motivation to create something, you'll be very receptive to sitting down and actually learning how to do just that. It can take a lot of motivation to sit through hours of video tutorials or to read manuals or even buy instructional materials. But, as long as you retain your enthusiasm, you can easily get past what prevents other people from "learning new things." :)
PS - Always bring a light! ;)
Aha! I noticed that Sculptris starts off with a different sort of mesh, on the "sphere" that it offers you as its starting point. I've been wondering about this for a couple of years as it seemed to me this approach lends itself more to making facial features - the man in the moon, that sort of thing. Ergo, I wanted to have a similar mesh in Hexagon.
Taking a cue from this feature of Sculptris, I finally figured out that Hexagon supports this "geodesic" (?) mesh too! And I was thus able to tesellate a bit, to get an "eye" like range of edges... pushing and pulling and tweaking a bit lead to me actually making something that looks like a worn marble sculpture (maybe). Progress!!
Ok, so in Hexagon once you add a bit of smoothing something happens to the mesh, correct? You no longer have access to pushing and pulling on edges, or at least that is what I seem to be getting. So is the workflow in Sculptris a bit less strict, I wonder.
Certain operations in Hexagon require you to "Validate" them. Most notably, this includes all the "UV and Paint" tools. I assume that the reason for this is because they carry out certain logical operations and those operations have to be calc'd while you work with those tools and stopped once you have finished working with them for the moment. If you do not Validate such an operation, bad things can happen, like a crash, weird funky stuff or... the loss of ability to continue modifying a mesh until the current operation is Validated. The last bit is what you probably experienced. So, click the "Validate" button and all should be well for you to continue modifying the mesh. :)
If you ever get to the point in a project where you can not deform a mesh or move a vertice, it's likely because you did not Validate the current operation. If you've done that, but you also have a the object showing in the "Dynamics" window, then it means the current tool you're using won't work on a dynamic mesh and you need to "collapse" the subdivided mesh, first. (Either click the lightning bolt to collapse it and apply the current sub-d level or the undo arrow to collapse it and undo the current sub-d level.)
Sculptris vs Hexagon: Sculptris is different than a general polygon modeler in that it continuously adds complexity to the mesh as you work, relieving you of the burden of having to do it yourself, allowing you to just "sculpt" without worrying about how the topology is constructed. (This feature can be adjusted.) However, because of that, it is much more difficult to do certain sorts of general polygon modeling in Sculptris vs more traditional 3D applications. In short - Hexagon is much more capable as a general 3D polgyon and subdivision modeler than Sculptris. However, I recommended Sculptris because I thought someone with a traditional sculpting background might enjoy it and it could enable you to easily produce certain shapes/forms you might find desirable. In the end, though, I'd recommend it only for certain limited sorts of experimentation or for creating certain sorts of meshes without having the expense of more serious dynamic modeling apps. There's nothing you can make in Sculptris that you can't make in Hexagon, for the most part. However, certain objects may be easier to make in Sculptris, depending on what they are, versus the more complex nature of topology in a traditional 3D polygon/sub-d app like Hexagon.
Ok, got it. No idea how I may have missed that, but following your guidance I seem to have access to the mesh points and edges etc., even after I've applied some smoothing... I'm now wondering if I should *ever* apply smoothing in the middle of working on a model, but that's a question for another time.
Ha, I noticed that too - the greater complexity. Like when making the bumble-bee below... when I import the mesh into Hexagon to have a different look at it, the mesh density for the mouth area is quite a bit different that the stuff that makes up the "eyes".
I am wondering now about the strange poly-shapes that seem to occur when I do some tesellation say, on a smoothed-out quad in this sample model of a pipe. (Figures 1 to 7). First of all, I noticed that although free tesellate is a "straight" operation, once you validate the new edge conforms to the previously applied curvature. Cool! But what is with those little pointy things as I do a total of two tesellations, moving slowly from right to left on the screen? Then when I tug upwards on a vertex things get really strange (in Hexagon)... it's not like plasticene at all... it's following some different set of rules that are beyond me at this point in terms of being able to predict what is going to happen.
That's "puckering" due to the algorithm used in sub-d encountering a different result than the rest of the area, likely do to the mesh changing. Keep in mind you're working at a high subdivision count (4) and you haven't, in lower sub-d levels, worked with the geometry to add edges that the sub-d algorithm can use to fine-tune itself a bit in expectation of this extra bit of difference you're introducing. So, what does it do? It does exactly what you've told it to do! Except... it's trying to do that with nex-to-no sort of guide on exactly "how" you want that done. So, prepare the base mesh by going back without any subdivision (0) and adding some geometry there to "start off" that sort of desired shape for that area. Then, go back to a higher sub-d and see how much cleaner the final deform looks! (PS - Subdivision can only base itself on the actual geometry present in the model, before the Sub-d is collapsed. You can, however, in Hexagon add geometry at any active (not collapsed) Sub-d level, specific to that level, and see higherly levels reflect that addition. That's a pretty handy thing to be able to do.)
Something you may want to take a look at, to get a better handle on how subdivision works, is the "Smooth" tool in the Surfaces(?) menu. Start off a primitive shape, like a box/sphere or something, then click on the Smooth tool (NOT the "Smooth" level command, which just uses Catmul-Clarke, IIRC). You'll see several different sorts of subdivision algorithms represented there. And, you'll see that you have the option of adding control edges to designated what areas should be kept "sharp" (out of the smoothing algorithm) and several other tools, depending upon exactly what type of sub-d you're choosing to do. So, mess around with that for a bit and see how your control edges effect the end result. Go back to a level 0 sub-d and makes some deformations in the mesh or extrude a few faces, here and there, then go back to that Smooth tool. Try different sorts of sub-d and try placing your Control edges to preserve the deformation/extrusion you just made in the mesh. After a bit, you'll see that for a good sub-d that preserves the features you want preserved or that smoothly deforms the mesh the way you want it to, you'll have to have edges in certain places, whether or not you use the general "Smooth Level" panel or decide to use the more focused "Smooth" tool.
Note: Just a sort of caution - If you're taking a model from sub-d of 0 and then moving right to a sub-d of 4, you're probably doing something wrong. :) Sure, there are reasons you might do that, but if you're trying to model something recognizable, it's going to be better to work your way up to that level of sub-d, by setting up the necessary topology in lower sub-d levels, first. You CAN add edges in Hexagon at lower sub-d levels, but it's almost always best to start out first with a topology that will only need one or two levels of sub-d before it's considered to be "finished" at least with any further general level of subdivision.
Wow, thanks, well put. You should be teaching!
I looked up the Catmul-Clarke algorithm btw. (Wikipedia English link)
This is coming verrrrrry slowly! I'm pleased with my new ability to control the primitive shape though.
The initial mesh is balanced and smooth. I can tug on any edge or point and get predictable results.
The way that the smoothing seems to follow the Catmull-Clarke rules was very satisfying.