Daz 3D is part of 
Connect
DAZ Productions, Inc.
7533 S Center View Ct #4664
West Jordan, UT 84084
Licensing Agreement | Terms of Service | Privacy Policy | EULA
© 2026 Daz Productions Inc. All Rights Reserved.
Comments
I do have two codes. I'm double checking to make sure that I put the right one in.
Well that's odd. I uninstalled everything Carrara. Restarted my pc because this last time I installed it, it didnt ask me for a serial number. So I uninstalled everything. Restarted the pc then installed everything again. Still not asking for a serial number and still missing a bunch of stuff. I do have a support ticket in.
The good news is i am now very quick at making posts for balconies lol. I did learn quite a bit about moving around in the modelling room so that was cool, modelling and texturing are two things that I really really want to do.
No, the serial number survives uninstall/reinstall.
Open Carrara and look in the Help menu. If it's not in there, it's likely in preferences somewhere... I know I saw an option to update the serial number. You need to do this inside of Carrara.
The alternative is to see if you can find the local roaming folder or whatever that is - it's Windows' Data file folders. Find the Daz3d one that has Carrara in it and delete the Carrara folder (while Carrara's uninstalled), then reinstall.
But I know there's a way to do it inside of Carrara so we don't have to lose our preferences. The alternative mentioned above removes all preferences and such.
Okay I will give that a try next. Set up a render in Studio in the mean time so will have to wait til that is done. I really appreciate the help!
Woot found it! You have to click on the Carrara symbol at the very top left of the page inside the program. Put the serial number in again and everything is showing as it should. Thank you thank you!!! Its too late to give this another go tonight, I have to go to work tomorrow but I will work on it tomorrow. Thanks again!
How frustrating. I'm so glad you got it sorted out. Thanks, Dart, am filing away some of that information, but hoping I never need it.
Here are a couple of useful free tutorials.
Age of Armor on shaders (must watch video)
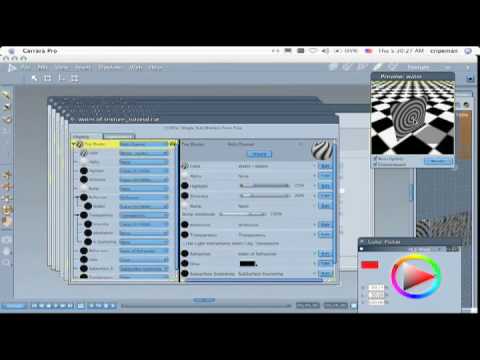
Cripeman (just an example of one of Cripeman's tutorials. Cripeman is fantastic. Has dozens of mini tutorials on different aspects of Carrara)
I went back through the Cat Burglar of Babylon walk-through and edited the screencaps to try to make the explanations a little more clear. Never did finish that project, though.
I was really enjoying that walk through until I was so rudely interrupted by missing files lol. I am just flabbergasted at how easy (relatively) it is to make things in this program. I really didn't mind doing it a couple of times, it helps cement the whole, this is what this button does and this is where it is.
Sounds like you've got it installed correctly now. I am competely clueless for installation issues or anything like that. Carrara makes it very easy to match your Daz content with stuff you imagine and create yourself, whether that be a model, or a sky, or a terrain, or whatever. Great tool.
Happy experimenting.
At the risk of making the modelers out there die of laughter, I am going to do a walk-through of some of the tools of the uvmapping function in Carrara. The goal is to point to some of the zoom and selection tools and to illustrate some of the presets and the seams/unfold function. Just to have something to work with, I modeled a simple post with a crown. I started with a vertex cylinder and then extruded the crown from the top. I filled the ngons at the top and bottom of the cylinder by using the tesselate : Vertex to center function.
While uvmapping, I have a simple checkered shader that I use to see how the uvmap is doing in test renders. I put a mixer in the color channel, then put PATTERN : CHECKER (set to 30 by 30) to drive the mixer and the bump.
I did a test render wth the default uvs. Carrara applies a sphere preset as the default (or something similar), so notice that the checkers along the stem are not equal size. There are plenty of options, but just to show some selection and zooming issues, I will try to use the cylinder preset and attempt to use unfold combined with a preset for just one section.
Some preliminaries.
First, here is the default uvmap of the post model. I have done nothing to it. See how the uv polygons of the stem change scale in the vertical axis? That is why the stem is distorted in the test render.
Second, it can be tricky and frustrating to move around the uvmapping room until one gets used to it. Here are some helpful hints.
- you can use the view menu to pick a zoom, but it will do so only for the currently selected window (left or right in my screenshots). Returning to default zoom can be handy.
- you can make a selection and then hit 0 (zero) to zoom to that selection
- use the camera tools to rotate the view around a selection
- use the magnifying glass to draw a rectangle around a desired area and zoom to it
- to modify selections, notice the additional tools in the properties tray (upper right). You can change selection mode (just whole polygons, just edges,...). There are tools for loop, ring, between. There are plus and minus tools to expand or contract a selection to all contiguous polygons.
Time to try a preset uvmapping projection. Under the operations tab, there is a section for presets. I chose cylinder and made sure the z-axis was selected. Carrara prompted me to use "custom" and I said OK. If you compare the resulting uvmap to the default, you will see that the stem polygons look more consistent in vertical scale. A test render confirms that the stem is improved. Might have issues with the crown, though.
(Note - TangoAlpha reports that the cylinder preset has a bug in which one column of uvs gets placed in an overlap but you can't see it in this camera angle).
Next will try the seams/unfold method.
The seam/unfold method is accessed by the last tab to the right of the uvmapping properties tray. Notice the drop down menu for seams and pins. Seams cut the projected 2d image that is supposed to be wrapped around your object. Seams are good for cutting the 2d map into islands to better fit differently shaped portions of your model. Pins lock a point of your 2d image in place. An example of their use would be to place 2 pins to lock the vertical chin/mouth/nose/brow axis so that a round head unfolds symmetrically away from that center. We will only be using seams in this walk through because the viewing and selection rules are the same.
** remember that you can use 0 to zoom to a selection, use the View menu to restore the default zoom, and the magnifying glass to zoom to a rectangle that you draw.
For this first attempt, I want to create islands for the bottom, the stem, and the crown. I will also want to cut the stem vertically so that it can be placed flat and cut the crown just to see. For the bottom island, I selected one edge and then clicked th LOOP button. I also used the magnifying glass to zoom closer to the uvmap. Notice that after the loop function, the edges are highlighted on the model in the left menu and a row of uvs in the right window.
Next, I chose two vertical edges in the same column along the stem and clicked the BTW (between) button. The result selected the entire vertical column between the two edges that I had selected.
WAIT - I want to start over. Why? It doesn't matter. I just want to show how. One easy way is to select the entire model and then hit the minus (-) key in the seams menu. NOTE - watch out for mistakenly clicking the minus key in the top selection menu instead of the minus key in the seams menu. I do that from time to time. LOL.
Here is a second try. I put seams along the bottom loop, along a loop where the stem meets the crown, and a vertical seam from the bottom to the top point. Here is the result of hitting the unfold button. Notice how Carrara sticks the islands along the bottom edge of the uvmap. Even though they are separate islands, I did notice that two islands are so close together that it may be difficult to select one of the two on the right without also selecting that one highlighted point from the other island. If I don't have shading domains corresponding to the islands (remember, can use the top menu to select by shading domain) then I select as much of the island up to the problem point as possible, then zoom in and select the edge connecting the problem point which will also select the problem point. If that looks troublesome, sometimes you can select part of an island and then use the plus and minus keys to expand the selection to the entire island without getting any uvs from other islands.
First, I selected the stem island and used the rotate and scale tools to put it in the upper left of the uvmap.
Second, I selected the bottom island (remember hint about selecting a problem point through the edges it is connected to) and moved that to the upper right.
Third, I selected the crown and rotated and scaled it
Here is a test render. The stem scale is not distorted. Have some choices about the crown, which will use to show how to combine a general seam method with selected presets.
I want to change the uvmapping for just the crown. It would not be difficult to select the crown island, but this is a good opportunity to show the plus/minus method. I selected the top rows of the crown (made sure even around) and then hit the plus tool in the selection menu until I had the entire crown. I then went to the operations tab instead of the seams tab. With the crown selected, I chose the spherical preset and the z axis. Carrara applies the preset and fills the uvmap with the crown's uvs. First, I used the scale tool to reduce the size of the crown island to match the size of the stem, then I selected all, and used the scale and translate tools to fit to the uvmap space. And here is the final test render.
I'm sure the real modelers are shaking their heads, so I invite suggestions and tips, as always.
There's a reason why I don't like to use the spherical / cylindrical presets, at least not unless I'm using very plain textures or colours.
You started with a 16 sided cylinder, right? Now count how many sides there are on your crown UV map. There's one missing. Actually there isn't. Render your crown with the seam facing the camera and you'll see what it does.
I think it's going to be very hard to map that shape without some kind of distortion, and ultimately how you do it will depend on how it'll be textured. Plain colours, procedural metals etc won't much care and you'll get away with any of the options you've shown. But fitting a patterened bitmap to it could be tricky, especially if you want it to be seamless. On the other hand, this is where 3d painting will come into its own, either from within Carrara, or some external editor.
It is easy to confirm TangoAlpa's point. In order to have 16 polygons in a row, the row has to be 17 vertexes wide, just like a single square has two points in each direction. However, if you count the number of vertexes in the row for the preset cylinder result and the preset spherical result, there are only 16, not 17. The reason is because one of the columns has been put in an overlap of another column. If you can find it, you can fix it manually by finding the two ends, use the BTW tool, and then translate the selection to the side. In general, better to just use the seam/unfold method, which is why I have been putting time towards learning seams/unfold. If you look really closely at the attached pic, I have counted the number of vertexes along the bottom of the crown island, which is 16 not 17. If I remember correctly, there is a thread on uvmapping in which Dart had a clever way of identifying the column with the overlap - but I might be confusing it with another issue.
Just drag-select across the, er, shaft, and you'll find it soon enough (sorry, not at the right computer to provide an illustration. But what you'll discover is that the end poly, the one starting at the far right, wraps all the way back to the far left. So what you'll see in the render is the entire width of the crown UV map squidged into a single column.
Oh diomede! This is SO COOL!!! Thank You!
I'm going to come back later and grab some links so when people ask, I can send them to the right spot(s) throughoutthis thing... such a wonderful thread!
Thank You, Friend!
That was most helpful. Now I will see if I can put it into practice lol. Thank you very much!
Another silly question. Once I have the uv's unwrapped what do I DO with it?
Export the UV Map, and use that as a guide to create the texture maps: Color, Highlight, Bump, etc.,
Some artists paint them, others clip pieces of images together, warp them, stitch them, otherwise blend them however you want the model to look.
A good UV Mapping job will make your model easier to work with in things like Carrara's 3D Paint feature and other such things, like Substance Painter and the like.
Okay. I have no idea how to do any of that stuff but I always go by the premise of starting out the way one wants to go in the future so it becomes habit.
I'm pretty excited, I managed to get the whole balcony thing done (minus the person, because I did the person twice and really wanted to concentrate on the modelling part), and I managed to uv map my post and apply textures to the whole thing. Haven't figured out how to put a sky in after the fact but that's okay. Can't believe I did it lol. It can use a bit of work as far as lining up all the posts in a straight line etc. but overall I am pretty happy with it. Thanks so much for all the help! I posted it in my art thread if you want to have a look. No laughing though...
Models are 3D objects and textures that you might use to apply to them are 2D. A UV Map translates between the two, it basically defines where to apply a 2D texture map onto the 3D object.
Keep in mind, that having good UV mapping skills is an incredibly amazing talent to have. Most people don't have the patience for it.
Now, a well UV Mapped model will also texture much better even using the procedural shaders that come with Carrara. "Procedural" meaning that they use values and calculations built into the software to create textures rather than using maps.
This can be HUGE if you don't like the idea of trying do perform what I was mentioning earlier because we can tweak the shader(s) to look right on the model by experimenting with the various tools available in the channel sliders of the shader, and then when we get something we like, we can use Inagoni's Baker plugin to export the result as maps for any channels we want!
Don't have Baker?
We can also "Bake" texture maps from procedural shaders by exporting the model as an obj file, making sure to check the appropriate export option to save texture maps. Whether we have a use for the obj or not, we now have a texture map to take into PhotoShop, GIMP, or my favorite, Project Dogwaffle Howler, or similar image editor, and further tweak the image if we want to.
I think is worth mentioning this Dartan (I know that expirienced users know this), for those who just started learning Carrara and are new to UV mapping, procedural textures cannot be baked nicely on models without proper UV's, by proper UVs I mean no overlaps should be happening in UV space
Thanks Diomede... This thread is great... I've learned quite a few things myself in everything you mention... some more than others. Finally I may just tackle making cute little islands with UV map Unfolding. Kewl!
I just linked to your UV mapping and unfold in my modeling thread... Modeling Objects in Carrara - Q&A - Come One and All.
Some WIPs for a pinup Christmas project. Believe it or not, my personal learning goal is actually the pine tree in the background. I am experimenting with the plant editor. In the meantime, I thought would use the RDNA unidwarf in honor of their store closing. I have some wonderful models and other resources from there.
EDIT: No postwork yet.