Tutorial: Bryce Instancing Without the Instancing Lab
 Fencepost52
Posts: 513
Fencepost52
Posts: 513
The Bryce Instancing Lab is a great tool and really helpful when wanting to place large amounts of geometry within a scene, but has a few quirks that often make it unstable; I've had a number of Bryce scenes crash during the instancing process. So, I began looking for ways to accomplish the same thing, but without the Instancing Lab....a manual instancing of sorts. My search led me to a technique that allows you to instance exactly where you need, at the appropriate scale, and most importantly, without crashes. After several requests, I decided to prepare this tutorial to help others. The process isn't difficult at all, but can be somewhat time consuming. All materials and terrain objects come with Bryce, so nothing special is required. I've included pictures and descriptions so that even a relative Bryce newbie can experiment.
I hope this tutorial is beneficial to you. Lets' begin!
Step 1
Create a new terrain.

Step 2
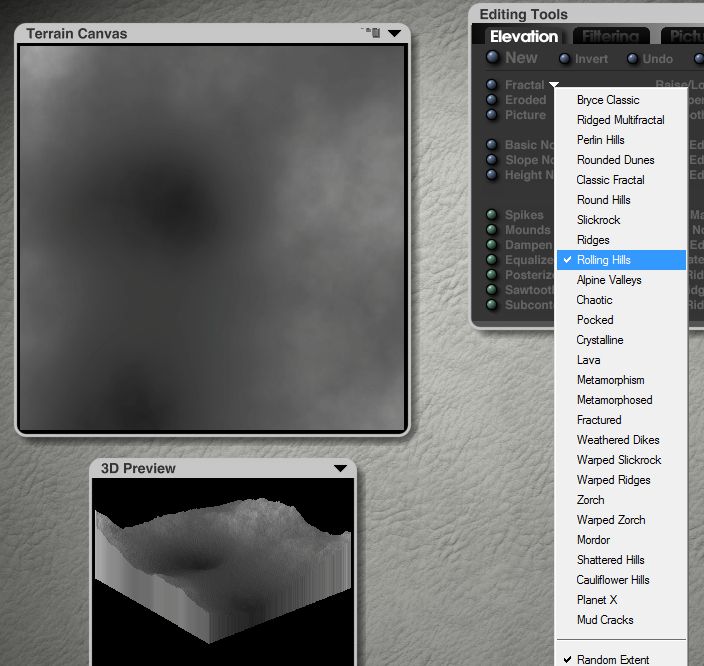
In the Terrain Editor, create a fairly level landscape. I used Rolling Hills as shown below, but you use whatever you wish. The reason that I suggest a landscape that's somewhat level is that it's easier to learn the techniques until you're familiar enough to use complex terrains. Once you've got a good terrain, scale it and position it as desired.
Step 3
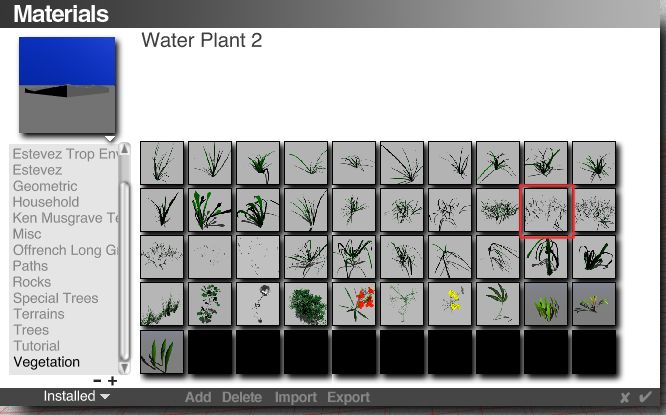
Add some vegetation. Click the little arrow by Create and in the dialog that opens, scroll down to Vegetation and select on that looks good to you. I'm using Grass 19.
Step 4
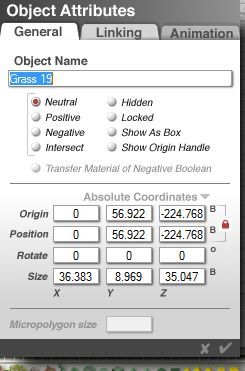
It's important that the scale of the grass match your scene. There are no hard and fast rules, but for this tutorial, I scaled the grass to look like so, using the following settings.

Step 5
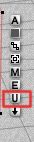
In order for Bryce to instance an object, it must be ungrouped. If your model isn't grouped, you're all set; however, in this case, Grass 19, is a grouped object and must be ungrouped. Click on the little "U" as shown to ungroup the model.
Step 6
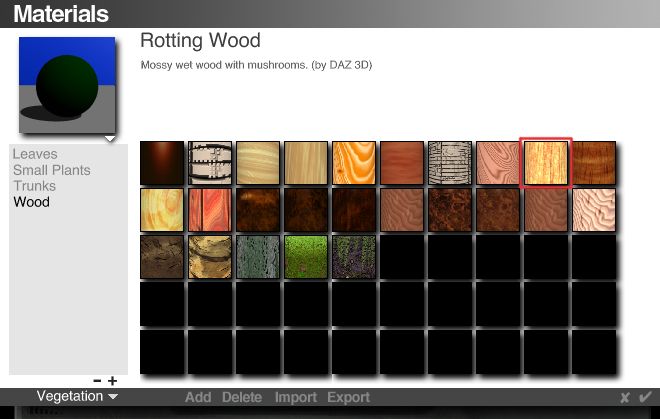
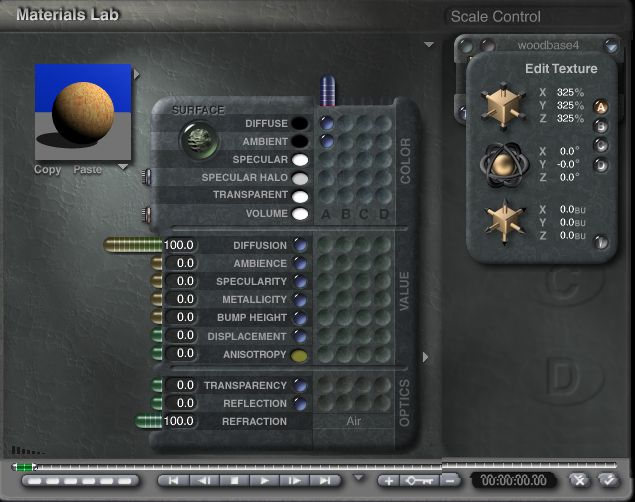
Let's add a material to our grass. My first grass will be dead. In nature, not everything we see is living. On the Create shelf, click the little arrow next to the Edit menu, in the dialog that appears go to Vegetation > Wood > Maple Wood. I don't want ambience in the material and I want the scale (frequency) to be higher and I set the settings like so.
Step 7
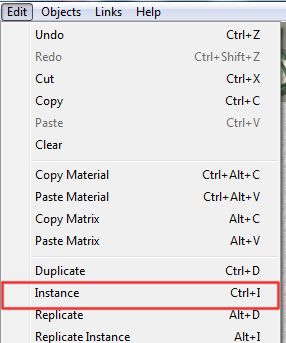
The next step is to create an instance. Go to Edit > Instance
Step 8
Group the instances and move them away from the originals.

Step 9
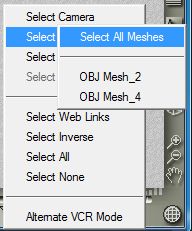
I don't like to use the original meshes anymore, but I do keep them in the scene out of the way. Select the original grass meshes, in this case there are 2 meshes, group them and move them out of view of the camera.
Step 10
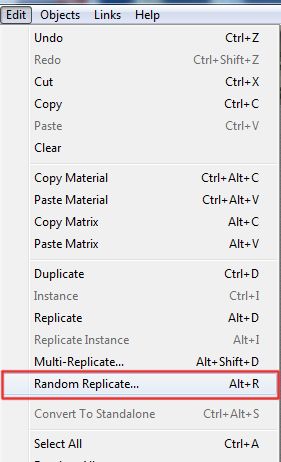
Now let's make some magic. Go to the Edit Menu and choose Random Replicate. This will allow us to instance a specific number within a specified boundary.
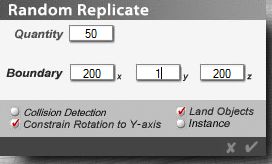
Here are the settings I used. Notice that I didn't check the "Instance" option. We already created an instance, now we're just making bunches of them. By selecting the "Land Objects" option, all of our instances will be placed on the ground (with the exception of the original). After the instances are made, I select the original instance and move it to the ground with the rest of them.
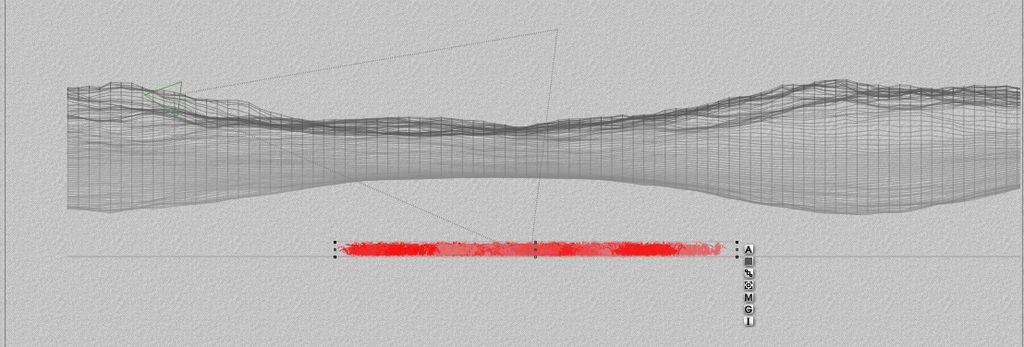
Step 11
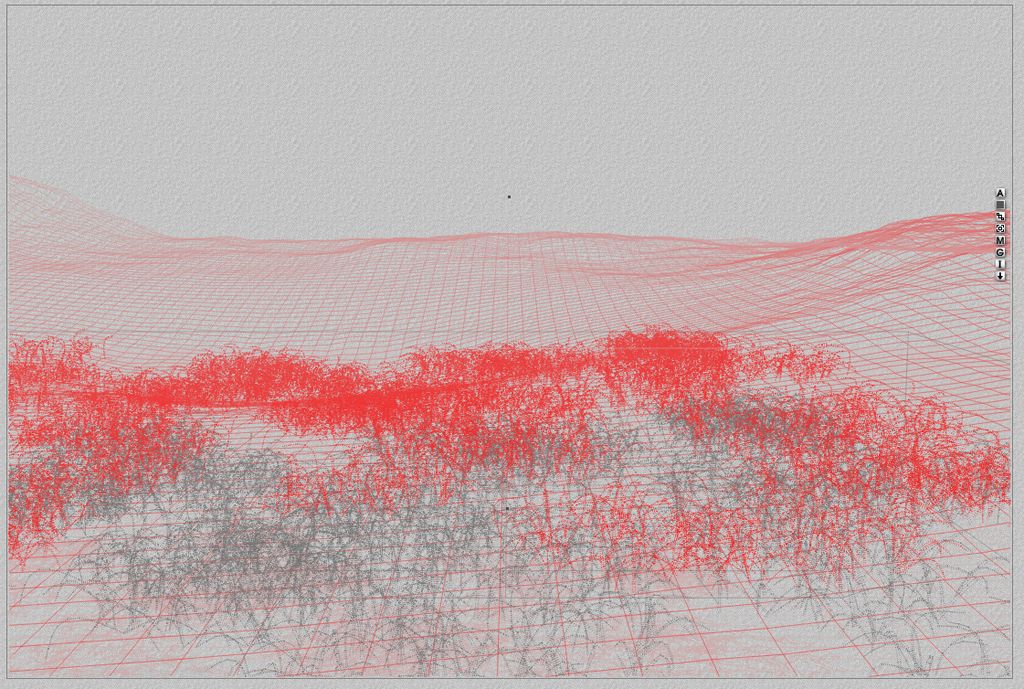
In the side view (keyboard shortcut 3), I select all of the instances (make sure they're ungrouped, which is vital for placement of the objects on the terrain.).
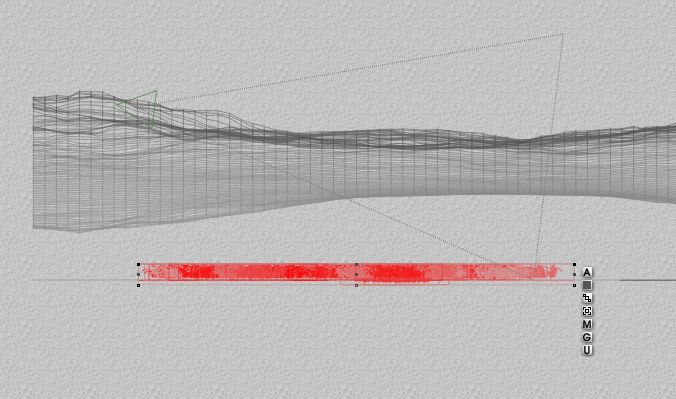
Move the selected instances above the terrain.
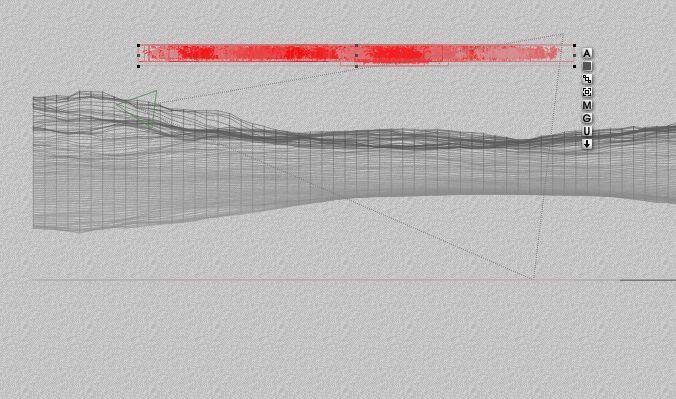
Go back to your original camera view and move the grass cluster horizontally as desired. Click on the little arrow next to the grass cluster to place on the terrain. Once placed, you'll need to lower the objects slightly so they're within the terrain because Bryce will place them based on their bounding box, not the actual geometry. Make sure after the grass is in place you group it. If you don't do this, you'll have a hard time selecting all of the grass if you need to make changes.
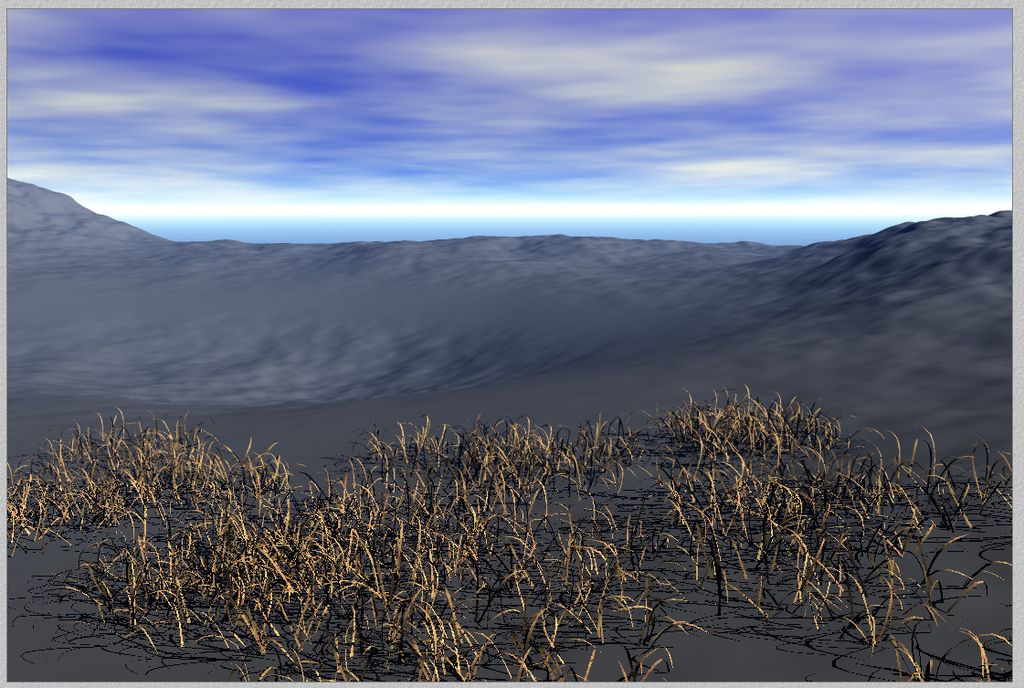
Here's a quick render.
Step 12
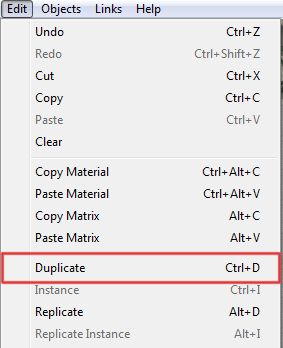
Let's make some more grass. I'm going to reuse the same cluster that I just created, but will modify the material. Select the instanced cluster and go to Edit > Duplicate.
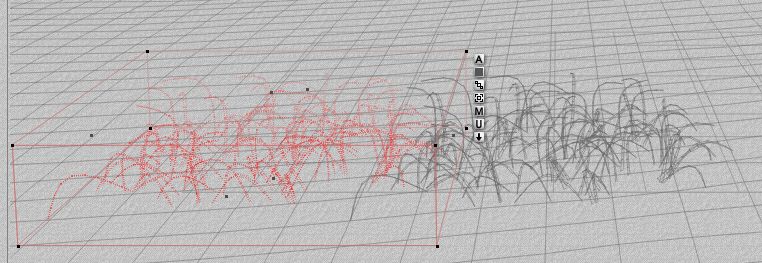
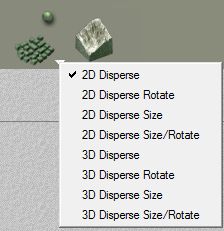
Here you can change the material (I used a green one from the Vegetation Material section), move the instances around using the 2D Disperse tool (See picture. Make sure to ungroup before using), scale, etc.
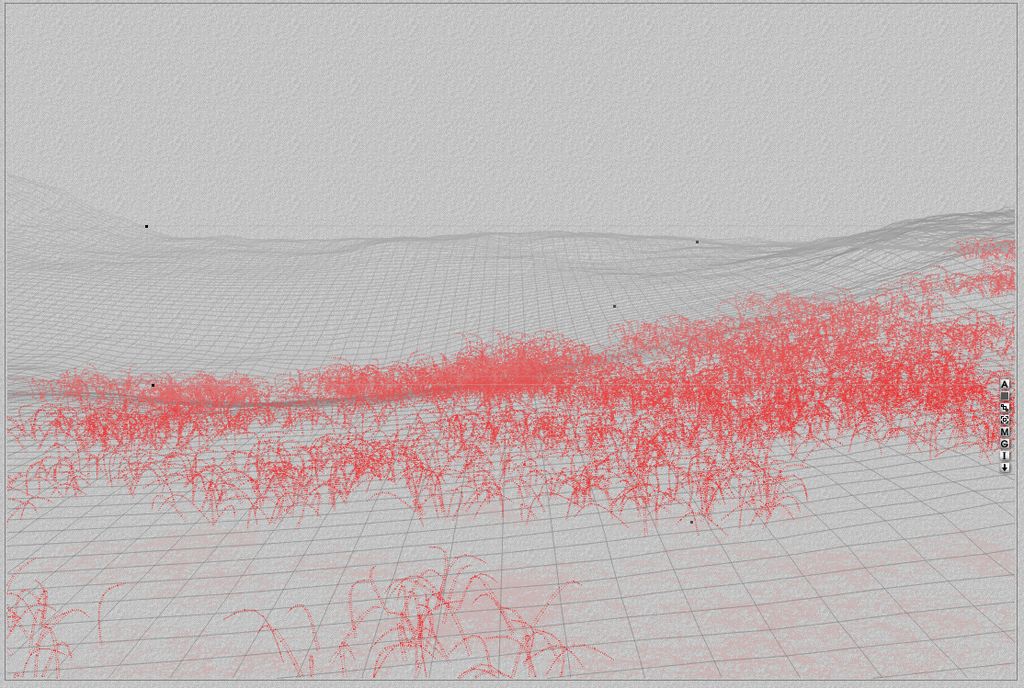
Step 13
Once you have it the way you want, we need to place it on the terrain because if you moved it around it might not look right. There is a catch, however. If I were to tell you to just redo the placement steps above, the original grass instances would create a "barrier" when Bryce tries to put the grass on the terrain, making some of the grass objects floating. But, there is a way around it and I'll show you how....I won't leaving you hanging <<< See what I did there?! 
Select the new instanced grass and the terrain only.
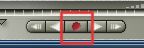
Now let's hide the original grass instances so it's no longer a barrier. To do that, select the Solo Selection On/Off tool in the bottom right-hand corner of the Bryce screen.
Your original instances and everything else that was not selected is temporarily hidden from view.
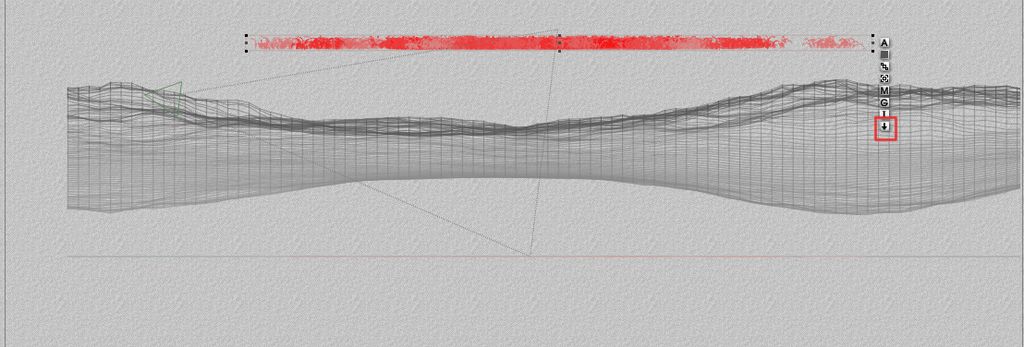
Step 14
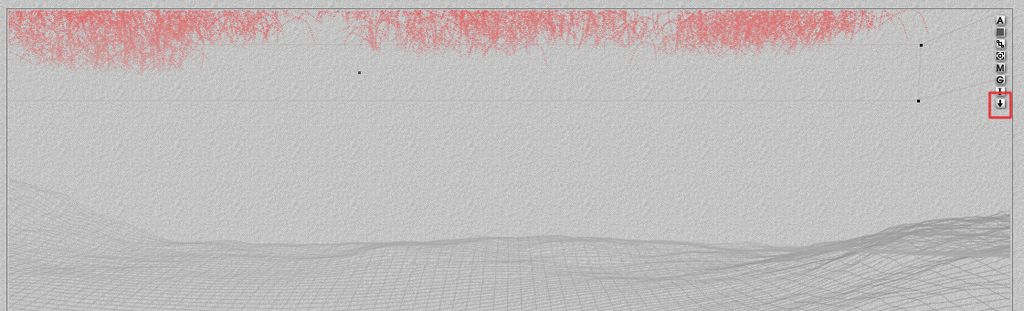
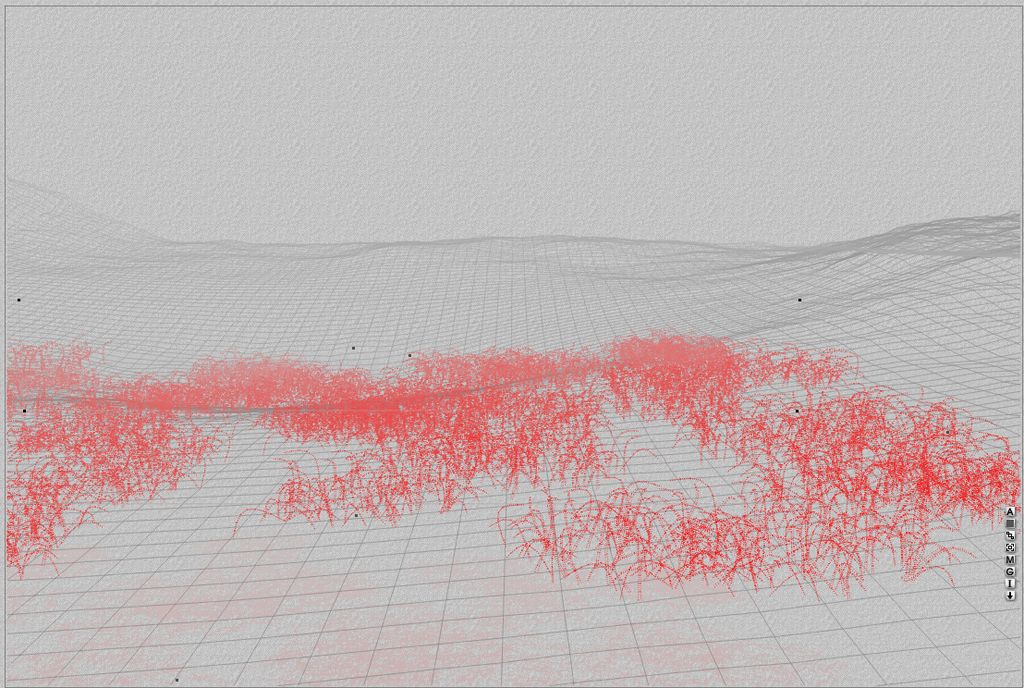
Deselect the terrain and only the grass instances will be selected. Click the down arrow next to the group, to drop the instances to the ground. As before, go into side view (keyboard shortcut 3)
Make sure your instances are on the ground and ungrouped.
Lift the instances above the terrain and click the down arrow next to the group to place them on the terrain.
Step 15
Now that your grass has been placed, Group it so you can easily select the group later. Next, click again on the Solo Selection On/Off button to unhide the hidden objects.
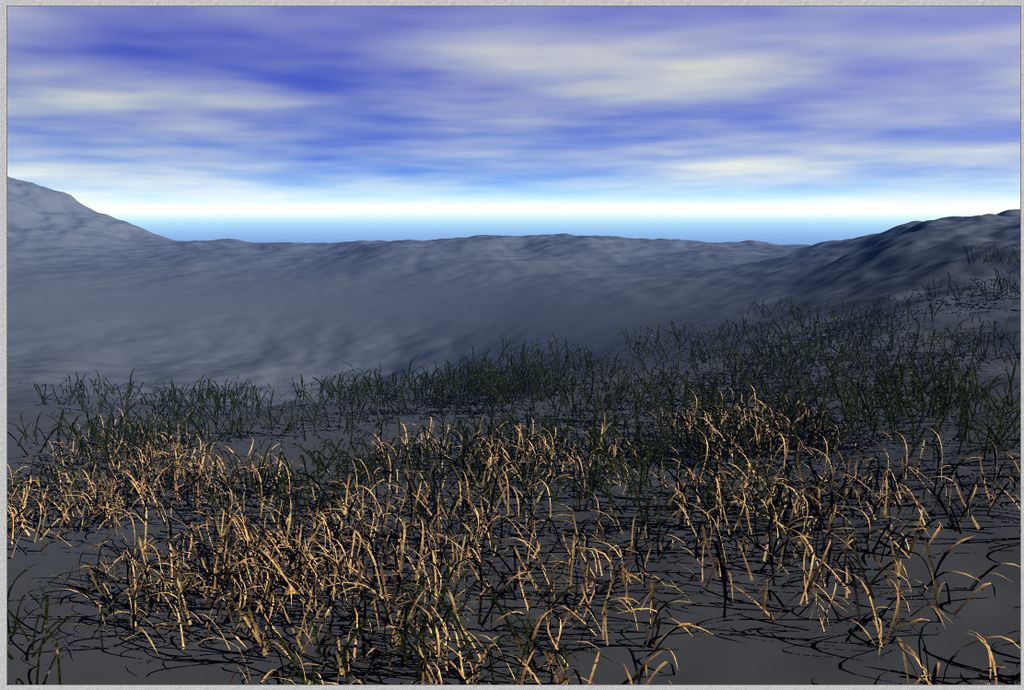
Continue doing the steps above until your landscape is populated with grass (or trees, primitives, objects, etc.)
You're finished! How did you do? Here's a final render of what I've done so far.
I hope the tutorial was beneficial and will help you in making more complex scenes. If I wasn't clear about something, please let me know and I'll modify the tutorial accordingly.
Cheers and Happy Bryce-ing!
Art
Daz 3D is part of 
Connect
DAZ Productions, Inc.
7533 S Center View Ct #4664
West Jordan, UT 84084
Licensing Agreement | Terms of Service | Privacy Policy | EULA
© 2026 Daz Productions Inc. All Rights Reserved.
Comments
Nice clear tutorial. There are one or two things I do differently but it is basically the same result.
Thanks, Sandy!
Looks very useful. I do use the instance lab quite a bit. Doesn't give too many trouble, as long as I am patient (very!). But this way, you can place more precisely, I think. Should try it sometimes!
thanks for sharing :)
@Hansmar: Yeah, the Instancing Lab can be a bit buggy, but I'm glad it works for you. Give this method a try sometime.
@Tim: You're welcome.
You're welcome, c-ram! Glad you got a new computer and you've seen an improvement in working with the scenes.
Great tutorial from Fencepost52. Having been visiting these forums for some years and lost many great tutorials with every forum software change, I started to assemble tutorials to a PDF so I have them save on my computers. If the author gives me the permission, I put the PDF up on my website so everyone can get it.
Art generously gave me his permission to publish his work. Here is the link: https://horo.ch/docs/guests/pdf/InstancingWithoutLab.pdf Thank you, Art!
Art - thanks a ton for this tutorial. My first Bryce render for 2016 will be trying this tut.
Horo - thanks for the pdf, downloading it now.
My attempt on Art's tutorial Thanks for a very nice tutorial