Morphs for Indian Bedroom #4
 Catherine3678ab
Posts: 8,556
Catherine3678ab
Posts: 8,556
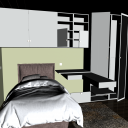
I got this on sale. https://www.daz3d.com/indian-bedroom-4
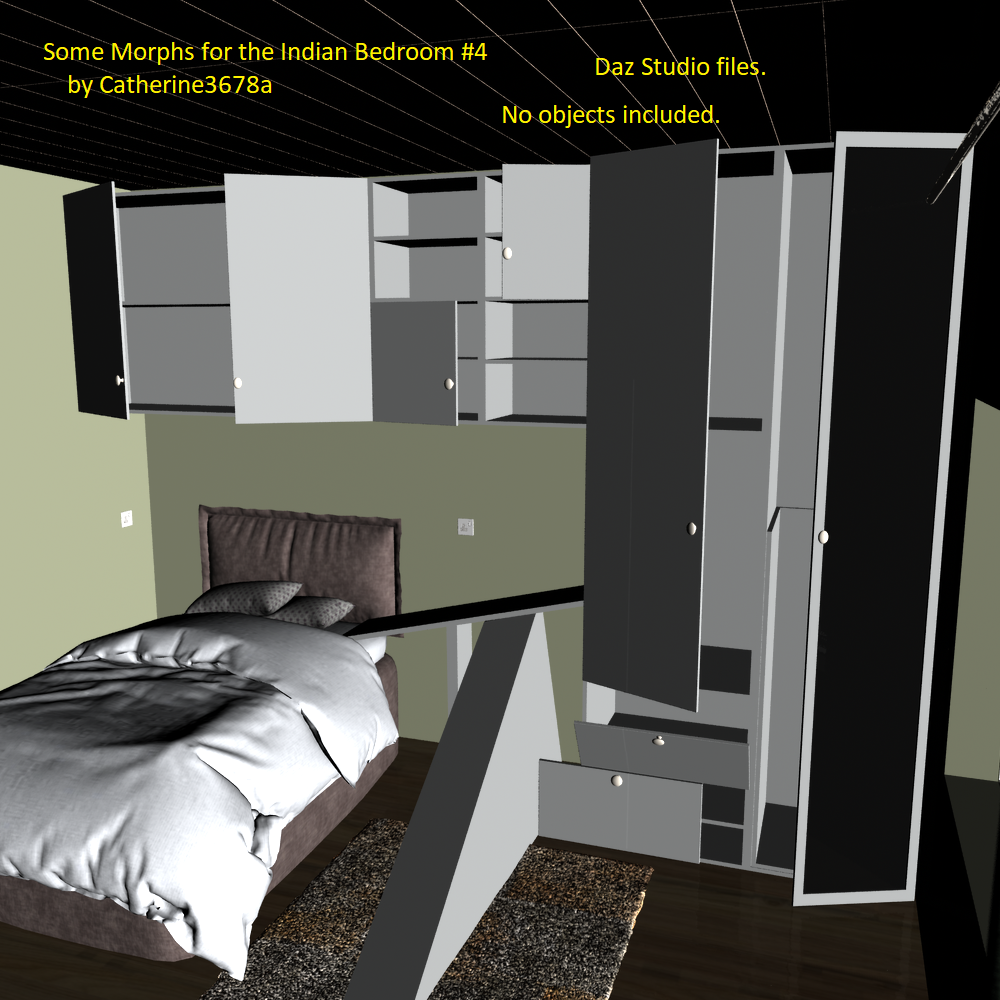
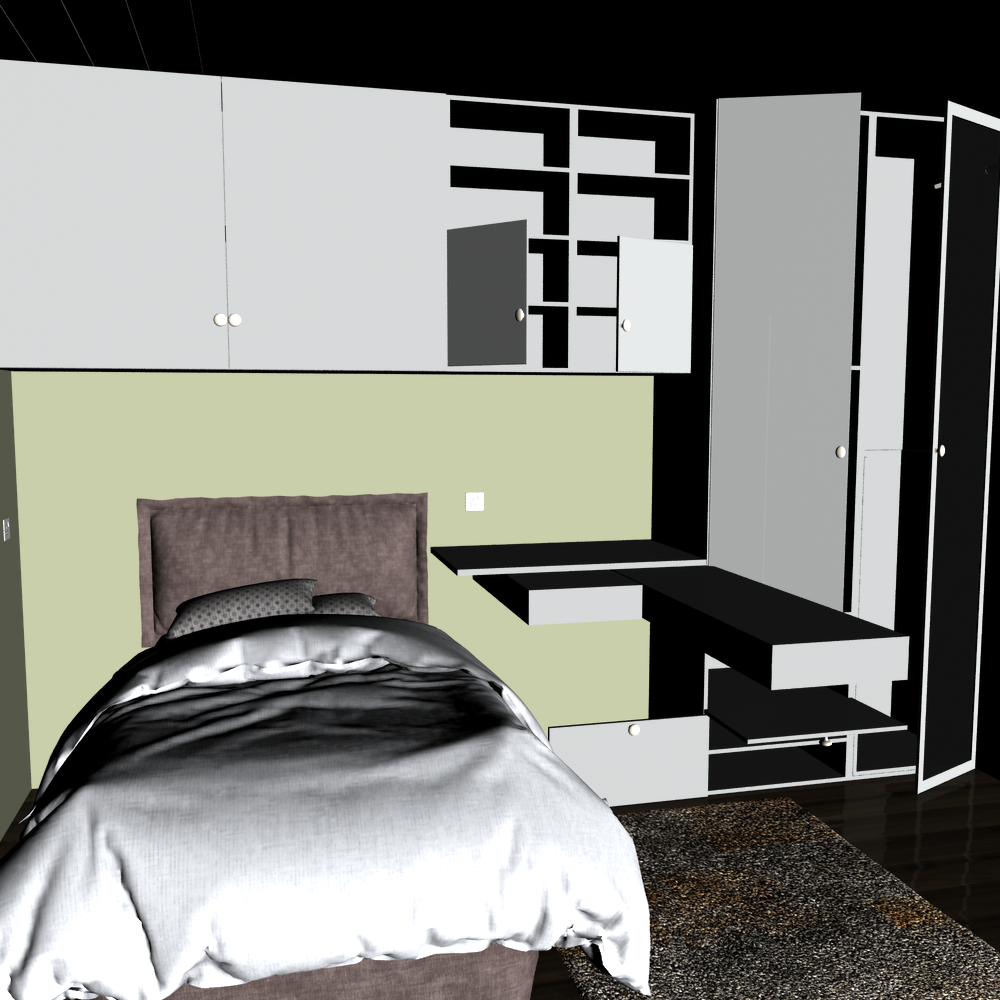
The cabinet is one solid piece BUT was modelled inside so I made some open door morphs. Also made an animal slide for the little runtime critters to have access to the bed.
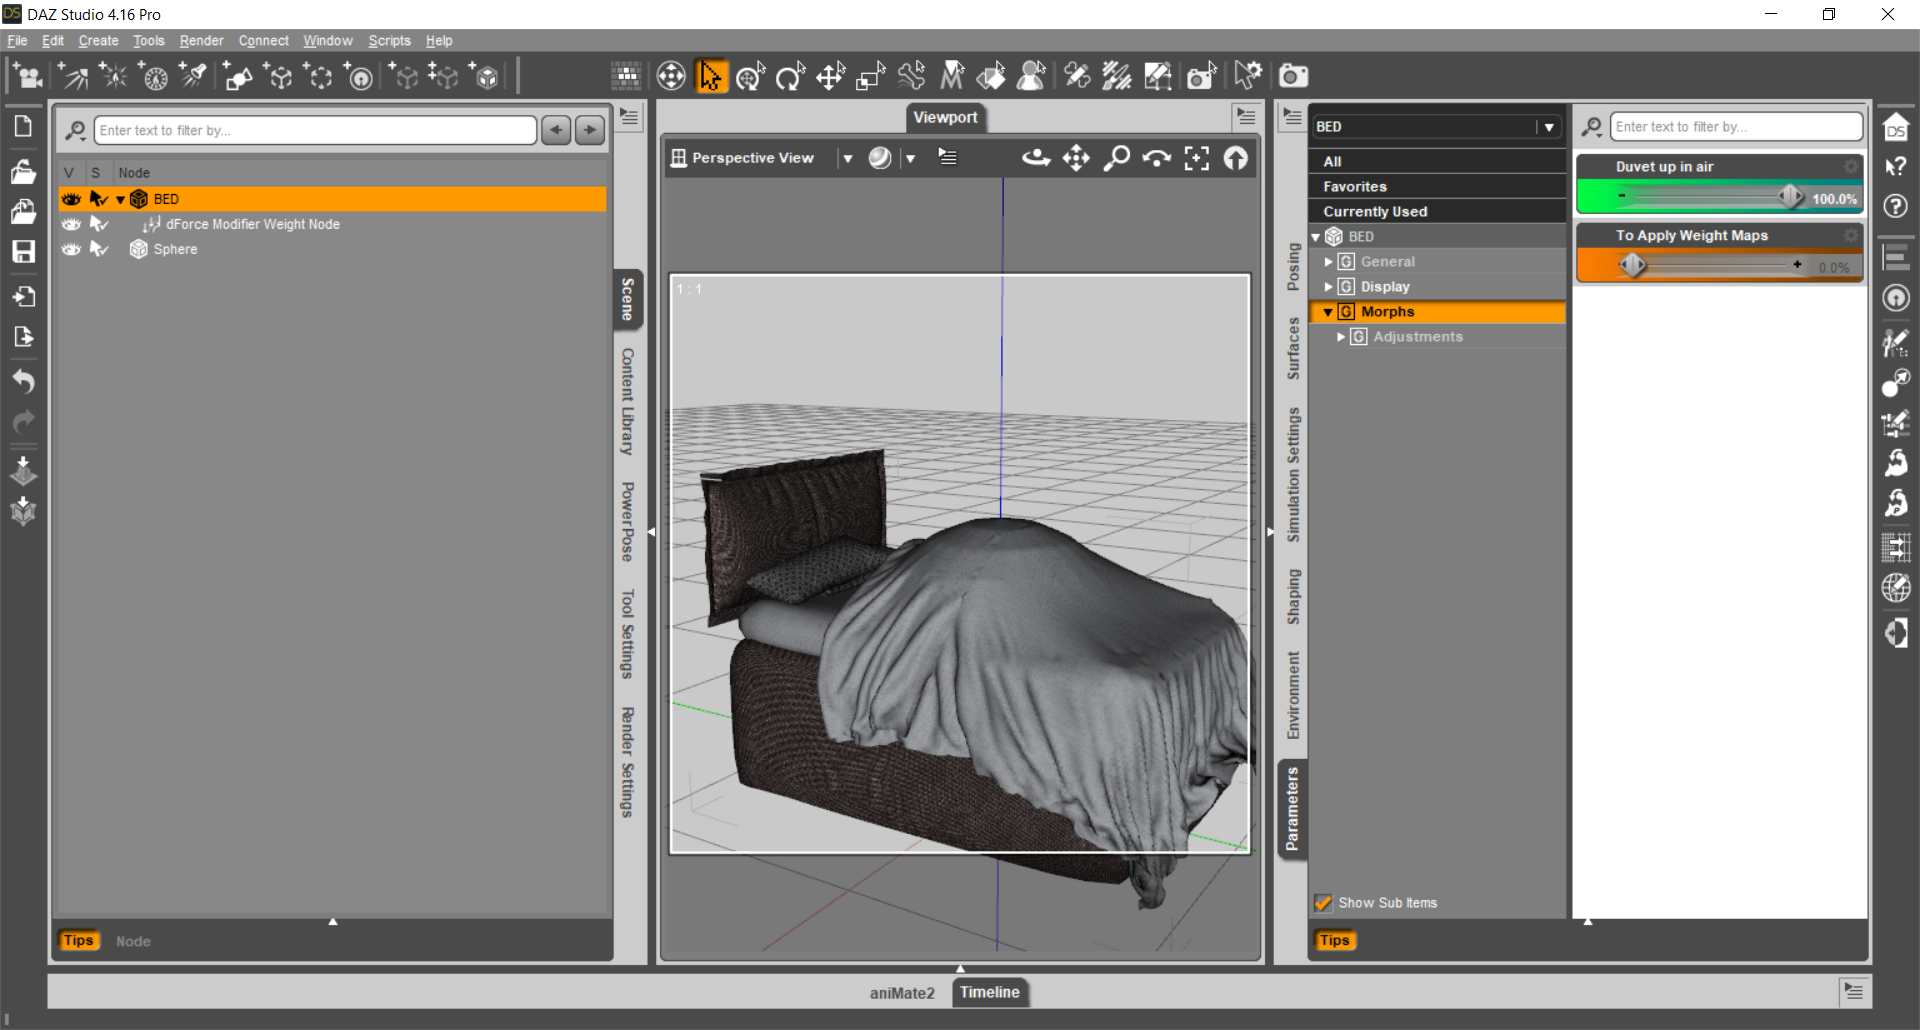
I also made 2 morphs for the bed - which again is one solid item. Guess nobody was expected to be sleeping. Okay, so I made a pull apart morph so one can paint a dForce weight map, then dial that out and dial in some amount of the cover in the air -- then one can use dForce to have the blanket drape over whatever might be in the bed.


Daz 3D is part of 
Connect
DAZ Productions, Inc.
7533 S Center View Ct #4664
West Jordan, UT 84084
Licensing Agreement | Terms of Service | Privacy Policy | EULA
© 2026 Daz Productions Inc. All Rights Reserved.
Comments
Why a sloped animal ramp down towards the bed you ask? Glad you asked! Because Mokey does not walk on its own ;-)
Because these are morphs, I imagine the swinging doors get narrower at slider values less than 100%. Like, for a morph where the 100% value is 90 degrees open, I imagine the door gets it's narrowest at 50%, narrowerd by the square root of 2.
If this is not so, and the swinging doors keep their full width at morph values less than 100%, then you know a secret about making morphs that I would love to know.
Depends upon how the model was created in the first place. For this cabinet, while all the mesh is "one unit" - it is not all physically welded together. {thankfully}
Secrets: {hmm ... what's this worth} hehe
In Hexagon, go to "lines" - select the door you want to do something with, pick lines for the various angles, then "k" "l" "k" or "l" "k" "l" and maybe repeat the pattern one BUT give Hexagon "time" or you will crash it. Then with all the lines selected {including for the door knobs}, go to Selection > change lines to faces. Then MAKE A NEW SHADING DOMAIN for it. {makes life so much easier}
Click in the viewport anywhere, then {main model is still selected} select that new shading domain. Use either "world" or "selected" for the manipulator {whichever one makes sense so you can rotate the door around properly}.
Now, patiently one rotates the door {for eg.} to the desired angle {can toggle transparency and verify that it's more or less even with the unit} and "slide" the door to the proper position for 100% open. You want to use as few steps as possible to get the door into the final position. But do take all the steps necessary to get it placed properly. Check that the door doesn't intersect with the cabinet's walls or other doors, etc. Consider how they would be placed in reality. {if the carpenter bothered to use a level, the walls in this apt are not vertically level but I digress}
Then {with the model ready to receive in D/S} - send the morphed model back over the bridge to D/S {or however it is you want to make morphs} and make the morph.
Check that it works, zero it, save it.
Now, if going to try and do several in one session, options are to apply the full morph in D/S so that it looks just like the model in Hexagon, in Hexagon - hit ACCEPT - then carry on and make the next morph. On return into D/S - be sure to check "reverse deformations."
Alternatively, in D/S you can delete the model {having saved the morph(s)}, load a new one, in Hexagon delete the morphed model, from D/S send over a fresh copy. This is the workflow I chose for these cabinets. Occasionally it is wise to close Hexagon to let it clear its memory ;-)
I don't see anything in what you described that would prevent the narrowing of the swinging doors. But it is possible that your method does in fact prevent it. I can't test the results of your method because I don't have the Indian Bedroom product.
In the promo pictures you provide, it does look like the swinging doors are narrower in mid swing.
But it is cool that users of the product can now open that cabinet and show stuff inside them.
No, I think that's shadow, bad lighting and that camera was putting the scene in some kind of fishlens or something. But, one cannot hide "one" wall, 'cause that's all one mesh too.
Wasn't going to spend hours trying to figure out how to light this box. Set comes with several cameras.
For your enlightenment, I don't use a protractor to figure out what morphs do.
Here are a couple of images. If you don't like morph opening doors, feel free to learn how to rig them. This set could be rigged but then not shared. So I went with morphs.
I can see the narrowing of one of those cabinet doors in one of these pictures.
But that's probably just fine for many folks.
It's a shame we can't freely distribute a rigged version if we make one ourselves.
But I wonder whether we can give such a rigged version to the originating P.A. and let them turn around and offer it in an update that all the customers can get through the Daz update process.
Rigging the work of any PA for them to redistribute would be between the PA and whoever really wants to do that. And then whether that all as a set is still going to pass QC. It's one thing to put a bone on a door and relabel a dial to open/close. It can be quite something more of challenge to meet professional standards.
Treasure your eyesight, to my eyes [I do have impaired vision] I see very little difference in thinness - the door is shorter at the half-way mark. And the knob is also squished abit. So put the model's hand over the knob like they're opening the door and not likely many people would even notice. They tend to seek out "what hair" was that lol ...
Lukon,
You can rig it yourself, just can't distribute it. Basic rigging is not too hard, I ended up rigging my little jewellery box hinge using the tutorial here: https://www.daz3d.com/forums/discussion/156776/how-to-rig-a-prop-cabinet-doors/p1. Personally I use my modeller to create facet groups which makes selection of items for the bones by DAZ rather easier than the way described by RGcincy in that tutorial.
Regards,
Richard.
Thanks, Richard. I already have some experience with rigging, as I have now made a few models in Blender and rigged them in Daz Srudio. I learned the process form some other tutorial by Sickleyield.
If I really wanted to rig the cabinets in question here, I would put the cabinet prop in Blender and crerate the vertex groups and so on. But, it so happens I'm not really interested in rigging these cabinets. I don't have the Indian Bedroom product and no plans to get it. I just replied to this post because I was curious whether Catherine had made morphs that swing verticies in an arc, rather than moved verticies in strictly linear paths. I've been working on a project where I would really love to make morphs that swing verticies through an arc. It would solv a lot of problems.
I use the manipulator that has straight lines with an arrow, and the circles for piveting.
What exactly do you mean by "swing verticies in an arc" [picture would be nice]?
.........................
In Hexagon one can change the pivot point and this could make the door open without warping IF the model had been not all "one" as is the case here. In this image I used copy/delete/paste to make the door a separate item. Went to vertices, right-clicked on selected door and set the pivot point to a logical place there so it could be pivoted. For this model, even using the Hexie trick to get all the parts back together as one object did not work for making morphs. And such pivoting is not going to be of any help as rigging in D/S.
btw - for any mesh wherein one might want to change pivot points, it's rather important to have the vertices already in existence. That's one of the reasons I tend to put lines 'round the middle of sections. +
A cabinet set from a different product has working doors and drawers, etc. Every door, drawer, etc. is a separate .obj prop but grouped to nulls. So these doors, drawers, etc. all can be opened without warping and without requiring bones for rigging.