Grainy Iray Render - Urban Vyria
 hjake
Posts: 1,334
hjake
Posts: 1,334
The scene and the model look grainy like an old photograph taken in low light.
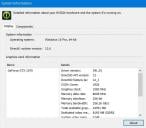
I have attached all the information I could think of to provide on what I have done. I realize/suspect the problem is lights setup and render settings. I have read the forum render tips given and Daz instructions but obviously something is way off.
This basic scene took 8 .5 hours on my system to complete 5% of the render?!?! I know it is the craftsperson not the tools. Unless ofcourse the craftsperson is a tool. :-)
I uploaded the final render and scene file to dropbox for thoughs who have these items and can help. It is about 35 Mb for the 2 files. The render shown in this post is 20% the size of the original.
https://www.dropbox.com/sh/8lix13i0nvsjid5/AAAGASIEYQIXB2RZ2J_NB7q6a?dl=0
Vyria for Arabella 7
http://docs.daz3d.com/doku.php/public/read_me/index/23106/start
Bronwyn Hair for Genesis 3 & 8 Female(s)
http://docs.daz3d.com/doku.php/public/read_me/index/52339/start
Hongyu's Mini-Dress for Victoria 7
http://docs.daz3d.com/doku.php/public/read_me/index/35037/start
Urban Future 5
http://docs.daz3d.com/doku.php/public/read_me/index/37741/start
(I could not figure out which light set I dragged and dropped into the scene. Three light setup.)
########
Side note, is there a text log file generated after the render which includes render time, iterations, errors, and settings? It would be much better than posting so many screen shots.


Daz 3D is part of 
Connect
DAZ Productions, Inc.
7533 S Center View Ct #4664
West Jordan, UT 84084
Licensing Agreement | Terms of Service | Privacy Policy | EULA
© 2026 Daz Productions Inc. All Rights Reserved.
Comments
I don't have Urban City 5 so I've tried to duplicate it with Streets of Venice which is fairly large also. Same character, same hair I think (Bronwyn), default IRay settings and lighthing (DS startup settings) and same size render. Here's how it looks after about 22 minutes / 159 iterations, on a GTX 1070. There's definitely a difference. Click to view full size (5120x2867).
Hm, looks like IE is resizing it to a smaller size, but Chrome shows full size. Otherwise use this link to download:
http://taosoft.dk/temp/venice_vyria.png
More than likely your scene overloaded the GPU memory and dumped down to CPU instead. Urban Future 5 is a fantastic set, but it is a beast of a scene. What I do when I use ones like it is delete anything in the scene (buildings, props, etc) that is not in camera or affecting the lighting, then if it's still too big I run https://www.daz3d.com/scene-optimizer to get it down to a point that will live on my video card. How much VRAM does your GPU have?
Taoz - that looks infinitely better than mine. Skin and background. Could you please provide your render settings so I can determine what I am doing to clobber my card? I am tempted to buy Streets of Venice now.
dragotx - if i understand you correctly, DAZ loads everything into the card memory even if it is not in the viewport? Also when it started rendering is showed loaded textures 1GB and the card has 8GB. I own Scene Optimizer optimizer so now is a good time to learn how to use it.
There are multiple areas that it shows how much memory it's using, and they all add up. And yes, it's my understanding that if it is in the scene, it loads into memory even if it's not on camera. There is also a memory leak where Studio doesn't release memory from the card correctly, so if you've done several renders without closing down Studio, you will wind up overloading the GPU even on a scene that normally would fit. Scene Optimizer is a wonderful utility, I use it quite frequently as I have a nasty habit of overloading my GPU.
thanks for the info drogtx
No special settings, just the default Iray settings that loads when you start DS (I don't know if you can change the defaults, but mine are not). The only thing I've changed is Dome Rotation (set to 90), to position the sunlight.
And I agee with dragotx - yours has probably dropped to CPU with that long rendering time.
i'm on the road for a while so i haven't been able to try your suggestions. thank you for your advice.
The Urban Future 5 set doesn't seem any worse that most large sets. I find forest and jungle scenes to be the worst.
From experience the overall grain goes away fairly quickly. It is the shadow areas that are hardest, especially with many small light sources. In the attacked image there was some grain under the right thigh which I removed in post.
Did you try a render with only the HDRI environment light just to see the effect on the grain?
If nothing else helps, perhaps simply reduce the size of the render.
Wow that is pretty little black dress "smile".
Before I left on my work trip to sunny Wisconsin, I did hide (toggle eye icon off) of all content not in my render and that did help render time. I have a 3 point light setup and the default DAZ Iray dome/scene light. The background looks great and the figure is lees grainy. If I understand you, I should try turning off the 3 lights and see what I get by playing with the intensity of the Iray dome/scene light?
edit: I forgot to mention that I did reset all render settings to default then did what I mentioned above.
Given that the environment intensity in your settings are 9 I am going to guess your character is standing in a shadow of one of the buildings so there is no direct light reaching her. Try moving her out of the shadow, hide the off screen building, or forego the environment lighting and use lights closer to the character that are brighter to illuminate the shot.
I would agree it looks like the figure is entirely in shadow, which could be part of the issue.
Check out this thread:
https://www.daz3d.com/forums/discussion/177156/stonemason-urban-future-5-dark-as-heck#latest
Stonemason posted a link with some presets. I believe, like most of his presets, this uses sun-sky for the lighting rather than HDRI. This makes it easier to do things like add in a camera, have that be selected for teh Sun Node, and then use that to aim so you can get an idea of the direction of the sun and make sure it is hitting your character,
I am not home at the PC I work with so I can not confirm but I believe you are right that she is in the shadow of a structure hence the reason I put a front, shadow side, and back light on her. If I were to turn off world illumination then I wouldn't I have to put lights for all of the background or do I just use a distant light? I am not certain but I think I did hide the building behind the camera.
Does toggling scene visiblity to "hidden" (eye winking) mean that the object no longer renders and has no effect on light calculations?
Yes. The item would be "invisible". If you turn off the Environment light you would need to replace it with something else or do a night scene.
One suggestion is to keep the world light and only use one fairly large mesh light (disk or plane) on the figure. Attached is a quick render with Environment Map and Intensity set to 8 and a single light mesh.
V.W. Singer "and only use one fairly large mesh light (disk or plane) on the figure."
Iray Spotlights have geometry and will work like a photo studio softbox, with the advantage that you can view the scene through them.
The whole "meshlights are better light than spotlights" thing went aay with the advent of Iray.
Whatever rocks your boat. I find that I can do more things with a mesh light than a spot, but that is just me.
thank you fasbike1 and v.w. singer fore your suggestions :-)