Novica & Forum Members Tips & Product Reviews Pt 9
This discussion has been closed.
Daz 3D is part of 
Connect
DAZ Productions, Inc.
7533 S Center View Ct #4664
West Jordan, UT 84084
Licensing Agreement | Terms of Service | Privacy Policy | EULA
© 2026 Daz Productions Inc. All Rights Reserved.
Comments
I made a few changes to the tips for that: so if you copied/pasted the tips, you might want to use the new one. I also made it a new paragraph on how to name them, so it's easier to read. And I added at the top that the V4 product was sold at Rendo. You're not going to be the only one wondering how I did that. :) I also put a link in my sig for for the tips. Can't guarantee it will always be there, but for the foreseeable future, it will be.
So now you have your morphs. Load up your target figure (the figure you're putting this on, such as Genesis 3) and now to apply those morphs, using the Shaping pane. Find them fast.
9.) Make sure you have Genesis 3 or your target selected in the Scene. Then choose it in the Shaping pane. Your morphs will then be > Actor > Generation X
10.) And also in the Shaping pane, the head will be: Genesis 3 Female (whatever your target is) > Head > Generation X> VIctoria 4 (whatever your source was)
Keeping in the spirit of this thread's title of "...members tips" there's a great thread going on over in teh commons about features in DS that you might not know about.
https://www.daz3d.com/forums/discussion/185056/features-that-you-could-slap-yourself-for-not-figuring-out-sooner/p1
The BIGGEST tip I read there that has absolutely blown my mind is the Align Tool, that I never knew existed.
Trying to put a cup on a table correctly? Tearing your hair out changing the x, y and z parameters? The align tool will do it automatically.
https://www.daz3d.com/forums/discussion/comment/2665651/#Comment_2665651
cypherfox explains it simply in his/her comment there. To me, it's the greatest thing since sliced bread. LOL.
I remember from five years ago, I mentioned that if you select a light in Scene and in the view dropdown out in the viewport, it became the light and you weren't just using a view anymore, you were directing the light, and someone who had years more experience (YEARS, and well known) said (seriously- they meant it) "OMG, I didn't know that!" We both laughed about it.
The biggest tip I got recently (that I already mentioned) is when rendering, there's that little, teeny tiny slit of a button on the render popup window, on the left, that will let you open the render settings and make certain on-the-fly changes. Grrrrr. I can't tell you how many times I've stopped a render to tweak it when now I know I didn't have to.
I haven't gone to that thread to check out that post, but if it's what I'm thinking, we did cover that a long time ago so it's buried in a thread. But I completely forgot about it! So thanks for mentioning it. I used it on glassware, I remember it because it made it SO much easier when dealing with see through stuff and getting it right on a surface.
Edit- nope, this is something different- there was an actual script we had to download. Wonder if Daz got permission to put it in the studio? There were actually three scripts, but I can't remember the other two-
Well, here's another tip, since we're speaking of those.
Another fun one is Vignetting in Tone Mapping. It not only does edges darker, but it fades toward the center as you increase it. Because it's dark, it will change your character's skin tones. In reverse- Going negative lightens your image! I'll do one of those (the first image shown) then the default, then darken.
Shown at -23, where the image is LIGHTENED. Next, Zero- the default, then it darkens with 50, 100, then 130, 150, then 200. And you can go even further. Note she is in a rectangular setup, doing a square render will get you beautiful, symmetrical corners which darken/lighten.
I didn't do any postwork tweaking on shadows, midtones, contrast- so you can see it out of the box. Open new windows and click back and forth to see the changes in motion. Rather fun.
First the lightened (-23) Vignetting then the original, no Vignette. See how the negative lightened the render? (and remember, with that little rectangle in the middle of the left side of the render popup window (which opens Render Settings), you can adjust things on the fly. INCLUDING VIGNETTING. So you can actually lighten your image this way too, from the corners toward the middle, during your render.
Keep in mind again, this is a rectangular setup, the corner/ fade in effect will be different with a square.

Vignetting 100 and 130
Then 150 and 200, and you could do even more. Very dramatic possibilities.
No, the Align pane was much earlier, I think you're thinking of the scvripts to have multiple instances drop to follow a terrain.
I think you're right. It's been so long, I don't remember.
Makeda needs a bit of help. Here's my post. Looks like the map isn't lined up right with the eyebrow? (I don't know about this kind of stuff.) And the stripes on the hiney- ugh.
Edit- and the link is Makeda but the image says Makada. SIGH. COME ON DAZ! This poor vendor!
AND in the gallery the product name is wrong. It's NOT Makeda! So whoever did the web link also did the gallery title? Screwed it up twice. OR the person who did the promo art spelled it wrong. Wonder which one is right?
I don't remember to visit the Platinum Club threads very often- if you haven't, you might read up on the 99 cent promotion change (in the newsletters.) They are changing the discounts starting next week.
FW Alfred HD for Michael 6 is like that, sort of. All the promo stuff says Alfred, but the product uses Aelfred in various places, including on the icon to load the character! LOL
I hate typos like that. I report them when I find them but this makes me think they need a better editor.
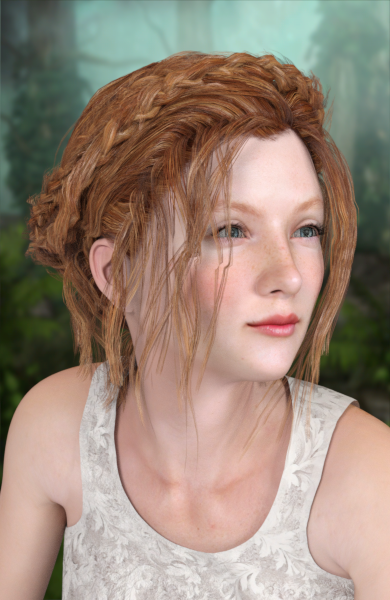
Quickly throwing this in here before I run off to work. Sayaness' Benita.
I added this to the GenX2 tips post (in my signature)
I did a head and body separate, but the body is moving the head morphs, so I am going to redo it. Oh, the hunt for the morphs. You apparently can do it with the morphs tab in GenX, but I was curious where the files were and this was just easy. So this will save you about ten minutes of looking it up, if you're not good with files. Or just being me on any given day. So this is what I added:
EDIT: This will also help you- Let's say you messed up and want to delete the morphs. I didn't try the morphs tab, I used (and this is when transferring a V4 onto a G3F)
Content > Data > Daz 3D (note the space) > Genesis 3 > Female > Morphs > D3D Gen X > Victoria 4
I'm having an equal mix of "aha got it tackled" and "um, what happened there?" When I save a character preset, it's not saving to the folder I created, even when going out and coming back in to the studio. And instead of screenshots, it's black, so I assume it's the headlamp turned off or something.
Anyway, I looked up saving multiple materials at a time, am I missing something on that front? Because all these Gex2'd characters (the morphs) won't look good with just one set of material options. I didn't see a product for doing that and don't remember one. But here's a Rendo gal named Astrid, showing you a few of the Pro-Studio lights. I'm liking my older content. This is a V4 with the iray converter I've been using. These lights had a bit of rosey color so her hue is more red than normal.
One thing to note- if you want a GREAT hat, get the Casual Style Female outfit. You don't need a hat helper or anything else with this hat! It widens, tips, tilts, flattens, raises- any way you want to go. The visor extends, shortens...you get the idea! Hair is Katharina.
I've been playing with dynamics. It seems to have really petered out, haven't seen a new dynamic outfit for G3 in ages. But thanks to seeing Valzheimer use a dynamic dress on G3 the other day and chatting with her, I decided to dust off the old dynamic control and give it a go. I didn't realize that V4 dynamic outfits would fit on G3 quite well. This is the "Twiggy Dress" for V4, which is a freebie over at optitex's site. The texture is from a paisly pattern that I bought at rendo a long time ago - a retro pack with patterns and pngs and stuff. All I did was select the dress in the surface tab (all its parts) then went to the base colour and hit 'browse' and just selected my paisly pattern. Then I irayed it - just the default iray shader, if I'd played a bit more I probably could have got it looking better. I was really quite pleased how easy it was to get the V4 dress looking good on G3! Just chose what it collided with, then hit 'drape'...and it finished quite fast. I pose the G3 first, before loading the dress. I think I might have to go back through the small amount of dynamic products I bought and have a play!
click for larger version.
Oooh, it does look good! I have alot of dynamic stuff and haven't touched it. Only so many hours in the day :( but your outfit looks stellar- love the pose you put with it- groovy, baby!
@isidorn Benita has so much character- really like her. Your lighting brought out the features of the face quite nicely.
BTW, Fast Grab has some fun stuff- Mosquito, with shaders, can look spectacular. Think of those ceramic shaders, or metallics. And I had wishlisted Baroness Hair so already scooped that up.
I have spent the last few days playing with morph transfers to G8F. Here is my latest young lady: the G8F Base figure with a mish-mash of morphs ported from G3F and G2F (via GenX2 first) using Redz morph transfer method.
I gave her the P3D Emi skin texture, Adell Hair for G3F (picked up in in Fastgrab yesterday - parented, then retextured with Slosh's UHT2 shaders) and Arki's CallaSuit for G3F (autofit plus tweaks), then lit her with J.Cade's Painter's Lights (still a favourite light set for me).
She is lovely!
This is my first morph transfer, Aliya for V4. She is using a G3F texture as I haven't had time to try out the skin transfer tool yet. The morph worked perfectly so thank you very much Novica, for the tutorial and pointing me toward that video.
Thank you
Is that the Aliya for V4 by Morris? (https://www.daz3d.com/aliya) Or some other Aliya from another place? If it's the Morris one she does look different with a dark skin. Are you planning to move the textures the hard way or pick up Cayman's UV geograft product for V4 to G8F?
I like what you've done with that shader on the dress too.
Yes it is. I did pick up Caymans UV Product, it was on sale for $12.95 I think. I prefer not to do it the hard way unless I have to lol. And thank you
Did anyone buy Cyber Stealth-BodySuit HD for Genesis 3 Male? I am having some distortions and pokethough and am curious if I'm the only one with these issues.
@melaniel The Painter's Lights look good, I always liked the classic look of the portraits, a subdued glow about them. The Old Masters type of lighting on some of them. The Emi texture looks really nice!
Thanks! That setting is one of the less moody ones (classic I think) as I wasn't going for "atmosphere" so much. I really like the Old Masters ones for "real" renders.
I have it and haven't seen any distortions or pokethrough. Which body parts are poking through?
I mostly see pokethrough of skin through the suit on m7 as well as some weird poochiness for the sides around the abdomen and pecs that stick out.
On a garment that covers almost everything, the easiest way to get rid of poke through is to hide the corresponding bones of the character. You probably already know this, so your problem might be something else.