Pseudo-G2F to G3F conversion (deprecated)
 mtl1
Posts: 1,508
mtl1
Posts: 1,508
August 11, 2017: Deprecated. New (similar) method coming out soon
Oct 7: Tutorial is complete! Please refer to the PDF...
Oct 9: Complete Conversion coming...
--------------------------
I've been working on a Pseudo-G2F to G3F conversion freebie-tutorial-thing for the past few days, but it needs critiques and insights before it goes any further.
The method, in short, is extremely simple: export/import a G2F OBJ, (edit) convert OBJ to general weight-map figure (end edit), auto-fit (not transfer utility) onto G3F using G2F/None option, smooth out the corrupted/weird weights at the lips, then hide G2F's eyes, mouth, teeth, and tongue while keeping G3F's equivalent parts.
The result is that G3F 'wears' G2F's skin -- wow, this gives me horror movie chills, just in time for halloween in Oct -- while keeping the original eyes and mouth. G2F will also reasonably follow G3F's morphs, as shown with Aiko 7 below, so there's no need to transfer G3F's morphs onto G2F.
However, there are issues, which will need community development and input:
- I have *no* idea why this works better with OBJ than autofitting G2F directly. Following transforms, weight maps and expressions seem to work much better... but I may have confused a step along the way
- This method is highly dependent on painting skills to fix the mouth/lips rig, and I'm only a beginner-ish level user with the weight-mapping tools in DAZ
- There's some poly corruption at the face, namely near the right side of the mouth -- could be weightmap issues, but it appeared on two different weight-map attempts -- and G2F's inside upper eyelid and lower left eyelash. These issues also disappear if I turn on the headlight of the camera, so perhaps they're stretched polys casting shadows. As well, the tragus of the ear looks a bit off if I turn the camera to a side profile...
- I haven't checked texture stretching either, but I didn't see any from a cursory glance
Hopefully someone out there will have some insights or critiques into this? :) Thanks in advance!


Daz 3D is part of 
Connect
DAZ Productions, Inc.
7533 S Center View Ct #4664
West Jordan, UT 84084
Licensing Agreement | Terms of Service | Privacy Policy | EULA
© 2026 Daz Productions Inc. All Rights Reserved.
Comments
Another quick sample: this time Valoria 7 dialed into G3F while wearing Lilith 6's skin. There's a bit of an issue with the ears as evidenced by this render...
Oh man! If this ends up working well I'm going to be SO HAPPY! I'm keeping an eye on this thread. I hope you can work the bugs out. Sadly, this is completely above my head. lol
It looks pretty low poly - is there a way to increase the poly count? That might get rid of the odd jaggy at the ears.
I'm following this thread too -- I have GenX2 [or whatever it's called these days], but I'd love some more detail about painting weight maps, something I've never figured out.
--MW
Thanks for the comments guys :) I just got hope so now I'm able to run a few more tests.
I'm also trying to work out an alternative method to manually painting weight-maps -- or at least, painting in such a way that doesn't require *too* much subjectiveness.
This gave me an idea on a couple of things, especially the way I set up my original model. I'll see if my hunch is correct very shortly.
Sweet! Welcome home! :D
I hope you're able to get your ideas flowing! :) I'm excited by the possibilities of this!
So a strange confluence of events: I was freaking out earlier this week because I thought that G2F was supposed to load at base resolution. I later found out that, by default, she loads at high resolution with SubD level 1. My previous tests were with G2F at Base resolution, hence @divamakeup 's comment about low resolution.
Thanks to @divamakeup, I realized my mistake and exported G2F as a SubD-1 object, reimported it, and did the same steps above. I also paid more attention to the weightmapping, since there are now more vertices involved.
edit: Notice how the central 'crease' from earlier is gone, and the ears are in much better shape now.
Interestingly enough, a lot of the weight map anomalies can't be found by looking at the weight maps alone. Only poses/expressions can identify these areas. As you can see, this test still needs more work with the odd lip protusions -- and this was after a few expressions already.
Sadly, I did find a bug -- or perhaps a feature? -- within DAZ's weight-map tool. Smoothing operations seem to affect multiple bones instead of the selected bone, which is not the expected behavior and makes this conversion a little time consuming. The bright side is that this is a one-time operation and can be reused later on!
Also @modernwizard , I plan to write up a detailed approach of how I fixed the weight-mapping at the lips. It's not that it's hard, but it's extremely time consuming and requires a few 'tricks'.
Oh wow! That's awesome - it looks So Much Better! This is quite exciting! I hope that the final process won't be TOO hard for newbies like me. :) Because I'm totally going to have to try this (if it's not too hard).
I'm really glad that my comment about the low res was helpful! :)
I really should be going to bed -- I have to be up at 6:30a -- but I found another area that needs fixing. Not entirely surprising considering it's part of G3F's complex face rig.
Also, I've noticed that my G2F "skin" looks like it has ridges on her lips. I wonder if there's a way for me to fix that...
Whoa - weird eye ridges. Hmmm That looks like it's trying to fit a larger number of polys into a smaller area/zone?
Well, it could be a number of things. There was a mini-discussion out on Technical Help about weight map projections, as I mainly believe that it's due to projection issues with G2F fitting onto G3F.
In short: the geometries of the two figures are different, so the weight maps of G3F have to be "approximated" onto G2F. It messes up on certain surfaces for some reason -- some vertices have extremely high/corrupted values while others are simply blank -- such as in the inner lips and now evidently the eye margins.
I have another hypothesis concerning weight/projection maps but I need to work out *how* I'm going to carry out the experiment first...
So, more findings this time around:
- Found a strange occurance with this method and Smile Delight expression dials. They produce the same melty mouth effect from earlier, but it doesn't seem to be caused by the weight maps/rigging. I'm guessing that the product uses G3F-specific morphs, which result in an effect similar to G2F's initial state in this tutorial.
- The small lip ridges and other small 'bumps' caused by mesh distortions (ie. not weight map issues) can be solved by adding mesh smoothing. However, the hidden length influence variable must be adjusted or else it will collide with hidden G3F elements below.
- Weight-mapping anomalies should not be solved using the Smoothing tool. That's because the tool has issues interpretting this mesh, and will send weights across several maps. Unfortunately, smoothing is the only way to remove the 1-weight bugged value -- at least within DAZ.
- The mouth area still has a few issues with certain face shapes, as seen by the 3rd Olympia render below. This is unavoidable due to the two meshes being entirely different. The simple solution is to dial back the morph. Yes, this is quite the limitation.
- If the chosen G2F mat isn't Base Female, you'll have to update the UV. That's a fairly simple process so I'll write that up later as a part of the final tutorial.
- If polys are hidden using the geometry editor, they'll reappear upon reloading the file.
At this point, I can safely say that this method is complete. All that's left to do is to write up the guide for it :)
Awesome work! Thank you for sharing your progress. I've learned a lot.
I'm excited to hear that the method is complete. I'm looking forward to seeing the guide! :)
Well, my guide is a little delayed because of procrastination. However, there's a good reason for this: I've achieved nearly distortion-less conversion with zero jaggies -- my eyes can't see any jaggies, but there may be some hidden somewhere.
Bad news? It involves Blender.
But the good news? It takes less than 5 clicks inside Blender itself, not counting importing/exporting the models.
Please excuse the poor render angles, but I wanted to highlight the important areas.
I'll explain more later once I get more testing done on this :)
Yay! Five clicks in Blender - I think I can handle that (as long as it's a step by step process that a child can do! lol).
The renders look great - I'm not seeing any jaggies or distortion. Awesome work! :D
I'm really looking forward to the guide!
Five clicks in Blender? I can handle that with illustrations! I await further developments eagerly.
--MW
First draft is done!
Are we allowed to attach PDFs here? Let's see...
... and I've already spotted something I should add into the tutorial. It'll make it to the next revision.
edit: To-Do list:
Ohhhh It's here! This is exciting! :D I hope I can do it! :)
I'm working on some art commissions but I'll try and tackle this tutorial as soon as I can. I'm very much looking forward to doing this! :D
Thank you!!
You're very welcome.
For some reason, it doesn't need to use Blender anymore... I don't know why it doesn't need Blender anymore. I'm trying in vain to figure out why but it's also close to 1:30am here.
I quickly redid another conversion, fixing the eyes a little this time: Olympia 6 mats on Olympia 7 100% fully dialed, using 7's eyes and teeth.
There's also another small trick I want to detail in the tutorial, but it'll have to wait until next week since I want to catch up on my marking during our Canadian long weekend...
You don't need Blender anymore? WHA? NICE! Should I wait until next week when you've updated the tutorial or try this version of the tutorial?
Another test render: Aiko 6 skin on Aiko 7 100% dialed, with a classic A6 outfit/hair. No OBJ imports, no smoothing.
I didn't hide G2F's eyes or inner mouth in this case -- eye surfaces didn't have much noticeable corruption, at least from this distance. That, and the mouth is closed.
edit: I've also detailed this in the Technical Help section, but there seems to be a severe bug when trying to autofit (ie. generate a projection map) a clothing item over surfaces that are hidden through the geometry editor. While I'm waiting for confirmation of this bug, I suggest hiding geometry as the last step, after clothing and everything has been set up.
Hmm. Found a way to preserve the eyes. A test-render for Halloween: G3F with Ariadne skin, Aether Outfit, and Terror Eyes.
Those renders look great! I hope to find some time this weekend to do your tutorial. I'm looking forward to seeing if I can get it to work too. :D
Thanks! I played around with a bit more of my findings, and it looks like smoothing modifiers with Generic Smoothing Type and No Collision Item can effectively remove corrupted eye details. I'll need to test more.
Hopefully in the future I'll find a way to fix the teeth as well.
Well, this was unexpected.
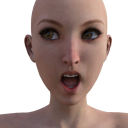
You may be wondering why I am uploading another image of G3F-shaped G2F with her tongue out. That's because I may have achieved total conversion of G2F into G3F -- the test render below uses Base G2F's eyes and mouth! This means no more awkward hiding of eyes and mouth for G2F. :) Blender, unfortunately, is still used, but it's optional at this point unless G2F/G3F is used for portraits and close-ups.
I'll post more later; I have to do more test renders to confirm.
One more: Mst's Trik Or Treat for V4 on G2F on Aiko7/G3F.
Oh wow! That's fantastic news! :D I think I'll wait until you update the tutorial then. :) I'd love to get "total conversion".