-
AOBB's Luminous v4 for G8.1F (aka Audrey Hepburn). No materials nor textures included.
Oh, thank you, BronzeDragon! Both for your praise and the beautiful render you just made!

 It is gorgeous and I like it even more than its first version which was a bit too dark for the luminous Audrey. You are very talented!
I have a morph named "Neck Length" - I think it was among the "200 Plus" set of head morphs and I used it to elongate Audrey's neck. Those morphs round out nicely the base set of morphs. I have plenty of morph packages, because they are very useful to me of course. If you don't plan on going deep into shaping head or body morphs then I would still encourage you to get the 200 Plus morph kits. They aren't an answer to every need but they are indeed very useful...
You did some beautiful work and it made me very happy. Thank you again!
Edit: I have double-checked the "Neck Length" morph - it is in the basic morph package (red sliders) under Actor/Head/Neck. Still, having those 200 Plus morphs won't hurt.

Cheers,
AOBB
New Release: Bringing Daz figures To Life in UE5dave_0aa47f5a80 said:
Ellessarr said:
since we are talking about "geograft elements" any chance for this pluging to fix the issue of "double mesh" from geografts?, it's a really old and annoying issue which when you create a geograft element in daz this generate 2 extra meshes", instead of a single one, it's a old issue which never got worked on the bridge and maybe it could be fixed here
https://www.daz3d.com/forums/discussion/433892/geografts-elements-help
basically when using geograft attachments and exporting to daz you ending get a second copy of the "geograft" which normally comes without any mats, and normally the best way to "maybe fix it would be create a invisible material to make this mesh "hidden", but still a "extra mesh" and extra polygons which the right way to fix would be to "remove it, then any way this tool would find a way to proper fix it and only export "one version" of the tool", like the "right one", because when you export it one of the meshes come "bugged" leaving "holes"(seams) between the geograft and the main mesh, while the other proper attach it without any hole or seamless,
DTL already does this. The first part of the Maya script deletes any 'ghost' geografts leaving the underlying mesh (complete with any merged geografts) intact. This has been tested with a variety of geografts. DTL does not support any sort of colour / effect shells so those are deleted at the same time; so whatever is seen in DazStudio when any shells are hidden / disabled is exactly what is seen when the final fbx is imported into UE.
another thing which i would love to see addressed would be for the geoshell stuff which when exported to the unreal it become a sort of "plain non rigged mesh" like a obj and if you animate the main mesh it will remain in the same place not following the mesh, the "workaround for it normally would be if the geoshell use the same uv as the main mesh like for exemple a underwear geoshell which use the main character body uv as base then you can apply the geoshell direct to the main body material, however the right way would be turn the geoshell into a proper rigged mesh.
and for the last the non rigged props which are attached to the character instead of rigged, you have a workaround inside daz to convert most of then to "rigged" however it not work 100% all times some objects when converted they are moved to a different place like for exemple some "props shoulders" you have one left and one right then when you convert let's say the left instead of it remain in the "left" when you conver it goes to the right like it was just a clone of the right a good way to proper convert those objects to rigged if needed" like some outfits acessories which are supposed to be rigged but are added as props.
another variation for the props are the rigid props or stuffs whcih are "attached" to the outfit or body part which are props which when exported to unreal they fall apart from the main body, would be good see a way to fix it and make then get rigged into they right place.
The geografts I have tested with DTL (various anatomical elements) are merged into a single mesh by the DTL Maya script, along with eyelashes, tears and any clothes / accessories. All morphs (including JCMs) act on this single mesh perfectly. This includes any exported morphs that were specific to geografts or clothes / accessories - e.g. there will be a morph called 'Shirt__ExpandAll' in the list of morphs for the character in UE that will do the exact same thing as it did in DazStudio before the meshes were merged.
The exceptions are meshes attached to rigid follower nodes (e.g. buttons, some jewely) and any other meshes attached to regular joints within the joint hierarchy (e.g. props, some jewelry). DTL keeps both of these separate from the single mesh. As part of the pipeline, I export higher subdivision fbx files to feed into DTU via the DazToUnreal plugin. Some rigid follower nodes seem to get displaced by the DazToUnreal plugin fbx export process, so the DTL Daz script saves their positions when exporting from Daz and repositions them correctly in Maya. Once imported into UE any rigid follower meshes or other embedded meshes display correctly on the DTL figure. The only remaining issue is that they are not affected by JCMs or other morphs.
I'm currently working on a feature that would move rigid follower meshes in the way they should when morphs are applied in UE (e.g. buttons on a shirt move forwards and rotate slightly when the 'heavy' morph is applied). Additionally, some morphs change the regular joints transforms when applied (e.g. facial bone positions change when opening the mouth or character head morphs are applied). These joint position changes would be applied when the morphs are applied in UE. This feature is not planned for the initial release of DTL though, it will be in a later version as it's quite a lot of work and I want to get DTL released asap.
the geoshell i was talking about are products like this one:
https://www.daz3d.com/dforce-wet-and-dry-dark-fantasy-outfit-for-genesis-8-females or this one
https://www.daz3d.com/gloves-and-mitten-fashion-for-genesis-8-females
the geo shell is a sort of "fake mesh" which when exported to unreal it become a "prop" which works like the others props when exported like not being rigged and they can't be turned in a rigged mesh in daz, normally the way to deal with then is use they "texture applied direct to the character in the cases where they use the same uv as the character body part and allow it.
in some cases like this one
https://www.daz3d.com/jepes-body-hair-project-81
use the texture direct to the body mesh is really the right option, like tatoos but some cloths are made in this way and can make those cloths "not proper work since they work in a totally different way in daz.
yeah the rigid follow node is one of the big issue many outfits which have buttoms and others parts "attached aways ending being a issue and being exported as a "prop"(not rigged) to the character and in some cases is hard to make it proper work i really hope it can be fixed on this tool.
still too much time until the tool release????, any estimate date to release like: still this year, or maybe in 3 or 4 months???
Getting on the 9 train, or not
Yeah we all have different needs. Just bought the initial DO morphs, expressions, 'essentials extension' and stopped, AND started converting my G8 characters LOL. G9 could be my closeup goto though.Pendraia said:CHWT said:
Pendraia said:
RAMWolff said:
So with this new mesh set to be "inbetween" folks will be able to make small breasted women, trans folks, little kids and all that with no issues with how the clothing fits. That's the idea any ways. I've read this thread and a couple of others and folks seem so upset that nipples and navels are now just a morph and hi def map. SO WHAT! I think what it boils down to is folks don't like change but are intrigued enough to check it out and then complain about X Y & Z until they get used to the new way! LOL Cracks me up!
Agreed Ram...happens with every new figure.
Whether someone likes a change depends on whether that person thinks the change is good or bad. Just like everyone has the right to say something and we might not like what they say. G9 will always be the apple of some people's eyes...
I don't disagree that everyone has the right to say what they want. I merely said that I find it amusing that this happens everytime there is a new figure. Personally I didn't like it when they went back to separate genders. It stopped me from buying into any generation since to the same degree as I did for V4 and Genesis. I have bought some things but I only bought the rare item that I could either use on other figures or liked enough to fork out cash for it. My buying reduced drastically...Genesis 9 has reversed this trend somewhat. I don't know that I would call G9 the apple of my eye though as I use many figures including older ones like Nursoda's. I've gotten very good at transferring clothing manually where there isn't an autofit clone.
New Release: Bringing Daz figures To Life in UE5Ellessarr said:
since we are talking about "geograft elements" any chance for this pluging to fix the issue of "double mesh" from geografts?, it's a really old and annoying issue which when you create a geograft element in daz this generate 2 extra meshes", instead of a single one, it's a old issue which never got worked on the bridge and maybe it could be fixed here
https://www.daz3d.com/forums/discussion/433892/geografts-elements-help
basically when using geograft attachments and exporting to daz you ending get a second copy of the "geograft" which normally comes without any mats, and normally the best way to "maybe fix it would be create a invisible material to make this mesh "hidden", but still a "extra mesh" and extra polygons which the right way to fix would be to "remove it, then any way this tool would find a way to proper fix it and only export "one version" of the tool", like the "right one", because when you export it one of the meshes come "bugged" leaving "holes"(seams) between the geograft and the main mesh, while the other proper attach it without any hole or seamless,
DTL already does this. The first part of the Maya script deletes any 'ghost' geografts leaving the underlying mesh (complete with any merged geografts) intact. This has been tested with a variety of geografts. DTL does not support any sort of colour / effect shells so those are deleted at the same time; so whatever is seen in DazStudio when any shells are hidden / disabled is exactly what is seen when the final fbx is imported into UE.
another thing which i would love to see addressed would be for the geoshell stuff which when exported to the unreal it become a sort of "plain non rigged mesh" like a obj and if you animate the main mesh it will remain in the same place not following the mesh, the "workaround for it normally would be if the geoshell use the same uv as the main mesh like for exemple a underwear geoshell which use the main character body uv as base then you can apply the geoshell direct to the main body material, however the right way would be turn the geoshell into a proper rigged mesh.
and for the last the non rigged props which are attached to the character instead of rigged, you have a workaround inside daz to convert most of then to "rigged" however it not work 100% all times some objects when converted they are moved to a different place like for exemple some "props shoulders" you have one left and one right then when you convert let's say the left instead of it remain in the "left" when you conver it goes to the right like it was just a clone of the right a good way to proper convert those objects to rigged if needed" like some outfits acessories which are supposed to be rigged but are added as props.
another variation for the props are the rigid props or stuffs whcih are "attached" to the outfit or body part which are props which when exported to unreal they fall apart from the main body, would be good see a way to fix it and make then get rigged into they right place.
The geografts I have tested with DTL (various anatomical elements) are merged into a single mesh by the DTL Maya script, along with eyelashes, tears and any clothes / accessories. All morphs (including JCMs) act on this single mesh perfectly. This includes any exported morphs that were specific to geografts or clothes / accessories - e.g. there will be a morph called 'Shirt__ExpandAll' in the list of morphs for the character in UE that will do the exact same thing as it did in DazStudio before the meshes were merged.
The exceptions are meshes attached to rigid follower nodes (e.g. buttons, some jewely) and any other meshes attached to regular joints within the joint hierarchy (e.g. props, some jewelry). DTL keeps both of these separate from the single mesh. As part of the pipeline, I export higher subdivision fbx files to feed into DTU via the DazToUnreal plugin. Some rigid follower nodes seem to get displaced by the DazToUnreal plugin fbx export process, so the DTL Daz script saves their positions when exporting from Daz and repositions them correctly in Maya. Once imported into UE any rigid follower meshes or other embedded meshes display correctly on the DTL figure. The only remaining issue is that they are not affected by JCMs or other morphs.
I'm currently working on a feature that would move rigid follower meshes in the way they should when morphs are applied in UE (e.g. buttons on a shirt move forwards and rotate slightly when the 'heavy' morph is applied). Additionally, some morphs change the regular joints transforms when applied (e.g. facial bone positions change when opening the mouth or character head morphs are applied). These joint position changes would be applied when the morphs are applied in UE. This feature is not planned for the initial release of DTL though, it will be in a later version as it's quite a lot of work and I want to get DTL released asap.
Skin body G8 to G9And therein lies my problem because even with the Genesis 8 Male clone morph dialed up the mouth and eyes don't align well with Genesis 8. Not without some more manipulation. The genitals I did get to align somewhat, but that's a fairly easy map to clean up.
Blender Noobie having issues with morphs (shape keys). Please help?I hope someone can give me some helpful pointers, but I'm running into an issue with the results of several of my morphs not meeting expectations. Before I try to waste my time with going too far forward, I hope someone can help me fix these early efforts.
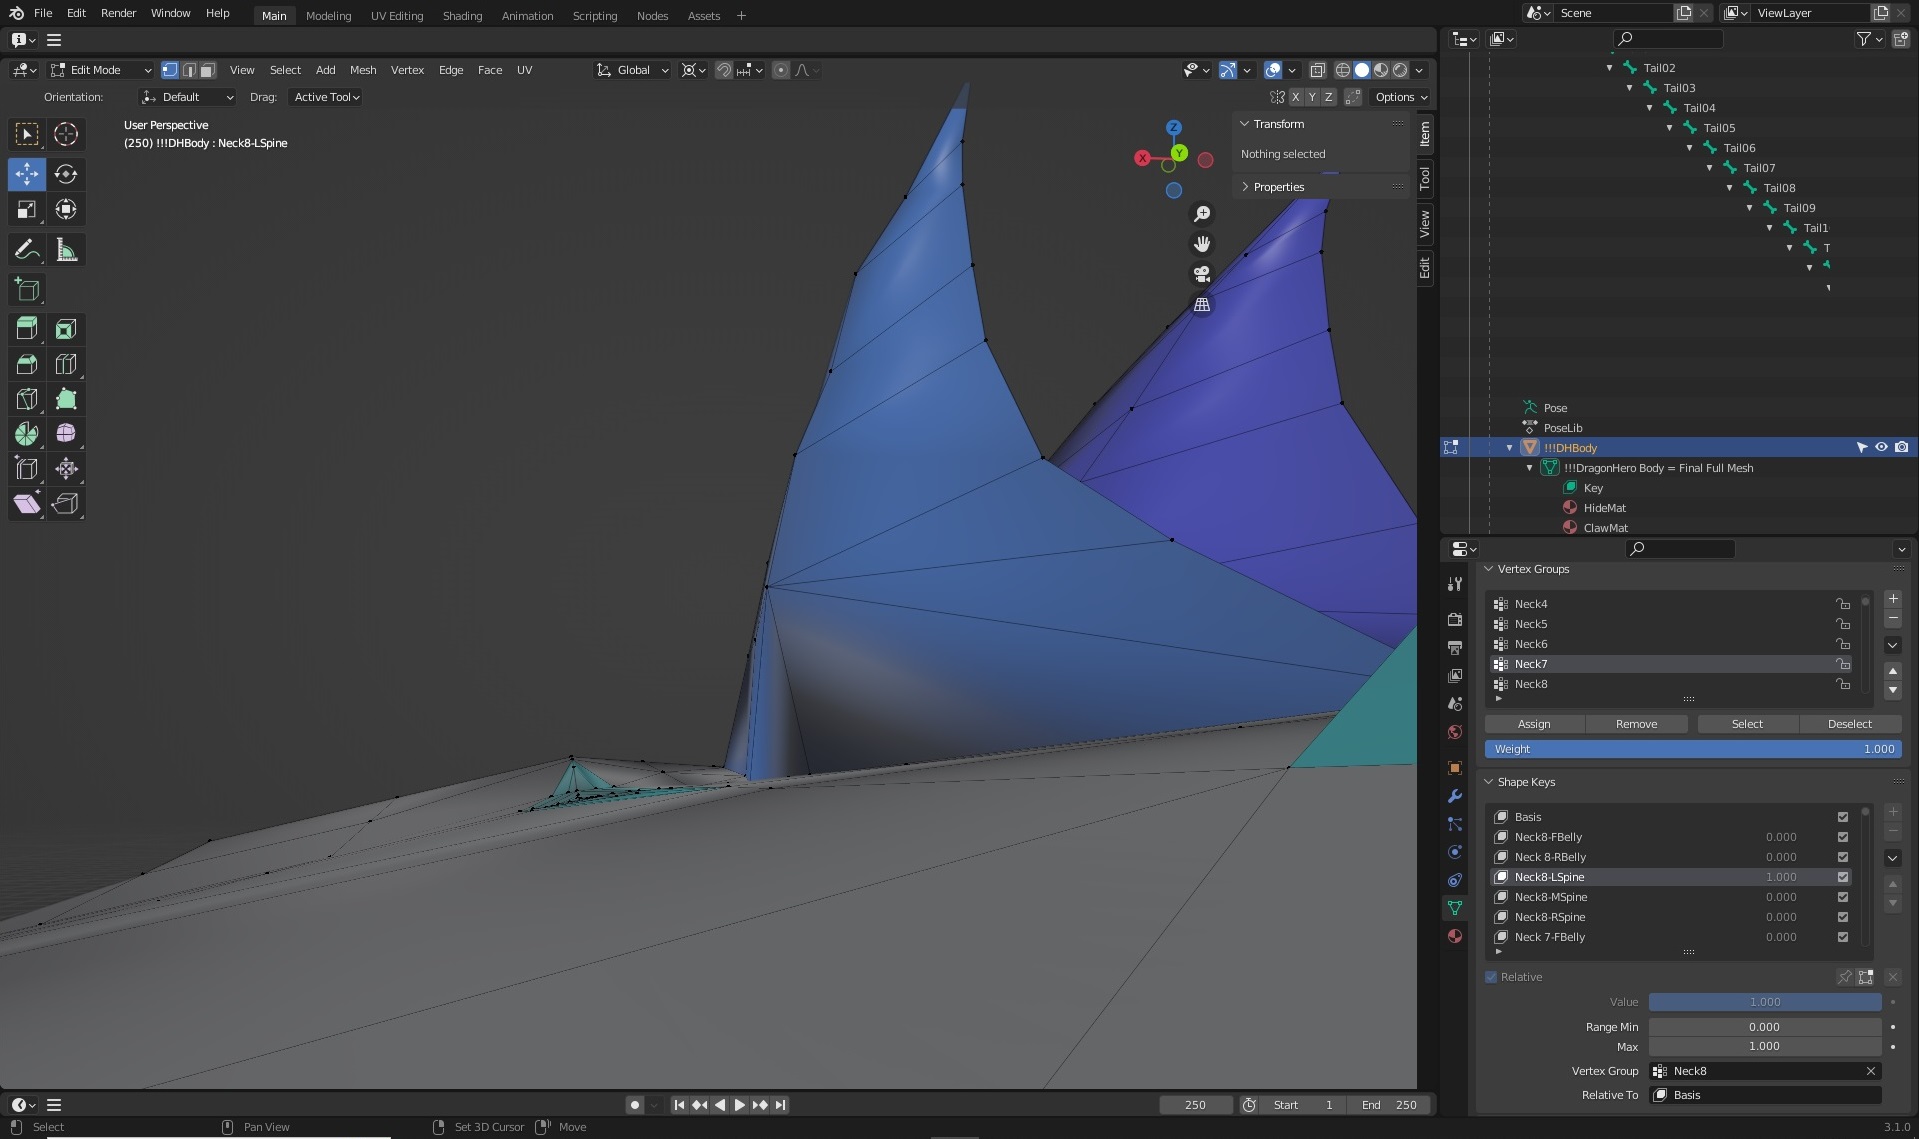
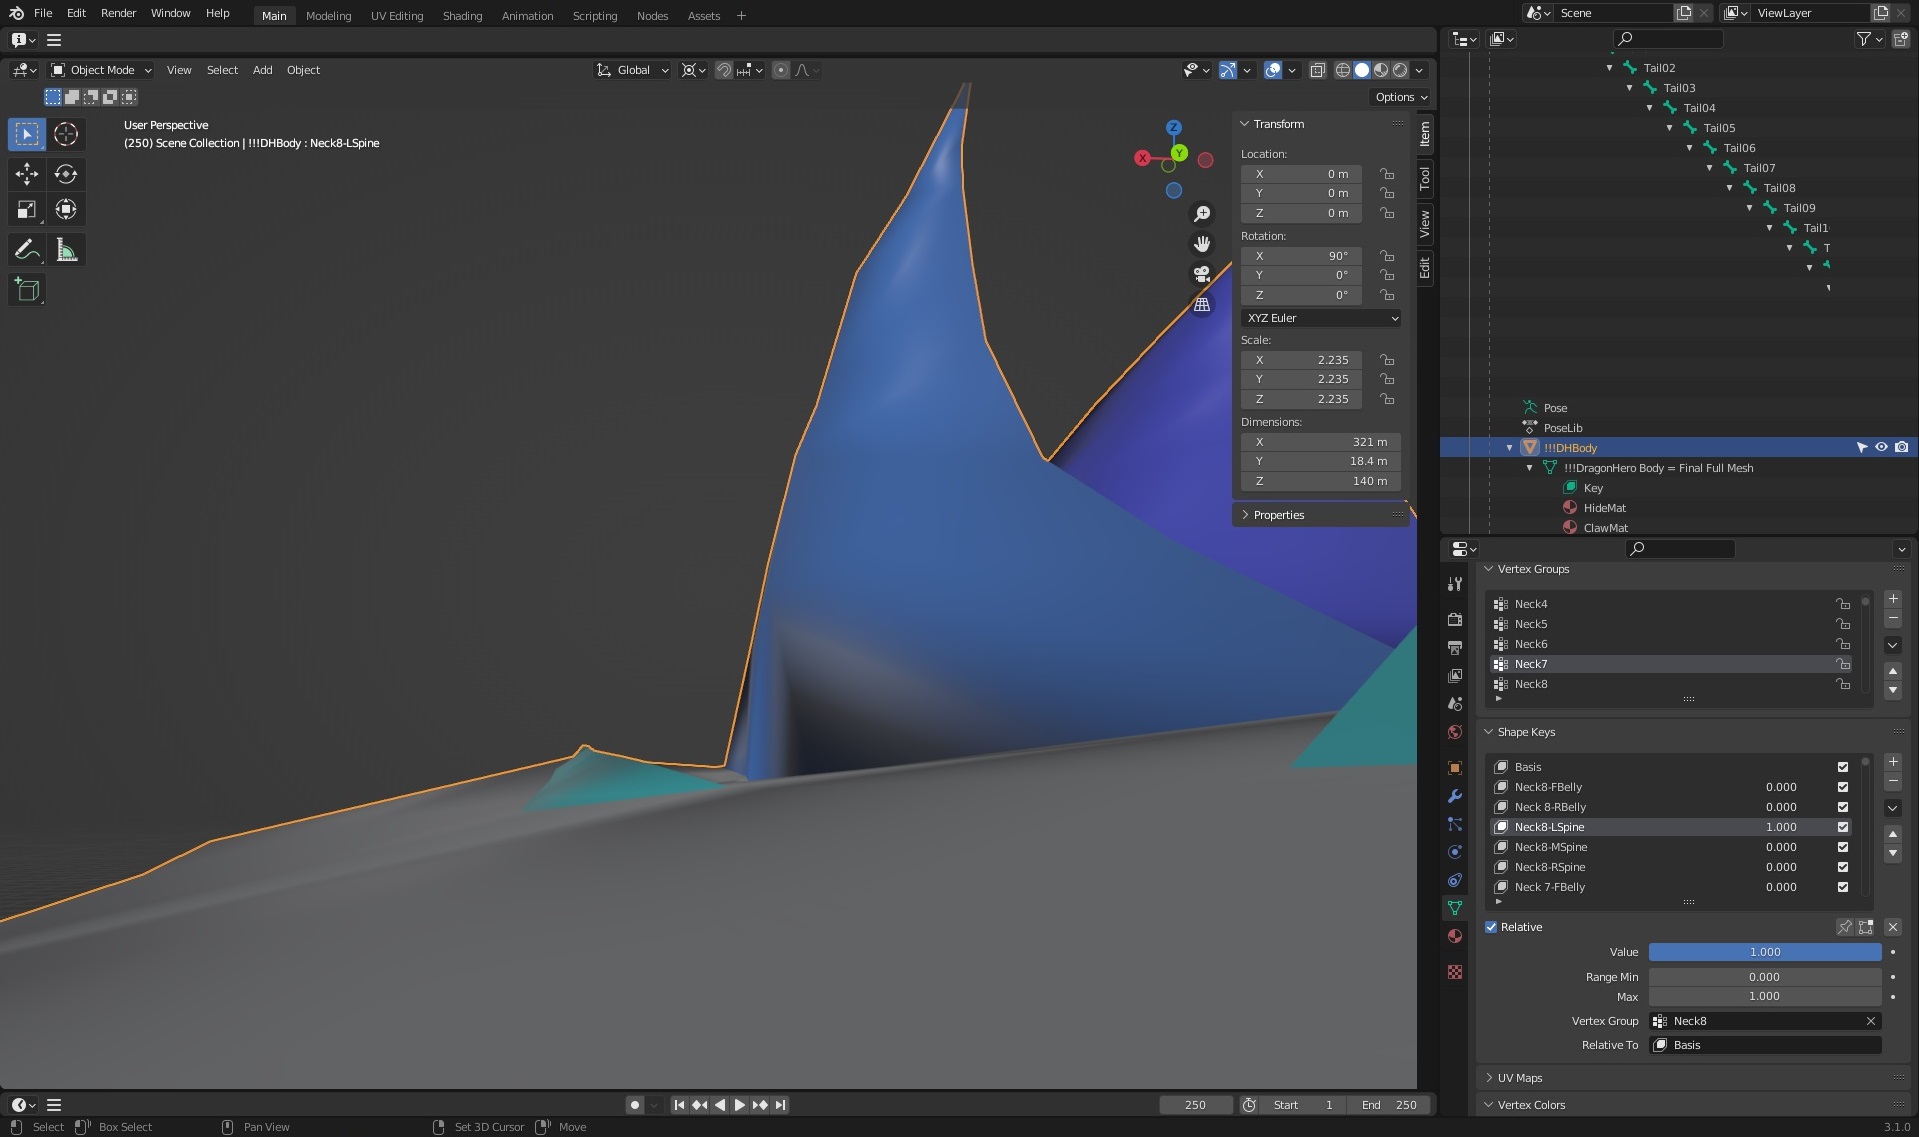
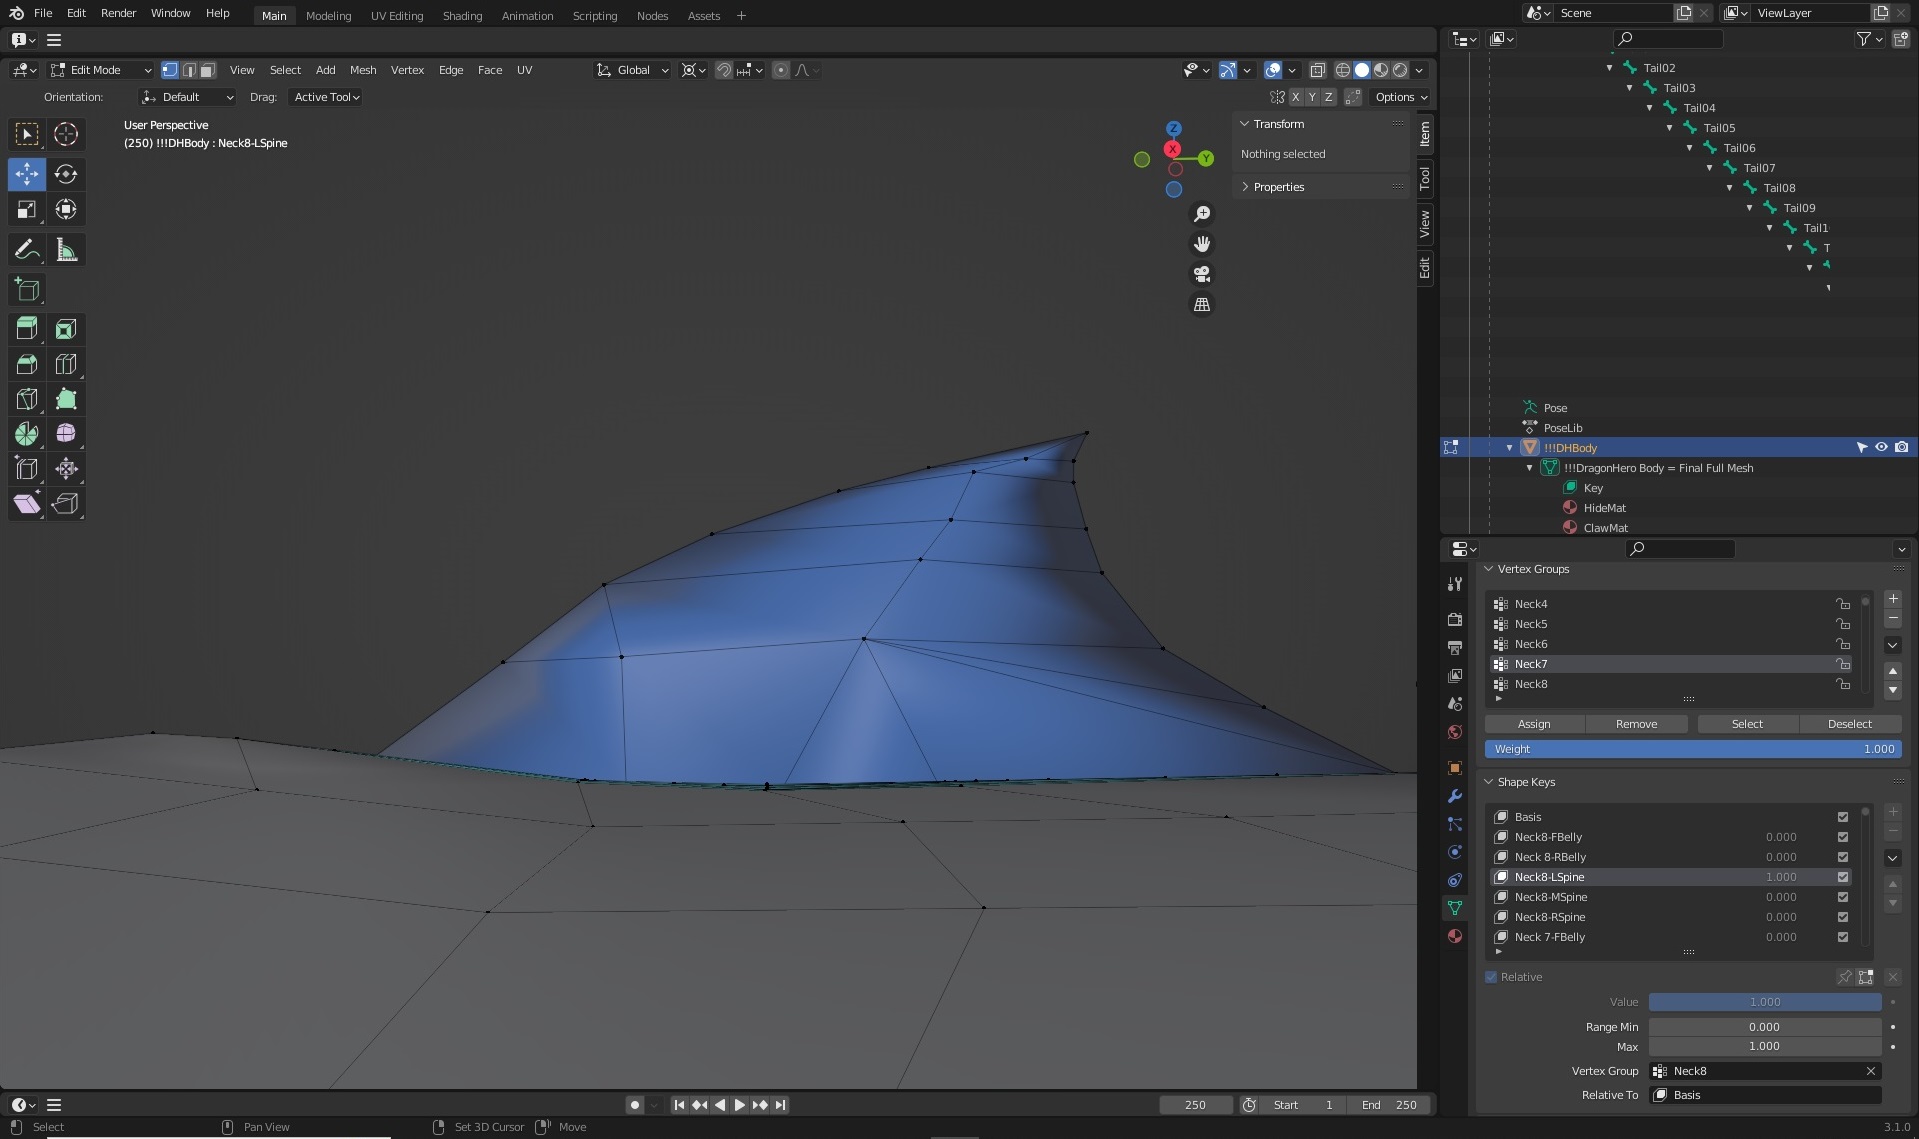
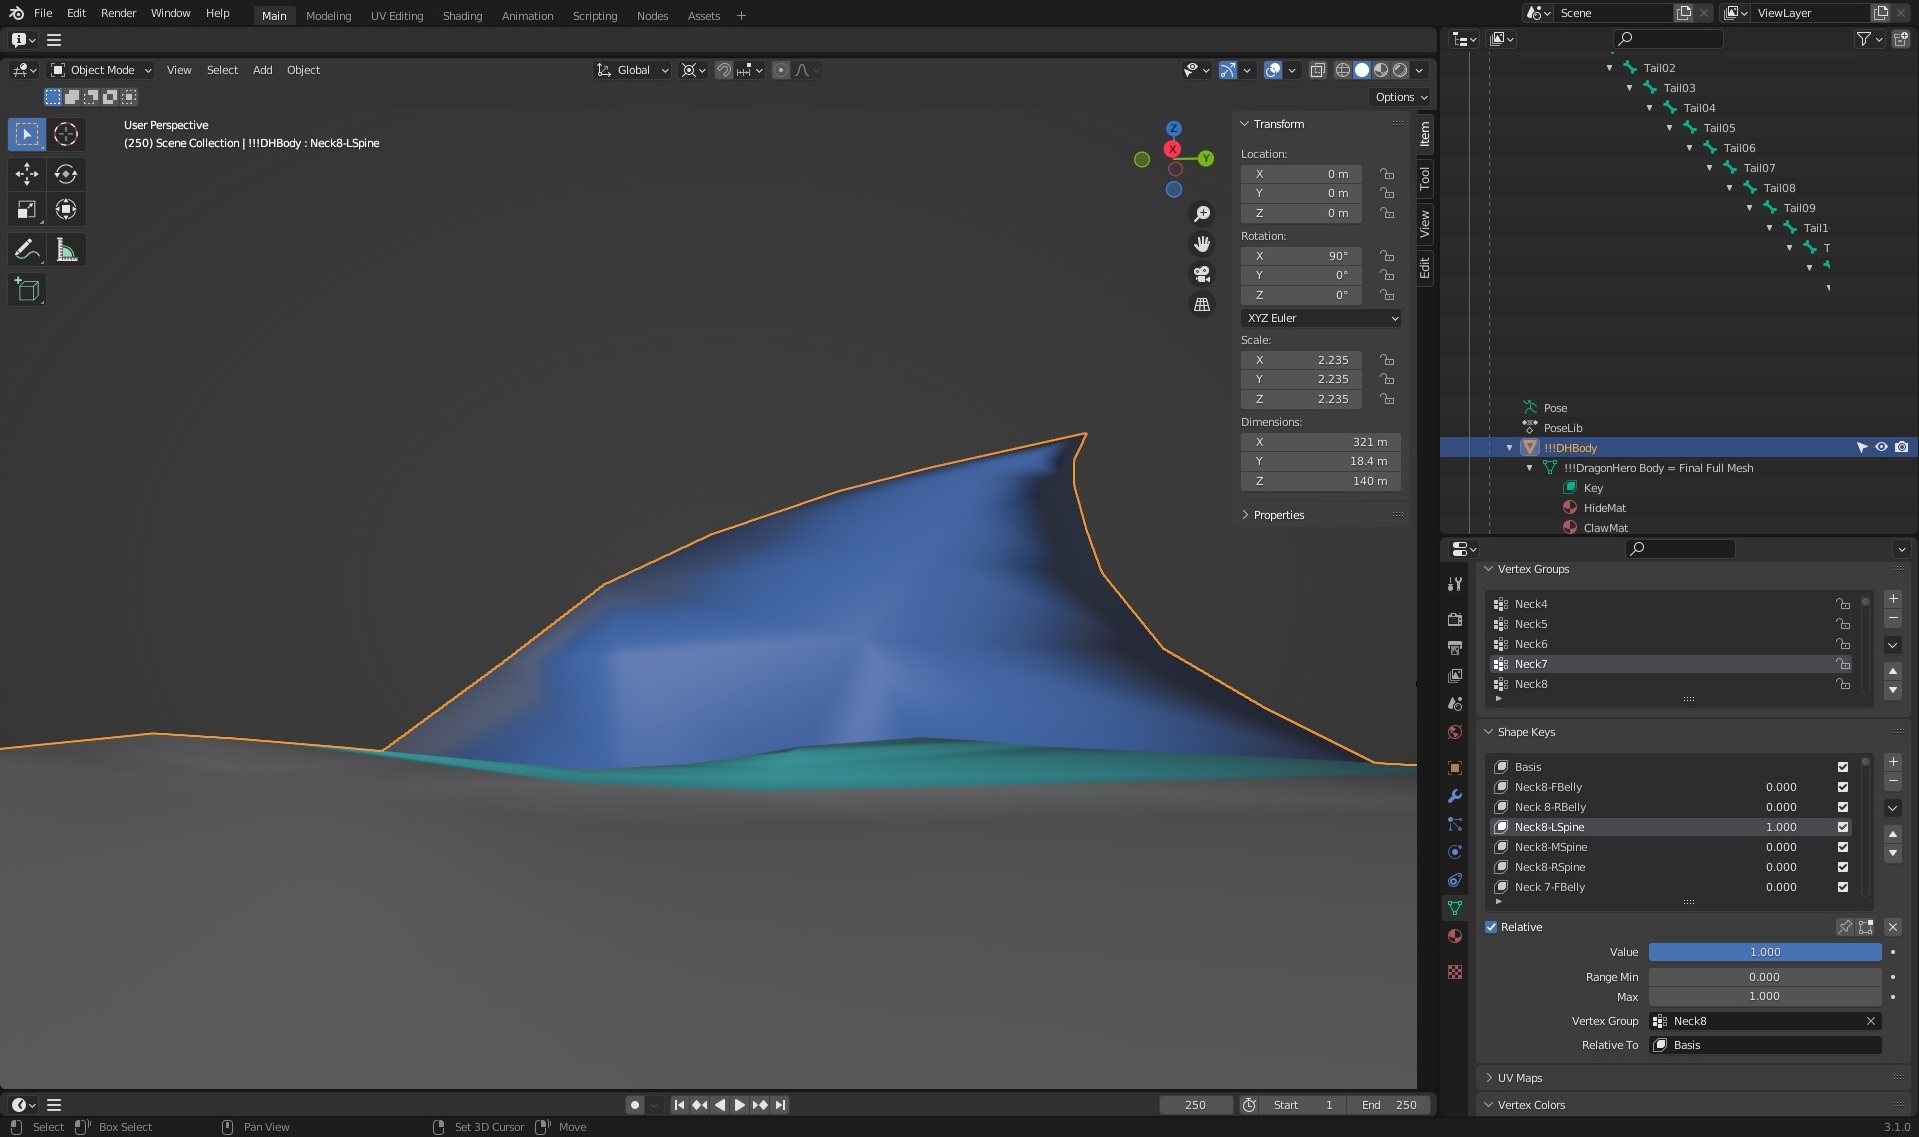
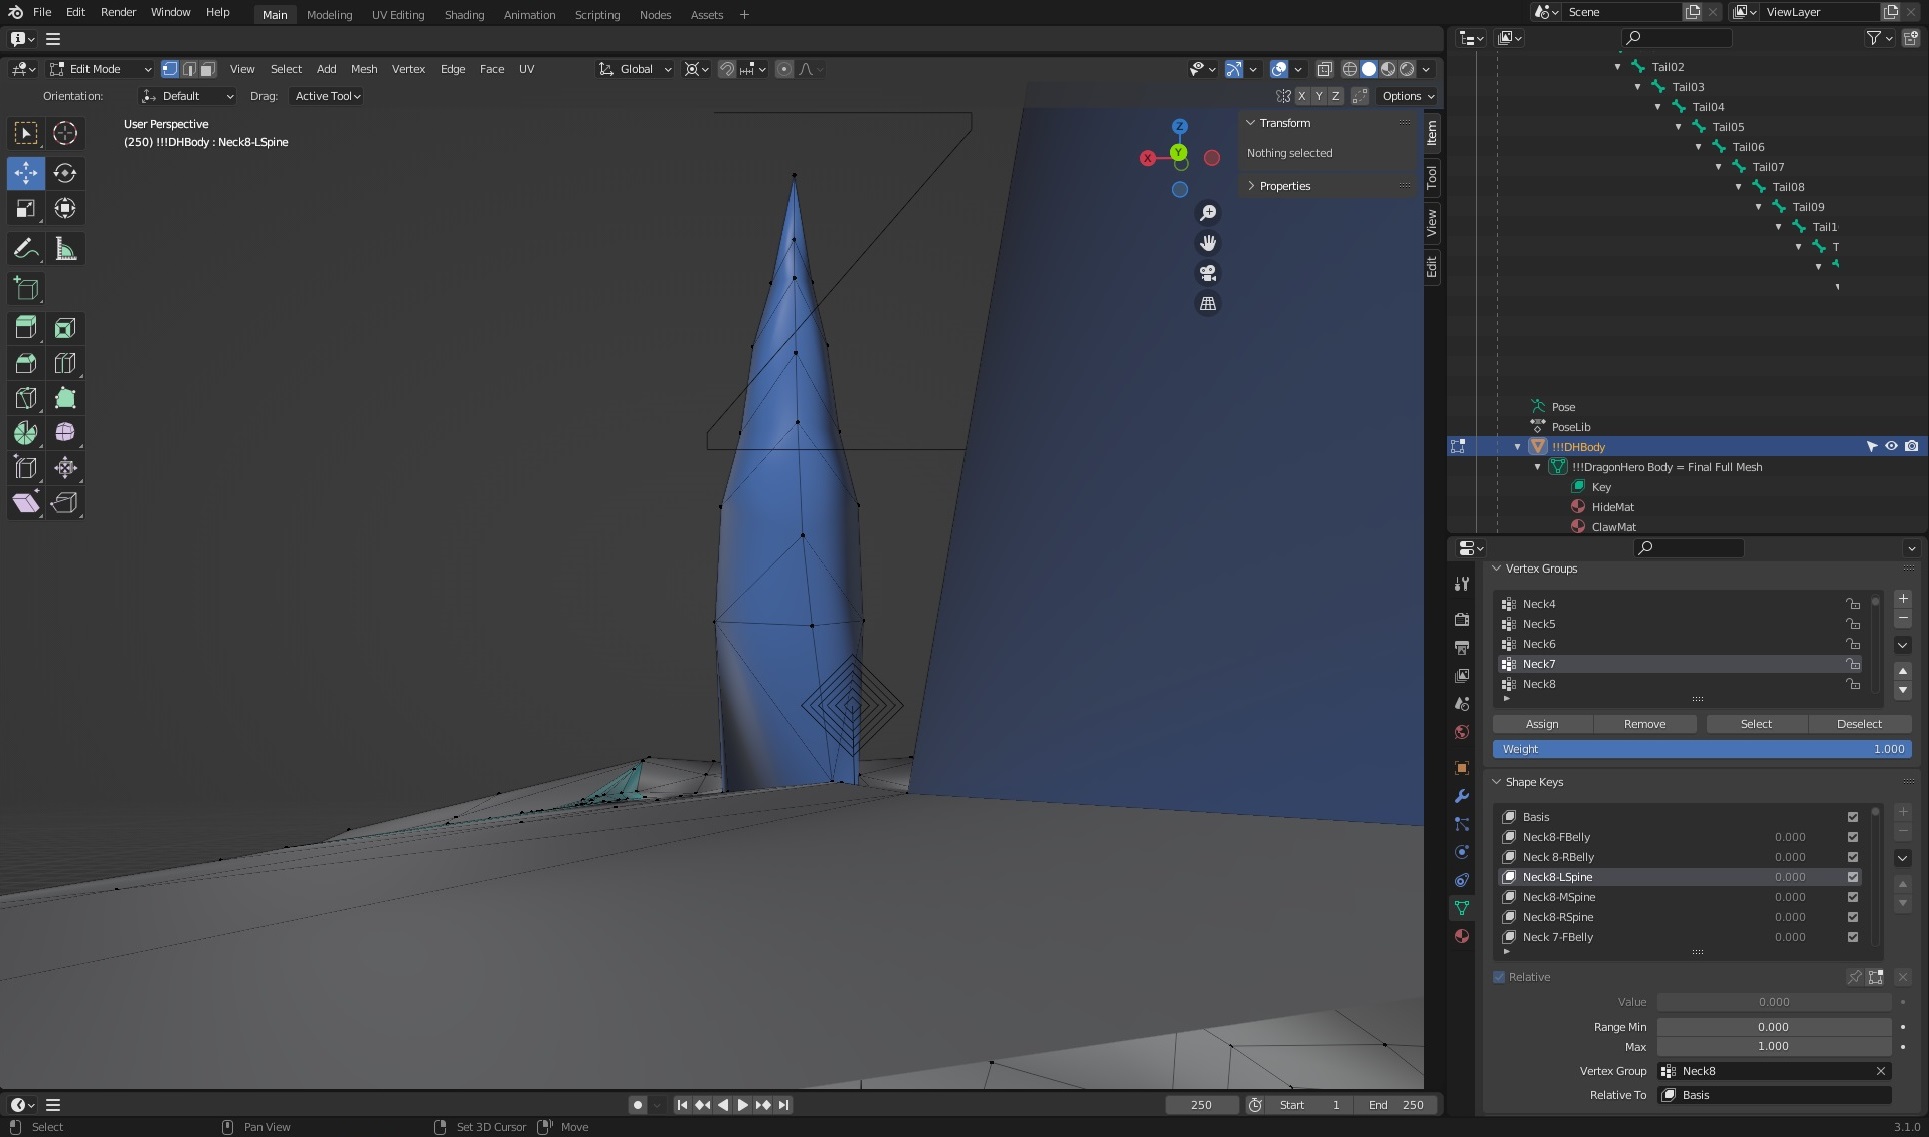
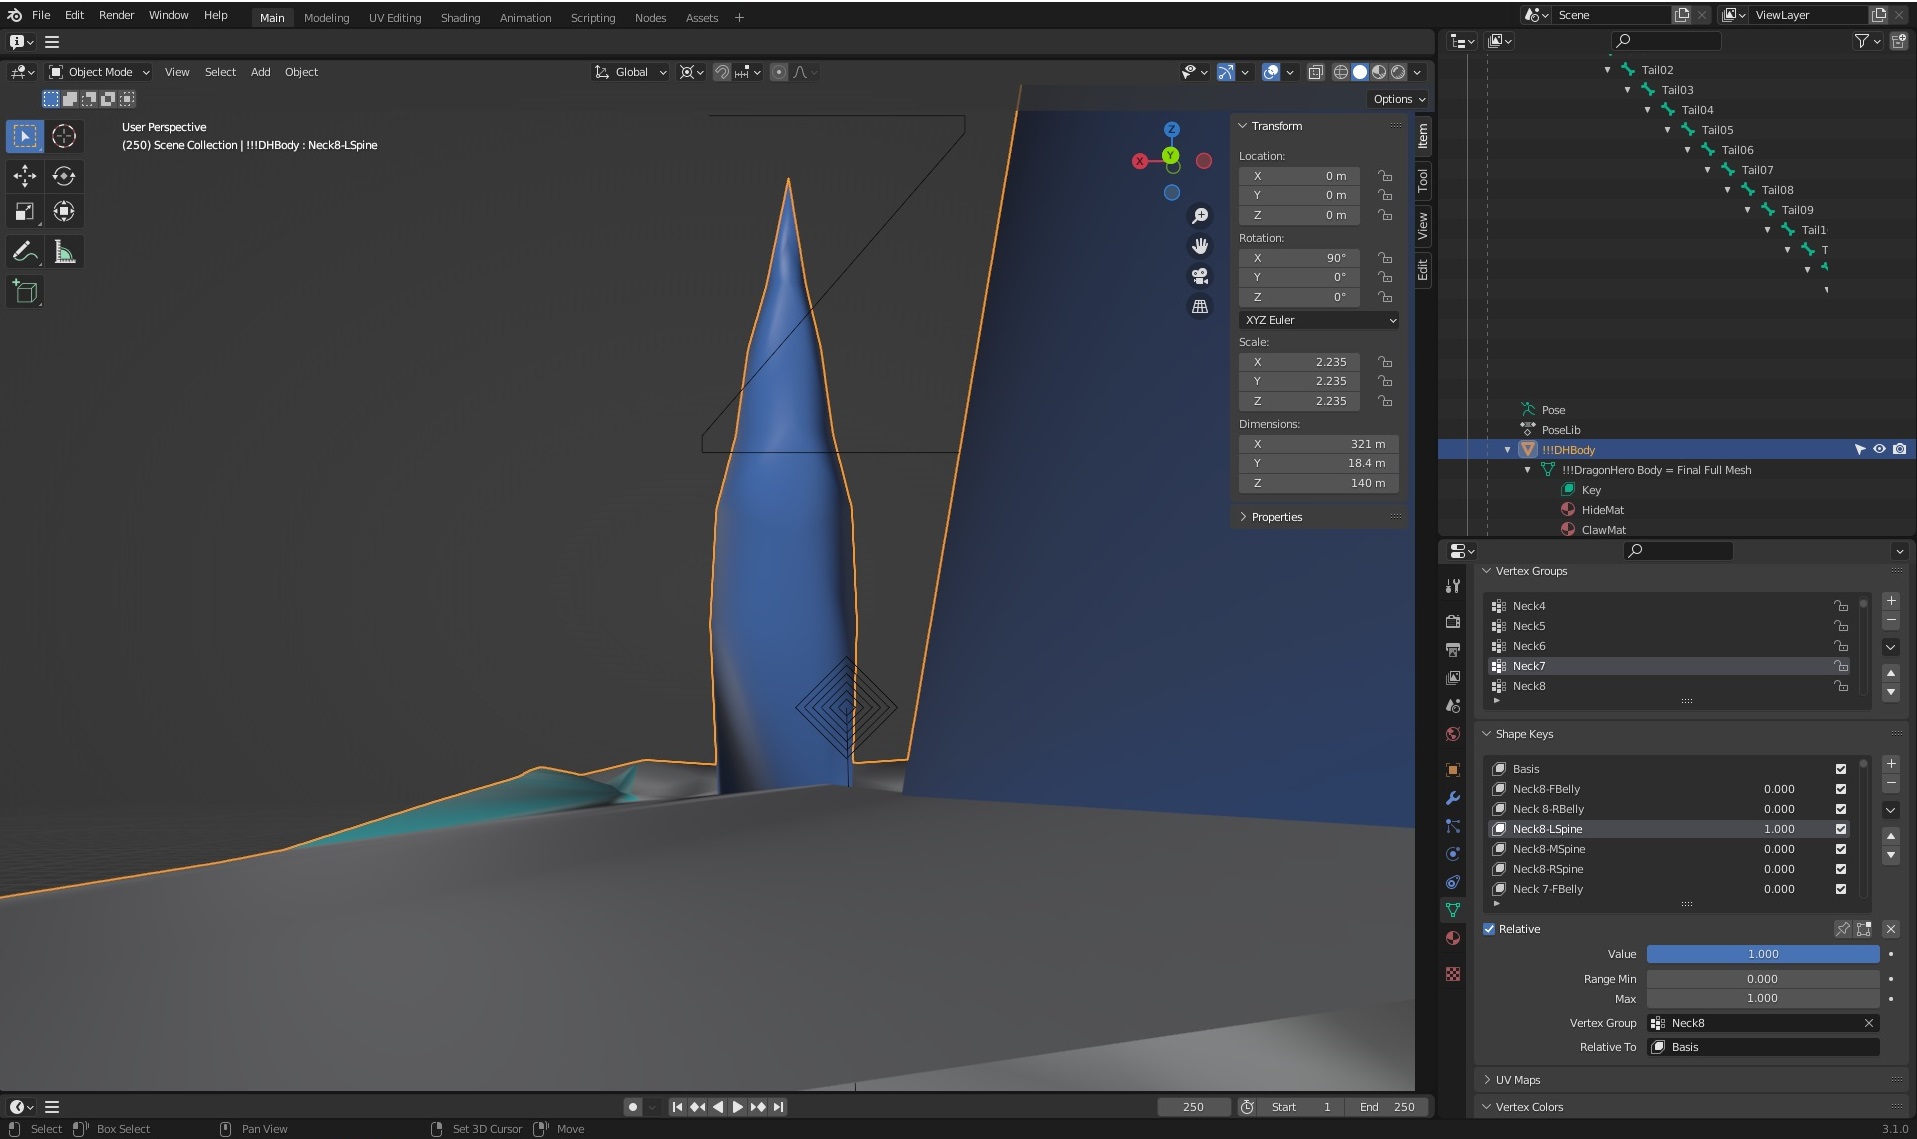
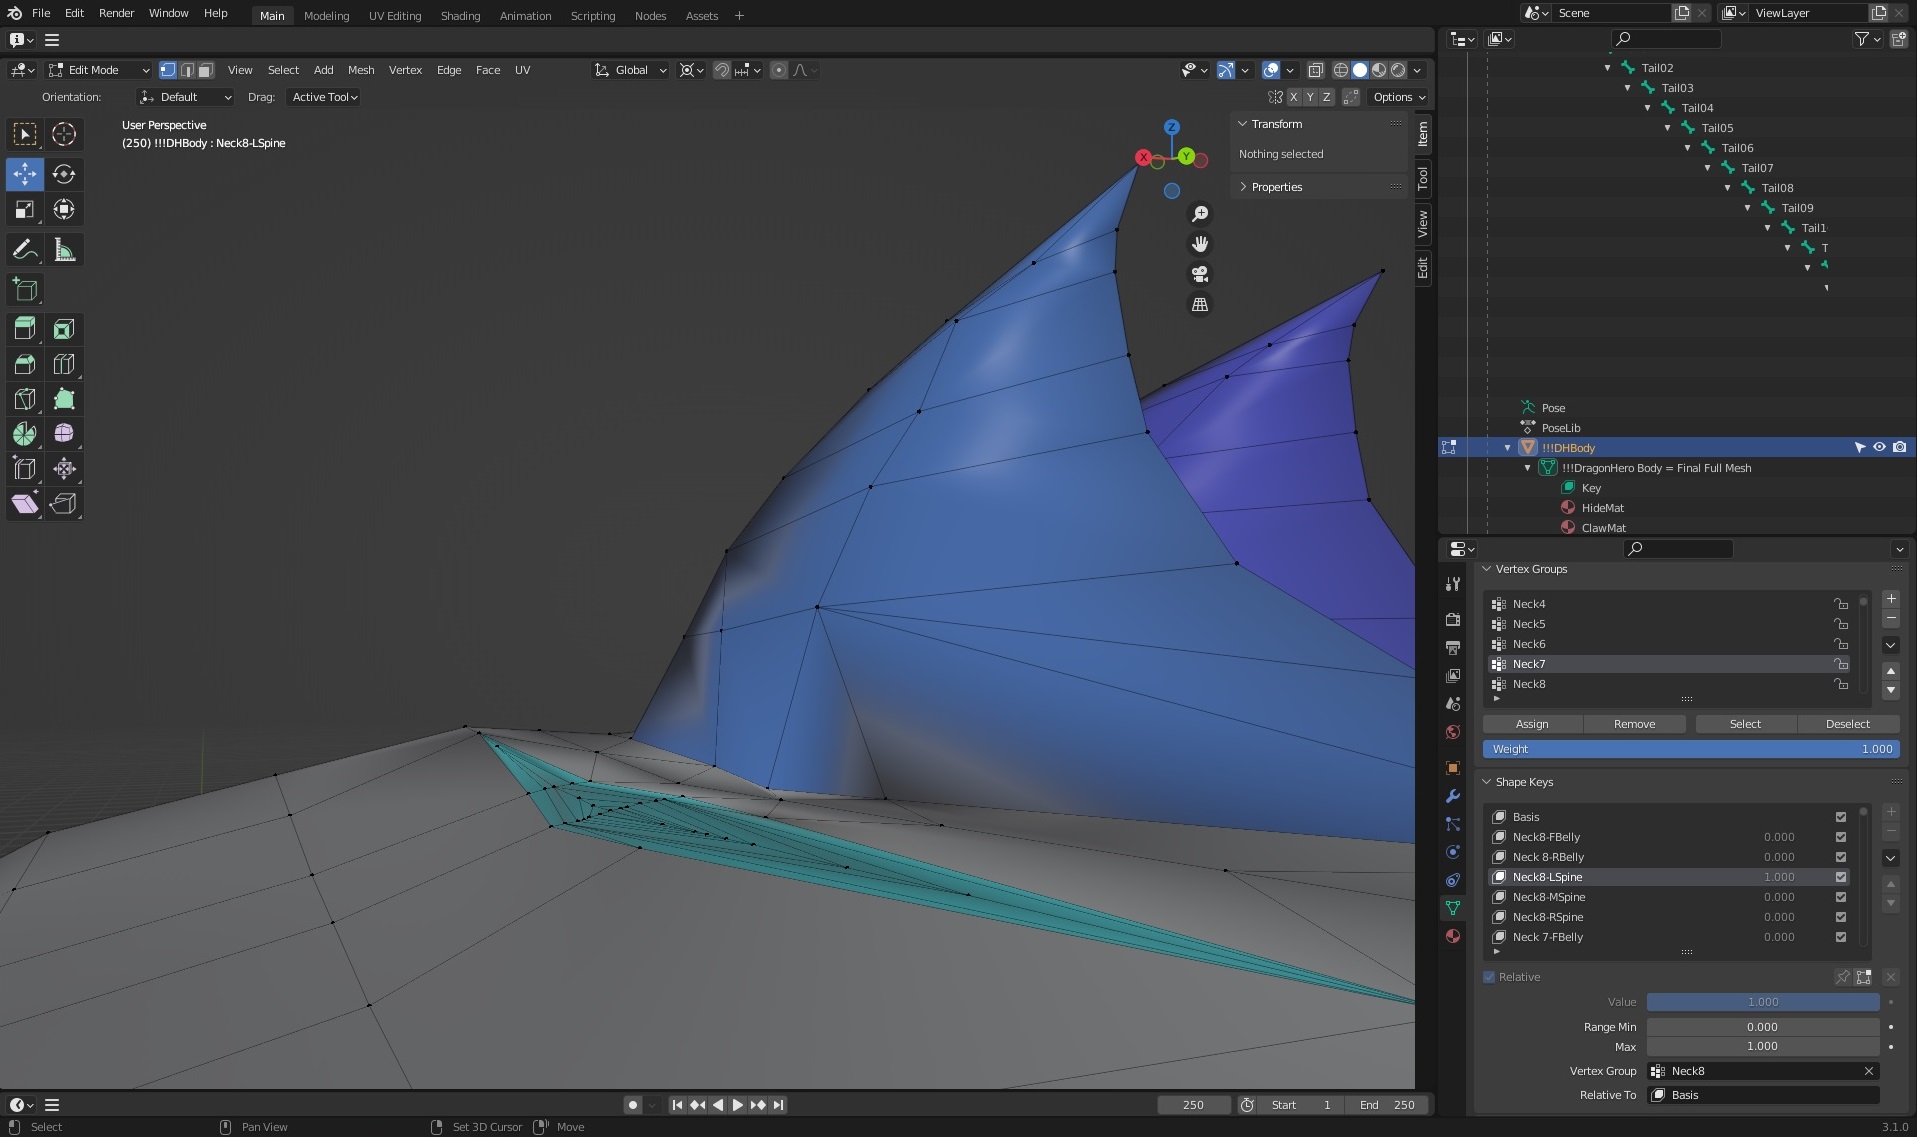
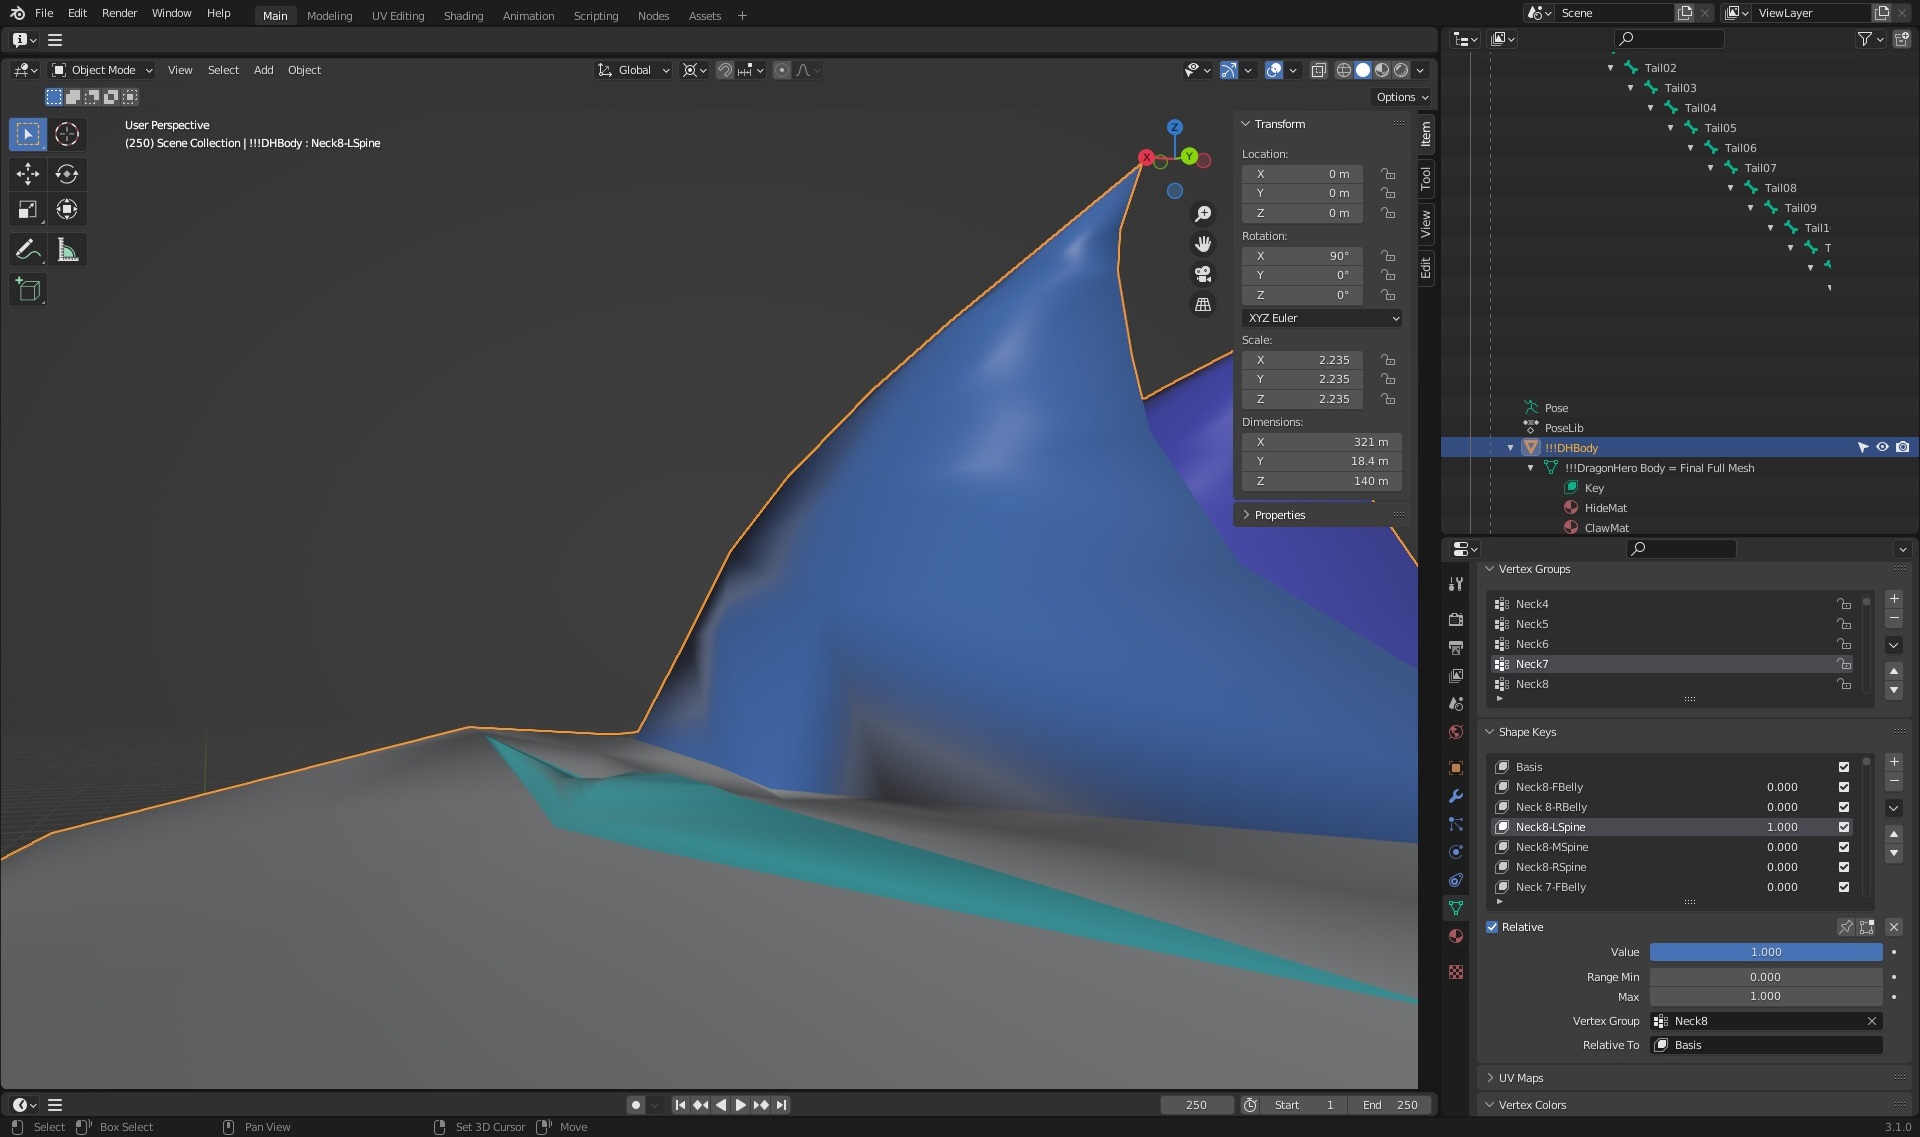
I'm working on a dragon figure that I had purposefully tried to set morph targets (like spinal ridges, belly scales, etc) for a wide versatility by having each ridge individually controlled--with the intent of using Blender's Driver function to control multiple sets of mporphs in the way DAZ and Poser uses JCMs, and such multichanel controls.
In the Edit mode of Blender, I created a series of Shape Keys (what Blender calls their "morph targets"), and confirmed the selected verticies for the spinal ridges were flat to the neck of the dragon' neck. However, when I went to test it in Object mode @ 1.0 value, the morphs were all well short of their target values. Furthermore, just simply increasing the value of the morphs aren't achieving the desireed result as the target zones are severely distorted when going >1.0.
Is it normal for Blender to simply not give us what we should be expecting, or am I simply doing something wrong by failing to set some unknown hidden control value somewhere (which I suspect this latter case is highly likely, given how "user-friendly" Blender's documentation tends to be)?
Thanks in advance to anyone who can help.
 Getting on the 9 train, or not
CHWT said:
Pendraia said:
RAMWolff said:
So with this new mesh set to be "inbetween" folks will be able to make small breasted women, trans folks, little kids and all that with no issues with how the clothing fits. That's the idea any ways. I've read this thread and a couple of others and folks seem so upset that nipples and navels are now just a morph and hi def map. SO WHAT! I think what it boils down to is folks don't like change but are intrigued enough to check it out and then complain about X Y & Z until they get used to the new way! LOL Cracks me up!
Agreed Ram...happens with every new figure.
Whether someone likes a change depends on whether that person thinks the change is good or bad. Just like everyone has the right to say something and we might not like what they say. G9 will always be the apple of some people's eyes...
I don't disagree that everyone has the right to say what they want. I merely said that I find it amusing that this happens everytime there is a new figure. Personally I didn't like it when they went back to separate genders. It stopped me from buying into any generation since to the same degree as I did for V4 and Genesis. I have bought some things but I only bought the rare item that I could either use on other figures or liked enough to fork out cash for it. My buying reduced drastically...Genesis 9 has reversed this trend somewhat. I don't know that I would call G9 the apple of my eye though as I use many figures including older ones like Nursoda's. I've gotten very good at transferring clothing manually where there isn't an autofit clone.
Duplicate Formulas Found in FilesDeleting stuff if you don't even know what it is is not soemthing you should advise others to do.
A formula is the linkage between proeprties - for example, ensuring that a morph to modify the eye closing kicks in when, and only when, the shape it is correcting and the eye close property are applied.
Duplicate Formula Issue after recent Update from DAZBejaymac said:
I suspect that what you have are 4 badly done JCM morph asset files, 2 in this Matthieu character, and the other 2 in another character from the same vendor.
Richard check the "MatthieuJCMShinBendLeft.dsf", does it use "ZachJCMShinBendLeft" for all of the Asset ID's in the file, or is it just used in the Formula.
It's used both as id and in the formula - it does look like a copy/paste issue, as if Zach https://www.daz3d.com/zach-hd-for-genesis-81-male was used as a tempate (and I don't have that character, so if that is the conflict I would be spared).
Duplicate Formula Issue after recent Update from DAZI suspect that what you have are 4 badly done JCM morph asset files, 2 in this Matthieu character, and the other 2 in another character from the same vendor.
Richard check the "MatthieuJCMShinBendLeft.dsf", does it use "ZachJCMShinBendLeft" for all of the Asset ID's in the file, or is it just used in the Formula.
Messie Ness 0.0.1Hello all,
I was working of my first morph of Messie Ness a character I am developing for a Web comic. This work is intended as a reference that I will use for the comic. I also plan to share the resulting morph (and those that will come in the future) as she evolves and produce some renders... Maybe even a story rendered in DAZ or Blender, who knows?
Don't take it as a definitive product. The shape is still far from the actual facial traits I imagined for Messie, though I am happy of the result so far, also because I am proud I have been able to understand the roundtrip workflow using DAZ Studio Pro and Blender and at least it chatches her personality.
I taken this picture from an extreme witn a 18mm focal length. The reason for this angle and the focal length is that with the advent of smart phone cameras, that usually have short focal lenghts, everybody started to publish selfies (especially OnlyFans girls) with this kind of perspective/distortion (and I didn't add lens distortion, vignetting... yet). We became so accostumed to it that this is what our brain evaluate as authentic. At least these are my observations on the base of other 3D works considered to be very realistic (there is an example in particular that comes to my mind but I don't have the link anymore).
I am not sutisfied of skin and in particular the amount of Sub Surface Scattering. The material looks like plastic and I don't exactly how to tune the values in in DAZ / Iray. I made some attempts to modify SSS values but it looks like nothing changes.
Also I don't like the nostrils: they look too "dolly".
Sculpt in Blender
I also found difficult to sculpt in Blender. The mesh expored from DAZ is quite "low" poly and it's complicated to sculpt the details. In particular I was working on the features on the side of the mouth that every human has. The original shape was too smooth in that area.
I am not certain if there is any solution to this problem. Every tutorial I saw tell to set "Resolution Level", in "Parameters" pane, to "Base", before exporting and I don't know if I can change the "SubDivision Level" value and export a higher density mesh or if I can leverage the Blender multi subdivision modifier (for example) to sculpt the shape at a higher subdivision level without affecting the original mesh vertices order when exporting back to DAZ Studio (I guess I have to try).Mess up with Messie
Also I messed up (after all she is Messie Ness) with the teeth. I don't know... Those morphs "Mouth Realism HD" and "Mouth Realism 8.1 HD" sounded so good too me and I set them both to 100%
 and exported I'd never imagined that their effect was to make teeth very irregular.
I used the default hair for Genesis 8.1 Basic Female just to give her some hair. I plan to model her hair soon: i know exactly what I want.
Original Assets
The starting shape, developed in DAZ Studio, is based on these free products:
Cora Character Morph For G8 and 8.1 Female by HumanXYStudio
SY 200 Free Morphs Genesis 8 by SyckleYield (which apparently works even with Genesis 8.1)
Nyotengu for Daz Genesis 8 *DOWNLOAD* by TaliDesadeProcess
Then I exported it in Blender 3.3 for further editing. In particular I was happy with the face but not the body (too thin) but it was not possible to apply only the face morph of Cora because it is a full body morph. So I used Shape Keys in Blender to obtain a mid way between Cora body and the default Genesis 8.1 Basic Female, while keeping the Cora face morph at 100% since the Shape Key is applied only on a Vertex Group that doesn't include the head vertices. To get a smooth transition around in the neck area I modified the Vertex Weights associated to the Vertex Group. Finally I sculped the face a little bit in particular around the mouth and a little bit on the nose bridge.
And now... I don't know how to save the morph.
But I guess that have to save it as a product.WindField's Dalila hair - help with issueHere's another example using one of the figures used in the Dalila hair promo pictures (Lucia HD). While the problem isn't as pronounced, it's still visible. I'm sure WindField didn't have to do all those steps to make the promo picture, so it has to be something else, right?
I don't really understand what you suggest to do here:
The only real fix is to make a custom morph for the shape, which (if named to match the morph name) will apply automatically, or to approach that by using dForms or Mesh Grabber to adjust the shape of the hair on an ad hoc basis.
What does that mean? I'm sorry I don't understand.
WindField's Dalila hair - help with issueThis is an issue with the automatic projection of morphs - if the morph introduces a marked change in scale (here in the head) then an item that spans across aprts that were scaled and parts that were not is likely to distort. The only real fix is to make a custom morph for the shape, which (if named to match the morph name) will apply automatically, or to approach that by using dForms or Mesh Grabber to adjust the shape of the hair on an ad hoc basis.
Advice for saving a prop assetYes, and it changes the mangling, but it still mangles. It appears that with the default "Redirect transforms" selected, the body morphs affect the bone ends as expected, but leave the bone origins in place, resulting in some very weird distortions. With "Autofollow Transforms" selected, the entire bones adjust properly to the morph, but the morphs are doubled, being applied both at the parent level, AND at the level of the figure that's been "fit to" itself. Not sure what to do here.
CARRARA CHALLENGE #64: Old egypt..... WIPDiomede said:
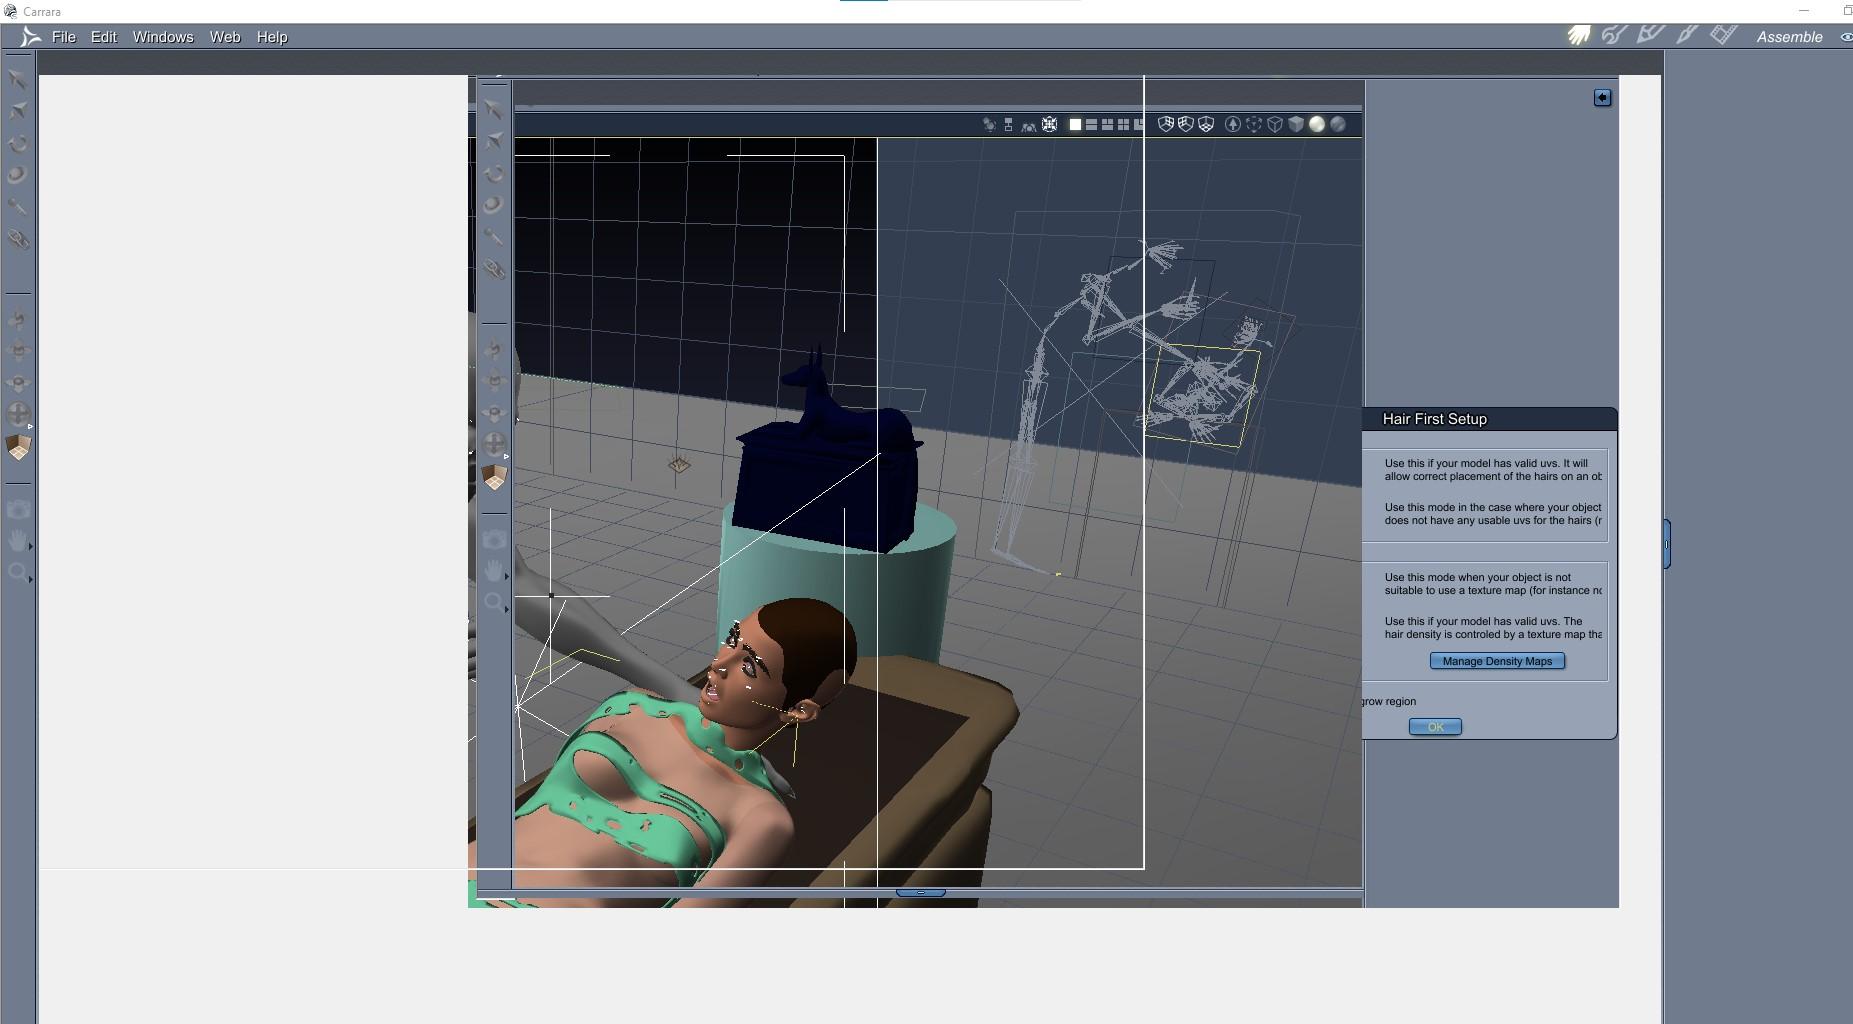
Argh, and more argh. I am just having all sorts of trouble this time around. Another scene, another crash. In this, I had 2 Genesis 9 figures, one set to my G8 Male Mummy morph and one set to Victoria 9. I had one Carrara hair for V9 which I liked and did not save (argh, that was very stupid of me). I had maybe 4 or 5 props with some tiled shaders of Egypt-themed texture maps. I had one vertex object to be V9's clothing/wrapping. Lighting was set up. All was well and I was getting close to doing test renders. I decided to try to add some detail to a prop by adding Carrara hair - and crash-o freeze-o.
Argh, argh, argh.
What a PITA - was hoping your troubles were behind you !!!
WindField's Dalila hair - help with issueThank you for your advice. The hair does work on the Genesis 8 basic female figure. However, it doesn't work on any of the characters/figures I've bought. The Edit>Figure>Zero>Zero Figure Shape does fix the hair, but it resets the morph to basic female.
Any other advice you might have to fix the problem would be appreciated.
Hylas' cornerGypsy Angel's Jericho did let himself be transferred but something about his morph screwed with the auto-follow, now beards don't follow his chin properly. Had to bust out the mesh grabber to yank it back into place.
CARRARA CHALLENGE #64: Old egypt..... WIPArgh, and more argh. I am just having all sorts of trouble this time around. Another scene, another crash. In this, I had 2 Genesis 9 figures, one set to my G8 Male Mummy morph and one set to Victoria 9. I had one Carrara hair for V9 which I liked and did not save (argh, that was very stupid of me). I had maybe 4 or 5 props with some tiled shaders of Egypt-themed texture maps. I had one vertex object to be V9's clothing/wrapping. Lighting was set up. All was well and I was getting close to doing test renders. I decided to try to add some detail to a prop by adding Carrara hair - and crash-o freeze-o.
Argh, argh, argh.
DAZ Install manager and DSON Importerdemetriouca said:
Oh, wow! I am relatively new to Poser (I user Poser 12). Am I right in saying that it doesn't look like I should bother in using the DAZ figures for now? That they are problematic... and take some "technical savvy?"
It would be possible to export the Gensis 1 and 2 figures from Poser in CR2 format, but that is fiddly and would lose some features 9such as morph following - though Poser does now have its own version of that). Older cintent (e.g. Victoria/Michael 4 and older) is already in Poser native format.
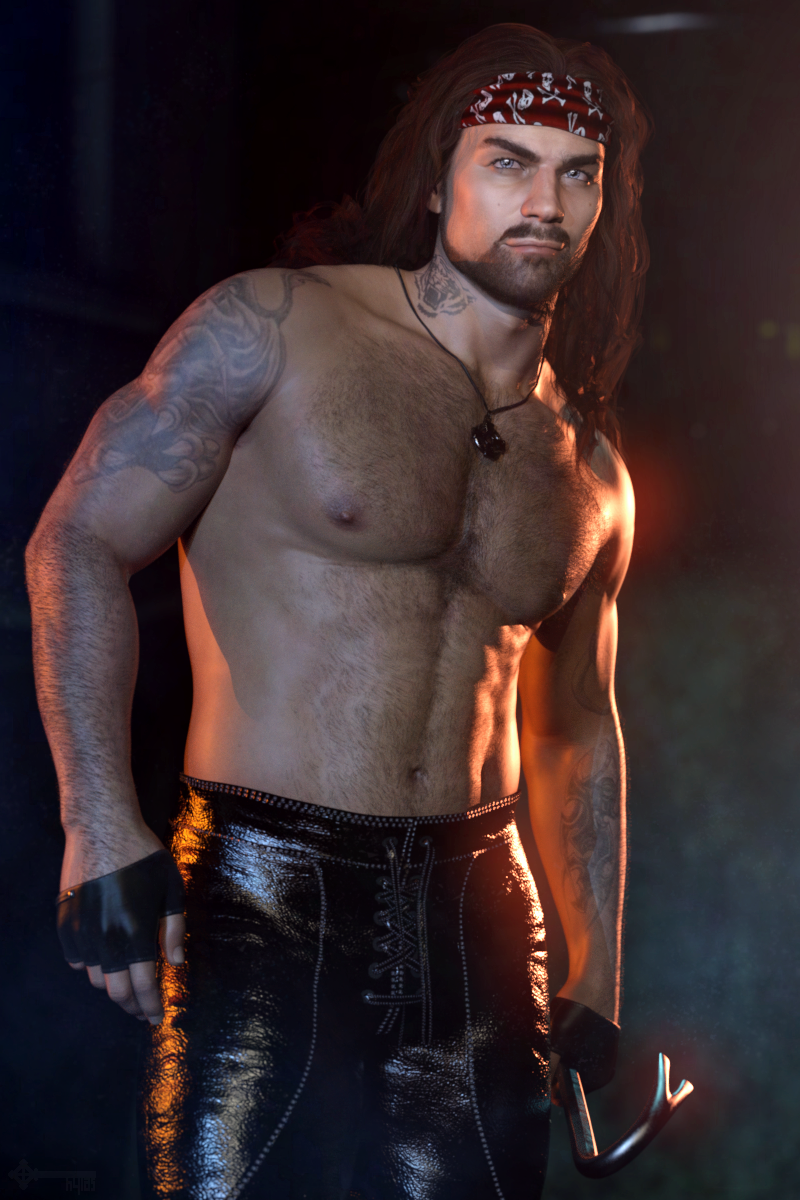
AOBB's freebie head morph Dashing for G8.1M based on Cary Grant. No materials nor textures.Good morph, like off the movie Charade but younger.
Daz 3D is part of

Connect
DAZ Productions, Inc.
7533 S Center View Ct #4664
West Jordan, UT 84084Licensing Agreement | Terms of Service | Privacy Policy | EULA
© 2026 Daz Productions Inc. All Rights Reserved.