-
Bend Control for Genesis 8 (Commercial)
This'll be an automatic buy for me, but that almost goes without saying.
As for the nomenclature... I didn't have a problem figuring out that "Karen 7" was part of Victoria 7's wave, IE Genesis 3 Female. So going to 'Genesis 8' alongside 'Victoria 8' and all the other 'Figure 8' (pun not intended) simply means that same consistency's going across the product line.
But then, perhaps it's easiest to assume that 'Genesis 4-7' were exclusive to Windows 9.
Beautiful Eyes for Genesis 8?Can you switch the UV for the eyes to G1 or G2 or V4 - and then just apply one of those textures?
Genesis 8 has for me only the base female available as UV. G3 textures seem to work although there have been changes to the eye geometry and I believe a material got merged. But eyes have always been a problem for me so I wonder what users here prefer or if they have something which works well for them.
Hm,
no idea.
Try this. And give her some Cornea Bulge and close the iris (Eyes Pupils Delate = -30%).
We're talking about G8F?Yes its G8F and this one does work. Here is a comparsion of where I stand currently:

Left to right are the base female, elizabeth, victoria and rebekah. The last two are elizabeth with the duf and cornea bludge=60% and 0%. The light for the reflection is a point light.List of links to useful tutorials.My tutorial to convert the materials of DAZ "7" female figures for use on Genesis 8 Female is live. Although it uses Victoria 7 for the tutorial, any "7" female figure will do.
[Tutorial] From Map Transfer to Material Presets
This is an easy to follow, comprehensive, step-by-step tutorial.
Show Us Your Iray Renders. Part VI
This is a render of Genesis 8 Female. She uses the shape morph of Victoria 7, created via Redz latest tutorial in the Morphs from G3 to G8 thread, with Victoria 7's materials converted to Base Female UVs using the Map Transfer utility. (There's a step-by-step tutorial on how I did this, From Map Transfer to Material Presets, in the Art Studio forums.) She's wearing the Classic Tuxedo (G3M) . The buttons are separate, parented objects, and they didn't fare well with auto-fit. But they were relatively easy to move around. The jacket was too loose in the arms for this pose, so I had to leave it out of the scene. It fit well enough in standing poses, though. Last, but not least, is the expression. It took me a few minutes to get used to power pose, but I'm loving the control it gives me over facial expressions.
Funny how it is called Sophisticated Lady, yet the way she is sitting is generally considered unsophisticated, LOL Nice render though
Well, she is wearing a tux! lol
I had to give it a title. "Genesis 8 Female Morphed Into Victoria 7 With Victoria 7 Materials," somehow didn't feel right...

And thank you.
Show Us Your Iray Renders. Part VI
This is a render of Genesis 8 Female. She uses the shape morph of Victoria 7, created via Redz latest tutorial in the Morphs from G3 to G8 thread, with Victoria 7's materials converted to Base Female UVs using the Map Transfer utility. (There's a step-by-step tutorial on how I did this, From Map Transfer to Material Presets, in the Art Studio forums.) She's wearing the Classic Tuxedo (G3M) . The buttons are separate, parented objects, and they didn't fare well with auto-fit. But they were relatively easy to move around. The jacket was too loose in the arms for this pose, so I had to leave it out of the scene. It fit well enough in standing poses, though. Last, but not least, is the expression. It took me a few minutes to get used to power pose, but I'm loving the control it gives me over facial expressions.
Funny how it is called Sophisticated Lady, yet the way she is sitting is generally considered unsophisticated, LOL Nice render though
should I get G8? Render speed etcGenesis 8 Female is free. Why not try her and see. She is in Genesis 8 Starter Essentials, which you can download and install. Victoria 8 is not free, but you don't need to buy her to test G8F.
Bend Control for Genesis 8 (Commercial)Actually the flex system is imbedded in the base model. Victoria 8's flexes just piggy backs off that. When I say flex I mean muscle flex.
Indeed, as Genesis4 (8) does have flexion morphs as well as some JCM bending morphs (But your's are much better!) in fact, that is why I became an early adopter of Genesis4/Victoria 8!
Yes, the G8 version will work similar. I don't have the time to make a G8 promo vid but the G3 one does a good job at showcasing what the product does in realtime for those who don't really get it looking at promos alone.
And this is fitting seeing as Genesis 4 **(8) is not much more different than genesis 3, it is Victoria 8 that really incorporates the bend/flexion features much more than Genesis 4!
**(I think the Genesis 8 moniker is silly and have re-named my library's folders to reflect this)
Yeah, what happened to 5, 6 & 7? I think it was to remove confusion with "Gen 4," i.e. Victoria 4. Also, the Victoria 7/Gen 3 number difference is a pain. Hopefully you don't have to do a lot of renaming.
For me it's:
- Generation 1-8
- Victoria 1-8
- Genesis 1-4
As far as folders are concerned my content folder has both Genesis 4 and Genesis 8 as separate folders in the same dirs (*:\****\TZO_(3D PROGS)\DAZ 3D_(64)\TZO_DAZ CONTENT\People\Genesis 8 (Alt 4)\Genesis 8 (alt 4) Female/Male)
I have this set up for my own alt/custom morphed character and the official version for their frequent updates...I also separate the genders under the genesis 1-4/8 monikers as there are coed products for the skins/materials as well as shared props and poses!
Victoria 8 and Carrara 8.5What is needed to make Victoria 8 to work with Carrara 8.5?
Bend Control for Genesis 8 (Commercial)Yes, the G8 version will work similar. I don't have the time to make a G8 promo vid but the G3 one does a good job at showcasing what the product does in realtime for those who don't really get it looking at promos alone.
And this is fitting seeing as Genesis 4 **(8) is not much more different than genesis 3, it is Victoria 8 that really incorporates the bend/flexion features much more than Genesis 4!
**(I think the Genesis 8 moniker is silly and have re-named my library's folders to reflect this)
Yeah, what happened to 5, 6 & 7? I think it was to remove confusion with "Gen 4," i.e. Victoria 4. Also, the Victoria 7/Gen 3 number difference is a pain. Hopefully you don't have to do a lot of renaming.
How are you acheiving realism with skins and faces?*Slams table* Sir I have to disagree with you here, some HDRI enviroment is bad by the lights emitting (some emits blue lights like what??) but sun-sky and HDRI default is the best way to check if your skin is forced, or if your skin is naturally realistic

Sorry, but the best way to make up and/or check if a skin shader looks realistic is the use of a neutral light (spotlight) with a temperature of about 5000 K and "Film ISO" of 200.0 max. Both Sun-Sky and HDRi tend to colorize the final result. The shader may look great in that particular light setup, but might look not so great up to rubbish in another. If a skin shader looks realistic under a neutral light, it will still look realistic in any other light. In case it won't then it's most likely the used HDRi which is crappy.
Spotlight parameters:

 "Luminous Flux (Lumen)": 15000.0
 "Temperature (K)":  5000.0
 "Light Geometry":  Disc
 "Height (Diameter)":  10.00
 "Width":   10.00
For Translucency color and Transmitted color, I used a very light pink (one more notch, and it'd be off-white, but that was personal preference). The "value" you mention must be "Translucency Weight".
It seems proper Iray lighting (even the default set of Iray lighting) further helps getting a nice render, rather than boosting some regular lights from the top menu to half a million lumens. Don't ask me why, but it simply works out better.
For "Tranylucency Color", I'd recommend an RGB 217-133-114 orange (based on real-world measured absorption coefficients of subdermal skin tissues, liquids and blood, the color of the Dermis would be of a light orange). Or alternatively, like DAZ introduced with Victoria 8, a slightly overworked Diffuse Texture (estimated values : Hue: -5, Saturation: -10, Lightness: +25) with a neutral RGB 255 white.
"Transmitted Color" should be the skin tone picked from the Diffuse Texture, in combination with a "Transmitted Measurement Distance" of 1.00. That's the only way to determine the correct amount of light of a certain wavelength which will get transmitted through the material.
That's true, instead of boosting the light mindlessly, one should use lights with lumens they'd have in the real world (a common 100 watt light bulb f.e. has ~ 1600 Lumen [1521.00] ), and then customize the Shutter Speed and Film ISO parameters to get the appropriate "Exposure Value".
Well I'm back to doing things this way. I tried a new HRDi yesterday and the light intensity was so bright and the presumably the shader adjustments I copied from someone at DeviantArt so wrong that I could actually see the eyeballs and mouth through the head when I rendered! Of course completely unadjusted leaves the render far too dark & tan.
How are you acheiving realism with skins and faces?*Slams table* Sir I have to disagree with you here, some HDRI enviroment is bad by the lights emitting (some emits blue lights like what??) but sun-sky and HDRI default is the best way to check if your skin is forced, or if your skin is naturally realistic
Sorry, but the best way to make up and/or check if a skin shader looks realistic is the use of a neutral light (spotlight) with a temperature of about 5000 K and "Film ISO" of 200.0 max. Both Sun-Sky and HDRi tend to colorize the final result. The shader may look great in that particular light setup, but might look not so great up to rubbish in another. If a skin shader looks realistic under a neutral light, it will still look realistic in any other light. In case it won't then it's most likely the used HDRi which is crappy.
Spotlight parameters:

 "Luminous Flux (Lumen)": 15000.0
 "Temperature (K)":  5000.0
 "Light Geometry":  Disc
 "Height (Diameter)":  10.00
 "Width":   10.00
For Translucency color and Transmitted color, I used a very light pink (one more notch, and it'd be off-white, but that was personal preference). The "value" you mention must be "Translucency Weight".
It seems proper Iray lighting (even the default set of Iray lighting) further helps getting a nice render, rather than boosting some regular lights from the top menu to half a million lumens. Don't ask me why, but it simply works out better.
For "Tranylucency Color", I'd recommend an RGB 217-133-114 orange (based on real-world measured absorption coefficients of subdermal skin tissues, liquids and blood, the color of the Dermis would be of a light orange). Or alternatively, like DAZ introduced with Victoria 8, a slightly overworked Diffuse Texture (estimated values : Hue: -5, Saturation: -10, Lightness: +25) with a neutral RGB 255 white.
"Transmitted Color" should be the skin tone picked from the Diffuse Texture, in combination with a "Transmitted Measurement Distance" of 1.00. That's the only way to determine the correct amount of light of a certain wavelength which will get transmitted through the material.
That's true, instead of boosting the light mindlessly, one should use lights with lumens they'd have in the real world (a common 100 watt light bulb f.e. has ~ 1600 Lumen [1521.00] ), and then customize the Shutter Speed and Film ISO parameters to get the appropriate "Exposure Value".
Geograft: Does Anyone Recognize These Artifacts?I've no idea what (generation) those figures are,.
have you tried changing the texture map setting to "Sampling" ,. rather than fast mip map
Q: does the pattern change if you reposition the camera,. ?
The Open GL preview of the textures in the assembly room isn't a Full resolution texture display,. (it's filtered down to make working faster)
so it will look different from the full rendered version. but..
This looks like either a Texture issue,. or a mapping interpretation issue,
I don't think I have either of those figures you mention,.
In the Forums,. it's helpful to mention what the figure (generation or main type) is,.. rather than a "character" name
EG: Victoria 4,. Genesis 1 male etc..
Characters for crowds/backgroundI am sure this has been asked before, but what is the best way to have characters suitale for background or crown scenes without vastly increasing render times in iRay? Detail is not important but render time is.
What is the best character to use? (V4, V5, V6, V7, V8)? I assume V4 is best but is there a lot of difference?
What skin/materials? Is it worth resaving these as lower resolution? Are there changes to iRay surface settings other than the default conversion (for pre V7) that improve rendr time? Presumably removing any reflectivity and transluscency/SSS helps.
What hair? Presumably lowest poly and simplest textures
What clothes? Again does poly count make a lot of difference? What about texture complexity or iRay settings?
Thanks
V4 has more geometry than later generations; just a note that V5 and onwards is a subset of G1, 2, 3 and 8; Victoria 4 was and is a base, whereas for Genesis the base is Genesis.
G8 has slightly lower poly-count than earlier generations; you could also delete the eyelashes; but later figures are more likely to have 4K maps, and G3 and G8 always do (with rare exceptions).
You can reduce textures, or use the same textures on multiple figures, then tweak the shaders for very slightly different skin tone. You can also reduce the quality of the .jpg file; for example, with default G8 Female, the Face is 884KB compressed on disk; lowering the quality when saving could have it as 617KB, 152KB or lower; too low and you could have issues unless far from camera. Not that compressed jpg on disk are stored uncompressed in video RAM during rendering.
Load Genesis (I'd go with 8); if some distance or facing away from camera, remove eyelashes.
Optionally - but would help - save lower resolution textures.
NGS Agenesis2 uses far fewer textures and achieves great results - or can, like much it's down to our own skills. So this is a useful product regardless of texture size. (https://www.daz3d.com/n-g-s-anagenessis-2-revolution)
All I'd do with NGS, and similar otherwise is:
Load lower res textures to just the base: Surfaces > Genesis 8 Female > Default Templates > Base: (Template 1 to 4 for skin textures; Template 5 if you use mouth; Template 6 for eyes, which you'll need if facing the camera. Template 7 has no textures.)
Then apply the NGS shader setting.
For template 6, with NGS, you should also replace the texture in Top Coat Weight and Top Coat Curve 0; this is automatically generated you could end up multiple copies of it. I'd save a copy of it (at a reduced resolution) wherever you have saved your reduced resolution textures. (If you go with G3 and not G8, this would be Template 7 and not 6.)
Once you have this, save it as a preset, subset or whatever method you use.
Edit:
For hair, clothes, (and perhaps worth a try on G8 after saving a copy first) is the Decimator. It reduces the number of polygons; IRAY is less concerned with geometry I believe, but it still takes up a little RAM. It isn't cheap (I waited until I could get some discount) https://www.daz3d.com/decimator-for-daz-studio
Oh and you would need to reduce the texture sizes on clothes, hair, and other items perhaps; there is a script somewhere that does it for you. Maybe someone knows the link?
Novica & Forum Members Tips & Product Reviews Pt 9If I wanted to continue onto Genesis 8, it would only be the skin using Cayman's product. Or am I missing a tutorial on doing the morphs? There's been so many things posted about Genesis 8, it's impossible to keep up.
The best tutorial, I think, is Redz "Genesis 8 Clones Tutorial," which walks you through the creation of clones for both the G8F base and G2F base. (You can use any Genesis base, though.) You can find the dropbox link in the Morphs from G3 to G8 thread. Follow the instructions in the tutorial using G3F instead of G2F. In Part 3, you apply a shape to G3F that will become your morph. That shape could be your GenX V4 morphs. And when you finish Part 3, you'll have a shape morph of your V4 character for G8F. Then use Cayman's V4 on G8F version of Legacy UVs to apply the materials.
Thanks- I was thinking about just holding off doing any V4 to Gen3F because I really want them to go to Genesis 8. Has there been any hint of what's going to happen so far as an official product released that would be similar to GenX2? I'll take a peek at the tutorial. (I'm trying to stay focused on packaging though. As you can see, not really doing that LOL. But I was doing Exnem's food so that's my excuse, still testing as I go to make sure things work right.)
Novica & Forum Members Tips & Product Reviews Pt 9Interesting, I tried making a material preset of the current ones on Gen3F (Dublin) which were V4's with the Cayman's Genesis 3 combined- but the problem is, Surfaces showed there is nothing in the UV, when I put in Base Female, everything distorts in the face (didn't bother checking the body.) So I did a material preset "as is' without anything for the UV, but nothing happened when applied to Genesis 8. So for now, only the Genesis 3 Female has both the V4 morphs (GenX2) and materials.
If I wanted to continue onto Genesis 8, it would only be the skin using Cayman's product. Or am I missing a tutorial on doing the morphs? There's been so many things posted about Genesis 8, it's impossible to keep up.
The best tutorial, I think, is Redz "Genesis 8 Clones Tutorial," which walks you through the creation of clones for both the G8F base and G2F base. (You can use any Genesis base, though.) You can find the dropbox link in the Morphs from G3 to G8 thread. Follow the instructions in the tutorial using G3F instead of G2F. In Part 3, you apply a shape to G3F that will become your morph. That shape could be your GenX V4 morphs. And when you finish Part 3, you'll have a shape morph of your V4 character for G8F. Then use Cayman's V4 on G8F version of Legacy UVs to apply the materials.
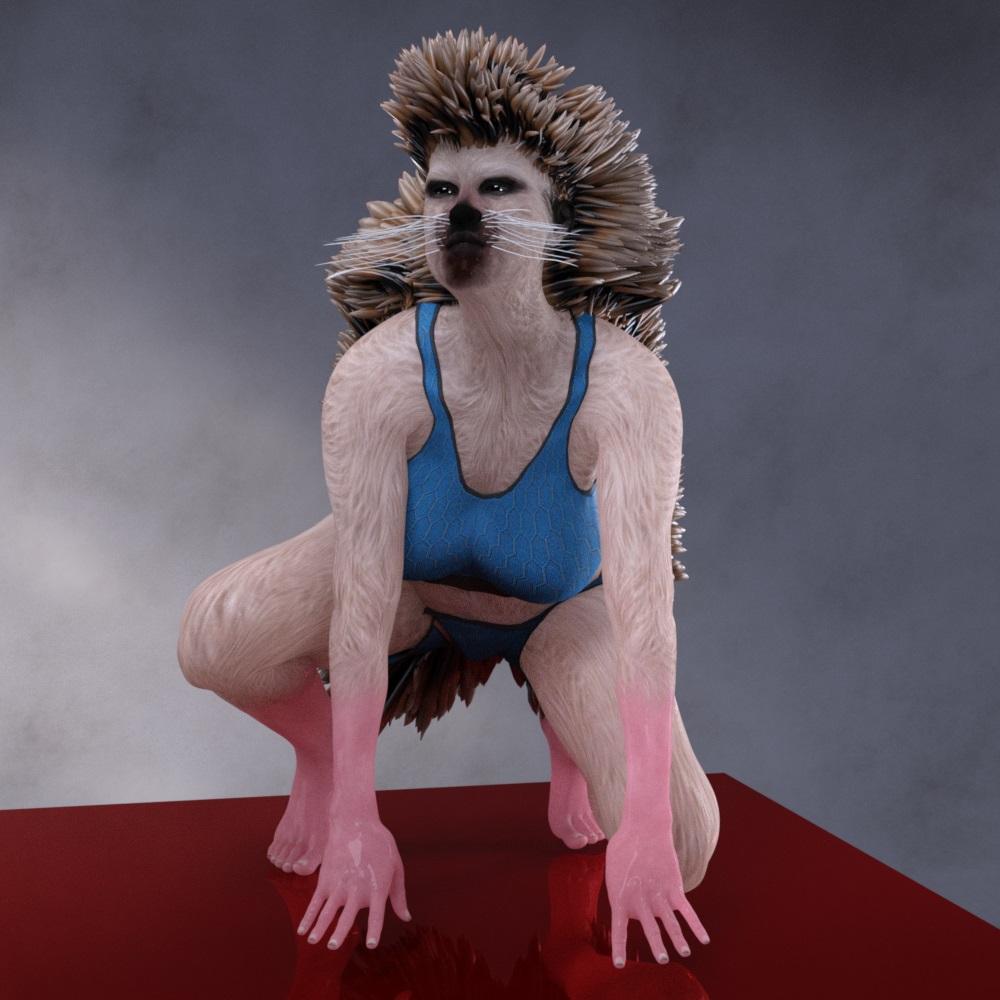
How to add a suntan to an existing skin textureMs Hedgehog... on Victoria 8 based character.
 Bend Control for Genesis 8 (Commercial)
Actually the flex system is imbedded in the base model. Victoria 8's flexes just piggy backs off that. When I say flex I mean muscle flex.
Bend Control for Genesis 8 (Commercial)Yes, the G8 version will work similar. I don't have the time to make a G8 promo vid but the G3 one does a good job at showcasing what the product does in realtime for those who don't really get it looking at promos alone.
And this is fitting seeing as Genesis 4 **(8) is not much more different than genesis 3, it is Victoria 8 that really incorporates the bend/flexion features much more than Genesis 4!
**(I think the Genesis 8 moniker is silly and have re-named my library's folders to reflect this)
2 QuestionsI was trying to use my space navigator and lost my scene. I tried to move it back to the default view but i can't figure out how. I even closed the program but it came back just where I left it.
1. How do I get back to the default view?
I purchased the victoria 8 and Lanie models as well as the Lanie bundle. I cannot get the hair to take a color and.... there is a white base cap on her head even after her skin is applied.
2. How do I color her hair and remove the white cap?
Daz 3D is part of

Connect
DAZ Productions, Inc.
7533 S Center View Ct #4664
West Jordan, UT 84084Licensing Agreement | Terms of Service | Privacy Policy | EULA
© 2026 Daz Productions Inc. All Rights Reserved.