-
Detached clothing items, like buttons?
Your workaround works great, thanks Padone!
Instead of moving the figure to the floor in DAZ first, I now export it as is. With the feet slightly below the floor after resetting the hip's Z translation.
Import into Blender now has all the buttons in the right places, more or less. With a bit of tweaking its fine.
Much easier than moving, rotating and vertex parenting every single button individually. Shudder!!Detached clothing items, like buttons?Yes I can confirm there's an offset if the figure is wearing heels, this is due to "apply transforms" in easy import that apparently doesn't work fine if the figure is moved away from zero coordinates. As a workaround we can either uncheck "apply transforms", or move the figure to zero before exporting, the latter is better. Now reported to Thomas.
https://bitbucket.org/Diffeomorphic/import_daz/issues/2569/
update. Rigid followers are fixed in the last commit.
Distorted Body with Genesis 9 when Importing BVHHello,
I’ve encountered a problem when working with Genesis 9. When I create an animation or even just a pose and export it as BVH, the file does not import correctly back into Daz Studio. The character comes in with distorted body parts.
To clarify: I’m not making any edits to the exported file. I simply export the BVH from Daz Studio and immediately import it back into Daz Studio and it already shows the distortion.
This issue does not happen with Genesis 8, BVH files export and import perfectly fine with no problems.
So my question is: Does Genesis 9 support BVH import, or is this a known limitation/bug?
Thank you in advance for your clarification.
Detached clothing items, like buttons?Oh man...
If it didn't take me over 10 minutes to import the full figure (including several hair moving morphs) into Blender, then I would probably have tried to re-import it again before.
But since the buttons on both the coat and the blouse the character is wearing were static, I figured that this just isn't supported in Diffeo. Can't have it all, right?So today I did re-import it and sure enough, the coat's buttons were parented to the coat just fine this time. Minus an offset from where they actually should be attached. Not sure why that is. Maybe because the figure wears shoes and that created the Z offset.
But the buttons from the blouse were still static. Go figure.
I checked in DAZ and finally noticed that visibility for the button followers was turned off. Probably to not annoy people with all the little crosses. That apparently made Diffeo ignore them on import. After turning vis. back on, it worked fine.I have to admit that I'm constantly amazed by how complex Diffeo really is. There is just so much functionality under the hood.
Anyway, thanks Padone.Detached clothing items, like buttons?Works fine here the buttons follow with the pose and the coat, even if I deform the coat in edit mode the buttons follow as vertex parented. I don't see where the issue is unless there's specific steps. It is best to use "eliminate empties" in easy import to avoid some cluttering with the rigid followers, but works fine without as well.
Daz Studio 6 Beta - version 6.25.2026.19821! (Updated July 23, 2026)barbult said:
New related problem: I disabled all custom toolbars in the F3 Activities.. I saved the layout. I reloaded the layout. I opened F3 again and all the toolbars show that they are enabled again. Why didn't they stay disabled?
If I shut DS and repen it, all those toolbars are back again. They will not stay disabled.I resorted to using custom menus and not the Favourite or Scripts so that when they are removed by updates or Merge script it is not an issue. i simply F3 and import my Utility menu again leaving the others blank (actually sometimes they are not always blank, they contain GUID information for the previous assets that were linked). Will test your toolbar issue. Usaully i can R-Click on the toolbar and uncheck the boxes, Exit Studio and they remain in the state i left them (disabled or enabled). F3 sometime override the R-Click.
Treat multiple surfaces as one@jmucchiello That's a once and for all solution. The question is if you'd like to give it a try ~
A step-by-step for you and the ones who want to make a Tiling UV :
1) Load G9 in DS, set its Resolution Level to Base. Export G9 to OBJ file via File > Export... with the settings in (ss1), i.e. uncheck Write UV Coordinates.
2) In Blender, import OBJ file via File > Import > Wavefront (.obj). Switch to UV Editting layout and Edit Mode. Hit Numpad 1 to have a Front View and center the figure. Hit A to select G9. Click menu item: UV > Project from View (ss2). Then Export to OBJ file via File > Export > Wavefront (.obj). (ss3)
3) Go to Surfaces pane in DS, from context menu > Edit > Load UV Set, select OBJ file. (ss4). Name it as "Tiling UV", then go to menu: File > Save As > Support Asset > UV Asset(s)... (ss5)
4) Select all Surfaces, choose Tiling UV in the slot UV Set, then apply the Shader Preset you want (ss6)Edit: The UV Set is attached. If you don't want to make it yourself. You can extract the data folder within the attached ZIP file to the root directory of your Daz Library. Reload G9 figure. Do the above step 4).
Selecting more than one line to delete in the Lost and Found directory?I have the same thing as Piquant except worse: only MOST of them are blank references. This means that destroying Lost and Found is not an option for me.
I had to reset my database (saved my user data, thank you) due to a faulty product stating "updatable" and then not updating (http fetch errors). The reset didn't help either.
The UI design on this is atrocious.- If I move something via the menu, it transports me instantly to where I moved it, while if I duplicate it, it doesn't do this
- If I move something to a subfolder by dragging it, I am teleported to the top of the (in this case, VERY LONG) list. What I expect is that I am left where I was or, at the very least, left in the place where I moved it to.
- The inability to multi-select on the left-hand frame is completely out of line, given that the tree is not shown in the right hand frame where multiple select IS possible.
- There is no option to tell the UI to show folders in the right-hand side.
What I'd started doing is this:
- create a Lost and Check folder (for the LaF items that are not blank)
- create a Lost and Empty folder (for the myriad items that are blank)
- drag-move, one by one, from Lost and Found to one of the above, periodically destroying and recreating "Lost and Empty"
Then I thought I'd be smart and go thru letter by letter and move only the populated stuff, which is where I ran into the first set of problems, namely after moving each non-blank item, getting teleported to the very top of Lost and Found.
If I have to ever rebuild my DB and re-update/re-import metadata again I swear I am going to hang myself for the trouble it is causing me.Finding version used on file/rolling back to that versionthe date created might help
and I sort of understand where you are coming from because DAZ to Unreal at some point gave me the same issues with UE4.27, which is the version I mostly use, I simply cannot use the plugin at all now and have to use alternative import methods
Blender like Unreal has so many updates too
I mostly use Blender 3 when I use it myself
SBH On High Resolution GenesisRichard Haseltine said:
For your own use you could export the higher-resolution, base shape mesh (don't gho overboard though), use an external modeller or the Geometry Editor to trim it down to remove areas that won't have hair (or won't need the higher resolution if that leaves too much), and rig it as a figure using the Transfer Utility. It will follow the shape you add to the figure, give you a base for the fur, and won't be as demanding as a fully high-resolution figure.
Thank you to everyone for your responses. This here will be the solution, Richard, thank you again for all that you do. The problem is hard to describe but I think Richard understood where I was getting at. Even if you paint a full density map across all of the character after it's been sculpted quite drastically, you will get bald spots even if you put the density to 2000 (far far too much at that point anyway if you do animation like me). Even in the painting segment of the SBH editor, you will see spots that you cannot paint. A solution that helps if you don't want to go as far as I plan to with Richards suggestion is to make your density map in substance or whatever you use for painting and then import it with SBH. As far as the angularity, there is no amount of interpolation or hair segments that will fix what I am talking about. When I get back to the pc, I'll post a picture of one of the areas for clarity for others who run into the issue in the future.
SBH On High Resolution GenesisDark45 said:
Hey guys,
Normally this isn't an issue but I am working with an anthro that is stretched a bit so to speak from normal genesis proportions (muzzle, ears, etc.). Aside from grafting a face replacement with a higher density, is there any creative way to generate Strand Based Hair on the higher resolution (subd) genesis? I've tried a few things but none have worked so far.
SBH generates based on the base resolution and therefore the fur has bald spots in it where the mesh is stretched a bit more or where the different surfaces connect (face, ears, torso, etc.). That and the fur is very... angular... since it is generated from the low resolution surface.
Thank you for any advice in advance.export your figure at subd and make that the haircap
make haircap: import, transfer utility (reverse source shape ticked)
create sbh on haircap instead of figure
I wonder how far Bryce could be pushed, ha-haSo I was glancing through some nostalgia discussion about Bryce 2 on the web, and this comment took my attention:
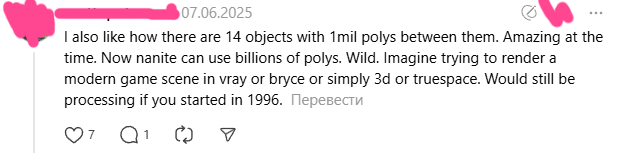
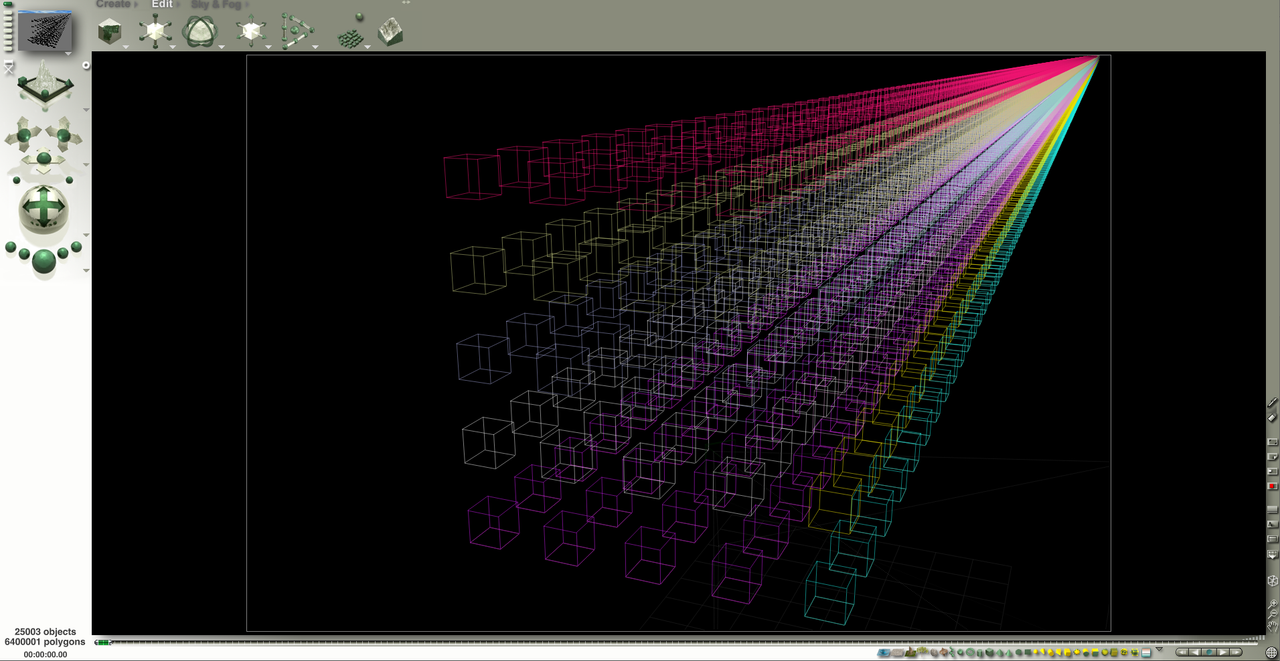
Firstly, yes - I agree that those Eric Wenger's (and others) demonstration scenes are indeed impressive. However, this line of thoughts made me thinking about "how far we all can go with Bryce?". I then remembered reading a post (I think it was written by KinemagiK) that Bryce handles structures made from 20 000 metaballs or something like that. Without giving it too much of a thought, I've launched Bryce and started replicating objects. Though I decided to use a simple sphere instead.
It was fine and easy up until I've got 5 000 spheres. Trying to double their amount led to Bryce freezing (maybe I could wait for an hour or something, but I lack the patience for it). However... I've decided to add "just" another thousand - and it worked, giving me 6 000 spheres. Then I tried to bite a bit larger piece and added 4 000 more - also worked. In the ended, I've managed to reach 25 000 spheres, alternating 1 000 and 4 000 spheres addition. I stopped after that as the more spheres I was adding, the more lag for actions like selecting/deselecting objects or changing sun position was being introduced.
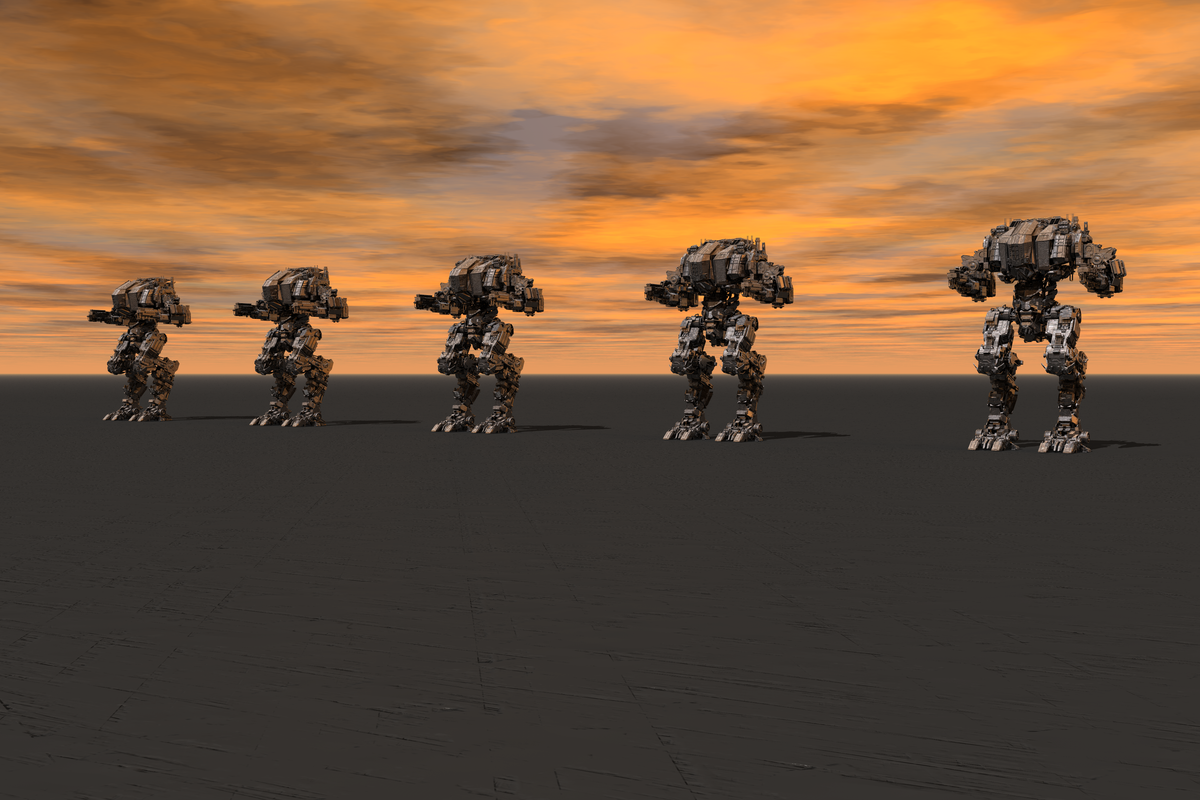
Well, that was about the objects. Now, how about imported models? Now, I think Bryce is pretty generous with them! For starters, I've loaded the "Lythos mecha" model (it's a freebie available at CGTrader, made by a pretty cool author called Megalord) which has around 2.4 million polys. You might want to open the image in a new tab if you'd like to appreciate the details in the model.
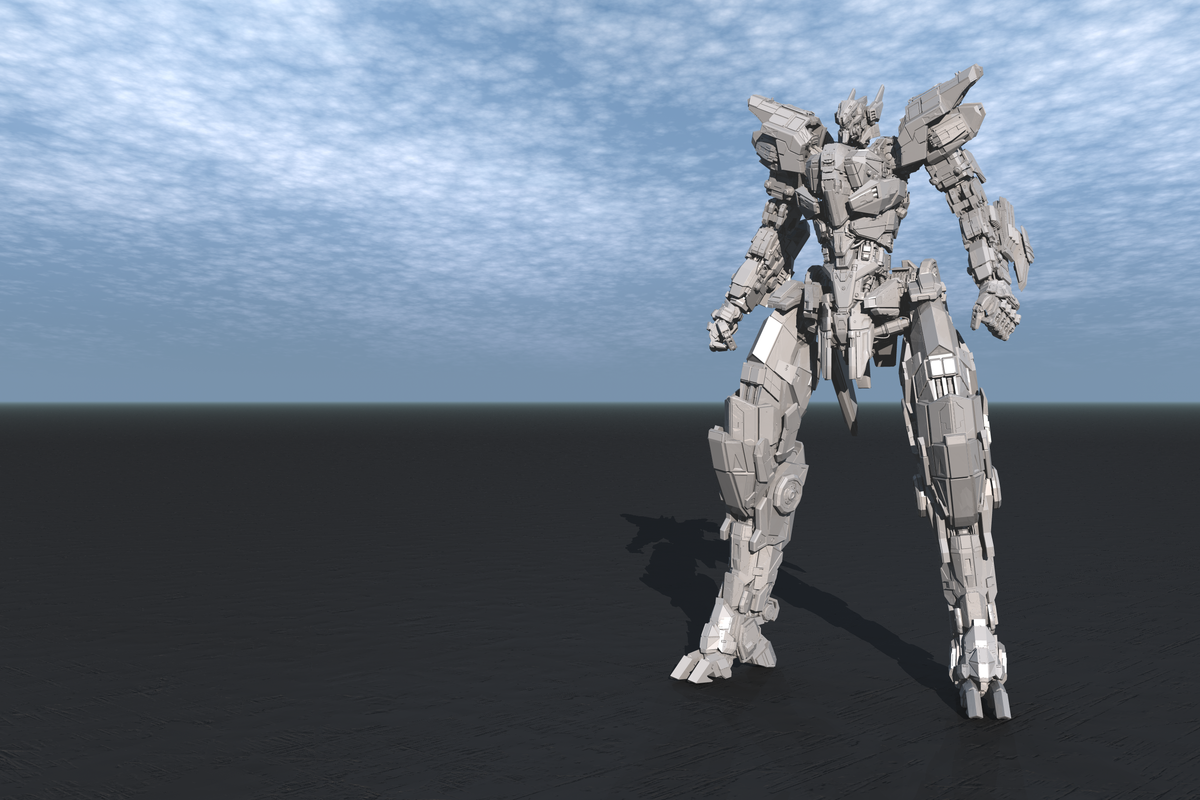
Then I added 10 more... which gives us around 26 million polys. Not bad, huh? Also I think they look pleasant with Bryce procedural materials.

But hey, let's increase the challenge! Another freebie by Megalord, the amazing "Juggernaut" mech that has, like, 10 million polys itself. Wow. (Again, open fullsize to check the detail level). Had to wait, like, 7 minutes during import, but it loaded in the end!
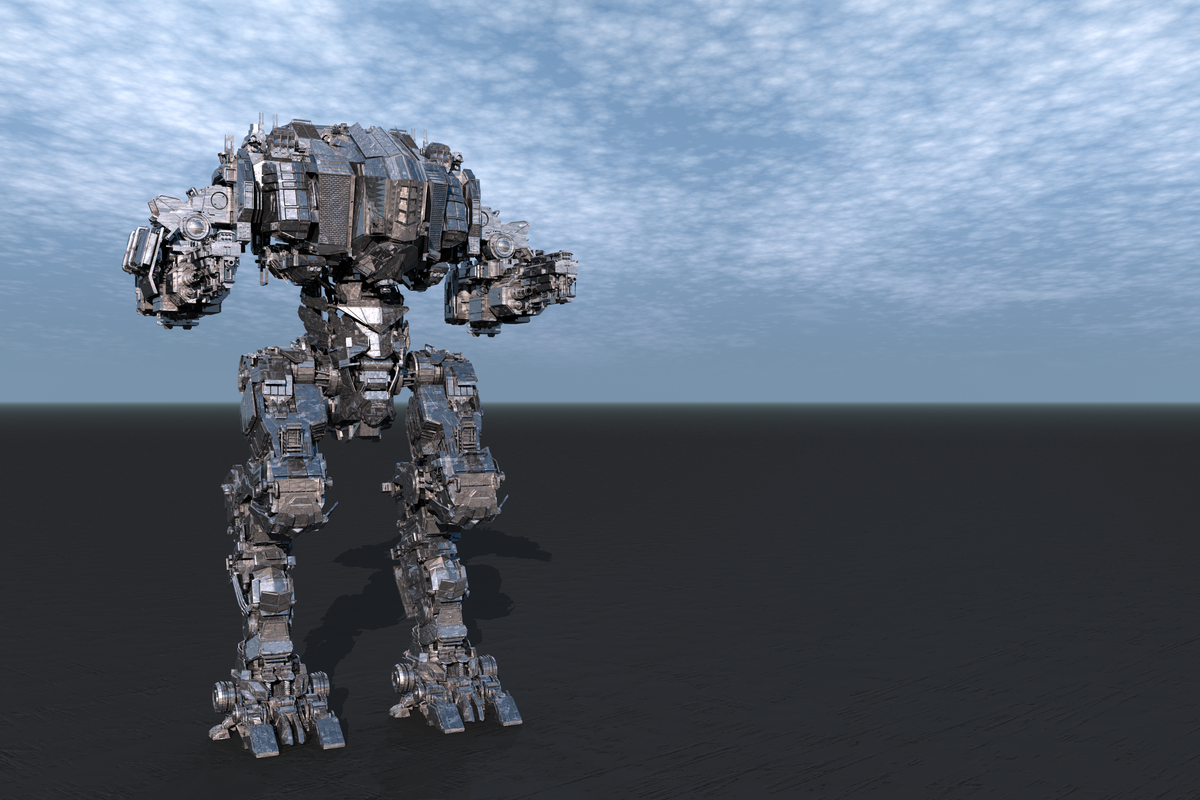
If "Lythos" model was taking, like, ~600 mb memory, then "Juggernaut" eats around ~1700 mb. Good to know we have instancing! I've stopped at 4 copies, which led to the amazing 50 million polys scene. Stopped after that as, like in experiment with spheres, simple interactions started getting more and more slow. Still, I think it's pretty impressive!
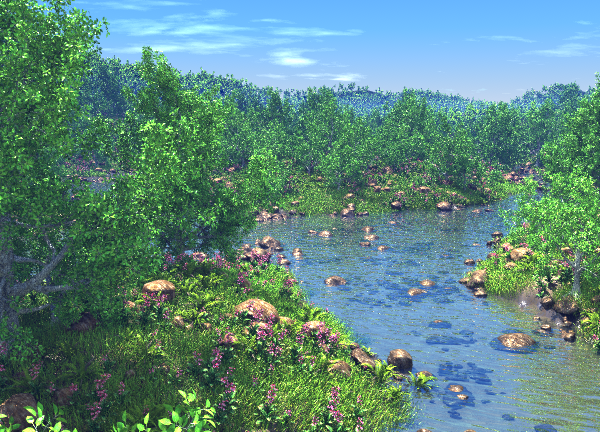
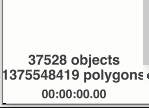
All this cool and what not, but... the initial "challenge" said the following: "billions of polys". 50 millions can't compare to that, for better or worse. I was ready to accept that, but... but... Rashad comes to rescue, and he did it before "nanites" were even announced :D Sorry, this is my attempt to joke, but.. Remember this amazing set of scenes? https://www.daz3d.com/forums/discussion/comment/2025691/ so I've opened (took quite a time as it used 3100 mb of memory during that) the amazing "MgScp Sunday Picnic EGFPLS Full" prepared by Rashad as part of his MegaScapes and Lighting tutorial and it says more then one billion polys there (and I think C-ram most likely had the similar polycount as well). So, yeah... I can now feel the satisfaction!

 Exporting an object - with lights?
richardandtracy said:
The obj file format can be very simple (most cases), however it can be very complex - only a few applications allow for all the complexities. See Paul Bourke's explanation of the file format here and the material library options here. (these descriptions are very detailed). The obj import & export implementation with DS tends towards the simpler end of the scale.
Remeber that the DS OBJ importer is part of the PZ3 Importer library (.dll/.dylib), as you can verify by disabling that through Help_About Installed Plug-ins, and is geared towards the features needed for Poser content. The SDK is available (for DS 4) for anyone who wished to write a more general-purpose one
Regardless of the complexity of the implementation, the format does not seem to include ways of defining emission of light from a surface. So.. you simply can't do it that way to/from DS without work at either end. Shame, though.
Regards,
Richard
Exporting an object - with lights?The obj file format can be very simple (most cases), however it can be very complex - only a few applications allow for all the complexities. See Paul Bourke's explanation of the file format here and the material library options here. (these descriptions are very detailed). The obj import & export implementation with DS tends towards the simpler end of the scale.
Regardless of the complexity of the implementation, the format does not seem to include ways of defining emission of light from a surface. So.. you simply can't do it that way to/from DS without work at either end. Shame, though.
Regards,
Richard
Hair with BONES (Boneful hair?) [SOLVED]funkiestface said:
crosswind said:
For instance, to rig a clothing item to Genesis figure, I just import OBJ file, rig it to Genesis with Transfer Utility. Modify Face Groups, create custom bones as needed, do weight mapping and finetuning, create modifiers as well as corrective morphs, etc.
Crosswind you've been a big support in this matter. I return realizing my mistake. I have failed to fill the weighmaps by the selection groups. Thus everytime I ran the transfer utility it would remove the bones because they didn't have any weight assigned to them. Once I did that I was able to successfully complete the process.
Nice !
1968 AM Super Sport Coupe update errorsLink to product https://www.daz3d.com/1968-am-supersport-coupe
I don't have it.
I don't see Daz Studio listed as supported application. It says it has a blend file, so you might get it into blender and export as an fbx file, you then can import in Daz Studio.
Hair with BONES (Boneful hair?) [SOLVED]crosswind said:
For instance, to rig a clothing item to Genesis figure, I just import OBJ file, rig it to Genesis with Transfer Utility. Modify Face Groups, create custom bones as needed, do weight mapping and finetuning, create modifiers as well as corrective morphs, etc.
Crosswind you've been a big support in this matter. I return realizing my mistake. I have failed to fill the weighmaps by the selection groups. Thus everytime I ran the transfer utility it would remove the bones because they didn't have any weight assigned to them. Once I did that I was able to successfully complete the process.
Figure setup tool, can't drag geometry from left pane into right.Richard Haseltine said:
Can you import the OBJ into the scene normally, just as a prop?
Yes. I can try manual setup, but I'd like to use the Figure Setup tool.
Figure setup tool, can't drag geometry from left pane into right.Can you import the OBJ into the scene normally, just as a prop?
The 'Eat Your Food and Like It' Complaint ThreadMultiple complaints! I hate tech. Today I wanted to get back to work on the MacBook Pro whose metadata was messed up months (maybe a year) ago when Customer Service said the only way to get a fix for a product was to "Log In" through Daz Studio. The fix couldn't be pushed through DIM. So I Did. All my work wiped out. And more added because they had been updating the .dsx file names with punctuation, (s), and combining products together. And then I come to the SKUs where the RDNA products were released and I found the .dsa and .jpg files that had been there after I created metadata and made .jpgs were stripped out of Runtime/Support. So far I have found 63 files after I fixed the first. I thought that it was a fluke. Nope, the leading edge of a lot more work for me. At least I just have to assign the labels and link the products to their base items. And pull the .jpgs from my download folder.
That is, if I can keep my mouse from kicking off all my external hard drives. I have no idea what is happening to it.
And somehow, all the clothing I had converted for G8/G8.1/G9 in My Library is gone. I am going to have to completely start over. Actually a larger segment of My Library went missing. I have scenes and such but that is it.
@SilverGirl, I am not positive, but from the weather I heard this morning, I 'think' your area of the country is due to get a deep freeze tonight or tomorrow. Denver is on the SW edge of it and we are looking at temps in the 40s for the first time since early June. It is snowing now above 12,000 feet in the Rockies. That maybe why they are worried about your water pipes.
Mary
Daz 3D is part of

Connect
DAZ Productions, Inc.
7533 S Center View Ct #4664
West Jordan, UT 84084Licensing Agreement | Terms of Service | Privacy Policy | EULA
© 2026 Daz Productions Inc. All Rights Reserved.