-
Bug - Studio stops remembering categories
Ah, as you nailed it: re-importing user data made them Default... If so, it seems a bug to me. User-defined categories should be always marked as user-defined (non Vendor...)
I've never used export / re-import UserData, I only back up cms cluster and clean the data as needed from time to time.
But as for DS failing to assign a Category to an item, I've had no idea so far.... I hoped I could reproduce the issue but I failed ~~
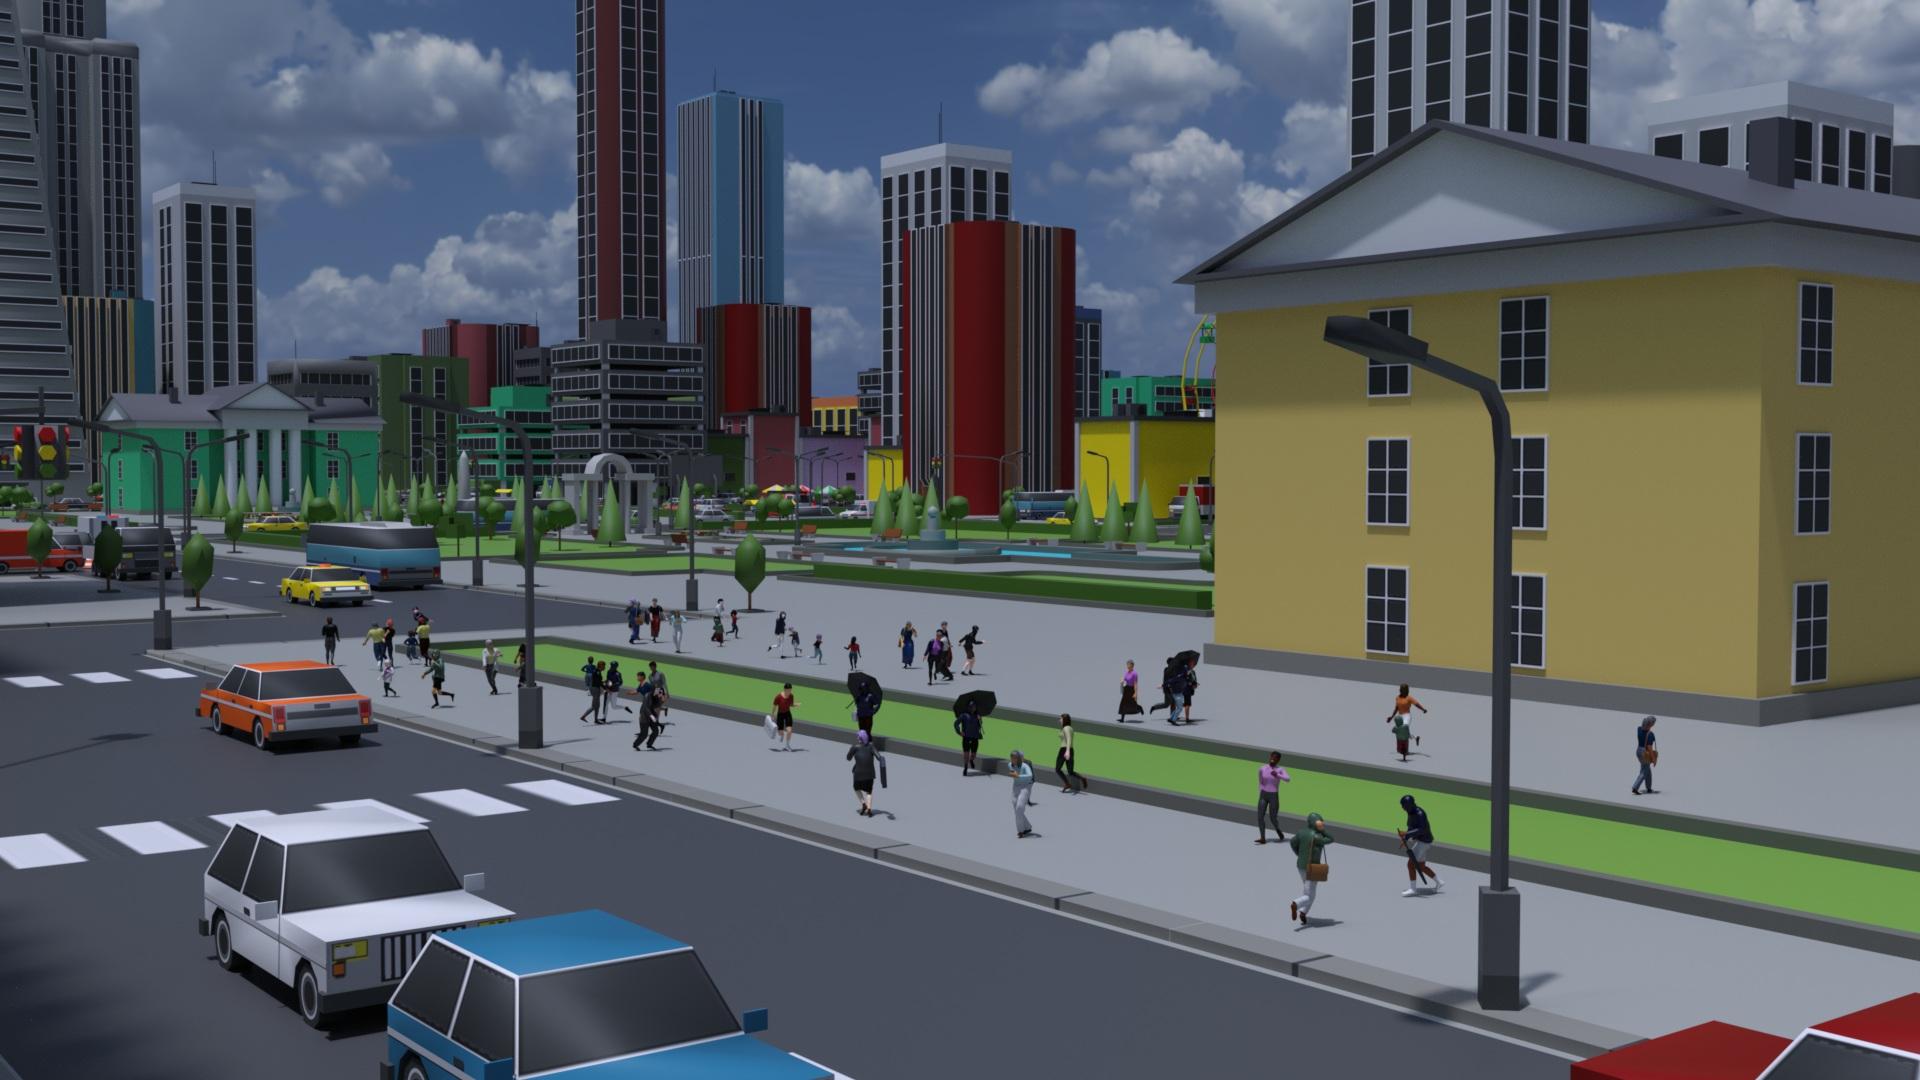
LIVE! In the store NOW!! LowPi - the Low Poly Figure, and Crowd Creator ScriptsMy trial with LowPi in the city.
Thanks to https://www.daz3d.com/blender-to-daz-studio-plugin I were able to import some large set to Daz Studio.
 Filter by context gone blank
Ah, no... that's not a "vanishing" but a "collapsing" because of a non-Default category there. You can see there're two Category groups on the left : Default and Shaders. As long as there're more than one category in the list, the category tree will be automatically collapsed.
You can just click Default category to expand it, you'll see your product thumbnails back.
That Shaders category usually comes from the wrong metadata in a Product ... if it was not created by you. Better re-assign a Default Category to the shader preset files under it, or delete that Shaders category. This "issue" will be totally gone.
Bug - Studio stops remembering categoriesRichard Haseltine said:
crosswind said:
I've never encountered such an issue though I also customize the categories a lot as well as handle assignments frequently.
Actually the categories shown in your screenshots look weird to me. Normally if one creates a user-defined category, the category icon should show a U mark on it (in below screenshots...). But most of yours are shown as Default (white icon with no U...).
Default category (AKA Vendor category... with pure white icon) can only be created by Daz or manually created in cms database directly... How did you create them?
No, as long as you add the metadata from a valid .dsx file with a valid Product GUID and Store ID (which doesn't have to be Daz) it will come in as Vendor data. You can create a new Store ID using http://docs.daz3d.com/doku.php/public/software/dazstudio/4/referenceguide/scripting/api_reference/samples/metadata/add_store_id/start (I have added one for the stores from which I have products, plus two for freebies - commercial use and non-commercial use). In fact the products that I have created in DS, no reimporting metadata, that meet those requirements are not user data and are not in the Local user product.
You're right ~ I forgot some vendors from 3rd-parties also create IM or XX installation package, as well as the ones made by the users.
As for Store ID, the case may vary... for instance, even if the vendor creates one store ID which is specified in product's DSX file, a user has to create the very same one in his cms database beforehand, otherwise the product will still go to LOCAL USER.
I couldn't reproduce your issue by now but, for instance, if you assign a Default category under User to an item... maybe with a conflict or glitch, you can try going to Default to filter the item out, I suppose....
(This sort of issue can be easily checked and identified within cms database if you have a postgreSQL DBA software... I always use Navicat to edit and fix things in cms ~~)
Bug - Studio stops remembering categoriescrosswind said:
I've never encountered such an issue though I also customize the categories a lot as well as handle assignments frequently.
Actually the categories shown in your screenshots look weird to me. Normally if one creates a user-defined category, the category icon should show a U mark on it (in below screenshots...). But most of yours are shown as Default (white icon with no U...).
Default category (AKA Vendor category... with pure white icon) can only be created by Daz or manually created in cms database directly... How did you create them?
No, as long as you add the metadata from a valid .dsx file with a valid Product GUID and Store ID (which doesn't have to be Daz) it will come in as Vendor data. You can create a new Store ID using http://docs.daz3d.com/doku.php/public/software/dazstudio/4/referenceguide/scripting/api_reference/samples/metadata/add_store_id/start (I have added one for the stores from which I have products, plus two for freebies - commercial use and non-commercial use). In fact the products that I have created in DS, no reimporting metadata, that meet those requirements are not user data and are not in the Local user product.
I couldn't reproduce your issue by now but, for instance, if you assign a Default category under User to an item... maybe with a conflict or glitch, you can try going to Default to filter the item out, I suppose....
(This sort of issue can be easily checked and identified within cms database if you have a postgreSQL DBA software... I always use Navicat to edit and fix things in cms ~~)
Filter by context gone blankPerhaps I haven't explained this well enough.
Say I want to apply G8 hair to G9. I ought to be able to select my G9 figure, then uncheck Filter by Context, and apply any hair prop I want. Right? But I can't do that, because as soon as i uncheck FBC, all of the Smart Content vanishes. If I click on empty space (no figure/prop selected) then recheck FBC, the Smart Content reappears, and then I can drag the prop to the figure. This is any figure/prop/item btw, not just G9 and not just figures.
HOWEVER. I have poses I want to convert to G9 but I can't because the script genesis-3-and-8-to-9-pose-converter requires me to have both the source post and the target figure selected and I can't do that because of the above problem. I select the pose using the above method, but the second I click on the target figure, the pose disappears.
I'm pretty sure this happened after I'd done some metadata editing (I had a problem where certain materials were showing up for everything and not just the apporpriate props) but I can't for the life of me work out what I've done and how to undo it!
Morphs Loader pro problemsPlease excuse my poor English, I'm using a translator.
"What is the name of the OBJ file? Or what is the name you're looking for in Morph Loader Pro (MLP)?"
I'm a PA, and this is a new article I created and integrated into Daz today.
"What do you mean by 'tab'? I assume you mean Path in the DS Settings pane >, like what I highlighted below (screenshot 1)."
Yes, that's right, again, forgive the translation XD
"Expand All (the name and label are named Expand All) is a morph from Fit Control for G8F. If this morph is enabled on G8F, once you rig a garment with the Transfer Utility on G8F, a hidden Expand All morph will be automatically created on the garment (via auto-tracking). Then, if you import a morph onto the garment with the same name: Expand All plus the option: Replace existing deltas of > only. The hidden Expand All morph property on the garment will be overwritten. Since it's hidden by default, you need to enable the Show hidden properties... option to find it in the Settings pane.
Check if this was the case when you have..."
Ah okay, like a ghost morph... I didn't know, that's where the problem comes from then, there's a duplicate and an error.
"Then, I'm a little confused... You said you couldn't display it, but how could you rename it? That's what you did with Show Hidden Properties... turned on, I guess."
I renamed it directly from the source in ZBrush and reimported it cleanly.
"That's not a problem for me... Well, you need to understand how a product works and what morphs are in that product, i.e., fit control. All Fit Control morphs for G8F are first activated on G8F rather than on conformers (fitted garments, accessories, etc.), and then because these morphs are defined as Auto Follow, the corresponding morphs will be automatically created by Auto Follow on the fitted garments. You have no way to "throw" them or manually compose them on the garments ~~ (screenshot 2)
So, in principle, don't use the same name as Expand All if you've triggered Fit Control morphs. Instead, give it a dedicated name that isn't in the property list, otherwise there will be problems..."
Yes, I'm aware that Fit Control is applied on G8F and then passes the morphs to the garment.
Thanks for the info, so the error came from the fact that an "Expand All" already existed in the settings... I will be for the future, thanks again !
 Will DAZ ever improve animating?
WOW!! I did not know that we could post active vimeo links here now
Glad to have it as an option

but are my animations that bad?
My most charitable answer is they are not very good from a technical perspective .

You claim you once used Iclone yet somehow you do not appear to understand how important a solid foot/floor Ik solver actually are in the core tool set of a modern character animation program.
Are the chars motions so unnatural or stiff?
Yes, frankly in many of the shots, they move like animatronic robots at Disney world or Tesla
But more importantly ,when they walk, they simply glide along weightlessly with feet sliding as though they are on roller/ice skates. and the girls feet pass ankle deep in the dirt on several occasions
Look , I get it,
you really seem to prefer to not rely on assembling canned aniblocks
as @Dartanbeck teaches in his popular animation courses..fair enough
But if you are going to hand keyframe human locomotion, you should seriously consider buying a seat of the cascaduer application because your hand key framed walking animations are not very realistic without a modern human IK system to give characters a sense of weight as I demonstrate with cascaduer in the video belowA very short & simple example of how IK actually works to give solid foot planting & weight to a character with a just few key frames (and can be baked to FK for BVH export to DS with limitations)
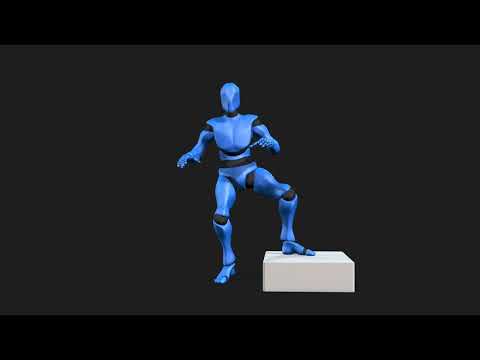
Now here is a simple hand key framed animated Character in Blender (no mocap retarget)
This is a Daz genesis 8 Male with his body rig converted to Auto rig pro
( with two mouse clicks with ARP quick rig )
but his head retains the original Daz face morphs & visemes converted to Blender shape keys for import of
mimic/Anilip/face mojo ,or whatever lipsync animation via the free Diffeomorphic
addon and his face can still be manually animated on top of the base lipsync with blenders native tools as wellNote how he leans on the table with some random
sliding forward of his left hand as he gets more "riled up" in his heated argument.
No need for scripts like “ limb stick” and hoping for ther best etc
just human IK contact solving and a true IK constraint system as it should be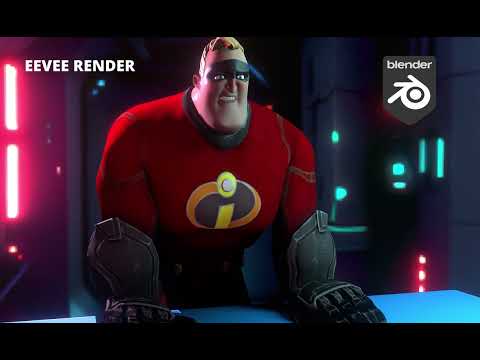 Morphs Loader pro problems
V8 Infinite said:
Hello, I wanted to create a morph for a piece of clothing. As usual, I use Morphs Loader Pro.
I import the morph, and everything is fine.
The dialog box tells me that the morph has been created successfully.
What is the name of OBJ file ? or what is the Name that you speficy in Morph Loader Pro (MLP) ?
Problem: It doesn't create the tab where it's located... or the tab is empty...
What do you mean by "tab" ? I suppose you mean Path in DS > Parameters pane, like what I highlighted in below (screenshot 1)
The morph in question is called "Expand All" and I can't display it. Its data is correctly entered but invisible in Daz.
Expand All ( both Name and Label are named as Expand All ) is a morph coming from Fit Control for G8F. (The vendor should've given it a prefix... like fc_)
If this morph is dialed on G8F, after you rig a garment with Transfer Utility on G8F, a hidden morph of Expand All will be automatically created on the garment (by Auto Follow). Then if you import a morph to the garment with a same Name: Expand All plus the option: Overwrite Existing > Deltas Only. The hidden Expand All morph property on the garment will be overwriten. Since it's hidden as default, you have to turn on Show Hidden Properties... to find it in Parameters pane.
Pls check if it's the case you have ...
I rename it to "Expand Toes" and it displays correctly.
Then I'm a bit confused... you said you can't display it but how could you rename it ? You did it with Show Hidden Properties...turned on, I suppose.
Is this a tab settings issue?
Does the latest update not like "official" names, which could conflict with certain morph creation extensions in particular? (I have Fit Control)
Not an issue to me... Well, you have to understand how a product operates and what morphs are within that Product, i.e. Fit Control. All the morphs from Fit Control for G8F are firstly activated on G8F rather than the conformers (fitted garments, accessories, etc..), then because those morpsh are set as Auto Follow, so the corresponding morphs will be automatically created by Auto Follow on the fitted garments. You have no way to manually "launch" or dial them on the garments ~~ (screenshot 2)
So, in principle, do not use the same name of Expand All if you've triggered Fit Control morphs, instead, give it a dedicated name that is not in Property List otherwise there'll be some problems...
Thanks
Morphs Loader pro problemsHello, I wanted to create a morph for a piece of clothing. As usual, I use Morphs Loader Pro.
I import the morph, and everything is fine.
The dialog box tells me that the morph has been created successfully.
Problem: It doesn't create the tab where it's located... or the tab is empty...
The morph in question is called "Expand All" and I can't display it. Its data is correctly entered but invisible in Daz.
I rename it to "Expand Toes" and it displays correctly.
Is this a tab settings issue?
Does the latest update not like "official" names, which could conflict with certain morph creation extensions in particular? (I have Fit Control)
Thanks
Will DAZ ever improve animating?Imago said:
wolf359 said:
How are you creating lipsynch for the G1 figures?
With the 32bit version of DAZ Studio that has the lipsynch tool integrated. Until now that's the best way I found to make good lipsynchs. It works with any figure but some times you have to find the MSC files that works with them. I compiled myself a few for older figure, it's not hard to create them.
I have both 64 and 32 bit versions installed, when I need to make a lipsynch, I simply start another session with the 32bit version, load G1 (or any other figure I need), select the audio file and input the text for a more precise result.
Once the lipsynch is done, I save it as Pose Preset selecting only the Visemes and the mouth movements and import that into the char I'm animating in the 64bit session.
I'm glad that I have options like Blender available to me should I need them (thanks again to wolf359 and the others who helped me get some figures into Blender to test them), but now that the DAZ Alpha allows Macs to use Filament and Filatoon, I'm going to do the next few 3D animations in DAZ Studio.
It's certainly not the best option for most serious animators, but my animations tend to be simple and very dialogue-centric, so it really works well for me.Similar to Imago as far as running 32-bit DAZ Studio, I have two older iMacs (2011 and 2012) on my network both running DAZ Studio, 32-bit version. With screensharing, they're basically extra windows on my MacBook Pro M4Pro, so they might as well be 64-bit and running native for what they're used for; they wouldn't lip sync any faster if they were. Like Imago, I do the lip syncs and save the pose subsets of just the head and necks.
This afternoon, I did all the Genesis 9 lip sync poses for 109 audio clips in just under 2 hours... roughly 11 minutes of audio, which should make a 13-15 minute video when I'm done.
I did a quick render test on the first clip, just to make sure things were set up correctly. It's about an 8-second clip, I only rendered at 720p, luckily, as it was still set to 30 fps, so I adjusted to 24 fps and did all 109 clips in one sitting.
For me, the best part is that the Alpha allows me to insert the audio clip and actually hear it (I haven't been able to do that using a 64-bit Mac OS in years) and export it as a single movie file with sound. No exporting individual frames and joining them later, then adding the audio. Such a smooth system for the type of animation I want to do, with some canned animations and sources like Mixamo that still work for me for non-facial animation. Again, it's not going to be enough for most serious animations, but as a hobbyist who just wants to have fun making quick little sci fi videos? Magic.
I also love how Mimic automatically handles the Genesis 9 lips, eyes and eye brows... not bad for free.
Bottom line, 7.7 seconds of 3D animation in under 8 miniutes including doing the lip sync (of course, 1080p would take longer to render, but you get the idea).
https://sterdan.com/wp-content/uploads/2025/08/04-A-little-over-12-hours-ago-Close-up.mp4
The new DAZ to Blender Pluginbrainmuffin said:
Masterstroke said:
If this is only a enhanced UI plugin for free Diffeomorphic, then 100$ + is really, really prizey.
In the video on YouTube, most of what the PlugIn does is in Blender and has little to do with Diffeomorphic. It does mention using the Diffeo API. Not really sure what that means though.
In a nutshell ...FAST Animation Studio Tools adds 600 new operators to Blender that improve literally everything in Blender...it essentially converts Blender into Super Blender...It's totally genius... It offers awesome DAZ import system, just look down the page and you'll see that section with all the green check mark icons that'll describe how it works... It's the fastest way to output large amounts of content in Blender and we got it all set up so you could render out scenes in parallel, essentially you could render 250 frames of animation in like 12 minutes... With our integration of AWS Deadline Studios...
The new DAZ to Blender Pluginbrainmuffin said:
Masterstroke said:
If this is only a enhanced UI plugin for free Diffeomorphic, then 100$ + is really, really prizey.
In the video on YouTube, most of what the PlugIn does is in Blender and has little to do with Diffeomorphic. It does mention using the Diffeo API. Not really sure what that means though.
See in developing this I put all the documentation into the add on one thing I neglected was making outward facing documentation so people that haven't purchased yet can learn about it I just realized that and I'm working on that today starting with this... In a nutshell it adds 600 new operators to Blender that improve literally everything in Blender...it essentially converts Blender into Super Blender...It's totally genius...Here's a pretty awesome synopsis:
Fast Animation Studio Tools >> Massive DAZ-Blender Bridge!!!:
Note from the Developer:
Hey everyone — I wanted to post this officially, but my Publishing Artist (PA) account isn’t currently linked to my main DAZ forum account, so I don’t have permission to create a proper support thread just yet. That should be resolved by Monday. Once the accounts are correctly linked, I’ll go ahead and create the official thread in the proper PA section. For now, I’m posting this here so people can learn about the add-on and report any issues. Thanks for understanding!
Imagine This: Fast, Full Scene Creation in Blender from DAZ Studio
What if you could import a DAZ Studio character into Blender already rigged, posed, and animated, using the powerful Diffeomorphic bridge — but with a huge upgrade? Diffeomorphic is already the best DAZ to Blender tool, and we’ve bundled it, then added over 600 additional vital operators that help you save clicks, work faster, and actually output scenes fast.
This isn’t just an import tool — it’s a television production system for Blender. We built it to produce our own show, and now we’re sharing it.
Blender + DAZ = Fast Scenes, Beautiful Renders
DAZ Studio renders are the best but take a minute or 2.
Blender renders with Cycles are awesome but take a minute or 2...too...and setting things up takes forever.Our add-on changes that: You’ll go from DAZ to Blender to rendered scene FAST.
Flexible Import: Mixamo, Azure Lip Sync, Poses — Your Way
Importing characters isn’t “one-size-fits-all.” With FAST Animation Studio Tools, you get three import options, and you can mix and match them any way you want:
Three Import Options:
-
Pose Preset (Face and/or Body)
-
Mixamo Animation (Download any animation using our built-in “Open Mixamo.com” button)
-
Azure Lip Sync (Like Mimic, but easier — upload audio and get lip sync automatically – Create any audio using our built-in “Open Voice.ai” button)
Mix-and-Match Import Configurations:
-
Import a pose preset for the body, then apply Azure Lip Sync for face.
-
Import only a pose preset with facial animation.
-
Import only a Mixamo animation (for the body), and use Azure for lipsync.
-
Import both Mixamo and Azure animations for a complete body + face result.
-
Or any combination of face and body animation of the above!!
Example Workflow (My Favorite):
-
Go to DAZ Studio and use our supplied “AT Pose” script on your character.
-
Save the character to our special folder.
-
In Blender, Toggle on the Mixamo Animation button, choose your animation.
-
In Blender, Toggle on the Azure Animation button, choose your audio.
-
Import your character — done. You now have a walking, talking character in your Blender scene saying and doing whatever you want.
Need another character?
Go back to DAZ Studio, in a new scene, add new character, clothes, and hair with just a few clicks.
Repeat the above steps — it takes minutes.Lights, Cameras, Action: Automated Scene Setup
In Blender, lighting usually means manually adjusting lights — not anymore.
Lighting:
-
One-click adds an 8-light Hollywood spotlight system (in a collection).
-
One-click adds a 3-light setup parented & sized to character (in a collection).
-
Adjust all lights in collection at once with real-time mousewheel nudge control — no keyboard.
-
Cameras:
-
Add cameras for each character in just one click, already aimed, already perfect.
-
Cycle between cameras using our Cycle Cameras button.
-
Adjust them with mousewheel nudge control — no keyboard.
-
Cameras automatically snap to your viewport...no resizing necessary.
-
Organize Your Scene: Collections System
Every character imports into its own collection automatically.
Collection System Setup (Fully Automated):
-
Click Setup Collections.
-
It adds start and end markers around each character’s animation.
-
Adds visibility keyframes so characters are only visible during their animation — keeps Blender high-performance.
-
You can move entire collection sections on the timeline in one click with our Relocate Collection button.
-
Build Your Scene Like This:
-
Character A speaks — move their collection to Frame 1.
-
Character B replies — move their collection right after A.
-
Character A responds — move collection again.
-
You’ve now built a full dialogue scene in minutes, with perfect visibility control and performance.
Ready to Render? Render in Parallel (Not Overnight)
Once your scene is built, rendering in Blender is slow — unless you render in parallel.
Our Solution: AWS Deadline Cloud Rendering
-
Open our Fast Render panel.
-
Follow the official AWS Deadline tutorial.
-
Request 8 Spot Instances from AWS for Blender rendering — we show you how.
-
Once approved, you’ll be able to render 8 frames at once, in parallel.
-
Example:
-
You built a 24-second animation (~576 frames).
-
Normally that takes 10+ hours on a single machine.
-
With AWS, render the whole scene in 30 minutes, for pennies.
We’re automating this Parallel rendering even further soon — but it already works seriously awesome now.
We fully support DAZ Studio and DAZ Boost... If you want parallel rendering available in DAZ Boost just send them a feature request and if they're hesitant just tell 'em that we already worked out and easy to implement template for this that's very cheap to provide and use, and that we'll send it over for free... and then see, by doing this you will help, DAZ Studio, which Is one of the coolest companies on the planet... and yourselves!
BONUS: Use Our Ready-to-Render Blender File
Start from our ready-to-render file, with everything already set up for a one-room scene.
(Need a different configuration ready-to-render file? Just ask!)If you forget to set up your scene in the ready-to-render file, you can use our Append All button to import everything you need — including sounds, cameras, objects, properties, and rebinded operators...
Blender’s default Append operator is not this comprehensive.The Biggest Blender Add-on in the World
We’ve only described 4 panels here. There are over 30 panels total, plus a massive 200+ item context menu. You’ll rarely need to touch your keyboard thanks to the sheer number of context-aware buttons — everything is click optimized, fully automated, and built for real-world scene production by professionals.
This is the largest for-sale Blender production pipeline in the world, and we’re using it right now to create our own animated show in Blender. It’s built, maintained, and constantly upgraded by real-life 3D animation experts — and provided to you so you can experience real success in your own productions, faster and easier than ever before.
Look on YouTube — It’s Time for More
Look — go on YouTube and search for “DAZ animations” or “Blender animations.” What do you see?
Almost all of them are 30 seconds or less — because making Blender animations takes forever...And even though DAZ Studio is incredibly fast, the renders, although beautiful (the best, in my opinion), take a long time...
Not anymore. We just showed you how to create nearly 30 seconds of animated content in about an hour or less... So fast, you could create your own TV show in Blender if you work at this 8 to 12 hours a day like we do.
Just think about it — if everyone used this add-on, you’d see cool, high-quality 3D animations with DAZ characters everywhere.
Not Just for DAZ Characters
And here’s the kicker: this add-on isn’t just for DAZ characters.
It includes optimizations for any character type, including shapekey animations, Grease Pencil animations, and more.We even bundled and upgraded the Mixamo add-on to work with the latest version of Blender, because Adobe still hasn’t.
Our version is pro-level, fully functional, and works better than ever — just go to Mixamo.com, grab your animation, and you’re ready.Summary Line
This is a TV production tool for Blender — not just an import script...
It’s the biggest Blender add-on in the world code-wise — it’s 4 gigabytes and totally optimized for DAZ characters.It’s the best way to work with DAZ characters in Blender, and we really hope that you’ll try it.
FAST Animation Studio Tools is how you build, animate, and render full scenes every day, not once a month.
Choose success.
Be successful at your hobby.
Be successful at your job.In Closing
We are masters of Logical Systems over here — and it shows. Every time we run into something tedious or time-consuming in Blender, we write code to fix it. If something slows us down, we automate it. If something’s just a bit off or inefficient, we put it in our 5,000-line upgrade file — and it’s growing every single day.
This add-on is constantly upgraded, and it’s just the beginning. As soon as humanly possible, we’ll be launching a Kickstarter campaign to fund at least 200 seriously awesome new features, including AI-powered tools and other world-changing upgrades already planned and ready to be built.
Now here’s the real vision: we’re not building an “entirely new” piece of software — we’re using Blender itself as the foundation, because Blender is genius software. We’re simply going to upgrade it with a professional Adobe-style interface, and enhance the logic wherever needed.
-
It’ll still be stock Blender under the hood, with our add-on fully installed.
-
Any other add-on you install will now use this awesome new interface.
-
If we need to tweak Blender’s source code to support it, we will, safely, — but we’re not replacing Blender, we’re taking it to the next level.
Our goal? To make Blender look and feel like a Creative Cloud app, while keeping it open-source, customizable, and insanely powerful.
Your purchases help make this happen.Finally...
If you want to know more, just ask — We are masters at Logical Systems and Efficiency Experts and Customer Service... And we love to talk to you. Any questions about the add on you can e-mail them here: [email protected] and we will help you through any questions you may have about this amazing add-on.
The New Mac FAQYou both are most welcome. We are about to get heavy weather, again. So as soon as a render is done I will be offline for the day.
Yeah, connecting has destroyed more hard work than I want to think about. I still have my MacBook Pro to fix after Customer Service promised me that they could only update a file that way. Totally destroyed all my metadata, stripped out thumbnails because of revised file program lines... At least I know how to fix it, but it takes at least 5 - 10 minutes a file sometimes.
Will DAZ ever improve animating?What makes possible improve Iray but not the Timeline?
Improvements/updates to the Iray render engine are made by its owners at NVIDIA.
A company valued at 4 trillion dollars
Daz has to choose wiseley where it commits resources.AniMate, GraphMate, KeyMate... They are all optional plugins that added a lot of functionalities for animating in DAZ Studio
Yes and those you named are created by third parties whom are not obligated to update them to keep up with the changes to the core Daz studio application’
Yes Daz actually purchased graphmate/keymate and folded it into the native Daz timeline.However Animate 2 has not been fully compatible with Genesis since G2 and is effectively useless for viable aniblock creation with G9 and while Animate2 is listed as “pending update “in the DS 2025 Alpha thread,
ALL of your other animation helpers & scripts
cannot be used after DS4.2X
unless the various third parties decide it is worth their time & effort.
It feels like everyone is terribly scared of having any kind of improvement for animation. As soon as someone talks about animating in DAZ Studio a whole army of angry users arrives and scares the soul out of anyone interested...
No one here seems angry to me.
People are just giving their honest assessment based on their expertise and experience
When they see you make broad comparitive assertions about other animation software that you clearly have never used for character animation (Blender) they are going to correct your claims.Gotcha, that might be why I couldn't get it to work back then. I'll look into this more, thanks!
I still have the older 2023 free version of cascadure with FBX export limited to 300 frames per animation clip ,and rigs with 120 joints Max
Geneis 8-9 have too many joints to import/animate & export to DS from my free version.
Thus ,in my case I just hand animate the included UE4 mannequin in cascadure
with auto physics and export it as FBX to Iclone which supports the UE rigs natively.From Iclone I can export a perfect BVH to any Daz figure ,from Mike & Vicky 3 up to G9,
or directly to a FBX compatible with Maya,C4D or Blender (for auto rig pro retargeting)I also use Iclone to port ragdoll simulation from Poser(12) physics and Endoprhin, again to any DAZ figure from
Mike & Vicky 3 up to G9, or directly to a FBX compatible with Maya,C4D or Blender (for auto rig pro retargeting).Change/adapt the shirt automatically generated wrinklescrosswind said:
OK, do you know some software like Blender ? You can send the shirt to Blender, reshape the wrinkles by using Draw / Grab / Smooth / Flat brushes, etc. so as to make them look more organic and / or natural. Then import the shirt back as a fixing morph to DS.
I can try it, but I think that my Blender knowledgments are too much simple to make these changes.
Thanks, Xavi
Render presets for Agent Unawares' SkydomesHello,
Agent Unawares shared 26 skydomes on Deviantart a couple of years ago, covering various times of a day (links below).
While they are nice, by default, no render presets are provided to make applying them easily in Daz Studio, so after sleeping on the subject for many months, I decided to create them myself and I’m now sharing the result with anyone else.
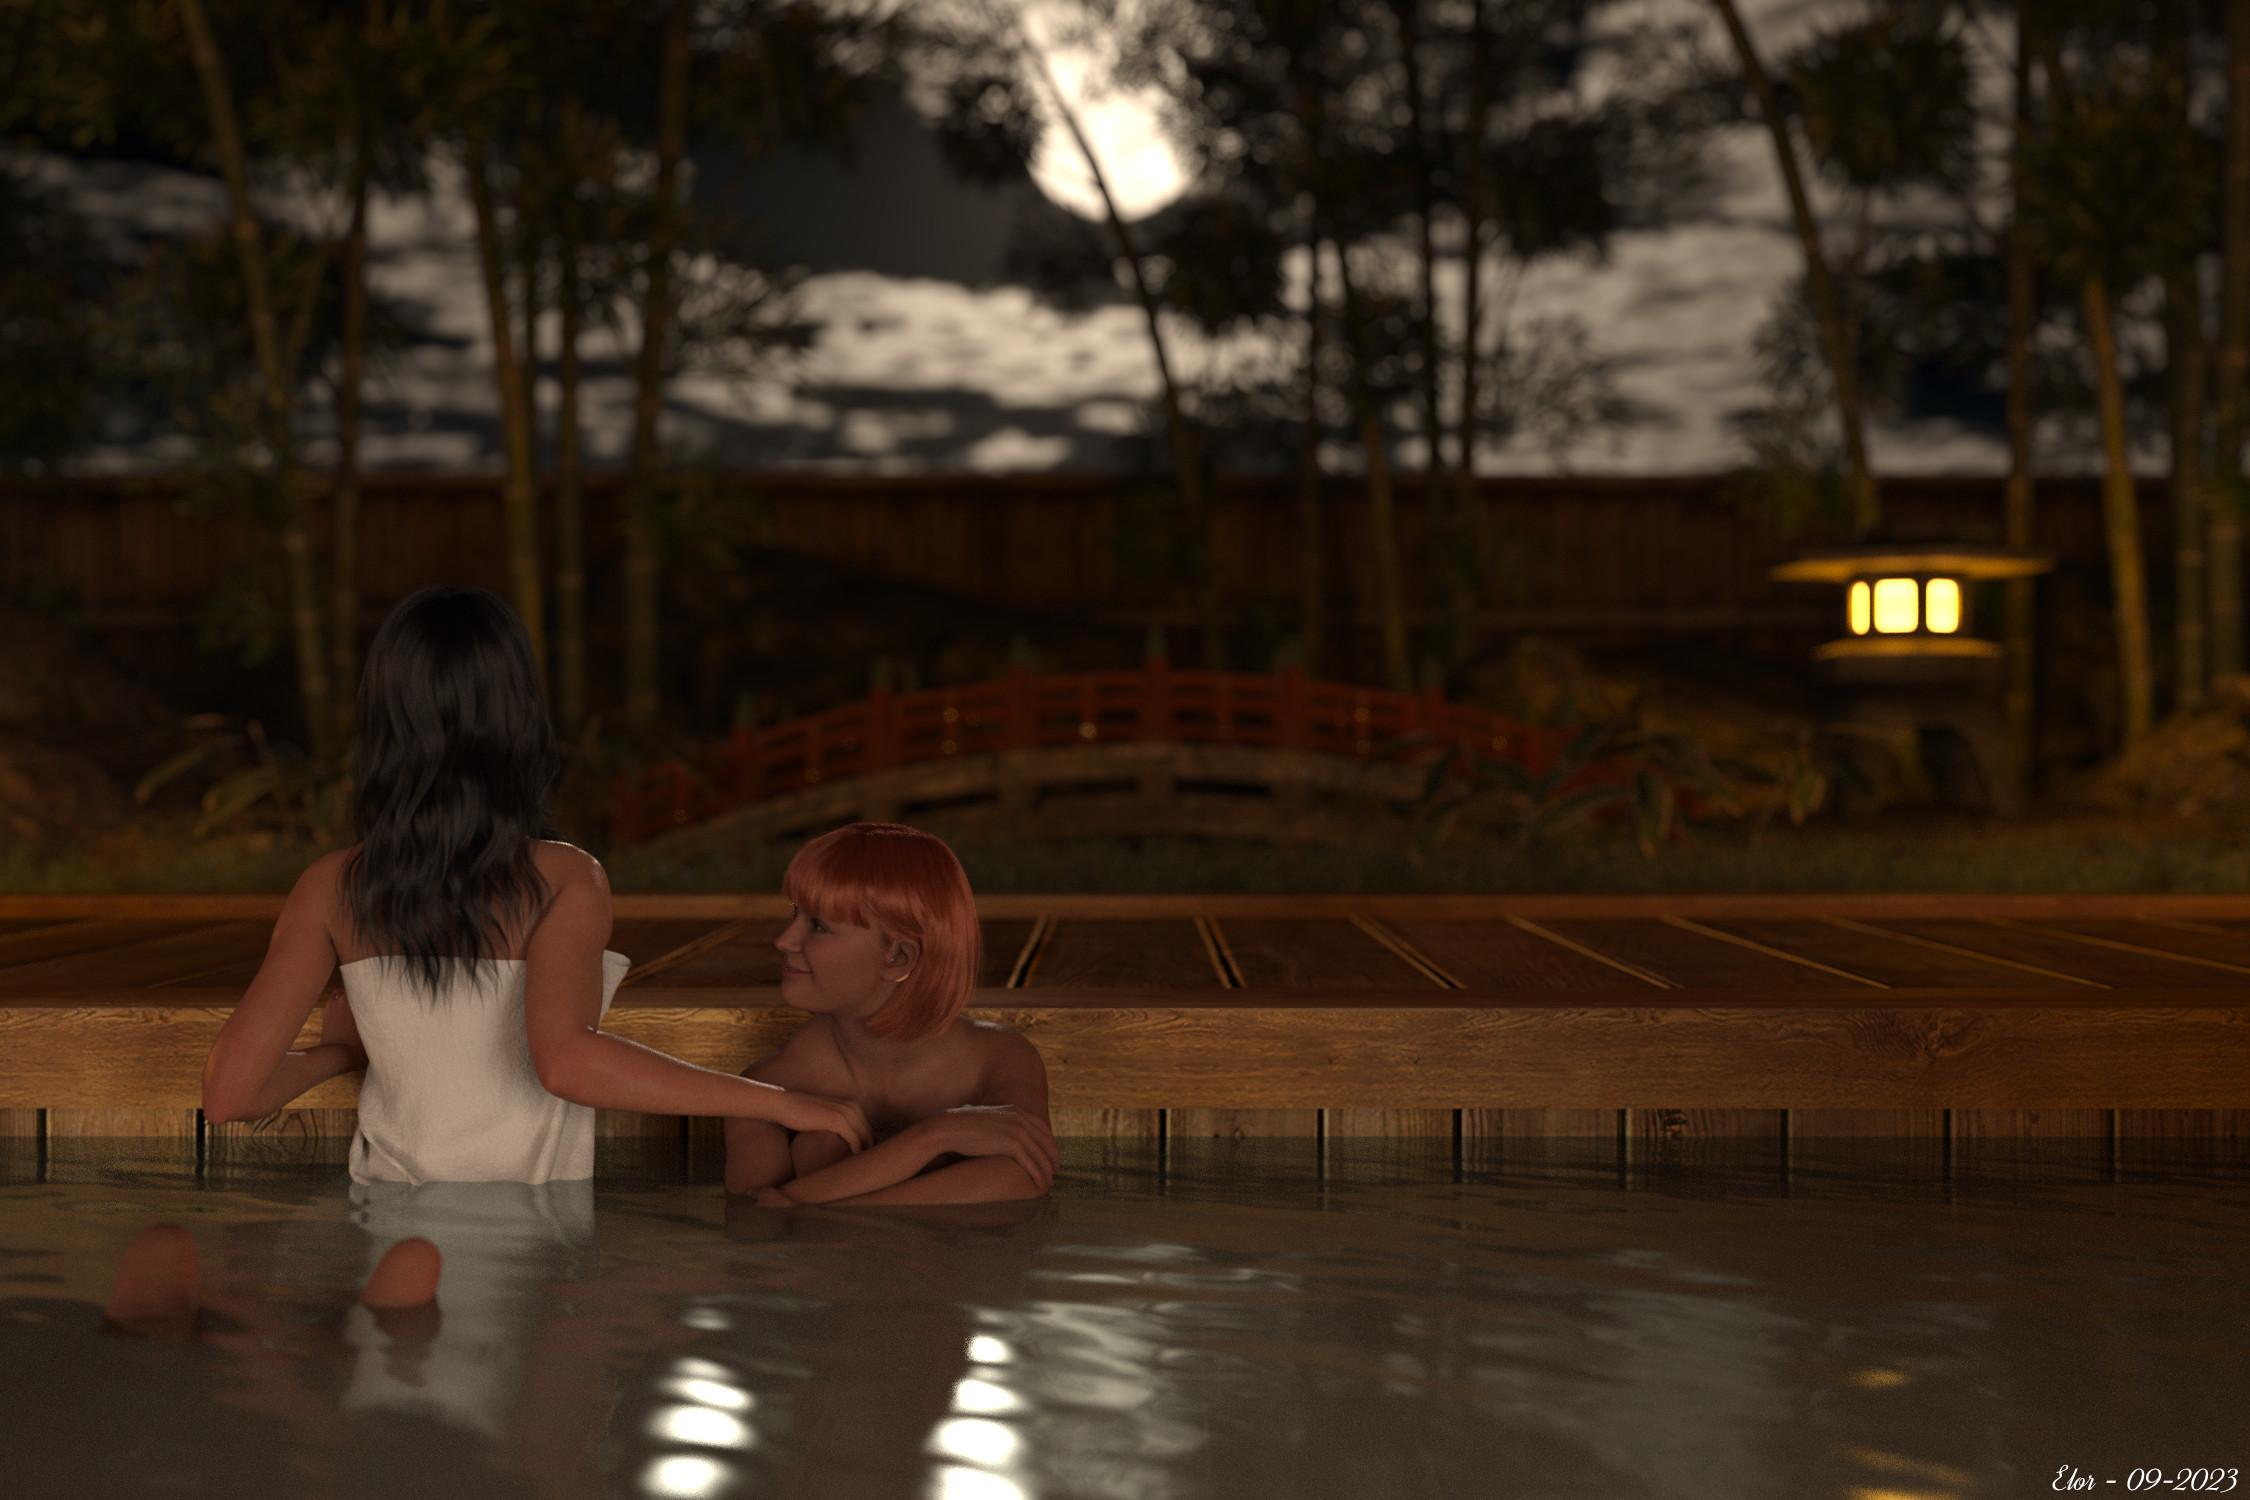
One I like a lot is the one with a full moon, used in a render from 2023, ‘The moon is beautiful, isn’t it?’:
An important note.
I’m not completely sure I’m allowed to share AgentUnawares’ skydomes and anyway, I don’t have online storage to easily share around 1.8 GB… so I’m not sharing the skydomes themselves, just render presets to load them more easily in Daz Studio than searching for them manually each time and you’ll have to download the 26 skydomes yourself and will need a (free) Deviantart account to do so.
What’s included.
- One render preset per skydome.
- The whole folders’ hierarchy to know where to move the skydomes files once downloaded.
- Metadata for people who like them.
Note: if you’re planning on using the metadata, you MUST respect the folders’ hierarchy.
If you just want to use the render presets from the Content Library, while it’s best to respect the folders’ hierarchy, you can at least move the render presets files themselves where you want: HDRI files on the other hand should be placed in the correct folder.
Licence
Agent Unawares set the following rule for using the HDRI:
These skydomes may be used in 2D and 3D art without restriction, including games. No attribution required.
Using the render presets to load the HDRI has obviously no impact on the licence set by Agent Unawares and should you feel the need to credit someone, please, give credits to Agent Unawares.
Regarding the render presets themselves, as with my previous freebie, as long as they are attached to this message, please refrain from sharing them elsewhere and redirect people here to make sure they will access the latest version. If the archive is not available anymore and if I’m not active anymore on the forum, feel free to share them as a freebie.
Installation instructions
Note: My advice is to NOT place the various files included in this archive into ‘My DAZ 3D Library’, especially if it’s managed by DIM.
It’s safer to install the needed files in another library (either ‘My Library’ or one you created yourself).
Warning: DO NOT REPLACE ANY EXISTING FOLDERS OR FILES, none of the ones I created should exist on your computer.
Steps
- Move the ‘Light Presets/AgentUnawares’ folder into the ‘Light Presets’ folder of the library you want to use. If ‘Light Presets’ doesn’t exist in that library, simply move the ‘Light Presets’ folder from this freebie.
- Move ‘LOCAL_USER_AU_Iray_Skysets.dsa’, ‘LOCAL_USER_AU_Iray_Skysets.dsx’ and ‘LOCAL_USER_AU_Iray_Skysets.jpg’ from the ‘Runtime/Support’ folder of this freebie to the ‘Runtime/Support’ folder of the library you’re using.
- Download the 13 skysets, using the following link (you’ll need a free Deviantart account):
- https://www.deviantart.com/agentunawares/art/Skyset-001-702365724
- https://www.deviantart.com/agentunawares/art/Skyset-002-705701571
- https://www.deviantart.com/agentunawares/art/Skyset-003-707491209
- https://www.deviantart.com/agentunawares/art/Skyset-004-711669600
- https://www.deviantart.com/agentunawares/art/Skyset-005-715173309
- https://www.deviantart.com/agentunawares/art/Skyset-006-716145005
- https://www.deviantart.com/agentunawares/art/Skyset-007-719515158
- https://www.deviantart.com/agentunawares/art/Skyset-008-719515877
- https://www.deviantart.com/agentunawares/art/Skyset-009-722742369
- https://www.deviantart.com/agentunawares/art/Skyset-010-726898177
- https://www.deviantart.com/agentunawares/art/Skyset-011-729804822
- https://www.deviantart.com/agentunawares/art/Skyset-012-731356738
- https://www.deviantart.com/agentunawares/art/Skyset-013-737291033
- Extract every archive.
- Check that each. hdr file is named ‘Skydome XXX.hdr’ with XXX replaced by a number from 001 to 026 (it’s their default name but better safe than sorry, right?)
- Move all. hdr files extracted into the ‘Runtime/Textures/AgentUnawares/AU Skysets’ of this freebie.
- Move the ‘Runtime/Textures/AgentUnawares’ folder into the ‘Runtime/Textures’ folder of your library. If the ‘Runtime/Textures’ or the ‘Runtime’ folder don’t exist, simply move the equivalent from this freebie.
At this point, you should have the following folders moved into the library you’re using:
- ’Light Presets/AgentUnawares/Skysets’ with 78 files in it (26. duf files, 26.png files and 26. tip.png files).
- ’Runtime/Support’ with at least ‘LOCAL_USER_AU_Iray_Skysets.dsa’, ‘LOCAL_USER_AU_Iray_Skysets.dsx’ and ‘LOCAL_USER_AU_Iray_Skysets.jpg’ in it (possibly alongside similar files from other products that came with metadata).
- ’Runtime/Textures/agentunawares/AU Skysets’ with 26. hdr files in them.
How to install metadata?
With the Content Library active (I’m reusing older screenshots but the text should be up-to-date):
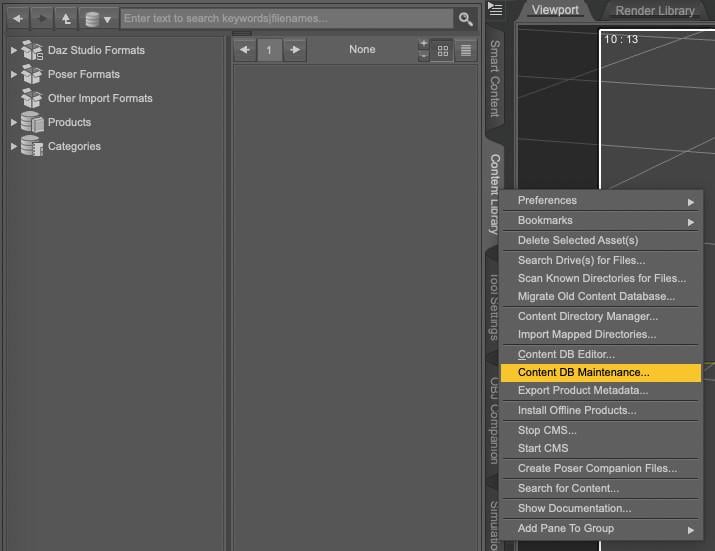
1. Open your Content Library, right-click on the tab to get the following menu and select Content DB Maintenance
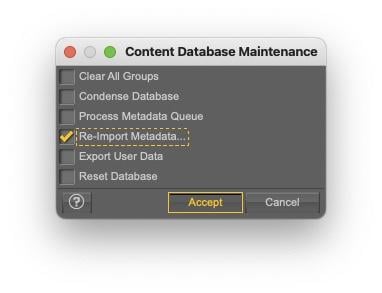
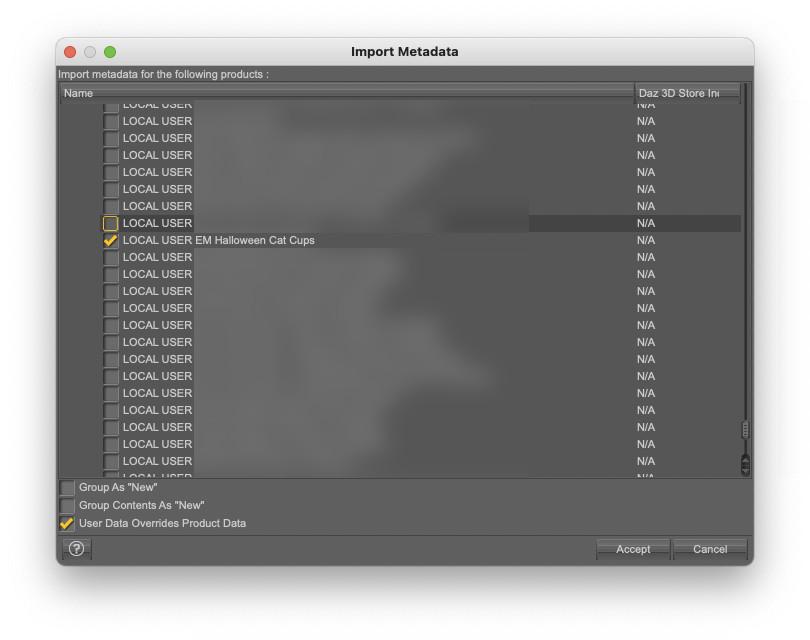
2. Select Re-import Metadata
3. UNSELECT everything by unchecking User Data and All Products, to avoid overwriting existing metadata (it’ll also be much faster to only import one product metadata than your whole library…).
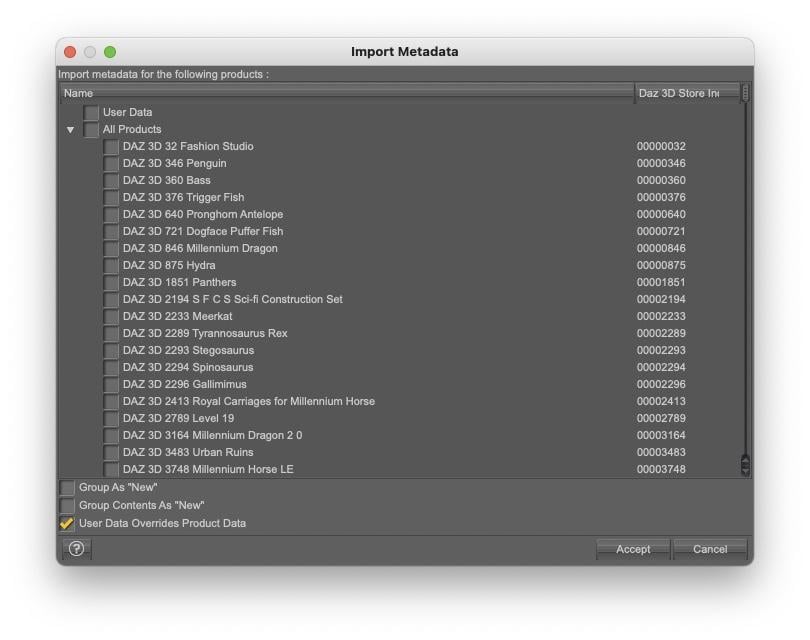
4. Select ‘LOCAL USER AU Iray Skysets’ (as announced, it’s an old screenshot done for another freebie) and click accept:
Once installed, you will be able to find the skysets in Smart Content:
- By searching for ‘skysets’
- By searching for the author, by typing 'key::AgentUnawares'
Or by looking into the 'Render-Settings' category.
What are each render preset doing?
Note: I looked at how the various skies from the Skies of the Economy were loaded to get a better understanding on how to do it.
Each .duf file will do the following actions, all impacting the Environment Options:
- set the 'Environment Mode' to 'Dome and Scene'.
- set the 'Dome Mode' to 'Infinite Sphere'.
- set the HDR file as the 'Environment Map'.
- set the 'Draw Dome' value to On.
- set the 'Dome Rotation' value so that the shadows will be cast on the X axis.
Every other settings of the Environment Options should stay as they were.
Small advice on how to use them.
Regarding the last action done (changing the Dome Rotation), if you want to change the Dome Rotation, I suggest using the 'Dome Rotation Y' setting: as it is not changed by the .duf files, once you’re happy with the direction the shadows are cast, you will be able to check if one of the other skydomes suits better the scene you’re currently creating and shadows will continue to be cast in the same direction once the new skydome is loaded (warning: some of these skydomes have the sun either on top of world centre or have enough clouds to diffuse the sun light so shadows will mainly be under the various objects and figures of your scene).
I didn’t change any other settings, and you will likely get better results by playing with the tone mapping options compared to the default values. If your reaction is 'tone mapping what ?', I can only suggest watching the Masterclass by Jay Versluis on the subject:
Conclusion
I used them a lot on my computers since I created them and I checked the content of 'LOCAL_USER_AU_Iray_Skysets.dsx' for the most common mistakes I’m usually making with a Shell script I wrote, so hopefully, if you’re following the instructions, you should end up with working render presets.
Should any problem arise, you should be free to ask a question and I’ll try to help you fix it.
The same is true if you have suggestions to improve any part of this freebie (except the HDR files of course).
In the meantime, happy rendering and my thanks to Agent Unawares for sharing these wonderful skydomes !
[Released] RSSY Clothing Converter from Genesis 8 to Genesis 9 [Commercial]Joe.Cotter said:
RiverSoft Art said:
Joe.Cotter said:
Is this thread still being monitored?
I have a situation where something broke where the product will not function at all. It starts, I can import files but not folders, and when I select convert or force convert, it runs through the list of files as if it is working and then ends up with 0 converts after x minutes. The log file just says "skipping." I have tried to uncheck all of the recommened check boxes but that didn't help. I then tried to uninstall and reinstall and still nothing. It seems to have a cache issue but I have no idea what that file(s) would be or where to find it/them if exists
It sounds like the metadata broke in your Daz Studio. Try selecting one of the checked items and clicking Force Convert. If that works, multi-select the items and try Force Convert
As I mentioned in my post, I already tried Force Convert. Please re-read.
Sorry about that. Ok, then I need the Daz log when the script is executing to see what is happening. Thanks.
Importing DAZ Decals into Blender?In my example above I imported the decal with easy import, then moved and scaled the gizmo to reposition the decal over the figure. I'm working on "uvw" and my results seem to work fine for the specific decals you used, but I'll test with other products before updating Thomas with a possible implementation.
[Released] RSSY Clothing Converter from Genesis 8 to Genesis 9 [Commercial]RiverSoft Art said:
Joe.Cotter said:
Is this thread still being monitored?
I have a situation where something broke where the product will not function at all. It starts, I can import files but not folders, and when I select convert or force convert, it runs through the list of files as if it is working and then ends up with 0 converts after x minutes. The log file just says "skipping." I have tried to uncheck all of the recommened check boxes but that didn't help. I then tried to uninstall and reinstall and still nothing. It seems to have a cache issue but I have no idea what that file(s) would be or where to find it/them if exists
It sounds like the metadata broke in your Daz Studio. Try selecting one of the checked items and clicking Force Convert. If that works, multi-select the items and try Force Convert
As I mentioned in my post, I already tried Force Convert. Please re-read.
Daz 3D is part of

Connect
DAZ Productions, Inc.
7533 S Center View Ct #4664
West Jordan, UT 84084Licensing Agreement | Terms of Service | Privacy Policy | EULA
© 2026 Daz Productions Inc. All Rights Reserved.