-
Daz to Unreal Bridge - Meet the Team
Could you bring to a 5.6 project and then migrate those files after import to your 5.7 project
Getting shaders to work on imported .obj [SOLVED]I apologise in advance if this has already been discussed - I searched but found nothing (probably my fault).
A friend of mine has made an .stl-file using one of these websites, that enable you to quickly make a figure for 3D-printing.
He has then used another website to convert it into an .obj-file since I told him that Daz could import .obj-files but not .stl-files.
The .obj-file imports nicely, so no problems there (apart from odd opacity, scale and rotation but all easily corrected).
I want to turn it into marble or granite and use it in a scene as a statue.
My problem is, that I can not add a shader to the figure. Well, I sort'o can. Selecting the figure in the scene tab and in the surface tab I double-click the shader I want (say, a nice granite with red veins) and the result is disappointing. The colour changes to something a bit like the colour in the shader but just a uniform colour, no patterns, bumps or anything.
I have tried the following:
- Add an Uber Shader first (I read somewhere this should add a proper surface property).
- Export the figure as .obj and re-import it (someone mentioned this could do the trick).
- Made a subset of the figure and merged it in afterwards.
Nothing helped - it is quite possible that I did it wrong.
If smeone could point me to a step-by-step tutoral or explain it here, I would appreciate it.
Please take into account, that I am just a happy amateur that dabbles in Daz from time to time; don't assume I know anything.
Oh, I am running Daz Studio 4.23 on Windows 10 if that matters.
Thank you in advance.
How can import facs from daz as arkit blendshapes into blender?Someone told me there is a script that can do this, I didnt know how I could bring in facs as blendshapes that have the right naming convention for arkit. Is anyone familiar with how to this?
Inverted verticescrosswind said:
Lots of artifacts can be seen in your image... what file format did you import into DS... OBJ ?
DS only supports tris and quads topo, but no matter you choose to Triangulate OBJ in Blender when exporting or leave it to DS's OBJ importer to triangulate, you may get the artifacts.
Check this post : https://www.daz3d.com/forums/discussion/comment/9043001/#Comment_9043001
Also check the objects in Blender... their topology as well as some Modifiers can make things more complex ~~
It's the arches, I uploaded the specific arch picture. I did play around with the setting on export, after readin your linked comment, from Blender and the issue resolved itself so thanks!
Inverted verticesLots of artifacts can be seen in your image... what file format did you import into DS... OBJ ?
DS only supports tris and quads topo, but no matter you choose to Triangulate OBJ in Blender when exporting or leave it to DS's OBJ importer to triangulate, you may get the artifacts.
Check this post : https://www.daz3d.com/forums/discussion/comment/9043001/#Comment_9043001
Also check the objects in Blender... their topology as well as some Modifiers can make things more complex ~~
Using the Transfer Utility to move rigs between hard surface modelsLzy said:
I'll check out the plugin. I'm finding that fbx impart results in a mesh where the parts have split apart, rotaton and sclae are all over the place.. I've checked and my scale, rotation and transforms are zero'd, I'm at a bit of a loss to be honest. I've used figure setup alot in the past as I tried the fbx import route and burned countless hours trying to get it to work, with very little documentation to review. Trial an erro where the whole cycle is 15 mintues is soul destroying. I'm now stuck between a rock and a hard place, I want to iterate the model I'm working on but having to redo the figure setup every time is a nightmare...
Understood ~ Well, as for FBX format export / import, the only reliable DS version is 4.23+ for which DS fixed quite a few bugs with FBX Importer.
Importing both softbody and hard surface objects from Blender works well on my side ~~
Using the Transfer Utility to move rigs between hard surface modelsI'll check out the plugin. I'm finding that fbx impart results in a mesh where the parts have split apart, rotaton and sclae are all over the place.. I've checked and my scale, rotation and transforms are zero'd, I'm at a bit of a loss to be honest. I've used figure setup alot in the past as I tried the fbx import route and burned countless hours trying to get it to work, with very little documentation to review. Trial an erro where the whole cycle is 15 mintues is soul destroying. I'm now stuck between a rock and a hard place, I want to iterate the model I'm working on but having to redo the figure setup every time is a nightmare...
Using the Transfer Utility to move rigs between hard surface modelsI'm also a Blender user. As for FBX import/export, default settings will do. But I also recommend this plugin to the folks who're Blender heavy users as well as content creators with DS: https://www.daz3d.com/blender-to-daz-studio-plugin
If you're interested, you can check if there's any big discount in this store as well as superhivemarket.com since Black Friday is approaching ~
 Using the Transfer Utility to move rigs between hard surface models
I'm afraid you have to re-rig or re-weight mapping in DS if the base geometry changes ~~
Instead, you could always rig the item in the software with which you made it. If there's any change / update in terms of base geometry, it should be easier to tweak the rig / weight mapping in the source software rather than DS ~~
After the job is done, export / import FBX into DS. Then finalizing the settings of figure will be much simpler.
DAZ to 3ds Max Bridge support for Genesis 9It looks like the import is working. Perhaps the figure has some unusual material applied? Geoshell, morphs, some child elements... Have you tried exporting a standard Genesis 9 figure from DAZ?
I have eliminated all PA folders!Ron Knights said:
Again, my approach is simple. Once I'vwe eliminated the PA folders, I have very little work to do.
I use the Content Library pane. Here is what I get. No need for search, metadata etc.
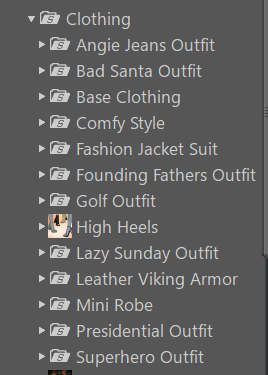
Which is, at least for now, fine for you and your decision. But others need to be aware of the potential issues, and that there are alternatives which don't involve throwing out the whole feature.
I have eliminated all PA folders!Again, my approach is simple. Once I'vwe eliminated the PA folders, I have very little work to do.
I use the Content Library pane. Here is what I get. No need for search, metadata etc.
I have eliminated all PA folders!Torquinox said:
takezo_3001 said:
Richard Haseltine said:
The name and location of the content directories are not functionally significant, it's the relative paths within that matter. Zips which include My Library/My Daz 3D Library as a root folder are very annoying.
Indeed, it is, as I have to open the folder within to be able to copy the "people/props/scripts/etc" over to my own content directory, so it's a bit of a pain…
I'm not going to sugar coat the hassle factor - It's a hassle! I use PeaZip to open all the zips from other sites into their own folders and then I combine and reconfigure the content as needed for installation and storage. Then I copy/paste into my content library. Then, I actually load the product to make sure it works and to see what it does. That last part... There are products in my library I have never loaded! Anyway, I've been doing that for so long that it doesn't bother me at all - It's just what I have do to install the product. As for Daz items installed with DIM, I use Everything (a search program @WendyLuvsCatz recommended) to find the items in my library and then I find them in DS, browse to folder and move/modify whatever needs moving to make me happy with the arrangement.
I generally unzip, discarding excess folders, into a testing content directory to make sure it is working and to set up metadata, then I move into the real content directory (or not, as the case may be)
There's no free lunch. Even if one is using Smart Content, the metadata may need modification to suit people, as well - People do rearrange their stuff! Items from other sites may not even have any metadata! Is it quicker and easier to go through Smart Content? I don't know. Maybe? I think it's all in what one gets used to doing. I'm used to rearranging files, so I do that. I might reach a point in the future where I need or want to get Smart Content to work for me, and then I'll see.
Don't forget options like links (.djl files), and of course the Smart Content pane is not the only metadata-using content view (Categories/Products in the Content Library pane, Presets tabs in most property panes) so it isn't an either/or.
I have eliminated all PA folders!takezo_3001 said:
Richard Haseltine said:
The name and location of the content directories are not functionally significant, it's the relative paths within that matter. Zips which include My Library/My Daz 3D Library as a root folder are very annoying.
Indeed, it is, as I have to open the folder within to be able to copy the "people/props/scripts/etc" over to my own content directory, so it's a bit of a pain…
I'm not going to sugar coat the hassle factor - It's a hassle! I use PeaZip to open all the zips from other sites into their own folders and then I combine and reconfigure the content as needed for installation and storage. Then I copy/paste into my content library. Then, I actually load the product to make sure it works and to see what it does. That last part... There are products in my library I have never loaded! Anyway, I've been doing that for so long that it doesn't bother me at all - It's just what I have do to install the product. As for Daz items installed with DIM, I use Everything (a search program @WendyLuvsCatz recommended) to find the items in my library and then I find them in DS, browse to folder and move/modify whatever needs moving to make me happy with the arrangement.
There's no free lunch. Even if one is using Smart Content, the metadata may need modification to suit people, as well - People do rearrange their stuff! Items from other sites may not even have any metadata! Is it quicker and easier to go through Smart Content? I don't know. Maybe? I think it's all in what one gets used to doing. I'm used to rearranging files, so I do that. I might reach a point in the future where I need or want to get Smart Content to work for me, and then I'll see.
Sagan: A DAZ Studio to Blender Alembic ExporterOk I've installed the plugins, but still by default it behaves the same. I import the abc in the content drawer, select either static mesh or geometry cache. Is there something extra I need to do to get it to work, or it should work out of the box like in blender? To be clear I exported the entire figure, hair and everything together.
3D Printed Action Figuresrichardandtracy said:
A very intriguing idea.
Can I ask a few things about this?
What printers are required and what print resolution? My experience would suggest that filament printers would require a lot of post work. Are current SLA resins up to much use? I'm trying to ascertain whether these could be robust enough to be toys or more aimed at being posable statues for adults. Also, have you found a minimum/maximum practical size for the models? The knee articulation looks quite clever, but I suspect it would be vulnerable to damage if too small and also have an upper limit on the size (scale effect: cross section area & strength is a squared factor, mass is a cubic factor).
In the past I printed some DS characters on an Anycubic Proton SLA printer, before becoming very allergic to the resin available at the time (2019-20), and have been a bit wary about experimenting further.
Regards,
Richard.
Initially I designed it for FDM printers but filament is terrible for joints (see attached pics). Most thermoplastics, PLA especially, start warping and the joints will become loose even if you don't move them (a phenomenon called "creep"). For this reason I changed to using UV resin exclusively.
UV resin has come a long way since the 2020s. The resin I used is Resione TH-74, which was designed for action figures and it's pretty great but has some downsides. There are a bunch of other alternatives out there but I didn't get the chance to test them all.
As far as a printer goes, any resin printer is fine. The female figure was printed on a 4k printer but 2k works as well though 2k printers have been discontinued for years. Specifically it was printed on an Anycubic 4k printer (not to be confused with the Anycubic 4 printer which is the upgraded version).
The scale is true 1/10. To get an idea, most collector action figures from Marvel or DC are sold as 1/12 but they're actually closer to 1/10-1/11th scale. Import figures from Japan are also sold as 1/12th but they're noticeably smaller in size. There's no real standard in the toy industry but I myself am using the Genesis 9 scale divided by 10.
The figure itself has ~50 points of articulation and I designed it to be a competitor to collectible action figures which aren't really aimed at young kids in the first place. So it can be a toy but the level of poseability is too sophisticated for a small child to manipulate properly. Some figures on the market cost 200$ and they're definitely not child-proof. The advantage of having a 3D printable figure is that even if a kid breaks something, it can easily be replaced for only a few cents.
[Released] Blender to Daz Studio Plugin released!!! Official support thread [Commercial]How long does the importing step usually take? I'm trying to import this BlenderKit scene into Daz. I've removed any of the Blender/non-Daz materials (mix nodes, glass BSDF shaders, etc.). I'm just using the base textures and mapping. It's basically stuck at 0% for 20+ minutes. I tried a smaller scene, but even that got stuck at 3% after several minutes. What exactly am I missing here?
The 'Eat Your Food and Like It' Complaint ThreadComplaint (as in I scared myself half to death): Opened Daz Studio and my Smart Content Products was missing! I could see it as files but not as product folders. My file structure was okay, my CMS was on, I couldn't figuer it out, my eyes were on the top of the screen. I even closed D|S and checked all connections. I was ready to do that death by metadata and log in when I looked down and realized somehow I was clicked on to the 'Pending' tab on the bottom of the window, not the 'Installed' tab. While I have absolutely no idea how that got clicked on, I thought I would note it here, just in case someone else ever has the same issue. Check those bottom tabs before you go nuclear on your database and save yourself months of work recovering your hard work setting up your files.
The exported model’s hair has too many polygons when using it in Unity.If you do not have Decimator for Daz Studio, you could export hair and reduce in Blender.
1. Export Hair from Daz:
* File → Export → OBJ (or FBX).
* Make sure to export only the hair.
2. Import into Blender:
* Use **File → Import → OBJ/FBX**.
3. Use Decimate Modifier:
* Select the hair mesh.
* Add **Modifier → Decimate**.
* Set **Ratio** so that final poly count ≈ 4000.
* Apply modifier.
4. Optional Retopology:
* For better quality, use **Quad Remesher** or Blender’s **Remesh** tool.
5. Apply Transformations in Blender:
* `Ctrl+A → Apply All Transforms` (Location, Rotation, Scale).
Use baked textures (Diffuse, Normal, Alpha).
* Save in **PNG or TGA** for transparency.
* Export as FBX:
* Use File → Export → FBX.
* **Settings**:
* Apply Modifiers: ON
* Smoothing: Face
* Scale: 1.0
* Forward: `-Z Forward`, Up: `Y Up` (Unity standard).FPE HD Dragon Scales for G9 [Commercial Thread]These are *amazing*. I love your materials. Snatched this up right away, and had to try out the iridescent shader on them just to see.
I did a quick render to show you what I got. Note: all the lights in the scene are white. The iridescent shader changed color based on angle and you can do all sorts of color combos. This is just a white base with a kind of rainbow setup.
Anyway, thank you SO much Esid and FenixPhoenix! This is just an awesome set!
For those interested, I've attached the material preset for fem and masc setup for the shell. Select the shell and apply (no metadata, sorry). For these presets to work, you'll need to have FPE HD Dragon Scales for Genesis 9 (of course) and Iridescent Shaders for Iray (by Oso3D).
I love dragon stuff if you can't tell XD

Daz 3D is part of

Connect
DAZ Productions, Inc.
7533 S Center View Ct #4664
West Jordan, UT 84084Licensing Agreement | Terms of Service | Privacy Policy | EULA
© 2026 Daz Productions Inc. All Rights Reserved.