-
Thank you Oskarsson and Luthbel (and others)
It's 'Gas station with a shop' by Alexander L., the .skp is quite big at 22 MB.
https://3dwarehouse.sketchup.com/model.html?id=ub62b2714-a274-426f-b0f5-87032bab7a38
By the way, the ambulance and stretcher in the first image are from 3D WareHouse too.
There's a lot of fine stuff to be found there, but it ALWAYS involves tinkering to get them right.
Often worth it though!
Octane for DAZ Studio (2k Spp, not quite enough to get rid of all the noise).
Thank you Oskarsson and Luthbel (and others)LOL! It's just a test, found that shop on 3D WareHouse (SketchUp) and didn't want to render it completely empty : )
By 'Battlefield Hardline' you mean they were taken from a game?
That's too bad, that fabric simply looks fantastic, and the gear bits too!
Who said Blender was hard?I cannot agree that "blenders Interface is crap". 3D modelling is a complex thing, there are no simple ways to do it well. If you want simple get something else - maybe sketchup..I have used Blender since 2.49 and it took a long time to learn but it was worth it: yes, you can mouse around if you want to but hotkeys are the only way to model fast. Also, practice: keep working at it and you will remember the hotkeys better. That applies to all software really - and there is the core issue I think: 3D modelling takes a certain kind of mind and determination to learn it . I don't know all of Blender, I only use some of the features - there is always more to learn.
For free software, Blender is amazing. Compared to other software you will pay thousands for, it is better in some ways and equal in many.
Show Us Your Bryce Renders! Part 9Launok, well done, yes it can be a bit of a pain moving things from one piece of software to another, recently working on a scene which brought terrains and spheres from Bryce, models from DS, models made in Wings3D, all into Modo and exporting to UV layout for mapping, then back to Modo for assembly and adjustments, while using Bryce, PixPlant and Genetica to make some textures, then all shuffled over to Octane for final rendering, I eventually feel by the time all this is managed it is like more work than it really is because every time software is switched, controls and shortcuts change. Probably explains why for fun I tend to focus on doing everything in Bryce and only with a few elements.
Wow, David, that seems a great deal of work the way you did it and with my bad luck at times Bryce seems to crash as was the case with the model shown here. Again a character from Sketchup Warehouse. The "Ben" character I've initially tried for the ventriloquest puppet but struggled quite in Daz Studio with body, especially the fingers as every part of the body are separate shapes and confused me as body parts only appear in the Daz scene as 'shape' and not which part, i.e. hand, eye, etc. I have too little experience with this kind of thing and needs to practice much more on changing and morphs on existing models. Although I have asked at Daz Studio forum for help I am still waiting for a reply. Or I must try making my own figure from scratch in Hexagon, etc. but am looking at videos on learning. :)
Laura
The bridge for me from DS to Bryce is not always the most trust worthy, often I exporting as .obj the safer approach and then importing into Bryce. The bridge in the other direction seems even more tempremental.
Show Us Your Bryce Renders! Part 9Launok, well done, yes it can be a bit of a pain moving things from one piece of software to another, recently working on a scene which brought terrains and spheres from Bryce, models from DS, models made in Wings3D, all into Modo and exporting to UV layout for mapping, then back to Modo for assembly and adjustments, while using Bryce, PixPlant and Genetica to make some textures, then all shuffled over to Octane for final rendering, I eventually feel by the time all this is managed it is like more work than it really is because every time software is switched, controls and shortcuts change. Probably explains why for fun I tend to focus on doing everything in Bryce and only with a few elements.
Wow, David, that seems a great deal of work the way you did it and with my bad luck at times Bryce seems to crash as was the case with the model shown here. Again a character from Sketchup Warehouse. The "Ben" character I've initially tried for the ventriloquest puppet but struggled quite in Daz Studio with body, especially the fingers as every part of the body are separate shapes and confused me as body parts only appear in the Daz scene as 'shape' and not which part, i.e. hand, eye, etc. I have too little experience with this kind of thing and needs to practice much more on changing and morphs on existing models. Although I have asked at Daz Studio forum for help I am still waiting for a reply. Or I must try making my own figure from scratch in Hexagon, etc. but am looking at videos on learning. :)
Laura
Show Us Your Bryce Renders! Part 9Just a simple render of a Ventriloquest doll I made today. I got the head (freebie) online and the body/clothing part (no head) at Google Sketchup Warehouse and tried in Bryce to add the two objects together. Unfortunately the body part only the legs and hands can be moved away from the torso. The arms are fixed to the body and can't be moved unless I try it in Hexagon. But I only tried a sit position today for starters. The head is fixed and currently I can't do facial morphs, etc.
The character is Genesis 1 which I have posed beforehand in Daz Studio more or less for a position to hold the puppet but not great pose!
Laura
Never done this before - but would like to add morphs, etc to figureHi, I have never done this before but got a model of "Ben" over at SketchUp Warehouse and want to try adding morphs, etc. to the character. I want for instance for the character to go into a sitting position and change hand signals, etc.
I have saved it as an obj (wavefront) and exported it via Bryce to DS4.8
The thing about this character is that every single part, i.e. eyes, lips, teeth, body, clothing, are separate pieces. If I select "all" in DS it doesn't select the character as 1 full object. As you will notice on the attached image top left there are many shapes. Is it possible to do changes here or do I rather try in doing so in Hexagon instead? Actually I have not even try this in any other program, including Hexagon. Total new to this!
Any help and suggestions are much appreciated.
Laura
Realistic Renders.... NOT! 14: A new frontier.....Another iray render of vehicle from SketchUp. Environment from:
http://www.daz3d.com/oot-hdr-360-environments-space-for-daz-studio-iray
Rendering Time: 17 minutes
Very nicely done!
CHEERS!
Realistic Renders.... NOT! 14: A new frontier.....Another iray render of vehicle from SketchUp. Environment from:
http://www.daz3d.com/oot-hdr-360-environments-space-for-daz-studio-iray
Rendering Time: 17 minutes
 Realistic Renders.... NOT! 14: A new frontier.....
Below is DS4.8 iray render of a car model converted from Google Sketchup warehouse together with
http://www.daz3d.com/kelly-for-victoria-7
dressed with http://www.daz3d.com/everyday-for-genesis-3-female-s
Rendering Time: 21 minutes 19 seconds
When I have rendered only the car, it took 2 minutes 25 seconds to complete.
Looks great, one day, hopefully, even my Iray render times will be down to that.
CHEERS!
Realistic Renders.... NOT! 14: A new frontier.....I am experimenting with importing the 3D models from Google sketchup web site - there is thousands of free files there.
Below is DS 4.8 iray render of AlphaJet with some of the materials applied from iray DS Uber folder.
Rendering Time: 6 minutes 9 seconds

...looks nice. Is that with the free version?
Sorry, it was converted with 3DXchange 6.2 Pipeline, which reads .skp files too and has many tools to help with exporting
geometry, textures and animations to different formats, including .obj and .fbx
...so it also requires ICLone as 3DXchange is an expansion. At 600$ for the bundle, a bit out of my budget particularly as I don't work with animation.
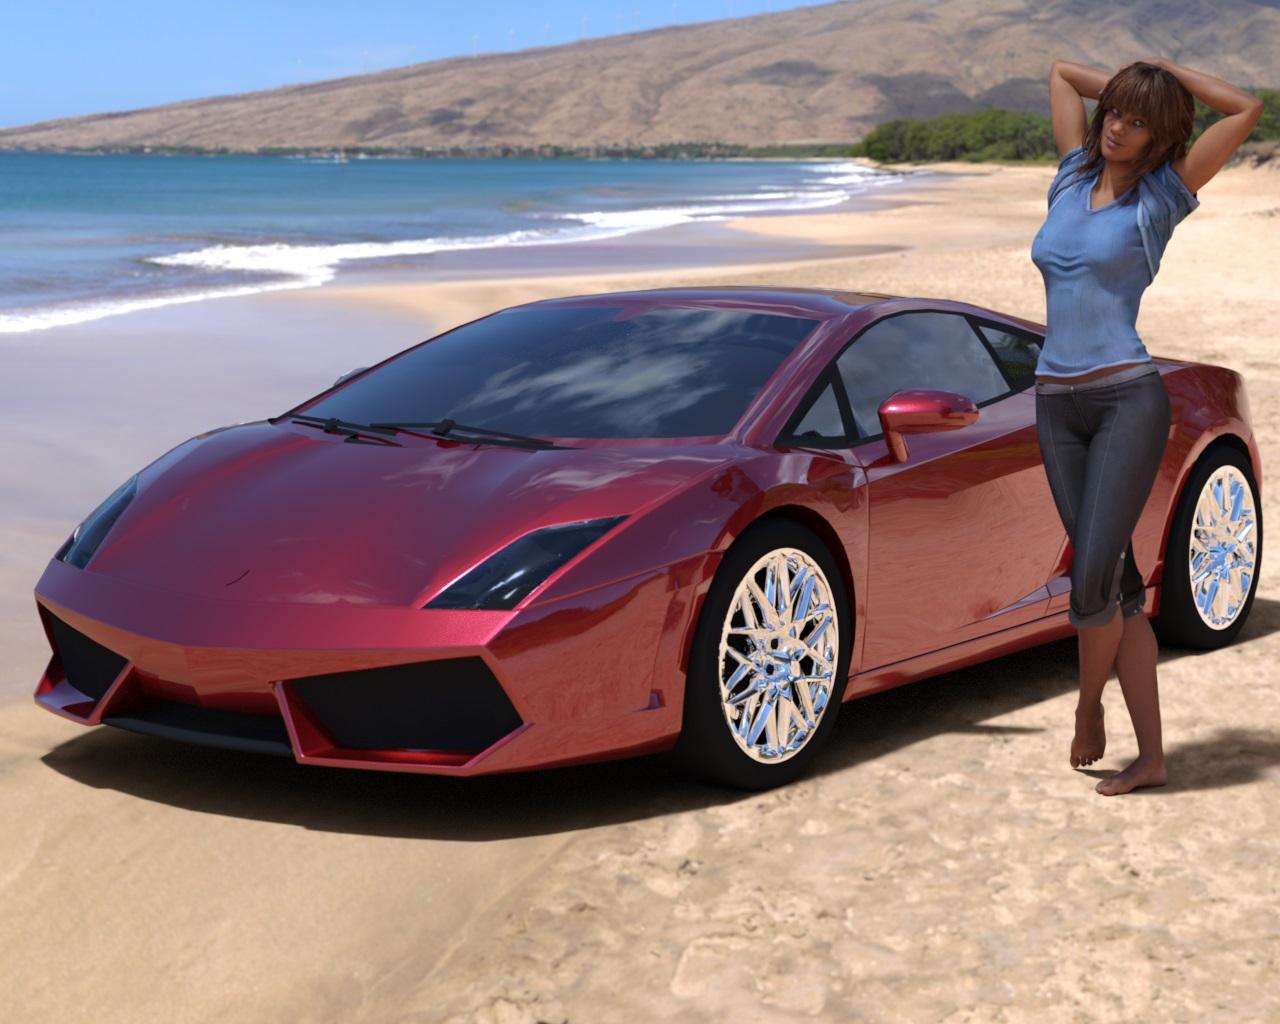
Realistic Renders.... NOT! 14: A new frontier.....Below is DS4.8 iray render of a car model converted from Google Sketchup warehouse together with
http://www.daz3d.com/kelly-for-victoria-7
dressed with http://www.daz3d.com/everyday-for-genesis-3-female-s
Rendering Time: 21 minutes 19 seconds
When I have rendered only the car, it took 2 minutes 25 seconds to complete.
 Realistic Renders.... NOT! 14: A new frontier.....
I am experimenting with importing the 3D models from Google sketchup web site - there is thousands of free files there.
Below is DS 4.8 iray render of AlphaJet with some of the materials applied from iray DS Uber folder.
Rendering Time: 6 minutes 9 seconds
...looks nice. Is that with the free version?
Sorry, it was converted with 3DXchange 6.2 Pipeline, which reads .skp files too and has many tools to help with exporting
geometry, textures and animations to different formats, including .obj and .fbx
Realistic Renders.... NOT! 14: A new frontier.....I am experimenting with importing the 3D models from Google sketchup web site - there is thousands of free files there.
Below is DS 4.8 iray render of AlphaJet with some of the materials applied from iray DS Uber folder.
Rendering Time: 6 minutes 9 seconds
...looks nice. Is that with the free version?
Realistic Renders.... NOT! 14: A new frontier.....I am experimenting with importing the 3D models from Google sketchup web site - there is thousands of free files there.
Below is DS 4.8 iray render of AlphaJet with some of the materials applied from iray DS Uber folder.
Rendering Time: 6 minutes 9 seconds
pretty cool. I'll have to keep sketchup in mind sometimes...I always forget about it.
Realistic Renders.... NOT! 14: A new frontier.....I am experimenting with importing the 3D models from Google sketchup web site - there is thousands of free files there.
Below is DS 4.8 iray render of AlphaJet with some of the materials applied from iray DS Uber folder.
Rendering Time: 6 minutes 9 seconds
Need tutorials or help in creating a puppet style characterNo "Sketchup" ... nooooo .....
Organic modeling is relatively easy in Hexagon. Most things start out as a box. Those extraction tools are wonderful.
Need tutorials or help in creating a puppet style characterHi there,
I am interested to create a puppet style character or dummy such as a ventrologist's dummy from scratch. I have searched for tutorials and have noticed how to make a bear at Youtube. I have not watched the 8 videos in the series yet, but want to know if there are any other ways or tutorials to get started. I wanted to try it in Sketchup but for that I need to buy the artisan organic toolset/plugin which is not possible at the moment. I believe one can do organic modeling in Hexagon too (?) but don't know how.
Any help and suggestions are much appreciated!
Laura
Where to change the "Default" material... To my defaultsI hate admitting defeat... (Insert childish pouting and crying here)
Thanks everyone... again... again...
Looking into Rich's idea about importing, and the other idea about exporting or saving as Daz stuff... (I know that will work, but it is a constant REDO process, while editing in external programs.)
If it, for some reason, saves this extra info for the MTL, I may be able to write a quick program to slap "My defaults", to the MTL files before importing. That isn't much of a bother, as I can have it auto-append to every file in a folder. At-least it will only be a one-step process.
This is just ONE of the objects I am using... (Still playing with geometry and detail, but, test-rendering in Daz, to ensure things are seen correctly.)
Ship: Old war frigate, updated and converted into a mini cruise-ship, for private use. Loosely based off the "USS. Constitution ship.", but bigger... The ungifted bigger brother, intended to be sold to the British navy, but pirates stole it. (There is an irony within the story, the novel.)
https://en.wikipedia.org/wiki/USS_ConstitutionAreas: Sun-Deck, Top-deck, Mid-deck, Main-deck, Lower-deck, Storage-Deck, Keel
The Sun-deck is where the life-boats are. The Top-deck contains about 20 rooms, laundry-room, medical bay and the control-tower. The mid-deck contains about 40 rooms, the pool, the hot-tub, showers, bathrooms, cafeteria. The main deck is on the mid-deck, but it is the central component with two shops, 17 tables, 50 bench-seats, 6 trash-cans, 6 look-out glasses, 4 power-blocks. The lower deck contains another 30 rooms, the cafe, the casino, the lounge, the strip-club, the movie theater (which is under the sun-deck at the nose of the boat.) the back-stage, the film-room, a private lounge. The storage deck contains the upper engine-area, crews quarters, various storage locations. The keel contains the lower engine area and more storage and ballasts.
Not including any of the rooms contents, which are now being broken-up into isolated scenes, as well as the inner floors. (Obviously not seen, but built within the ship to ensure reality of them "fitting into real space".) Everything in there, except the outline of the blue person, is all original. The blue person is the sketchup-person that comes with the default empty scene. She, however, will not be part of my visual-novel game. She is just there for scale, while I rig the cameras and lighting.
It is for a visual novel. You traverse the locations as pre-set camera angles, within the story. Sort-of free-roaming, but limited by the story-line. Not an actual 3D place to walk around though. I may upgrade it to VRML panoramic views, to save some storage space and work-flow. Plus, it's a little cooler to be able to spin the view around 360, or have the camera turn to look at aomeone arriving from off-camera.
All with default plastic, 100% gloss, 100% diffuse white, 100% specular grey, 0% reflection. xD
My settings are more like this... 94% diffuse (whatever the object color is), 15% glossy, 6% specular white, 2% reflection white.
I did find a way to group them so I can bang-out the initial slider settings for the whole thing as one solid object, but that is annoying to have to keep doing, for a test-render.
This is what I get trying to do 100 things at once, alone... I need more arms and heads and computers and time!
Attached is a tiny fraction of the things I am fighting with, at the moment. (The ship, The pool area mid-deck, assorted junk, transparent view.)
Shade 3D System RequirementsIt's not just OBJ, but I use the basic and OBJ makes the most sense because I can use that OBJ everywhere :) Basic Supports Poser formats for those inclined :) Basic supports FBX, just don't expect rigging to work.
File I/O 
Basic Standard Professional BVH Motion File Import


COLLADA Import
Piranesi EPix format Export
3ds Max (3DS)/Lightwave 3D (LWO)
Adobe Flash SWF (Toon Renderer) Export
Adobe Illustrator AI (Toon Renderer) Export
Adobe Illustrator AI Export
Adobe Flash SWF Export
DirectX Export
Photoshop (PSD) Export
VRML 2.0 Export
Vertex Color I/O through FBX and OBJ format (ver.15.1)
Wavefront OBJ Import & Export
DXF Import & Export
STL Import & Export
HDR/OPENEXR Import & Export
FBX Import & Export / Daz Studio Integration through FBX (ver.15.1)
iClone Export (Windows)
COLLADA for BlueMars Export
COLLADA Export
SketchUp Import (32-bit only)
Second Life Sculpted Prim Export
PoserFusion 2 (pz3, pzz Import)
QTVR Export
XML Import/Export (Shade Scene)
EPSF Import
JPEG/BMP/TARGA/TIFF/PNG/ OpenEXR/HDR/GIF/PSD/PFM Import/Export
MPO Export
Audio Import / Export: WAV, AU, AIF, AIFF
AVI Movie Import/Export
QuickTime Movie Import/Export
Mmmm, seems ok. This should be on the store pages though.
CHEERS!
Daz 3D is part of

Connect
DAZ Productions, Inc.
7533 S Center View Ct #4664
West Jordan, UT 84084Licensing Agreement | Terms of Service | Privacy Policy | EULA
© 2026 Daz Productions Inc. All Rights Reserved.