-
How do I isolate sliders to individual body parts.
A detail morph is probably HD, though I haven't checked, and those cannot be adjusted. However, there are several options for splitting morphs. If you don't need a soft transition you can just make the morph a favourite (click the heart icon on the slider, and make sure nothing you don't want to remove is also favourited), use the Geometry Editor to select the areas you want to exclude (you need to be in vertex mode, but you can select in polygon mode if it's easier and then convert to vertex mode from the right-click menu), right-click>Morph Editing>Remove selected from Favourites (from memory). Another option, which does give smooth transitions, is to set up a dForm, edit its weight map to cover the area you want to remove (or keep, whichever is easier), export the morphed figure (base resolution) as OBJ, then import as a new morph with Edit>Figure>Morph Loader Pro and use the Attenuate By options to select the dForm - the downside here is that a lot of morphs have additoonal morphs to improve their interaction with other shapes or posing, and you would really need to split and reconnect those. A third option is https://www.daz3d.com/shape-splitter
no sound when importing audio?Hi, I'm running 4.20.0.17 on a mac - I'm trying to import an audio file, but when I do (Edit-Audio) and press play, I get no sound. I've tried with wav, mp3 and aiff - nothing. Am I missing something?
INSPIRED BY BLADE RUNNERThanks all.
great suggestions
This was more of quick look dev, concept piece to take a break from all of the NPR/toon stuff I have been doing lately.
I took a bit of a lazy shortcut and parented the camera to the car to keep the craft centered for the flight.
The “replicant “at the beginning was Just a basic idle motion retargeted from Mixamo after Diffeo import.
Honestly not too happy with the MOHO created lipsync.

but I have found a way to get promising results from the ”pose recorder” app by using rendered video of a 3D speaking avatar from an external program.
I may do a tutorial on that process.
More detailed spaceships please!...besides the prices, a lot of stuff on Turbosquid and Share CG is in formats like .max (which is proprietary to 3DS Max). and .lwo which don't import into Daz without converting them in a modeller.
I used to design aircraft, spaceships, vehicles etc, by hand for stories and role play game scenarios that I would love recreate as 3D models, but alas my modelling skills have a way to go to create actual saleable or even freebie content. Bugs the heck out of me as I can easily visualise them.
How to use Diffeomorphic?when using the "import DAZ" button in the daz importer tab after installing Diffeomorphic, I get this error
Gen 8 or gen 2 conundrumglobally said:
TheMysteryIsThePoint said:
I wonder if you could use R3DS to wrap a G8.1 around a G2 and create a morph...
Thank you, i think that maybe what im looking for. Luck that R3DS has a trail version. Ill give it a try.
Holy crap, it can be done with just Blender, with some limitations, particularly that the body, without the head and hands can be done relatively easily:
Pose the G2 to match the G8.1 as closely as you can get it. Do not modify the G8.1 at all. This is important.
Remove the tears and lashes from the plain G8.1 and the G2 shape you want as OBJ, at base resolution. Import both into blender. On both, you want Forward = -Z Forward, and Up = Y Up, so that they match DAZ Studio visually, without actually changing the mesh. On the G8.1, make sure to select "Keep Vertex Order", it is essential that Blender does not optimize the mesh, or it will confuse DAZ Studio's Morph Loader Pro. This doesn't matter for the G2, as we will just be "stealing" its shape with a shrinkwrap modifier.
Make a copy of the G8.1 and hide it. This is your backup copy in case you accidentally do something that changes vertex order.
Scale the G2, (Not the G8.1!!) to match the G8.1 as closely as you can get it, around the areas that you are interested in.
Create an empty vertex group on the G8.1. You can leave it as "Group".
Remove the eyelashes and brow surface from the G2. If your G2 is symmetrical, find the center-line edge loop, hide it, delete the other half, unhide it, set the transform pivot point to Median, hit S X 0 to line them up, go to the N panel, under Item, enter 0 for Location X, and then back in object mode, add a mirror modifier on the X axis.
Add a shrink wrap modifier to the G8.1, choose Wrap Method = Nearest Surface Point, Snap Mode = On Surface, Target = <Your G2 Mesh>, Offset = 0, and Vertex Group = Group.
Now, on the G8.1, select the Vertex Group you made and go into Weight Paint mode. As you paint around the G8.1, it will start conforming to the G2. This way, you can get really get it to look the way you want it. You'll have to decrease the radius and weight to get in some of the tight spots where the Shrink Wrap modifier got confused, and you'll probably have to alternate between add and subtracting to get everything to blend in a visually pleasing way.
If the hands are completely wrecked, I found a reasonable edge loop near the wrist of the G2, hid those vertices, selected the disjoint hand, hit ctrl-L to get all connected, deleted the hand, and then unhid the edge loop. I then made a copy of a similar region from the G8.1, deleted everything but the hand, joined the meshes, got the graft vetices reasonable close with proportional editing and a pretty large radius, snapped them together, and them merged all vertices by distance. Yes, you'll have to wreck to topology in order to do this, but we don't care; the Shrink Wrap Modifier will do its thing.
You might want to do the same thing for the feet. I didn't have to (I did this with a V4 whose hands are posed totally differently from the G8.1). But you can make the feet match more closely with proportional editing, or weight paint the differences out.
When you're done, apply the Shrink Wrap modifier to the G8.1, and export it as OBJ. Don't forget to select Keep Vertex Order again.
Now, just load the OBJ you just exported with Morph Loader Pro. No need to Reverse Deformations.
Here's a G8.1 that is pretty darned close to The Girl Next Door 4.3 at Rendo, actually a V4.2...
Lynna Hair Issue when importing to UnrealHi,
I am not sure if this is the right place to go to but I am having trouble with the Lynna Hair (https://www.daz3d.com/lynna-hair-for-genesis-8-females) when importing to Unreal and it seems to have the same issue when importing to Blender as well.
Basically the Bangs1 seem to stretch to the ground as per screenshots. I did get some import issues from the import log but I don't really understand it.
I do not have a lot of experience with Daz. Can someone help me out or point me in the right direction to fix this?
Introducing the Daz to Blender Bridge & native Blender File FormatsDigiDotz said:
Ok got it. Copied the Daz folder from the D:documents to my "Users" Documents folder

Try this experimental blender plugin (attached zip). Instructions to install:
- Open Blender
- Select from main menu: Edit -> Preferences
- Select Add-ons from left pane
- Find and select "Import-Export: DazToBlender", open the drop-down arrow
- Click "Remove" at the bottom of the DazToBlender section.
- Click "Install" button at the top of the window
- Find and select the "DTB-2022.1.11.zip" and click "Install Add-on"
Introducing the Daz to Blender Bridge & native Blender File FormatsDigiDotz said:
Should it work with Blender 3.1 ? I'm getting the "appropriate fbx does not exist" message
Yes, it's been tested with Blender 2.83 LTS, Blender 2.93 LTS, Blender 3.0.1, 3.1.0, 3.1.2 and 3.2.0. All should work. Make sure that you are following the installation instructions and video above to Install the Blender Plugin. If you were using "Use Custom Import Path" in the Blender Plugin, you will need to disable that.
If it's still not working, try resetting Blender to Defaults:
- File -> Defaults -> Load Factory Settings.
- Then go to Edit -> Preferences and re-enable DazToBlender
Daz To Blender How-To videos thread:
Any tutorial about using MD cloth + Genesis Figure in Blender ?If you use in Blender I think you need a rigged clothing.
Marvelous exports only a geometry file with UV..no rigged geometry so you must:- pose the figure before importing in Marvelous (or pose in Marvelous: https://youtu.be/L2Q4RVpRIQs?t=184), model the clothing and export it in posed shape (but you can't anymore move the figure)
- or maybe import in DAZ to transfer the rigging from your figure to clothing and later reimport in Blender
Not all clothing can be used with only a clothing simulation, so I suggest to always add some rigs (like the sleeves). Like DAZ assets, many times it's a mix of rigged and simulated clothing (Dforce in DAZ)
Introducing the Daz to Blender Bridge & native Blender File FormatsHow to Transfer and Use Auto-JCM (Joint Controlled Morphs) with Daz To Blender 2022
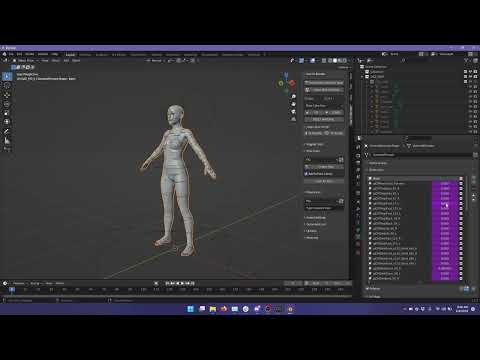
1. Open Daz Studio
2. Add Figure, Clothing, Hair
3. Select File \ Send To \ Daz To Blender
4. Enable Export Morphs
5. Click "Choose Morphs"
6. In the Choose Morphs window, Find the "Morph Utilities, Add JCMs" in the bottom-left corner.
7. Click "Arms", "Legs" and "Torso"
8. Click Accept for Choose Morphs window.
9. Click Accept for DazToBlender Bridge window and wait for export to complete.
10. Open Blender
11. Click the DazToBlender Tab in the blender toolshelf, on the right-edge of the Viewport.
12. Click "Import New Genesis Figure"
13. Wait for automatic Python script execution Warning.
14. Click "Allow Execution"
15. Select Daz Figure Shape in Viewport.
16. Select "Object Data Properties" (Icon: upside-down triangle with 3 vertices) in the right-panel.
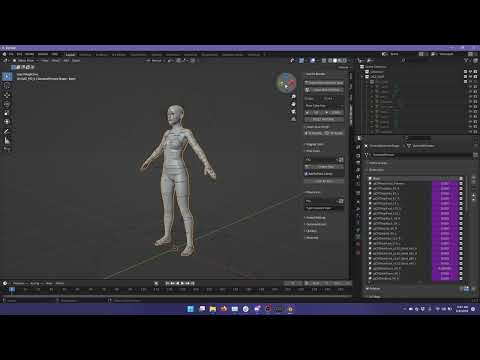
17. Under ShapeKeys, auto-JCM morphs should now be listed in purple, meaning they are controlled by another property in Blender (joint position).
18. Rotate joints in the figure.
19. The Morph Strength of controlled morphs (in purple) should now automatically be updated.OFFICIAL DazToBlender Bridge 2022 (SEPTEMBER UPDATE): What's New and How To Use ItThe DazToBlender Bridge 2022 September Update is now available on Daz Central and Daz Install manager! It has some changes to the UI which may take users familiar with the old version time to get used to. Here's what's new:
- Subdivision crashfix for Blender's FBX Importer, allowing to re-enable Subdivision Baking Features
- Improved Geograft Material
- Preliminary Geograft Morph support (Genesis 8 Male and Female, Centaur 8)
- Updated to latest Daz Bridge Library v2.2
- Updated Help and Welcome text
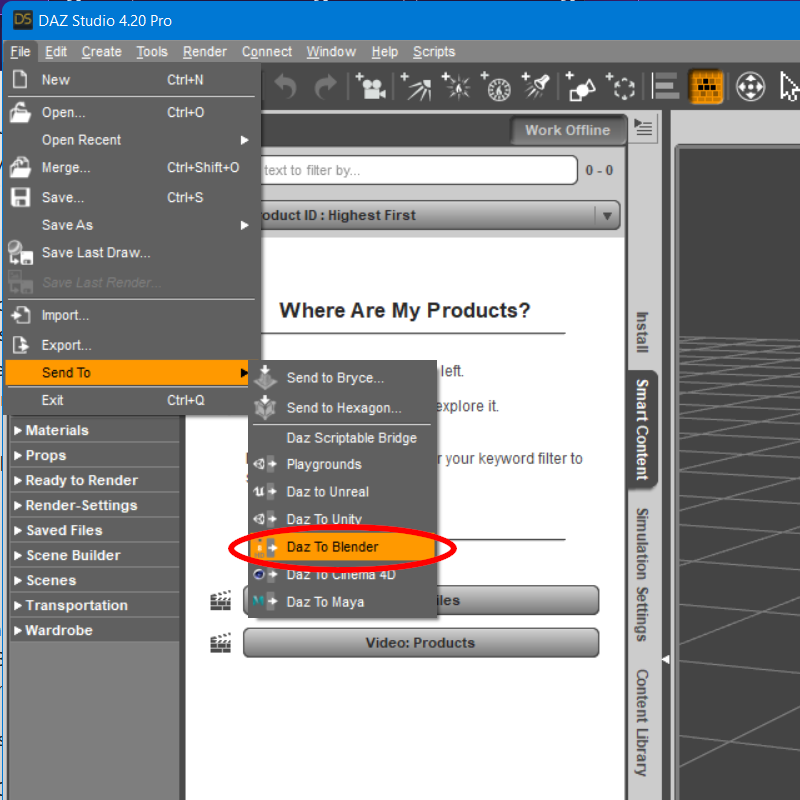
You will need to install the Blender Plugin using the new integrated Blender Plugin Installer. Access this from the Advanced Settings box of the new DazToBlender Bridge UI.
How to Install the Blender Plugin
- The Daz Studio Plugin now comes embedded with an installer for Blender. From the Daz To Blender Bridge Dialog, there is now section in the Advanced Settings section for Installing the Blender Plugin.
- Select your Blender Version from the drop down menu. If your Blender version is not directly supported by this drop-down or you have a custom plugins folder, then select "Custom Addon Path".
- Then click the "Install Plugin" button. If you selected a supported version of Blender, you should see a popup dialog box confirming if the Blender plugin was successfully installed for your version of Blender. Be sure to restart Blender after installing the Blender Plugin.
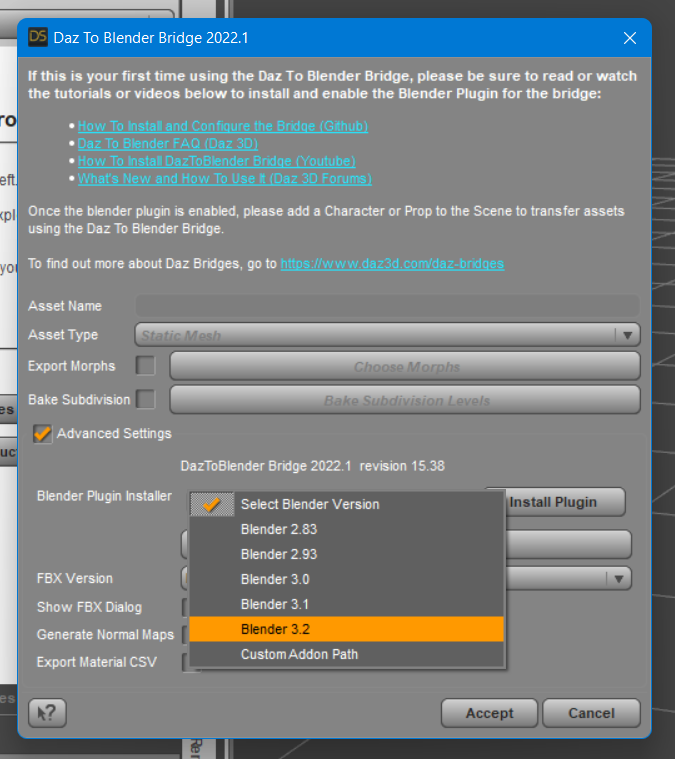
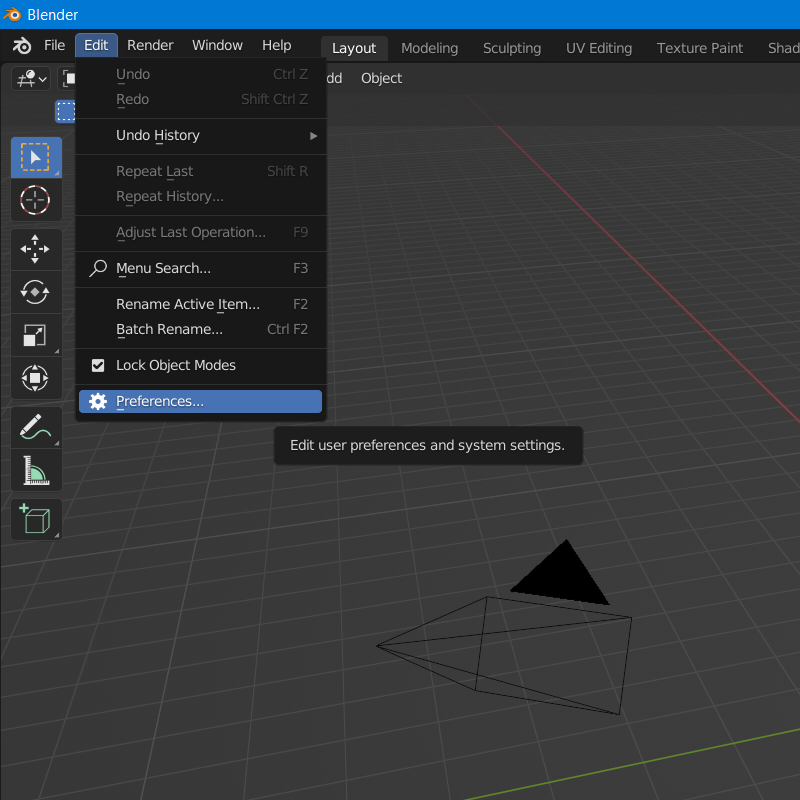
- From Blender, open the Blender Preferences window by selecting Edit -> Preferences from the Blender main menu.
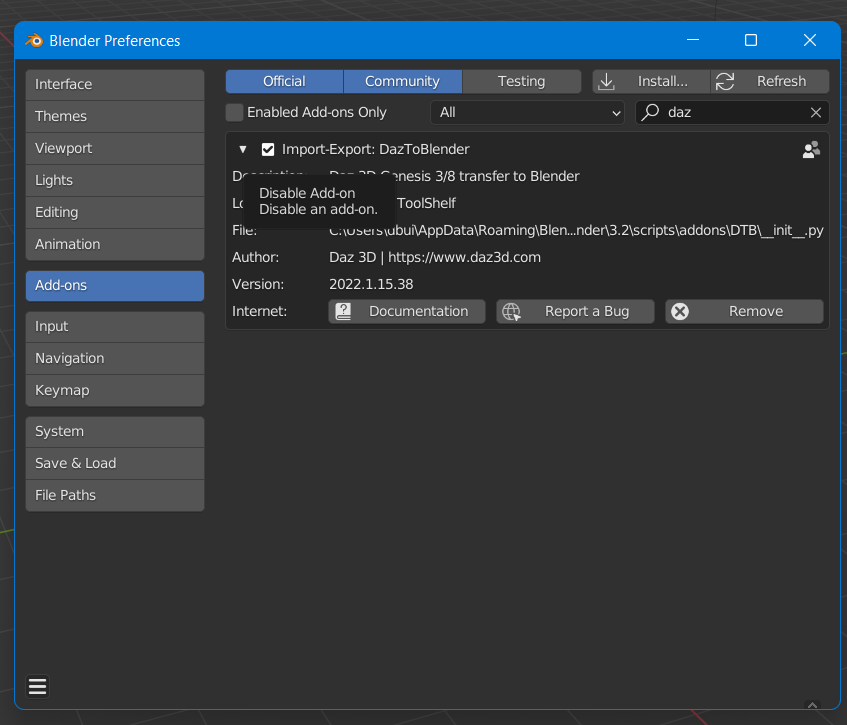
- In the Blender Preferences window, click on the Addons button found along the left side of the window.
- Scroll down the list of add-ons, and look for "Import-Export: DazToBlender". Check the box next to "Import-Export: DazToBlender" to enable the plugin.
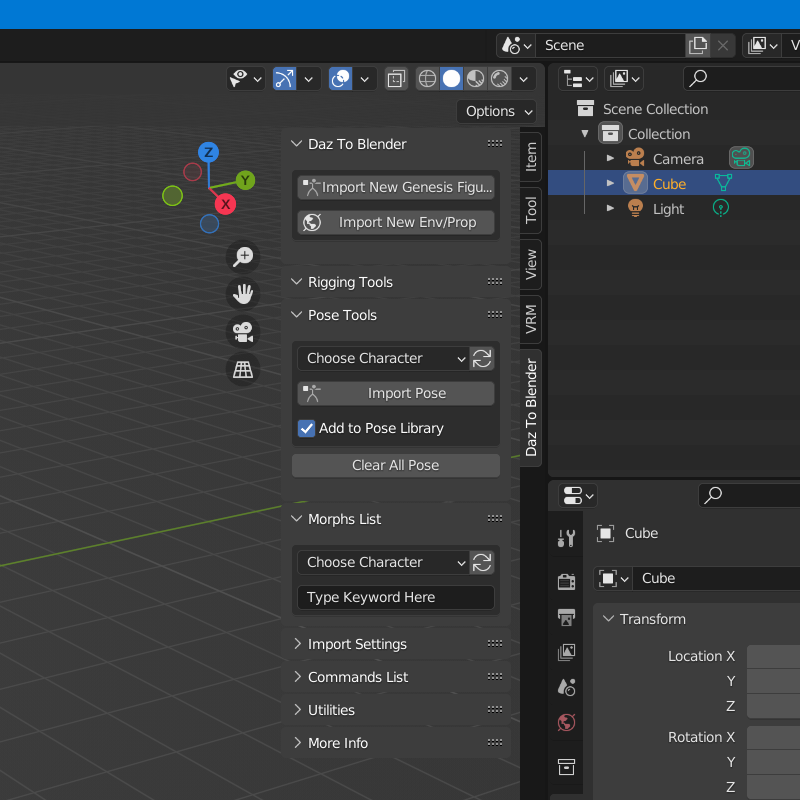
- A DazToBlender tab should now appear on the Blender "Tool-shelf" which are a set of vertical tabs along the right edge of the Blender viewport window.
The following steps are for people who wish to use the "Custom Addon Path" installation option.
- If you chose "Custom Addon Path", you will see a window popup to choose a custom Scripts or Addons folder. The starting folder path will be the location where Blender stores preferences and files for each version of Blender.
- If you are using an unsupported version of Blender, you should see a subfolder corresponding to your version from the starting folder path. Open that folder and select the scripts folder. Then click "Select Folder".
- If you have configured a custom Scripts path from the Blender Preferences window, then you may navigate to that folder and click "Select Folder". You will then see a confirmation dialog stating if the plugin installation was successful.
For more information on the updates to the DazToBlender Bridge, please see these resources:
- Download latest updates and bugfixes (Github Releases Page)
- DazToBlender Bridge FAQ (daz3d.com)
- DazToBlender Github Page
- How to Install DazToBlender Bridge (Github Readme)
- How to Use DazToBlender Bridge (Github Readme)
Install and Configure OFFICIAL DazToBlender 2022
OneDrive Backup Compatibility and How to Set Custom Import Path

And here are several tutorials on how to use the new interface:
1. Transfer Figure with Clothing and Hair
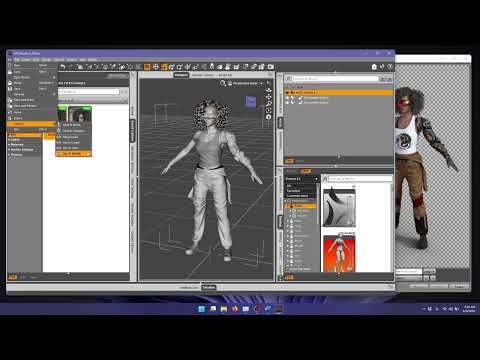
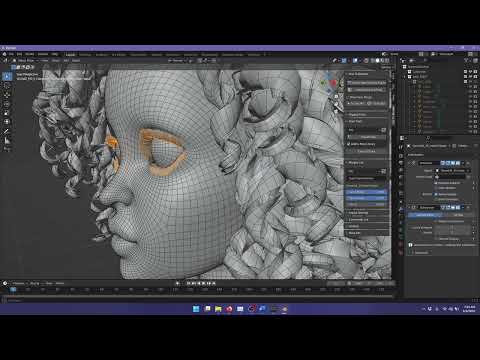
2. Transfer Figure with Morphs, use Blender Native Subdivision Surfaces
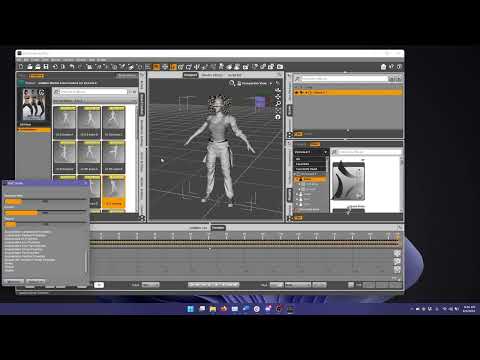
3. Transfer Animation
4. Transfer and use Auto-JCMs:
 Introducing the Daz to Blender Bridge & native Blender File Formats
How to Transfer Figures with Animation using Daz To Blender 2022:
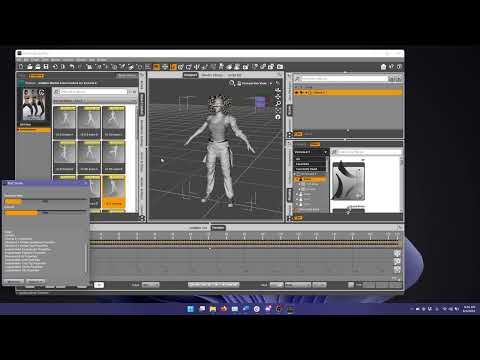
1. Open Daz Studio
2. Add Figure, Clothing, Hair
3. Add Animation
4. If it is an aniMate or aniBlock based animation, you will need to bake to Daz Studio Timeline
5. Right-Click in any empty-space on the aniMate pane, and select "Bake to Studio Keyframes"
6. Click Yes to confirm, then wait for baking to finish.
7. Select File \ Send To \ Daz To Blender
8. Click the Asset Type drop-down and select "Animation"
9. Click Accept to transfer animation to Blender.
10. Open Blender
11. Click the DazToBlender Tab in the Blender Toolshelf
12. Click "Import New Genesis Figure"Introducing the Daz to Blender Bridge & native Blender File FormatsHow to Transfer a Daz Figure with Morphs and Use Native Blender Subdivision Surface Support with the Daz To Blender Bridge 2022:
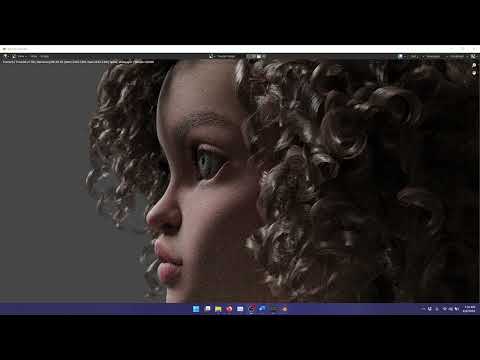
Step by step Instructions
1. Open Daz Studio
2. Add Figure
3. Add Clothing
4. Add Hair
5. Select File \ Send To \ Daz To Blender to open DazToBlender Bridge window
6. Check Export Morphs and click "Choose Morphs"
7. Select the scene object from the left pane, then select morphs from the middle pain and click "Add Morphs" to add them to the Morphs to Export in the right pane.
8. Click Accept to finish Morph Selections.
9. Click Accept to transfer to Blender
10. Open Blender
11. Click the DazToBlender tab in the Blender Toolshelf on the right-edge of the Blender Viewport
12. Click "Import New Genesis Figure"
13. In the Toolshelf, look for the "Morphs List" section.
14. Adjust the ShapeKeys Sliders to increase or decrease morph strength. This will apply the morph to the figure and all parented clothing and hair.
15. Select the base Daz Figure.
16. Open the Blender Modifiers (Wrench Icon) Tab on the right-panel.
17. Select the Subdivision Modifier.
18. Increase the viewport or render subdivision level to the desired amount.Outfit cuts away body parts. How to turn this off?Thank you all for the tips but I am using the model in Unity and I use an Outfit-System there. If I change the outfit in Unity to something like casual wear then unfortunately the 3d model will have again no feet or hands. I thought that there is maybe an import script or a setting in DAZ3D or something else that I could edit to prevent this... I guess my workaround, for now, is either to use 2 3D models (one with casual wear and one with the armor) or replace gloves and shoes.
Introducing the Daz to Blender Bridge & native Blender File FormatsHow to Transfer a Daz Figure to Blender using the updated DazToBlender Bridge 2022:
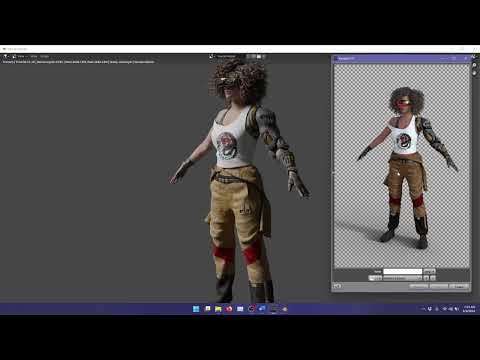
Step by Step Instructions:
1. Open Daz Studio
2. Add Figure
3. Add Clothing
4. Add Hair
5. Select File -> Send To -> Daz To Blender
6. Make sure Asset Type is "Skeletal Mesh"
7. Click Accept and wait for export to finish
8. Start Blender 3.2
9. Open the Blender Toolshelf by clicking the small arrow along the right-edge
10. Click the DazToBlender Tab
11. Click "Import New Genesis Figure"Introducing the Daz to Blender Bridge & native Blender File FormatsThe Daz To Blender Bridge has been updated to version 2022.1. Here is a video to show you how to install it with the newly released Blender 3.2:
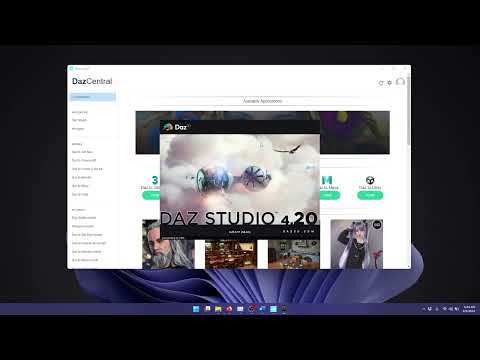
Step-by-step Instructions:
- Install Daz To Blender Bridge from DazCentral or Daz Install Manager
- Start Daz Studio
- Add a character or prop to the scene
- Select File -> Send To -> Daz To Blender from the main menu
- Put a check in Advanced Settings in the "Daz To Blender Bridge 2022.1" window
- Click the "Select Blender Version" dropdown and select "Custom Addon Path"
- Click "Install Plugin" and the "Select a Blender Scripts folder" window pops up
- Click "New Folder", name it "3.2" and double-click the "3.2" folder.
- Click "New Folder", name it "Scripts" and double-click the "scripts" folder.
- Click "New Folder", name it "Addons" and double-click the "addons" folder.
- Click "Select Folder"
- Open Blender 3.2
- Select Edit -> Preferences... from the main menu
- Select "Addons" on the left.
- Type "daz" into the search box
- Put a check on "Import-Export: DazToBlender" to enable the DazToBlender Bridge.
- A DazToBlender tab should now appear on the Blender Toolshelf located on the right-edge of the Blender Viewport.
Updated Tutorial videos coming soon...
New DAZ to Blender BridgeI have installed the new DAZ to Blender Bridge. I have exported a Genesis 8F figure. All goes well on the DAZ end. It exports ok but there are not any import options in Blender. Any suggestions. I have Blender 3.2. I have also tried on Blender 3.1 and 2.93. It has wiped out all my previous DAZ to Blender import options in the Blender tool. Cheers
Hair changes when moved from Daz3D - Blender - Mixamo?This has been driving me insane all day. I'm trying to get characters from Daz3D to Clip Studio modeler by following some tutorials and so far everything has been going ok.
UNTIL, this hair. It's the "Wildmane hair" (I think it came with Daz, not sure).
First image: The hair in Daz3D (Texture shaded to left and NVIDIA Iray to the right), everything looks fine.
Middle image: I import a .obj from daz3D into Blender. The hair now looks kind of smoother but is still OK enough.Last image: I export as .fbx from blender and upload to mixamo. Then it looks like this and all is clearly messed up.
I have had small issues with loss of quality etc between Daz3d -> Blender -> Mixamo but far from as bad as with this hair.. Anyone got a clue what this might be about?Transfer Utility - reduce influence of arms/hands or remove them entirelyRichard Haseltine said:
any rigged figure can act as the Source for Transfer Utility
i actually did do a new figure*** between now and the original post, in default pose her upper arms are twisted and forearms raised, which gets them out of the problem area - the first instance i saved it as a subset, which didn't work as it just seemed to decide to refer back to the basic G8F when autofitting, even with source/target set to Current and Reverse Source Shape checked
SO, i saved it as a character preset instead, which does work keeping the hands out of the way, but now none of the autofit templates are available, e.g. knee-length dress, SY's templates etc. - the drop down list just greys out.
a quick look at the scene ID shows that nothing appears to be missing when compared to a vanilla G8F, so not sure what is amiss here.
if this doesn't work i might do another morph, keeping the original bone orientation this time but with teeny little T-Rex sized arms and see if that works better. if i can't bend them out of the way, i'll shrink them out of the way.
*** (pose figure, export, import with morph loader pro, adjust rigging to shape, ERC freeze, save as morph asset, save figure)
Daz 3D is part of

Connect
DAZ Productions, Inc.
7533 S Center View Ct #4664
West Jordan, UT 84084Licensing Agreement | Terms of Service | Privacy Policy | EULA
© 2026 Daz Productions Inc. All Rights Reserved.