-
[Help] models from Source film maker to Blender to Daz
Because Daz has its own rigging system and no matter the format bones don't import properly. You would need to re-rig in daz studio after the OBJ import
Discontinued productsThanks for all the advice.
I have put together a short guide on migrating DAZ to a new PC but I have not tested these instructions yet as I have not purchased a new PC.
So I hope this works when it is needed...
Restoring DAZ Studio to a new PC
When you migrate to a new PC desktop, follow these instructions:
1. First be sure to export your user data (favorites) by right-clicking the Content Library pane and selecting 'Content DB Maintenance' from the context menu. Check the box for 'Export User Data' and press [Accept]. The information will be written here:
C:\Users\Username\Documents\DAZ 3D\Studio\My Library\Runtime\Support\UserData_1.dsx
2. The DAZ Studio installed content is in the My Daz Connect Library under your Username directory, and the DAZ Install Manager data is the Public Documents folder. So be sure to backup all of these folders, which will also backup the user data mentioned above:
C:\Users\Username\Documents\DAZ 3D
C:\Users\Public\Public Documents/DAZ 3D
C:\Users\Public\Public Documents/My DAZ 3D Library
C:\Users\Username\AppData\Roaming\DAZ 3D
3. After powering up your new desktop, install the DAZ Studio and DAZ Install Manager software programs.
4. Restore the backed up folders - from step 2 - to the new desktop.
5. Run DAZ Studio and ensure that it is recognizing all products and user data (such as your custom Favorites categories). If so, then you are done; otherwise, proceed to the next step.
6. Restore the custom Favorite categories by right-clicking the Content Library pane and selecting 'Content DB Maintenance' from the context menu. Check the box for 'Re-Import Metadata...' and press [Accept]. You will see a new window that shows all the content with metadata that DAZ Studio detects. Make sure that UserData / UserData 1 are the only boxes checked and press [Accept]. You will now see a progress bar move as DAZ Studio re-imports your user data.
7. If DAZ Studio is not recognizing the other products that belong in the Smart Content pane, then repeat step 6 and check all the metadata content boxes.
8. Note that anything that installs as a plug-in (actual plug-ins, plus some scripts and older shaders) will need to be reinstalled on the new system.
DazToUnity 2022 Bridge (SEPTEMBER UPDATE): What's New and How to Use ItThe September Update for the Daz to Unity Bridge is now available on Daz Central and Daz Install Manager. These are the new features and some video tutorials on how to use them.
- Bugfixed URP shader code
- Updated to latest Daz Bridge Library v2.2
- Fixed morph undo bug (distorted faces on export)
- Improved Geograft material support
- Preliminary steps for Geograft Morph support (exports blendshapes)
You can find out more about DazToUnreal Bridge and Daz Bridges from these resources:
- Download latest updates and bugfixes (Github Release Page)
- DazToUnity Main Github page
- How to Install DazToUnity
- How to Use DazToUnity
- DazToUnity FAQ
- Daz Bridges
The steps to install the Unity Plugin have changed from previous versions. Please make sure you follow these directions to fully install the Unity Plugin component:
How to Install the Unity Plugin
- Start your Unity Project and leave it in running in the background.
- Start Daz Studio and select File -> Send To -> DazToUnity.
- Enable the Advanced Settings checkbox.
- Select your Unity Version and Rendering Pipeline from the dropdown.
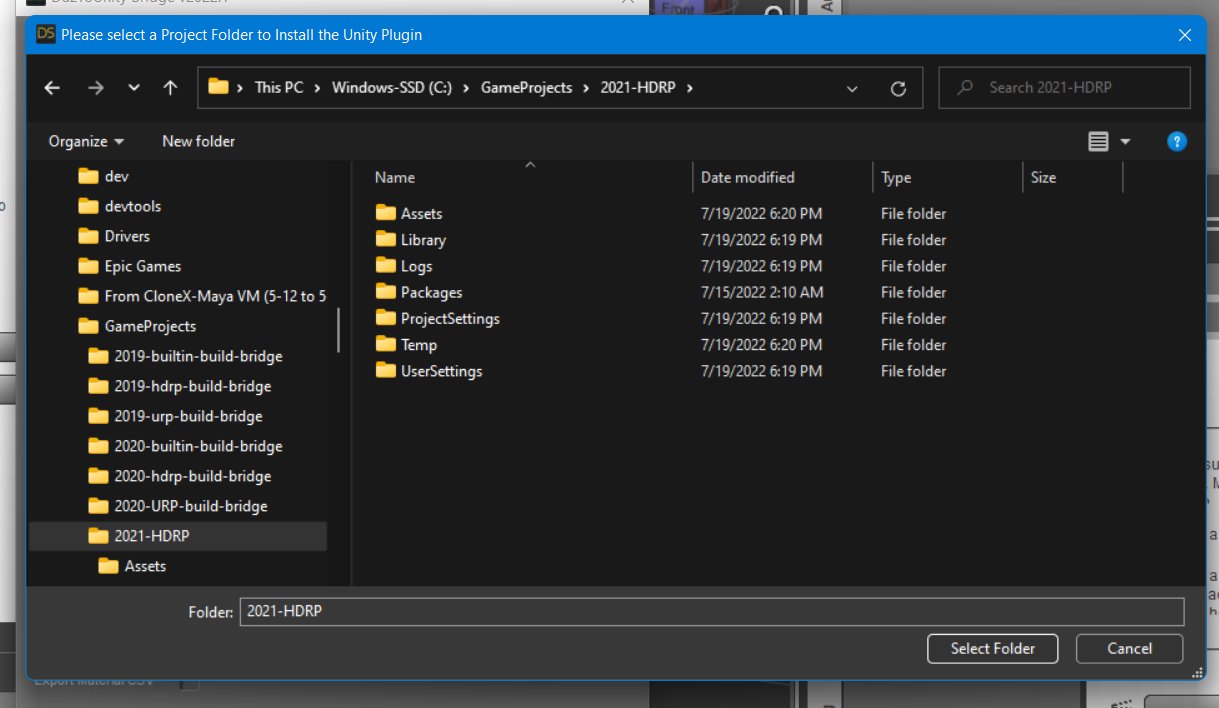
- Click "Install Plugin". A window will popup for you to select a Unity Project to which to install the Unity plugin.
- Navigate to your Unity Project's root folder.
- Click "Select Folder". You will see a confirmation dialog stating if the plugin was successfully copied to your Unity Project.
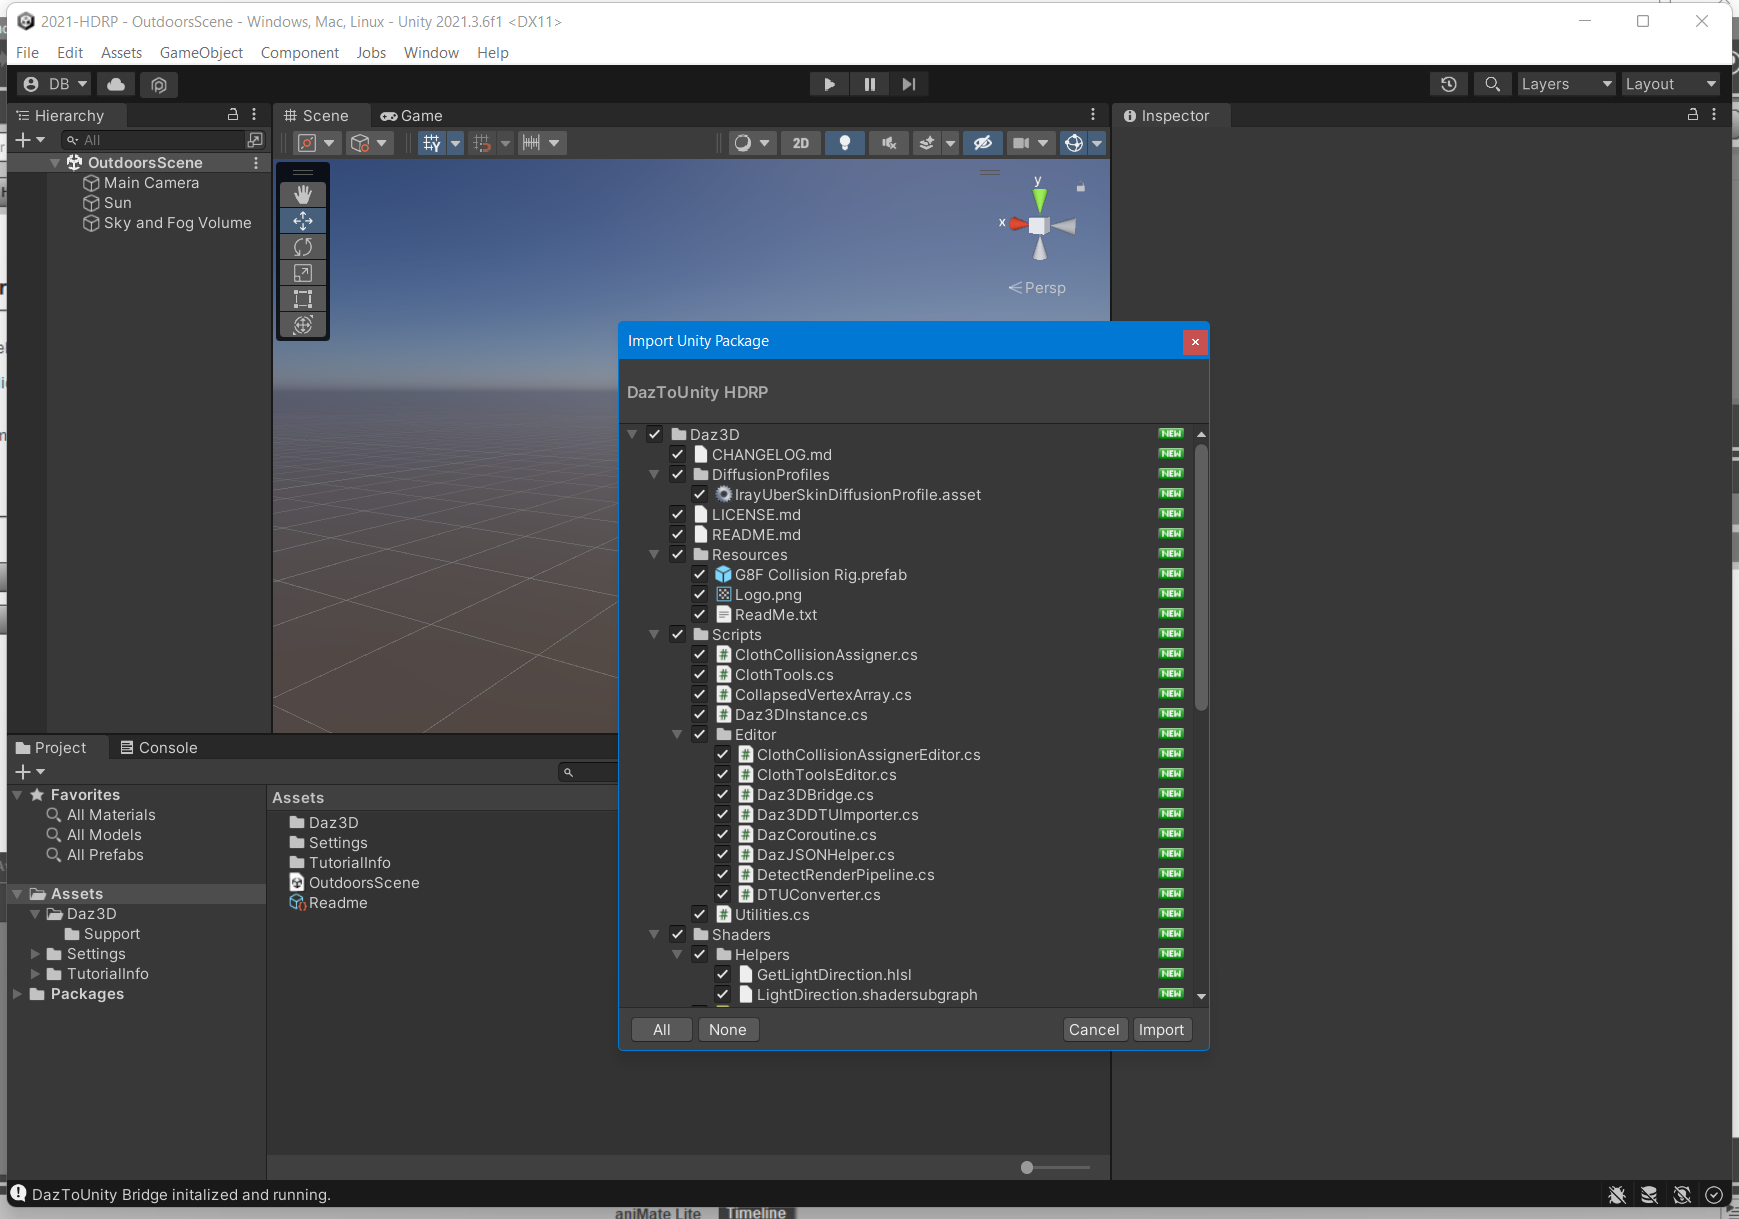
- Depending on your machine and setup, a Unity Import Package dialog may automatically appear. Click Import.
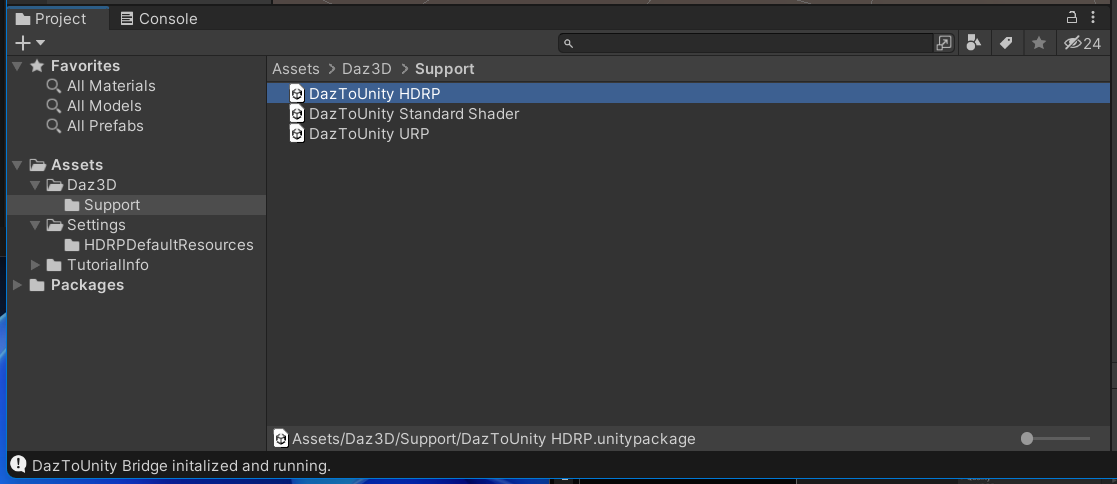
- If an Import Package dialog does not appear, switch to your Unity Project and navigate to the Assets\Daz3D\Support folder.
- Inside that folder, you will find installation packages for all render-pipelines:
- For HDRP: double-click "DazToUnity HDRP.unitypackage" and click Import.
- For URP: double-click "DazToUnity URP.unitypackage" and click Import.
- For Built-In Render-pipline: double-click "DazToUnity Standard Shader.unitypackage" and click Import.
- If a popup window asks you to Update the Scripts or API, then click "Yes, for these and other all files".
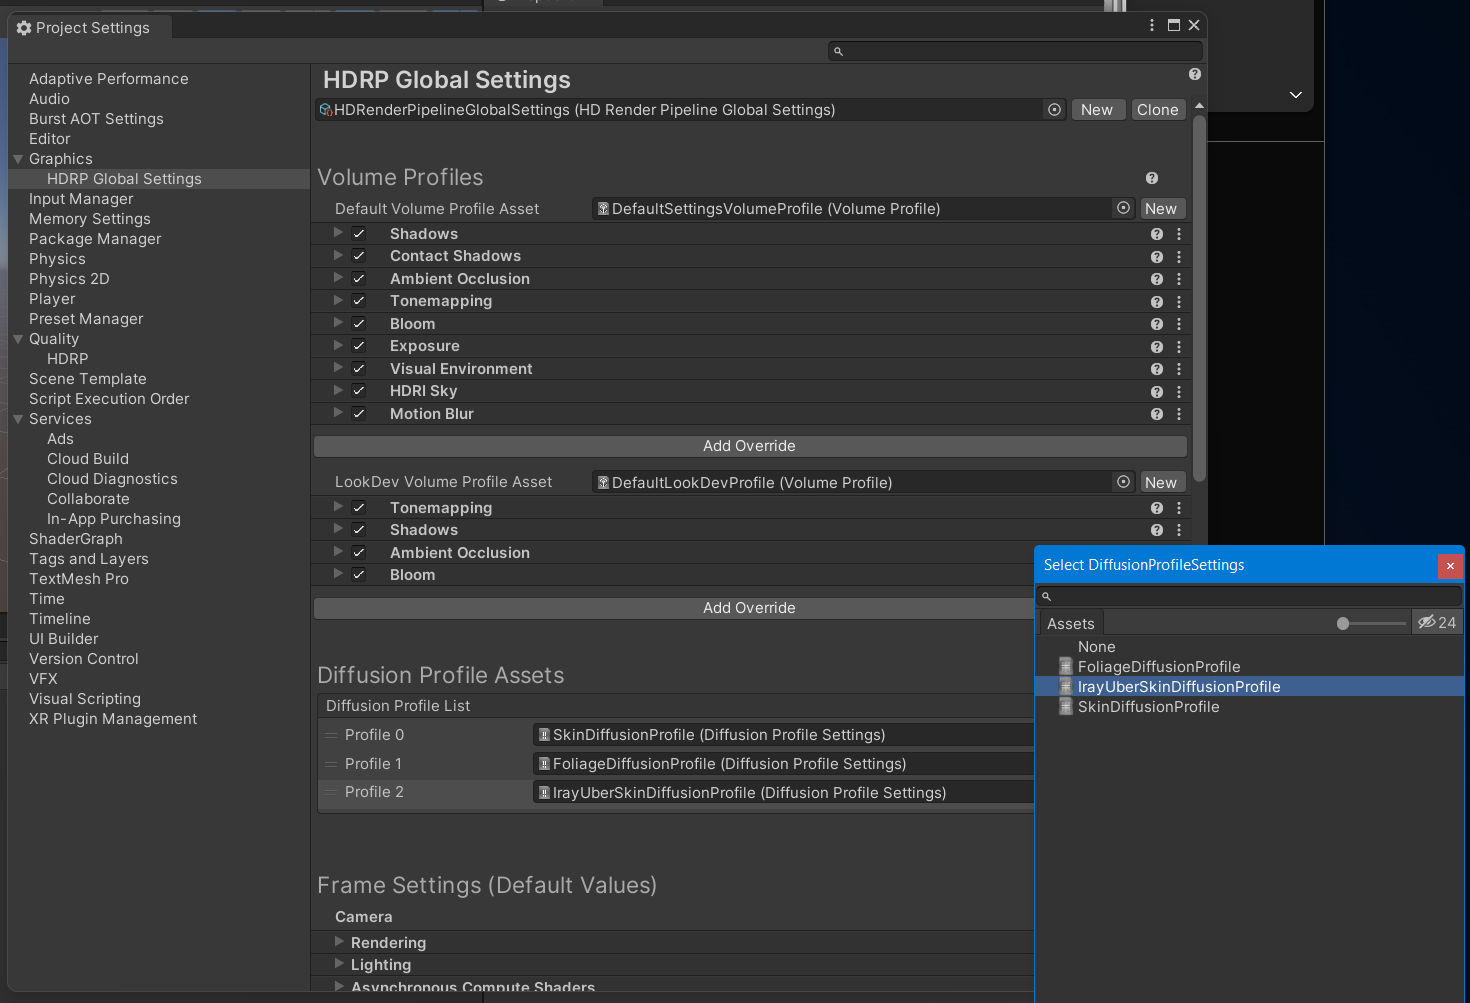
- For HDRP, you will also need to add a diffusion profile: Unity 2019: This list is found in the Material section of each HD RenderPipeline Asset, which can be found in the Quality->HDRP panel of the Project Settings dialog. Unity 2020: This list is found at the bottom of the HDRP Default Settings panel in the Project Settings dialog. Unity 2021: This list is found in the Graphics -> HDRP Global Settings panel.
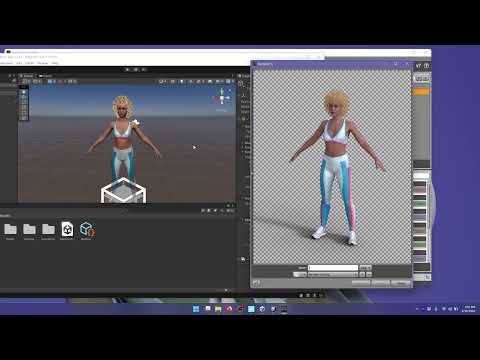
Here is a video demonstrating the above steps for Unity 2021 LTS + HDRP:
1. How to Install DazToUnity Bridge with Unity 2021 LTS + HDRP:
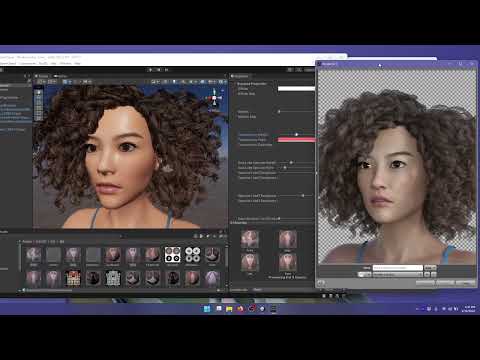
Does the skin look too shiny or oily? Is the complexion too red? Are the hair strands or eye-lashes too blocky or pixelated? Check out how to modify these things in video #2...
2. How to tweak Materials in Unity that were generated by DazToUnity Bridge:
more videos coming soon...
DAZ to UE 5 Error: Failed to find any bone hierarchy. Try disabling the "Import As Skeletal" optionI use UE5 plugins v5.0.0.75 https://github.com/David-Vodhanel/DazToRuntime/releases
And DAZ to UE Bridge plugin.
But I kinda confuse with the version of this plugin. Is it version 4 or is it version 2?And after installation the version change again 2.4.0
Meanwhil DAZ youtube video shows its version 4.12?
https://prnt.sc/ZE4TL5-MAlFyIs the latest 4 or 4.12 or 2.4.0?
When I installed DAZ plugin, there's installation dialog to choose which UE I want to use.
But it only shows for UE 4 available.
So I choose it since there's no other option, and there's only one bridge on the marketplace and I don't know will that be a problem.After I activate the UE5 plugin and start to export a figure from DAZ, I got this error over and over on UE5:
Failed to find any bone hierarchy. Try disabling the "Import As Skeletal" option to import as a rigid mesh.
Import failed.
So what to do?
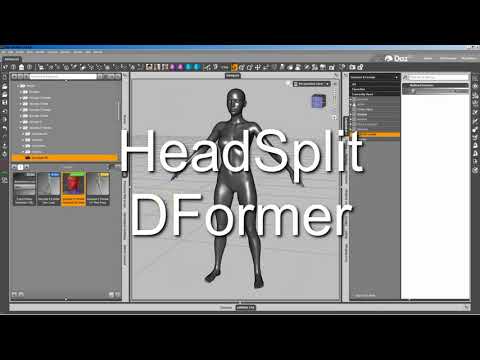
I have followed some tutorials on youtube, it just not working as theirs.Splitting Expressions? (Upper and Lower)Your best option I guess is to follow tutorials about DFormer. Which will enable you to load morphs and partially assign their influence to only parts of the mesh. Idea in a nutshell is to export Genesis 8 as obj with only 1 expression loaded. Then on a base Genesis 8 in DAZ, create a DFormer that will influence only the upper head. Load the export Genesis 8 obj (morph loader pro) with the expression you want, and use the DFormer influence at 1 or -1 to influence upper or lower face (tutorials thereafter so that you understand what that means)
Good tutorials on the subject are ultra rare and focus mostly on how to import head and body separately (FHM, FBM). Meaning that they use the default DFormer already set-up in DAZ for content creators (My DAZ 3D Library>People>Genesis8>Developer Kit>Genesis 8 HeadSplit DFormer). But by making your own DFormer you can for the morphs to apply to any given part of the body.
I'd advise you to follow those tutorials and take notes. It might sound a bit complex at first if you've never dont that. But it's extremely necessary DAZ knowledge to acquire ;) Those expression bundles you talk about have been very probaby made this way. Once you made a DFormer that influence half the head, you can save it and easily re-use it to split upper/lower face the influence of all expressions you want.
1/ First option, good tutorial (except for head/body morphs it doesn't talk about characters taller or smaller than the default G8) :
2/ Second option, in my opinion a more in depth and definitely more advanced tutorial on head/body morphs :

Again, both those tutorials are about head/body, but you can make what you need UpperHead / Lower Head, using the same exact technique except you'll have to create your own DFormer (which is pretty simple really).
Good luck !
P.S : you could also support a vendor and buy : https://www.daz3d.com/shape-splitter
But the same can be done following tutorials I linked thereabove.
Can I create a custom pose morph from asset I bought on the marketplace?Hi Richard, thanks for you answer.
I tried to import my .obj scultp with Morph loader pro - put reverse deformations at Yes ans used the ERC Freeze but I'm still getting exploded geo. Here what I got :
Any idea how to solve this problem, I really want to make it work. Thanks
Problem with OOT Heroic Curly Style HairSevrin said:
I don't own the product, but you might want to check Lost & Found. If it's there, you can right-click categorize it properly until support gets it fixed, which could take months.
Lost & Found was my first thought, but it's not there. Another oddity is that in rge materials folders the hair beads are caregorized as 'vwhicles' so I think maybe something went wrong with the metadata when the product was packaged.
My files disappear when I select a female characterI think there was a product some time ago that caused this problem to the metadata, but that should have been updated.
Have you recently installed new content? If so, then it could have been that, and you could try to uninstall.
There might be other ways to get metadata working, but I am not sure how.
what skin did I useIf it's a Daz product installed with metadata you could use http://docs.daz3d.com/doku.php/public/software/dazstudio/4/referenceguide/scripting/api_reference/samples/metadata/list_products_used/start
Otherwise, open the Surfaces pane, seelct the figure, select one of the skin surfaces in the Editor tab, and look at the path for the base Colour (Diffuse Colour if it is using a 3Delight shader) - you can see this most readily by hovering over the namo-thumbnail. With luck that will at least narrow it down, and usually will give the artist and character names.
Discontinued productsNorthOf45 said:
True, that. However, take note that you do not necessarily have to re-install everything. You can literally copy the entire library and supporting files (Package Archive, Thumbnail Archive, Manifest Archive) to the new machine. If you were happy with the setup, use the same settings in DIM and Studio. Reimport your metadata (including your user data), and you should be ready to go. (Personally, I keep a copy of the source files on an external drive, just in case...)
Thank you.
I know where the user data file is located and I back that up frequently.
But can you point me to the entire library location (Package, Thumbnail, and Manifest archives)?
There are some files for DAZ in my user directory, and some are on the Public directory. Unfortunately I don't know which is which.
I have always used the default directories that DAZ Studio uses and have never changed them. Just don't know what they are for.
Discontinued productsTrue, that. However, take note that you do not necessarily have to re-install everything. You can literally copy the entire library and supporting files (Package Archive, Thumbnail Archive, Manifest Archive) to the new machine. If you were happy with the setup, use the same settings in DIM and Studio. Reimport your metadata (including your user data), and you should be ready to go. (Personally, I keep a copy of the source files on an external drive, just in case...)
Gen 8 or gen 2 conundrumTheMysteryIsThePoint said:
globally said:
TheMysteryIsThePoint said:
I wonder if you could use R3DS to wrap a G8.1 around a G2 and create a morph...
Thank you, i think that maybe what im looking for. Luck that R3DS has a trail version. Ill give it a try.
Holy crap, it can be done with just Blender, with some limitations, particularly that the body, without the head and hands can be done relatively easily:
Pose the G2 to match the G8.1 as closely as you can get it. Do not modify the G8.1 at all. This is important.
Remove the tears and lashes from the plain G8.1 and the G2 shape you want as OBJ, at base resolution. Import both into blender. On both, you want Forward = -Z Forward, and Up = Y Up, so that they match DAZ Studio visually, without actually changing the mesh. On the G8.1, make sure to select "Keep Vertex Order", it is essential that Blender does not optimize the mesh, or it will confuse DAZ Studio's Morph Loader Pro. This doesn't matter for the G2, as we will just be "stealing" its shape with a shrinkwrap modifier.
Make a copy of the G8.1 and hide it. This is your backup copy in case you accidentally do something that changes vertex order.
Scale the G2, (Not the G8.1!!) to match the G8.1 as closely as you can get it, around the areas that you are interested in.
Create an empty vertex group on the G8.1. You can leave it as "Group".
Remove the eyelashes and brow surface from the G2. If your G2 is symmetrical, find the center-line edge loop, hide it, delete the other half, unhide it, set the transform pivot point to Median, hit S X 0 to line them up, go to the N panel, under Item, enter 0 for Location X, and then back in object mode, add a mirror modifier on the X axis.
Add a shrink wrap modifier to the G8.1, choose Wrap Method = Nearest Surface Point, Snap Mode = On Surface, Target = <Your G2 Mesh>, Offset = 0, and Vertex Group = Group.
Now, on the G8.1, select the Vertex Group you made and go into Weight Paint mode. As you paint around the G8.1, it will start conforming to the G2. This way, you can get really get it to look the way you want it. You'll have to decrease the radius and weight to get in some of the tight spots where the Shrink Wrap modifier got confused, and you'll probably have to alternate between add and subtracting to get everything to blend in a visually pleasing way.
If the hands are completely wrecked, I found a reasonable edge loop near the wrist of the G2, hid those vertices, selected the disjoint hand, hit ctrl-L to get all connected, deleted the hand, and then unhid the edge loop. I then made a copy of a similar region from the G8.1, deleted everything but the hand, joined the meshes, got the graft vetices reasonable close with proportional editing and a pretty large radius, snapped them together, and them merged all vertices by distance. Yes, you'll have to wreck to topology in order to do this, but we don't care; the Shrink Wrap Modifier will do its thing.
You might want to do the same thing for the feet. I didn't have to (I did this with a V4 whose hands are posed totally differently from the G8.1). But you can make the feet match more closely with proportional editing, or weight paint the differences out.
When you're done, apply the Shrink Wrap modifier to the G8.1, and export it as OBJ. Don't forget to select Keep Vertex Order again.
Now, just load the OBJ you just exported with Morph Loader Pro. No need to Reverse Deformations.
Here's a G8.1 that is pretty darned close to The Girl Next Door 4.3 at Rendo, actually a V4.2...
Thank you so much. I did end up doing it with the trial version of r3ds but you taught me a lot of useful stuff there. I will always use blender in the future so this process will be perfect.
How do I isolate sliders to individual body parts.A detail morph is probably HD, though I haven't checked, and those cannot be adjusted. However, there are several options for splitting morphs. If you don't need a soft transition you can just make the morph a favourite (click the heart icon on the slider, and make sure nothing you don't want to remove is also favourited), use the Geometry Editor to select the areas you want to exclude (you need to be in vertex mode, but you can select in polygon mode if it's easier and then convert to vertex mode from the right-click menu), right-click>Morph Editing>Remove selected from Favourites (from memory). Another option, which does give smooth transitions, is to set up a dForm, edit its weight map to cover the area you want to remove (or keep, whichever is easier), export the morphed figure (base resolution) as OBJ, then import as a new morph with Edit>Figure>Morph Loader Pro and use the Attenuate By options to select the dForm - the downside here is that a lot of morphs have additoonal morphs to improve their interaction with other shapes or posing, and you would really need to split and reconnect those. A third option is https://www.daz3d.com/shape-splitter
no sound when importing audio?Hi, I'm running 4.20.0.17 on a mac - I'm trying to import an audio file, but when I do (Edit-Audio) and press play, I get no sound. I've tried with wav, mp3 and aiff - nothing. Am I missing something?
INSPIRED BY BLADE RUNNERThanks all.
great suggestions
This was more of quick look dev, concept piece to take a break from all of the NPR/toon stuff I have been doing lately.
I took a bit of a lazy shortcut and parented the camera to the car to keep the craft centered for the flight.
The “replicant “at the beginning was Just a basic idle motion retargeted from Mixamo after Diffeo import.
Honestly not too happy with the MOHO created lipsync.

but I have found a way to get promising results from the ”pose recorder” app by using rendered video of a 3D speaking avatar from an external program.
I may do a tutorial on that process.
More detailed spaceships please!...besides the prices, a lot of stuff on Turbosquid and Share CG is in formats like .max (which is proprietary to 3DS Max). and .lwo which don't import into Daz without converting them in a modeller.
I used to design aircraft, spaceships, vehicles etc, by hand for stories and role play game scenarios that I would love recreate as 3D models, but alas my modelling skills have a way to go to create actual saleable or even freebie content. Bugs the heck out of me as I can easily visualise them.
How to use Diffeomorphic?when using the "import DAZ" button in the daz importer tab after installing Diffeomorphic, I get this error
Gen 8 or gen 2 conundrumglobally said:
TheMysteryIsThePoint said:
I wonder if you could use R3DS to wrap a G8.1 around a G2 and create a morph...
Thank you, i think that maybe what im looking for. Luck that R3DS has a trail version. Ill give it a try.
Holy crap, it can be done with just Blender, with some limitations, particularly that the body, without the head and hands can be done relatively easily:
Pose the G2 to match the G8.1 as closely as you can get it. Do not modify the G8.1 at all. This is important.
Remove the tears and lashes from the plain G8.1 and the G2 shape you want as OBJ, at base resolution. Import both into blender. On both, you want Forward = -Z Forward, and Up = Y Up, so that they match DAZ Studio visually, without actually changing the mesh. On the G8.1, make sure to select "Keep Vertex Order", it is essential that Blender does not optimize the mesh, or it will confuse DAZ Studio's Morph Loader Pro. This doesn't matter for the G2, as we will just be "stealing" its shape with a shrinkwrap modifier.
Make a copy of the G8.1 and hide it. This is your backup copy in case you accidentally do something that changes vertex order.
Scale the G2, (Not the G8.1!!) to match the G8.1 as closely as you can get it, around the areas that you are interested in.
Create an empty vertex group on the G8.1. You can leave it as "Group".
Remove the eyelashes and brow surface from the G2. If your G2 is symmetrical, find the center-line edge loop, hide it, delete the other half, unhide it, set the transform pivot point to Median, hit S X 0 to line them up, go to the N panel, under Item, enter 0 for Location X, and then back in object mode, add a mirror modifier on the X axis.
Add a shrink wrap modifier to the G8.1, choose Wrap Method = Nearest Surface Point, Snap Mode = On Surface, Target = <Your G2 Mesh>, Offset = 0, and Vertex Group = Group.
Now, on the G8.1, select the Vertex Group you made and go into Weight Paint mode. As you paint around the G8.1, it will start conforming to the G2. This way, you can get really get it to look the way you want it. You'll have to decrease the radius and weight to get in some of the tight spots where the Shrink Wrap modifier got confused, and you'll probably have to alternate between add and subtracting to get everything to blend in a visually pleasing way.
If the hands are completely wrecked, I found a reasonable edge loop near the wrist of the G2, hid those vertices, selected the disjoint hand, hit ctrl-L to get all connected, deleted the hand, and then unhid the edge loop. I then made a copy of a similar region from the G8.1, deleted everything but the hand, joined the meshes, got the graft vetices reasonable close with proportional editing and a pretty large radius, snapped them together, and them merged all vertices by distance. Yes, you'll have to wreck to topology in order to do this, but we don't care; the Shrink Wrap Modifier will do its thing.
You might want to do the same thing for the feet. I didn't have to (I did this with a V4 whose hands are posed totally differently from the G8.1). But you can make the feet match more closely with proportional editing, or weight paint the differences out.
When you're done, apply the Shrink Wrap modifier to the G8.1, and export it as OBJ. Don't forget to select Keep Vertex Order again.
Now, just load the OBJ you just exported with Morph Loader Pro. No need to Reverse Deformations.
Here's a G8.1 that is pretty darned close to The Girl Next Door 4.3 at Rendo, actually a V4.2...
Lynna Hair Issue when importing to UnrealHi,
I am not sure if this is the right place to go to but I am having trouble with the Lynna Hair (https://www.daz3d.com/lynna-hair-for-genesis-8-females) when importing to Unreal and it seems to have the same issue when importing to Blender as well.
Basically the Bangs1 seem to stretch to the ground as per screenshots. I did get some import issues from the import log but I don't really understand it.
I do not have a lot of experience with Daz. Can someone help me out or point me in the right direction to fix this?
Introducing the Daz to Blender Bridge & native Blender File FormatsDigiDotz said:
Ok got it. Copied the Daz folder from the D:documents to my "Users" Documents folder

Try this experimental blender plugin (attached zip). Instructions to install:
- Open Blender
- Select from main menu: Edit -> Preferences
- Select Add-ons from left pane
- Find and select "Import-Export: DazToBlender", open the drop-down arrow
- Click "Remove" at the bottom of the DazToBlender section.
- Click "Install" button at the top of the window
- Find and select the "DTB-2022.1.11.zip" and click "Install Add-on"
Daz 3D is part of

Connect
DAZ Productions, Inc.
7533 S Center View Ct #4664
West Jordan, UT 84084Licensing Agreement | Terms of Service | Privacy Policy | EULA
© 2026 Daz Productions Inc. All Rights Reserved.