-
Zack 9
Richard Haseltine said:
I see this too, which is off as AutoFollow is cetainly enabled for the body morph itself and that seems to be the shape (the sub-components are all joint centres or CBMs for adjusting bends). Please report this to Tech Support.
Done.
Zack 9I see this too, which is off as AutoFollow is cetainly enabled for the body morph itself and that seems to be the shape (the sub-components are all joint centres or CBMs for adjusting bends). Please report this to Tech Support.
Let's appreciate/discuss today's new releases - ongoing threadMatt_Castle said:
lou_harper said:
I'm in love with the Costume Set for Horse 3. https://www.daz3d.com/costume-set-for-horse-3
It should fit on the reindeer too.
With some techy whatnot, it'll also go on the centaurs.
Not finished, but a test of that (along with the Willow dress):

So Matt any chance of making that "techy stuff" into a morph for the set?
Diffeomorphic DAZ Importer version 1.7.0 releasedThanks a lot !!
I looked up how to do this after reading your comment and realized that Diffeomorphic actually has an option for transforming a mesh into a shapekey.
I thought I was going to have to learn how to use software like R3DS Wrap but I'm glad I was wrong.
So I did what you said and recreated the shapekey in the eyes base mesh using the baked eyes mesh, and everything seems to work once exported to Unreal Engine.
I was able to apply a face animation (a short speaking animation) that I had previously created for Genesis 8.1 Basic Female, play it on my character inside Unreal Engine and then switch the head morph on/off at runtime, and everything seems to work fine.
Thank you very much!
I'll keep experimenting with Diffeomorphic and see where it takes me.
p.s. As for implementing morphing armatures that's what Thomas did in blender. You can't just "pose" the armature because the geometry will follow the deforming bones. You need to enter edit mode and modify the rest pose.
I was thinking of something like this:
https://www.youtube.com/watch?v=Qoboh-da_9Q
I tried this method on a morph that modifies the body a lot (so initially I got some deformations on the hands when I played an animation inside Unreal Engine and activated the morph at runtime) and, even if it does seem to correct the deformations, it's a lot of work and it's error-prone because you have to place the bones correctly.
I'll probably go for a code-based approach instead, to get something more precise and automatic.
But since it's rather complicated and time-consuming, at least for me, I'll concentrate on Genesis 8.1 Basic Female for now, add simple morphs, clothes, hair and stuff like that.I will probably start by adding a simple component that will abstract the mesh from the rest of my code. This way, I'll be able to swap meshes if an ERC morph is too complicated to fix and it's simpler to use a custom mesh that's already been baked. And for the V2, when I've got the time and motivation, I'll make the necessary changes to be able to modify the armature when necessary so I can reuse the Genesis 8.1 Basic Female mesh and its morphs.
Transfer UtilityIt's a shame that Daz can't automatically make perfectly rigged clothing for users automatically. I guess if it could, then everyone would be a vendor on the daz marketplaces.
if you want more confidence in the content creation pipeline, there are tutorials about the sequence of steps you need to take to make clothing work. The good all-in-one tutorials you may have to pay for, though.
Another thing/hack to consider with Transfer Utility, is that usually people will use the base Genesis figure as the source (occasionally opting in to use a Projection Template for the Genesis Figure), but another thing you can do, which i guess youre technically not 'allowed' to do if you want to distirbute your clothing, is you could transfer weights from an existing face mask. I.e., if you own an existing face mask that is similar to the one you are masking, you could use that as the Source in Transfer Utility instead of using Genesis figure as the source.
Face Transfer 2Mix away. It's just a normal G9 figure with the FT face/head shape.
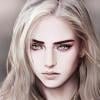
This is the dark-haired girl from above, aged down to tweens or early teens. This one uses Time Machine, and the Shaping includes only that, Base Feminine and the Face Transfer 2 shape, and a little bit of initial twiddling with her ear. FT2 seems to slightly deform some ears - haven't run into that before so I don't have a slick 'n quick process for fixing that yet.
 Face Transfer 2
Artini said:
Then the look from the different angle.
Just wonder, have you change the body morphs on the characters created with Face Transfer 2?
Sure. Just that last one alone ("Angry Santa") had differing amounts of Zack 9 Elder, Julius 9 Elder, Nikolai 9 and Cliff Head and Cliff Body. Aside from one-off test renders, I don't use commercial characters in whole - I buy character bundles for the other stuff in them, and for the shapes, skins and other features (eyes, facial hair) that come with characters.
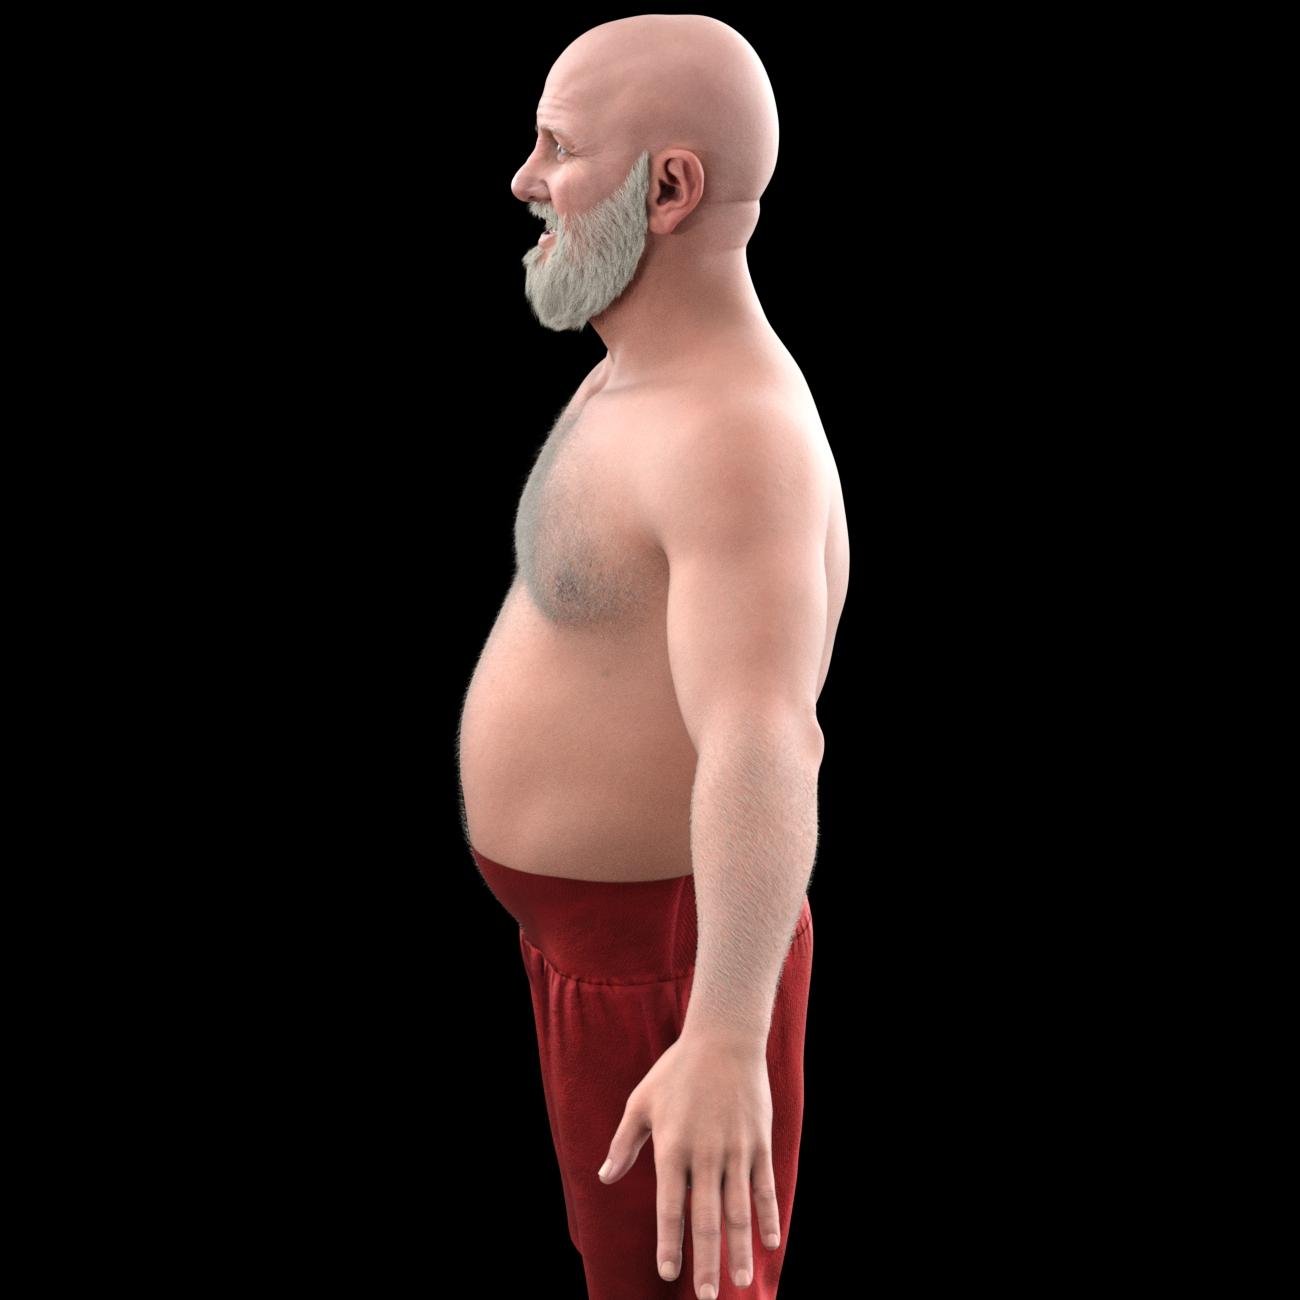
"Angry Santa" - side view, minus Zack Elder. (As a sidenote - completely unrelated to Face Transfer 2 or 4.22, as I confirmed the behavior on Zack 9 HD in my production 4.21 Daz - there's a bug with the Zack elder shape that makes itself obvious in this side view.)
The original FT2 character with only Base Masculine shaping added:
 Face Transfer 2
Then the look from the different angle.
Just wonder, have you change the body morphs on the characters created with Face Transfer 2?
 Face Transfer 2
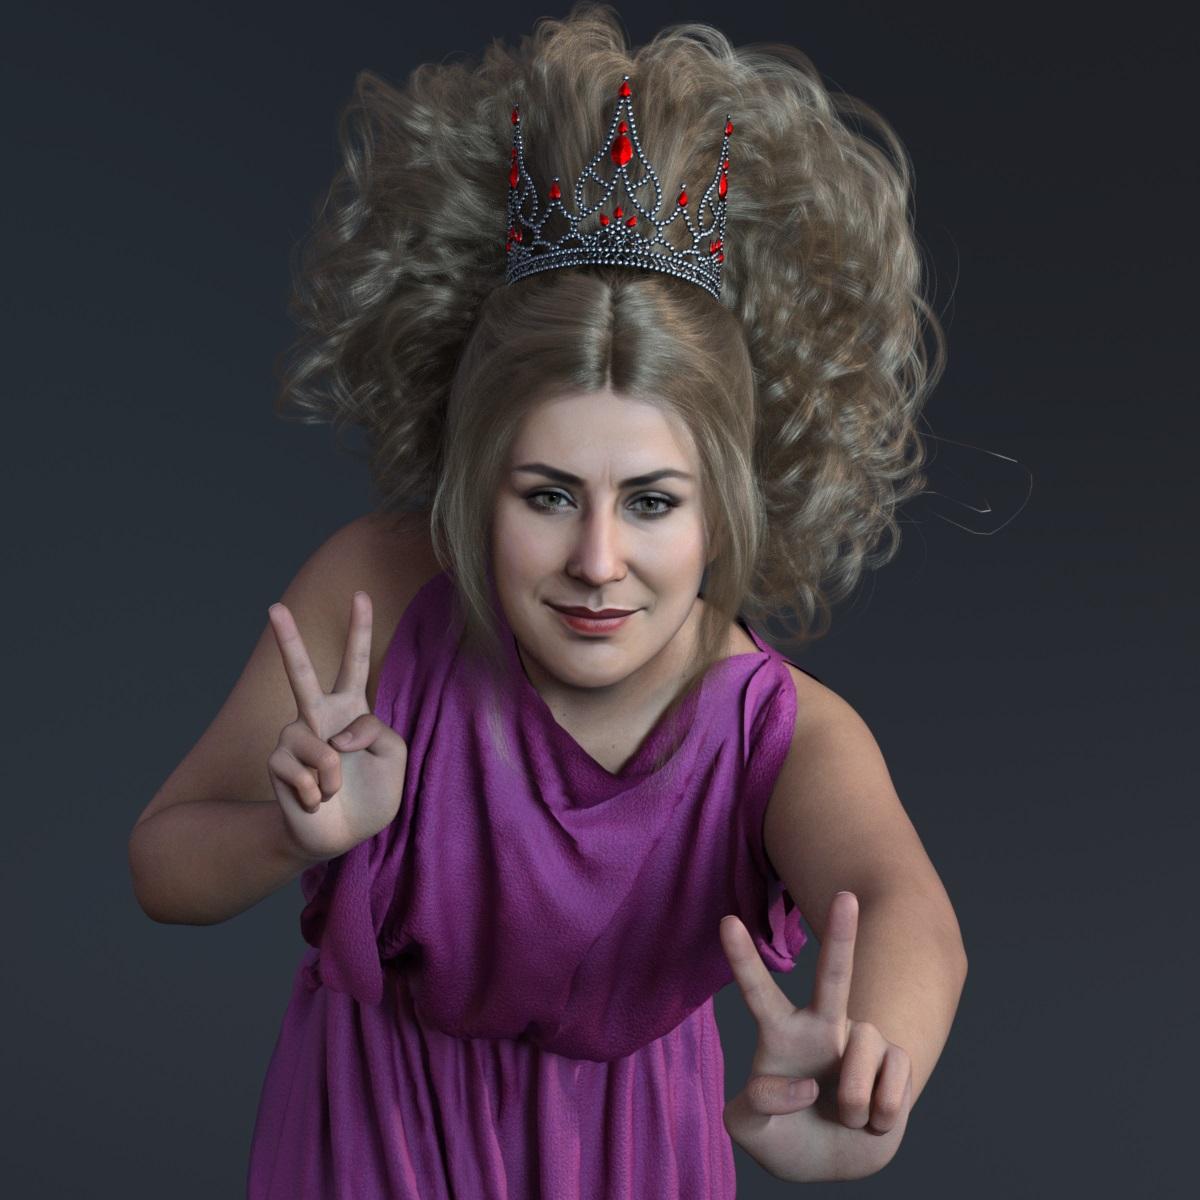
Another creation made with the Face Transfer 2.
 Transfer Utility
Perilous7 said:
So im back to square one at the moment? what do i do now to get rid of the crease?
Well im not sure you can say youre back to square one because you would have a fitted/rigged mask now, which you didnt before. Youre at least at square 2.
If a character head or body morph is causing issues on clothing, one way to fix is to make a corrective morph for the clothing (i.e.,make a corrective autofollow morph as specified in the post above yours).
You will notice that whenever you dial in a morph on the base figure, an auto-generated autofollow morph gets applied to your fitted clothing. You can see autofollow morphs on clothing by showing hidden morphs. To fix issues with that, you can manually create a corrective morph, load onto your clothing with the exact same 'Name' as the autofollow morph so that it overrides the autofollow morph.
Alternatively, you could consider changing/manually painting the weights that were automatically transfered during Transfer Utility. During transfer utility, i can assume that some of the mesh was weighted to ear bones, which may cause issues - hard to predict de novo.
Morph Export in UE5 by Daz To Unreal PluginHi, I have a question about exported morphs using Daz To Unreal plugin. Currently I'm using Bridge 2023 v.1.2.63. and my UE5 version is 5.2.
I'm satisfied that a Genesis 8.1 character with facial or whatever morphs applied has no problem being exported to UE5 maintaining its applied morphs.
But as far as I tested, the applied morphs are not controllable in UE5 because I didn't included them as morphs when I exported the character.
So I wanted my morphs to be controllable in UE5 like JCMs, and tried to include my morphs to the exported morphs list.
I selected morphs wanted in the "Choose Morphs" function in Daz to Unreal Plugin and included them to be exported.
When the export was done, I found those morphs included in the skeletal mesh, but they were all disabled by default and only be applied through dialing from -1 to 1.
So here are my questions;
Is there a way to export morphs and maintaining the percentage of them in the original figure at the same time?
And if there isn't, must I use the UE5 blueprint eventgraph to set the wanted morphs to be applied to the character?
Diffeomorphic DAZ Importer version 1.7.0 released@AlternateDreams Yes I can reproduce the issue with the Victoria 8 FHM. The explanation is epic eyes doesn't provide a vendor morph for Victoria 8 so in blender it is used a fast "nearest face" method to transfer, while this works fine enough in most cases it is not the same as the daz studio transfer. So when vendor morphs are not provided there's some difference.
What you can do is to export the eye shape from daz studio as obj, then import in blender as shapekey for the FHM. In general you can use this technique whenever you need to export a complex daz morph to blender.
Another simpler way in this case is to just use some smoothing to fix the transferred shape.
p.s. As for implementing morphing armatures that's what Thomas did in blender. You can't just "pose" the armature because the geometry will follow the deforming bones. You need to enter edit mode and modify the rest pose.
Face Transfer 2This is one strictly for the lulz ... also does illustrate the use of morphs and a fairly extreme expression. This is Face Transfer 2 (from a source image of an older male) + varying amounts of multiple "elder" shapes and Cliff for Thimor. On top of that is a couple of JW Exaggerated Expressions. It's using the base/diffuse created by FT2.
 Permanent Installation of Assets
karl said:
Okay, time to update the steps based on the latest information, since this may be useful for anyone else who wants to install assets on the D:; then, if they reinstall Windows or get a new PC and so do a fresh install of Daz Studio, Daz Studio will be able to find and use those installed assets exactly as before, so they don't have to download and install the assets all over again.
STEP 1: PREPARATION
If necessary, uninstall all current Daz stuff from the PC to start fresh.
Use Daz Central (DC) or Daz Install Manager (DIM) to uninstall Daz Studio (DS) and content (whichever one you used to install DS in the first place), then uninstall DC/DIM through Windows.
Then do any manual cleanup - see the instructions at https://helpdaz.zendesk.com/hc/en-us/articles/360055963392-How-do-I-uninstall-delete-Daz-Studio- but note that some of the folders names may be different, and the guide misses out a few folders (e.g. I had a Daz 3D folder on the root on my C: that needed deleting).STEP 2: INSTALL AND RUN DIM
Download DIM from https://www.daz3d.com/install-manager-info/
Install DIM on the C: at its default location.
Run it, tick "Work Offline" (so you can set preferences). This will temporarily disable the password box. Enter your email and click Start.STEP 3: SET UP DIM
We want to set locations on the D:, so they can be easily backed up and will also survive Windows reinstalls.
In the top right corner is a small Gear icon (Settings). Go to Settings>Advanced Settings.
Go to the Downloads tab – this is where we set the location to save the files you download from your store account.
It has two options. There is a Package Archive C:/Users/Public/Documents/DAZ 3D/InstallManager/Downloads and a Thumbnail Archive C:/Users/Public/Documents/DAZ 3D/InstallManager/Thumbnails
Package Archive is the zip files downloaded from the Daz store.
Thumbnail Archive is apparently optional, some kind of preview in DS. Nothing is added to it by DIM installing assets, so things are probably only added by DS. However, since it will get downloaded anyway, and they don’t take up much space compared to the main assets, it makes sense to back them up too.
Since I want to back them up, and they are different content types, I will be using a nested folder structure where the downloads and installed files all go under D:\image creation\Daz 3D\assets\
So I set the Package Archive as D:\image creation\Daz 3D\assets\downloads
and the Thumbnail Archive as D:\image creation\Daz 3D\assets\thumbnails
Leave all other settings alone.
Next go to the Installation tab. This allows you to set and add Content (Runtime) install paths.
Again, there are multiple options.
There is a Manifest Archive at C:/Users/Public/Documents/DAZ 3D/InstallManager/ManifestFiles
There is a Content Database Base of C:/Users/NA/AppData/Roaming/DAZ 3D/cms
And there is a Recommended folder of C:/Users/Public/Documents/My DAZ 3D Library (which has an ellipsis after it but clicking it does nothing).
Manifest Archive is for the files that DS uses to track what it has installed.
Content Database Base is the database used by the Content Management System. It is accessed and managed by PostgreSQL and has no DS content in it. DS and DIM update it based on product metadata. To avoid losing any metadata it should be on the D: drive and included in back ups. This location will be the same as the ContentCluster path you can set in DS Edit>Preferences>CMS Settings.
So I set the Manifest Archive as D:\image creation\Daz 3D\assets\manifest
and the Content Database Base as D:\image creation\Daz 3D\assets\cms
However, I had an issue with this step! Every time I changed the Content Database Base to D:\image creation\Daz 3D\assets\cms, and Accepted it, then went back in, it had reset to C:/Users/NA/AppData/Roaming/DAZ 3D/cms (there were no error messages). This seems to be a bug. One option was to skip this step temporarily, let DIM go online, install DS, then try changing it inside DS (Edit>Preferences>CMS Settings, the ContentCluster location). But I found that once I installed DS and logged in, then came back to DIM, DIM then let me finally change the location of the CMS, so all was good. For some reason it would only let me after I installed DS.
We also need to set a folder (a fifth location) for the actual files that DIM unpacks from downloaded zips and installs, which is the key ones to move to the D:. By default this is the Content Folder, which shows as C:/Users/Public/Documents/My DAZ 3D Library. First click the + in the bottom left of the window. Give the path a label such as “content” and choose a location on your D: (for me it was on my D:\image creation\Daz 3D\assets\content). Any added locations will be available in the Content Path Shortcuts drop-down selection box above, so change it to the one you want there. You can then delete the original default option so you only have the D: option for content.
You can confirm the patsh etc in the main interface window “Ready to Install” tab: click on Show Details.
That’s five folders set, so the hard work should be done.STEP 4: SET UP DAZ STUDIO
We have set up DIM. If you haven’t done it already, let DIM go online and install DS. DIM should have transferred all the correct paths into DS, but we can double check for peace of mind.
Open DS.
Edit>Preferences>Content tab>Content Directory Manager.
(You can also open preferences with F2.)
That lets you expand the path trees for where thinsg will be stored.
The CMS Cluster Directory should be whatever you set in DIM (D:\image creation\Daz 3D\assets\cms).
Content (in both DAZ Studio Formats and Poser Formats) should be whatever you set (mine were both D:\image creation\Daz 3D\assets\content as I expected).
Daz Connect Data isn’t something set by DIM, so will be a C: location. Daz Connect means installing content from within DS rather than via DIM (and doesn’t work for all content). As such, since we are using DIM, it makes sense to ignore that and install everything via DIM. So you can leave that alone.
This hopefully just confirms that DIM correctly set the directories and transferred those locations to DS.
I don’t think there’s a way to set a default for saving your scenes etc in DS, but I created a folder at D:\image creation\Daz 3D\my presets and will manually save scenes and characters there, so they get backed up and can also be transferred to a new PC or survive Windows reinstallation.STEP 5: DOWNLOAD AND INSTALL CONTENT/ASSETS
Now that everything is set up, we can install all the assets we bought.
Open DIM. Make sure you are “Working Online” (enter your password).
The “Ready to Download” tab should be populated with everything you bought on the Daz Store, plus Daz Studio and some freebie starter content.
TIP to save space and time: hide anything that you don’t want to download and install that might be things you don’t need such as Hexagon, or a bridge for Photoshop (if you aren’t going to use that). To the right of each line is a right-facing triangle. Click that for a menu, and you can hide any items you don’t want to install and they’ll disappear (you can view the hidden items at any time by clicking “Display Hidden”, and unhide them in the same way).
My big tip is that many things I’d bought had the same file twice – once with ds at the end, once with ps. According to https://www.daz3d.com/forums/discussion/28450/ds-ps they are pretty much the same thing, and the ds version will work better in Daz. Also, the ps (Poser) version would often not work as smart content anyway. So, we want to just download and install the ds versions, and hide the ps. Installing both just doubles the storage, and unfortunately that is the default DIM chooses. So it may be worth filtering it – type ps onto the top right filter box. Ignore false positives (e.g. files where ps are next to each other liks “special ops poses” but identify real ps files and hide them using the right triangle menu I mentioned. For me that prevented DIM downloading and installing 94 items, or 12.3GB of unnecessary files. The downside is that I had to hide all 94 items individually, two clicks for each (and since the button is small and right next to the install button, I accidentally downloaded a few and had to delete them again). The little menu ignores the fact that you may have selected multiple items with the check marks on the left, making you hide each individually. Also be aware that if you hide ps packages in DIM in this way, then if you ever you reinstall DIM (e.g. on a new PC, or reinstalling the OS), you may well find them all back again and offered for install, so will need to hide them again (another 188 clicks …).
If ever you use the filter box, remember to click the x in it when you are finished, to cancel the filter and reveal all the files again. Also, the filter box is handy for finding a particular item.
A big bonus of DIM is multiple downloads. Daz Central (and Daz Connect) only let me download items one at a time (if I tried to download multiple items in DC it cancelled previous ones and only downloaded the last one I clicked on). But DIM lets you download multiple items – or even everything – at once. You can re-sort the packages by size or name and select groups. If you tick “Install After Download” it will do it for you. Because I don’t have superfast Internet, and have to share it with my partner (and use the same network for work), it took me three days to download and install what I currently own. That’s why I don’t want to ever have to do it again if I get a new PC or reinstall Windows – hopefully this method means the content will be there on my D: for future installs of DS!
DIM downloaded and installed everything to the folders I set.
(Also, I did NOT click “Delete Packages Once Installed” on the “Ready To Install” tab; this way, if something goes wrong with my plan, at least I can reinstall the assets from the downloaded files, saving the three day task of downloading them all again. The downside is content appears twice on my D: and takes up twice the space – once as the installer, once as the installed version. Maybe one day, if I find this system works even after reinstalling Windows or getting a new PC, I will then have the confidence to delete the downloaded installers and free up a lot of space – currently the installers alone take up 119GB).STEP 6: TEST CONTENT IN DAZ STUDIO
Check the items show up fine and work in DS, showing up as Smart Content if applicable, that there are no problems that might require a refund.
Note that in DIM the installation tab shows if a product has installed Metadata. If so, there will be a checkmark underneath the “Smart” column, letting you know it will show under “Smart Content” in DAZ Studio 4 and higher. Most items will have metadata, but some may not have user-facing files (e.g. morph sets may add new sliders to the figure without having any presets to click). Additonal parts of a file that is so big it is in more than one part may not show as having metadata either. If there are properly installed products which don't have the data to appear in database-driven views (Smart Content) but which do have user-facing files you should still be able to find them in the Content Library pane under daz Studio formats (or Poser formats) and then the content directory name. This often applies to older items.
I have noticed one problem: some items I installed via DIM show up in DS, but are greyed out, as if they aren’t installed. I’m not sure what has happened there, or how to fix it. If I right click install within DS then it uses Daz Connect, so would download the item again (when it is already downloaded and stored on my D: by DIM), plus it would store it on the C: unless I change that path too. Using multiple install methods is perhaps asking for trouble, so I want to work out why DIM is not working for some items instead. Is this a known issue? Some of the items it applies to: Genesis 3 Starter Essentials; Rocker Outfit for Geneis 3 Females; Shadow Thief Outfit for Geneis 8 Females; Genesis 8 Starter Essentials; Nyala HD for Genesis 8 Female; Daz Studio Iray HDR Outdoor Environments; and others.STEP 7: REGULAR BACKUPS
I do a full backup of my D: regularly. So this would now mean I am also backing up the downloaded asset zip files in one folder, the installed Daz assets in another (doubling the storage requirements but meaning I am covered for a few potential scenarios), and things like the cms, thumbnails, manifests, and my presets in other D: folders. I also save one caleld “previews” which lets me browse what I have bought – each product gets a folder within a structure that categorises it (people, hair, lighting, poses etc), with a link to the product page, a txt file with the full description, and all the preview images from the product page. This is really useful to store as products are sometimes withdrawn, and that information is no longer available – there are a few items where I can no longer get the preview images, which si a shame as they give ideas for how to use the content, or illustrate all the options. Ideally all that info would be available in a zip for everything you buy, which would save manually having to save every image via the browser.
NB: do backups only when DS, DIM, and other applications using the cms are all closed and there are no PostgreSQL processes running.STEP 8: REINSTALLING WINDOWS / GETTING A NEW PC
If I reinstall Windows, or get a new computer (where I'd copy my D: backup contents to the new PC's D:) I would perform steps 2-4 above, choosing the same paths (so they actually now point to installed content on the D:). That should mean DIM and DS see and use all my existing content, so it doesn’t need redownloading or reinstalling again, saving me days.
Worst case scenario is that I reinstall Windows then all the Daz software, as above, but DIM and Daz Studio don't "see" the previously-installed Daz assets. In that case, as long as DIM can see the downloaded zip files, I can manually delete the installed assets from my D:, leaving that folder empty; then point DIM at my previous downloads and reinstall everything from the downloaded zip files. (Which at least saves downloading everything again.)OMG, you are a huge life saver bro. Almost all the posts I came across people weren't really explaining stuff in detail and was assuming we can understand everything at one go especially since DAZ thing isn't easy to deal with.
But your instructions were a gem and one thing I would like to add is that people might come across the error of not being able to connect to CMS especially after a reinstall and they are pointing DIM to backed up directories. It will think you have CMS installed but you don't. So uninstall it in DIM and reinstall it and everything should be working perfectly :)
Face Transfer 2Face Transfer 2 shape and FT2 Base/Diffuse.
 BJ Camera Manager (Commercial)
Thanks everyone - I do appreciate efforts to help. I normally figure stuff out on my own, but if there is an issue where nothing I do on my end will change anything - then patience is the order of the day.
I use DIM and when I click from the DAZ Store website to [Install] via DIM my DIM window filter populates with the SKU ::92616 but nothing shows up in ANY of the tabs (Download/Install/Installed). I have other plugins installed without any issues at all, like AB Greebles Generator, Face Transfer, Foliage Maker, LAMH2Iray Catalyzer, Measure Metrics, Orbital Lights, and never a problem. There is no pop-up window, or error, I never get to a point for there to be a reason for any error- there's nothing to install! I haven't tried a manual install yet, but did download the file just fine, wanted to wait and see if anyone else is having an issue as well. I have a gazillion things going on on my computer, but will shut everything down and do a reboot - first step in troubleshooting - usually. I'm excited to use this plug-in as it addresses MANY of my frustrations!
I have "Display Hidden" checked, and "Install Types : Plugins" is checked.
I just rebooted both DAZ Studio and DIM and this is what I get clicking Install via DIM from the product page.
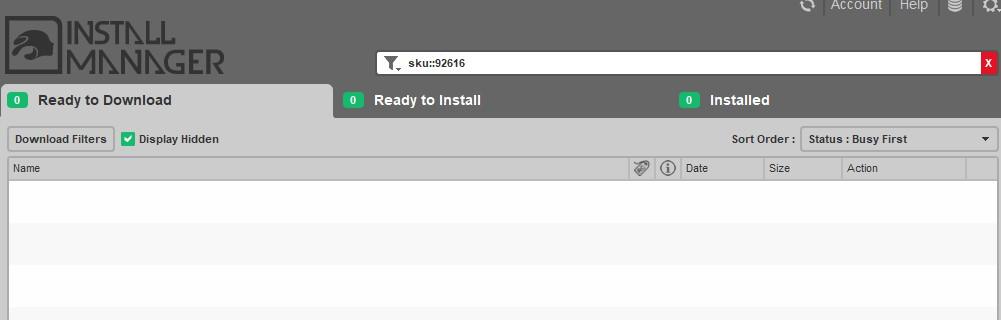
And I did just install some stuff I bought yesterday, so DIM is working fine.Face Transfer 2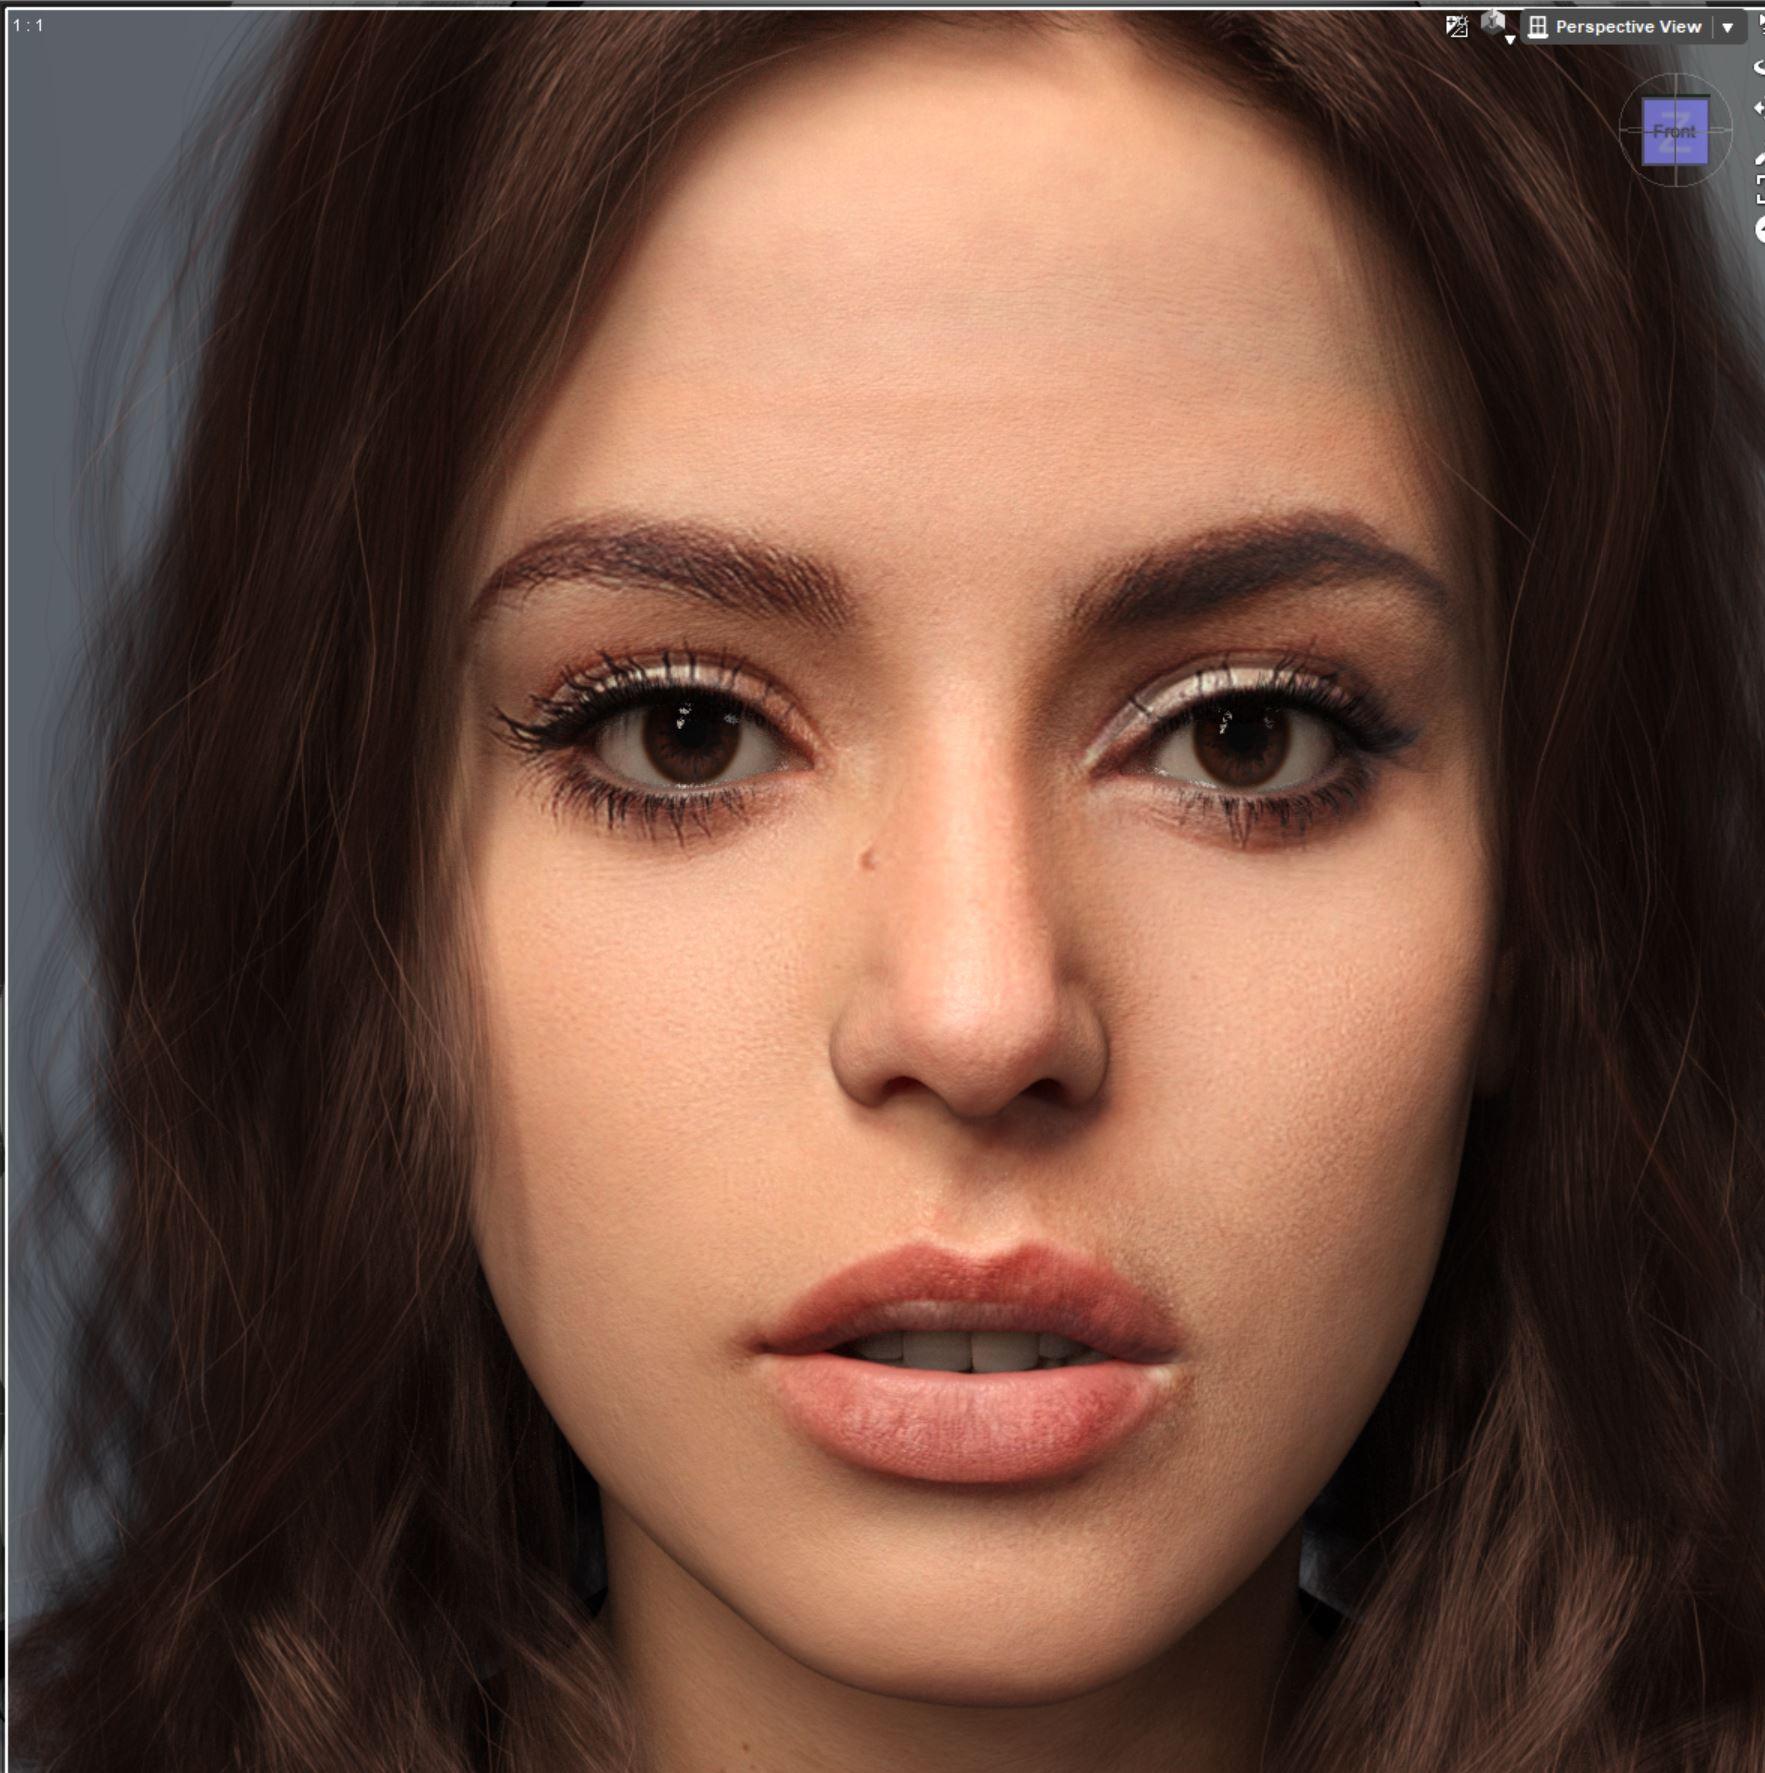
I really like Face Transfer 2 but as you can see if any shadows on lips, eyebrows you can get this. HD photos with neutral face a must (even lighting)
Transfer UtilityYes, that's why we have to fix auto-followed full head morph on the wearables...in quite a lot of cases....
As for the ears, you can use auto hide function with Geometry Editor, i.e. when fitting, the ears will be hidden automatically.
Face Transfer 2Thanks, nonesuch00.
I like this character very much and makes me want to continue exploring more of Face Transfer 2 creations.
Transfer UtilityOk i took on board what you said and quickly altered the mask to fit base gen 9 figure and applied it with transfer utility again
and it works, However once a head morph is dialled in,the exact same effect above the ears are present so still have the same result.
i tried multiple head morphs from various characters and all seem to affect the mask in various levels of severity.
Daz 3D is part of

Connect
DAZ Productions, Inc.
7533 S Center View Ct #4664
West Jordan, UT 84084Licensing Agreement | Terms of Service | Privacy Policy | EULA
© 2026 Daz Productions Inc. All Rights Reserved.