-
The "Complaints 'R' Us, complaint thread"
I hate public toilets.
Why is there large gap at the top and bottom? Is the material so expensive?
Is it so we share the experience?
I could give you several reasons, but the main one is usually ease of cleaning, you can hose the floor, or use a powerjet or even just sling buckets of water and it will go easily from one end to the other. Sometimes floors are very slightly sloped towards a central open drainage pipe.
Novica & Forum Members Tips & Product Reviews Pt 11There's a third one now, for Genesis 2 and DSON. You only have about 15 minutes if I am guessing the time right? It's 5:15pm Central here.
Floyd 8...so can he be mixed with G3 characters?
You have to morph transfer. Here's a quick test render of G3M with 40% Lee 7 and 60% Floyd 8.
...very nice.
One combination I need to do is for one of the central male characters in my storyline, Lord Marshal Trevor, who is the head of Net47, London's most important independent news network. Needs to look older but still "dignified" and "a bit dashing" (the Floyd/Edward mix in the promos comes close but can't afford another character set just for one person).
Anyone have X-Fashion Justice Outfit? (looking for holes)Very interested in this nifty new one by xtrart-3d
https://www.daz3d.com/x-fashion-justice-outfit-for-genesis-8-females
None of the promos show the back, and we know the PAs like to sneak impractical fashion holes into practical garments.
Anyone have this set? Can you please report all-round unholeyness if such empty spaces are indeed absent?
And check those flat boots. SciFi kitbash central!
Twitch Stream about using DAZ Studio and ZBrush to make 3D Printable Miniatures!Yeah, yeah, I decided to stream.
Basically, what this stream is about,is I have made an original geometry male and female figure, and lots of props for them. I load in the figure in DAZ Studio, and load in the props, then I take the result in ZBrush and sculpt on clothing, armor, hair, and the like, and convert it into a tabletop miniature you can print on a home 3D printer. Very often, I'll take requests from the audience, as well, to determine what to make.
The primary stream is on Sundays, at 8 PM Central US time. On Sundays is when I usually sculpt a full figure, and the result will be available as a free download on Thingiverse.
Thursdays at 8 PM Central Time is more of a 'utility' stream, where I make more props and weapons, as well as further FBM's for the figures to better represent other races, humanoid monsters, and the like.
The address for the stream is: https://www.twitch.tv/valandarthered ; , and below are a couple sample prints of these miniatures. They are printed on a moderately inexpensive FDM printer, showing what you can do without a super expensive resin printer.
Please be aware my camera is potato. The prints look a LOT cleaner in person. :P
May 2018 - Daz3D New User Challenge: Action & PropsThank you so much, @Kismet2012. That means so much. I appreciate your comments and I'm thankful for the suggestion concerning a suggestion. Will do.
I like the way you have concentrated the image to the action of the individuals. Your shooter's pose looks good to me ( but I will leave any critiquing of posing there to those that are more knowledgable ) and I like the flying casings.
A suggestion of the outside world beyond the window is probably all you need. Some grass or something.
Looking good.
@daybird - Thank you so much for the input. Makes me feel much better. I've been very concerned about my direction with this. I want to thank everyone who gave me feedback on it. I feel like it's so much better than it was, and that's due in large part to the wonderful insights of the people in this thread. You know who you are!

Now, about the arms. I struggled much with the posing. The left hand/arm/gun is actually aimed just above the headshot zombie's face, to account for recoil. The right hand/arm/gun is actually just above the creepy kid's face. I didn't have the heart to put a bullet in her. How goofy is that? Still, I'm not sure what to do... Right now, the bullet hasn't impacted anywhere visible. It's passed through the lot of the zombies without striking any of them. I thought about trying to put a bullet hole in the doorway trim or in the wall near the door, but in the end, I opted to leave it as is and leave the question to the audience about where the bullet went or ought to go. So, to ensure I had the guns accurately posed in terms of aim, I put a camera in between where the eyes would be of the target and aligned the gun to aim into the camera. With the headshot zombie, I chose a point just above the head, central-facing to the gun, where i imagined the eyes to be. Then I moved the hands, guns, and somewhat the arms slightly to compensate for the recoil effect. I just hate to kill creepy kid. Even though she's not real, something about pulling the trigger on a child just stops me in my tracks. I wonder, too, if our heroine/hero would pause as well, in spite of her hardened exterior/jaded outlook. What do you think? Where did the bullet go?
Wow,wow,wow, that rocks!
Great improvement with the whole scene.
Her pose and position is nearly perfect. You can change her right arm position a little downwards, so that it points more more to the headshoted zombie.
The different color outside the window makes even without a scene a big different.
That is really a fine work for this month contest. :)
Anyone else who cares to chime in is welcome to give me feedback on this variant of the image. What are the obvious issues you see that maybe aren't as visible to me now that I've been staring at the same things for so long? How do you feel about the lady's outfit? What objections do you have to this pose and image? What would make it better?
Sometimes it is good to take a break for a couple of days. Work on something else or nothing at all and come back with fresh eyes.
May 2018 - Daz3D New User Challenge: Action & PropsThank you so much, @Kismet2012. That means so much. I appreciate your comments and I'm thankful for the suggestion concerning a suggestion. Will do.
I like the way you have concentrated the image to the action of the individuals. Your shooter's pose looks good to me ( but I will leave any critiquing of posing there to those that are more knowledgable ) and I like the flying casings.
A suggestion of the outside world beyond the window is probably all you need. Some grass or something.
Looking good.
@daybird - Thank you so much for the input. Makes me feel much better. I've been very concerned about my direction with this. I want to thank everyone who gave me feedback on it. I feel like it's so much better than it was, and that's due in large part to the wonderful insights of the people in this thread. You know who you are!
Now, about the arms. I struggled much with the posing. The left hand/arm/gun is actually aimed just above the headshot zombie's face, to account for recoil. The right hand/arm/gun is actually just above the creepy kid's face. I didn't have the heart to put a bullet in her. How goofy is that? Still, I'm not sure what to do... Right now, the bullet hasn't impacted anywhere visible. It's passed through the lot of the zombies without striking any of them. I thought about trying to put a bullet hole in the doorway trim or in the wall near the door, but in the end, I opted to leave it as is and leave the question to the audience about where the bullet went or ought to go. So, to ensure I had the guns accurately posed in terms of aim, I put a camera in between where the eyes would be of the target and aligned the gun to aim into the camera. With the headshot zombie, I chose a point just above the head, central-facing to the gun, where i imagined the eyes to be. Then I moved the hands, guns, and somewhat the arms slightly to compensate for the recoil effect. I just hate to kill creepy kid. Even though she's not real, something about pulling the trigger on a child just stops me in my tracks. I wonder, too, if our heroine/hero would pause as well, in spite of her hardened exterior/jaded outlook. What do you think? Where did the bullet go?
Wow,wow,wow, that rocks!
Great improvement with the whole scene.
Her pose and position is nearly perfect. You can change her right arm position a little downwards, so that it points more more to the headshoted zombie.
The different color outside the window makes even without a scene a big different.
That is really a fine work for this month contest. :)
Anyone else who cares to chime in is welcome to give me feedback on this variant of the image. What are the obvious issues you see that maybe aren't as visible to me now that I've been staring at the same things for so long? How do you feel about the lady's outfit? What objections do you have to this pose and image? What would make it better?
Getting priced out of this hobbyThe reason for the high percentage is simple really.
If a 3D modeller has his own website and its store, it's unlikely that he is going to sell many if any. Big sites like Turbosquid acts like a central marrket place.When someone is looking for a 3D model to buy, it's one of the first places they will visit.
Long story short, the volume makes up for it.
In return, Turbosquid, Daz, and the like handle billing, basic support, and chargebacks if any.
Carrara Challenge #40 NOIR WIP - A warm welcome to our PA sponsor, Fenric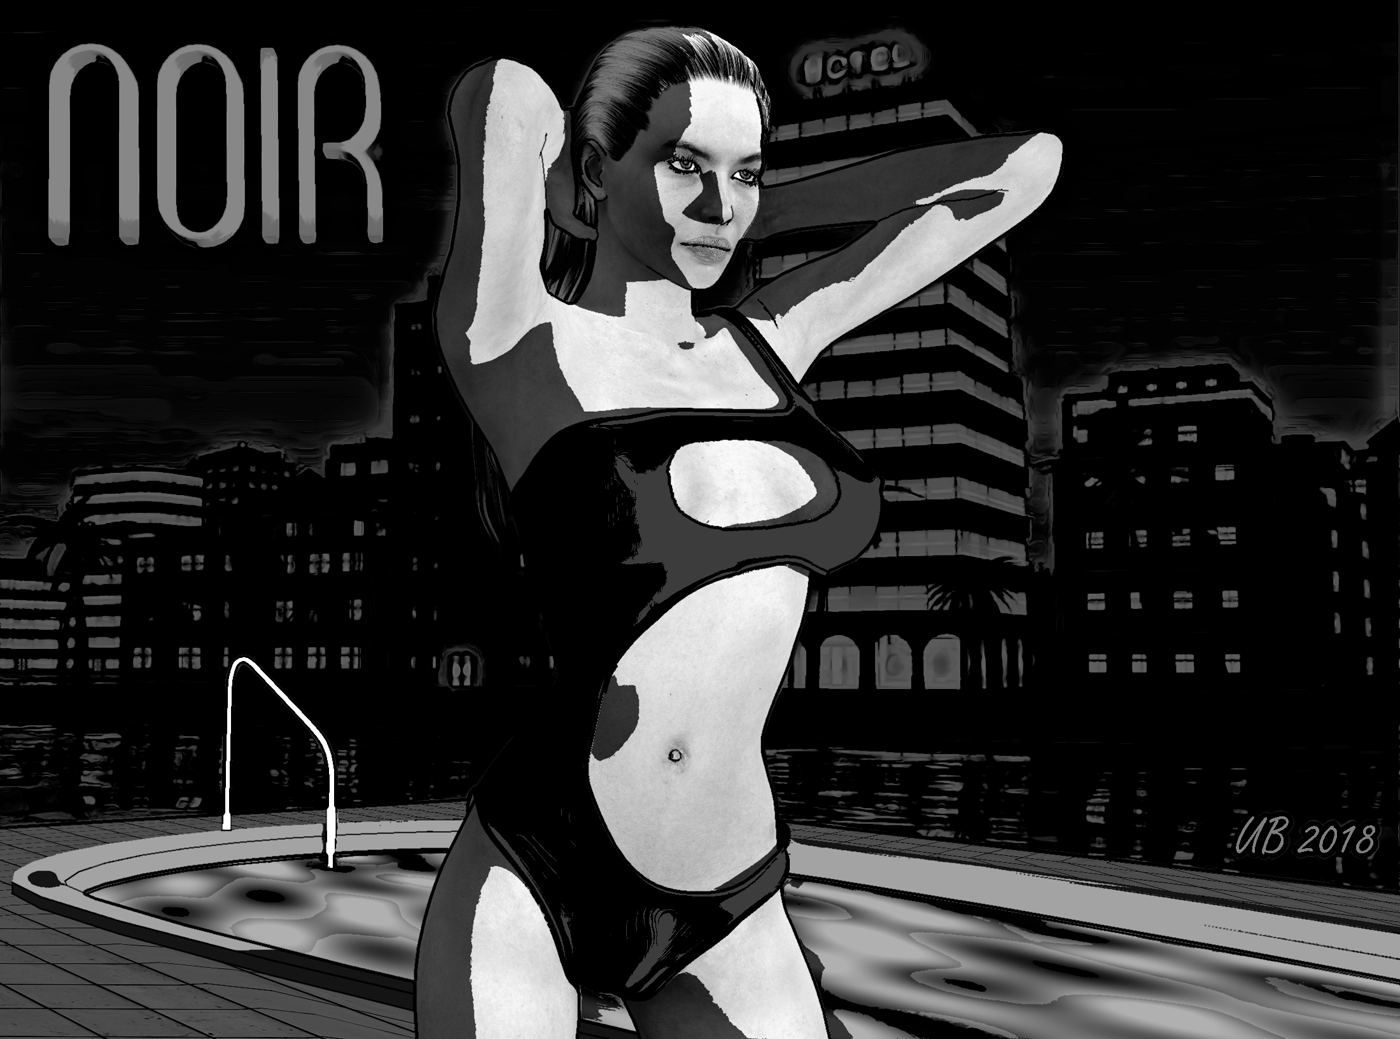
Welcome to the Noir Challenge! This month we get a little thuggish and explore the smoke-filled (originally B&W) vision of crime and corruption made famous by Hollywood in the 1940's and 50's. In this Challenge, you can choose from three different categories, and enter up to three renders.
Postwork is permitted. But this is a Carrara Challenge, so working as much as possible in Carrara is encouraged.
The Skinny
You can enter renders in three categories.
Category 1: Render a black & white image in the Noir style. The subject matter can be anything, from any time period, but the idea is to apply lighting, poses and props in a way that creates a "Noir mood." Such a mood is easier to grasp by actually seeing examples, so check out the post below. And keep reading, as some elements of the style are discussed in this post as well.
In this category, there is a specific Carrara function requirement. The image must include the use of a light gel. (Cripeman gel tutorial here) In the light gel drop down menu, the choices are Blinds, Formula, Gradient, or Map. These different light gel variations allow you to create venetian blinds or other interesting high contrast shadows which commonly give structure to a Noir image. A parallel in the traditional art world is the style is known as Chiaroscuro, which means "pictorial representation in terms of light and shade without regard to color."
Category 2: Create a classic Film Noir character portrait or pinup. Choices include the cynical Private Eye, the Detective, the Femme Fatale, the Crime Boss, the Gangster's Moll, the Goon, and so on. There is no specific Carrara function requirement; B&W and color are both OK.
Category 3: Make an homage to a famous Film Noir movie or hardboiled detective novel. This can include recreating a specific movie scene, a book or magazine cover, or a movie poster. Or, you can create an homage to the Noir/detective genre in general, and make up your own image.
There is no specific Carrara function requirement; B&W and color are both OK.
The Big Scheme
The term "Noir", which is French, has a variety of meanings. For this Challenge, it is connected to "Film Noir," which means "dark film." In 1946, a French film critic coined the term to describe the hardboiled Hollywood crime melodramas made at the time, but the term wasn't adopted by other critics until decades later.
In a Noir movie, the hero is cynical, the women are of questionable virtue, and greed + jealousy + murder are all typically central to the plot.
The 1940's defined the Noir style, with movies like The Maltese Falcon, Double Indemnity, and The Postman Always Rings Twice, all filmed in glorious black and white. However, many elements of the Noir style - dark mood, high contrast dramatic lighting, archetypal poses - can be found in later decades as well, with color films like Farewell My Lovely, Mulholland Drive, and Chinatown. And further, the Noir style has spread across many genres, including science fiction (Blade Runner). These later films are often referred to as Neo-Noir.
But what, you may ask, does all of this have to do with "dreams" in the title of this Challenge? For those who may be unfamiliar with classic Noir movies, click on the video clip below from The Maltese Falcon. (Spoiler alert if you've never seen it!)
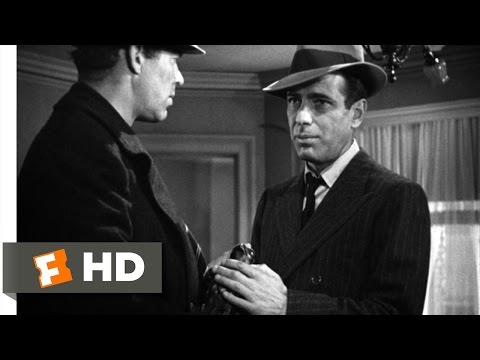
The dream quote is a variation of a line in Shakespeare's play The Tempest: "We are such stuff / as dreams are made on."
By the way - if you are curious whatever happened to that black bird, the story is here:
https://www.vanityfair.com/hollywood/2016/02/mystery-of-the-maltese-falcon
The Law
General rules.
1. Up to 3 renders can be entered. However, if you enter more than 2 renders, at least one of them must use the Carrara light gel effect..
2. Images must be new (previously unpublished).
3. Images must be "mostly" set up in Carrara.
4. Where postwork is allowed, it must not be the dominant part of the image. Posting images of before and after postwork is encouraged.
5. At least one WIP (work in progress) image of the final Carrara setup must be posted to the WIP thread
6. The winner of the "Best Participation" category becomes the next Carrara Challenge host, and sets the rules for the next competition. But should the winner decline this honor, the winner of the next category (Best B&W image) will then get the opportunity to step forward and fill the role.
The Geetus

Once again Daz will generously sponsor the monthly Challenge.
Fenric is the PA sponsor.
As in all the Challenges I host, the prize format has categories, much like the Academy Awards (Oscars) and the prizes are all more-or-less equal. An artist can win only one of the Daz prizes, but can win both a Daz prize and a PA prize. Comments about this are again welcomed. I explain the process in more detail in THIS THREAD. Please read it if you have questions.
The four prize categories are:
Best Participation (cumulative images from a single artist)
Best B&W Image (Any subject, Noir style, B&W, Carrara light gel)
Best Noir Portrait or Pinup (private eyes, femme fatales, etc)
Best Noir Homage (familiar Film Noir scenes, posters, books, or create your own!)
This translates into:
Most votes total for one artist: $50.00 towards DAZ 3D owned item(s)
Most votes B&W image: $50.00 towards DAZ 3D owned item(s)
Most votes Portrait/Pinup: $50.00 towards DAZ 3D owned item(s)
Most votes Film Noir homage: $45.00 towards DAZ 3D owned item(s)The Summons
Dates to Remember:
All dates are Daz Utah Time http://www.timeanddate.com/worldclock/usa/salt-lake-city
WIP Thread Opens: Monday May 14, 2018
Entry Thread Opens: Monday May 28, 2018
Entry Thread Closes/Voting Begins: Friday June 15, 2018
Voting Ends: midnight Friday June 22, 2018
The Plug
I have added an Art Studio thread so you can share your entries with others outside of the Carrara forum.
Age of Warriors Celts 1 and II gone for good?Well, Cents are not Gauls, although the period overlaps. And Powerage does have a Gaulish village in his store on Rendo. Or did.
I was taught Gauls were a tribe of Celts like Franks were a tribe of Germans. Thanks for the pointer to the Gaulish village, There is a authentic reconstructed Celtic village museum in County Wexford, another recontructed one on Lake Constance in Germany. They even showed a bit of how metal working was done as would have been needed to make the armour in the OP post images.
The difference between Celtic and Gallic ethnicities
In considering the genetics of Western Europeans it should be understood that our concept of who the Celts were and are is very much based on speculation that has circulated among scholars and academicians since 1707 when Edward Lhuyd first hypothesized that the Irish, Scots, Manx, Welsh, Cornish and Bretons represented the descendants of the ancient tribes referred to as the "Keltoi" by the Greeks and the "Celtae" by the Romans, who learned of these people through the writings of early Classical explorers.
Unfortunately most archaeologists and anthropologists continue to perpetuate the mistaken notion that the Gallic tribes (Gauls) who later moved into the areas already occupied by the Celts were one and the same as the Celts themselves.
The actual Celts were a pre-Gallic population, the aboriginal inhabitants of Western Europe, descendants of the megalith builders whose many cromlechs (stone circles) and dolmens are found throughout the territory occupied by the indigenous Celtic people and later by the Gallic tribes who migrated into their area, introducing their Indo-European language and their Hallstatt/La Tene artwork and handicrafts to the areas already inhabited by the native Celts.
The Gallic tribes originated in Eastern Europe, in part of what was once known as Scythia, where the ancient Eastern European province of Galicia is located on both sides of the Polish-Ukraine border. While most of the Gallic tribes eventually migrated westward into what is now France as the Gauls, and parts of Spain as the Gallaeci (Galicians), eventually reaching Ireland and Britain as the Gaels; other Gallic tribes migrated eastward, settling in Anatolia in present-day Turkey, where they were known as the Galatians.You complete lost me saying that Celts are not a part of the a superset of a culture that includes the Gallic tribes like I've always been taught. That's sort of a misnomer that Celtic are aboriginal to France, they came in as wave of migrants from the Eurasian steppes basically the same history that you gave for the Gallic tribes. According to the FTDNA that I paid to have testing done with in 2003 I'm 78% British Isles, 14% Eastern Europe, 5% Scandinavian, 2% Finn, and 1% East Middle East. That 78% British Isles you see would be the genetic legacy of the people that are not Celts and preceded the Celts and they were about a 50% - 50% mix of hunter-gatherers and farmers. They think that, after the ice sheets retreated and the lsles repopulated again, that the 50% - %50 mix of hunter-gathers and farmers came from the area of Basque Country, Spain and the Po Valley, Italy, There has been no speculation that I know of what language(s) was spoken but maybe one(s) related to Basque and Etruscan as non-Indo-European languages might be possible. The 5% Scadinavian & 2% Finn would be the Scandinavian migrants of 1000 years ago. The 14% Eastern Europe would be the Celts, a cultural superset that includes the Gallic tribes. The cultural superset of the Celts would be the Proto-Indoeuropean tribes and the 1% East Middle East work be indicative of the original founding of the proto-Indo-European cultures southeast of the Caspian Sea. Well,that there is where they now think that they originated using genetic samplying of modern people, archealogical digs, and mathematics and well as written histories and conjectores of the past such as you've sited. That though precedes Celtic, Gallic, Bulgar, and other P.I.E. tribes by a lot of time. Most longtime native people in western and central Europe have similar genetic histories although the percentages change.
GIMP 2.10.2 out now...will that only work with Bryce though? I'm looking to create custom IBL domes for use in Daz Iray as again a standard skydome blocks the Iray "sun" so there needs to be an appropriate light source (using a Photometric Distant light doesn't have the same characteristics).
Details
Turn your Bryce scenes into spherically mapped images - for use in Bryce (and other software) as pre-rendered backdrops.
You don't need Bryce for this. There are camera options in Daz to turn your render into a 360 image. It is located under the camera parameters, there is a box for "distortion". Change this to spherical and locate your camera in a central location. This is a newer feature, it is only in 4.10 and one of the last versions of 4.9.So you create an hdri with any scene from Daz and GIMP....so can you turn an old skydome into an IBL with a functioning "sun" for Iray?
DAZ has Sun-Sky for iRay already. An HDRI will always have the same 'Sun' since it's a capture of the light at a specific point in time but Sun-Sky's functioning sun is adjustable.
GIMP 2.10.2 out now...will that only work with Bryce though? I'm looking to create custom IBL domes for use in Daz Iray as again a standard skydome blocks the Iray "sun" so there needs to be an appropriate light source (using a Photometric Distant light doesn't have the same characteristics).
Details
Turn your Bryce scenes into spherically mapped images - for use in Bryce (and other software) as pre-rendered backdrops.
You don't need Bryce for this. There are camera options in Daz to turn your render into a 360 image. It is located under the camera parameters, there is a box for "distortion". Change this to spherical and locate your camera in a central location. This is a newer feature, it is only in 4.10 and one of the last versions of 4.9.So you create an hdri with any scene from Daz and GIMP....so can you turn an old skydome into an IBL with a functioning "sun" for Iray?
It should be possible in GIMP if it can work on HDRI like people say. I tried in the 2.9 beta that said it could, and though GIMP loaded it I was unable to do anything with it. I really hope it works now. I have several 360 pictures I have taken with a Samsung 360 camera as well as a few video game scenes I made 360 pics with using Nvidia Ansel. Ansel is really cool because it is possible to create massive screenshots and 360 shots that far exceed the actual screen size. I have 2 games that support Ansel, Hellblade and Mass Effect Andromeda. Even though Andromeda was a so-so game the different planet scapes could make for some awesome HDRI images.
And as I said, you can make a 360 image from Daz. Its really quite easy. I forgot to say you need to make the image ratio 2:1 to fit the correct size of a 360 image. Then just render it as large as you can, as obviously larger is better.
Here is a nice little video I found for making 360 images in Daz. It does not show how to turn a 360 image into a HDRI.
GIMP 2.10.2 out now...will that only work with Bryce though? I'm looking to create custom IBL domes for use in Daz Iray as again a standard skydome blocks the Iray "sun" so there needs to be an appropriate light source (using a Photometric Distant light doesn't have the same characteristics).
Details
Turn your Bryce scenes into spherically mapped images - for use in Bryce (and other software) as pre-rendered backdrops.
You don't need Bryce for this. There are camera options in Daz to turn your render into a 360 image. It is located under the camera parameters, there is a box for "distortion". Change this to spherical and locate your camera in a central location. This is a newer feature, it is only in 4.10 and one of the last versions of 4.9.So you create an hdri with any scene from Daz and GIMP....so can you turn an old skydome into an IBL with a functioning "sun" for Iray?
GIMP 2.10.2 out now...will that only work with Bryce though? I'm looking to create custom IBL domes for use in Daz Iray as again a standard skydome blocks the Iray "sun" so there needs to be an appropriate light source (using a Photometric Distant light doesn't have the same characteristics).
Details
Turn your Bryce scenes into spherically mapped images - for use in Bryce (and other software) as pre-rendered backdrops.
You don't need Bryce for this. There are camera options in Daz to turn your render into a 360 image. It is located under the camera parameters, there is a box for "distortion". Change this to spherical and locate your camera in a central location. This is a newer feature, it is only in 4.10 and one of the last versions of 4.9.So you create an hdri with any scene from Daz and GIMP.Thanks I was trying to remember if that was true or not but couldn't remember so I though it better to not say anything.
It's cool though, that, and you can even change the render exposure settings in DS and get a 'theorectically' technically better HDRI using a series of DAZ iRay renders made for the same scene with 12 or 24 or whatever exposures than you could with a real model digital camera and a real scene. Of course it won't be really technically better but it will probably be a more suitable HRDI for DAZ and game scenes than real HRDIs which often ruin 3D scenes if they are exceedingly well done and adapted.
GIMP 2.10.2 out now
You don't need Bryce for this. There are camera options in Daz to turn your render into a 360 image. It is located under the camera parameters, there is a box for "distortion". Change this to spherical and locate your camera in a central location. This is a newer feature, it is only in 4.10 and one of the last versions of 4.9. So you create an hdri with any scene from Daz and GIMP....will that only work with Bryce though? I'm looking to create custom IBL domes for use in Daz Iray as again a standard skydome blocks the Iray "sun" so there needs to be an appropriate light source (using a Photometric Distant light doesn't have the same characteristics).
Details
Turn your Bryce scenes into spherically mapped images - for use in Bryce (and other software) as pre-rendered backdrops.
Snow conesVery interesting! Its not popular here, although of course, pizza is hugely popular. I live in central. california which has more of a fishing and agricultural focus. We are not LA, and we are not San Francisco- We are the regular working class folks.
Even regular ice cream places are closing their doors around here. Most people prefer buying icecream at the store and coffee shops tend to get the business of ordinary citizens for their frappuccino and lattes and shake-like drinks.
Ice Dragon Art WIP'sLooking great! Didn't even notice the other two figures at first, eye is really drawn to the central character with the lighting style you've done
The "Complaints 'R' Us, complaint thread"Complaint: I needed the air-conditioner again last night and especially this morning. Already at 8:00 AM it's 70F outside in the shade, my bedroom is upstairs, in the sun, and much warmer. I guess I need to get my a** in gear and unpile all those boxes off the top of my air-conditioner, eat my Wheaties, put on my knee guards and back brace and then muscle that machine up 6 inches and back 2 feet into the window. This used to be a lot easier 20 years ago.

So glad we have central AC/heating! Trying not to turn mine on yet, though. But, it's 90f out there right now!!!
 Fortunately, I'm not out there. But the thermostat says it's 80 in here. If I left my computer running all day, like I used to, I'd have no choice but to start up the AC. But I like the "Sleep" feature in Windows. Starts right back up where you left off, in a couple seconds. I guess I can't wait too much longer to turn it on, though. Temperatures will drop after Friday, a cold front coming through with rain. At least a 10 degree drop is expected. That will help delay the inevitable.
Dana
Convert a camera to a virtual camera?Couple things, figured I ask first before making a product request.
Sometimes I want to convert a camera into the virtual viewport...viewer...the default viewing port that exists BEFORE you make a camera. Does that make sense?
So instead of choosing to create a new camera from the current view, I want to do the opposite and change a Camera into the default viewer.
------------------
Related as I wonder if it's possible to create a script that moves the active port a certain distance from an object. In your camera control doo-hickey you can press the [+] sort of thing and get a better focus on an object in the scene. BUT! If I want to jump large distances, I'd like to be able to select an object in the scene and run this script and have THE DEFAULT VIEWER move a certain distance (of the scripts choosing) from the object. Maybe with orientation presets. A certain distance from its central axis. Or always floor level pointing up...
-----------
Or a script that can CREATE A NEW CAMERA pointing at an object, and also a certain distance away from that object.
I know I can make a camera myself and use the align tools to move it about and then look through that camera, but I want to move the Daz default viwer about.
Any ideas?
Wanderer's OasisOkay, so I went dark for a bit while working on this or that challenge or contest. And then I had to deal with the guilt of winning. But I'm back and I will attempt to document here my attempts at improving my skill and my art for the sake of those who come after--and also because I tend to forget how or why I did this or that after a while. Anyway, enough of all that.
First, I want to share an image I did with a little post-work. I posted it over in the Sci-Fi Celebration thread, but the crickets over there let me know they are the same crickets who hang out at the RRRR contest. ::wink:: That's about as funny as I get. Anyway. I still like it. I've considered sharing the how of this, but since it doesn't seem to be very well liked, it might not be worth doing. Several who see it probably know exactly what I did anyway.
Visitration
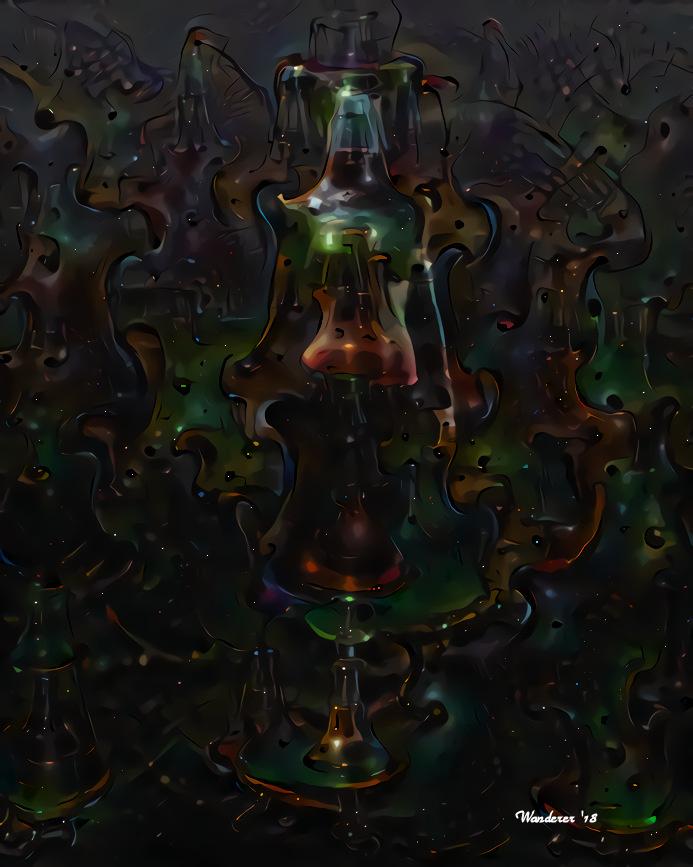
I'm going to copy my post from the second place winner of the Riversoft Art contest to elaborate a bit upon my technique because it occurs to me that some might not be familiar with what I did, or why.
The Dance
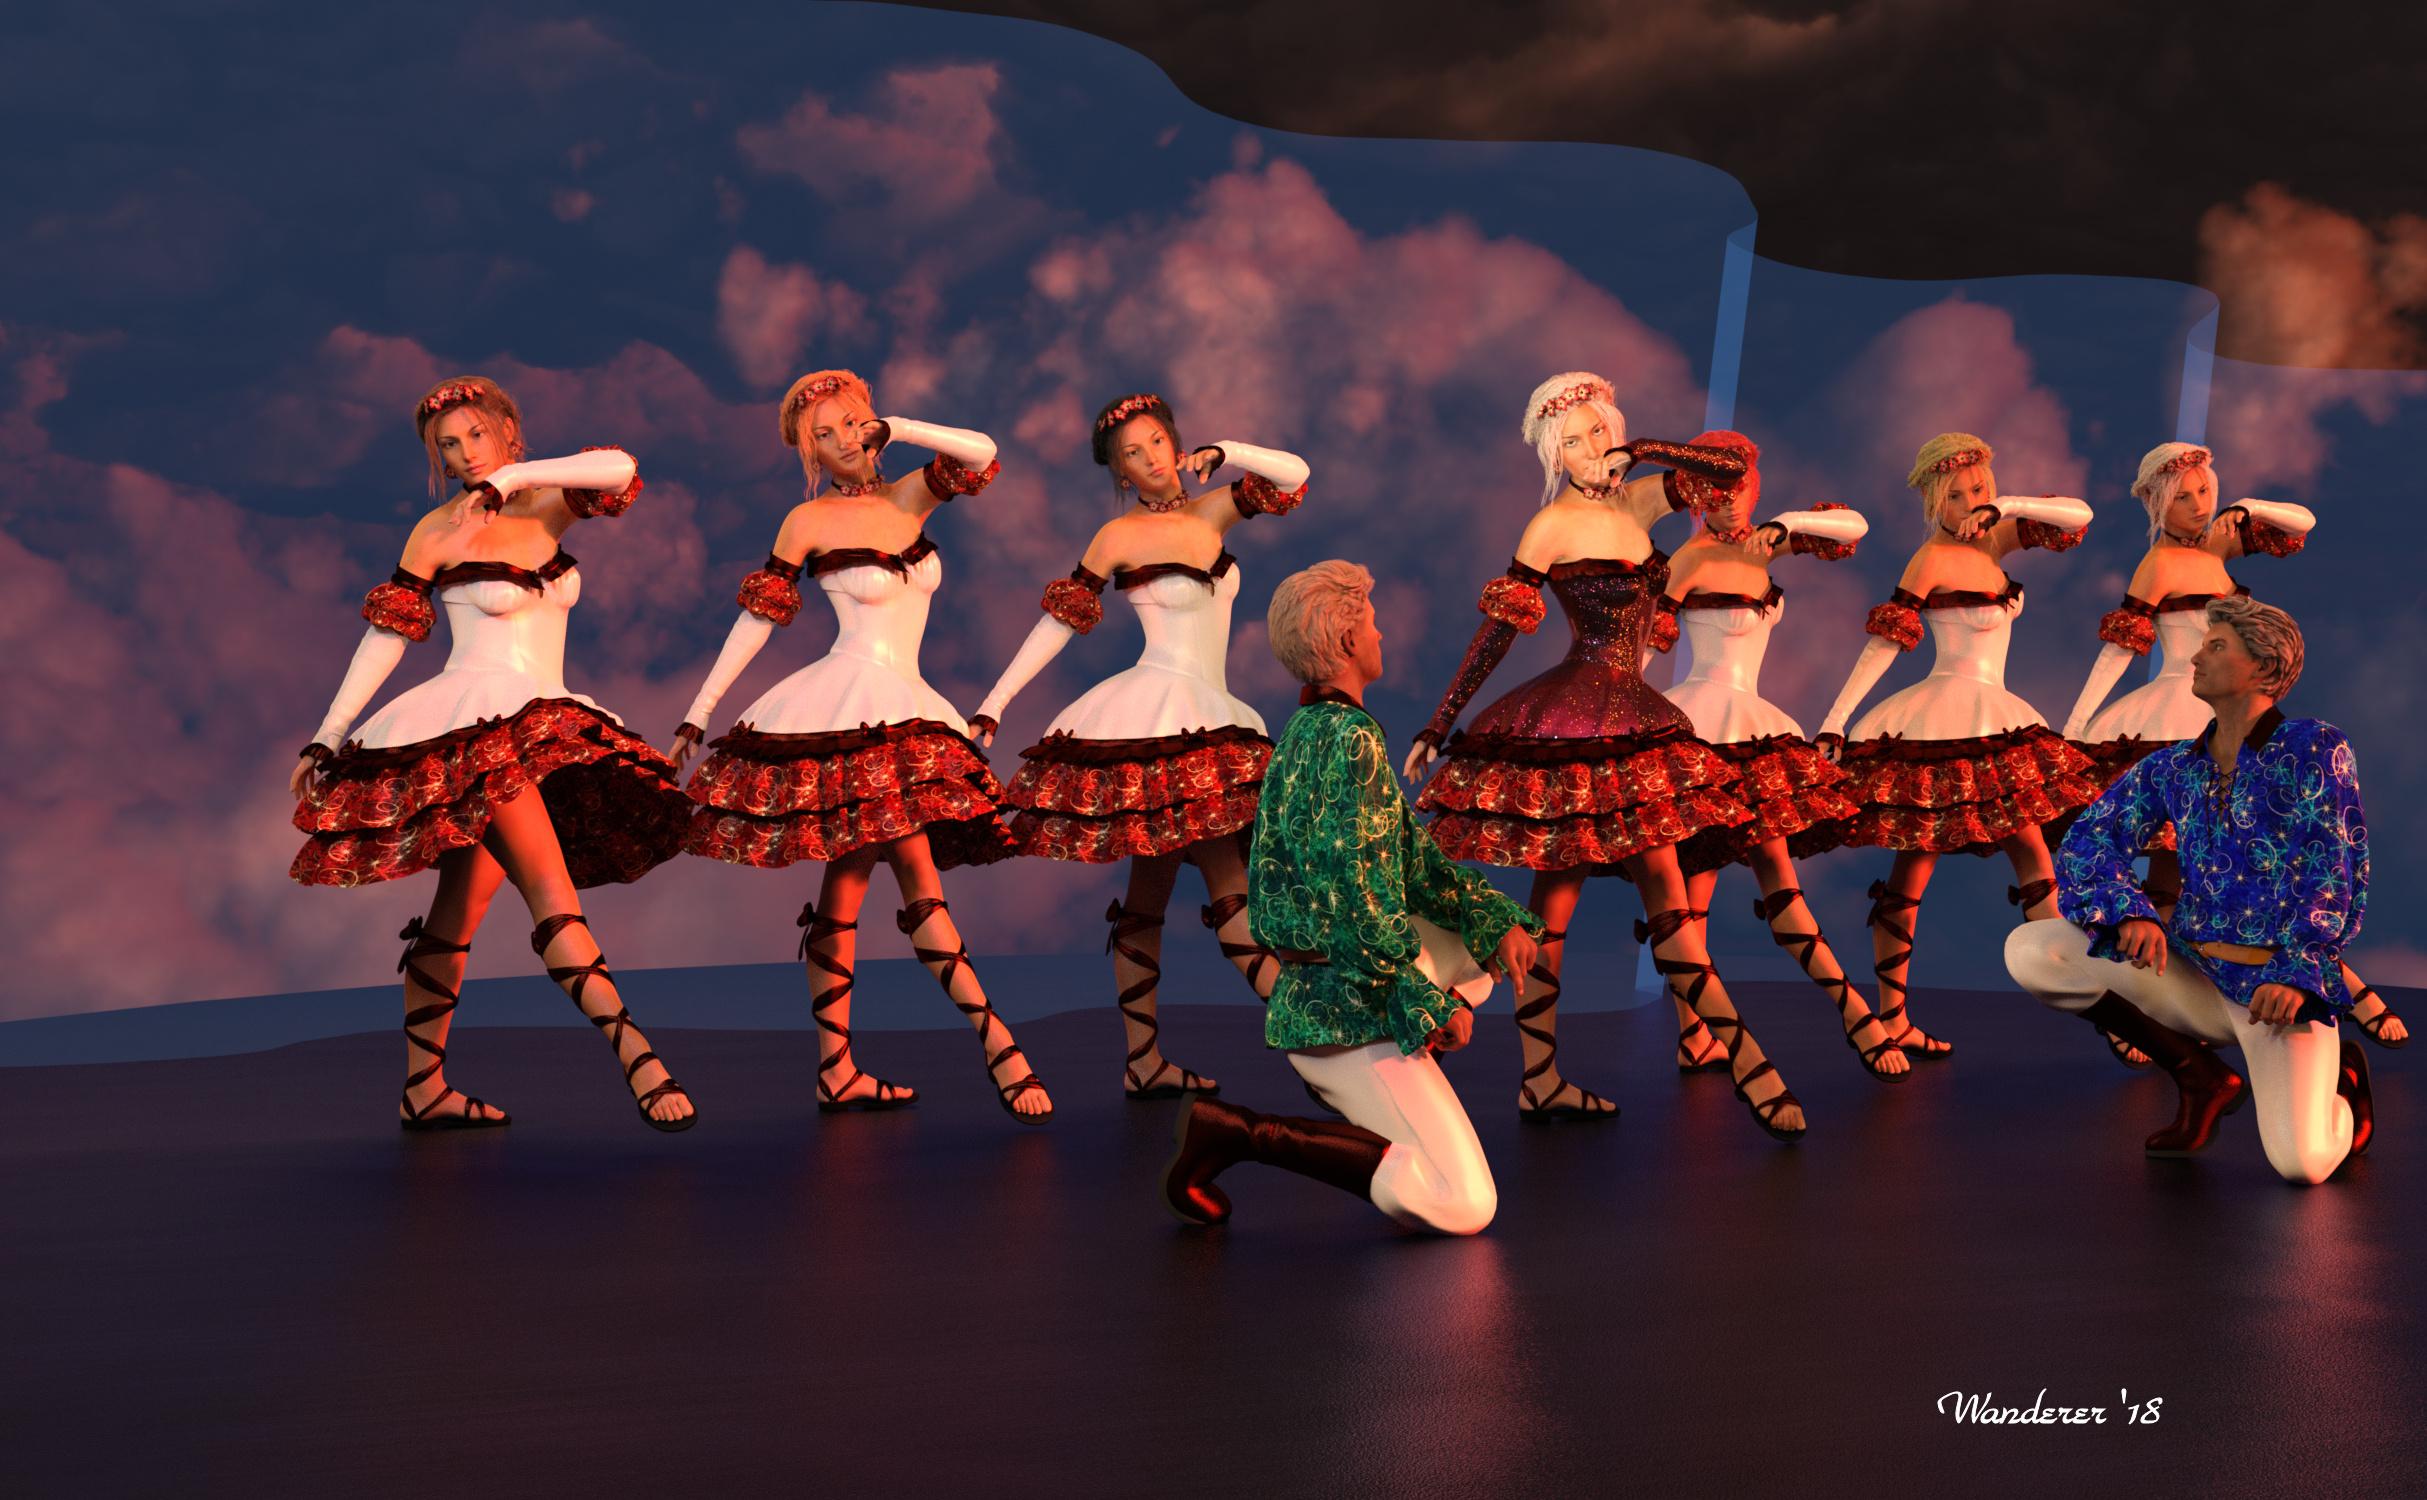
Riversoft Art Product Used: Pose Randomizer
Accompanying Text (the winning factor):
When Pose Randomizer (hereafter refered to as PR) was first released, I saw the potential in such a great product and purchased it immediately. Even though I'm still very noobish, I knew right away how and why I would use it, and here I've demonstrated that use in my entry. When doing any sort of dance scene, nothing suggests failure to my eye faster than a group of dancers all posed perfectly in sync without realistic variations. Just look at the images in this link from the March New User Posing Challenge, but doing all that posing is hard, tedious work. After 4 or 5 meticulous figure posings, time becomes a serious limiting factor, as can system resources on one's computer. PR to the rescue!
I've had a scene like this in my head for some time, but I was working toward having enough knowledge and skill to do it some justice. PR enabled me to focus on everything but the minutia of attempting to pose so many dancers with just enough variation to approach verisimilitude. In putting my entry together for this contest, I deliberately chose to minimize my resources to highlight the way Riversoft's product really shines. So, apart from cameras, lighting, and stage, inspired partly by this image, I've really only used two outfits (Hanami Outfit and Troubadour), two hairs (Fraser for G2M and Anjou for G3F), and two figures (G2M and G3F), with different textures to help make the illusion a little more believable. I think it turned out great, and Riversoft Art made it achievable with a lot less time and labor--and, I think to a much better end, than would otherwise have been possible.
After creating my first female character with base pose, clothing, and hair, I duplicated node hierarchies to make seven identical ladies. Since I needed variety across the forms, I couldn't simply use instancing. I then used another merchant's product to randomize the morphs for each figure to help them look more like individuals. I changed textures for the clothing and hair, and carefully crafted some variety into the hair strands. I went to my first lady, brought up the PR script to vary her pose, selected a lower percentage, and applied. At this point, my old computer was moving more slowly with so many figures on stage at once. Rather than needing to play with each body part on every figure over a long and painful process, it was as simple as point and click. Check the preview before applying. Approve. Wait only a moment. Choose next figure. Point and click. I did the same thing with the males and applied variation in pose for each figure after using shift-y to mirror the original pose. In the end, I only needed to make a very few adjustments to compensate for places where limbs clipped clothes or the stage slightly. The only alteration I made to any pose after hair and slight post-pose corrections was to aim the lead ballerina's eyes at the camera.
I'm convinced that this tool saved me a great deal of production time and resulted in greater organic fluidity than I'd likely have achieved myself. Just look at the lead's toes and compare them across all seven ladies (okay, sorry, a few are hidden). That is the kind of subtle difference that arose spontaneously out of using PR. The kind of loving, careful craft required to manually massage that sort of detail out of seven roughly identical figures is highly time dependent and labor intensive, and honestly wears on one's passion for the project. Imagine now doing a scene with 15 or 20 such figures. I can, thanks to Riversoft Art and Pose Randomizer.
Thank you for reading and looking at my work.
Okay, one of the parts that readers might not be familiar with is the duplicate node hierarchies command in Daz Studio. If you want to duplicate an object or figure in your scene without having to go and create something new again, you can go up under edit, go to duplicate, then choose node(s). But if you have a figure with hair, clothes, pose already applied, and you don't want to fool with instancing because you need to alter a few details, you can go below the previous menu item to duplicate node hierarchies, and that will make an exact copy of whatever figure and parented items you have selected in scene. I'm sure there are things about it that I don't know, but I learned how to do this last month while working on the new user challenge. I was able to put this technique to good use in this scene for the reasons I stated above.
Red Gold Blue: The Purification of Old Town
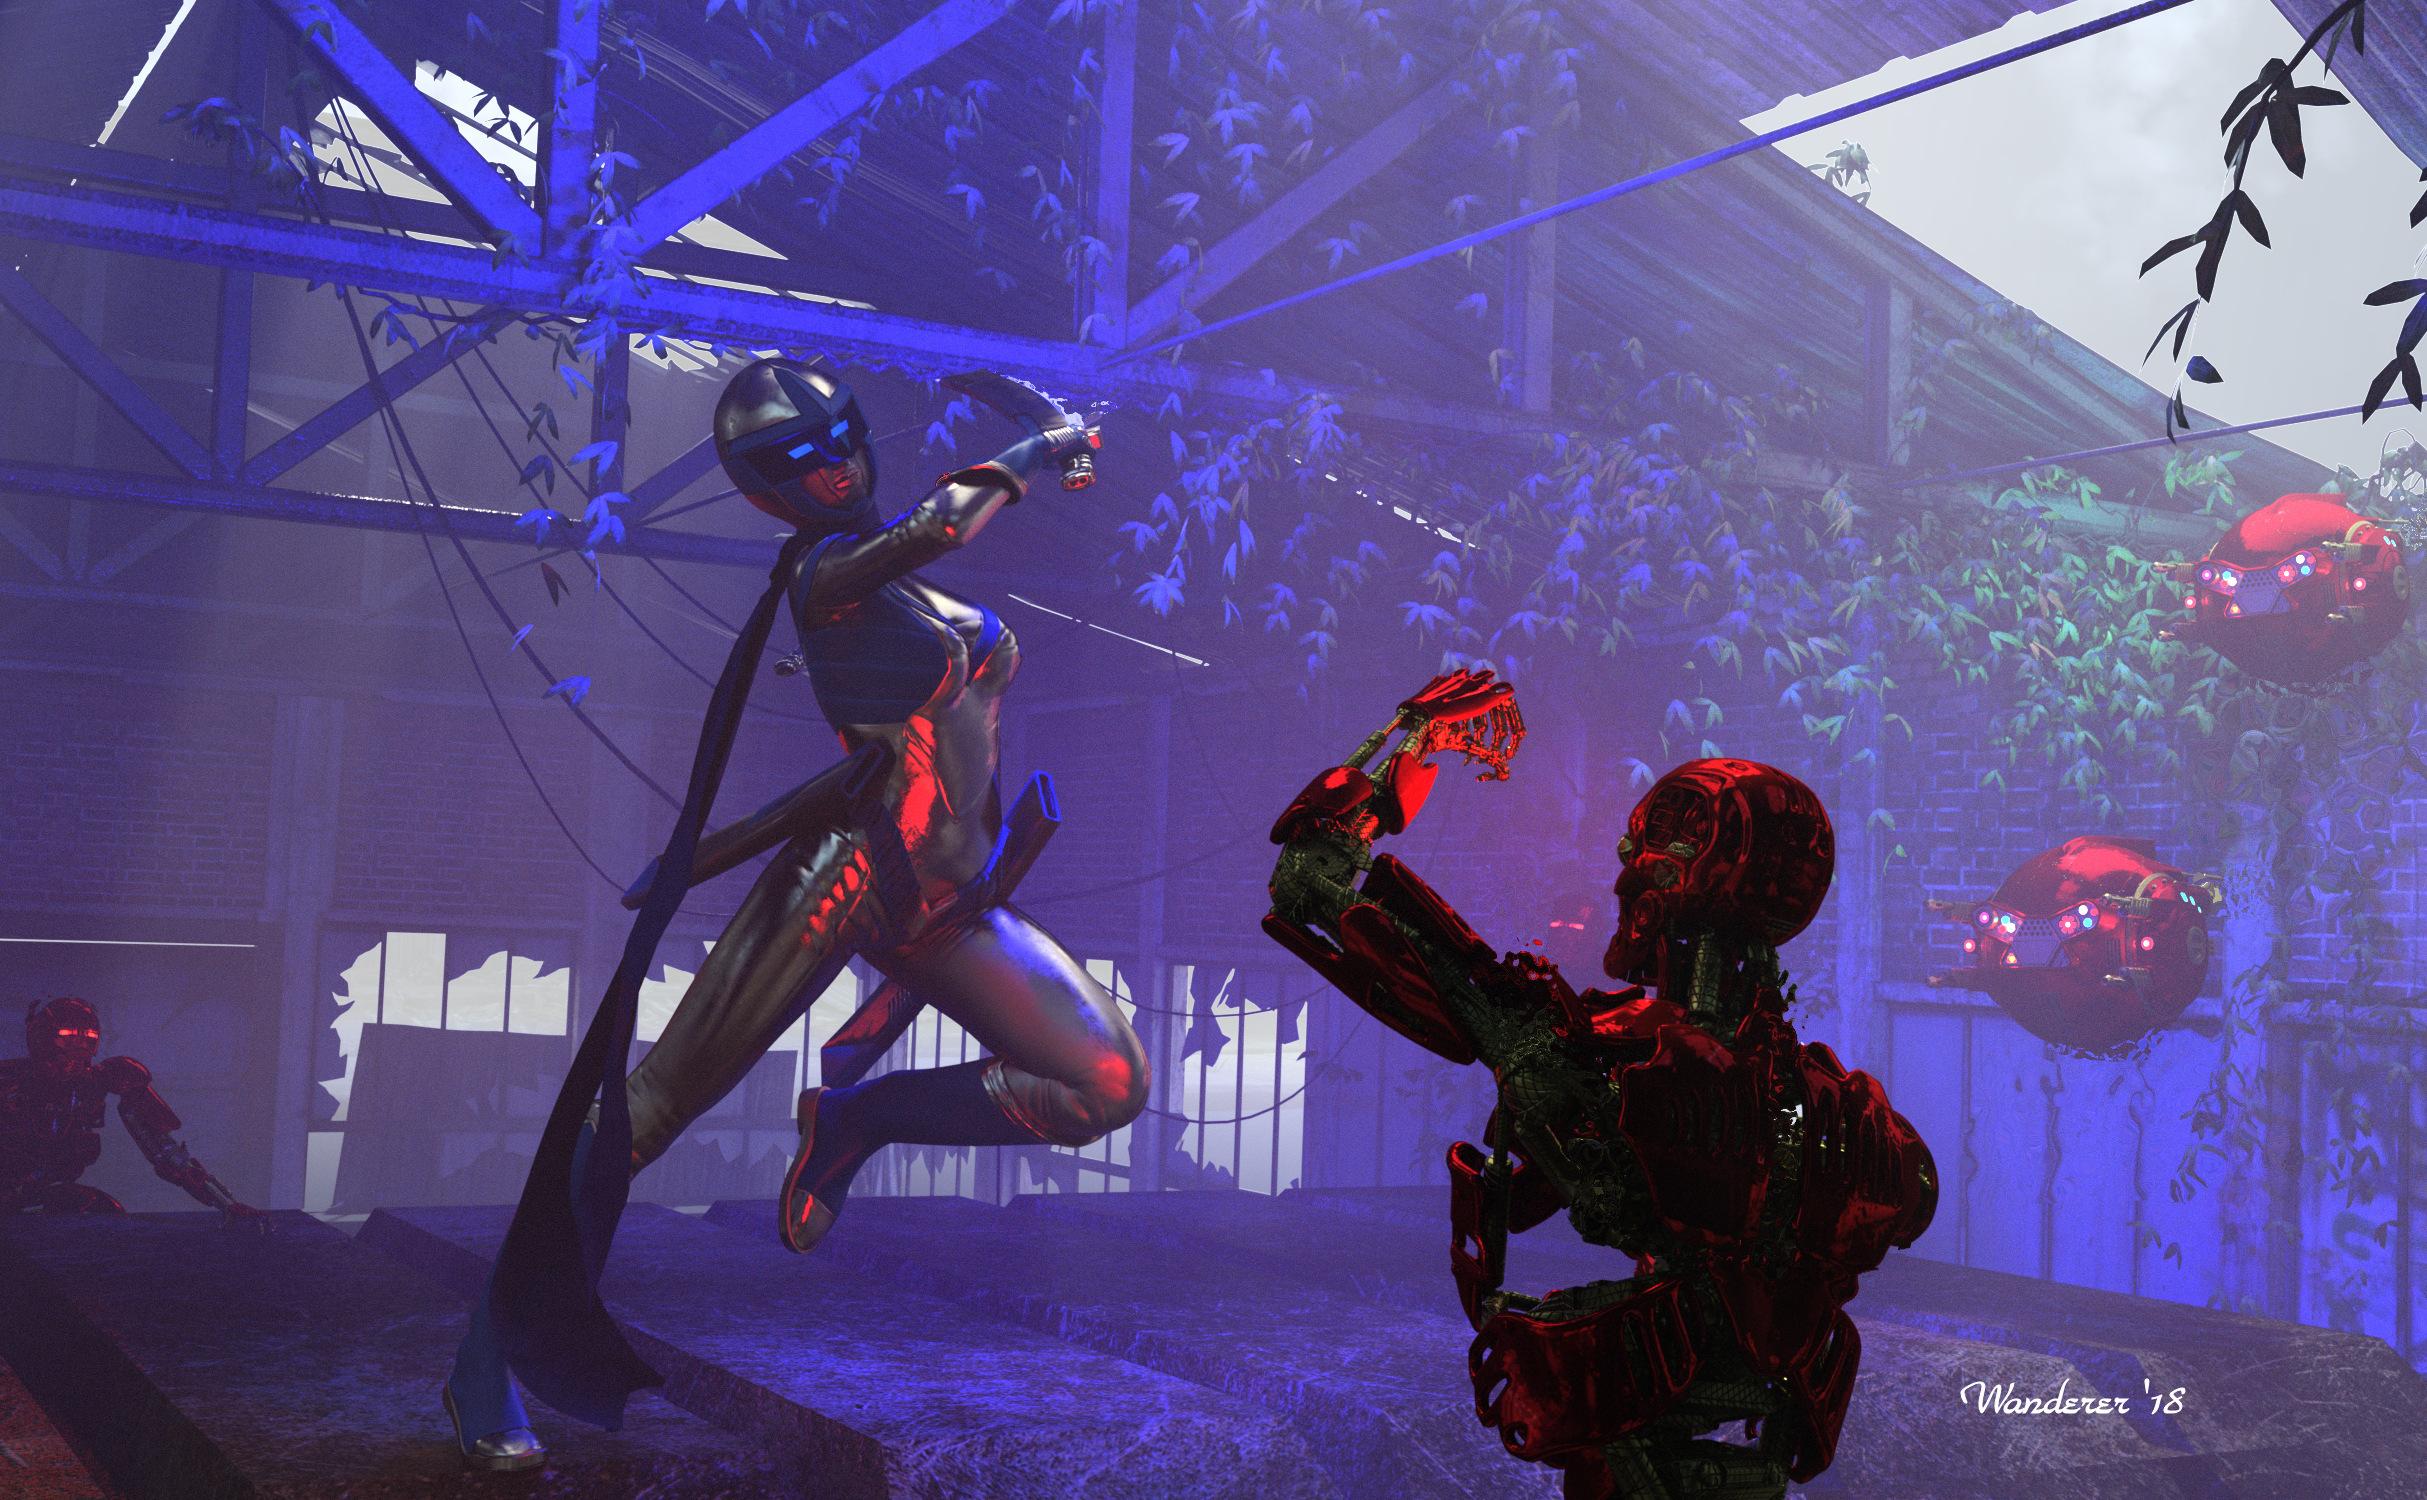
My final version of my first image entered in the April new user challenge. I've gone toward a more unrealistic lighting for a specific reason/inspiration. I'm proud of the heat shimmer effect I achieved on this in Photoshop post-work. I'm glad that @IceDragonArt has encouraged me to do more to familiarize myself with those tools. There are so many really good images this month. It's really humbling to be compared to such great artists as those .
Winter Gives Way to Spring
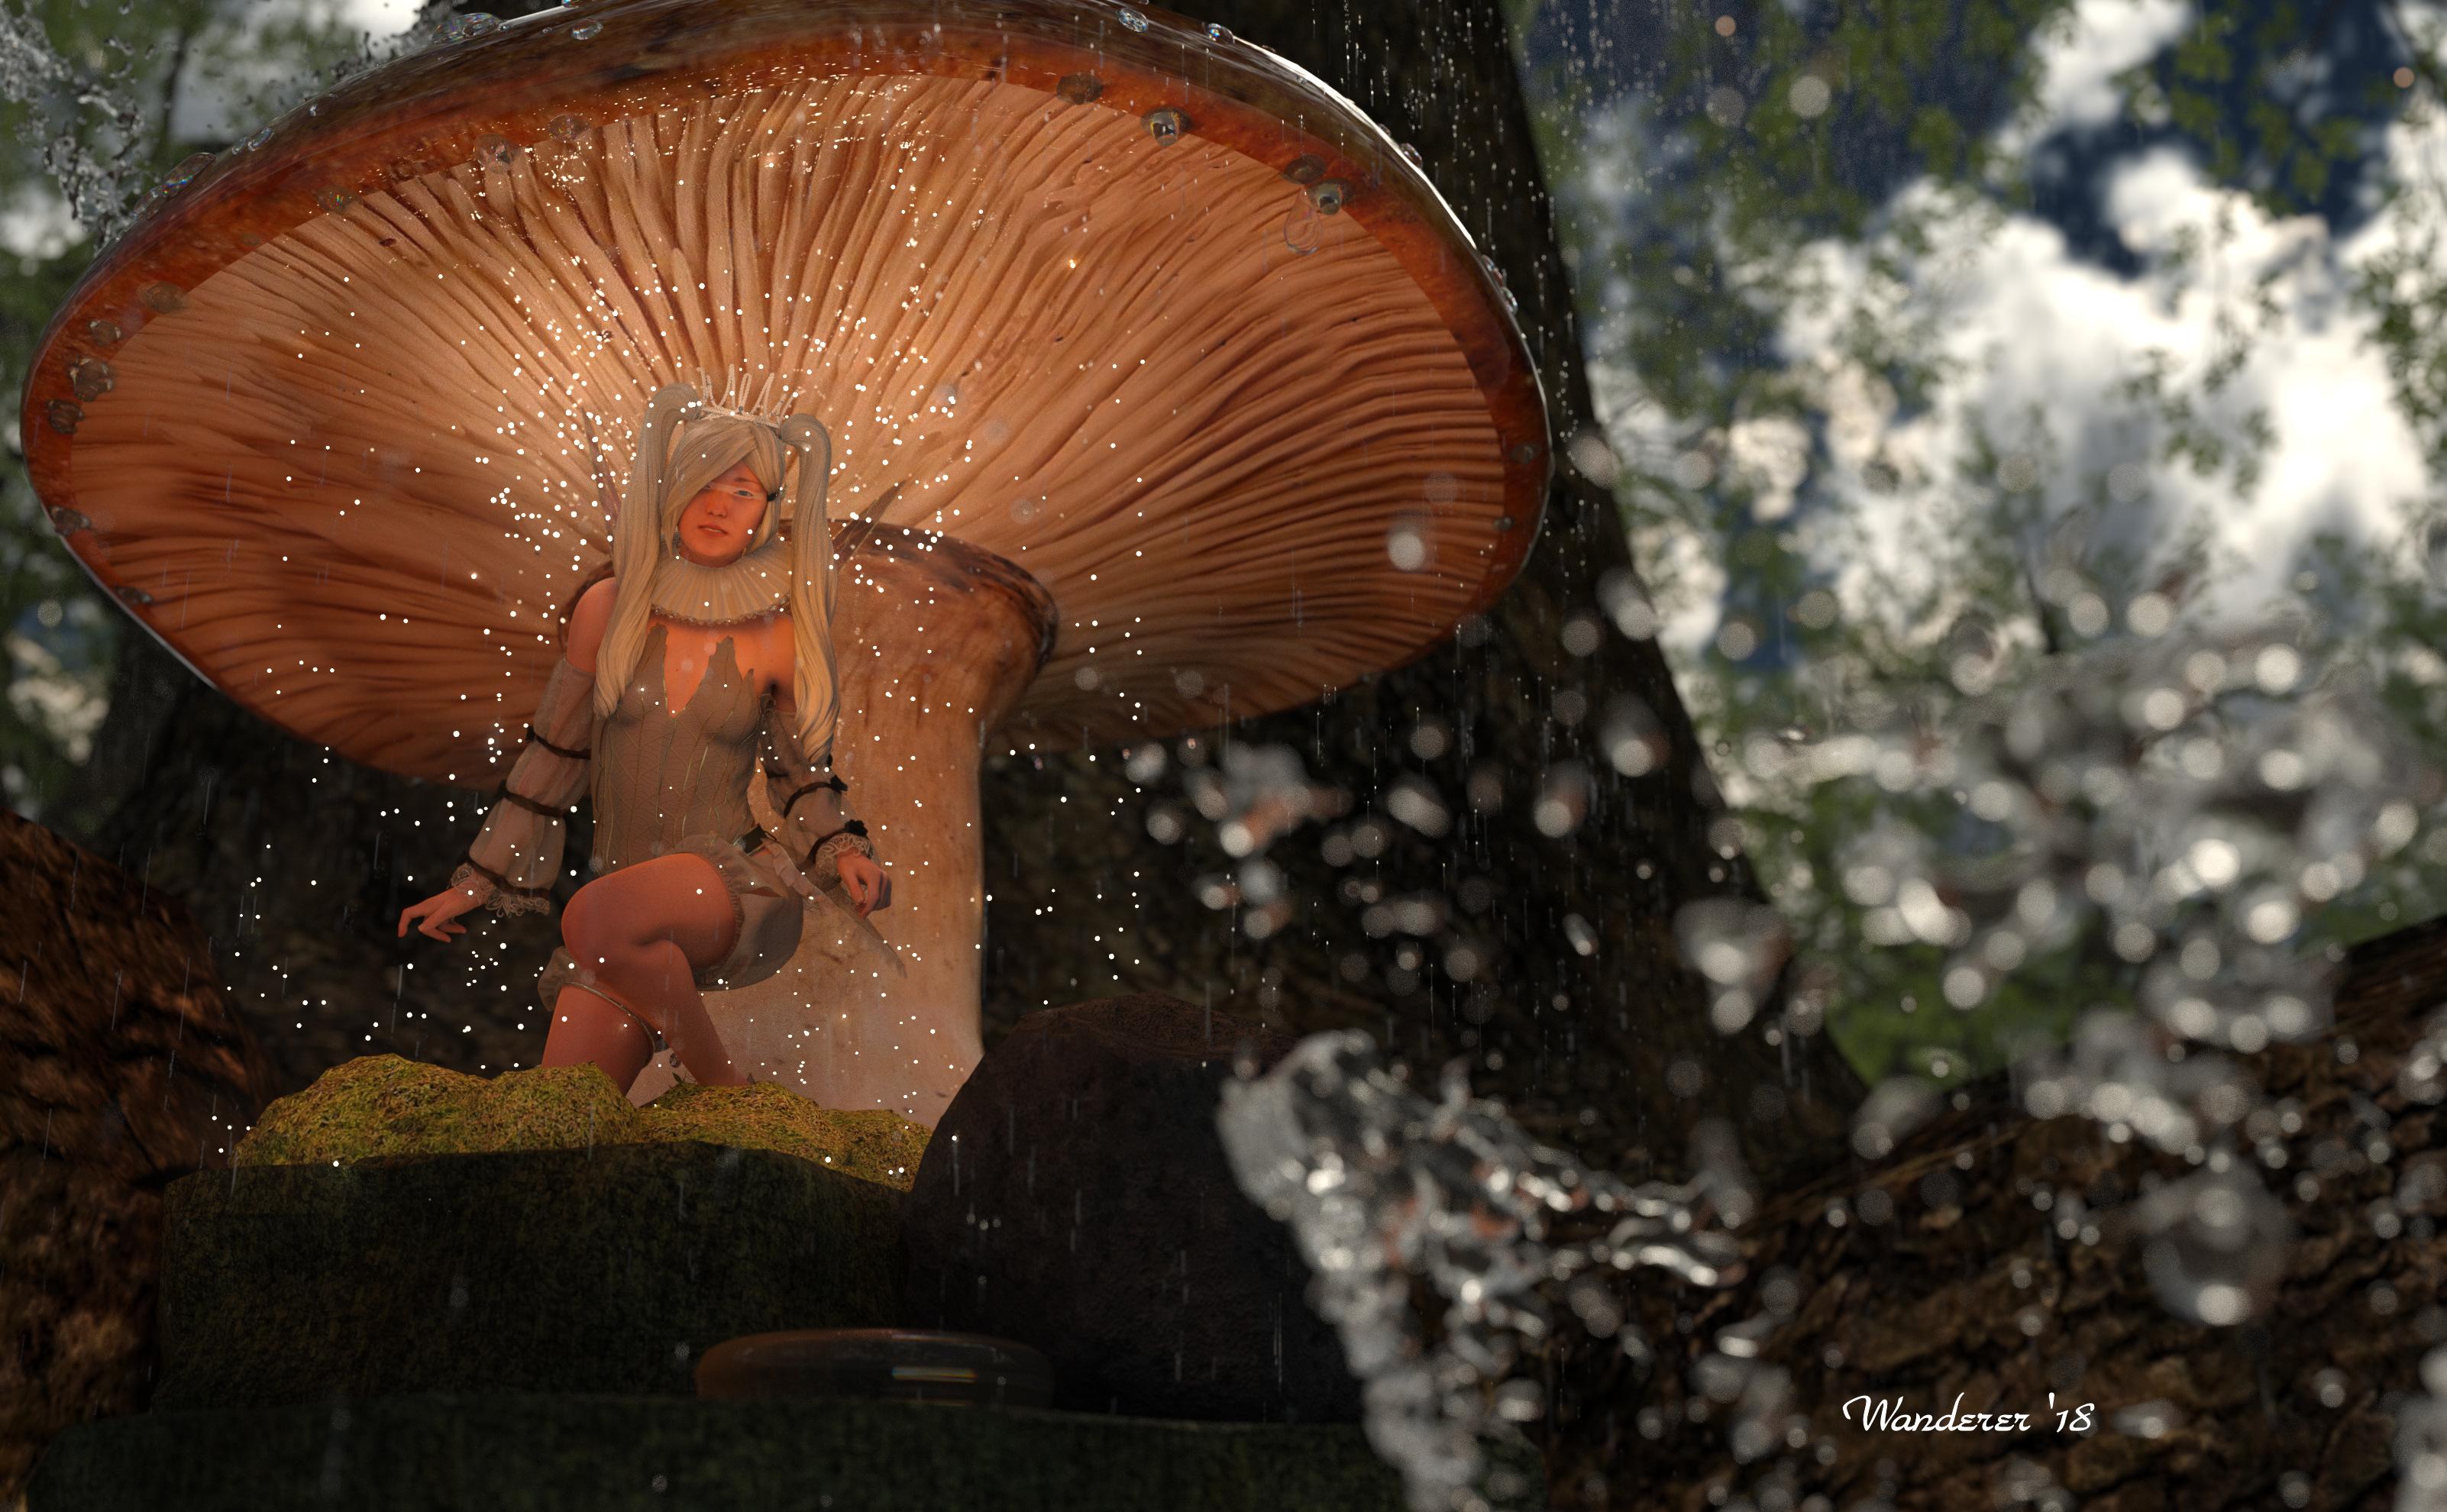
My final version of the second image I did for the new user challenge. I was very much inspired by the works of @IceDragonArt to create this.
My 2 Freebie Entries for the "April Showers Bring... " Challenge:
Entry 1:
Risk of Romance
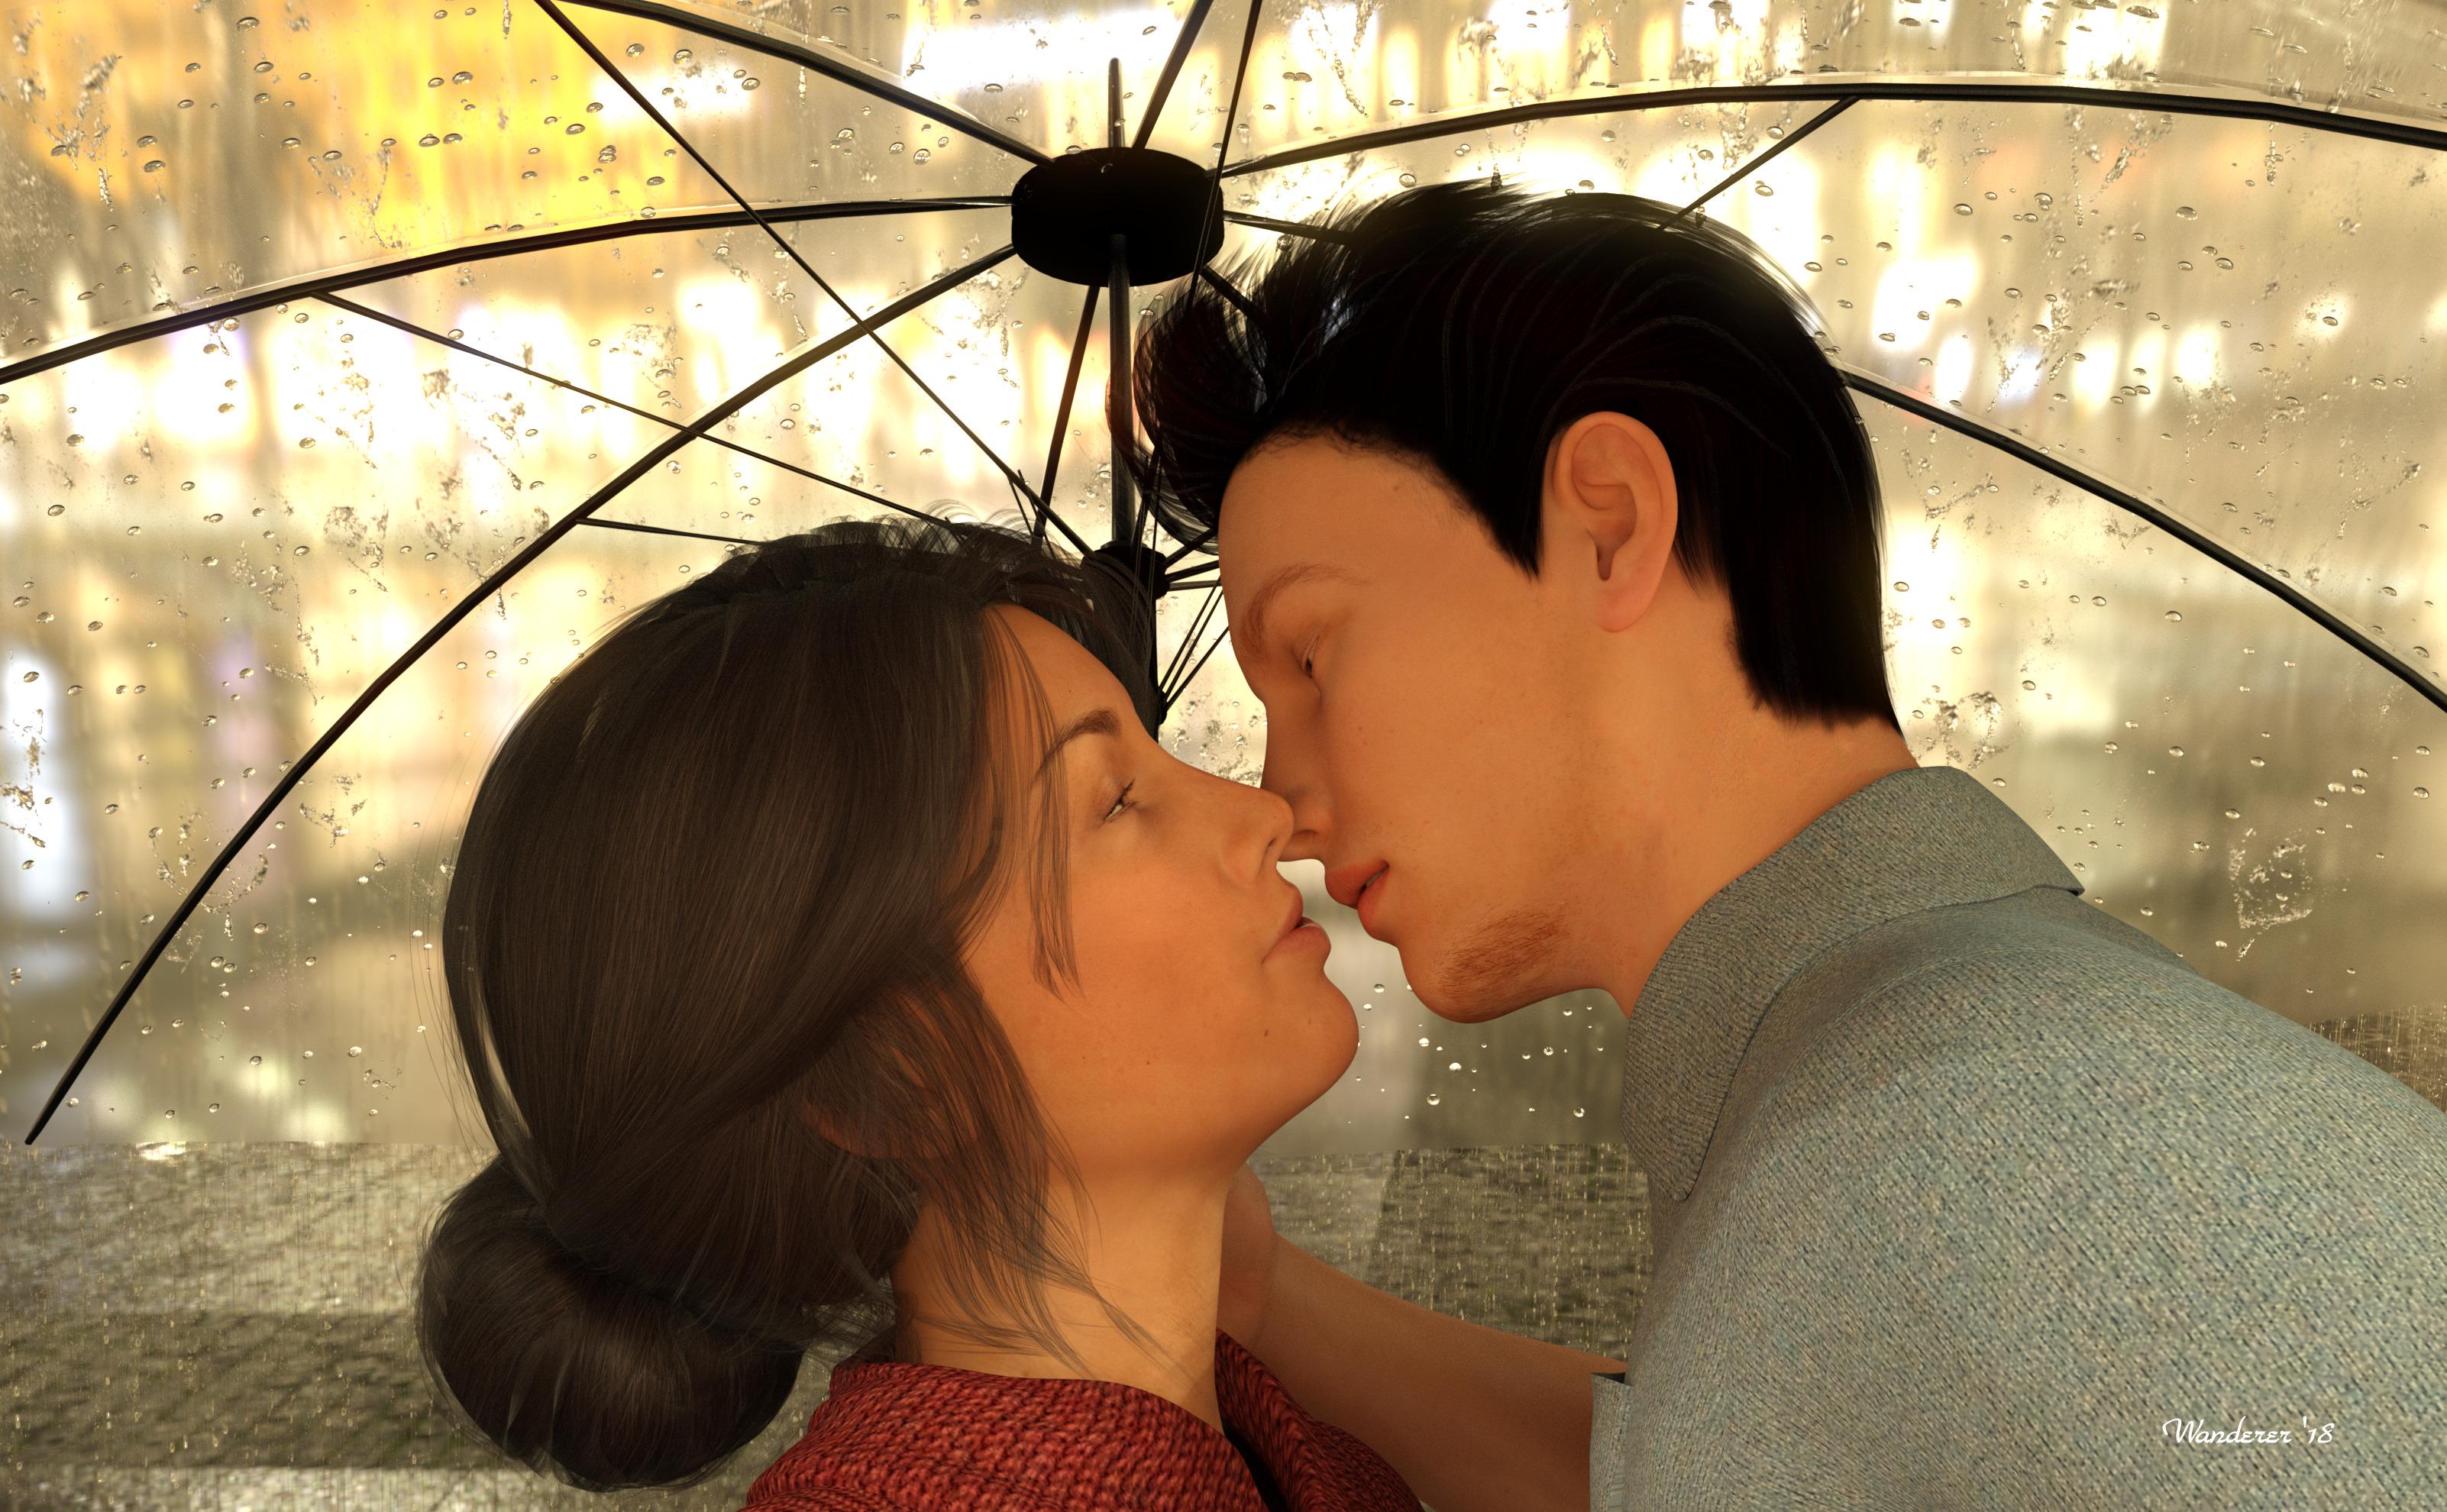
Free List:
1. HDRI Rathaus
2. Gwennili Hair for G3F by kayleyss (color altered by me in shader settings)
3. Translucent White Plastic Shader (applied to outside surface of umbrella with settings tweaked by me. Translucency Weight: 1/Glossy Roughness .09/Refraction Weight: 1/Refraction Index: 1.06)
6. Armani Hair for G3M from Genesis 3 Starter Essentials.
Paid:
1.Umbrella: Yamaki Victory Lane (uber shader conversion and clear plastic shader in free item list)2. i13 Romance & Rescue Pose Collection couple poses used as a base with several modifications
3. Creative Water 3d Splashes by OoT
4. Ultrascatter Advanced Instancing by HowieFarkes (used to apply 2000 instances of water droplets modeled by me and almost 600 splashes from the Out of Touch resource listed)
5. Iray Rain by KindredArts Rain and puddle system which worked spectacularly with the HDRI's from the resourse listed above, but some HDRI's are better than others for this.
No Count:
G3F (Uber Iray Base conversion with settings tweaked slightly by me)
G3M (Uber Iray Base conversion with settings tweaked slightly by me)
Water Drops modeled by me in Anim8or (shader applied from OoT water asset above)
Uber Iray Shader (applied to both characters and umbrella)
Primitive Cylinder (used to patch the place in the umbrella where the ribs did not come together at central pole)
Primitive Plane (used to create lighting enhancement using Uber Iray Base shader with settings tweaked by me)And my second entry:
Lovecraftian Horror
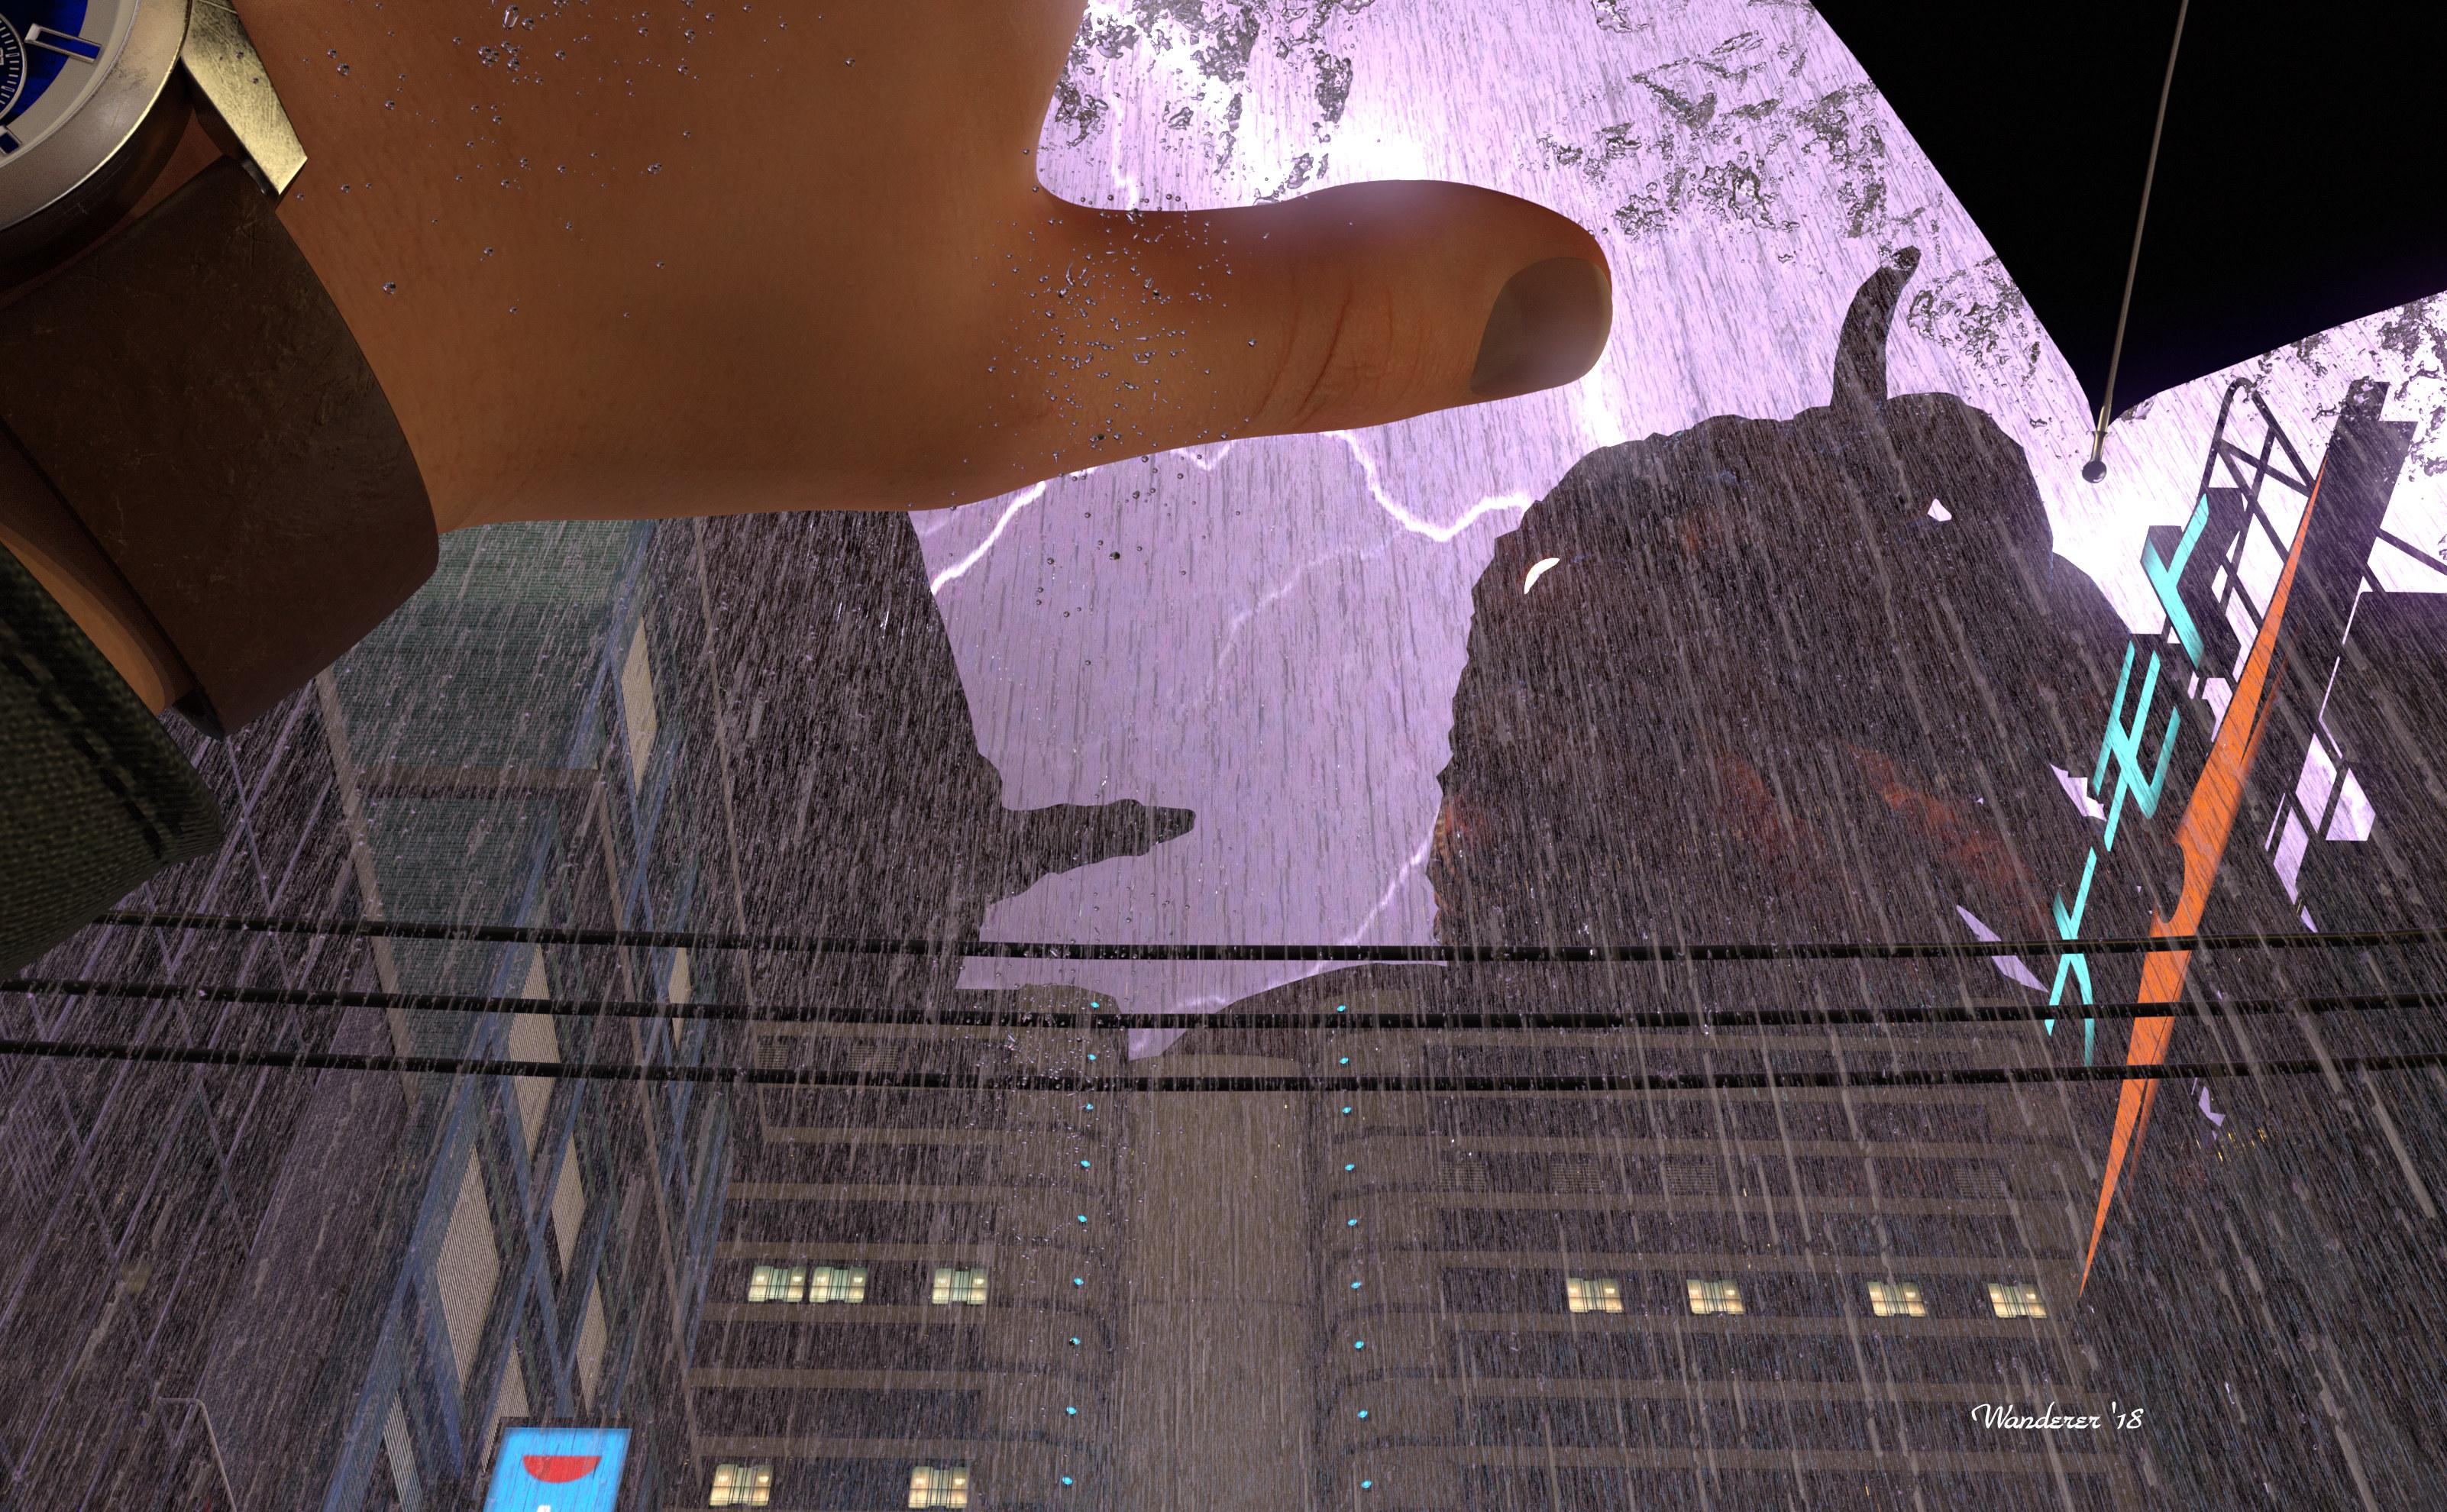
Free:
1: Urban Streets of Tomorrow by sfman here.
2. HDRI Zwinger Night from HDRIHaven: (environment intensity turned way down)
3. Lightning Bolt JPG (applied to plane with emissive output)
4. His Shirt (DSC Shirt) - From DS Creative Magazine, v 24, p 23.
5. Wristwatch Prop.
6. UmbrellaPaid:
Cthulhu by Luthbel
Iray Rain by KindredArts
Ultrascatter
Creative Water 3D Watersplashes
Mec4D PBS Shaders V2 for Iray (shaders for watch and umbrella)No Count:
G3M
Water drop on tip of umbrella spoke modeled by me in Anim8or with shader applied from OOT's resource aboveI wanted to talk about my process in some of these, but I actually was so far behind that now I've said all this, I'm not sure anyone would still be reading at this point anyway. Oh well. If anyone has any suggestions about how I might improve any of these, while it's too late for the challenges, I'd still love to hear the opinions of others. If you did read all of that, thank you.
Daz 3D is part of

Connect
DAZ Productions, Inc.
7533 S Center View Ct #4664
West Jordan, UT 84084Licensing Agreement | Terms of Service | Privacy Policy | EULA
© 2026 Daz Productions Inc. All Rights Reserved.