-
The right way to export Victoria 4 into, and out of Daz?
WendyLuvsCatz said:
well unlike Genesis+ you don't have to export all of the mesh, just the head
(with eyelashes etc, whole head)
as all body parts are separate meshes by bone name
you then reimport that mesh using morphloader specifying its the head (or whatever other part under attenuate I think (read or watch a tutorial been a while and I used Poser or Carrara personally)
eyes and mouth you can move the bones manually to fit (again separate meshes)
creating ExP injection files is another load of fun (I have done it but following DAZ documentation tutorials)
It took me a while to figure out how to move the eyes and mouth in Daz. It's just a shame that it isn't possible with the eyelashes. Because then everything thing could be corrected in Daz Studio.
Alas, no.
crosswind said:
1. Even with Genesis figures, you don't have to hide or delete anything, just use Filter Objects option when exporting OBJ ( DS version 4.12+, IIRC...). The same settings apply for V4 when exporting to OBJ, there's nothing special.
2. V4 has no multi-resolutions by default. Leave it alone if you did not convert it to SubD beforehand.
3. If you use FaceForm Wrap, as the floating geometry, V4's vertex positions must have change after wrapping. Then when importing OBJ with MLP, you'll get the delta with no problem, just by using Reverse Deformations + Deltas Only.
4. As per my exp., with wrapping V4/G2, in FaceForm Wrap, 1) hide eyelashes, inner mouth, gum, eyes related surfaces, etc. on the floating and fixed geometry with the nodes of Selection Polygons and Subset; 2) Add a Brush Node after Wrapping node to smooth / tweak any distortion / displacement.
5. After importing OBJ into DS, if there's any rigging issue on eyeballs / mouth cavity, etc., re-rig them as needed.
Attached is my attempt. I managed to reposition the eyes. But the Lacrimal, lashes, and eye sockets have "dropped". I've tried to fix everything in Blender, but when I try to import it through MLP into Daz, I get the "missing deltas" message.
As a quick test. I even created a morph for V4.2 in Blender. When I tried to load the morph through MLP, "No deltas".
No matter what I do, everything just comes up as having no deltas. Right now, I feel like smashing my face into a blender - turned up to full.
NylonGirl said:
That is two cats in a row.
It'd be three, but my boy doesn't stay still for very long ^^'
Thank you for the replies.
Certain object can't be imported using morph loader.I've use morph loader very frequently.
But currently I'm facing certain object that's somehow throws error when imported back using the obj from blender.
If I exported the object out and reimport back again using morph loader, no problem.
But the same object exported to blender, done nothing, exported, and imported back to DAZ, there's a problem.THe errors say:
Error maching facet
Geometry did not match, failed to create morph.The object is already base res
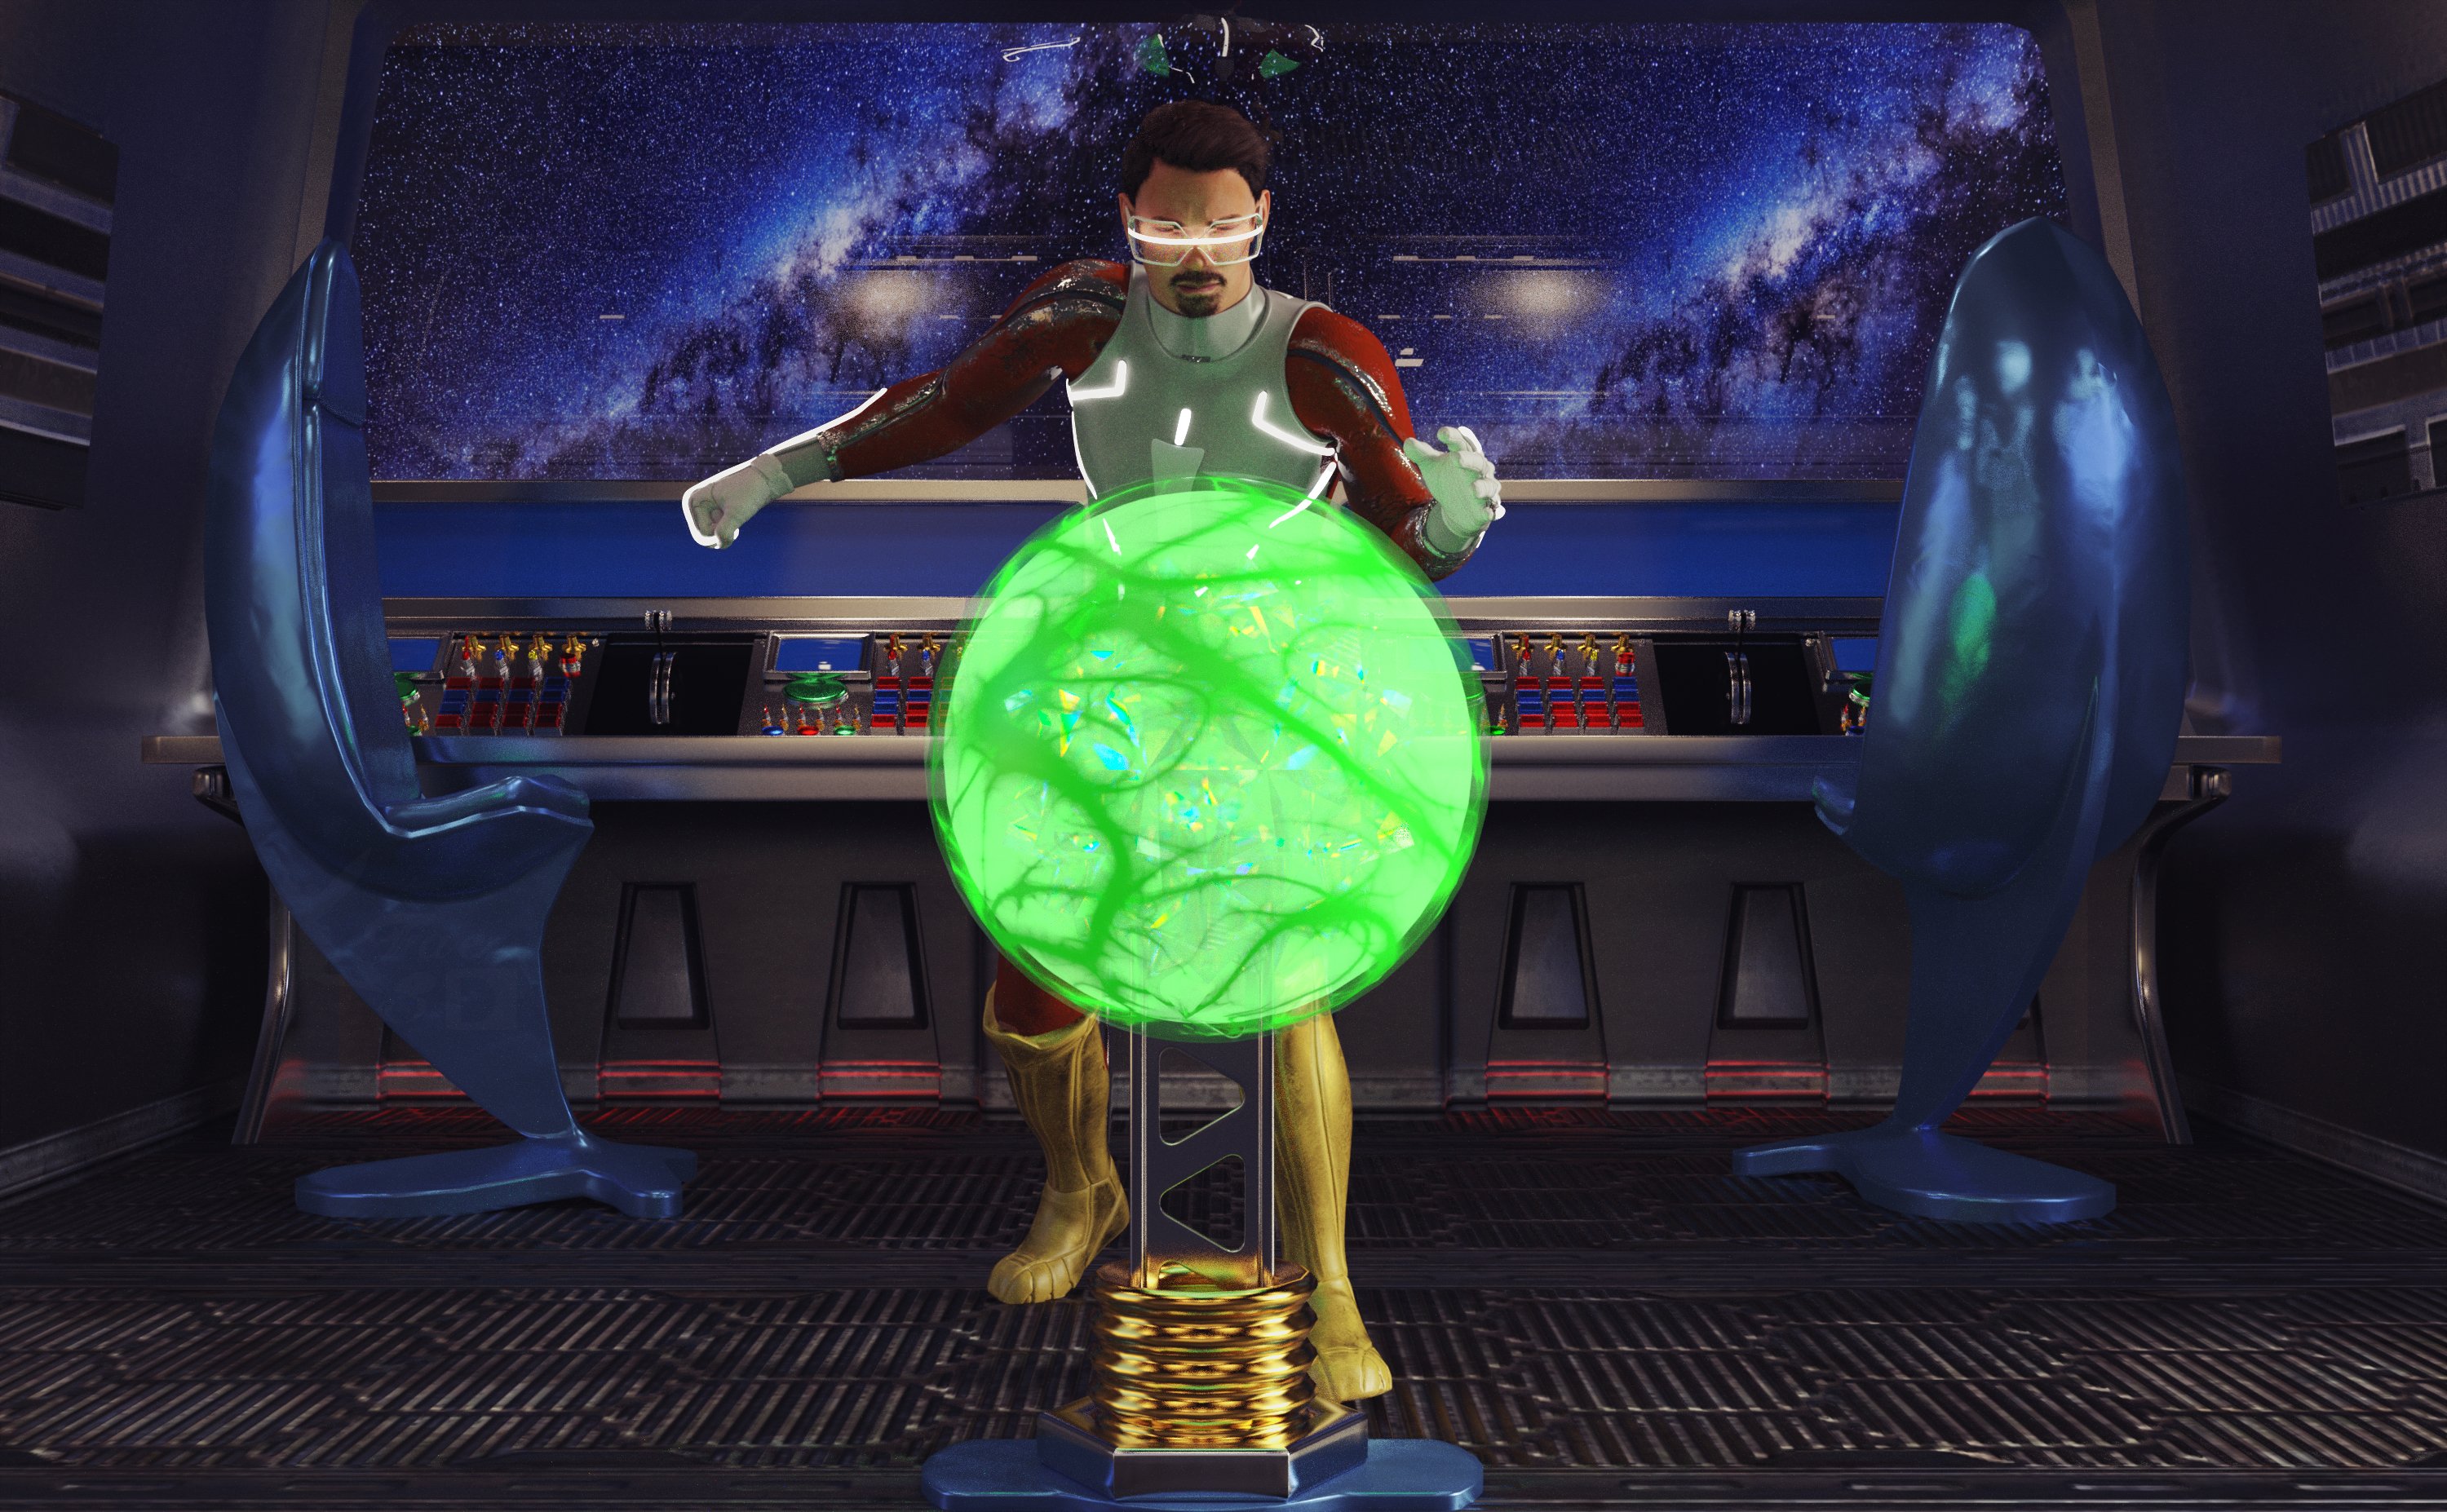
Freebie Challenge March 2024 - "Power Source" - Entries ThreadStealing the Power Core
No one else was on the ship, they had all fled to the escape shuttles when all the emergency alarms went off. Of course, he had been the one to trigger them. The traitor was alone, no one had noticed that he had remained behind. Now was his chance - the brand new, secretly developed power core was unguarded and ripe for the taking. With the fortune he would make from selling it on the black market, he knew he would be able to retire to any planet he desired!
Freebies:
Anakin Skywalker for G8M and G8.1M (Character Morph) - https://www.deviantart.com/shinteo/art/Anakin-Skywalker-for-G8M-and-G8-1M-873019338
Walther G8M (materials) - https://sharecg.com/v/92848/favorite/21/DAZ-Studio/G8M-Walther
S.EXE Full Outfit G8F - https://www.renderosity.com/freestuff/items/96378/sexe-full-outfit-g8f
Sci-fi Suit for Gf8 - https://www.renderosity.com/freestuff/items/88617/sci-fi-suit-for-gf8
Panther Gloves G8M - https://www.sdebstore.com/collections/free-stuff/products/panther-gloves-g8m-free
Batgirl for G8F and G8M dForce (Boots) - https://sharecg.com/v/94473/browse/21/DAZ-Studio/Batgirl-for-G8F-and-G8M-dForce
Cyber Glasses 2 - https://www.renderhub.com/mbit/cyberglasses-2
Every Day Style Hair (and beard) G8M - https://www.renderhub.com/zoro-d/everyday-style-hair-for-genesis-8-males
Glowing Eyes - https://sharecg.com/v/99763/browse/21/DAZ-Studio/Glowing-eyes
The Brawl! Poses for G8M - https://www.renderosity.com/freestuff/items/84898/the-brawl-poses-for-g8m
Unsplash Space BG (I don’t remember which one, sorry!) - https://unsplash.com
AAL Plasmaball (Glowing Core) - https://sharecg.com/v/74972/favorite/21/DAZ-Studio/AAL-Plasmaball (This thing is really useful!)
Ghastly's Sci-Fi Sets - https://sharecg.com/v/93518/gallery/21/DAZ-Studio/Ghastlys-Sci-Fi-Sets
Iray Jewelry Shaders (On just about everything except the character) - https://sharecg.com/v/95893/favorite/21/DAZ-Studio/Iray-Jewelry-Shaders
No Count:
Tetrasphere (It's inside the sphere for colors) - https://www.daz3d.com/forums/discussion/541886/the-january-2022-render-challenge-glass/p2(scroll down a little over half way)***Works for me but not for someone else, so unsure***
Space Station Window - Can’t find anymore, was free when I got it (I used this once before and forgot that it was no count, lol!)
Paid:
None
Lighting is the default HDRI light and point lights in Daz Studio. I tweaked the materials, the lights and the pose. Set up and rendered within Daz Studio Iray. Postwork in Pixelmator Pro.
I’ve attached the before post render (the one that says Raw Render) and the finished image file.
which v4 is better to load?Moved to Technical Help as it is a content question, not a Daz Studio question.
They are not different versions of the figure, they are different morph sets which can be toggled on or off independently. Which is better will depend on what you are doing.
Remove Items from 'Lost and Found' TabI have purchased 'Face Transfer' and I have saved many characters using the 'Save Face...' function.
When I was new to DAZ I didn't know how to properly delete some of these characters (I have since learned to do it the right way).
But back then I just deleted the files, causing DAZ to move them to the 'Lost and Found' tab (see pic below).
Even though it's not important, is there a way to remove these items from the tab so it's empty?
Thanks for any help! :)
Freebie Challenge March 2024 - "Power Source" - Main ThreadFae3D said:
Stealing the Power Core
No one else was on the ship, they had all fled to the escape shuttles when all the emergency alarms went off. Of course, he had been the one to trigger them. The traitor was alone, no one had noticed that he had remained behind. Now was his chance - the brand new, secretly developed power core was unguarded and ripe for the taking. With the fortune he would make from selling it on the black market, he knew he would be able to retire to any planet he desired!
Freebies:
Anakin Skywalker for G8M and G8.1M (Character Morph) - https://www.deviantart.com/shinteo/art/Anakin-Skywalker-for-G8M-and-G8-1M-873019338
Walther G8M (materials) - https://sharecg.com/v/92848/favorite/21/DAZ-Studio/G8M-Walther
S.EXE Full Outfit G8F - https://www.renderosity.com/freestuff/items/96378/sexe-full-outfit-g8f
Sci-fi Suit for Gf8 - https://www.renderosity.com/freestuff/items/88617/sci-fi-suit-for-gf8
Panther Gloves G8M - https://www.sdebstore.com/collections/free-stuff/products/panther-gloves-g8m-free
Batgirl for G8F and G8M dForce (Boots) - https://sharecg.com/v/94473/browse/21/DAZ-Studio/Batgirl-for-G8F-and-G8M-dForce
Cyber Glasses 2 - https://www.renderhub.com/mbit/cyberglasses-2
Every Day Style Hair (and beard) G8M - https://www.renderhub.com/zoro-d/everyday-style-hair-for-genesis-8-males
Glowing Eyes - https://sharecg.com/v/99763/browse/21/DAZ-Studio/Glowing-eyes
The Brawl! Poses for G8M - https://www.renderosity.com/freestuff/items/84898/the-brawl-poses-for-g8m
Unsplash Space BG (I don’t remember which one, sorry!) - https://unsplash.com
AAL Plasmaball (Glowing Core) - https://sharecg.com/v/74972/favorite/21/DAZ-Studio/AAL-Plasmaball (This thing is really useful!)
Tetrasphere (It's inside the sphere for colors) - https://www.daz3d.com/forums/discussion/541886/the-january-2022-render-challenge-glass/p2 (scroll down a little over half way)
Ghastly's Sci-Fi Sets - https://sharecg.com/v/93518/gallery/21/DAZ-Studio/Ghastlys-Sci-Fi-Sets
Iray Jewelry Shaders (On just about everything except the character) - https://sharecg.com/v/95893/favorite/21/DAZ-Studio/Iray-Jewelry-Shaders
No Count:
Space Station Window - Can’t find anymore, was free when I got it (I used this once before and forgot that it was no count, lol!)
Paid:
None
Lighting is the default HDRI light and point lights in Daz Studio. I tweaked the materials, the lights and the pose. Set up and rendered within Daz Studio Iray. Postwork in Pixelmator Pro.
I’ve attached the before post render (the one that says Raw Render) and the finished image file.
"Tetrasphere" link is broken, but since you have enough freebies anyway:
Entry approved, please move to Entries Thread!
Weird 'hole' in clothing - Genesis 9crosswind said:
I think the culprit comes from the body shape / morph you dialed on this figure... if you find no issue after fitting jeans on Base figure. And you used auto-fit by the way? Yes, I used autofit
Yes, I used autofit but I get the same result when applying Genesis 9 clothing. The character is extensvely morphed, including my custom morphs but it was fine the day before. The other issue is that the problem is with the clothes not the body. Yet I have not done anything to the clothes....so I'm at a loss as to what the problem is...which is why I posted on this forum. I will try to recreate a duplicate figure using the same morphs to see which is causing the problem.
FBX doesn't match in other software - HELPAfter importing to C4D, go to Pose Morph, you'll find the corrective morph properties. Normally they'll be auto dialed.
G8.1 Morphs visible in parameters but don't workThat was it. Thanks for the detailed info.
PerttiA said:
Making the G8 base expressions (and any expressions that are using them) work on G8.1 requires removing dummy/placeholder expressions that are installed to G8.1 morph folders - These dummy/placeholder expression files have no other function than to prevent the base G8 expressions from loading.
The dummy/placeholder files are located in;
...\Data\DAZ 3D\Genesis 8\Female 8_1\Morphs\Daz 3D\Base Pose Head\ (255 files, can be more if you have additional DAZ expression packs)
...\Data\DAZ 3D\Genesis 8\Female 8_1\Morphs\Daz 3D\Expressions\ (24 files, can be more if you have additional DAZ expression packs)
...\Data\DAZ 3D\Genesis 8\Male 8_1\Morphs\Daz 3D\Base Pose Head\ (255 files, can be more if you have additional DAZ expression packs)
...\Data\DAZ 3D\Genesis 8\Male 8_1\Morphs\Daz 3D\Expressions\ (24 files, can be more if you have additional DAZ expression packs)Please make sure you are removing the files from G8.1 morph folders and not G8 morph folders.
Note 1; If you are logging in to DS and letting DAZ Connect (within DS) to install/update your content, you may have these also in an other location that has "\Data\Cloud\" in it's path
Note 2; Do not remove any files from "FACS" or "FACSExpressions" foldersTroubles when creating custom morph for G8F based on combination of other morph dialsAs Gordig says - apply your character, using the existing morph settings not the OBJ, and then right-click in the Parameters pane and check Edit Mode (if it isn't already checked)
- right-click in the group you want to hold your character (e.g. Actor>People) and select Create New Property
- In the dialogue that opens enter a name and label (the label is what appears in the property list, the name is the internal identifier which isn't user-facing and absolutely must be unique), usually turn on respect Limits and set the minimum to either -100% or 0 according to taste. Clicjk Accept
- Set the new property to 100%
- Right-click on the new property and select ERC Freeze
- In the dialogue that opens run your eye down the list of Sub-components to make sure there is nothing that shouldn't be there (you don't usually want to include any poses, for example, or expression controls). Click Accept.
- Test your new morph controller
Assuming all is well you can either save a Scene subset (if this is for a specific project, for example) or a morph asset (if you want to have the character available all the time): to save as a morph File>Save As>Suport Assets>Morph Asset (or Modifier Asset, according to the change log the command is getting updated to reflect the scope of the function); in the dialogue that opens the Author and Product names are used for folder names within the data folder for the character, so you know what to back up.
Troubles when creating custom morph for G8F based on combination of other morph dialsYou should do an ERC freeze to link all the morph dials together instead of exporting as a single object, because that destroys the links to JCMs.
Troubles when creating custom morph for G8F based on combination of other morph dialsI've been looking online for a while now, but have not found anything that helped me understand or solve this. I have a number of morphs going into a character that I'd like to consolidate into a single morph. I've gotten as far as exporting the character as an .obj and re-importing to create the morph on a new Genesis 8 figure, and everything looks great - until I try and pose the character. I assume it has to do with JCMs, but I'm not entirely sure what that means, or if what I'm trying to do is even possible because of some underlying issues.
Does anyone know if there's a tutorial out there that would help me understand what's going on, or able to provide some input?
Thank you ahead of time!!!
FBX doesn't match in other software - HELPThanks for the reply, I added the corrected morph to the morph export but how do I apply them in daz - I can't see the corrective forearm dial on the current used tab. Also the corrective morph don't work in C4D. I have the dials but it doesn't effect the mesh. Any clue?
Weird 'hole' in clothing - Genesis 9I think the culprit comes from the body shape / morph you dialed on this figure... if you find no issue after fitting jeans on Base figure. And you used auto-fit by the way?
Transferring G8 morphs to G9nabob21 said:
Hi franky85. I'm still not clear on this yet., but if I have a G8F in the scene with 200 morphs and only 10 are active (i.e. set greater than zero) are all 200 morphs converted and transfered to G9 or only the 10 that are active?
ManFriday's converter does not "transfer morphs" - rather it will transfer the shape. You could have 200 active, at the end it will merge them and split the head/body etc. If you wish to transfer a bunch of individual morphs, I think the transfer tool remains your best bet - however it will rely on you using a clone shape on your G9 figure.
FBX doesn't match in other software - HELPCheck the body morph you use...as some body morphs are already embedded with HD mesh. And DTC bridge can export HD mesh, you just need to Bake SubD when exporting the figure.
Then go to the folder: your user name\Documents\DAZ 3D\Bridges\Daz To Cinema 4D\Exports\FIG\FIG0, to check the exported FBX file.
Question About Weight MappingI'm trying to teach myself how to fit and rig clothing on G8F. The transfer utility works great, but I'm not satisfied with the weight mapping it applies. I tried playing around with the weight mapping, but for some reason, I'm getting spots that I just can't remove (circled in red in the attached image). I'm sure the main issue is that I have no idea what I'm doing, but can anyone tell me why this happens, or how to fix it?
Thanks!
Transferring G8 morphs to G9nabob21 said:
When the ManFriday Figure Converter is used, do all of the morphs that are available for G8 get converted, or just the ones that are currently used?
You have to select a G8 and G9 figure in your scene - it won't create a morph-by-morph transfer, rather it will create a new morph with the name of your choosing for head / body / full body etc.
FBX doesn't match in other software - HELPHi,
I have an odd issue latly, I built a character using morph that I purshased. Everything looks good inside DAZ but when I'm exporting in FBX the character doesn't look like inside DAZ. I tried the classic FBX export and the daz bridge to C4D but I got the same reasult. The character doesn't match what I see in DAZ. However when I exporting in OBJ the export match perfectly. See the image attached below
Anyone can help me with that issue please!Thanks
From Daz

FBX Export
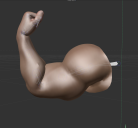
Squishy Human for Genesis 8 and 8.1 Female - Nails issueSo I have had this product (Squishy Human for Genesis 8 and 8.1 Female) for some time now and never really paid attention to changing the nails or addign a morph with elongated nails
I tried to test some nails, many of my morphs that do not make "Long" nails do not display the morph issue but I found some that when set to 100% show the issue and finally I tested to show that if set to below the invisible threshold the issue is not there till I go a few % over and the issue shows up.
 01 Squishy on left (pink) and G8F base on Right (textured)
 02 Found some nail morphs and favorited them, nail morphs that can show the issue to show that it was not specific body morph that was the cause and as you can see on the Base G81F, there is no issue
 03 another one
 04 pears
 05 testing to show that below that magical threshold it does not show the issue
 06 and when I go above that threshold, had to goto 38% so you can see it better but it subtly starts at 28%
Daz 3D is part of

Connect
DAZ Productions, Inc.
7533 S Center View Ct #4664
West Jordan, UT 84084Licensing Agreement | Terms of Service | Privacy Policy | EULA
© 2026 Daz Productions Inc. All Rights Reserved.