-
GeoBra - Geometry Shell Bra for G3/G8/G8.1
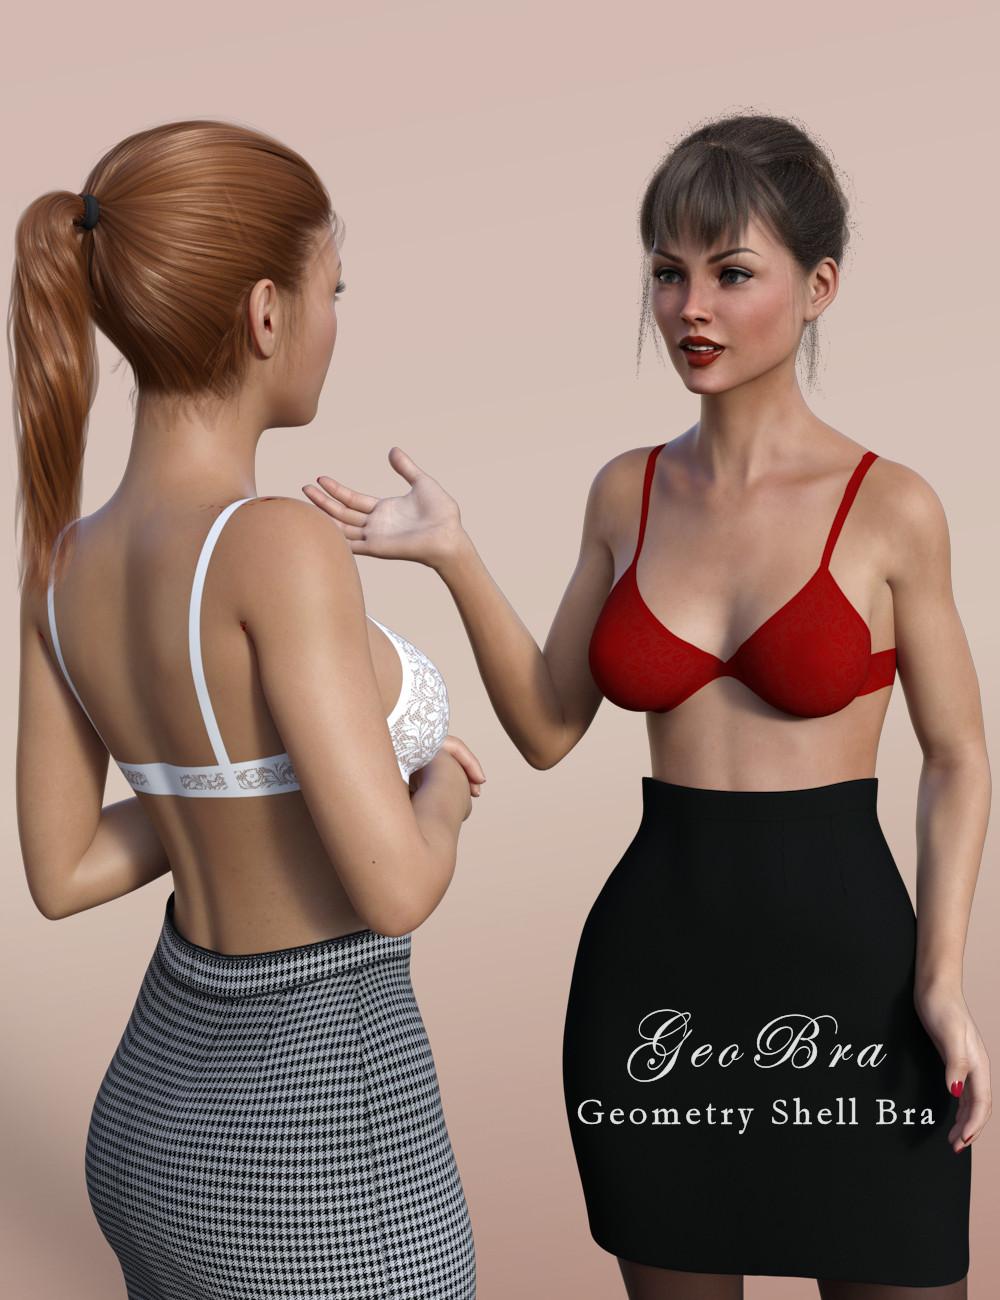
Introducing the GeoBra for G3F, G8F & G8.1F, a bra so comfortable it's like a second skin! No wires, buckles, hooks or clips, in fact no geometry of its own at all.
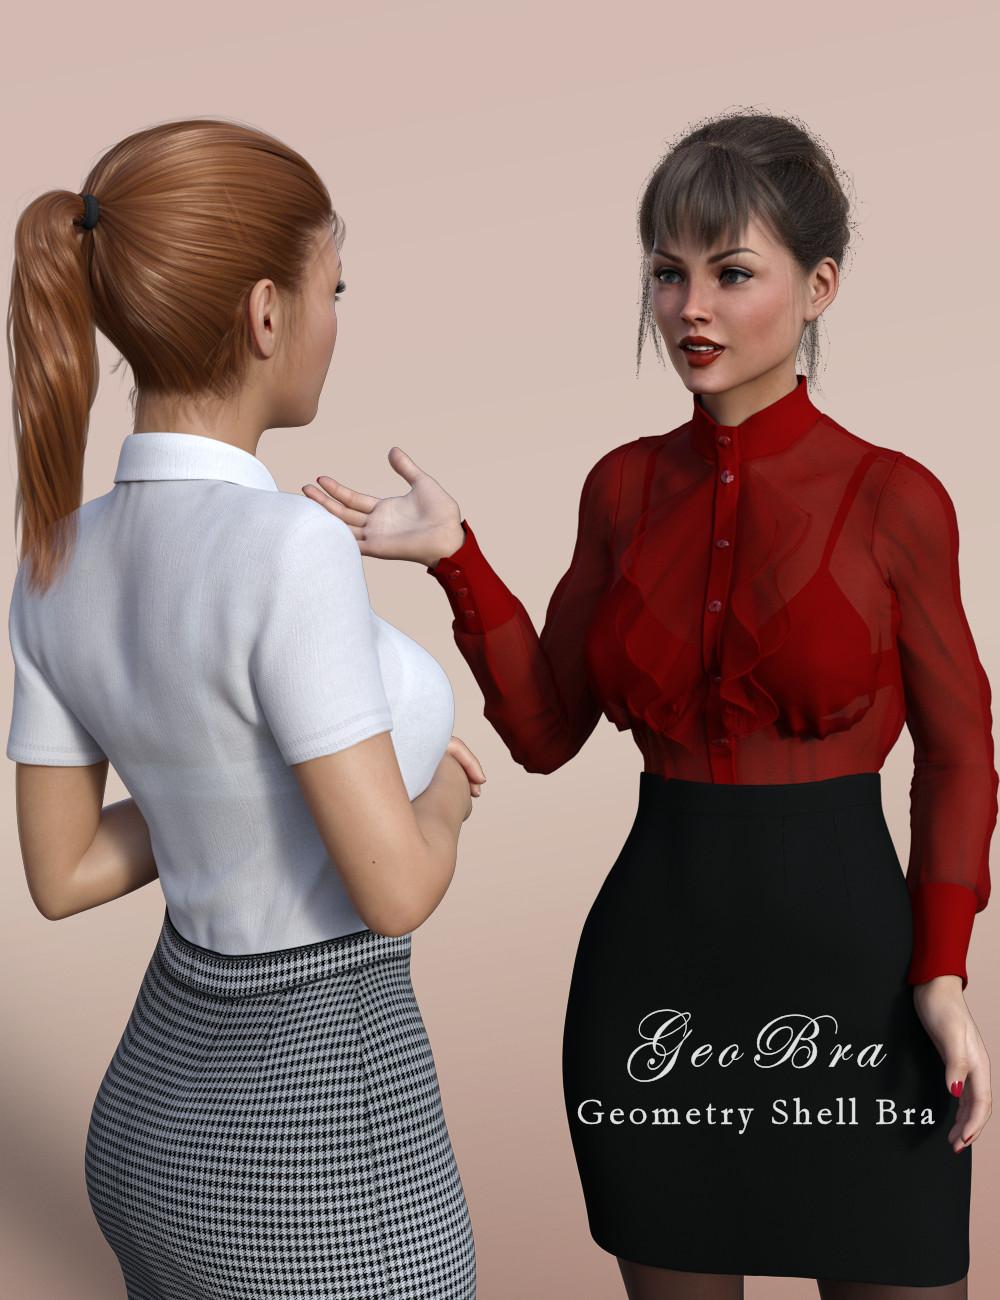
This product uses Daz Studio's Geometry Shell feature to create a bra that can be safely worn under other clothes without requiring many resources or causing poke-through. It is intended to be used under sheer or semi-sheer tops to preserve your model's modesty.
The bra is available in two styles (lacy and plain) in both 1K and 4K resolutions, and in three colors - but you can set it to whatever color you like by changing the diffuse. Both Iray and 3Delight versions are included.
If you're looking for a bra to be worn on its own, as outerwear, this product is not for you. There are a ton of suitable products in the shop, and freebies by (amongst others) Wilmap and Beat578 that autofit nicely to more recent generations. But if your model is wearing a garment over her bra, you can get problems with poke-through if the bra has geometry of its own. This product is for that situation - it essentially paints a bra shape onto the model's skin, so it can be seen through a thin top, but doesn't actually poke through.
Here's an example of it in use:
And now in creepy Man-O-Vision:
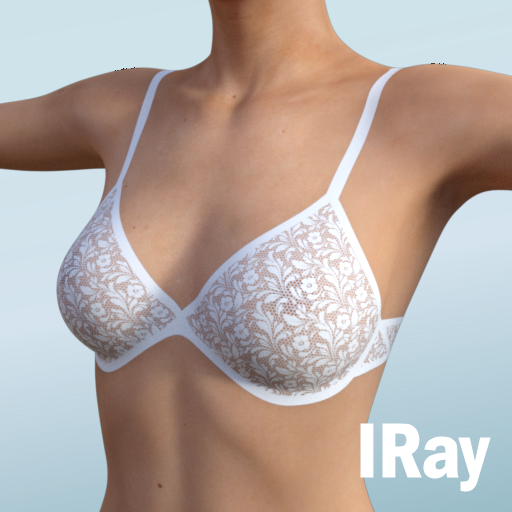
Here's one of the icon files to give you a better view of the front. I hope the strapping looks plausible, such garments really aren't my area of expertise!
You can download it here: https://www.renderosity.com/freestuff/items/100085/geobra-for-genesis-3-8-and-81-female
Promo Credits
White Top
Red Top
The Newest Evolution Is Here: The Daz Season Pass!certaintree38 said:
BTR said:
Fair enough! No doubt I am not doing Brooke 8.1 the justice she deserves with my screenshots.
I like her skin in some of your other renders, but it really seems like PBR skin can be hard to light.
The default skin has SSS direction set at -0,7. That's why the low SSS effect. And like Victoria and Michael 8.1 she likes a lot of light. I don't like this very much as it is sometimes hard to put them in an environment. Either you get an unnaturally dark character or an overly bright environment.
As for the lips, I don't mind them so much, as I have a friend that has really similar lips.
hear ye hear ye dforce outfits for diffeoHey Padone, you asked me to leave some thoughts. I'm a bit confused as to what Diffeo is accomplishing with this. For example, I understand that Diffeo's default skin shader is doing a great job of mimicking how a character will look like in Daz. Is Diffeo trying to mimic Dforce behavior in Blender or is it just trying to find a good starting point for all dforce clothes to not completely break in Blender?
I loaded in Victoria 8 with a Dforce Retro Romper. This is what it looks like unsimulated.
[Image Removed]
First thing I noticed is that the cloth has a collision modifier which confused me.
[Image Removed]
I baked the default settings to 30 frames and got this result, which is okay but creates some material overlap in the cleavage area.
[Image Removed]
Removing the collision modifier and enabling self-collision on the garment itself (leaving the default Diffeo settings as is) seems to give better results.
[Image Removed]
Here's the quick way of how I would have tackled this type of garment myself. Note I'm no expert in cloth sims but get by well enough to where it's useable for my projects.
This garment's topology is actually not ideal for simulating and it's default position is already wrinkly and somewhat overlapping mesh.
[Image Removed]
[Image Removed]
The bottom half of the garment seems to be autofitted well enough in Daz so added it to the pin group and excluded from the sim. I then only simulated a few frames just to get the straps to sit on the shoulders. I then applied this as a Shapekey and reassigned the pin group to only contain the area I want to do the rest of the simulation on. (Highlight the simulated area and do ctrl+i to invert the selection).
[Image Removed]
This is the 30 frame sim using Simply Cloth's Silk preset.
[Image Removed]
If this was a personal project where I would spend more time on it, I would edit the topology and add some additional vertex groups as well such as trim. These would be utilized in this section to further control the overall shape and simulation.
[Image Removed]
I may just not be understanding the goal here but adding this dforce feature to Diffeo seems like it's a lot of extra work with very little benefit. Other than setting the collision distances to 0.001 by default, all the other settings are very scene specific. For example, cloth having a collision modifier on by default may cause a lot of frustration for users not understanding these settings well. I normally try to simulate layers of clothing one at a time rather than having multiple cloth/collisions running at once. Even the Quality Steps value is so very specific not just to the garment and simulation settings, but also to the pose and rate of change. If I have a pose that's significantly different than the prior or resting pose, I need to either raise quality steps to match my minimum fps (24,30,60) or keyframe the pose over a long range of frames to make it stable. Whereas more subtle changes even a low value of 5 can be more than enough.
Overall these default settings seem fine as a starting point but I imagine it will be a source of frustration for Thomas since there's so much room for error and there may be a lot of posts of users having issues with cloth sims. Perhaps rather than it being implemented as part of Diffeo, the Diffeo manual can simply have a section on best practices when using cloth sim and how to address common issues? I can provide the presets that come with Simply Cloth as these tend to work better in my experience.
[Image Removed]
Edit: Looks like I'm unable to paste images into the body of text so I've saved and attached the finish product instead.
Content Question Timebrother grim said:
Got it fixed. One more question is there a way to edit the ranger vest on victoria in that pose. If i select the model for the ranger top in the instance manager then click the icon to edit in assembly room the vest jumps off the character. If i select the ranger top and everything included with that model, hip, abdomen, etc. i can only edit it in the modeling room. The problem is I end up deforming the mesh a little more than I need and jumping back and forth between the two rooms which makes a bigger mess. So I make the edit jump back if it doesn't work I undo the edit and start again. If I had to fix several instances of poke through this way the vest would probably look a little off (odd bends and folds) I would think.
If you need to work on the mesh while in a posed position, it truly is a lot easier to work in the Model room instead of using the Edit option in the Assemble room.
In the model room, use the zoom tools in the tiny preview window to get the problem area as visible as possible.
Now go to the Animation tab in the model room (middle tab on the right panel) to see the item as it is on the conformed figure. We cannot actually make adjustments here, but we can select the exact polygons we need, then switch back to the model mode.
Once back in modeling mode, and the polygons selected from above, set the softness to your liking and make your tweaks while looking at the results in the preview.
We can make the preview window bigger, but then it changes the whole interface. We can move it back, but I just got used to leaving it little and just being patient with my adjustments.
I say all of this because there's no way in hell that I can stick only to morph parameters that have been included with products, and I'm always tweaking.
Another useful tidbit to follow this post
Now that I'm finally making moves from V4/M4/K4 to G8MF ... is there a way to convert that far?WillowRaven said:
Oso3D said:
I would REALLY not bother converting hair or skin; the tech has come a LONG way and results are unlikely to look that great.
I have thousands of dollars in characters with skins ideal for my needs. If I can salvage even half of them, I would feel less sick about making the switch.
Looking around, I've found Legacy UVs for Genesis 8: Victoria 4 & Legacy UVs for Genesis 8: Michael 4.
From what I can tell, if I can't find full character conversion tools, these will at least save my favorite generation 4 skins. :)
I love these!! they work well and I still use 3Delight , and while tech has come a long way Generation 4 skins were under appreciated ,and not all were set up properly for DAZ Studio. It all depends on what makes you happy
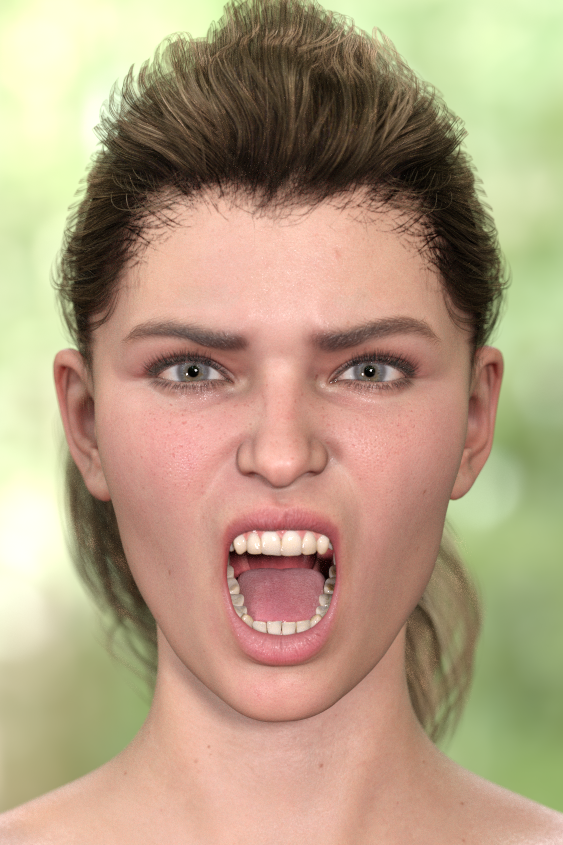
Show Us Your Iray Renders. Part VIIIExperiments in applying the Facial Action Coding System to Genesis 8.1's new face rig.
Crossposted from "'Anatomy of Facial Expression': A Genesis 8.1 Companion Guide?"
Victoria 8.1 with Vertigo Ponytail.
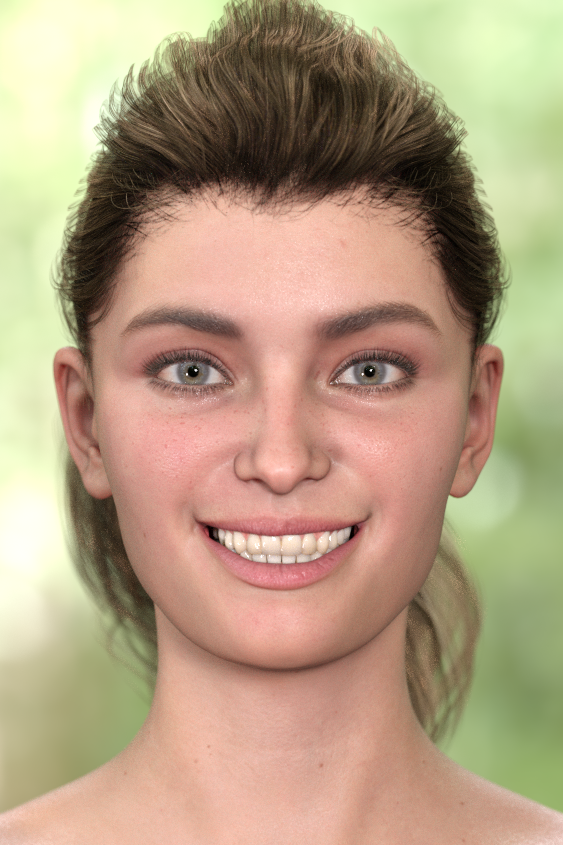
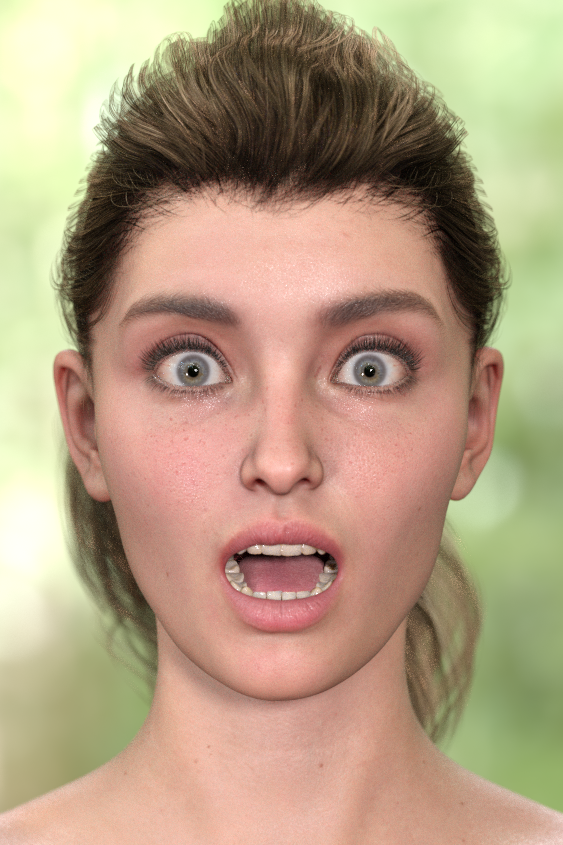
 Show Us Your Iray Renders. Part VIII
This male character is based on Freja 8.1 HD. Genesis 8.1 male vellus hair, Victoria 8.1 skin, Tyrone Beard, and Tousled Hair.
https://www.daz3d.com/gallery/user/5999567703113728#gallery=newest&page=1&image=1137879
Now that I'm finally making moves from V4/M4/K4 to G8MF ... is there a way to convert that far?Oso3D said:
I would REALLY not bother converting hair or skin; the tech has come a LONG way and results are unlikely to look that great.
I have thousands of dollars in characters with skins ideal for my needs. If I can salvage even half of them, I would feel less sick about making the switch.
Looking around, I've found Legacy UVs for Genesis 8: Victoria 4 & Legacy UVs for Genesis 8: Michael 4.
From what I can tell, if I can't find full character conversion tools, these will at least save my favorite generation 4 skins. :)
Now that I'm finally making moves from V4/M4/K4 to G8MF ... is there a way to convert that far?Daventaki said:
Getting the characters transferred is going to be your hardest thing. Check out this thread. Biggest thing to keep in mind is GenX2 is no longer supported because the creator is no longer with this world. Zev0 has the XTranfer utility also along with RSSY's Characer converter but none of those convert from V4. This thread has a small tutorial on how to convert to genesis manually if your interested in that. RSSY also has hair converters.
I'm grabbing RSSY's hair converters: RSSY Hair Converter from Michael 4 to Genesis 8 Male & RSSY Hair Converter from Victoria 4 to Genesis 8 Female
If I already have the Genesis & Genesis 2 base and a couple of characters, will I still be able to make the conversion?
Now that I'm finally making moves from V4/M4/K4 to G8MF ... is there a way to convert that far?I see I will want to add RSSY Clothing Converter from Victoria 4 to Genesis 8 Female to this list :)
I forgot I also will need to convert so much hair! lol
(Released) - Debutante Hair for Genesis 8 and 8.1 FemalesCrushguy05 said:
Very nice! Always on the hunt for regal looking hair so this is going on my list.
Do you remember what figure you used for the main promo picture?
It's Victoria 8.1 mixed with a bunch of other head shapes :)
Character based on Victoria 8, can I get Victoria 8.1 instead?I have no idea what you want to do with your own 3D projects but the Head and Body Morphs for the Genesis figure you want to use, (for G8F in this case) are always good buys. Also, Raiya has other good characters that don't need Victoria.Clothing conversion?I will try this - thank you!
Richard Haseltine said:
perlk said:
Well, I applied the clothing to G8F and then said it was a Genesis outfit then tried to mess around with the dimensions. It just didn't work. I didn't see Victoria 4 in the AutoFit dialogue. Do I need to install something to make that work? Even so, shoes don't really work at all :-(
Richard Haseltine said:
How did you manually convert? The results will vary but you could fir the clothes to Genesis, selecting Victoria 4 in the AutoFit dialogue, then fit the results to Genesis 8, selecting Genesis in the AutoFit dialogue. It may be worth trying that first, though the RSSY Clothing Converters have more features and may well do a better job for some items.
Fit the Victoria 4 clothing to the original Genesis, then fit the clothing converted to Genesis to Genesis 8 - it's a two-step process.
Character based on Victoria 8, can I get Victoria 8.1 instead?First, if this is your first step, I wouldn't start with mixing 8.0 and 8.1 (that adds complications).
Second, you can apply Leony to the G8F base figure, too, but these figures describe the differences. Basically, V8 says "make everything taller and slimmer", and Leony says (I think) "make everything more muscuLara". If you skip V8, then you'll get a more muscular base figure.
Third: hey, V8 and Leony were exactly my 2 first figures a year ago :) Probably not a popular opinion around here, but, *cough* IMO Victoria isn't as essential as it used to be. I'd look for a figure that is directly modeled on the base figure, something with a shape you like (and get DAZ' Gen 8 Female Body Morphs, it's fun and some figures depend on it). But then, Leony's nice and sooner or later you'll probably want Victoria anyway.
Broken HairAh, its starting to make sense. As i said it only happens with the same hair i used on the original character, so something must be baked in.
I'm surpised to hear you say that combining morphs isnt a good idea (although it makes sense now) as i followed a tutorial that said it was the best way of storing your custom characters. I mainly liked the idea as i could load my custom character shape on to a straight Gen 8.1 instead of the Victoria 8.1 it is based on.
Can i ask what your recomended way of saving custom charaters is? Sub scene? and is there a way of transfering my custom character settings to other base models?
Broken HairHello, I have just made a single morph combining a bunch of smaller morphs (including my own from blender) i done on Victoria 8.1 HD. Removed all extras from body, zero everything, base mesh export as obj, morph loader pro, save morph, adjust rigging, freeze erc and then loaded on to a gen 8.1. I'm now getting issues when i use Marigold Hair from OOT. It sits fine but if i use any sliders or try and move bones then the hair stretches in weird ways. Is there something in the morph process that could cause this? I tried a different hair style and it was fine so i thought it might be because i was using Marigold on the old model, but i had deleted it when making the morph. Is it something to do with the erc freeze?
Thanks for now.
Character based on Victoria 8, can I get Victoria 8.1 instead?Leony needs Victoria 8 to look like she does in the promos, because her shape is a mix of a custom one and Victoria 8 shape at 100%. Victoria 8.1 looks nothing like Victoria 8, so if you try to substitute 8.1's shape for 8, your results will not look like the promos.
Genesis 8.1 Female is backwards compatible in the sense that I can use G8F's shapes, including HD ones, on G8.1F without having to re-buy stuff. So you can use Victoria 8's shape and skin on G8.1F, but G8F can't use Victoria 8.1's shape or UV. Especially the UV because it has different material zones. (Head and Body, instead of just Torso.)
Bluejaunte appreciationoutrider42 said:
If you are wondering how, you can do this all inside Daz itself by baking the textures. When I did this, the resulting renders for Gaia look exactly the same with the new 8.1 converted textures as they do with her out of the box textures.
There is a tutorial somewhere in the forums, but here are highlights for those who don't know, and tailored to this specific task:
1- Load a basic 8.1 figure
2- Load your Genesis 8 material preset. Before going further, double check your default templates that everything is in place and note what surfaces are under which template. Since this is just for the torso, it is pretty easy.
3- Go to the surfaces tab. Locate the menu, the triangle with lines at the top left or right depending on where your surface tab is docked.
4- From this menu, locate Map Transfer. You will see two fields here. On the left there is Templates, and this will be blank. On the right you have Surfaces. Hover your mouse over the Templates field and right click. Pick the option to create a new template.

5- Template 1 is for the face and related textures. You can leave this blank because there is no change between 8 and 8.1. Template 2 is for the new Head texture. Template 3 is for most of the old torso texture. If this is all you want, you can stop creating templates right here. If you wish to try baking the eye, you can go further to the template for them. However I don't see a point in doing that. All you do is click on the surface and drag it to the template it goes to. You will notice that the surface you dragged is now missing from the surfaces section. That means you are doing it right.
6- To get going, you need to highlight the Default Templates. We want the torso, so we highlight BOTH templates 2 and 3. Doing this will allow us to continue. If you do not highlight the templates, you cannot proceed. Do not highlight the surfaces! You will see the target template is 8.1, and the source is "current". This is what we want. You can select where to save. Saving in the same location as the original textures makes sense, but you can do whatever you want here as long as you can find them.
7- I suggest keeping the file types the same, Gaia has JPGs. Crank the baking quality up to the max of 10. Hardware Cutoff was already maxed, I changed the bleed factor down a bit.
8- Then just hit accept.
9- Your new textures will have generic names. So it is a good idea if you do this a lot to save in new locations to not overwite previous convertions. This is where saving new files in the location of the original folder probably works better. All textures associated with Templates you chose are converted.
10- So for this character, I now have "Template2 Detail Normal Map", "Template2 Diffuse Color", "Template2 Normal Map", and "Template2 Specular Lobe Roughness". I also have these same maps for Template3. SInce the torso map for G8 already covers Template 3, there is no need to replace Template 3. You only need to go to Template 2 in your surface settings and replace the torso map with the equalivant texture you just created. Then go down the surface settings for the Head and change it to Base 8.1 Female.
11- You are done. You can do a test render to see if it looks ok. You can also save this as a material preset for future use. If you like messing with textures, you can now use your favorite blejaunte and other PA textures from 8.0 and mix them with native 8.1 textures.
12- Celebrate your bad self. WHOOO!
FYI this same process is also how you convert the unique UV maps from Victoria 7 and friends to standard Gensisis 3 (as well as Victoria 6 to Genesis 2.) So with this you can also convert any of the 7 series models that have unique UVs all the way to Genesis 8.1 by first converting them to Genesis 3. If you own the Gender swap UV product, then can also use this technique to convert textures from one sex to the other. This is how I cretaed a set of bluejaunte MALE textures. MWAHAHAHA!.
If you do see a seam, it is more likely do to the material settings using the new tiling feature in PBR Skin. How many times the tiles repeat can be adusted in the settings. This is a potential downside to using any kind of tiling for skin details if you like to do extreme close up pictures. But this is Gaia skin using newly converted head textures. There is no seam.

Thanks a lot everyone, but I am specially gratefuf to outrider42, for the time to explain all of this.
That is what I am interested in, but did not know, how to ask for.
Thanks again for such a nice explanation.
Character based on Victoria 8, can I get Victoria 8.1 instead?Hi! I'm looking at spending my first money in the store and quite confused to how it all works together with Genesis 8 and 8.1. I want to get the "Leony Character, Clothing and Hair Bundle" which includes "Leony HD for Victoria 8". So it requires Victoria 8 to work. But I should be able to get Victoria 8.1 instead and get the benefits that comes with 8.1 or? It only says that it is compatible with Genesis 8 Female. But 8.1 is supposed to be backwards compatible and Victoria 8 and 8.1 are the same price. Or is there any other reason why this would be a bad idea?
And as far as I understand it I don't need the HD packs for any of the versions of Victoria to use a HD pack of another character which is based of Victoria or?
Thaks for any answers!
Bluejaunte appreciationThey wanted to be able to mix and match your Gaia (and other) 8.0 UV based textures with native 8.1 UV based textures. So after doing this they can use your Gaia specularity maps with Victoria 8.1 color maps if they wanted to. This is for the kit bashers out there.
I do the same. I will frequently use the gloss maps from certain characters with other characters, stuff like that. It helps make them cohesively blend together in scenes with multiple characters, and I just like them that way. And like I said in the post, I used this to create male textures from your girls. So I can use the gloss maps from bluejaunte characters on males.
So it very much has its uses.
It should also be possible to use this to go in reverse, to bake the 8.1 textures into good old 8.0 textures.
Daz 3D is part of

Connect
DAZ Productions, Inc.
7533 S Center View Ct #4664
West Jordan, UT 84084Licensing Agreement | Terms of Service | Privacy Policy | EULA
© 2026 Daz Productions Inc. All Rights Reserved.