-
How do you use your various Genesis generations?
I don't use V4 or M4 any longer (only clothing autofitted to newer generations), Genesis 1 only for a few specific creatures I have for it.
Genesis 2 female I use often because I like the dense mesh, have some custom characters I like, have a decent amount of clothing and accessories and I can use Genesis 8 and Genesis 3 skins on her. Genesis 3 and Genesis 8 female are pretty much interchangable to me, but if I can upgrade an old G3 scene to G8 easily I will.
As for male figures, I just use genesis 8 male.
Luckily I snagged a copy of SingularBlues morph transfer script before it was pulled and have been able to get the essential character morphs I needed tranferred over to G8, so i am good for now.
How do you use your various Genesis generations?Genesis 1: for basic generic people and sci fi aliens/creatures
and animation Due to 100 Percent compatibility with my external animation tools.Genesis 2: for the overwhelming majorty of my Characters Due to 100 Percent compatibility with my external animation tools
(Particularly the classic mimic pro 2 for lipsync).I likely have every morph ever created for G2F as well as many pushed up from G1Mill4 even Mill3 via the GENX 2 Plugin and some custom morphs I created.
My CG self Avatar is G2 male based
and it natively uses All of my Millenium 4 Skin mats by simple UV switchingGenesis 3: Only use it for the Ivan and George HD male
Characters not interested in any of the females, although
I have modeled some clothing for this generation's males and females.
Genesis 8: DEAD ON ARRIVAL, skipping entirely except for creating some complex commercial animated motions for the base figures ... (Eventually)Lots of bodysuits- does anybody besides me think how impractical they are?
does anyone besides me think 99% of them could just be boots and a HD morphRedundant geometry is one of the things that inspired me to learn to model My own suits/clothing.
There is an older product ,in the store ,for genesis 2 male that has 13 bloody conformers!!.....13!!, to present roughly the same amount of surface detail as this suit ( pictured below)
I recently created this for the main Character in my movie
after his ***spoiler Alert***.......
.....Restoration to full mobility from a parapalegic state.
this suit is based on the white"future foundation suits" worn by the Fantastic four in the latter years in the Comics
it is ONE conformer with surface detail modeled in thus much less resource intensive when posing or doing animation test renders
Hey Daz Animators, I need helpI just picked up the Empty Detention Cell. I want to use it in a dForce timeline animation. However, the entire set displaces on every frame but the first, and is additionally keyframed every other frame to be displaced across 150 frames, for many individual props. I assume this is a bug and I have just filed a ticket. However, I would also like to know if there's some way to clear out all the keyframes associated with an object at once, or otherwise salvage this disaster.
To clear animation for a working character
go to edit>figure> scroll down until you see "clear animation" then choose "clear figure pose". this will clear all the animations from the keyframes and reset your character, leaveing your characters morph values intact.
I don't have this set so I can't test it for you sorry
I hope that helps
How do you use your various Genesis generations?G3 is my main generation to work with, I have tons of characters, morphs and accessoired /clothes, they are detailed enough for closeups and I can turn them into jsut anything I need.
G2 was the generation I started with, I have morphs but only few characters, I still like them but converting skins usefully to iray takes time. So they mostly get a role as background characters,
I rarely use G1 and if so in a similar manner as g2, mostly again because of lacking a good adn quick transfer of skin to iray.
g8.. I don't have much, I like the oldies and oddities there but they only rarely get a role
How do you use your various Genesis generations?I transfer anything I need to G8.
Those cases I need something not transferable, I use it in the generation it is meant for. These are pretty unusual as I don't do monsters and similar as a rule.
... But yes, porojects influence my choices.
Where are the textures for imported OBJ stored after saving?Hello again!
I imported a textured OBJ (jeans shorts) into Daz, rigged and morphed it by Transfer utility and saved it as DUF "wardrobe" item in Support Asset -> Figure/Prop assets in a made by me folder. So my question is - where are the textures for this item stored?
How to restore base G3 teeth?Some morphs, especially some freebies, may somehow unintentionally distort completely different parts of the mesh. I don't know why that happens but it does. I've gotten deformed teeth when applying a fingernail morph, for example. The only way I knew to isolate the offending morph was to to an Alt-Click on each morp to zero it, see if that made a diffference, and if not, Ctl-Z then try the next one. Tedious but it did turn up the bad morph and I got rid of it.
Lots of bodysuits- does anybody besides me think how impractical they are?does anyone besides me think 99% of them could just be boots and a HD morph
given need LIE because genesis 3 and 8 stupidly IMO don't have separate surfaces for the head and hands from the torso
(latter could at least have a glove texture but back of head being part of the torso rules out any second skins))
Looking for someone to design clothingYou don't need to buy any shaders. The Iray Uber shader are part of DAZ Studio.
First of all, PLEASE convert the suit texture to Iray. It is still in 3Delight, and that will not work properly. Select the bodysuit in the scene tab, then select all the surfaces of the body suit in the surface tab. Apply the Iray Uber Shader.
Once you have converted it, look for glossy reflectivity and glossy roughness. Glossy reglectivity should be down around 40%, roughness up to 50% - experiment until you have a proper "rough" feeling to your suit.
As for the skin - the character seems to be a morph without its own skin. May I ask what skin you are using?
Also, the surface colour in the "standard" view can't be used for determining how the render colour will look, because the standard view uses a differenrrt render engine to display things, and it doesn't translate the Iray values properly. So, it is recommended that you use the nVidea preview (AUX Viewport) mode when you change the coulours.
Geo Graft Gaps on MorphRigidity groups are vertex groups.
1 In Morph Loader pro in the import Morphs For list there should be a graft option - I don't have DS open to check the wording.
2 the OBJ file that you import as a morph needs to have the name (not label) of the morph it is to match. You can get the name from the Parameter Settings dialogue, via the gear icon on the slider.
Marvelous Designer - Script for Faux DynamicsHey. I've been playing with MD at a community college, as they only bought one license for one machine to try it out. I started out by using their avatars and just trying to draw my clothing. It is nothing like the real design phase of clothing, but you can fake that a bit. I found out only recently and tried it.
First, identify the type of garment. Then identify the body model. For me, I like to design around a real person. However, it takes a lot of time out of their schedule, and if you have a deadline for a theatre production, you need to innovate. So... ...I use software. The nuke foundry lab has facegen, so I use that to get their facial features into DAZ on a given model. Then I use Measure Metrics to put in the basics of their form and allow it to morph the figure. Another path... ...I can put their body characteristics into MD using the avatar editor and the tape measure feature. I can export the model to DAZ, but it won't have the head (this can take some of the creepiness out for some people). Using the tape measure, I can go back and forth between DAZ and MD to get the model just right in form. Then I use a photo to grab their general skin tone, and create a basic bumpmap (it takes time, but it's worth it; in about a day the digital model looks very much like the real deal). I can leave off hair for last. In MD, I then edit the avatar, with the wrap point and roll guides active in the 3d window, which will help when I try to simulate the garment. By adjusting these I can make sure the garment is properly wrapped on the model in the current pose. One these are finished I move on to making my garment guides.
Now to make it more realistic... ...By following the conventional bodice, pant\skirt, and undergarment sizing techniqures, I can use SEAMLY 2D to make a 2 dimensional photo to use as a guide in MD. By adding a box of set length, roughly 20cm, you can size your guide for use by matching that box to one you draw in MD. Then you just draw the rest on top of the other figures. By adjusting from the main guide, you can work like you would on a real garment. This will also work with Illustrator or other program, but you'll need a super large artboard. The image you draw should correspond to the values you calculate. Seamly 2d allows you to create the basic pieces, put in a few values and let the program adjust the sizing of the drawing so it will fit the sizing on your model. Either software you choose, make sure you give your guide a box for size matching.
Once you have your guide copied onto the 2d panel in MD, you can make it a garment. For symetrical garments, you only need trace half the piece, then unfold it or copy it as a mirrored instance copy. Changes to one side will be matched. For asymetrical garmens, start with the symetrical adjustments, then use the menu (right click on one of the copies, and then the option will be clear) to turn off symetry, then make the last adjustments. When I say symetrical adjustments, I also mean adding sewing. In the latest version this works rather well. Once your asymetry is finished you can move to the 3d window, adjust the placemtent of each piece to the wrap\point guides, and even tack it on in some points, using the model like a standing manequin for garments that don't hold up on their own or require more wrapping and tying. Tacking some areas into place will allow you to slowly adjust some towel or wrap garments, or making bows. You can even apply different fabric attributes to simulate real fabric, and it includes a muslin setting. When you finish you can export the garment to DAZ, and, using the same orignal base model with measure metrics for a quick readjustment to the understudy. Seeing both designs together allows a design director to comment on color, texture etc, which are easy enough to change in MD. Once the design is okayed, it's on to the sizing. First, I measure the lines for the first model, and redraw in seamly2d, making note of which lines from your original guide were moved or altered and how they were adjusted (some equation; this may not be evident, but occaisionally, a slight adjustment to an existing equation will be enough), so you can then make adjustments in Seamly2d to redraw a guide for your cutouts, and print it. You can refit your garment to the understudy and redraw in Seamly 2d, adding seams and determining which areas can be all one piece instead of sewn together. Then you print it for making your actual guides and cut your fabric.
The problem I have? I have a 3d setup, a stage, the whole scene, all designed in other software. But baking the whole thing together is tough. I need a way to export it like an OBJ, the actor\model and garments on them, all to a single object for import into another program. This program will show the 3d object with lighting and other values applied after rendering. So far, I haven't been able to get this to work right. OBJ is too limited. I'd like to be able to bake the surfaces together by linking the files inside the obj so textures and colors are linked at least and pulled in when I import the OBJ. I still haven't figured it out.
I've also tried Adobe Dimension, but I haven't been able to do as much with it. Vectorworks on the other hand... I'd love to use Dimension, but DAZ has more exacting measurements, along with MD. However, If I could get some help with baking it all together, I might be able to go into more on the usefulness of these programs in the live action field.
Geo Graft Gaps on MorphI tried this tonight, and momentarily had rigidity working, but when I tried to adjust the rigidity using a map, it all fell apart.
Actually... I'm not sure how I got rigidity working at all. I got it working once, but then when I tried it again, I couldn't reproduce it. Depending on whether I created the Rigidity group in Polygon Selection Mode, Vertex Selection Mode, or using the menu in the Tool Settings, I may or may not have the ability to create a Rigidity Group, or just had the option to create participants and references. Also, depending on what method I used to create it, the group may or may not appear in the Target Group options of the Grouping Tab in the Geometry Editor. Is it possible there is a defect around the UI in this area?
I'm thinking I need to reconsider morphs. I'm debating on whether I should do morphs by region (probably more reusable but might not always result in a smooth experience) or morphs per character (less resuable, but always have a nice clean option for a character if Ihave used them before). Based on this, I have two questions:
1. I'm assuming creating a morph for a graft must be similar to creating a morph for a figure... But I am struggling to get my head around the idea. I import the graft, convert it to a figure, export it again, and then when I import the change I just import it as a morph? Is that the gist of it?2. Let's say I do decide to make the morph specific to my character. I'm struggling at a high level to picture those steps as well. I apply the graft, add the character morph, export the whole thing (figure, with morph applied, and the messed up graft), make the fix... and then.... I guess I just import back in the graft as a morph? I believe I have seen on clothing and poses where morphs are automatically applied based on popular figures or shapes. How would I make the graft morph to always happen with it was applied to a figure with the same morph?
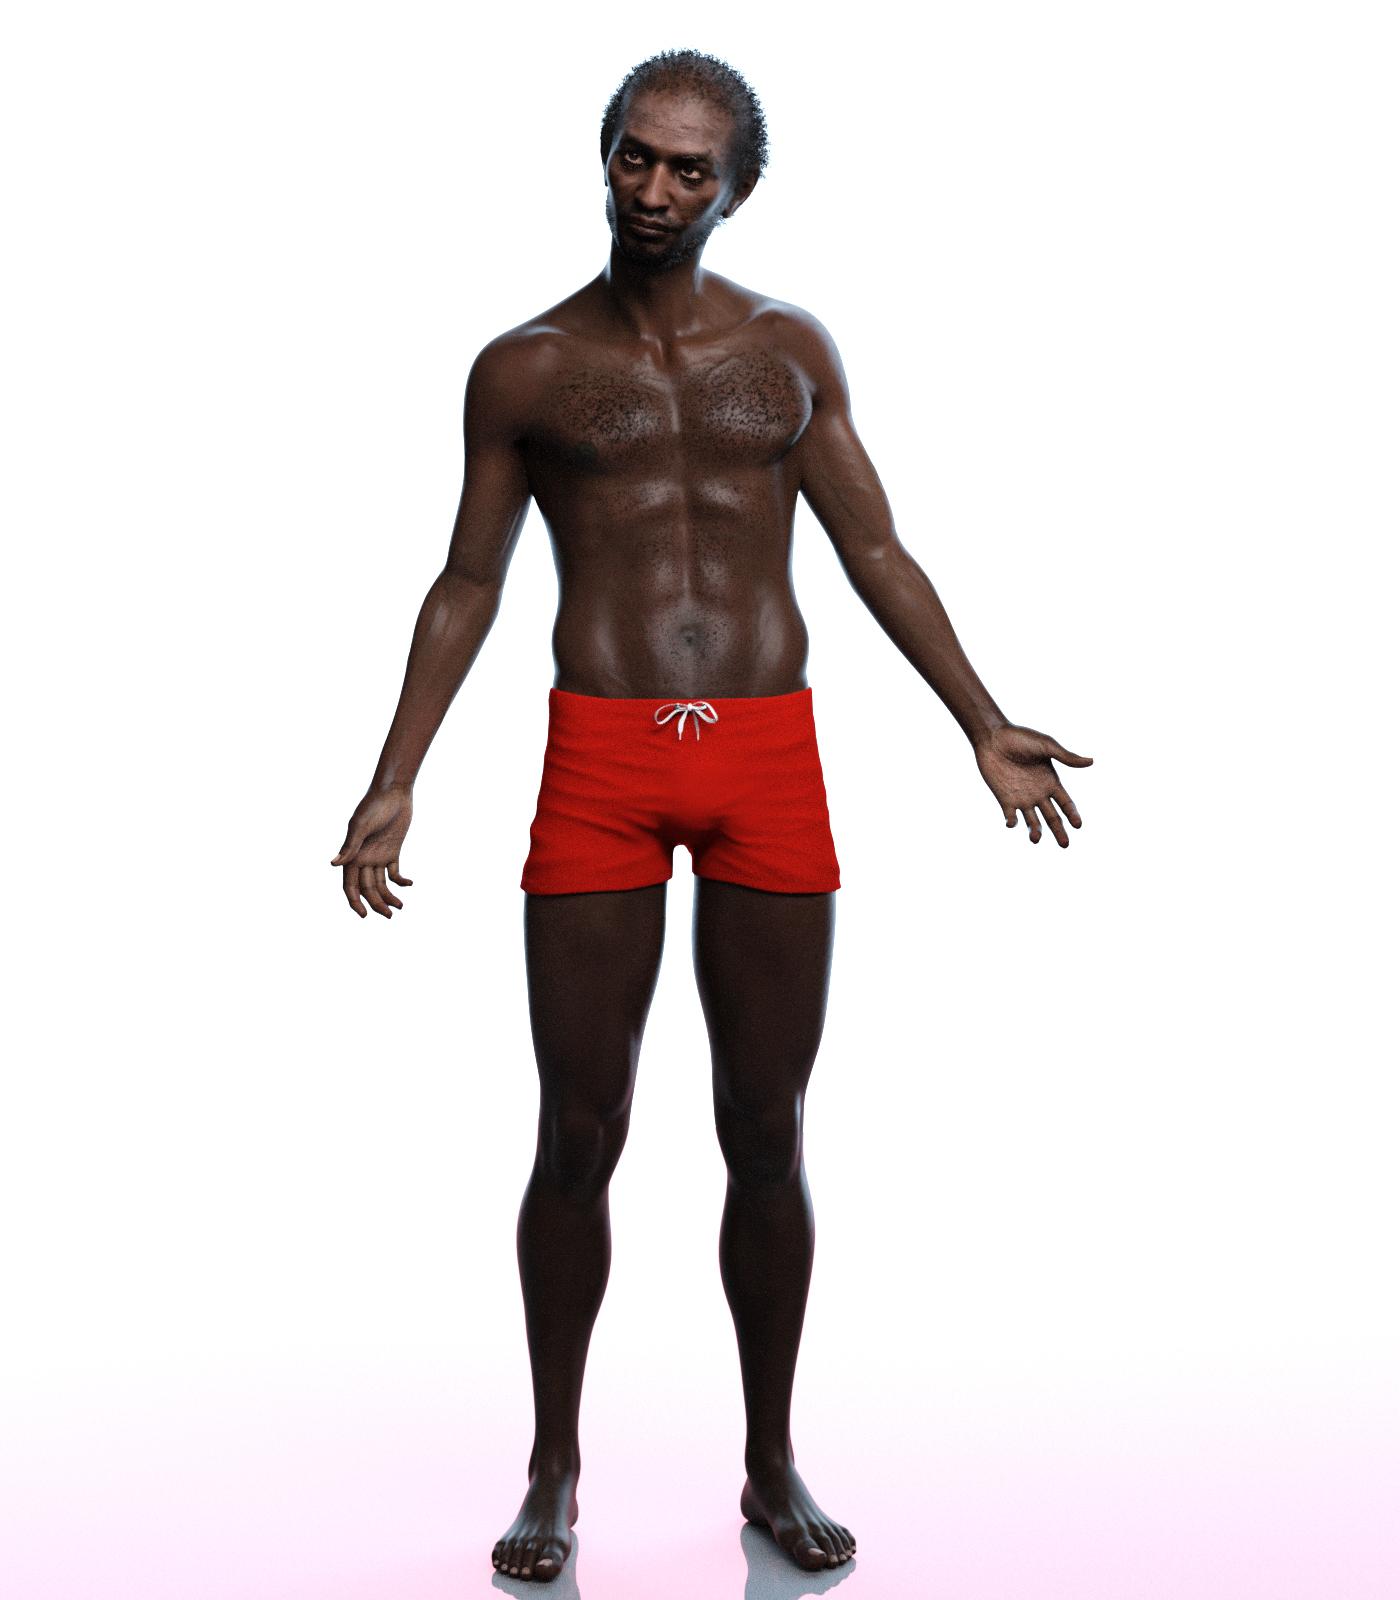
SereneNight's Sci-fi FunIf you haven't seen these, the shorts that came with EJ Anders are reallly good. They are a bit like the really nice ones that came with EJ Gregory but these are more like boxer briefs.. They have a nice tie and untie morph as well. Here I modeled them on Phx Joseph so you can see them from the front and back. =-)
 How to apply Old Morphs to new Figures
...well as I understand you sorta could if you had Generation X2 and the G3 expansion, by transferring the morph to G3 first, then importing it from the G3 version through the Transfer Utility
What's wrong with Blender?...objs that come with their own material files transfer fine. However, for a model converted from another format to .obj, that is where all the mapping information is lost when opened in Daz. This requires rebuilding the material zones manually using the polygon editor (in some cases for upwards of 100 individual mesh components that are often just labelled with numbers or labelled in a language I am not familiar with) before applying any textures (a very tedious process).
When I import a .lwo or .3ds file into Carrara, I get all the materials transferring over as well (though they do have to be adjusted to an extent). However saving a model as a .obj to import into Daz doesn't create a new compatible material file.
Ah, you mean materials rather than UV mapping.
Exporting texturesI am trying to convert the textures for a gen3 character to gen2. I was able to load the gen3 texures onto gen2 character by using https://www.daz3d.com/genesis-3-uvs-for-genesis-2-female-s , which makes geografts to fill in the seams.
It looks good in daz3d with the geografts, but I am trying to export those textures to the gen2 format so I can apply them on another gen2 character without using geografts. Is there anyway to export / make a texture map for this? I tried the map transfer utility, made a template and included the geografts in the template, but the areas the geografts filled are still blank when exported
What's wrong with Blender?...objs that come with their own material files transfer fine. However, for a model converted from another format to .obj, that is where all the mapping information is lost when opened in Daz. This requires rebuilding the material zones manually using the polygon editor (in some cases for upwards of 100 individual mesh components that are often just labelled with numbers or labelled in a language I am not familiar with) before applying any textures (a very tedious process).
When I import a .lwo or .3ds file into Carrara, I get all the materials transferring over as well (though they do have to be adjusted to an extent). However saving a model as a .obj to import into Daz doesn't create a new compatible material file.
formerly male content creation threadThanks for all this info, I'm in the process of trying to make a set of clothing to match that of the character Ciri in the Witcher 3 game. I've made stuff before but this is different becuase
- Will have to have straps and buckle
- Has a belt that I don't want to get all bent out of shape
- Needs boots and gloves, neither of which I've ever made
Usually when I make stuff I do a simple rig using the transfer utility but this time I want to really learn how to do JCMs and that sort of thing. It's not for sale but I'd like to finally make something I consider almost good enough to sell if it could be sold. Anyway, I may join the discussion from time to time, if that's okay. The title says "formerly male" so I am thinking a female warrior will be okay here.
Anyway here's what I've made thus far and what it's supposed to look like. This is the base model from Marvelous Designer. The rest will be done in Hexagon probably. The gloves are from an old V4 set, just for illustration purposes. I haven't figured out how to make my own yet.
Very nice.
More Musical InstrumentsYes :)
I think it'll include a morph for tenor also.
Daz 3D is part of

Connect
DAZ Productions, Inc.
7533 S Center View Ct #4664
West Jordan, UT 84084Licensing Agreement | Terms of Service | Privacy Policy | EULA
© 2026 Daz Productions Inc. All Rights Reserved.