-
Render your buys! ALL TIME Challenges
I don't have a title (blame the gallery being closed
 ) but I do have a short story
She was just enjoying a sunny afternoon, walking toward the next stop in her journey, reading the new book of her favourite author while a skeleton tried to jump her.
She likely could have won without stopping reading, but a two-handed warhammer, as the name suggests, requires two hands…
It takes skills to place a bookmark while dodging attacks, one she had to master since an evil overlord decided to threaten the peaceful countryside, so once she has disposed of the threat, she jumped back where she was.
Maybe she should start walking again, because by staying here, reading, she will have to walk without anything to read. Now, that would be horrific, right?
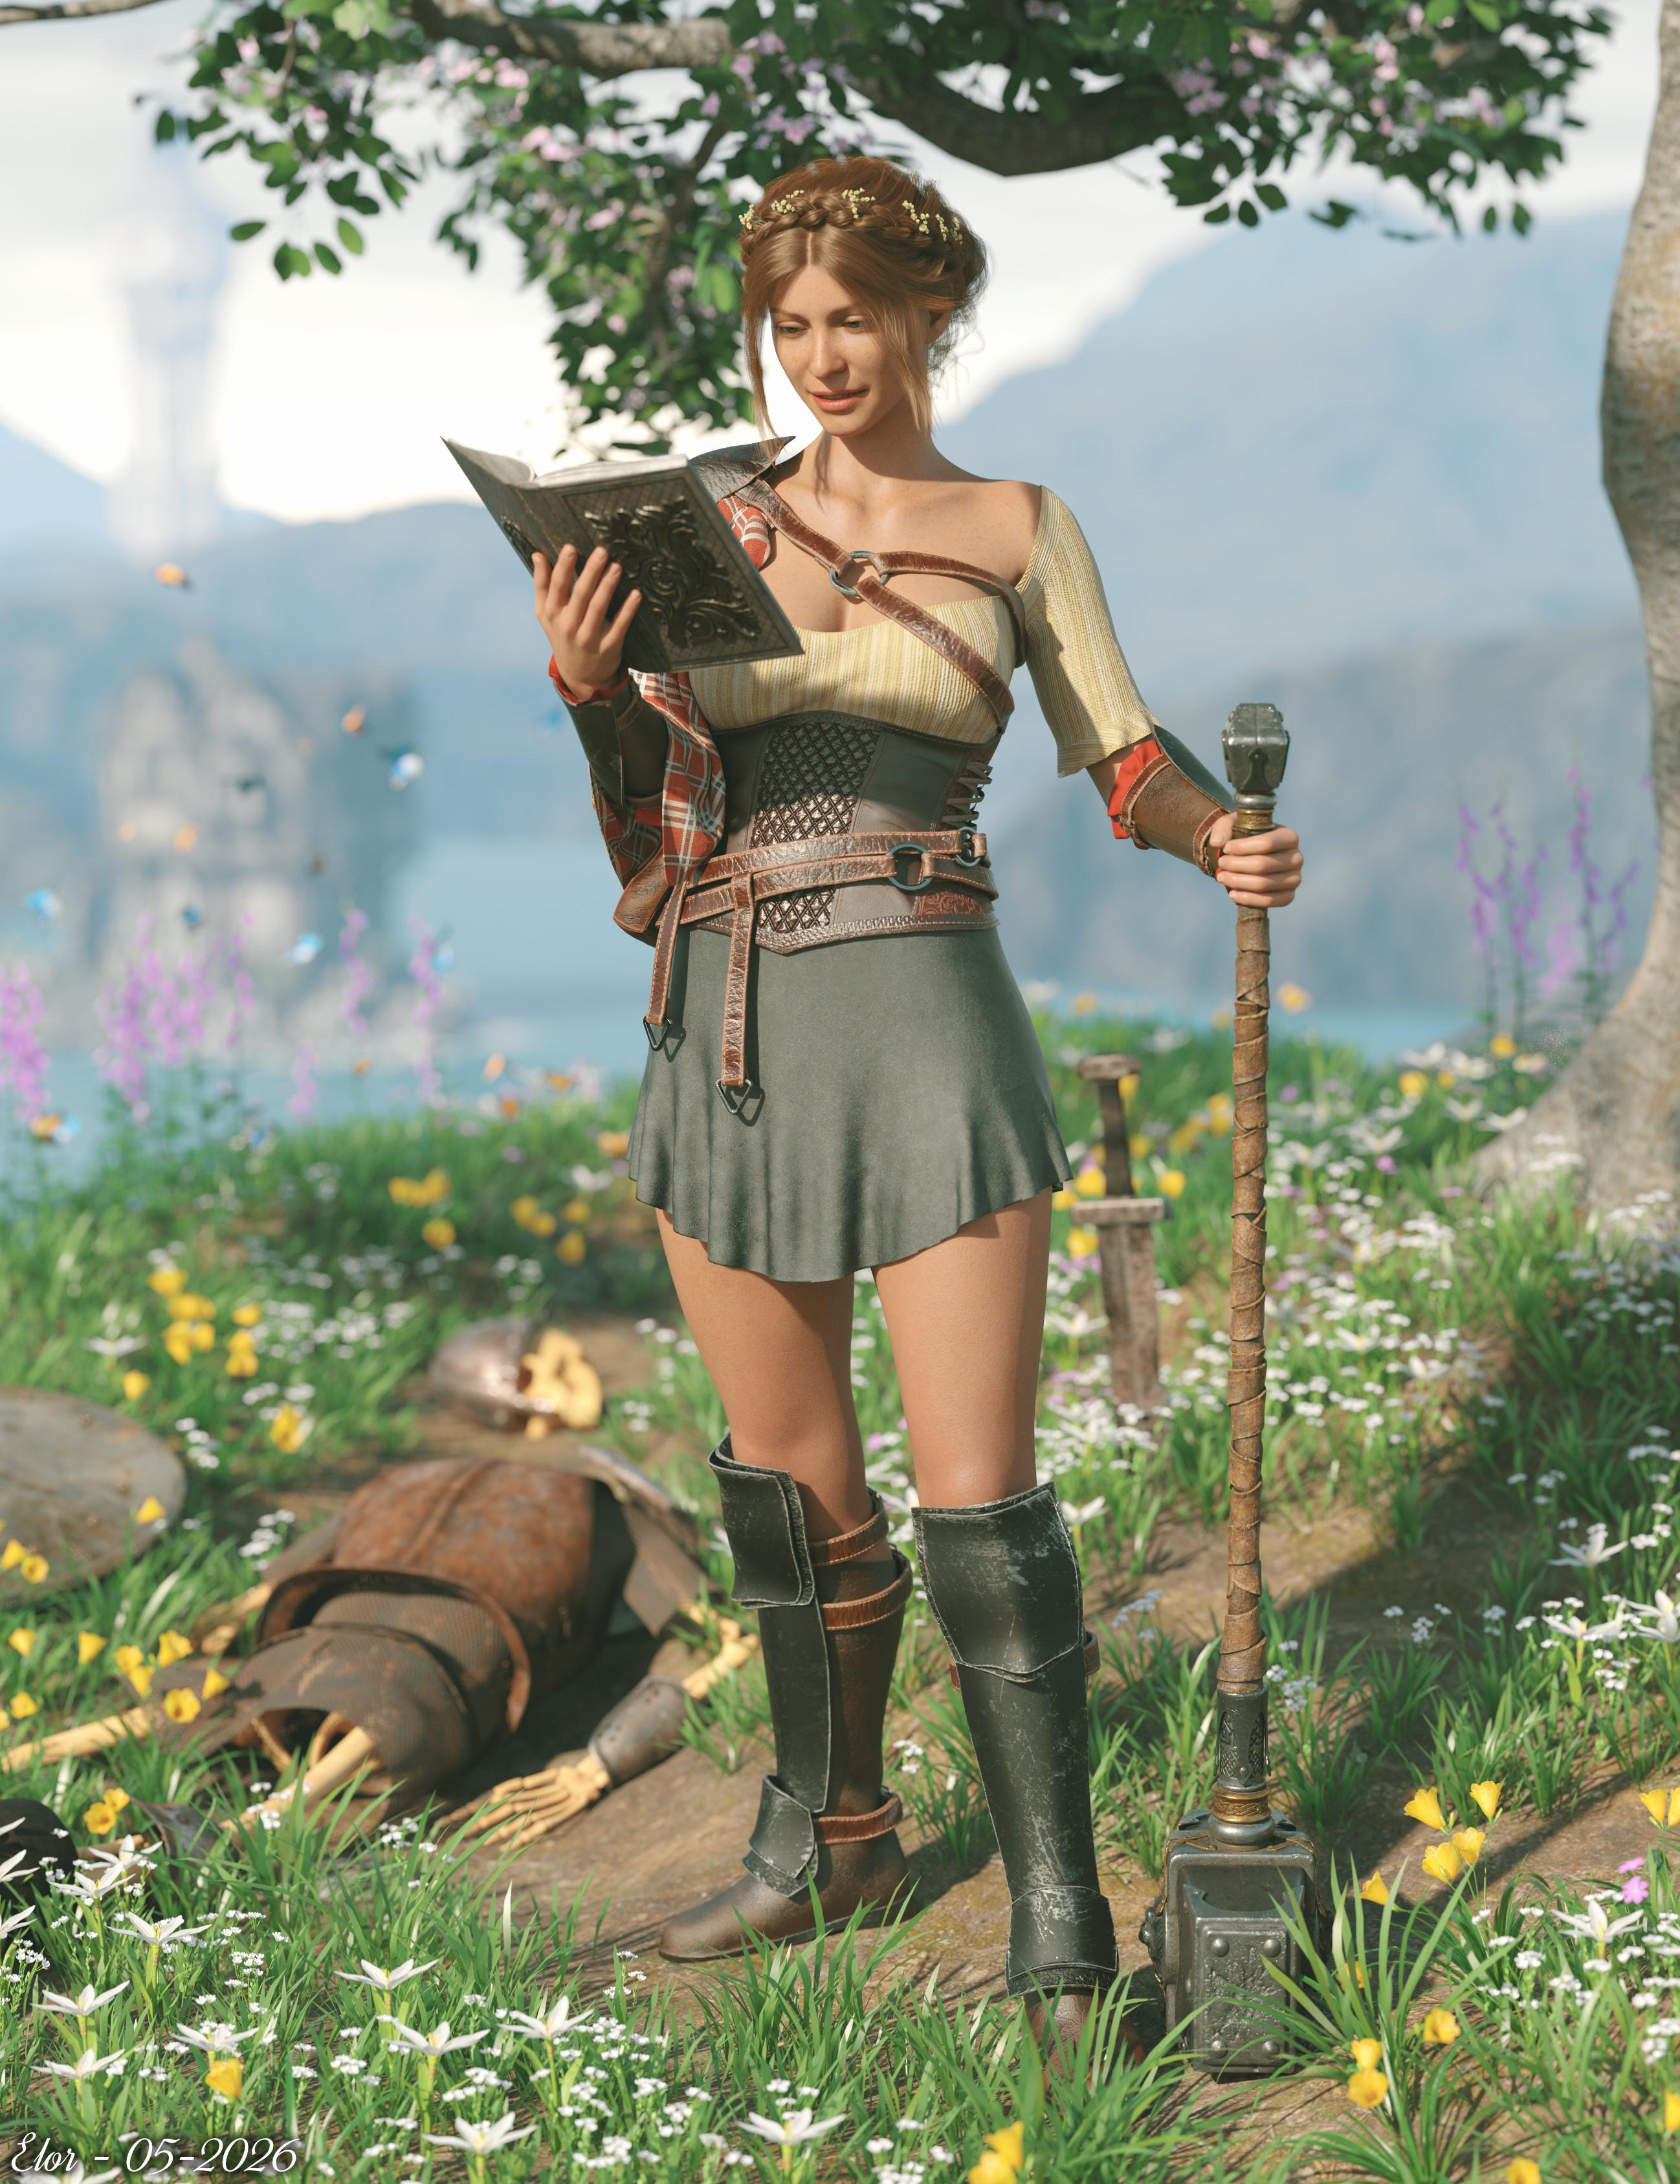
Newly used products:
- LoREZ Skeleton Bundle
- Blossoming Spring Modules
- dForce Aurola Warrior Wolf Outfit for Genesis 8 and 8.1 Females
- MW Loriane HD for Genesis 8.1 Female (skin and HD Morph only, the head and body morphs are from CGS Eva, a freebie by CGSerpent available at Renderhub).
- Worlds Of Fantasy Medieval House
I have some doubt about the tower from Jack Tomalin in the background and the butterflies.
The scene started as the icon for the metadata created for CGS Eva (I created the metadata and added .duf files akin to the ones you usually find in a character product) and for a change of scenery, I wanted to do a fantasy render and wanted to try to mimic the sense of depth @MaureenMcMahon was able to showcase in her renders (ex: 'The sight of home. Been along time since.' or 'king' to name two examples I like a lot).
I'm still missing something to put between the foreground and the background, but the couples of things I tried were not great and there is likely a more efficient way to but mountains in the background than using Mega Terrain: Highland but I like the foreground and background.
I used some dformers to push the plants and grass under the shield and the skeleton, inspired to do that by this month Daz 3D New User Challenge (otherwise, considering a past bad experience with dealing with dformers and grass, I would likely have removed the shield and not bother with the grass poking through the skeleton).
I have a list of the other items used, thanks to @Ascint's Asset Auditor: https://www.daz3d.com/forums/discussion/761231/easily-identify-products-and-assets-in-daz-studio-duf-scene-files-seeking-feedback/p1
Edit: I forgot, I did some postwork to merge various renders, to get the two tones dress because the way the dress is surfaced doesn't allow to easily have one color for the top and another one for the corset.
And it would have been easier to make FBM for the outfit if the corset was a difference piece: making sure the part of the dress under the corset was not inside the body required some strange cameras angle in Blender

But as a bonus, if someone want to only have the dress, it's possible because the part under the corset does exist.
I also used Thickener on various parts of the outfit, to give them a bit of thickness.
[Solved] Metadata: how to remove a wrong Scene ID from a Compatibility Base ?Hello,
Currently, in the database of my Daz installation, Genesis 9 Base is linked to two Scenes IDs:
- /data/DAZ 3D/Genesis 9/Base/Genesis9.dsf#Genesis9
- /data/Daz 3D/Product/G9Dragon/Genesis9.dsf#Genesis9
The first one is the intended one, and the second is bogus.
I think I have identified which product is responsible for that bogus link (Marley HD is the only one with the second Scene ID in its .dsx file in the package downloaded from Daz):
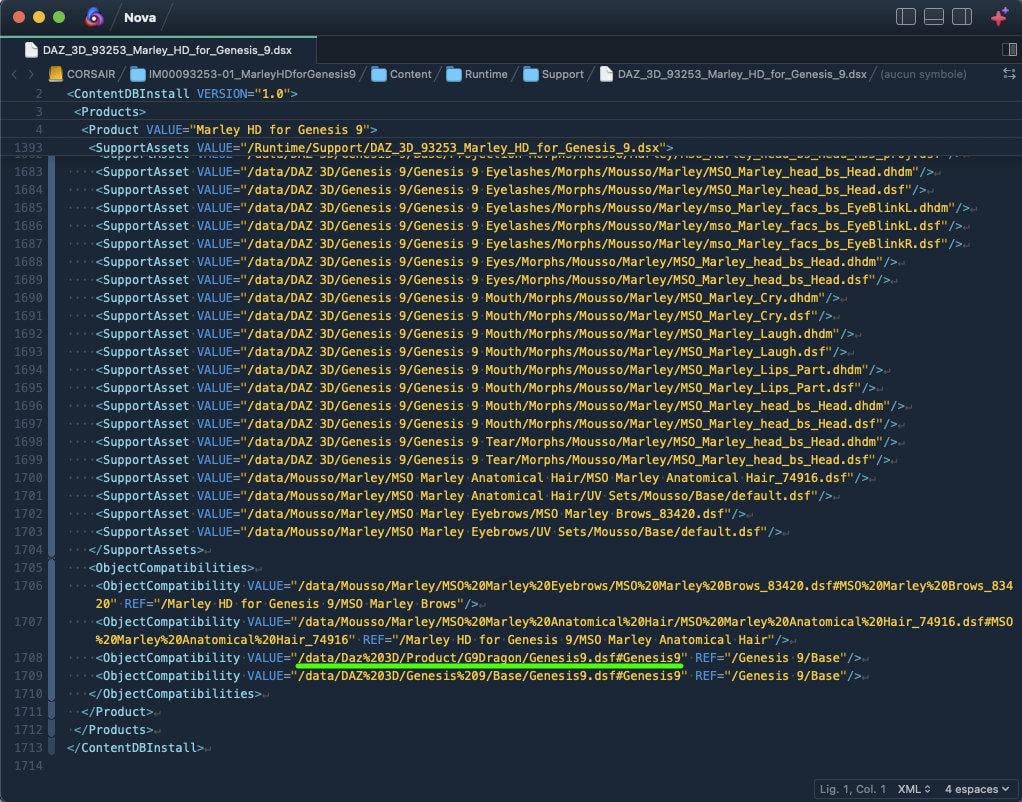
I removed all products with a mention of the G9Dragon Scene ID using DIM, then removed all of them through the Products listing from the Content Library but that problematic link is still here as shown on this screenshot of the metadata editor, opened with Genesis 9 selected in the scene:
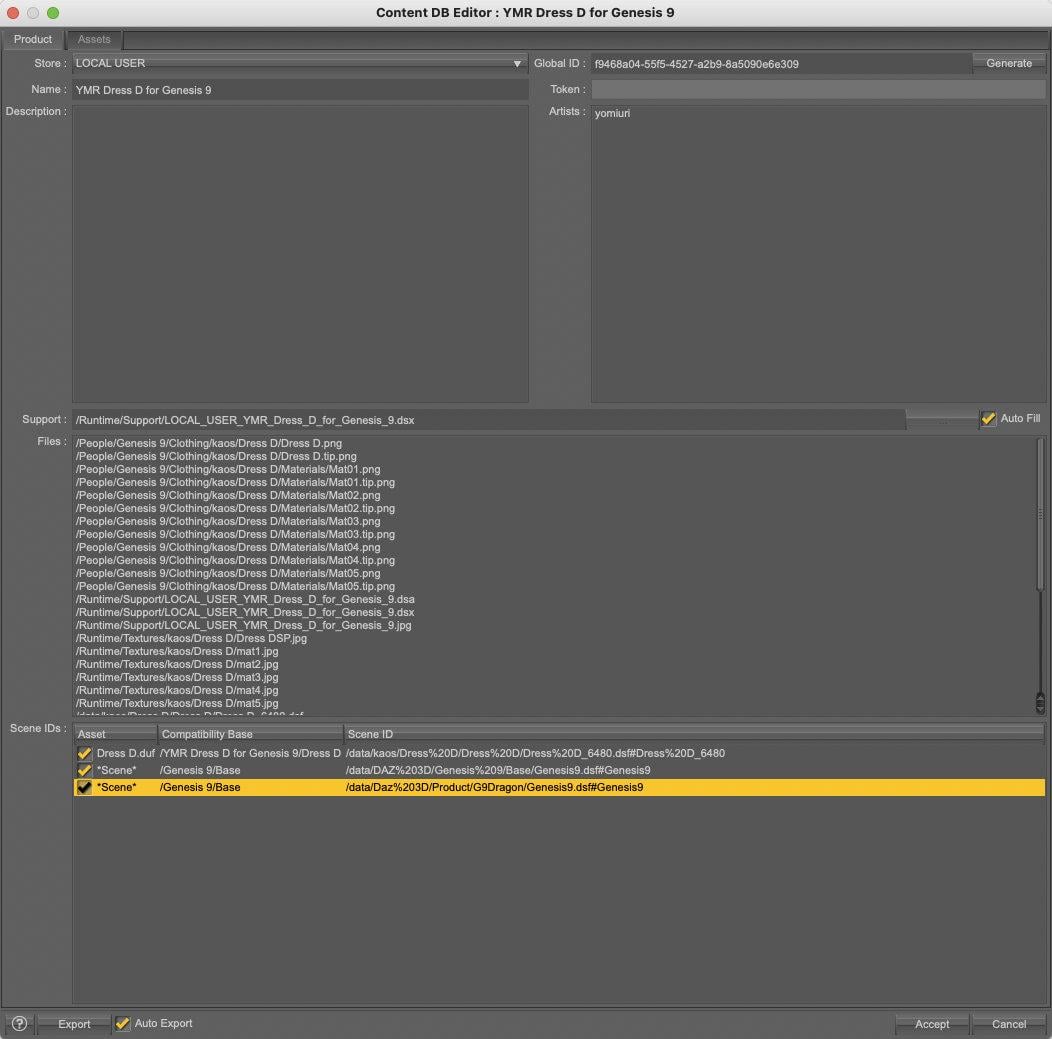
How to remove the link between Genesis 9 Base and the bogus Scene ID so that it doesn't appear in the metadata editor when I'm opening it with Genesis 9 selected?
DAZ3D option to export Iray materials to PBR industry standardI know that. However when I export an DAZ Iray prop as an obj (ie: prop.obj) with supporting .mat file (prop.mat) and material/texture files (diffuse.jpg, bump.jp, normal.jpg, displacement.jpg, etc). If I import the prop.obj into Vue, 3DCoat, Modo, Blender, etc. Many of the material/textures files are not recognized or missing.
If I export a prop from Vue, 3DCoat, Blender with supporting texture/material files. It will load flawlessly into DAZ, Blender, Vue, 3D coat and the model will be properly textured.
I think the issue is DAZ does not properly export Iray shaders or can not.
EZFinder - Advanced Content Manager for Daz Studio [Commercial]namffuak said:
I'm missing something somewhere - I have 5 defined libraries but I don't see any way to define them to EZFinder. Scan to file just scans my first library.
Are these libraries defined through the Install Manager?
They need to be listed in the Install Manger library path list.
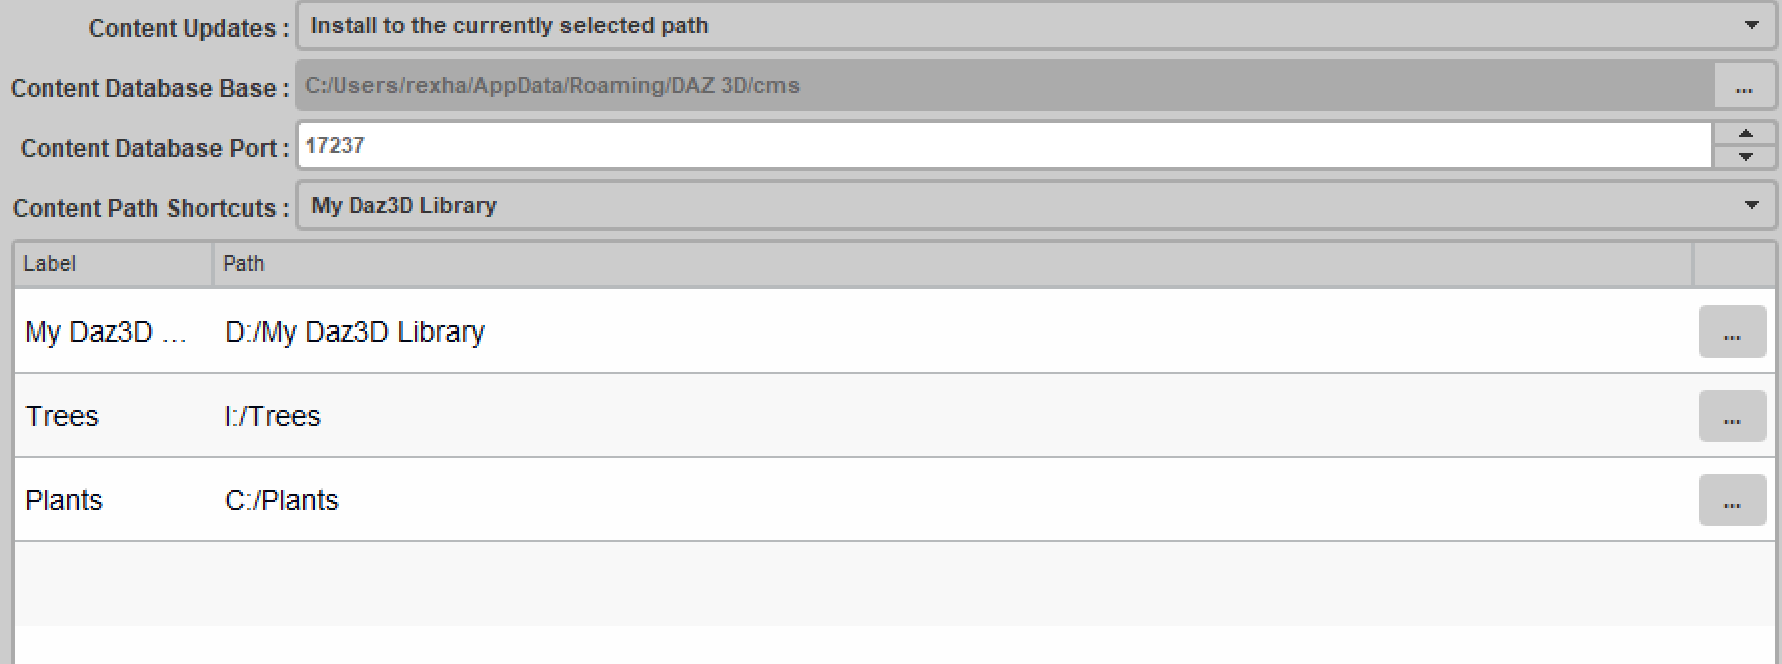
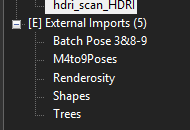
If they are not listed in Install Manager, then you need to scan the libraries not native to Daz Studio with the Import External Scanner.
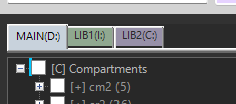
Daz Libraries = Compartment Tabs
Non Daz Libraries = Import External
If you are still having issues I will help troubleshoot the problem further for you.
Quick question to help me narrow this down — when you launch EZFinder, the splash screen shows a version number in gold text
at the bottom-left corner (something like "v1.0.x"). Could you let me know what version it says?Please refresh my memory on installing 3rd party contentYou can install them manually or use a tool like Content Wizard to create metadata and install Nubble.
Manually,I think it's best to let the library managed by DIM alone, so personnaly, I created a library for third part content and install products in it, but it's the same principle regardless of the library used:
1. Extract 3DU_DS_Nubbles.zip somewhere on your computer
Inside the folder where the content of 3DU_DS_Nubbles.zip was extracted, you should have three sub-folders:
- Animals
- data
- Runtime
2. If you're using Windows, select these three folders then drag and drop them onto the library you want to use: Windows Explorer should automatically merge the three folders with the already existing folders.
3. If you're using MacOS, don't do that, otherwise Finder will mess your files. So instead:
- Copy (CMD+C) the three folders
- Open the folder of the library you want to use
- Paste (CMD+V) the three folders inside that folder
- You should see a window asking if you want to merge the three folders with the content already installed, so click Merge and wait.
At that fourth step, if you don't see Merge among the choice, click ABORT.
It's very important to never ever click anything else than Abord or Merge on MacOS: otherwise, Finder will replace the already existing folders and you'll lose the content already installed.
Last advice on MacOS, if you made a mistake like copying the folders into the wrong library: don't ask Finder to cancel what you just did (it'll remove all the folders moved, including content that already existed and wasn't modified by the mistake), just painfully remove the files and folders related to the product you just installed.
A View Through The MirrorWendyLuvsCatz said:
background said:
I totally cheated, in a way. I tried drawing them onto the hdri, a few times but it looked terrible. The tyre tracks are actually two large diameter thin ring objects that I created and then cut in half and put in the image like the car, and set the opacity very low. The full ring had 512 segments to get a smooth curve. I did mess up though because I think the tyre marks appear to be from the front wheels, but the Toyota 2000GT is a rear wheel drive car. I never owned one, but I liked the open topped one in 'You Only Live Twice', and it makes a change from an Aston Martin.DB5.
well that is how I edit HDR
I render spherical camera 2:1 images to match in size, dome only in Environment but uncheck the HDR being visible in DAZ Studio or Carrara Octane (EXR there) then add the Tiff or EXR image as a layer to the HDR in Gimp keeping the metadata etc
That's clever, I will have to try that. I'm sure there will be other places in the story where a hdri is needed and often they don't contain everything I would like. On these ones. I was happy to get the car on the left side of the road, or at least appear not obviously in the middle.
V3D Magic Extract And Append Bundle (Commercial)jmucchiello said:
Can't wait for the group support. I usually put figures in a group and do translation and rotation on the group leaving the figure at 0,0,0 0,0,0 100%,100%,100%,100%. I think these translations and rotations aren't imported even when you choose the retain translation in the gui.
Thanks a lot for your feedback and remarks.
Group nodes already work in my in-development 1.2 version: they are displayed in the hierarchy and can be reloaded with their children.
In the current script logic, the “Zero after loading” option deliberately resets the loaded branch after import. More precisely, after loading, the script looks at the newly added nodes, matches them by label/name, finds the top node of the newly loaded branch, and applies the zeroing only to that top branch node, in order to place the loaded branch at the scene origin.
Bones, and also child props/figures inside that loaded branch, are not zeroed individually, because their placement depends on their parent hierarchy. They keep their relative position inside the branch. Zeroing every child separately would break that relative placement. If you want to zero a child item separately, then you need to select that child item itself instead of selecting its parent branch.
So if “Zero after loading” is enabled, the original placement is not supposed to be preserved. The loaded item or loaded branch is intentionally reset at 0, but only for the checked items. Also, if both a parent and one of its children are checked, the parent branch wins, because the child depends on it.
If “Zero after loading” is not enabled, then the script keeps the transforms as they are stored in the source file. That means:
-
if the figure/object was not parented, its transforms are effectively scene transforms;
-
if the figure/object was inside a group/parent, its transforms are local transforms relative to that group/parent.
This is why your case is important. If the figure itself is at 0,0,0 and the actual placement comes from the parent group, then loading only the figure will not necessarily reproduce the visible scene placement, because that placement belongs to the group transform.
I have already implemented a “reconstruct the world placement from the parent hierarchy” kind of behavior in the Cameras/Lights scripts, but it is rather complex and not something I want to blindly duplicate everywhere without careful testing. I will probably not try to add that specific reconstruction behavior in version 1.2, because loading the group itself should already solve this kind of case in a cleaner way.
The good news is that in the in-development 1.2 version, group nodes are now displayed and can be reloaded. So in your kind of workflow, you should be able to select the top prop/figure parent or group that carries the transform, load it with its children, and avoid zeroing its location. This should preserve the group placement and the relative placement of the children inside it. Then, if needed, you can keep only the interesting figure or prop afterwards, for example by unparenting it (with option "in place") and deleting the rest of the loaded branch.
I also plan to review scale handling more carefully in the next development step, probably with an additional user option for scaling.
Thanks again, this is exactly the kind of transform case I want to test before finalizing the group support.
A View Through The Mirrorbackground said:
I totally cheated, in a way. I tried drawing them onto the hdri, a few times but it looked terrible. The tyre tracks are actually two large diameter thin ring objects that I created and then cut in half and put in the image like the car, and set the opacity very low. The full ring had 512 segments to get a smooth curve. I did mess up though because I think the tyre marks appear to be from the front wheels, but the Toyota 2000GT is a rear wheel drive car. I never owned one, but I liked the open topped one in 'You Only Live Twice', and it makes a change from an Aston Martin.DB5.
well that is how I edit HDR
I render spherical camera 2:1 images to match in size, dome only in Environment but uncheck the HDR being visible in DAZ Studio or Carrara Octane (EXR there) then add the Tiff or EXR image as a layer to the HDR in Gimp keeping the metadata etc
DAZ Hair Cards look flat in Blender Cycles after Diffeomorphic importSkin and hair are translucent materials, that means their appearance depend heavily on lights setup. To compare with daz studio you have to use the same lights, as different lights will produce a different appearance.
That said, there's two types of hair in daz, ribbons or strands. The first are geometry hair which converts fine enough and the look is similar to iray. The second are SBH or dForce SHB which are more approximated and they may look different in blender, to be adjusted by hand.
A final note is that custom shaders don't convert to blender, for these you get a warning in the console after import. Typical products are OOT hair which use custom shaders and don't convert fine.
p.s. Also tone mapping affects how colors and highlights appear in the scene, both in daz studio and in blender. The standard view transform in blender is more similar to the default tone mapping in daz studio.
render tab > color management
DAZ Hair Cards look flat in Blender Cycles after Diffeomorphic importHello. I import characters from DAZ Studio into Blender using Diffeomorphic. I have a problem with hair cards: in Cycles the hair looks too matte and almost has no highlights. It seems DAZ hair shaders do not convert properly. Could someone explain: 1.what is the correct shader setup for DAZ hair cards in Blender 5? 2.are there any good tutorials or node setups specifically for DAZ hair in Blender?Problem with Breastacular for G8FHi,
I'd like to use this product in order to get higher mesh density in the chest area for sculpting.
The import via Diffeo works fine, but after rendering there is a noticeable green outline around the B-Tac material zone.
I've tried several different G8F character materials and on some it's more noticeable than on others, but still too much though.Does anyone else have this issue?
My only other option is to omit B-Tac and exporting the figure at subD 2 out of DS, or using a MultiRes modifier in Blender (which doesn't let me sculpt with shape keys).
Both options significantly increase the vertex count in areas other than the chest as well, which I don't need. Making the figure way heavier than needed.
Not a huge issue when using 2 or 3 figures in a scene, but this all adds up quickly.Is there a way to fix that outline issue?
Thanks!The Complete Beauty Collection is out! [Commercial]Well my backup crashed after the 2nd volume, so I am taking a break on that to check this out. I started with loading first the CP Frame and then the VG Cards. When I used my mouse to click on the CP Frame so I could see the VG Cards Daz Studio crashed.
This is what the Help log had:
05-16 07:51:44.025 [INFO] :: Prepare asset load (merge): /Props/Cosmetics/Boudoir/CP Frame Square.duf
2026-05-16 07:51:44.026 [INFO] :: Locking viewport redraw...
2026-05-16 07:51:44.026 [INFO] :: Viewport redraw locked.
2026-05-16 07:51:44.333 [VERBOSE] :: Native format content directories: 3
2026-05-16 07:51:44.333 [VERBOSE] :: Poser format content directories: 2
2026-05-16 07:51:44.333 [VERBOSE] :: Other import format content directories: 0
2026-05-16 07:51:44.333 [INFO] :: Begin asset load (merge): /Props/Cosmetics/Boudoir/CP Frame Square.duf
2026-05-16 07:51:44.338 [INFO] :: Determining missing assets...
2026-05-16 07:51:44.400 [INFO] :: Setting textures...
2026-05-16 07:51:44.401 [INFO] :: Scanning for addons...
2026-05-16 07:51:44.424 [INFO] :: Creating node geometry...
2026-05-16 07:51:44.427 [INFO] :: Creating UV sets...
2026-05-16 07:51:44.427 [INFO] :: Creating materials...
2026-05-16 07:51:44.436 [INFO] :: Resolving legacy figures...
2026-05-16 07:51:44.436 [INFO] :: Sorting property groups...
2026-05-16 07:51:44.436 [INFO] :: Setting up follow targets...
2026-05-16 07:51:44.437 [INFO] :: Finished asset load (merge): 0m 0.103s - /Props/Cosmetics/Boudoir/CP Frame Square.duf
2026-05-16 07:51:44.890 [INFO] :: Unlocking viewport redraw...
2026-05-16 07:51:44.890 [INFO] :: Viewport redraw unlocked.
2026-05-16 07:51:45.055 [INFO] :: Loaded image: Picture01.jpg
2026-05-16 07:53:32.716 [INFO] :: Prepare asset load (merge): /Environments/Architecture/Vignettes/Vignette Bedroom Props/VG Cards.duf
2026-05-16 07:53:32.716 [INFO] :: Locking viewport redraw...
2026-05-16 07:53:32.716 [INFO] :: Viewport redraw locked.
2026-05-16 07:53:33.026 [VERBOSE] :: Native format content directories: 3
2026-05-16 07:53:33.026 [VERBOSE] :: Poser format content directories: 2
2026-05-16 07:53:33.026 [VERBOSE] :: Other import format content directories: 0
2026-05-16 07:53:33.026 [INFO] :: Begin asset load (merge): /Environments/Architecture/Vignettes/Vignette Bedroom Props/VG Cards.duf
2026-05-16 07:53:33.032 [INFO] :: Determining missing assets...
2026-05-16 07:53:33.095 [INFO] :: Setting textures...
2026-05-16 07:53:33.097 [INFO] :: Scanning for addons...
2026-05-16 07:53:33.102 [INFO] :: Creating node geometry...
2026-05-16 07:53:33.103 [INFO] :: Creating UV sets...
2026-05-16 07:53:33.103 [INFO] :: Creating materials...
2026-05-16 07:53:33.116 [INFO] :: Resolving legacy figures...
2026-05-16 07:53:33.116 [INFO] :: Sorting property groups...
2026-05-16 07:53:33.116 [INFO] :: Setting up follow targets...
2026-05-16 07:53:33.116 [INFO] :: Finished asset load (merge): 0m 0.90s - /Environments/Architecture/Vignettes/Vignette Bedroom Props/VG Cards.duf
2026-05-16 07:53:33.609 [INFO] :: Unlocking viewport redraw...
2026-05-16 07:53:33.609 [INFO] :: Viewport redraw unlocked.
2026-05-16 07:53:33.764 [INFO] :: Loaded image: Picture04.jpgSo, I decoded to load the CP Frame first, move it up. Image looks okay. Loaded CP Frame Square and it also looks okay.
I clicked on both items, D|S stayed open and stable. Now, I need to mention I am on my MacMini M4, not my Windows 11 laptop.
This is what I see in my Help Log for what was going on in D|S:
2026-05-16 08:00:14.027 [INFO] :: Prepare asset load (merge): /Environments/Architecture/Vignettes/Vignette Bedroom Props/VG Cards.duf
2026-05-16 08:00:14.027 [INFO] :: Locking viewport redraw...
2026-05-16 08:00:14.027 [INFO] :: Viewport redraw locked.
2026-05-16 08:00:14.332 [VERBOSE] :: Native format content directories: 3
2026-05-16 08:00:14.332 [VERBOSE] :: Poser format content directories: 2
2026-05-16 08:00:14.332 [VERBOSE] :: Other import format content directories: 0
2026-05-16 08:00:14.332 [INFO] :: Begin asset load (merge): /Environments/Architecture/Vignettes/Vignette Bedroom Props/VG Cards.duf
2026-05-16 08:00:14.339 [INFO] :: Determining missing assets...
2026-05-16 08:00:14.374 [INFO] :: Setting textures...
2026-05-16 08:00:14.376 [INFO] :: Scanning for addons...
2026-05-16 08:00:14.379 [INFO] :: Creating node geometry...
2026-05-16 08:00:14.383 [INFO] :: Creating UV sets...
2026-05-16 08:00:14.383 [INFO] :: Creating materials...
2026-05-16 08:00:14.398 [INFO] :: Resolving legacy figures...
2026-05-16 08:00:14.398 [INFO] :: Sorting property groups...
2026-05-16 08:00:14.398 [INFO] :: Setting up follow targets...
2026-05-16 08:00:14.398 [INFO] :: Finished asset load (merge): 0m 0.66s - /Environments/Architecture/Vignettes/Vignette Bedroom Props/VG Cards.duf
2026-05-16 08:00:14.824 [INFO] :: Unlocking viewport redraw...
2026-05-16 08:00:14.824 [INFO] :: Viewport redraw unlocked.
2026-05-16 08:00:14.968 [INFO] :: Loaded image: Picture04.jpg
2026-05-16 08:00:15.158 [INFO] :: Loaded image: Picture03.jpg
2026-05-16 08:00:15.326 [INFO] :: Loaded image: Picture02.jpg
2026-05-16 08:00:15.513 [INFO] :: Loaded image: Picture01.jpg
2026-05-16 08:01:03.575 [INFO] :: Prepare asset load (merge): /Props/Cosmetics/Boudoir/CP Frame Square.duf
2026-05-16 08:01:03.575 [INFO] :: Locking viewport redraw...
2026-05-16 08:01:03.575 [INFO] :: Viewport redraw locked.
2026-05-16 08:01:03.890 [VERBOSE] :: Native format content directories: 3
2026-05-16 08:01:03.890 [VERBOSE] :: Poser format content directories: 2
2026-05-16 08:01:03.890 [VERBOSE] :: Other import format content directories: 0
2026-05-16 08:01:03.890 [INFO] :: Begin asset load (merge): /Props/Cosmetics/Boudoir/CP Frame Square.duf
2026-05-16 08:01:03.896 [INFO] :: Determining missing assets...
2026-05-16 08:01:03.902 [INFO] :: Setting textures...
2026-05-16 08:01:03.906 [INFO] :: Scanning for addons...
2026-05-16 08:01:03.912 [INFO] :: Creating node geometry...
2026-05-16 08:01:03.913 [INFO] :: Creating UV sets...
2026-05-16 08:01:03.913 [INFO] :: Creating materials...
2026-05-16 08:01:03.922 [INFO] :: Resolving legacy figures...
2026-05-16 08:01:03.922 [INFO] :: Sorting property groups...
2026-05-16 08:01:03.922 [INFO] :: Setting up follow targets...
2026-05-16 08:01:03.922 [INFO] :: Finished asset load (merge): 0m 0.32s - /Props/Cosmetics/Boudoir/CP Frame Square.duf
2026-05-16 08:01:04.435 [INFO] :: Unlocking viewport redraw...
2026-05-16 08:01:04.435 [INFO] :: Viewport redraw unlocked.I am not sure if this is helpful or not.
I opened up the Runtime>Textures again and looked at Picture 01 and Picture 06 and they are different. I am going to attach screen shots. I noticed the VG Cards have partial images from Pictures 01, 02, 03, 04.
I do agree that listing one set's textures in folder and another in a separate folder. But I think I have seen some PAs put repeated textures in another folder. I don't know what is the best practice but for my installation by DIM seems to not care. But I do like being able to track down a file in it's folder, not a comingled folder. I would think that if a PA builds a large library of products, one folder becomes crazy and the individual folders are best.
I am not a computer programmer, just managed computer systems/rooms/keypunch support. I am better at tracking down black market activity in military supply systems. So it is possible I am missing your point. Both sets seem to work just fine for me.
Mary
Mixamo animation in Studio?If for whatever reason you don't want to use diffeomorphic then a simple process is to import the mixamo fbx in blender and save as bvh. Then you import the bvh in daz studio, on the G9 figure.
I'll use whatever works. Just trying to understand the steps.
DAZ Director Plugin (WIP)Tugpsx said:
sidcarton1587 said:
Hi all,
I did a major revamp of the DAZ Script Server plugin to clean up some lingering bugs as well as adding a Python package to drive the plugin. Now you can write code in Python, which translates to DAZ Script and submits requests through the script server. So stuff like this is now possible:
import time
from dazpy import DazClient, DazScene

client = DazClient()          # auto-loads token from ~/.daz3d/dazscriptserver_token.txt
scene  = DazScene(client)

print(scene.num_nodes(), "nodes in scene")

figure = scene.find_skeleton_by_label("Genesis 9")

bones = figure.bones()
print([b._identifier.value for b in bones if "neck" in b._identifier.value.lower()])

rots=[0,4,10,15,20]

for rot in rots:
    print (f"Set rotation {rot}")
    figure.find_bone("neck1").set_local_rotation(0, rot, 0)
    time.sleep(1)
The Python scripting is still in v0.1.0, and there is a lot of testing to be done, but I thought I'd put it out there for people to kick the tires on. See what you think. If there are features you'd like to see, feel free to raise a GitHub issue and request 'em.
Links:
The main GitHub repo for the project: bluemoonfoundry/daz-script-server: DAZ Studio plugin: embedded HTTP server for executing DazScript remotely and returning results as JSON
The GitHub release page for v2.0.0, which contains all this stuff: Release v2.0.0 — dazpy Python SDK + plugin rewrite · bluemoonfoundry/daz-script-server
The Script Server API docs: DazScript Server — HTTP API Reference
The dazpy Python package API docs: dazpy — DAZ Studio Python SDK — dazpy 0.1.0 documentation
--sid
I'll have to check into this agin once I repair my dead data drive. Warning make sure your AIO pump is not connected to the same power header as any hard drive, when the pump goes so does you hard drive.
Ouch!
DAZ Director Plugin (WIP)sidcarton1587 said:
Hi all,
I did a major revamp of the DAZ Script Server plugin to clean up some lingering bugs as well as adding a Python package to drive the plugin. Now you can write code in Python, which translates to DAZ Script and submits requests through the script server. So stuff like this is now possible:
import time
from dazpy import DazClient, DazScene

client = DazClient()          # auto-loads token from ~/.daz3d/dazscriptserver_token.txt
scene  = DazScene(client)

print(scene.num_nodes(), "nodes in scene")

figure = scene.find_skeleton_by_label("Genesis 9")

bones = figure.bones()
print([b._identifier.value for b in bones if "neck" in b._identifier.value.lower()])

rots=[0,4,10,15,20]

for rot in rots:
    print (f"Set rotation {rot}")
    figure.find_bone("neck1").set_local_rotation(0, rot, 0)
    time.sleep(1)
The Python scripting is still in v0.1.0, and there is a lot of testing to be done, but I thought I'd put it out there for people to kick the tires on. See what you think. If there are features you'd like to see, feel free to raise a GitHub issue and request 'em.
Links:
The main GitHub repo for the project: bluemoonfoundry/daz-script-server: DAZ Studio plugin: embedded HTTP server for executing DazScript remotely and returning results as JSON
The GitHub release page for v2.0.0, which contains all this stuff: Release v2.0.0 — dazpy Python SDK + plugin rewrite · bluemoonfoundry/daz-script-server
The Script Server API docs: DazScript Server — HTTP API Reference
The dazpy Python package API docs: dazpy — DAZ Studio Python SDK — dazpy 0.1.0 documentation
--sid
I'll have to check into this agin once I repair my dead data drive. Warning make sure your AIO pump is not connected to the same power header as any hard drive, when the pump goes so does you hard drive.
Actors disappear when I switch to IrayDear experts,
I added an image of a building as backdrop (Windows/pane/environment/import) and placed three actors in front of the image. Looks fine in all views, except IRAY or if I try to render. In those cases, the actors et cetera simply disappear.
Anyone know why this is so?Thanks in advance!
DAZ Director Plugin (WIP)Hi all,
I did a major revamp of the DAZ Script Server plugin to clean up some lingering bugs as well as adding a Python package to drive the plugin. Now you can write code in Python, which translates to DAZ Script and submits requests through the script server. So stuff like this is now possible:
import time
from dazpy import DazClient, DazScene

client = DazClient()          # auto-loads token from ~/.daz3d/dazscriptserver_token.txt
scene  = DazScene(client)

print(scene.num_nodes(), "nodes in scene")

figure = scene.find_skeleton_by_label("Genesis 9")

bones = figure.bones()
print([b._identifier.value for b in bones if "neck" in b._identifier.value.lower()])

rots=[0,4,10,15,20]

for rot in rots:
    print (f"Set rotation {rot}")
    figure.find_bone("neck1").set_local_rotation(0, rot, 0)
    time.sleep(1)
The Python scripting is new in v2.1.0, and there is a lot of testing to be done, but I thought I'd put it out there for people to kick the tires on. See what you think. If there are features you'd like to see, feel free to raise a GitHub issue and request 'em.
Links:
The main GitHub repo for the project: bluemoonfoundry/daz-script-server: DAZ Studio plugin: embedded HTTP server for executing DazScript remotely and returning results as JSON
The GitHub release page for v2.0.0, which contains all this stuff: Release v2.0.0 — dazpy Python SDK + plugin rewrite · bluemoonfoundry/daz-script-server
The Script Server API docs: DazScript Server — HTTP API Reference
The dazpy Python package API docs: dazpy — DAZ Studio Python SDK — dazpy 0.1.0 documentation
--sid
skin bug with facsThank you too, I personally tend to avoid HD as hell and never baked anything until recently, so to help others is also a good opportunity to dig in and verify things to work fine.
p.s. The artifacts you got in your first post, also happens if you forget to enter the geometry editor for HD export. That is, base resolution always exports fine, while to export HD with geografts you need to enter the geometry editor in daz studio, so to separate the geograft from the HD figure. If you don't then the importer tries to fit the morphs but the result is approximated and often not good enough.
steps:
- in daz studio save the scene
- enter the geometry editor and export the dbz
- import in blender
https://github.com/Diffeomorphic/import_daz/wiki/Export_High-resolution_Export_To_Blender
skin bug with facsupdate. There's a bug with HD meshes where the morphs didn't transfer with easy import and we had to transfer by hand. Now fixed so be sure to get the latest dev.
skin bug with facsYou didn't merge geografts. It is good to easy import without merging, because otherwise you can't bake textures, unless you make sure that udims don't ovelap. It is also good to keep a backup with geografts unmerged should you decide to add more morphs later. However, after import and baking, you have to merge geografts to get the figure ready for rendering.
setup > finishing > merge geografts
Daz 3D is part of

Connect
DAZ Productions, Inc.
7533 S Center View Ct #4664
West Jordan, UT 84084Licensing Agreement | Terms of Service | Privacy Policy | EULA
© 2026 Daz Productions Inc. All Rights Reserved.