-
AIUTO...CHI CONOSCE L’ITALIANO? PARTE UNDICI
Spero che ti ascoltino, visto che non faranno Genesis9.
Davvero non mi riesce di capire perchè non riparino gli IK, da quel che ho potuto vedere una marea di utenti si lamenta di questo, se non la quasi totalità...
E' letteralmente impossibile lavorare con Genesis8... Ora che sta saltando fuori un nuovo strumento per trasferire i morph tra le figure, spero di poter utilizzare le ultime.
SereneNight's Sci-Fi Fun Thread 2I couldn't figure out how to select morph vertices, however, there seems to be an issue with this one: MD_JCM_L ArmPit Fix01 it is part of the product in question. When I slid it, the eye moved back where it should be. But the shoulder bend looks awful without it.
SereneNight's Sci-Fi Fun Thread 2I do know it occurs when the shoulder morph product is applied so it is hopefully is one in the upper body. I need to step away from the computer for Alf hour but will return shortly.
SereneNight's Sci-Fi Fun Thread 2Ok, this looks to be the eye movement in a JCM. So select the root figure and look at the hidden JCMs that are on. Now you want to select the Geometry Editor tool, under Tool Settings make sure the Vertex Selection is active. Then right click on each JCM that's active and Select Morph Vertices. One of them should highlight the eyeball in question. It zooms to the selected verts. That should at least tell you which morph is causing the problem (but again, can be quite tedious). Hopefully it's not several morphs moving it a little and compounding to a large effect.
SereneNight's Sci-Fi Fun Thread 2It is definitely a rogue side to side morph though. Because that is how I generally fix it. When I toggle the shoulder on and off the eyeball is fixed. Its very confusing. Especially since I don't see this with all poses.
SereneNight's Sci-Fi Fun Thread 2Sorry, I am in that tab, I chose a previous screenshot.
And that's with Show Hidden on? That's weird. Click on Left Eye and see if the Side-Side is on.
Ohhh... it could be the eye was rotated with a jcm and not a joint rotation. Turn on the joint editor and see if the joint for that eye is still straight forward like the other or if it's turned. If it's straight forward, the the JCM has the eye in the morph and not just a joint ERC.
Welcome to Hatsune Miku Anime Manga Cafe ☕"which Daz model is better for that anime style?"
Tough question, actually, baton210, which may be why no one has dived in to answer. As has been mentioned elsewhere in the thread, translating 2D manga or anime characters to 3D models can be difficult. Part of the reason for that is that most wanting to do that want to use an application like DAZ Studio to render images of 3D characters and environments in a way that looks like the hand-drawn originals. The difficulty in doing so stems from the fact that originally 3D computer graphics was developed as a means of creating more realistic images, albeit the early efforts were still largely toonish. Ever since then 3D computer graphics has largely been driven by demands for ever increasing realism. Today, "photorealism" seems to be the holy grail of many, but not all, enthusiasts. So, long story short, with most of the 3D programs and the content that they use or create driven by realism, it becomes a little bit like trying to fit a square peg in a round hole attempting to recreate a 2D style in a 3D environment. It can be done, and there are some excellent examples of work by forum members in achieving this. But it is neither simple nor easy.
Okay then which DAZ3D figure? It doesn't matter, really. The body in your example is probably the easy part. That could be done using any of the DAZ figures, old or new, providing you have the addon morph packages for them so you can adjust the various characteristics/parameters of the model. The head is the trickier part. Here again, there are resources that are available to assist in achieving a manga/anime "look", but getting exactly what you want will inevitably result in some tweaking and fiddling. The extreme expressions that such characters display is a whole other issue. They can be extremely exaggerated. I guess if I had to make a suggestion of a single solution for someone just starting out, I would have to say use Genesis 8 Female and Sakura 8, along with the head and body morph packages for Genesis 8 Female, all of which are 40% off at the moment as below:
https://www.daz3d.com/sakura-8
https://www.daz3d.com/genesis-8-female-head-morphs
https://www.daz3d.com/genesis-8-female-body-morphs
That should get you started. There are lots of other options, but we could write a book on that.

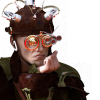
I wonder what software Ultrman is using. It's clearing 3D but still looks like Anime.
SereneNight's Sci-Fi Fun Thread 2I'd like to know, but only if it isn't too much trouble. I know you have plenty of lovely art to do... And this is low priority. I already uninstalled this, so that I can use the boys without the wall eye thing happening.
Nerdy as it is, bug tracing is one of my passions XD
- When a joint goes out of whack like that, with the out of whack on, select the joint that's affected (in this case the eye).
- Right click on the parameters tab and make sure Show Hidden is on, then click on Currently used. In the eye's case, it looks like it'll be the Side-Side dial.
- Here is the possibily tedious (and possibly dangerous) part. Right click on the morph and go into Edit Mode.
- Then right click and go to Show in Property Hierarchy (if you don't have this tab out, you'll need to add it). It will highlight the joint rotation and you can expand that.
- Subcomponents are things that it controls, so these won't be what you need. Expand the Controllers.
- Stage 1 controllers are things that will always dial the rotation when they are dialed. In a basic Genesis setup on the eye, there's going to be a control for EyesSideSide and EyesCrossed. This is the most likely place for the type of error you're having to be. Most likely when the pose was ERC frozen, there was an errant side eye on and it was missed.
- Stage 2 controllers that will prevent something from getting dialed. If you get characters with JCMs, the base JCM will go on the joint, then the character's morph will go in this section. This is not as likely a place for an error (other than a missing character morph sometimes) unless you aren't getting a dial that you should.
If all goes well and it's a more typical situation, the errant controller will be in Stage 1. You can right click it and Remove Selected then save your modification. You might need to save the controller or the joint rotation. It depends on where the control was saved to. You can check this by opening it further and looking at Attributes. There's a part that saves Save With and that will tell you if it's the joint itself or the controller that holds the link.
I hope that made sense. I tried to follow along as I was talking it through but I always forget something XD
L'Adair's Kitchen… (How'd She Do That?)Superb! I can hear the sound of the waves. What a great scene.
It is so difficult to make a night time scene looking good, so sharp and with no noise.
I'll watch your thread to see if you'll tell us your secrets

I think xmasrose deserves an award for almost single-handedly keeping this thread alive!
Thank you, girl friend.So here's the image she's gushing about.

Secret #1: The foreground "set" is actually a couple of primitives, a dForm-spawned morph, and a few props.
- The parking surface is a plane primitive with an asphalt shader, from DA Brick and Mortar Shaders.
- The ground on the other side of the asphalt started out as a high-poly cylinder primitive, with polys on the ends and about 3/4 of the sides deleted using the Geometry Editor.
- Two dForms were used, one moving vertices upward, the other moving them down, to create an uneven terrain on the remaining cylinder polys.
- Three wild grass props from Long Grass - Essential Grassland Flowers and Plants were instanced and scattered across the "terrain" using Ultrascatter Pro.
- I used one rock from Iray Plants and Rocks Pack and made several instances, which I manually placed and sized.
- The trees are from Ecomantics - Efficient Ecosystems with Iray Uber Base applied and are flat props. I was surprised to find they are not single poly billboards. I love using bits from this set when it isn't critical that the trees be full 3D.
- The fence is from The Old Barn. I chose it specifically because it was more than long enough to run the length of the image and I could move it left or right to control where the fence posts were in relation to the figures.
Secret #2: The red car on the left is Family Car 1950 with Resource Saver Shaders—red paint, chrome and rubber—on the three surfaces visible in the render: the hull; the trim, wheel and bumper; and the tire.
Secret #3: The convertible is Luxury Car 1950 with a combination of 1950's Luxury Car Iray materials and assorted shaders for the chrome and car paint. I used the sky from a "Draw Dome on" background render to create a texture map for the mirrors to "reflect" the night sky. Everything else I tried, when going for actual reflections, didn't work well in the low light.
Secret #4: I used the Geometry Editor to select details of the cars that weren't visible to the camera anyway and created a "HideDuringRender" Selection Set for each. With the main car, I included the convertable top as well. Before rendering, I hid those polys in the Tool Settings for the Geometry Editor.
The image below shows what parts of the cars are not hidden. Draw Mode is Texture Shaded, and the image has been removed from the asphalt so the black car is easier to see.

Secret #5: Not much of a secret, that wonderful ocean is out-of-the-box DA Big Ocean with number 11 materials. I didn't even use a decal! Rendered with Draw Dome on, the blue of the HDRI definitely contributed to the overall color of the ocean. Tip: The angle of the camera to the ocean is important. This material, for example, is tiled 33 times, and the pattern can become quite visible as the angle increases.
Secret #6: I was unable to render the complete scene in one pass, without the GPU dropping out. Even though the memory required easily fit on the 8GB Nvidia card, the high SubD requirement for the ocean caused the image to revert to CPU only. Rendered separately, the foreground needed Draw Dome off and the background needed Draw Dome on, so I separated the two into their own scene files.
This image below is the actual background image I used on the final image, though sized much smaller than the final image.

Secret #7: Because the foreground and the background are two scene files, rendered separately and composited in Photoshop, I had a lot of flexibility with the background. When both were in the same file, the horizon lined up with the top of the fence posts. Separately, I was able to move the moon down for rendering, then align the moon of both layers in Photoshop to move the horizon up.
Secret #8: I used one of the starfield HDRIs from TerraLUNA 3 for the lighting in both. I have never been satisfied with the background stars in any HDRIs, (a limitation with the technology, not a reflection on the quality of the products.)
- This HDRI is a lighter blue color, and really gave both images a nice tint. One trick I use with these types of HDRIs is to add some distinct white stars over the existing rendered stars, but that wasn't working with such a large expanse of clear sky.
- I ended up masking the sky in Photoshop, applying a gradient layer with the lighter color at the horizon, blending into a much darker color. Then instead of the moon from the background being visible, I used the moon from the foreground, which I had previously hidden with a layer mask.
- To add a starfield, I loaded another of the TerraLUNA starfield HDRIs into Photoshop, (one that was black or nearly black,) converted it to 8-bit, and layered it over the gradient layer. I made the layer smaller, until I liked the size of the stars, and then set the blend mode to "lighter."
- The "falling star" was created in Photoshop using Ron's Space Brushes and separate layers. The brush is very large, so I needed to resize the star. I also lengthened the tail and added a slight curve. A second layer with the brush set small went over the first resized layer to add brightness to the star end. I grouped the two layers and then moved the group into place.
- Tip: When compositing layers together in your graphics editor, use masks if you have them available. It's a real time-saver if you need to change anything. Same with adjustment layers. Photoshop has them, and I suspect Gimp does as well. The fewer changes you make that actually change the image layer(s) the better. (Best is the image layers have no actual changes.)
Secret #9: The leather jacket is actually fit-to a hidden Genesis 2 Male, whose pose matches the Genesis 8 male's pose up to a point. The G2M is actually standing, preventing the jacket from distorting on the bottom. In the front, the jacket doesn't fit quite so well. This is the jacket from Horror Survivors: Marius, with a leather shader applied to all the fabric material zones.
The rest of the actor and clothing secrets were part of my attempt to get the complete scene to render on the GPU. After I decided to put the background in it's own scene, I saw no reason to change any of these. Fewer "stuff" in the scene still means a faster render.
Secret #10: The T-shirt the G8M is wearing is actually a Geometry Shell with a T-shirt fabric shader applied, and all but a few Regions hidden.
Secret #11: I used the "shorts" option of the G8M MEGA Wardrobe as the rest of the jeans weren't visible anyway.
Secret #12: I originally planned on dforcing the Audacious Outfit's skirt and top, but with so little of it showing, I decided I didn't really need to, so the skirt which doesn't auto-conform is sticking straight out in front of G8F and intersects the hood of the car.
Secret #13: I used a feature of the Geometry Editor to hide unseen skin of both actors by selecting what I wanted to hide, (including the internal zones of the mouth, tongue and teeth,) and then using Geometry Assignment->Set Auto-Hide Faces for Attachment…. The G8M faces were assigned to the jeans, and the G8F faces were assigned to the skirt. When these items were fit-to their respective actors, those polys disappeared. To be honest, I don't know if that reduces the render time, but I think it should.
The image below is in Texture Shaded mode. The bright yellow is the chrome. To remove the odd colors you see in the viewport from these Iray shaders, you can set Per Pixel Shading to On in the Preferences dialog, Interface tab. There are trade offs, and I leave it Off most of the time.

Secret #14: I applied the same solid color G8 shader from the Resource Saver Shaders to both figures. I then copied the shader from one zone, and applied it all zones. As the eyes aren't visible, there's no need for those to be different. I then selected all the zones of the male and adjusted the color to be a little different than the female.
Secret #15: Finally, I used a large Ghost Light behind the camera to shed some "ambient light" on the cars and the couple. The image below is a composite, showing the actual settings I used on the ghost light, while the viewport shows the Debug materials applied so the position and size of the light are visible.

(@James47, #15 is the secret I use to "render such beautiful low light scenes." In a nutshell, more light! lol)
SereneNight's Sci-Fi Fun Thread 2Heads up, lately I've been experiencing some strange cross eyed behavior with Owen and Boyd's left eye. I thought it was a character morph but was having trouble figuring out which one. Now I believe it is Auto Shape Enhancer shoulder enhancer. If you have this product, can you test it out with Bold Pose number 20?
1. For example, load Base male.
2. Make sure shoulder enhancer is on.
2. Load Bold pose number 20 https://www.daz3d.com/bold-poses-and-expressions-for-nix-8-and-genesis-8-male
3. Left eye goes out of alignment.
It doesn't happen with all poses, so its tough to trace why this is happening. On some poses it doesn't go too far to the left, so its hardly noticble... Others it goes way left so it very much is. I am wondering if it has to do with how the pose is saved conflicting with the enhancer.
dForce and Marvelous DesignerHello, I am having a problem and have been battling for days without being able to resolve it. I designed my first piece of clothing in MD and exported the obj to Daz, applied the transfer utility, and dforce. It works perfect. The problem is when I apply stitching to the garment in MD and then apply gForce. It messes up everything. My clothing is exported as one object, which should includes the stitching. Am I exporting it wrong or why is dforce not happy when the stitching is applied on the garment?
Thank you so much for helping.
[Released] RSSY Clothing Converter from Victoria 4 to Genesis 8 Female [Commercial]I'm having a problem with the collar of this outfit. Is there a way to make RSSY "forget" to morph the collar when G8's neck twists?
No. The conformer pulls the V4 clothes to where G8F would like them. You can try different conformers (for example, cape) to see if that does a better job.
Breast bounce script for DAZ Studio 4.5Here is the updated download link for these scripts.
https://sites.google.com/site/vibrationphysics0606/
Breast Physics for G8F v1.01
Breast Physics for G3F v1.02
Breast Physics for G2F v1.02
Breast Physics for Genesis v0.65
All these scripts require the following breast control morphs for each figure.
- Breast Control Genesis 8 Female(s)
(https://www.daz3d.com/breast-control-genesis-8-female-s)- Breast Control Genesis 3 Female(s)
(https://www.daz3d.com/breast-control-for-genesis-3-female-s)- Breast Control Genesis 2 Female(s)
(https://www.daz3d.com/breast-control-for-genesis-2-female-s)- Glute and Breast Movement for Genesis
(https://www.daz3d.com/glute-and-breast-movement-for-genesis)
My script calculates the force applied on the figure’s breasts in each frame in each of xyz axis, simulates the vibration based on the technique called seismic response analysis, and then assigns morph values that represent the vibration. If the body moves in a complex way, the breasts vibration will equally be complex as is the case with a real human being.
You can set various parameters to change how the breasts vibrate, and these parameters are explained in detail in the accompanying readme file.
Enjoy! Don’t forget to share your video if you create a good one!
saving scene subset with character does not save shapeAre the shape chnages dialled in using add-on morph sets or are they custom morphs imported from a modelling application or spawned from dForms?
You can merge a full scene, by the way -File>Merge, or right-click on it in the content panbe and select Merge into Scene.
saving scene subset with character does not save shapeThis concerns v 4.10.0123 Pro 64-bit edition with a genesis 8 female character: When I save a scene subset consisting of a figure and some props and then reload it later the character's shape has reverted to the original. It seems that I actually cannot save the shape changes to the charater that I have made in any way other than a full scene save. I've tried every single save-as type and nothing saves the shape changes. The problem is I want to save the character with its shape for use in other scenes. Is that not possible? What am I doing wrong?
I've seen answers to other questions regarding shapes where a morph target is to be saved and then reloaded applying it to the new character. I see absolutely nowhere to save morphs and to load them. The supposed morph loader does not appear to exist for me.
[Released] RSSY Clothing Converter from Victoria 4 to Genesis 8 Female [Commercial]I'm having a problem with the collar of this outfit. Is there a way to make RSSY "forget" to morph the collar when G8's neck twists?
GoZ QuestionMy mistake for using the word “Morph” (in my "On a second note”) when I updated the basemesh. I will rephrase: You can imagine my frustration when I later reopened my saved (DAZ) dinosaur and saddle and saw that the changed saddle BASEMESH didn’t hold, e.g. the saddle no longer fit the dinosaur.
I guess there is one more step I must do to lock in the changes. Do I need to save the saddle as an Support asset> Figure/Prop and then re-add it to my scene to make it hold?
Morphs from G3 to G8I wonder if this product offers a solution to get V4 / M4 morphs straight to G8?
https://www.daz3d.com/sy-victoria-4-and-michael-4-clones-for-genesis-8
For my understanding the autofit clones can be used as morph shapes. This will turn a G8 figure into V4 / M5 shape right?
No, it won’t transfer morphs, it’s only for clothes. And again no, it won’t turn G8 in V4 or M4 shape. Autofit clones are indeed morphs, but they’re usually different from the source figure shape in some places so that the clothes convert better.
Morphs from G3 to G8I wonder if this product offers a solution to get V4 / M4 morphs straight to G8?
https://www.daz3d.com/sy-victoria-4-and-michael-4-clones-for-genesis-8
For my understanding the autofit clones can be used as morph shapes. This will turn a G8 figure into V4 / M5 shape right?
No ,the clones for auto fit don't change G8 shape they are more behind the scene things,that allow/help auto fit to fit the generation 4 clothing to Genesis8,but it is not a shape morph for Genesis 8
Morphs from G3 to G8I wonder if this product offers a solution to get V4 / M4 morphs straight to G8?
https://www.daz3d.com/sy-victoria-4-and-michael-4-clones-for-genesis-8
For my understanding the autofit clones can be used as morph shapes. This will turn a G8 figure into V4 / M5 shape right?
Daz 3D is part of

Connect
DAZ Productions, Inc.
7533 S Center View Ct #4664
West Jordan, UT 84084Licensing Agreement | Terms of Service | Privacy Policy | EULA
© 2026 Daz Productions Inc. All Rights Reserved.