-
make me smile
There are a coupe of morph packs by PedroFurtadoArts, one for G8F and one for G8M called 20 Unique Smiles. The promos look distinctly scary, but the morphs are designed to be dialed only partially in, so they can be mixed. There are other morph packs for smiles as well.
Actually there are a lot of them. Just do a store search on 'Smile' and you'll get a swarm of them. Of course they will go all the way back to gen4, if not earlier, but they are certainy there.
Black Is Beautiful IIRather disappointed in Shangrila by Mousso. Her morph is lovely but her skin lacks depth and is waaaay to yellow and orange. Even worse is that her face has a different tone than the rest of her body, so when I tried to balance out her complexion by adding blue to her skin, either her body or her face were always not quite right. I just requested a refund.
Not mentioning any names, but there are some PAs here who probably shouldn't be creating black characters.
Weird brown gunk on gen8female forehead when renderingFor future reference, when you say "expanding hair morphs", you're taking about simply selecting the hair and playing with the "scale"?
No, some hairs have morph sliders, just like morphs on your character.
Ahh, gotcha.
Ya'll are so helpful.
Thank you!
mat or texture files Face Transfer and HeadshopFace Transfer's are in the Runtime > textures folders.
Lana for Genesis 8 Femalehttps://www.daz3d.com/forums/discussion/comment/4946356/#Comment_4946356

Nope. Already checked. I've checked the "currently used", hidden, non zero values. Nothing is activated except for the intended morphs.
Did you really checked not only the "currently used" section, but all morphs for non zero values? And did you check for "Erevan Airy"? I bet that's the active morph. And it will NOT be shown under "currently used".
I checked through them looking for a white colored "0.0". It was still black, so it didn't pop out. I searched for Erevan and it was there. I'm gonna go fix that file and save it's morph anew. thanks.
EDIT: didn't work. there's another in there somewhere.
make me smileI was wondering is there was a morph pack that delt with smileing. I want to control it by giving her a half smile. Half smile left or right, or open lipped smile. Looking for control rather then just expression poses.
Not only smile but eye morphs as well. I want to control blinking, like half way closed of closed all the way.
Black Is Beautiful IIDuring the recent sales I purchased three black female characters. Hope to get some renders out soon, will post them here!
Rather disappointed in Shangrila by Mousso. Her morph is lovely but her skin lacks depth and is waaaay to yellow and orange. Even worse is that her face has a different tone than the rest of her body, so when I tried to balance out her complexion by adding blue to her skin, either her body or her face were always not quite right. I just requested a refund.
This is only my 2nd Mousso character. The first one (an Asian character) has great skin, so I'm not sure what happened here. Or perhaps it's just me... the promos look alright. But then again, I never had problems like this with previous black characters.
I'm much happier with Darcy 8 and Aniyah for Darcy 8. Face morph and skin are great for both characters, especially Aniyah. I don't particularly love their body morphs - both characters are very skinny - but it's not hard to dial in some curves.
Weird brown gunk on gen8female forehead when renderingFor future reference, when you say "expanding hair morphs", you're taking about simply selecting the hair and playing with the "scale"?
No, some hairs have morph sliders, just like morphs on your character.
Nida 8 new galAs a person of color, I think this is a great addition to the Genesis 8 family. A middle-age African-American woman is a very nice surprise. Soon, since Daz has shown interest in testing the waters of diversity, I'm sure we will get elderly and more middle-age people of color (like the middle-age Asian woman someone just mention).
While it can be argued that you can probably take Darcy 8 and dial an age morph at 50%, it is nice to see that Daz, as a company, does recognize that some of us like the diversity and representation within their Pro Bundles.
So, thank you Daz for another wonderful base character.
I agree 100% with this stament.
Making renders but using other people's assets....We are more than artists. If you use a filmmaking analogy, we are the producer, director, cinematographer, set designer/decorator, gaffer, makeup artist (if we use LIE makeup or SkinBuilder), wardrobe & hair person, choreographer, (P.A. when we fetch our own coffee, craft service when we eat lol,) still photographer, post production supervisor and PR agency. A lot of work goes into what we do. Way more than a photographer. We have to pose and morph the models too (assuming you don't use products out of the box.)
Well said.
Making renders but using other people's assets....We are more than artists. If you use a filmmaking analogy, we are the producer, director, cinematographer, set designer/decorator, gaffer, makeup artist (if we use LIE makeup or SkinBuilder), wardrobe & hair person, choreographer, (P.A. when we fetch our own coffee, craft service when we eat lol,) still photographer, post production supervisor and PR agency. A lot of work goes into what we do. Way more than a photographer. We have to pose and morph the models too (assuming you don't use products out of the box.)
Nida 8 new galAs a person of color, I think this is a great addition to the Genesis 8 family. A middle-age African-American woman is a very nice surprise. Soon, since Daz has shown interest in testing the waters of diversity, I'm sure we will get elderly and more middle-age people of color (like the middle-age Asian woman someone just mention).
While it can be argued that you can probably take Darcy 8 and dial an age morph at 50%, it is nice to see that Daz, as a company, does recognize that some of us like the diversity and representation within their Pro Bundles.
So, thank you Daz for another wonderful base character.
Morphs only affecting clothing?Hello!
I'm a new user and am working on building a "crowd" of diverse figures, and I have installed the Genesis 8 Female & Male Body Morphs (http://docs.daz3d.com/doku.php/public/read_me/index/42073/start).The morphs worked for me last week, but when I opened a new file to create a new figure today, some my morph controls affect the clothing but not the figure and others won't affect the clothing or the figure (see attached). I have uninstsalled and reinstalled using the DAZ Install Manager, restarted the program, and restarted my computer. All to no avail.
I have also opened up some of the figures I saved previously and none of those body morphs are showing up either. However, the clothes on those models are still morphed.
Does anyone know what is causing this or how I can fix it? I have googled it, but I'm not seeing anything that matches the issue I'm having.
Thank you for any help you can provide!
Also, I'd like to mention that all of my Genesis 8 Male morphs still work!
Best method to get G3 wearing the 'skin' of a G8 character?G3 and G8 have the same base UV, so as long as your character is using that, it will transfer over just fine. If the character you want to use has an hierarchical preset blocking you, save it as a material preset first and then it will load fine. I honestly don't get why some skin sets are hierarchical...it's annoying af.
Morphs only affecting clothing?Hello!
I'm a new user and am working on building a "crowd" of diverse figures, and I have installed the Genesis 8 Female & Male Body Morphs (http://docs.daz3d.com/doku.php/public/read_me/index/42073/start).The morphs worked for me last week, but when I opened a new file to create a new figure today, some my morph controls affect the clothing but not the figure and others won't affect the clothing or the figure (see attached). I have uninstsalled and reinstalled using the DAZ Install Manager, restarted the program, and restarted my computer. All to no avail.
I have also opened up some of the figures I saved previously and none of those body morphs are showing up either. However, the clothes on those models are still morphed.
Does anyone know what is causing this or how I can fix it? I have googled it, but I'm not seeing anything that matches the issue I'm having.
Thank you for any help you can provide!
Best method to get G3 wearing the 'skin' of a G8 character?So we have products to transfer/convert the morphs across generations.
I also see UV products to get G8 to wear the G3 textures/skins/materials.
What's the best method to get a G3 character to use the Materials of a G8 character?
--------------
And after reading about the models using the same UV sets, is there any way to bypass and get the G3 character to load the materials right from the Smart Content pane?
Like, as in, double-clicking different materials and have them load or apply them to the surface- in the surface pane.....
OR load a materials preset from a different generation?
Hmmmm, how are we doing this?
Making renders but using other people's assets....I'm confused if I am allowed to call a render my own work if I am using a skin from a premade character, hair that someone else made, clothes that someone else made. Even the Genesis 8 Figure belongs to DAZ. When I show people some renders they are impressed but I also feel like a sham because I didn't make the assets used in it (though I sometimes make custom morphs, but I still end up using skin textures, eye textures from premade characters).
Yes, I put this all together and rendered it, but this skin is from a Mousso Character, the eyes from a Merchants' resource, clothes from this bundle, even the HDRI lighting is from a bundle.
I feel like I am deceiving people. I don't even know how to feel. Am I allowed to call myself an artist if this is what I do? Forget about whether or not something has artistic value. At the very base of it, can one call their renders their own art if they use premade assets?
I have people now asking for commissions and I can do them. When I advertise my service for commissions, people can be impressed with my portfolio, but I wonder, am I deceiving them? Sometimes people want custom characters that I can make with the aid of Face Transfer. But I wonder if this can be considered my own work too.
Now when I advertise my commission work I'm always afraid someone will call me out and say that I'm not making any art, that I'm just "putting stuff together". I guess that's why I made this post in the first place.PS: Of course I do not mean taking other people's characters and creations and passing them off as my own. For example, I'd never claim I made an OOT hair. But I would use it in a render that I have uniquely made. The render is mine, the assets are not.
So where do we draw the line here?
AIUTO...CHI CONOSCE L’ITALIANO? PARTE DODICICol coupon JUST-THANKS danno 20$ di free Daz Originals :D
Poca roba davvero interessante... Quasi solo textures per prodotti che non possiedo, materiali e shader per lo scassatisimo IRay, pose da contorsionista, morph per morph di morph e altri oggetti che non saprei come usare.

Ma come? Ci sono tanti outfit per G8 per esempio!
AIUTO...CHI CONOSCE L’ITALIANO? PARTE DODICICol coupon JUST-THANKS danno 20$ di free Daz Originals :D
Poca roba davvero interessante... Quasi solo textures per prodotti che non possiedo, materiali e shader per lo scassatisimo IRay, pose da contorsionista, morph per morph di morph e altri oggetti che non saprei come usare.
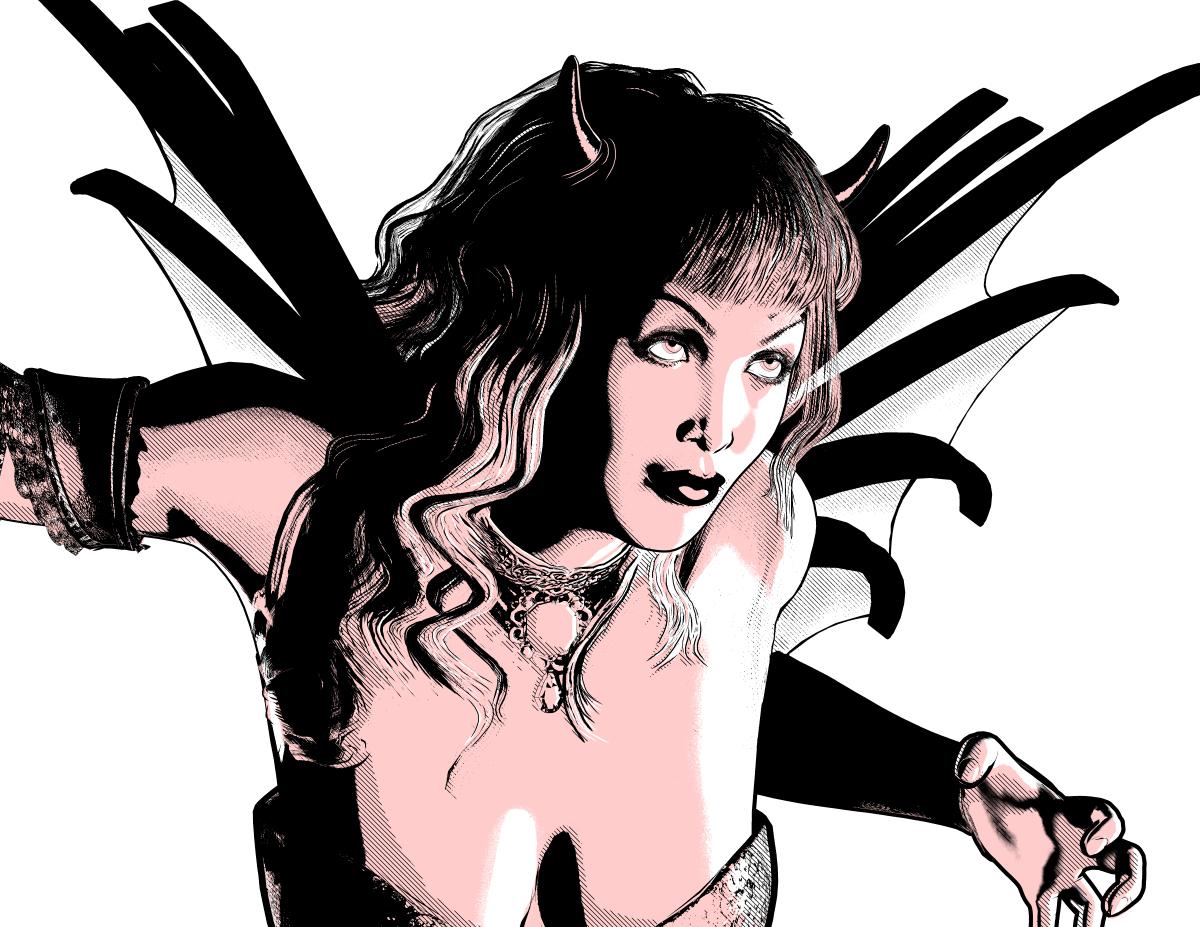
More Non-photorealisitic Renders (NPR II)We started an image in the class I taught yesterday. After it ended, I completed my post work and this is what I came up with. Figure is V4 with the Bettie Page morph and hair. Can't recall where I got the devil wings and horns, though.
Congrats for your class !! your approach really cool
This was done using Poser's Real-Time Comic Book feature. The line-work and shadows were rendered in Poser. I did touch ups and coloring manually on my iPad. I did some post-work in Photoshop as well. Its not perfect, there are some micro mistakes I'm sure. I'm just trying to see if I should bring Poser into my work-flow. That do you all think of the Shadows? I know my highlights suck, I'm working on that.
Like Always ..you always bring awesome to epic type NPR
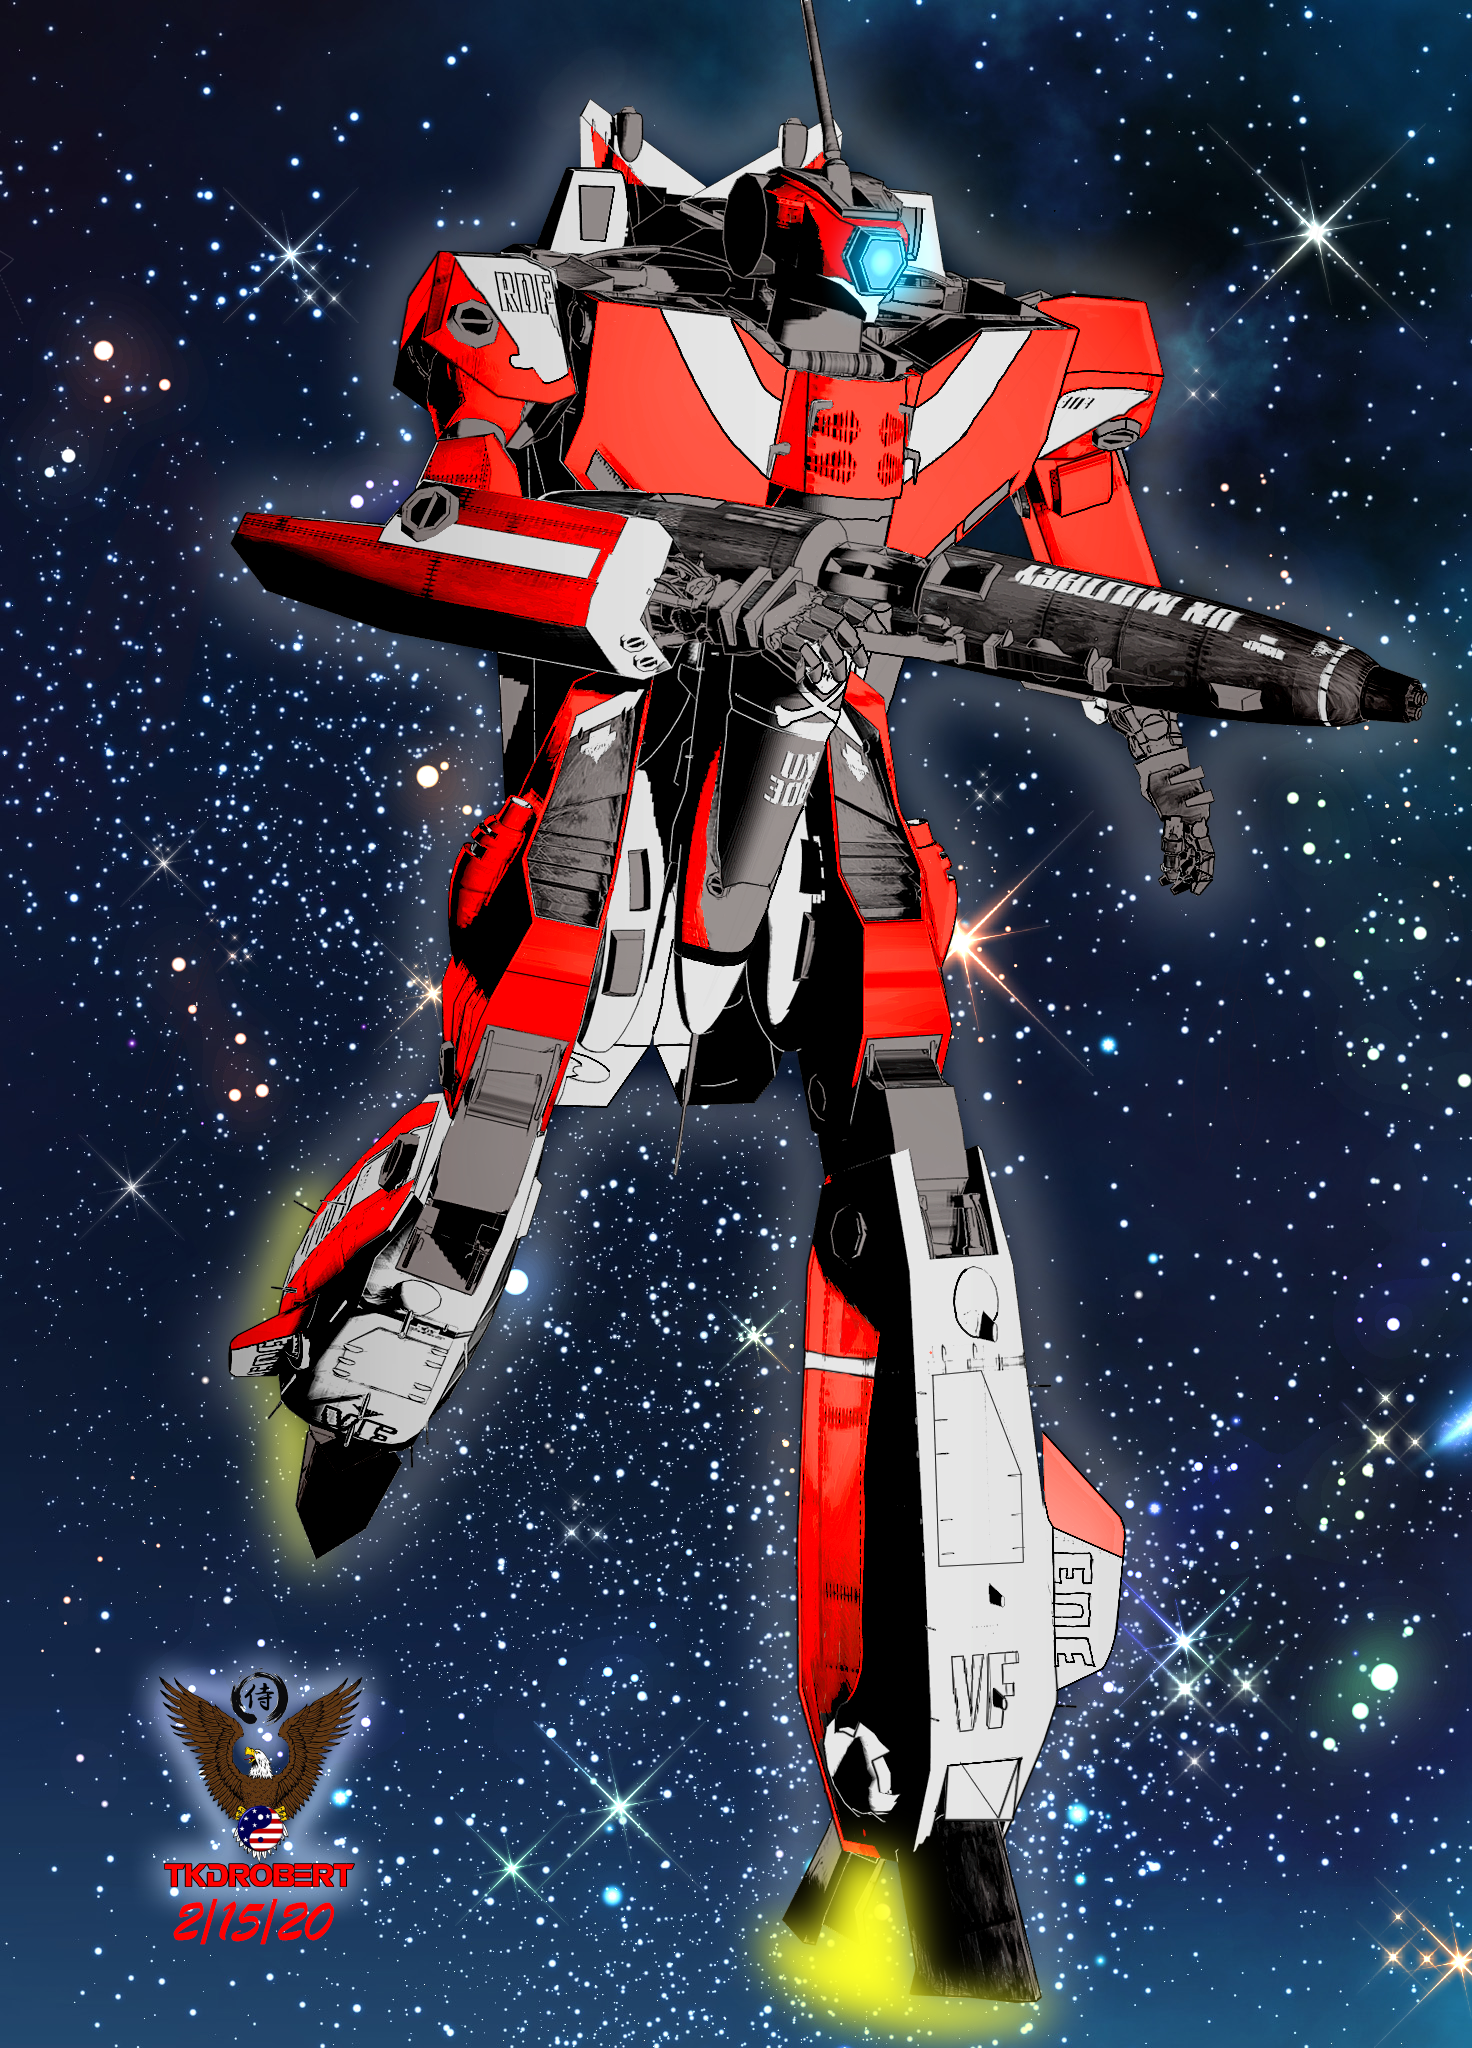
Yasss! Feed us more Robotech!
Here's a scene featuring both of the anime-style G2 characters I threw together today.
Cool , yeah G2M surprisingly still good for stylized type render
And this is my last experiment using IRAY and Photoshop . Waiting for Outline work
Cool CAP
Daz 3D is part of

Connect
DAZ Productions, Inc.
7533 S Center View Ct #4664
West Jordan, UT 84084Licensing Agreement | Terms of Service | Privacy Policy | EULA
© 2026 Daz Productions Inc. All Rights Reserved.