-
Almost Starting Over
That's is how I feel anyway. I've been away for about 4 years or so. I have almost all of my content installed again (finishing the rest of it as I type this). I tried to load a scene, figure, stuff like that. It's not bad. I remembered a lot of that. Before I could transfer morphs and uvs from genesis to genesis 2. I understand how to use clothes even if it wasn't designed for the particular generation and so on. I've done a little bit of modeling and understand the very, very basics of texturing. It's been awhile.
I worked a lot with Genesis and Genesis 2 and was just beginning to get into Genesis 3.
So therefore I don't really have any experience with 8. I understand that 4-7 were skipped?
What do I need to know? Any tips? Is Genesis 8 that much different? Are the processes pretty much the same?
I want to get into modeling. I write novels and illustrating and doing world building is more fun than the actual writing.
Money is real tight (read non-existent) so creating some of my own content would be very cool because even though I have gigs, and gigs, and gigs of content I can't always find what I am looking for.
Who is the beautiful girl used by Goldtassel in promo pics that looks like Felicity Jones?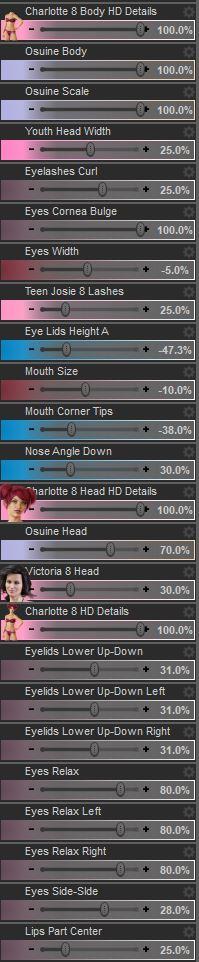
Anybody know what morph package the last 8 morphs in the image above are from? I already have quite a few of the main body/head/face morphs (200 Plus Head and Face Moprhs Females & Genesis 8 Female Head Morphs amongst others) but none of them have these particular morphs.
EDIT: Nevermind. Those morphs decided to randomly show up. Not sure why they were hiding form me!
Genesis 3 & 8 Face ControlsA couple of questions after having bought and installed this:
1.) Where is the manual? Clicking on the document link in DIM sends you to a 404 error page for the product listing.
2.) How does one manipulate the hovering overlay panel controls? I've tried using the selector, the universal tool, etc and while I can select the overlay parts, moving my mouse or click+hold the mouse button does nothing.
3.) This overlay panel's usefulness is _EXTREMELY_ limited by the fact that it does not move with the head's location. The second you pose the figure in any pose that's not the A pose the overlay panel is hovering where the face should be if the body was in the A pose.
4.) Editing to add this point, also it's pointless if you morph the body and the morph changes the height of the figure and the overlay panel doesn't track the head/face's location. Otherwise the overlay panel will end up buried inside the person's torso.
No one makes a facial expression before morphing both the figure and posing the figure.
Not trying to be overly critical as I applaude you for what you're maing and what it adds to the Daz universe, but w/o any proper manual or tutorial and an overlay panel that doesn't follow the face location this product is a bit buggy right out the gate.
Also second SnowSultan's request for powerpose like panel.
Use the Universal Tool. Do not click and drag, just click then the translate arrows of the Universal Tool. Some controls also have rotation.
If you want to make it move with the head you need to parent it to the head. Like I previously stated: it can be parented anywhere and moved anywhere. Morphing the character is irrelevant to the functionality of the tool.
I'll be posting a tutorial soon.
Genesis 3 & 8 Face ControlsA couple of questions after having bought and installed this:
1.) Where is the manual? Clicking on the document link in DIM sends you to a 404 error page for the product listing.
2.) How does one manipulate the hovering overlay panel controls? I've tried using the selector, the universal tool, etc and while I can select the overlay parts, moving my mouse or click+hold the mouse button does nothing.
3.) This overlay panel's usefulness is _EXTREMELY_ limited by the fact that it does not move with the head's location. The second you pose the figure in any pose that's not the A pose the overlay panel is hovering where the face should be if the body was in the A pose.
4.) Editing to add this point, also it's pointless if you morph the body and the morph changes the height of the figure and the overlay panel doesn't track the head/face's location. Otherwise the overlay panel will end up buried inside the person's torso.
No one makes a facial expression before morphing both the figure and posing the figure.
Not trying to be overly critical as I applaude you for what you're maing and what it adds to the Daz universe, but w/o any proper manual or tutorial and an overlay panel that doesn't follow the face location this product is a bit buggy right out the gate.
Also second SnowSultan's request for powerpose like panel.
The overlay parts use X/Y/Z, and some of them only move in specific directions according to the parameters (these tend to be marked with arrows).So if you grab the eyebrow closest to the bridge of the nose, you can translate Y or X, for example. If you have "show hidden properties" active under Parameters you can also dial them in.
It works no matter where the overlay is, as far as I can tell. I don't think it loads automatically parented to the head, probably to make it easier to find in the scene tab.
@Faux2D If you ever release a standalone pack of face movement/speaking animations I would pick those up in a heartbeat. The one that includes head movement (I think it's example 2?) is especially awesome.
Genesis 3 & 8 Face ControlsA couple of questions after having bought and installed this:
1.) Where is the manual? Clicking on the document link in DIM sends you to a 404 error page for the product listing.
2.) How does one manipulate the hovering overlay panel controls? I've tried using the selector, the universal tool, etc and while I can select the overlay parts, moving my mouse or click+hold the mouse button does nothing.
3.) This overlay panel's usefulness is _EXTREMELY_ limited by the fact that it does not move with the head's location. The second you pose the figure in any pose that's not the A pose the overlay panel is hovering where the face should be if the body was in the A pose.
4.) Editing to add this point, also it's pointless if you morph the body and the morph changes the height of the figure and the overlay panel doesn't track the head/face's location. Otherwise the overlay panel will end up buried inside the person's torso.
No one makes a facial expression before morphing both the figure and posing the figure.
Not trying to be overly critical as I applaude you for what you're maing and what it adds to the Daz universe, but w/o any proper manual or tutorial and an overlay panel that doesn't follow the face location this product is a bit buggy right out the gate.
Also second SnowSultan's request for powerpose like panel.
Skin glassesI now usually the glasses in DAZ are most of the time simply in the hierarchy of the head without any skining. But I have seen several cases aslo where the glasses are rigged and skinned. Normally these need less setup for different heads. But I can not find the way to do this rigging manually with new glasses using the transfer utility.
I can asure the skining is 100 dependent of the head bone to avoid unwanted deformations, but the generated automorphs for differnt heads have the tendency of being full of attifacts, But those glasses that uses Skining in DAZ shop works quite well.What Genesis 8 characters are these from the All Sweet Poses 4th Youth Collection?Look at the pics with flower crowns, the name of each character is given there.
Is he using some kind of unique smiling morph?
G8F wont show up in viewport. HELP!!! Eye icon is stuck closed!!!!!!ok, i looked and discovered the file "BaseJointCorrectives" for G8Male and for some reason a Morph that I had created has it also. Should I delete the morph? or move the whole folder for it to another area not accessable to Daz?
I think you found the problem. Move that folder somewhere where DS can't see it, start DS, clear the log and load the "Genesis 8 Female Base figure" into an empty scene - What does the log say?
DAZ to Maya Bridge exporting selected Morphs?I'm having the same issue on my PC. On my Mac I can't get the face morphs to transfer over at all. Any help would be greatly appreciated!
G8F wont show up in viewport. HELP!!! Eye icon is stuck closed!!!!!!ok, i looked and discovered the file "BaseJointCorrectives" for G8Male and for some reason a Morph that I had created has it also. Should I delete the morph? or move the whole folder for it to another area not accessable to Daz?
M4/H4/F4-G8M Bi-directional Pose Transferthank you so much! this is pure awesome! there is a great little free app to transfer all genesis poses, but M4 wasn't included, so this waas sorely needed. kudos! ^^
Will There Never Be a Way to Transfer HD Morphs?Just for clarification. The question has arisen many times in morph transfer discussions so, it appears transferring of HD morphs is desirable. Morphs are just better in HD. Alas, there appears no hope. I've scoured forums and the persisting answer (Up till June 2017) is that it's impossible. Why is this so? Must it necessarily be this way?
I don't understand why people can't take a few extra mionutes and create a completer Morph set from OBJ exports. You export an FBX for skinning info, a Base Obj and an Obj for whatevetr HD Morhps you want (I export at High Res at setting 3 its like a million faces! (Actually I hide the body and export the Head and Neck only OBJS so only the Head has Morph Tragers not the whole body!) then you simply use a SKINNING Transfer topol like 'SkinWrap' in 3ds Max and give the relative skinning from the FBX Low Rez to the OBJ Base High Rez by vertex position, (Works Great! Gives the NICE SMooth DAZ Skinning to the UE4 model! Nice Joints etc.!) I use the UE4 Bones renaming Script to make the character UE4 friendly,. I use Send to UE4 to get my Materials only basically,. I use FBX for Skinning to xfer to the OBJs base and it's morphs,.Whats the problem??? I will upload a video if there is a need, I have about 3k subs maybe it will help them too,. me: youtube.com/NextWorldVR
M4/H4/F4-G8M Bi-directional Pose TransferGuess how stupid & irritated with myself I feel. I didn't transfer the files over onto my memory stick yesterday evening, have just walked into work and in the 30 mins before work starts, I have no upload to make despite getting here early to do just that. I'll try by tablet this evening. It's not going to be easy, but I hope to be able to do it.
Regards,
Richard.
Genesis in Carrara question-- Welcome Back! You have been missed. --
Could be a couple of different things, so I apologize for the parts of this that are unnecessary.
----- In Browser Tray ---- Under Content tab ----
1) Do not load Genesis figures from a 'runtime' folder or 'figures' folder. Yes, even though Genesis, Gensis 2 Female, Genesis 2 Male, etc may appear there, it is because there is a way to convert from there to Poser. Do NOT do it to load to Carrara.
2) Do load Genesis, Genesis 2 Female, Genesis 2 Male, etc. from content "My Daz3D Library" or "My Library" or something. I renamed mine and don't remember the default name but it does NOT have the word Runtime in it. Once inside 'My Daz3D Library' or whatever it is called, the subfolder is People \ Genesis for the default Genesis load. Or, see People \ Genesis \ Characters for the likes of Victoria 5 or Michael 5.
3) The items designed specifically for Genesis should appear in subfolders of the respective People Genesis folder. For example, hair designed for Genesis 1 would be in People \ Genesis \ Hair, while hair designed for the Genesis 2 Male would be in People \ Genesis 2 Male \ Hair.
The first page of the following should help. See posts # 2-5 or so on the first page of the thread to see where they have placed the default carrara shaders for Genesis. You can safely ignore the other 40 pages of the thread. https://www.daz3d.com/forums/discussion/119181/no-one-asked-me-diomede-posts-screenshots-on-whatever/p1
Holy Zowies! I never knew that! Thanks Diomede! I fell in love with the whole Genesis design during the 8.5 beta phase, and Spooky kinda told me what I needed to know, so never even checked a Runtime path for it!
Hey BooksbyDavid! Great seeing you again! Just seeing your name always reminds me of HeadWax's very first of the Carrara Challenges! That garden pool scene you dod was/is Su-freaking-perb!!!
Since you're looking to get invloved woth Genesis, I thought that I should let you know that I have a very Genesis-in-Carrara centric websire going at Dartanbeck.com
I even have a nice little freebie Character Template scene with video instructions
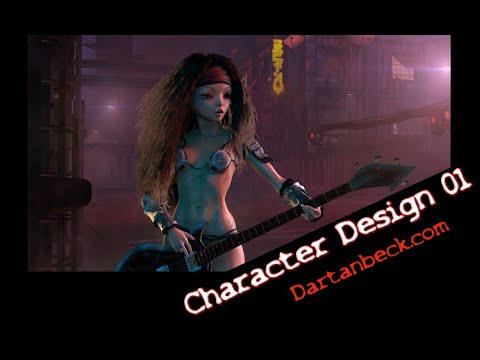
Here's a fun little intro to the character on the cover of that video

There's a lot of Genesis info in there. Have a poke around if you like ;)
Here are some quick links that may help:
Cheers! :)
Daz Studio Iray - Rendering Hardware BenchmarkingAlright, I did a new batch of testing, and I think I can comfortably confirm that the normal/bump maps are at the heart of this new new speed. But there may be a catch that comes with this speed.
I have the general 4.12.0.86 as well as the new 4.14.0.08 beta, so I compared my same test scene from a thread I posted back in July. (Actually, given the timing of this, I cannot help but wonder if my thread got somebody's attention to investigate normal map data usage, but I digress.)
I ran the scene 3 different ways in both versions using Zelara rendered at a 5000 pixel image resolution.
1- Default Zelara, which is subD 2 with normals, no HD morphs applied
2- Increased subD to 3 and added her HD morph, kept normals on.
3- SubD 3 with HD morphs again, but without normals.
In test 1, 4.12 took 6 minutes and 28 seconds to render. But in 4.14 it took only 3 minutes and 30 seconds!
In test 2, 4.12 took 6 minutes 50 seconds. 4.14 took 3 minutes and 50 seconds. In both tests, I saved 3 minutes off the render, the differences are astonishing.
In test 3, it gets interesting. Without normals at subD3, 4.12 took 4 minutes 10 seconds. 4.14 took 3 minutes and 45 seconds.
So you can see that without normal maps, the two versions are much closer in performance. But there's more, this test ran to default convergence. I noticed that 4.12 was also taking more iterations to reach its default value of 95% convergence. While 4.14 was hitting just over 900-950 iterations, 4.12 was over 1000 iterations. It did roughly 50 to 75 more iterations. So when you factor this into test 3, the render times are even closer than they first appear. If I had ran the test with a cap on iterations instead of convergence, they probably would have been a draw. At this point, it becomes quite clear that the way Daz handles normal maps is the prime reason for this new speed in 4.14. In fact, looking at my test, the speed difference is even greater than that of the benchmark scene, which makes sense. All of the spheres lack normal maps. The character in the scene is the only object with normals, her clothes might have some, but the character is not the focus of the scene. My scene has no walls or objects that lack normals. Thus the more your scenes depend on normal maps, the faster 4.14 will be for you!
Also, the difference between turning normal maps off was extremely minor on performance. In 4.14, I only saved a pitiful 5 seconds turning off the normals at HD3! In 4.12, this was not true at all, turning off the normals offered a massive leap in performance, which is exactly what I reported back in July. In fact the numbers I ran today in 4.12 are very very close to the ones I ran back in July.
HOWEVER!!! There is a catch!
It is not all sunshine and rainbows. As nonesuch00 pointed out, I can see some minor differences in the renders between 4.12 and 4.14. I stress they are very minor! But they are there. Basically, what I see is that the normal maps in 4.12 appear to be slightly stronger than in 4.14. This is really not a big deal to me. I had to directly compare the images up close, zoomed in a fair amount to really see these differences, and this was with a 5000 pixel render. Granted this image is a full body, not a close up. But I think all anybody needs to do if they want that is to simply turn up the normal value a bit. Maybe 25-50% higher...that's a guess. In my test without normal maps, the images were identical. So the normals are indeed the difference.
BUT that is not the bad part. It looks like 4.14 is using more VRAM than 4.12. A lot more! My Zelara render used a solid 500MB more in 4.14 than in 4.12 in all three tests. For some people that may not be much, but this a single character taking up an additional half GIG of precious VRAM than it used to. Many of us already battle VRAM in a scene creation. Even the no normal test used 500MB more, so this result is quite shocking to me. I didn't have any other apps open during testing, besides notepad, so no other apps should have been running to skew results. Additionally, I have 2 GPUs, and one is not connected to the display. This means that my second GPU is not effected by any apps, as it only gets used with Daz. So the numbers it reports are pretty accurate. Both of my GPUs used 500MB more in 4.14, so it is clear that this is from 4.14, and not some rouge app taking up resources.
So ultimately this is sort of a mixed bag. There is no doubt that the speed boost is fantastic, as I am sure most of us probably use normal maps. In fact, 4.14 seems to largely negate any performance penalty for using normal maps, as I only gained 5 seconds when I turned them off. This speed boost could translate to many, many hours saved in the long run. But on the flip side the VRAM could be something that catches up to some of us. I am sure that rendering at lower resolutions would not impact it as much, I don't know how many of you render at 5000 pixels, but it is something to be aware of. If you happen to try rendering a larger scene that you previously rendered in 4.12 that was close to your VRAM capacity, there is a possibility that it might not fit your VRAM in 4.14.
But IMO, I believe the speed is worth that trade. If it was a higher amount of VRAM, maybe I would be more hesitant, but I can work around VRAM limits by optimizing if needed. The performance gains I have seen are just too good to pass on. The benchmark scene does not even do it justice! This is where Iray needs to be to compete with growing competition. Though it is quite interesting to see Daz essentially hedge their bets with the addition of Filament, as finding an alternate render engine for animation is also a topic I and others have discussed at length.
Genesis in Carrara questionI've been away from these forums and Carrara for a long time. I've recently rediscovered my love for Carrara and am getting back into it. I've installed 8.5 and the newest Studio so I could play with the Genesis figure. I've installed Genesis and Genesis 2 female to use in Carrara. Both work in Studio, but I'm having a problem in Carrara. When I load Genesis and Genesis 2 female into Carrara I find no morph dials. In the Actor parameters tab, all I have is a button that says 'root'. Pushing the button does nothing and I have no morphs.
Any help would be appreciated. Thanks.
Zowie - an original participant from the first Carrrara Challenge back in 2013!
Great to see you here. Carrara still kicks butt. It is hugely underrated.
As for loading Genesis, Diomede's suggestion will allow you to load the figure, but I have trouble assigning global skin maps to them with that method. My default way to load genesis is to go to Smart Content and load a specific character - Vicky 5, Michael 5, Freak 5, etc. From there I have no issues, other than perhaps the morph bloating problem, and Alberto's Morph Reduction plugin helps there.
But I need to say, the issue you are having with no morphs loading sounds like something else. Whichever method I use to load Genesis, the morphs are present. Have you loaded all the Genesis and Genesis 2 Starter Essentials?
Rejuvenate the V3/M3 line?I've found in my experiments that if I convert either V3 or M3 to WM, they can take all of the other Gen3 figures as FBMs, including most of the retrofit ones like M3-to-M2 and Mil3-to-Mil2 kids, whereas M3 and the Freak were morph-compatible to each other and most of the rest were compatible with morphs from V3. The V3-to-V2 mesh isn't compatible with either, for whatever reason, but the zeroed mesh for V2 and that for V3 have the same shape. The Preschool retrofit meshes load about three feet in the air (head, not feet, as the anchor point) and the original Girl was a seperate mesh entirely, despite having a V3 UV option.
Any such product, though, would have to be weight-mapped, anyway.Generation 3 Aiko and Hiro Appreciation ThreadI copied across A3 to G8 via G1 and GenX and Zerv's transfer utility.
I don't use on own but combine
Generation 3 Aiko and Hiro Appreciation ThreadDefinitely. The new shilouette is similar to the original, although there is more definition overall, particularly in the limbs. And I doubt anyone still wants those balloon shoulders.
It might look closer scaled down to the original size.
And as for the Thorne/Sarsa vibe; my impression is that not a lot of people used unadulterated base A3 in any case. They almost always added a character morph, and it was usually a Thorne/Sarsa one.
Genesis in Carrara questionI've been away from these forums and Carrara for a long time. I've recently rediscovered my love for Carrara and am getting back into it. I've installed 8.5 and the newest Studio so I could play with the Genesis figure. I've installed Genesis and Genesis 2 female to use in Carrara. Both work in Studio, but I'm having a problem in Carrara. When I load Genesis and Genesis 2 female into Carrara I find no morph dials. In the Actor parameters tab, all I have is a button that says 'root'. Pushing the button does nothing and I have no morphs.
Any help would be appreciated. Thanks.
Daz 3D is part of

Connect
DAZ Productions, Inc.
7533 S Center View Ct #4664
West Jordan, UT 84084Licensing Agreement | Terms of Service | Privacy Policy | EULA
© 2026 Daz Productions Inc. All Rights Reserved.