-
Genesis Female
what happened to the Genesis Female blank morph? I can't find it anymore in Daz since the last time I used it
AIUTO...CHI CONOSCE L’ITALIANO? PARTE TREDICIHo trasferito tutto il content (quanto fa figo usare l'inglese
 ) su disco meccanico perché il povero SSD non ce la faceva più con lo spazio a disposizione; ho un computer veramente arcaico e con soli 8 GB di RAM (riesce a renderizzare scene praticamente normali solo a botte potenti di Scene Optimizer), quindi la mia figura base - uso quasi sempre la stessa, non G8 base ma con Face Transfer - ci mette oggidì tempi biblici a caricare.
Però, ora che mi ci fai riflettere - per quel poco che ho usato la nuova versione - mi pare di aver pensato: e che, il mio povero PC oggi si è impigrito più del solito?
Set All Morphs to Use Limits?Morphs are on the figure node, so it should be enough to right-click on the Parameters pane to put it in Edit mode (if it isn't alread), then click the All group, click the first morph, shift-click the last to select all, right-click in the proerpties list>Limits>Enable Limits On Selected Properties. I would advise not to do that with hidden properties showing, and definitely not to disable limits with hidden properties showing (or really at all) as some linkkages depend on limits being on (e.g. JCMS for joint bends, where the negative value is usually not wanted).
Batches using the bridge?If you want to reassemble the scene in Unreal use the Environment option. https://davidvodhanel.com/daz-to-unreal-environment-transfer/
Actually, even if you don't want to reassemble it, this process will transfer over each prop type separately first.
Breast physics daz model in ue4 helpegorchs said:
Hey! I am currently studying ue4 and i have a question: how to make breast physics in ue4 using a skeleton from daz? I send characters to ue4 using the DAZ to unreal plugin. I came across video tutorials on youtube, but additional bones were added to the chest using a blender, or the movement of the chest was added to each animation manually, frame by frame using morphs. Is there a solution using only ue4 and maybe there is some kind of guide? Thanks in advance!
Hi, i do it with physics body and morphs! For the breast i use physics, because the skeleton have bones for that. For the butt i use morph targets.
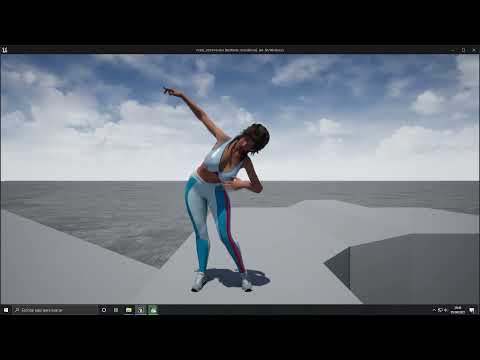
Here some videos from my chanel...

 Set All Morphs to Use Limits?
Some poses and animated pose files ask if we want to disable morph limits.
I think I might have done this somewhere along the line and saved my character scene file with those limits disabled - now I have a bunch of limitless morph sliders.
Is there a simple way to turn all limits On across the whole figure? I'm sure there is, I just don't know how.
I did find that, using Edit > Figure I can find a way to set limits for joint rotations, but I'm talking about morph dials, like Eyes Side-to-Side, Up-Down, etc.,
Thanks in advance for any help!
A couple of questions about Genesis, poses and scalingHmmm... thanks for the help, but my problem lies elsewhere. My saved character (not the character preset, but scene-save) has many morph limits turned off somehow by default. Morphs that I prefer to have limits turned on.
I'm not sure how they got unlocked - I sure didn't do it on purpose. But there's a lot of them. I'm wondering if there's a way that I can just turn all morph dials' limits back on. Not all of them have been turned off - but quite a few. Like Eyes side-to-side, up and down, etc., and others.
I think I may have applied a pose, let it turn off limits, then got rid of the pose and saved the file. Bummer.
Clothing morph assistanceRichard Haseltine said:
glossedsfm said:
Richard Haseltine said:
1) yes, and make sure that you have preserve vertex order on in the import/export options.
2) you can't delete stuff in a morph
3) as I said, you can't delete the unwated parts but you should be able to create the morph as you want and hide the upper parts.
I was going to delete the unwanted faces in Daz studio first. Then i was going to export to Blender and only move the wanted faces (not delete anything) around to create the morph. I wasn't planning on deleting anything in Blender for creating the morph just moving the verts around. I asked question #1 to make sure that i remembered the "no delete, only move" rule for verts when creating morphs in Blender.
OR
Would it just be better to export the entire set of pants to Blender first move the verts that i need to move to the correct spot then reimport it all into Daz. Then once the pants are back in Daz, i apply my morph. THEN i can worry about deleting/hiding the unwanted faces for the upper portion of the pants. I think this is what i will do instead unless you think this might cause issues.
It would be better not to delete anything - if you select the polygons you want to remove you can use the Geometry Editor to assign them to the selection group for a bone you don't want visible, then just hide that bone and theya re gone with minimal disruption.
ok i'll give that a try instead of deleting stuff, thanks for your help
How long does it take you to load G8F?Wonderland said:
Well I know I have a huge amount of characters and morphs but I want them all available because I mix everything when creating characters, that’s why I purchased so many different characters and morphs so I can create something original. Removing characters and morphs defeats the whole point of buying them in the first place...
So far as I am aware, based on everything I have seen posted so far, the issue is the complexity of handling all those characters/morphs and the only solution using the same hardware (specifically CPU) is to reduce the complexity by removing the characters/morphs from the view of the DAZ Studio UI. My set of instructions is designed to determine whether someone else's slow load times seem to be broadly the same as mine, if there are significant differences in the log times from 4.15.0.40 (in terms of percentage of total) then you are probably experiencing a different problem.
Various other suggestions have been made. There seems to be an obsession with the DSON cache and given that DAZ has repeatedly checked DSON cache status it might be a good idea to ensure the cache is on raided M2. SSDs, but I moved mine from a PCIe 4x mounted M.2 SSD to two raided M.2 SSDs on the motherboard and I saw, at best, a 10% speed-up in the cache creation, saving me 1s out of 140s. DAZ Studio does access a lot of files, but then the profiling/timing information on my system doesn't show disk access. It might be worth ensuring the DSON cache is on a physically different set of drives relative to the content, it might be worth splitting the content across multiple SSDs but I haven't tested this because I find it unlikely.
I do have 64GByte of RAM and that sits at about 40% occupancy so the rest of it is used by Windows as file cache. I do see a slowdown, maybe as much as 20%, if DAZ has to leave rebuild the DSON cache and DAZ Studio hasn't run for long enough for the file cache to get flushed (other apps, like Chrome, are always actively using it). Operating system file system caching normally obviates issues of slow disk read in this kind of scenario.
Apart from those tweaks (more RAM, SSD) which seem to offer only minor improvement, my intuition is that raw single core CPU speed is likely to be a straight (inverse) factor controlling load time. DAZ Studio does not seem to multi-thread the load, even though it is doing thousands of things that don't affect each other - building the data structures for an individual morph does not require access to the vast majority, or maybe any, of the other morphs. So forget core count. Look at level 1 and level 2 cache size and raw CPU speed. Go for a gamer system with an unlocked CPU that you can overclock, this is likely to require liquid cooling but since it is only the CPU you probably have that already.
Bear in mind that at least some of this will be down to the performance of specific Qt classes in Qt 4.8. Moving to Qt5 or Qt6 will likely change the low performance items. We already know the close-down slowness was addressed, and maybe fixed, by Qt changes.
So here's my other solution: I multitask:
"C:\Program Files\DAZ 3D\DAZStudio4\DAZStudio.exe" -instanceName #
I normally have two or three instances of DAZ Studio running in parallel. On my system DAZ Studio uses THREE CPU cores not ONE simply because there are three of them. I just swap from one to another when the UI slows down.
A couple of questions about Genesis, poses and scaling adamr001 said:
Have you tried holding down CTRL when applying the pose? You can then tell it to ignore morphs/scaling by unchecking the appropriate boxes.
Is there a way to bring this panel up without applying a pose preset?
Somehow (and from notning I've done manuallt/intentionally) my saved character file suddenly has many morph control paremeters set with limits turned off - and it's a pain. Things like Eyes Side-Side, Up-Down, etc., but there are others.
AIUTO...CHI CONOSCE L’ITALIANO? PARTE TREDICINon è colpa di DAZ Studio ma della versione del pacchetto di G8, per quanto riguarda i tempi di caricamento.
Io ho la versione subito precedente l'uscita di Face Transfer e i miei G8 caricano in quattro secondi con circa duemila morphs installati.
Clothing morph assistanceglossedsfm said:
Richard Haseltine said:
1) yes, and make sure that you have preserve vertex order on in the import/export options.
2) you can't delete stuff in a morph
3) as I said, you can't delete the unwated parts but you should be able to create the morph as you want and hide the upper parts.
I was going to delete the unwanted faces in Daz studio first. Then i was going to export to Blender and only move the wanted faces (not delete anything) around to create the morph. I wasn't planning on deleting anything in Blender for creating the morph just moving the verts around. I asked question #1 to make sure that i remembered the "no delete, only move" rule for verts when creating morphs in Blender.
OR
Would it just be better to export the entire set of pants to Blender first move the verts that i need to move to the correct spot then reimport it all into Daz. Then once the pants are back in Daz, i apply my morph. THEN i can worry about deleting/hiding the unwanted faces for the upper portion of the pants. I think this is what i will do instead unless you think this might cause issues.
It would be better not to delete anything - if you select the polygons you want to remove you can use the Geometry Editor to assign them to the selection group for a bone you don't want visible, then just hide that bone and theya re gone with minimal disruption.
XTransfer fiasco corrupted G3F character preset morph URL’sA little more speculation on my problem:
It makes sense that Daz Studio will update all the URL’s in all the scene files that use a morph if the location of that morph changes.
But why would it update the URL’s if the morph location did not change?
And, why would it change the URL’s to some path that never existed?
It is conceivable that I accidentally created the path in question, for a minute or two, before realizing my mistake and deleting the path. What I mean is, I may have accidentally pasted a folder full of morphs into my G3F morph directory. And the morphs in this folder have the same names as other morphs already in my G3F morph directory. But anyway, a few seconds later I realized that this folder full of morphs was supposed to go in to my G8F morph directory instead. And, realizing this, I then deleted the folder full of morphs from my G3F morph directory and put it into G8F where it belonged.
Could it be that the presence of this folder full of duplicate-name morphs triggered Daz Studio to make all character preset URL’s for those morphs point to these duplicate-named morphs, even if I removed them a minute later?
Maybe Daz Studio always scans for new versions of morphs in new locations and always updates the URL’s of character preset files using those moprhs. Make one accidental paste in like I did and Daz will mess things up like this.
The trouble is, I don’t even know whether I did this accidental paste-in of duplicate-named morphs. My memory is vague on this. But it is conceivable.
Anyway, if Daz Studo does work as I have speculated – if it does this automatic URL updating in response to duplicate-named morphs getting into the morph directory, can I provoke Daz Studio to reverse the damage? For example, would re-installing the products whose morphs got un-linked make Daz Studio restore the proper URL’s for them?
DAZ Studio 4.6 User Guide and QuickStart Guidekarl said:
Thanks, I'll make a note of that! Since it doesn't seem t ocover the common setup of Daz (assets on D:, program on C:) I don't know if this will be useful for anyone else who wants to do it that way. As well as D: being larger usually, this means if they reinstall Windows or get a new PC and so do a fresh install of Daz Studio, Daz Studio will be able to find and use those installed assets exactly as before, so they don't have to download and install the assets all over again. Note this is just my procedure!
STEP 1: PREPARATION
If necessary, uninstall all current Daz stuff from the PC to start fresh.
Use Daz Central (DC) or Daz Install Manager (DIM) to uninstall Daz Studio (DS) and content (whichever one you used to install DS in the first place), then uninstall DC/DIM through Windows.
Then do any manual cleanup - see the instructions at https://helpdaz.zendesk.com/hc/en-us/articles/360055963392-How-do-I-uninstall-delete-Daz-Studio- but note that some of the folders names may be different, and the guide misses out a few folders (e.g. I had a Daz 3D folder on the root on my C: that needed deleting).
STEP 2: INSTALL AND RUN DIM
Download DIM from https://www.daz3d.com/install-manager-info/
Install DIM on the C: at its default location.
Run it, tick "Work Offline" (so you can set preferences). This will temporarily disable the password box. Enter your email and click Start.
STEP 3: SET UP DIM
We want to set locations on the D:, so they can be easily backed up and will also survive Windows reinstalls.
In the top right corner is a small Gear icon (Settings). Go to Settings>Advanced Settings.
Go to the Downloads tab – this is where we set the location to save the files you download from your store account.
It has two options. There is a Package Archive C:/Users/Public/Documents/DAZ 3D/InstallManager/Downloads and a Thumbnail Archive C:/Users/Public/Documents/DAZ 3D/InstallManager/Thumbnails
Package Archive is the zip files downloaded from the Daz store.
Thumbnail Archive is apparently optional, some kind of preview in DS. Nothing is added to it by DIM installing assets, so things are probably only added by DS. However, since it will get downloaded anyway, and they don’t take up much space compared to the main assets, it makes sense to back them up too.
The thumbnails are for DIM, not DS, but they are not downloaded by default - if you want thumbnails in the tool tips when you hover over an entry in DIM then you need to right-clickand choose the option to download the thumbnail for the item under the mouse or for all selected items, or all missing thumnbnails in selected items.
Since I want to back them up, and they are different content types, I will be using a nested folder structure where the downloads and installed files all go under D:\image creation\Daz 3D\assets\
So I set the Package Archive as D:\image creation\Daz 3D\assets\downloads
and the Thumbnail Archive as D:\image creation\Daz 3D\assets\thumbnails
Leave all other settings alone.
Next go to the Installation tab. This allows you to set and add Content (Runtime) install paths.
Again, there are multiple options.
There is a Manifest Archive at C:/Users/Public/Documents/DAZ 3D/InstallManager/ManifestFiles
There is a Content Database Base of C:/Users/NA/AppData/Roaming/DAZ 3D/cms
And there is a Recommended folder of C:/Users/Public/Documents/My DAZ 3D Library (which has an ellipsis after it but clicking it does nothing).
Manifest Archive is for the files that DS uses to track what it has installed.
The manifests are used by DIM, not Daz Studio. Daz studio (or rather the CMS) cares only about relative location within the content directory - if you move the entire directory and update the location in the directory list then the files will still show in the database-driven views - but DIM needs to know the absolute location of files, for one thing so that it can install content if it isn't in a current content directory (manifests store other information too).
Content Database Base is the database used by the Content Management System. It is accessed and managed by PostgreSQL and has no DS content in it. DS and DIM update it based on product metadata. To avoid losing any metadata it should be on the D: drive and included in back ups. This location will be the same as the ContentCluster path you can set in DS Edit>Preferences>CMS Settings.
So I set the Manifest Archive as D:\image creation\Daz 3D\assets\manifest
and the Content Database Base as D:\image creation\Daz 3D\assets\cms
However, I had an issue with this step! Every time I changed the Content Database Base to D:\image creation\Daz 3D\assets\cms, and Accepted it, then went back in, it had reset to C:/Users/NA/AppData/Roaming/DAZ 3D/cms (there were no error messages). This seems to be a bug. One option was to skip this step temporarily, let DIM go online, install DS, then try changing it inside DS (Edit>Preferences>CMS Settings, the ContentCluster location). But I found that once I installed DS and logged in, then came back to DIM, DIM then let me finally change the location of the CMS, so all was good. For some reason it would only let me after I installed DS.
We also need to set a folder (a fifth location) for the actual files that DIM unpacks from downloaded zips and installs, which is the key ones to move to the D:. By default this is the Content Folder, which shows as C:/Users/Public/Documents/My DAZ 3D Library. First click the + in the bottom left of the window. Give the path a label such as “content” and choose a location on your D: (for me it was on my D:\image creation\Daz 3D\assets\content). Any added locations will be available in the Content Path Shortcuts drop-down selection box above, so change it to the one you want there. You can then delete the original default option so you only have the D: option for content.
You can confirm the path etc in the main interface window “Ready to Install” tab: click on Show Details.
That’s five folders set, so the hard work should be done.
STEP 4: SET UP DAZ STUDIO
We have set up DIM. If you haven’t done it already, let DIM go online and install DS. DIM should have transferred all the correct paths into DS, but we can double check for peace of mind.
Open DS.
Edit>Preferences>Content tab>Content Directory Manager.
(You can also open preferences with F2.)
That lets you expand the path trees for where thinsg will be stored.
The CMS Cluster Directory should be whatever you set in DIM (D:\image creation\Daz 3D\assets\cms).
Content (in both DAZ Studio Formats and Poser Formats) should be whatever you set (mine were both D:\image creation\Daz 3D\assets\content as I expected).
Daz Connect Data isn’t something set by DIM, so will be a C: location. Daz Connect means installing content from within DS rather than via DIM (and doesn’t work for all content). As such, since we are using DIM, it makes sense to ignore that and install everything via DIM. So you can leave that alone.
This hopefully just confirms that DIM correctly set the directories and transferred those locations to DS.
I don’t think there’s a way to set a default for saving your scenes etc in DS, but I created a folder at D:\image creation\Daz 3D\my presets and will manually save scenes and characters there, so they get backed up and can also be transferred to a new PC or survive Windows reinstallation.
icon_png files: see this https://www.daz3d.com/forums/discussion/225611/daz-studio-creates-icon-files
I had that problem, icon files all over my desktop. So need to change
Render Settings>General>Image Path and point it to some folder with no images in (can I set it as none? Chooce C:?). Then when save a render, browse to the desktop.STEP 5: DOWNLOAD AND INSTALL CONTENT/ASSETS
Now that everything is set up, we can install all the assets we bought.
Open DIM. Make sure you are “Working Online” (enter your password).
The “Ready to Download” tab should be populated with everything you bought on the Daz Store, plus Daz Studio and some freebie starter content.
TIP to save space and time: hide anything that you don’t want to download and install that might be things you don’t need such as Hexagon, or a bridge for Photoshop (if you aren’t going to use that). To the right of each line is a right-facing triangle. Click that for a menu, and you can hide any items you don’t want to install and they’ll disappear (you can view the hidden items at any time by clicking “Display Hidden”, and unhide them in the same way).
My big tip is that many things I’d bought had the same file twice – once with ds at the end, once with ps. According to https://www.daz3d.com/forums/discussion/28450/ds-ps they are pretty much the same thing, and the ds version will work better in Daz. Also, the ps (Poser) version would often not work as smart content anyway. So, we want to just download and install the ds versions, and hide the ps. Installing both just doubles the storage, and unfortunately that is the default DIM chooses. So it may be worth filtering it – type ps onto the top right filter box. Ignore false positives (e.g. files where ps are next to each other liks “special ops poses” but identify real ps files and hide them using the right triangle menu I mentioned. For me that prevented DIM downloading and installing 94 items, or 12.3GB of unnecessary files. The downside is that I had to hide all 94 items individually, two clicks for each (and since the button is small and right next to the install button, I accidentally downloaded a few and had to delete them again). The little menu ignores the fact that you may have selected multiple items with the check marks on the left, making you hide each individually. Also be aware that if you hide ps packages in DIM in this way, then if you ever you reinstall DIM (e.g. on a new PC, or reinstalling the OS), you may well find them all back again and offered for install, so will need to hide them again (another 188 clicks …).
If ever you use the filter box, remember to click the x in it when you are finished, to cancel the filter and reveal all the files again. Also, the filter box is handy for finding a particular item.
A big bonus of DIM is multiple downloads. Daz Central (and Daz Connect) only let me download items one at a time (if I tried to download multiple items in DC it cancelled previous ones and only downloaded the last one I clicked on). But DIM lets you download multiple items – or even everything – at once. You can re-sort the packages by size or name and select groups. If you tick “Install After Download” it will do it for you. Because I don’t have superfast Internet, and have to share it with my partner (and use the same network for work), it took me three days to download and install what I currently own. That’s why I don’t want to ever have to do it again if I get a new PC or reinstall Windows – hopefully this method means the content will be there on my D: for future installs of DS!
DIM downloaded and installed everything to the folders I set.
(Also, I did NOT click “Delete Packages Once Installed” on the “Ready To Install” tab; this way, if something goes wrong with my plan, at least I can reinstall the assets from the downloaded files, saving the three day task of downloading them all again. The downside is content appears twice on my D: and takes up twice the space – once as the installer, once as the installed version. Maybe one day, if I find this system works even after reinstalling Windows or getting a new PC, I will then have the confidence to delete the downloaded installers and free up a lot of space – currently the installers alone take up 119GB).
STEP 6: TEST CONTENT IN DAZ STUDIO
Check the items show up fine and work in DS, showing up as Smart Content if applicable, that there are no problems that might require a refund.
Note that in DIM the installation tab shows if a product has installed Metadata. If so, there will be a checkmark underneath the “Smart” column, letting you know it will show under “Smart Content” in DAZ Studio 4 and higher. Most items will have metadata, but some may not have user-facing files (e.g. morph sets may add new sliders to the figure without having any presets to click). Additonal parts of a file that is so big it is in more than one part may not show as having metadata either. If there are properly installed products which don't have the data to appear in database-driven views (Smart Content) but which do have user-facing files you should still be able to find them in the Content Library pane under daz Studio formats (or Poser formats) and then the content directory name. This often applies to older items.
I have noticed one problem: some items I installed via DIM show up in DS, but are greyed out, as if they aren’t installed. I’m not sure what has happened there, or how to fix it. If I right click install within DS then it uses Daz Connect, so would download the item again (when it is already downloaded and stored on my D: by DIM), plus it would store it on the C: unless I change that path too. Using multiple install methods is perhaps asking for trouble, so I want to work out why DIM is not working for some items instead. Is this a known issue? Some of the items it applies to: Genesis 3 Starter Essentials; Rocker Outfit for Geneis 3 Females; Shadow Thief Outfit for Geneis 8 Females; Genesis 8 Starter Essentials; Nyala HD for Genesis 8 Female; Daz Studio Iray HDR Outdoor Environments; and others.
STEP 7: REGULAR BACKUPS
I do a full backup of my D: regularly. So this would now mean I am also backing up the downloaded asset zip files in one folder, the installed Daz assets in another (doubling the storage requirements but meaning I am covered for a few potential scenarios), and things like the cms, thumbnails, manifests, and my presets in other D: folders. I also save one caleld “previews” which lets me browse what I have bought – each product gets a folder within a structure that categorises it (people, hair, lighting, poses etc), with a link to the product page, a txt file with the full description, and all the preview images from the product page. This is really useful to store as products are sometimes withdrawn, and that information is no longer available – there are a few items where I can no longer get the preview images, which si a shame as they give ideas for how to use the content, or illustrate all the options. Ideally all that info would be available in a zip for everything you buy, which would save manually having to save every image via the browser.
NB: do backups only when DS, DIM, and other applications using the cms are all closed and there are no PostgreSQL processes running.
STEP 8: REINSTALLING WINDOWS / GETTING A NEW PC
If I reinstall Windows, or get a new computer (where I'd copy my D: backup contents to the new PC's D:) I would perform steps 2-4 above, choosing the same paths (so they actually now point to installed content on the D:). That should mean DIM and DS see and use all my existing content, so it doesn’t need redownloading or reinstalling again, saving me days.
Worst case scenario is that I reinstall Windows then all the Daz software, as above, but DIM and Daz Studio don't "see" the previously-installed Daz assets. In that case, as long as DIM can see the downloaded zip files, I can manually delete the installed assets from my D:, leaving that folder empty; then point DIM at my previous downloads and reinstall everything from the downloaded zip files. (Which at least saves downloading everything again.)
DAZ Studio 4.6 User Guide and QuickStart GuideThanks, I'll make a note of that! Since it doesn't seem t ocover the common setup of Daz (assets on D:, program on C:) I don't know if this will be useful for anyone else who wants to do it that way. As well as D: being larger usually, this means if they reinstall Windows or get a new PC and so do a fresh install of Daz Studio, Daz Studio will be able to find and use those installed assets exactly as before, so they don't have to download and install the assets all over again. Note this is just my procedure!
STEP 1: PREPARATION
If necessary, uninstall all current Daz stuff from the PC to start fresh.
Use Daz Central (DC) or Daz Install Manager (DIM) to uninstall Daz Studio (DS) and content (whichever one you used to install DS in the first place), then uninstall DC/DIM through Windows.
Then do any manual cleanup - see the instructions at https://helpdaz.zendesk.com/hc/en-us/articles/360055963392-How-do-I-uninstall-delete-Daz-Studio- but note that some of the folders names may be different, and the guide misses out a few folders (e.g. I had a Daz 3D folder on the root on my C: that needed deleting).
STEP 2: INSTALL AND RUN DIM
Download DIM from https://www.daz3d.com/install-manager-info/
Install DIM on the C: at its default location.
Run it, tick "Work Offline" (so you can set preferences). This will temporarily disable the password box. Enter your email and click Start.
STEP 3: SET UP DIM
We want to set locations on the D:, so they can be easily backed up and will also survive Windows reinstalls.
In the top right corner is a small Gear icon (Settings). Go to Settings>Advanced Settings.
Go to the Downloads tab – this is where we set the location to save the files you download from your store account.
It has two options. There is a Package Archive C:/Users/Public/Documents/DAZ 3D/InstallManager/Downloads and a Thumbnail Archive C:/Users/Public/Documents/DAZ 3D/InstallManager/Thumbnails
Package Archive is the zip files downloaded from the Daz store.
Thumbnail Archive is apparently optional, some kind of preview in DS. Nothing is added to it by DIM installing assets, so things are probably only added by DS. However, since it will get downloaded anyway, and they don’t take up much space compared to the main assets, it makes sense to back them up too.
Since I want to back them up, and they are different content types, I will be using a nested folder structure where the downloads and installed files all go under D:\image creation\Daz 3D\assets\
So I set the Package Archive as D:\image creation\Daz 3D\assets\downloads
and the Thumbnail Archive as D:\image creation\Daz 3D\assets\thumbnails
Leave all other settings alone.
Next go to the Installation tab. This allows you to set and add Content (Runtime) install paths.
Again, there are multiple options.
There is a Manifest Archive at C:/Users/Public/Documents/DAZ 3D/InstallManager/ManifestFiles
There is a Content Database Base of C:/Users/NA/AppData/Roaming/DAZ 3D/cms
And there is a Recommended folder of C:/Users/Public/Documents/My DAZ 3D Library (which has an ellipsis after it but clicking it does nothing).
Manifest Archive is for the files that DS uses to track what it has installed.
Content Database Base is the database used by the Content Management System. It is accessed and managed by PostgreSQL and has no DS content in it. DS and DIM update it based on product metadata. To avoid losing any metadata it should be on the D: drive and included in back ups. This location will be the same as the ContentCluster path you can set in DS Edit>Preferences>CMS Settings.
So I set the Manifest Archive as D:\image creation\Daz 3D\assets\manifest
and the Content Database Base as D:\image creation\Daz 3D\assets\cms
However, I had an issue with this step! Every time I changed the Content Database Base to D:\image creation\Daz 3D\assets\cms, and Accepted it, then went back in, it had reset to C:/Users/NA/AppData/Roaming/DAZ 3D/cms (there were no error messages). This seems to be a bug. One option was to skip this step temporarily, let DIM go online, install DS, then try changing it inside DS (Edit>Preferences>CMS Settings, the ContentCluster location). But I found that once I installed DS and logged in, then came back to DIM, DIM then let me finally change the location of the CMS, so all was good. For some reason it would only let me after I installed DS.
We also need to set a folder (a fifth location) for the actual files that DIM unpacks from downloaded zips and installs, which is the key ones to move to the D:. By default this is the Content Folder, which shows as C:/Users/Public/Documents/My DAZ 3D Library. First click the + in the bottom left of the window. Give the path a label such as “content” and choose a location on your D: (for me it was on my D:\image creation\Daz 3D\assets\content). Any added locations will be available in the Content Path Shortcuts drop-down selection box above, so change it to the one you want there. You can then delete the original default option so you only have the D: option for content.
You can confirm the path etc in the main interface window “Ready to Install” tab: click on Show Details.
That’s five folders set, so the hard work should be done.
STEP 4: SET UP DAZ STUDIO
We have set up DIM. If you haven’t done it already, let DIM go online and install DS. DIM should have transferred all the correct paths into DS, but we can double check for peace of mind.
Open DS.
Edit>Preferences>Content tab>Content Directory Manager.
(You can also open preferences with F2.)
That lets you expand the path trees for where thinsg will be stored.
The CMS Cluster Directory should be whatever you set in DIM (D:\image creation\Daz 3D\assets\cms).
Content (in both DAZ Studio Formats and Poser Formats) should be whatever you set (mine were both D:\image creation\Daz 3D\assets\content as I expected).
Daz Connect Data isn’t something set by DIM, so will be a C: location. Daz Connect means installing content from within DS rather than via DIM (and doesn’t work for all content). As such, since we are using DIM, it makes sense to ignore that and install everything via DIM. So you can leave that alone.
This hopefully just confirms that DIM correctly set the directories and transferred those locations to DS.
I don’t think there’s a way to set a default for saving your scenes etc in DS, but I created a folder at D:\image creation\Daz 3D\my presets and will manually save scenes and characters there, so they get backed up and can also be transferred to a new PC or survive Windows reinstallation.
icon_png files: see this https://www.daz3d.com/forums/discussion/225611/daz-studio-creates-icon-files
I had that problem, icon files all over my desktop. So need to change
Render Settings>General>Image Path and point it to some folder with no images in (can I set it as none? Chooce C:?). Then when save a render, browse to the desktop.STEP 5: DOWNLOAD AND INSTALL CONTENT/ASSETS
Now that everything is set up, we can install all the assets we bought.
Open DIM. Make sure you are “Working Online” (enter your password).
The “Ready to Download” tab should be populated with everything you bought on the Daz Store, plus Daz Studio and some freebie starter content.
TIP to save space and time: hide anything that you don’t want to download and install that might be things you don’t need such as Hexagon, or a bridge for Photoshop (if you aren’t going to use that). To the right of each line is a right-facing triangle. Click that for a menu, and you can hide any items you don’t want to install and they’ll disappear (you can view the hidden items at any time by clicking “Display Hidden”, and unhide them in the same way).
My big tip is that many things I’d bought had the same file twice – once with ds at the end, once with ps. According to https://www.daz3d.com/forums/discussion/28450/ds-ps they are pretty much the same thing, and the ds version will work better in Daz. Also, the ps (Poser) version would often not work as smart content anyway. So, we want to just download and install the ds versions, and hide the ps. Installing both just doubles the storage, and unfortunately that is the default DIM chooses. So it may be worth filtering it – type ps onto the top right filter box. Ignore false positives (e.g. files where ps are next to each other liks “special ops poses” but identify real ps files and hide them using the right triangle menu I mentioned. For me that prevented DIM downloading and installing 94 items, or 12.3GB of unnecessary files. The downside is that I had to hide all 94 items individually, two clicks for each (and since the button is small and right next to the install button, I accidentally downloaded a few and had to delete them again). The little menu ignores the fact that you may have selected multiple items with the check marks on the left, making you hide each individually. Also be aware that if you hide ps packages in DIM in this way, then if you ever you reinstall DIM (e.g. on a new PC, or reinstalling the OS), you may well find them all back again and offered for install, so will need to hide them again (another 188 clicks …).
If ever you use the filter box, remember to click the x in it when you are finished, to cancel the filter and reveal all the files again. Also, the filter box is handy for finding a particular item.
A big bonus of DIM is multiple downloads. Daz Central (and Daz Connect) only let me download items one at a time (if I tried to download multiple items in DC it cancelled previous ones and only downloaded the last one I clicked on). But DIM lets you download multiple items – or even everything – at once. You can re-sort the packages by size or name and select groups. If you tick “Install After Download” it will do it for you. Because I don’t have superfast Internet, and have to share it with my partner (and use the same network for work), it took me three days to download and install what I currently own. That’s why I don’t want to ever have to do it again if I get a new PC or reinstall Windows – hopefully this method means the content will be there on my D: for future installs of DS!
DIM downloaded and installed everything to the folders I set.
(Also, I did NOT click “Delete Packages Once Installed” on the “Ready To Install” tab; this way, if something goes wrong with my plan, at least I can reinstall the assets from the downloaded files, saving the three day task of downloading them all again. The downside is content appears twice on my D: and takes up twice the space – once as the installer, once as the installed version. Maybe one day, if I find this system works even after reinstalling Windows or getting a new PC, I will then have the confidence to delete the downloaded installers and free up a lot of space – currently the installers alone take up 119GB).
STEP 6: TEST CONTENT IN DAZ STUDIO
Check the items show up fine and work in DS, showing up as Smart Content if applicable, that there are no problems that might require a refund.
Note that in DIM the installation tab shows if a product has installed Metadata. If so, there will be a checkmark underneath the “Smart” column, letting you know it will show under “Smart Content” in DAZ Studio 4 and higher. Most items will have metadata, but some may not have user-facing files (e.g. morph sets may add new sliders to the figure without having any presets to click). Additonal parts of a file that is so big it is in more than one part may not show as having metadata either. If there are properly installed products which don't have the data to appear in database-driven views (Smart Content) but which do have user-facing files you should still be able to find them in the Content Library pane under daz Studio formats (or Poser formats) and then the content directory name. This often applies to older items.
I have noticed one problem: some items I installed via DIM show up in DS, but are greyed out, as if they aren’t installed. I’m not sure what has happened there, or how to fix it. If I right click install within DS then it uses Daz Connect, so would download the item again (when it is already downloaded and stored on my D: by DIM), plus it would store it on the C: unless I change that path too. Using multiple install methods is perhaps asking for trouble, so I want to work out why DIM is not working for some items instead. Is this a known issue? Some of the items it applies to: Genesis 3 Starter Essentials; Rocker Outfit for Geneis 3 Females; Shadow Thief Outfit for Geneis 8 Females; Genesis 8 Starter Essentials; Nyala HD for Genesis 8 Female; Daz Studio Iray HDR Outdoor Environments; and others.
STEP 7: REGULAR BACKUPS
I do a full backup of my D: regularly. So this would now mean I am also backing up the downloaded asset zip files in one folder, the installed Daz assets in another (doubling the storage requirements but meaning I am covered for a few potential scenarios), and things like the cms, thumbnails, manifests, and my presets in other D: folders. I also save one caleld “previews” which lets me browse what I have bought – each product gets a folder within a structure that categorises it (people, hair, lighting, poses etc), with a link to the product page, a txt file with the full description, and all the preview images from the product page. This is really useful to store as products are sometimes withdrawn, and that information is no longer available – there are a few items where I can no longer get the preview images, which si a shame as they give ideas for how to use the content, or illustrate all the options. Ideally all that info would be available in a zip for everything you buy, which would save manually having to save every image via the browser.
NB: do backups only when DS, DIM, and other applications using the cms are all closed and there are no PostgreSQL processes running.
STEP 8: REINSTALLING WINDOWS / GETTING A NEW PC
If I reinstall Windows, or get a new computer (where I'd copy my D: backup contents to the new PC's D:) I would perform steps 2-4 above, choosing the same paths (so they actually now point to installed content on the D:). That should mean DIM and DS see and use all my existing content, so it doesn’t need redownloading or reinstalling again, saving me days.
Worst case scenario is that I reinstall Windows then all the Daz software, as above, but DIM and Daz Studio don't "see" the previously-installed Daz assets. In that case, as long as DIM can see the downloaded zip files, I can manually delete the installed assets from my D:, leaving that folder empty; then point DIM at my previous downloads and reinstall everything from the downloaded zip files. (Which at least saves downloading everything again.)
DAZ Studio 4 Installation Guide WindowsThis may be useful for anyone else who wants to install Daz with assets on the D:; then, if they reinstall Windows or get a new PC and so do a fresh install of Daz Studio, Daz Studio will be able to find and use those installed assets exactly as before, so they don't have to download and install the assets all over again. Note this is just my procedure!
STEP 1: PREPARATION
If necessary, uninstall all current Daz stuff from the PC to start fresh.
Use Daz Central (DC) or Daz Install Manager (DIM) to uninstall Daz Studio (DS) and content (whichever one you used to install DS in the first place), then uninstall DC/DIM through Windows.
Then do any manual cleanup - see the instructions at https://helpdaz.zendesk.com/hc/en-us/articles/360055963392-How-do-I-uninstall-delete-Daz-Studio- but note that some of the folders names may be different, and the guide misses out a few folders (e.g. I had a Daz 3D folder on the root on my C: that needed deleting).
STEP 2: INSTALL AND RUN DIM
Download DIM from https://www.daz3d.com/install-manager-info/
Install DIM on the C: at its default location.
Run it, tick "Work Offline" (so you can set preferences). This will temporarily disable the password box. Enter your email and click Start.
STEP 3: SET UP DIM
We want to set locations on the D:, so they can be easily backed up and will also survive Windows reinstalls.
In the top right corner is a small Gear icon (Settings). Go to Settings>Advanced Settings.
Go to the Downloads tab – this is where we set the location to save the files you download from your store account.
It has two options. There is a Package Archive C:/Users/Public/Documents/DAZ 3D/InstallManager/Downloads and a Thumbnail Archive C:/Users/Public/Documents/DAZ 3D/InstallManager/Thumbnails
Package Archive is the zip files downloaded from the Daz store.
Thumbnail Archive is apparently optional, some kind of preview in DS. Nothing is added to it by DIM installing assets, so things are probably only added by DS. However, since it will get downloaded anyway, and they don’t take up much space compared to the main assets, it makes sense to back them up too.
Since I want to back them up, and they are different content types, I will be using a nested folder structure where the downloads and installed files all go under D:\image creation\Daz 3D\assets\
So I set the Package Archive as D:\image creation\Daz 3D\assets\downloads
and the Thumbnail Archive as D:\image creation\Daz 3D\assets\thumbnails
Leave all other settings alone.
Next go to the Installation tab. This allows you to set and add Content (Runtime) install paths.
Again, there are multiple options.
There is a Manifest Archive at C:/Users/Public/Documents/DAZ 3D/InstallManager/ManifestFiles
There is a Content Database Base of C:/Users/NA/AppData/Roaming/DAZ 3D/cms
And there is a Recommended folder of C:/Users/Public/Documents/My DAZ 3D Library (which has an ellipsis after it but clicking it does nothing).
Manifest Archive is for the files that DS uses to track what it has installed.
Content Database Base is the database used by the Content Management System. It is accessed and managed by PostgreSQL and has no DS content in it. DS and DIM update it based on product metadata. To avoid losing any metadata it should be on the D: drive and included in back ups. This location will be the same as the ContentCluster path you can set in DS Edit>Preferences>CMS Settings.
So I set the Manifest Archive as D:\image creation\Daz 3D\assets\manifest
and the Content Database Base as D:\image creation\Daz 3D\assets\cms
However, I had an issue with this step! Every time I changed the Content Database Base to D:\image creation\Daz 3D\assets\cms, and Accepted it, then went back in, it had reset to C:/Users/NA/AppData/Roaming/DAZ 3D/cms (there were no error messages). This seems to be a bug. One option was to skip this step temporarily, let DIM go online, install DS, then try changing it inside DS (Edit>Preferences>CMS Settings, the ContentCluster location). But I found that once I installed DS and logged in, then came back to DIM, DIM then let me finally change the location of the CMS, so all was good. For some reason it would only let me after I installed DS.
We also need to set a folder (a fifth location) for the actual files that DIM unpacks from downloaded zips and installs, which is the key ones to move to the D:. By default this is the Content Folder, which shows as C:/Users/Public/Documents/My DAZ 3D Library. First click the + in the bottom left of the window. Give the path a label such as “content” and choose a location on your D: (for me it was on my D:\image creation\Daz 3D\assets\content). Any added locations will be available in the Content Path Shortcuts drop-down selection box above, so change it to the one you want there. You can then delete the original default option so you only have the D: option for content.
You can confirm the path etc in the main interface window “Ready to Install” tab: click on Show Details.
That’s five folders set, so the hard work should be done.
STEP 4: SET UP DAZ STUDIO
We have set up DIM. If you haven’t done it already, let DIM go online and install DS. DIM should have transferred all the correct paths into DS, but we can double check for peace of mind.
Open DS.
Edit>Preferences>Content tab>Content Directory Manager.
(You can also open preferences with F2.)
That lets you expand the path trees for where thinsg will be stored.
The CMS Cluster Directory should be whatever you set in DIM (D:\image creation\Daz 3D\assets\cms).
Content (in both DAZ Studio Formats and Poser Formats) should be whatever you set (mine were both D:\image creation\Daz 3D\assets\content as I expected).
Daz Connect Data isn’t something set by DIM, so will be a C: location. Daz Connect means installing content from within DS rather than via DIM (and doesn’t work for all content). As such, since we are using DIM, it makes sense to ignore that and install everything via DIM. So you can leave that alone.
This hopefully just confirms that DIM correctly set the directories and transferred those locations to DS.
I don’t think there’s a way to set a default for saving your scenes etc in DS, but I created a folder at D:\image creation\Daz 3D\my presets and will manually save scenes and characters there, so they get backed up and can also be transferred to a new PC or survive Windows reinstallation.
icon_png files: see this https://www.daz3d.com/forums/discussion/225611/daz-studio-creates-icon-files
I had that problem, icon files all over my desktop. So need to change
Render Settings>General>Image Path and point it to some folder with no images in (can I set it as none? Chooce C:?). Then when save a render, browse to the desktop.STEP 5: DOWNLOAD AND INSTALL CONTENT/ASSETS
Now that everything is set up, we can install all the assets we bought.
Open DIM. Make sure you are “Working Online” (enter your password).
The “Ready to Download” tab should be populated with everything you bought on the Daz Store, plus Daz Studio and some freebie starter content.
TIP to save space and time: hide anything that you don’t want to download and install that might be things you don’t need such as Hexagon, or a bridge for Photoshop (if you aren’t going to use that). To the right of each line is a right-facing triangle. Click that for a menu, and you can hide any items you don’t want to install and they’ll disappear (you can view the hidden items at any time by clicking “Display Hidden”, and unhide them in the same way).
My big tip is that many things I’d bought had the same file twice – once with ds at the end, once with ps. According to https://www.daz3d.com/forums/discussion/28450/ds-ps they are pretty much the same thing, and the ds version will work better in Daz. Also, the ps (Poser) version would often not work as smart content anyway. So, we want to just download and install the ds versions, and hide the ps. Installing both just doubles the storage, and unfortunately that is the default DIM chooses. So it may be worth filtering it – type ps onto the top right filter box. Ignore false positives (e.g. files where ps are next to each other liks “special ops poses” but identify real ps files and hide them using the right triangle menu I mentioned. For me that prevented DIM downloading and installing 94 items, or 12.3GB of unnecessary files. The downside is that I had to hide all 94 items individually, two clicks for each (and since the button is small and right next to the install button, I accidentally downloaded a few and had to delete them again). The little menu ignores the fact that you may have selected multiple items with the check marks on the left, making you hide each individually. Also be aware that if you hide ps packages in DIM in this way, then if you ever you reinstall DIM (e.g. on a new PC, or reinstalling the OS), you may well find them all back again and offered for install, so will need to hide them again (another 188 clicks …).
If ever you use the filter box, remember to click the x in it when you are finished, to cancel the filter and reveal all the files again. Also, the filter box is handy for finding a particular item.
A big bonus of DIM is multiple downloads. Daz Central (and Daz Connect) only let me download items one at a time (if I tried to download multiple items in DC it cancelled previous ones and only downloaded the last one I clicked on). But DIM lets you download multiple items – or even everything – at once. You can re-sort the packages by size or name and select groups. If you tick “Install After Download” it will do it for you. Because I don’t have superfast Internet, and have to share it with my partner (and use the same network for work), it took me three days to download and install what I currently own. That’s why I don’t want to ever have to do it again if I get a new PC or reinstall Windows – hopefully this method means the content will be there on my D: for future installs of DS!
DIM downloaded and installed everything to the folders I set.
(Also, I did NOT click “Delete Packages Once Installed” on the “Ready To Install” tab; this way, if something goes wrong with my plan, at least I can reinstall the assets from the downloaded files, saving the three day task of downloading them all again. The downside is content appears twice on my D: and takes up twice the space – once as the installer, once as the installed version. Maybe one day, if I find this system works even after reinstalling Windows or getting a new PC, I will then have the confidence to delete the downloaded installers and free up a lot of space – currently the installers alone take up 119GB).
STEP 6: TEST CONTENT IN DAZ STUDIO
Check the items show up fine and work in DS, showing up as Smart Content if applicable, that there are no problems that might require a refund.
Note that in DIM the installation tab shows if a product has installed Metadata. If so, there will be a checkmark underneath the “Smart” column, letting you know it will show under “Smart Content” in DAZ Studio 4 and higher. Most items will have metadata, but some may not have user-facing files (e.g. morph sets may add new sliders to the figure without having any presets to click). Additonal parts of a file that is so big it is in more than one part may not show as having metadata either. If there are properly installed products which don't have the data to appear in database-driven views (Smart Content) but which do have user-facing files you should still be able to find them in the Content Library pane under daz Studio formats (or Poser formats) and then the content directory name. This often applies to older items.
I have noticed one problem: some items I installed via DIM show up in DS, but are greyed out, as if they aren’t installed. I’m not sure what has happened there, or how to fix it. If I right click install within DS then it uses Daz Connect, so would download the item again (when it is already downloaded and stored on my D: by DIM), plus it would store it on the C: unless I change that path too. Using multiple install methods is perhaps asking for trouble, so I want to work out why DIM is not working for some items instead. Is this a known issue? Some of the items it applies to: Genesis 3 Starter Essentials; Rocker Outfit for Geneis 3 Females; Shadow Thief Outfit for Geneis 8 Females; Genesis 8 Starter Essentials; Nyala HD for Genesis 8 Female; Daz Studio Iray HDR Outdoor Environments; and others.
STEP 7: REGULAR BACKUPS
I do a full backup of my D: regularly. So this would now mean I am also backing up the downloaded asset zip files in one folder, the installed Daz assets in another (doubling the storage requirements but meaning I am covered for a few potential scenarios), and things like the cms, thumbnails, manifests, and my presets in other D: folders. I also save one caleld “previews” which lets me browse what I have bought – each product gets a folder within a structure that categorises it (people, hair, lighting, poses etc), with a link to the product page, a txt file with the full description, and all the preview images from the product page. This is really useful to store as products are sometimes withdrawn, and that information is no longer available – there are a few items where I can no longer get the preview images, which si a shame as they give ideas for how to use the content, or illustrate all the options. Ideally all that info would be available in a zip for everything you buy, which would save manually having to save every image via the browser.
NB: do backups only when DS, DIM, and other applications using the cms are all closed and there are no PostgreSQL processes running.
STEP 8: REINSTALLING WINDOWS / GETTING A NEW PC
If I reinstall Windows, or get a new computer (where I'd copy my D: backup contents to the new PC's D:) I would perform steps 2-4 above, choosing the same paths (so they actually now point to installed content on the D:). That should mean DIM and DS see and use all my existing content, so it doesn’t need redownloading or reinstalling again, saving me days.
Worst case scenario is that I reinstall Windows then all the Daz software, as above, but DIM and Daz Studio don't "see" the previously-installed Daz assets. In that case, as long as DIM can see the downloaded zip files, I can manually delete the installed assets from my D:, leaving that folder empty; then point DIM at my previous downloads and reinstall everything from the downloaded zip files. (Which at least saves downloading everything again.)
Diffeomorphic DAZ Importer version 1.6.0 releasedPadone said:
@wolf359 By exporting to dbz, the geometry in the viewport will be baked, this includes any morph applied.
@marble Yep, but you have to import the custom morphs yourself in a second step, aka any geograft morph.
steps:
- import the figure
- merge rigs
- import the standard morphs
- import the custom morphs for geografts
- transfer the standard morphs to geografts
- merge geografts
If you use easy import then merge geografts and transfer standard morphs are done for you. Then you can add the custom morphs later to the merged meshes.
https://diffeomorphic.blogspot.com/2021/07/adding-morphs-after-lashes-and.html
Thanks again @Padone - I shall bookmark this for future reference. What's in store for 1.7? ;)
Diffeomorphic DAZ Importer version 1.6.0 released@wolf359 By exporting to dbz, the geometry in the viewport will be baked, this includes any morph applied.
@marble Yep, but you have to import the custom morphs yourself in a second step, aka any geograft morph.
steps:
- import the figure
- merge rigs
- import the standard morphs
- import the custom morphs for geografts
- transfer the standard morphs to geografts
- merge geografts
If you use easy import then transfer standard morphs and merge geografts are done for you. Then you can add the custom morphs later to the merged meshes.
https://diffeomorphic.blogspot.com/2021/07/adding-morphs-after-lashes-and.html
Clothing morph assistanceRichard Haseltine said:
1) yes, and make sure that you have preserve vertex order on in the import/export options.
2) you can't delete stuff in a morph
3) as I said, you can't delete the unwated parts but you should be able to create the morph as you want and hide the upper parts.
I was going to delete the unwanted faces in Daz studio first. Then i was going to export to Blender and only move the wanted faces (not delete anything) around to create the morph. I wasn't planning on deleting anything in Blender for creating the morph just moving the verts around. I asked question #1 to make sure that i remembered the "no delete, only move" rule for verts when creating morphs in Blender.
OR
Would it just be better to export the entire set of pants to Blender first move the verts that i need to move to the correct spot then reimport it all into Daz. Then once the pants are back in Daz, i apply my morph. THEN i can worry about deleting/hiding the unwanted faces for the upper portion of the pants. I think this is what i will do instead unless you think this might cause issues.
XTransfer fiasco corrupted G3F character preset morph URL’sI had a difficult time coaxing XTransfer to work. And now I find that when I load some of my G3F character presets, Daz Studio can’t find some of the morphs used on that character preset.
The morphs exist. But the character preset files have been corrupted such that they call the morph at the wrong path. Something changed the morph URL’s to a path that never even existed. I can fix this in notepad by restoring the URL’s to the correct paths to the morphs.
But I don’t know how many of my G3F character presets got corrupted like this.
How do I easily find all the corrupted G3F character files and likewise easily fix them?
I’m considering restoring my G3F morph directory from a backup I made about 3 weeks ago, before my XTransfer fiasco. Do you think that would work fine, without any horrid side effects?
Daz 3D is part of

Connect
DAZ Productions, Inc.
7533 S Center View Ct #4664
West Jordan, UT 84084Licensing Agreement | Terms of Service | Privacy Policy | EULA
© 2026 Daz Productions Inc. All Rights Reserved.