Parameter slider customization question, also other questions
 StratDragon
Posts: 3,284
StratDragon
Posts: 3,284
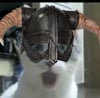
1) What is this mustard squeezy bottle in the attached screen shot?
2) And how do I change the color background of the slider box?
3) How do I move an object to a parent and have it move to the same position and I have parent in place checked off?
4) Why are my menu bars at the top of the screen invisible, but if I click in the general area the options drop down and I can see the contextual menu, just not the categories at the top of the screen?
5) Whats everyone’s favorite cheese? I ask because some people took the time to read this, didn't know the answer but I wanted to include them out of appreciation.
DS6Beta
Daz 3D is part of 
Connect
DAZ Productions, Inc.
7533 S Center View Ct #4664
West Jordan, UT 84084
Licensing Agreement | Terms of Service | Privacy Policy | EULA
© 2026 Daz Productions Inc. All Rights Reserved.
Comments
1. It's to enable or disable Auto-Follow.
It's for generating morphs in items that are fitted to automatically.
2. This is going to depend on which color you're talking about.
The "actual" background color(default 'grey') is controlled in Window>Style>Customize Style... popout. This is a universal control, and not just for the parameters contorllers, so it will change the color of everything associated in daz studio.
The Slider's themselves have two color controllers accessed via the Gear icon>Parameter settings. Color A is the primary color(left side), and Color b is the box color that color a degrades into on the right side of the slider.
3.I'm not clear on this one. If you're say, wanting to parent a sword to a hand, and the sword is at 0,0,0, you're kind of stuck with manual movement.
If, on the other hand, you want to move a chair that's at 215,14,126, to a figure at 0,0,0, you might try either a CTRL+C/CTRL+V to paste the parent objects location to the follower.
Or, might try using the Align tab's functions.
Can't guarantee either will work and you may still be stuck with manual movement.
4.IIRC, that's a known glitch that crops up occassionally. You'll need to change your layout(Window>Workspace>Select layout) to clear it. You can get to the upper menu by ALT+W
5. Toss up between Roquefort and Velveeta.
1 Enable/disble Auto-Follow apparently (trial and error, I didn't know).
2.Parameter Settings
3. I am not sure what you are asking - I think that is the default behaviour for props and other single node parents, but figues seem to behave oddly.
4. Try Window>Style>Select Style, it looks as if a lot of colours are white. It may also be that DS was running when you installed an update, though that usually makes everything white - in that case reinstall with the application definitely closed.
5. I don't often eat cheese, but Leicester, Lancashire, and Gloucester used to be.
Why would someone want to enable or disable Auto-Follow on Environment Lighting Blur?
thanks everyone, but Drunk Monkey, Velveta is a lubricant with yellow dye. Delicious? Yes. Cheese? Debatable.
You might want to disable auto-follow on one morph for a given scene if the automatic morphs give you weird results and you'd rather adjust the fitted items yourself. If you have many fitted item it will likely take less time to do that on the source morph rather than zeroing the automatic morphs on each item.
I eat and like various kinds of cheese, not sure which I would call my favorite. Probably brie or beaufort.
I still don't understand how Environment Lighting Blur (part of Render Settings) would affect any clothing or any morph.
(And I hate cheese.)
It's just a standard part of any propety when in the parameters pane, if edit mode is enabled.
If you check the parameters settings, the check box is missing for enabling or disabling auto-follow, meaning it's a null switch that does nothing.
Thank you for the clarification.